
Filter
- 101 Scout
- 112 Big Bore
- 1901 Badge Cover
- 2022+ Chief
- 2025+ Scout
- 3D
- 5 Inch
- Accent decals
- Air Force
- Airbox
- Alchemy
- Altered Carbon
- America
- American Flag
- Anchor
- Angel
- Any Brand
- Anywhere Decals
- Apocalypse
- apparel
- Army
- Arrowhead
- Art
- Art Print
- Artist Series
- Artwork
- Australia
- Aztec
- Aztec Dancer
- Azteca
- Badge
- Bag Lights
- Bear
- Black Flag
- Black Sails
- Blanket
- Bolt
- Bomber
- Bones
- Brake Lights
- Brave
- Brave Wolf
- Brock Black Customs
- Buffalo Chief
- BWC Racing
- Canada
- Celtic
- Challenge Coin
- Challenger
- Chief
- Chief Iron Shell
- Chief Side Panel
- Chief Warbonnet
- Clearance
- Clothing
- Coast Guard
- Coin
- Dark Chief
- Dark Horse
- Deadpool
- DeanSpeed
- Decal
- Decals
- Demon
- Demoness
- Designer Series
- Devil
- Diablo
- Dragon
- Dragon Warrior
- Dreamcatcher
- Druid Chief
- Dutch
- Eagle
- EGA
- Elf
- Embers
- Emblem
- Esadowa
- Fairing Decals
- Fantasy
- Feather
- Feather Ornament
- Feathers
- Female
- Female Apparel
- Female Chief
- Female Warbonnet
- Fenrir
- Firefighter
- First Responders
- Flag
- Floorboard
- Foot rest
- for your feet
- Frame Inserts
- Framed Print
- FTR
- Gift Card
- Globe
- Grizzly
- Harley
- Harley-Davidson
- Hatchet
- Helm of Awe
- Helmet
- Herald of Dawn
- Highway Bars
- HOLIDAY23
- Home
- Honda
- Honey
- Honeycomb
- Horn Cover
- Horse
- Hot Leathers
- Huginn and Muninn
- Huntress
- Inca
- Indian
- Indian Challenger
- Indian Chief
- Indian Chieftain
- Indian Classic
- Indian FTR
- Indian Girl
- Indian Girl Warbonnet
- Indian Male
- Indian Motorcycle
- Indian Pursuit
- Indian Roadmaster
- Indian Scout
- Indian Scout (2014-2024)
- Indian Scout (2025+)
- Indian Springfield
- Indian Vintage
- Inserts
- Jaguar
- Jaguar Warrior
- Jaymus
- KTM
- Lightning
- Lilith
- Lilith Challenger
- Logo
- M3
- Mad Monkey Motorsports
- Magic
- Mainframe
- Male Brave
- Male Warbonnet
- Marines
- Mayan
- Mayan Calendar
- Medicine Wheel
- Men's
- Mermaid
- Mesoamerican
- MesoChief
- MesoDancer
- Metal Mesh
- Mexico
- Military
- Morganna
- Motorcycle Boots
- Motorcycle Gloves
- Motorcycle Jacket
- Motorcycle Vest
- Mountain Lion
- Muspelheim
- Native American
- Native American Chief
- Native American Female
- Native American Male
- Native Girl
- Native Spirit
- Native Warrior
- Navy
- NEW Skull Warbonnet
- Nizhoni
- No Quarter
- Nordic
- Norse
- Nose Art
- Octopus
- Odin
- Owl Headdress
- Pablo Fernandez
- Panama
- Parts
- Passenger Peg
- Patches
- Paw Prints
- Pin-up
- Pin-ups That Stick
- Pinup
- Pinups That Stick
- Pirate
- Police
- Powerplus
- Powerplus Chieftain
- Powerplus Roadmaster
- Puerto Rico
- Quetzalcoatl
- Ragnarok
- Raven
- Ride Like a Girl
- Roses
- Runes
- RydeCulture
- Saddlebag
- Saddlebag Decals
- Saddlebag Tether
- Scales
- Sci-Fi
- Scout Bobber
- Scout Bobber Sixty
- Scout Classic
- Scout Frame
- Scout Rogue
- Scout Sixty
- Scout Sixty Bobber
- Scout Sixty Classic
- Scout Twenty
- Shamrock
- Shark Teeth
- shirt
- Shopify Collective
- Sissy Bar
- Skull
- Skull Warbonnet
- Soldier
- Space Force
- Speaker
- Spear
- Sport Scout Sixty
- Sportster
- Squid
- Succubus
- Sunburst
- Super Scout
- Surtr
- Suzuki
- T-Shirt
- TAB Performance
- Tank Decals
- Tee
- Tees
- Teeth
- Tentacles
- Texas
- The Hunt
- Thin Blue Line
- Thin Green Line
- Thin Red Line
- Thunderbird
- Thunderstroke
- TLC
- TLC Thunder and Lightning Customs
- Tomahawk
- Tree of Life
- TropicalBobber
- Turn Signals
- Undead
- Universal
- V-Cover
- Veteran
- Victory
- Viking
- Vinyl Accents
- Warbonnet
- Warrior
- WASH & WHIPS
- Wendy
- Wendy Warbonnet
- Wolf
- Wolf Headdress
- Wolf Warbonnet
- Women's
- Yamaha
- Zombie
- Zombies
258 products
258 products


Powerplus V-Cover Decal - Fenrir
Regular price $20.00/
Shipping calculated at checkout.
We usually have this product in stock and can ship right away but there can be a wait if it sells out before the restock arrives.
Buy 2 and get an automatic 10% off both v-covers
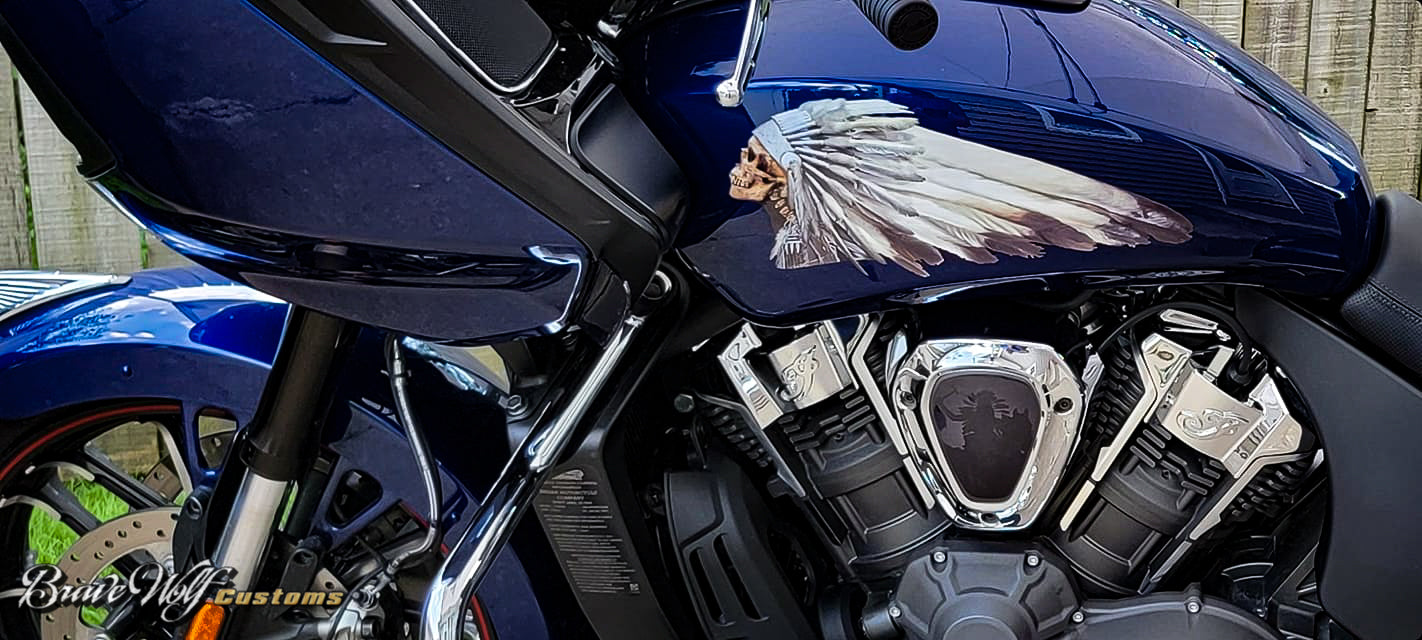
Fits the Indian Powerplus engine found on the Challenger, Pursuit, Powerplus Chieftain, and Powerplus Roadmaster models.
This premium finish badge cover takes minutes to install and provides a completely custom look. They fit both the left and right v-cover so if you haven't removed the right side cover for another intake, don't forget to grab two!
The v-cover decals are heavy-duty 12 mil laminated gloss vinyl that flow over the curves of the badge for a bespoke custom look.
These self-adhesive decals are applied by hand to the 1901 badge. If you've already removed the badge, or if your model has embossed letters on the v-cover, you can fill those in with silicon or putty or cover it with some vinyl or tape before applying our decal over it.
Installation: Be sure your v-cover badge is clean before installing the decal. Peel the decal off of the backing sheet, careful not to touch the adhesive side of the decal too much. Carefully align it to a centered position (the decal is slightly smaller than the badge). Press the decal firmly down in the center to stick it in place, then use your thumbs to push out from the center to the edges. Repeat this process until you've stretched/pressed it firmly down around the curves. And that's it!
How-to Video:


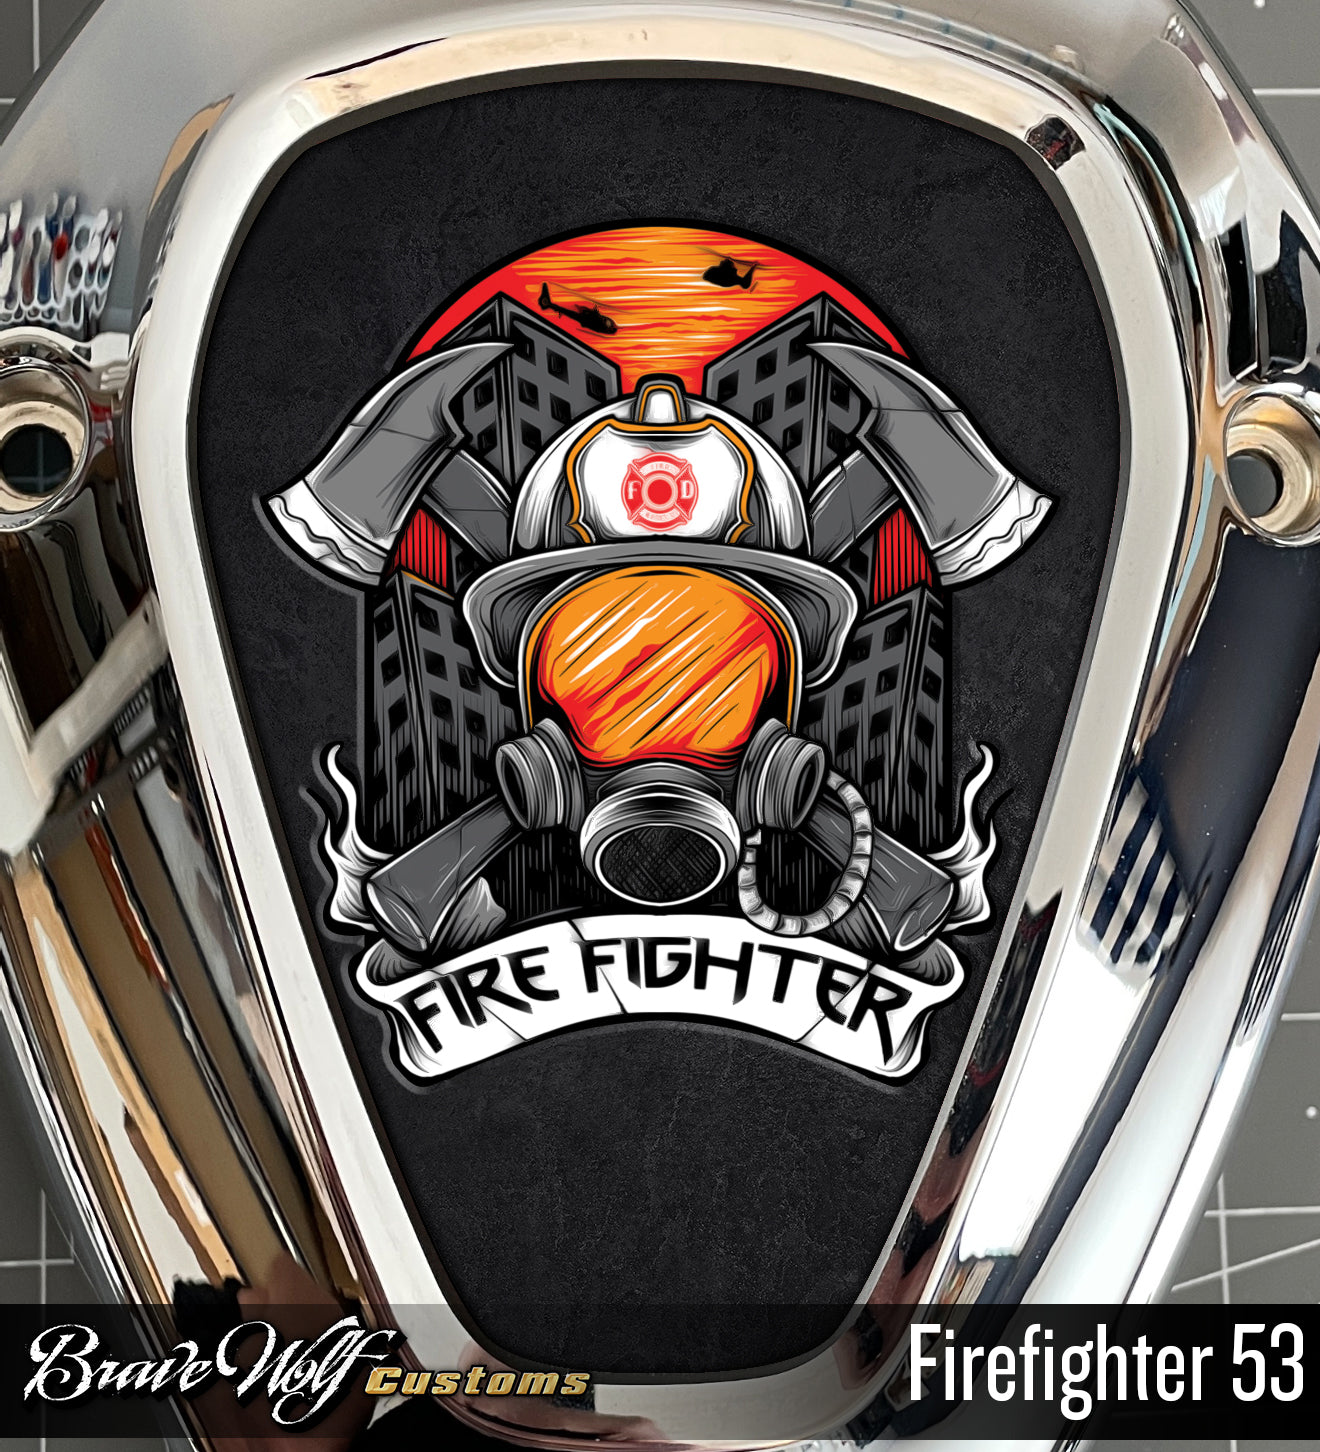
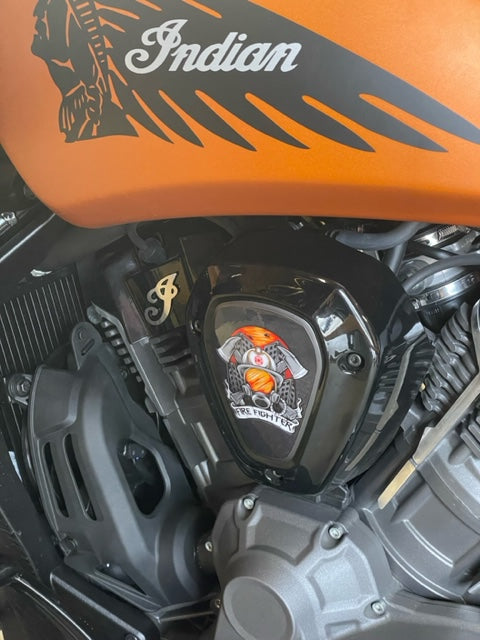
Powerplus V-Cover Decal - Firefighter 53
Regular price $20.00/
Shipping calculated at checkout.
We usually have this product in stock and can ship right away but there can be a wait if it sells out before the restock arrives.
Buy 2 and get an automatic 10% off both v-covers
Fits the Indian Powerplus engine found on the Challenger, Pursuit, Powerplus Chieftain, and Powerplus Roadmaster models.
This premium finish badge cover takes minutes to install and provides a completely custom look. They fit both the left and right v-cover so if you haven't removed the right side cover for another intake, don't forget to grab two!
The v-cover decals are heavy-duty 12 mil laminated gloss vinyl that flow over the curves of the badge for a bespoke custom look.
These self-adhesive decals are applied by hand to the 1901 badge. If you've already removed the badge, you can use poster putty to fill in the embossed letters before applying our decal over it.
Installation: Be sure your v-cover badge is clean before installing the decal. Peel the decal off of the backing sheet, careful not to touch the adhesive side of the decal too much. Carefully align it to a centered position (the decal is slightly smaller than the badge). Press the decal firmly down in the center to stick it in place, then use your thumbs to push out from the center to the edges. Repeat this process until you've stretched/pressed it firmly down around the curves. And that's it!
How-to Video:


Powerplus V-Cover Decal - FWB 123 B&W
Regular price $20.00/
Shipping calculated at checkout.
We usually have this product in stock and can ship right away but there can be a wait if it sells out before the restock arrives.
Buy 2 and get an automatic 10% off both v-covers
Fits the Indian Powerplus engine found on the Challenger, Pursuit, Powerplus Chieftain, and Powerplus Roadmaster models.
This premium finish badge cover takes minutes to install and provides a completely custom look. They fit both the left and right v-cover so if you haven't removed the right side cover for another intake, don't forget to grab two!
The v-cover decals are heavy-duty 12 mil laminated gloss vinyl that flow over the curves of the badge for a bespoke custom look.
These self-adhesive decals are applied by hand to the 1901 badge. If you've already removed the badge, you can use poster putty to fill in the embossed letters before applying our decal over it.
Installation: Be sure your v-cover badge is clean before installing the decal. Peel the decal off of the backing sheet, careful not to touch the adhesive side of the decal too much. Carefully align it to a centered position (the decal is slightly smaller than the badge). Press the decal firmly down in the center to stick it in place, then use your thumbs to push out from the center to the edges. Repeat this process until you've stretched/pressed it firmly down around the curves. And that's it!
How-to Video:

Powerplus V-Cover Decal - FWB 123 Color
Regular price $20.00 Sale price $15.00 Save $5.00/
Shipping calculated at checkout.
We usually have this product in stock and can ship right away but there can be a wait if it sells out before the restock arrives.
Buy 2 and get an automatic 10% off both v-covers
Fits the Indian Powerplus engine found on the Challenger, Pursuit, Powerplus Chieftain, and Powerplus Roadmaster models.
This premium finish badge cover takes minutes to install and provides a completely custom look. They fit both the left and right v-cover so if you haven't removed the right side cover for another intake, don't forget to grab two!
The v-cover decals are heavy-duty 12 mil laminated gloss vinyl that flow over the curves of the badge for a bespoke custom look.
These self-adhesive decals are applied by hand to the 1901 badge. If you've already removed the badge, you can use poster putty to fill in the embossed letters before applying our decal over it.
Installation: Be sure your v-cover badge is clean before installing the decal. Peel the decal off of the backing sheet, careful not to touch the adhesive side of the decal too much. Carefully align it to a centered position (the decal is slightly smaller than the badge). Press the decal firmly down in the center to stick it in place, then use your thumbs to push out from the center to the edges. Repeat this process until you've stretched/pressed it firmly down around the curves. And that's it!
How-to Video:

Powerplus V-Cover Decal - Gouyen
Regular price $20.00 Sale price $10.00 Save $10.00/
Shipping calculated at checkout.
We usually have this product in stock and can ship right away but there can be a wait if it sells out before the restock arrives.
Buy 2 and get an automatic 10% off both v-covers
Fits the Indian Powerplus engine found on the Challenger, Pursuit, Powerplus Chieftain, and Powerplus Roadmaster models.
This premium finish badge cover takes minutes to install and provides a completely custom look. They fit both the left and right v-cover so if you haven't removed the right side cover for another intake, don't forget to grab two!
The v-cover decals are heavy-duty 12 mil laminated gloss vinyl that flow over the curves of the badge for a bespoke custom look.
These self-adhesive decals are applied by hand to the 1901 badge. If you've already removed the badge, you can use poster putty to fill in the embossed letters before applying our decal over it.
Installation: Be sure your v-cover badge is clean before installing the decal. Peel the decal off of the backing sheet, careful not to touch the adhesive side of the decal too much. Carefully align it to a centered position (the decal is slightly smaller than the badge). Press the decal firmly down in the center to stick it in place, then use your thumbs to push out from the center to the edges. Repeat this process until you've stretched/pressed it firmly down around the curves. And that's it!
How-to Video:


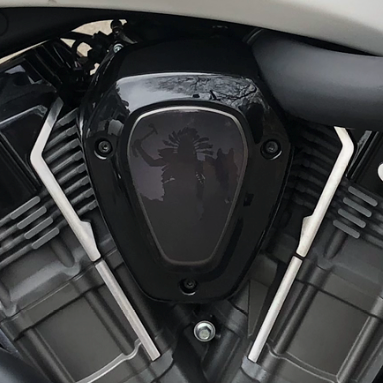
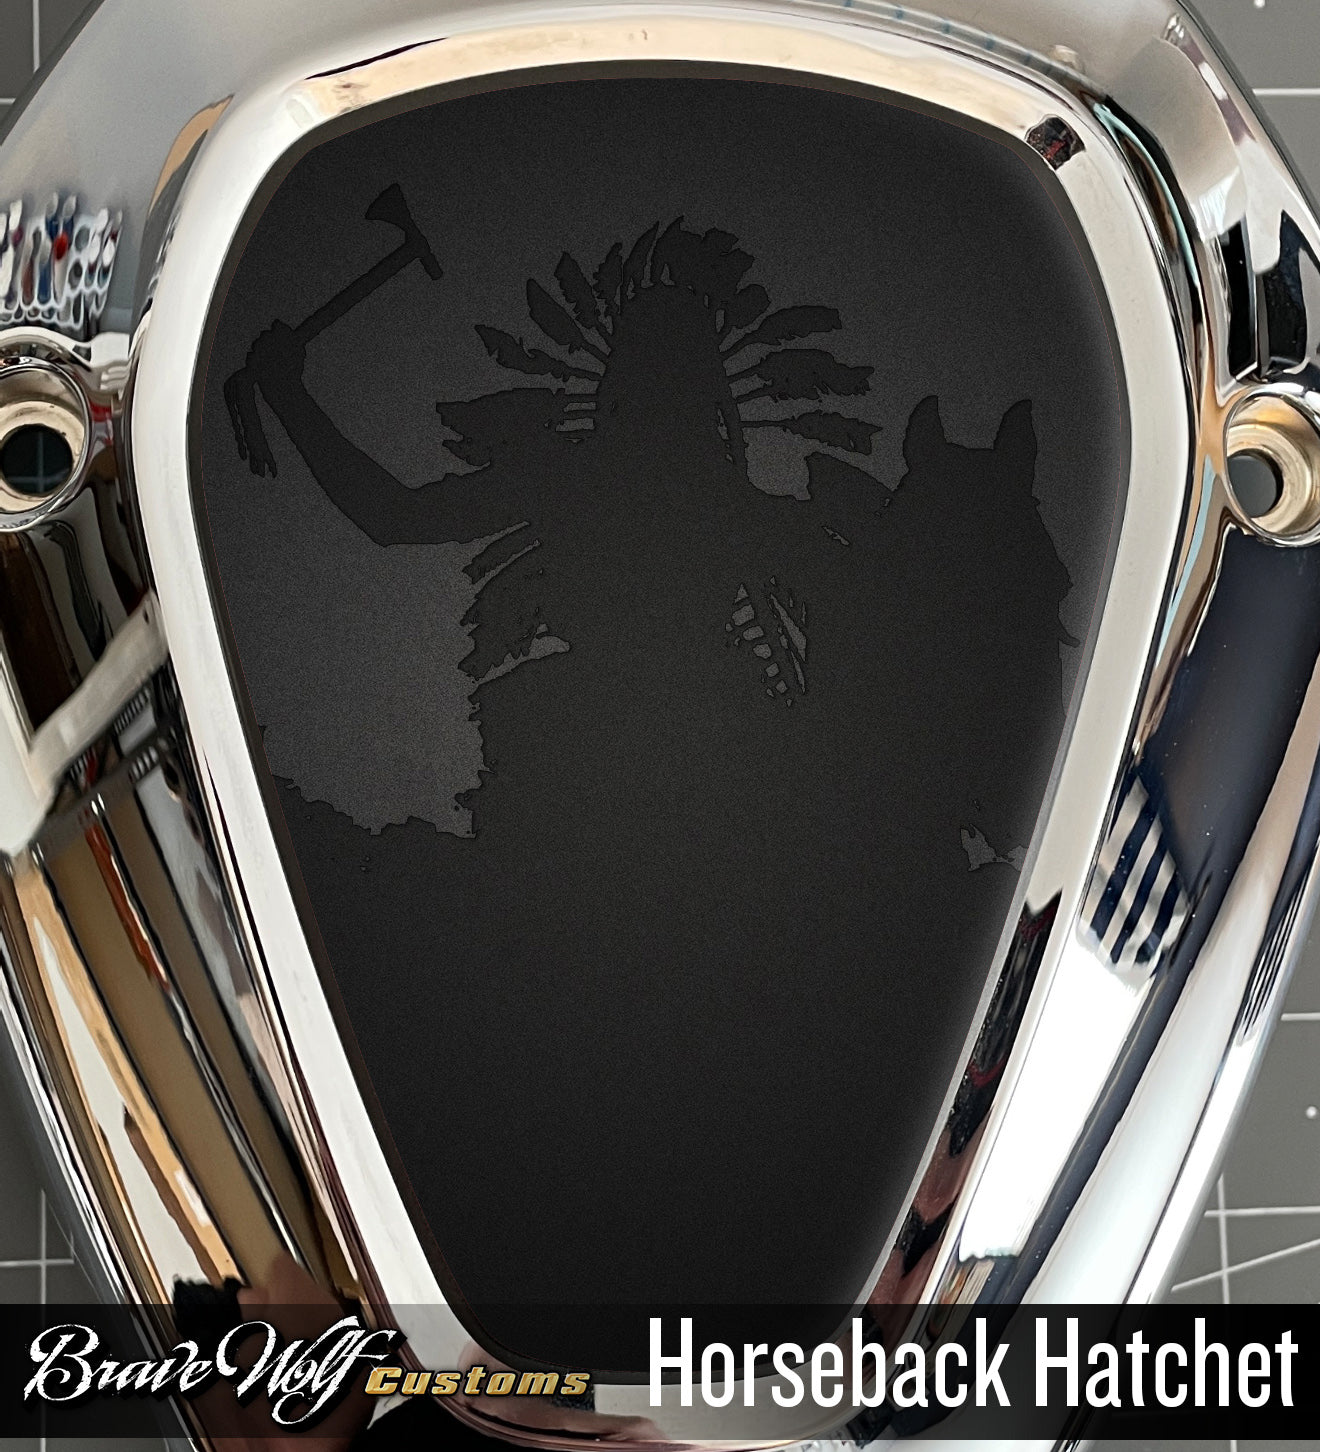
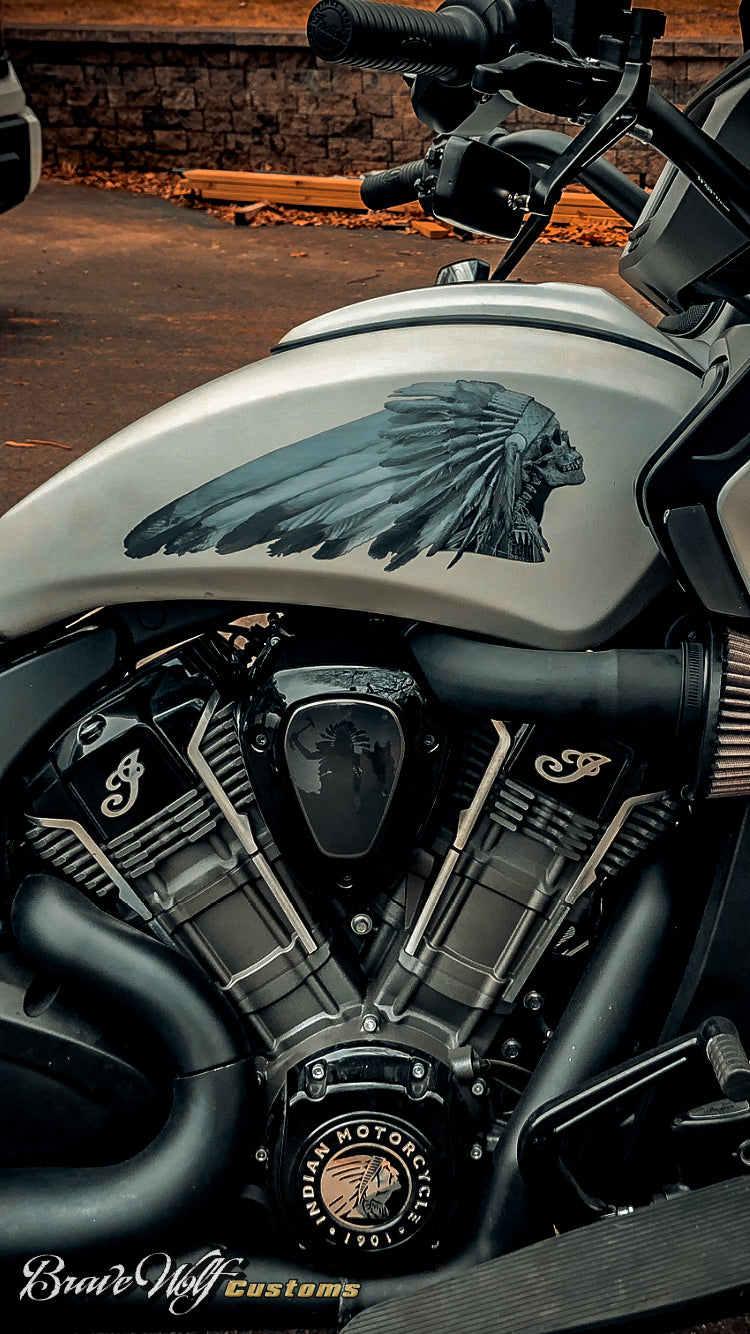
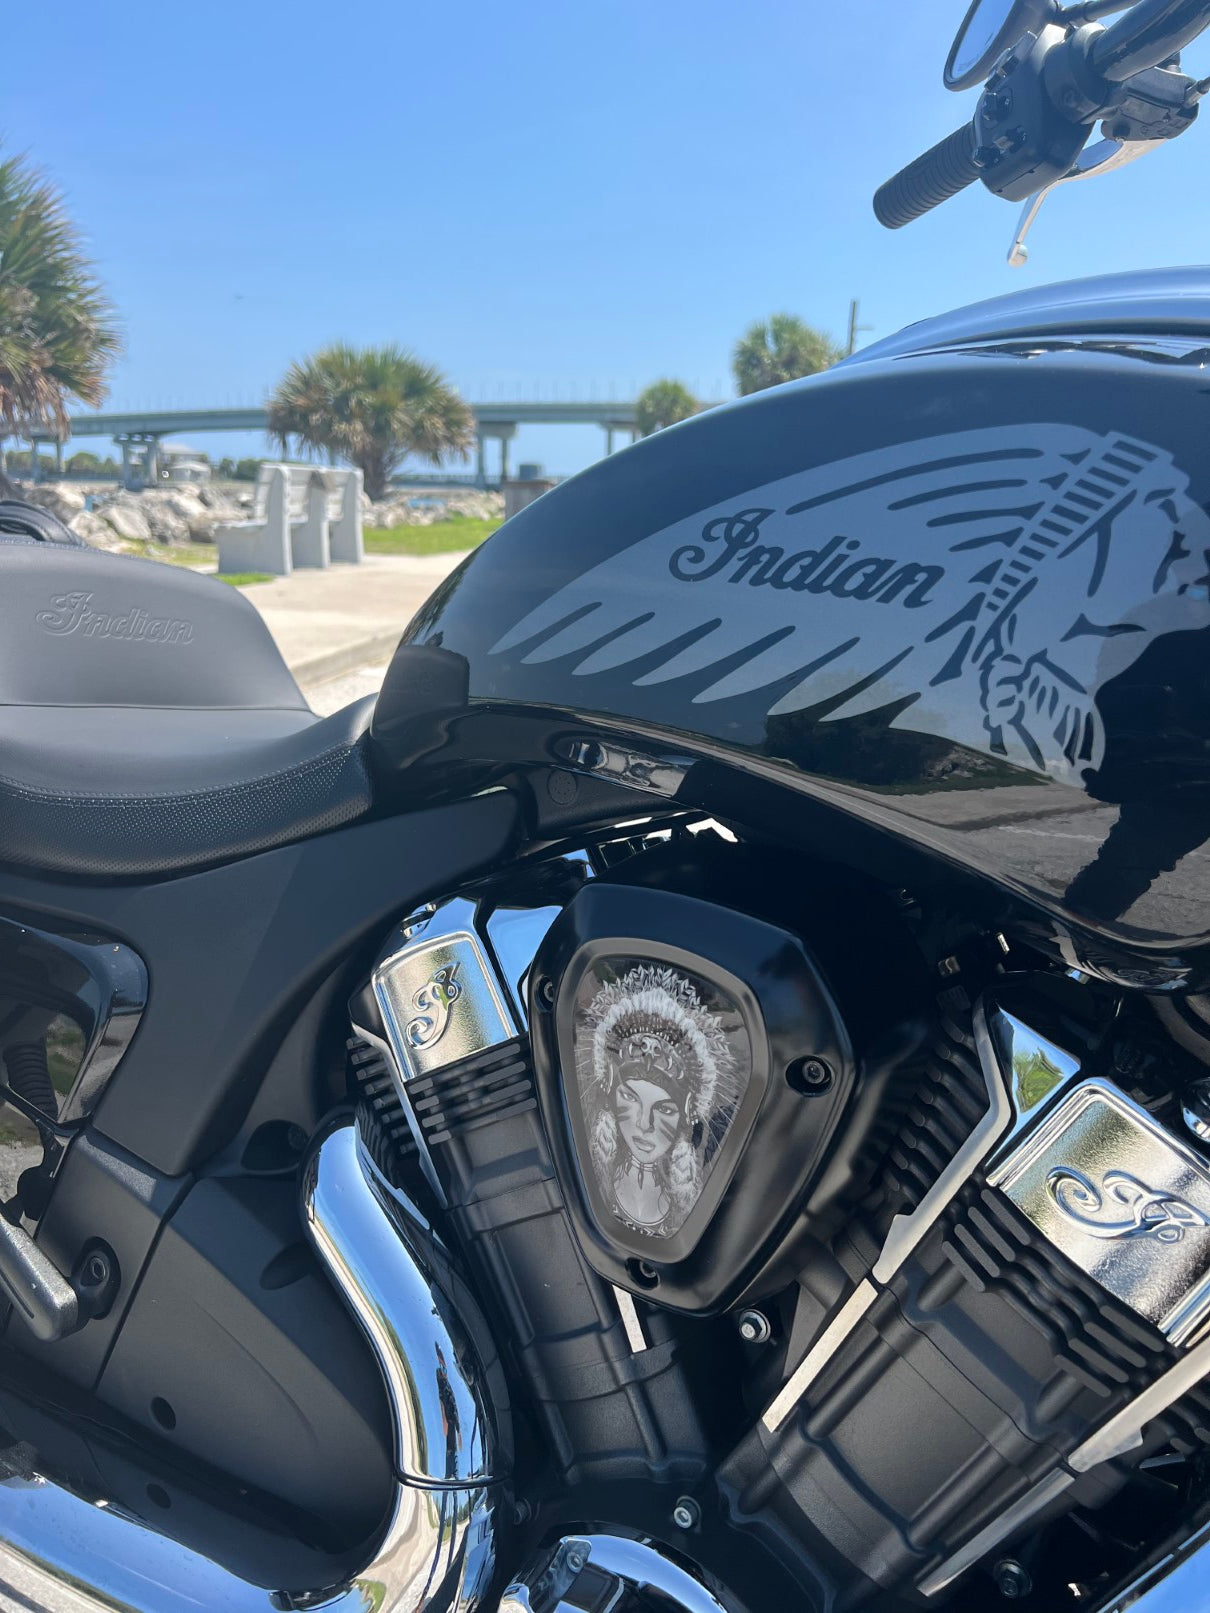
Powerplus V-Cover Decal - Horseback Hatchet
Regular price $20.00/
Shipping calculated at checkout.
We usually have this product in stock and can ship right away but there can be a wait if it sells out before the restock arrives.
Buy 2 and get an automatic 10% off both v-covers
Fits the Indian Powerplus engine found on the Challenger, Pursuit, Powerplus Chieftain, and Powerplus Roadmaster models.
This premium finish badge cover takes minutes to install and provides a completely custom look. They fit both the left and right v-cover so if you haven't removed the right side cover for another intake, don't forget to grab two!
The v-cover decals are heavy-duty 12 mil laminated gloss vinyl that flow over the curves of the badge for a bespoke custom look.
These self-adhesive decals are applied by hand to the 1901 badge. If you've already removed the badge, you can use poster putty to fill in the embossed letters before applying our decal over it.
Installation: Be sure your v-cover badge is clean before installing the decal. Peel the decal off of the backing sheet, careful not to touch the adhesive side of the decal too much. Carefully align it to a centered position (the decal is slightly smaller than the badge). Press the decal firmly down in the center to stick it in place, then use your thumbs to push out from the center to the edges. Repeat this process until you've stretched/pressed it firmly down around the curves. And that's it!
How-to Video:


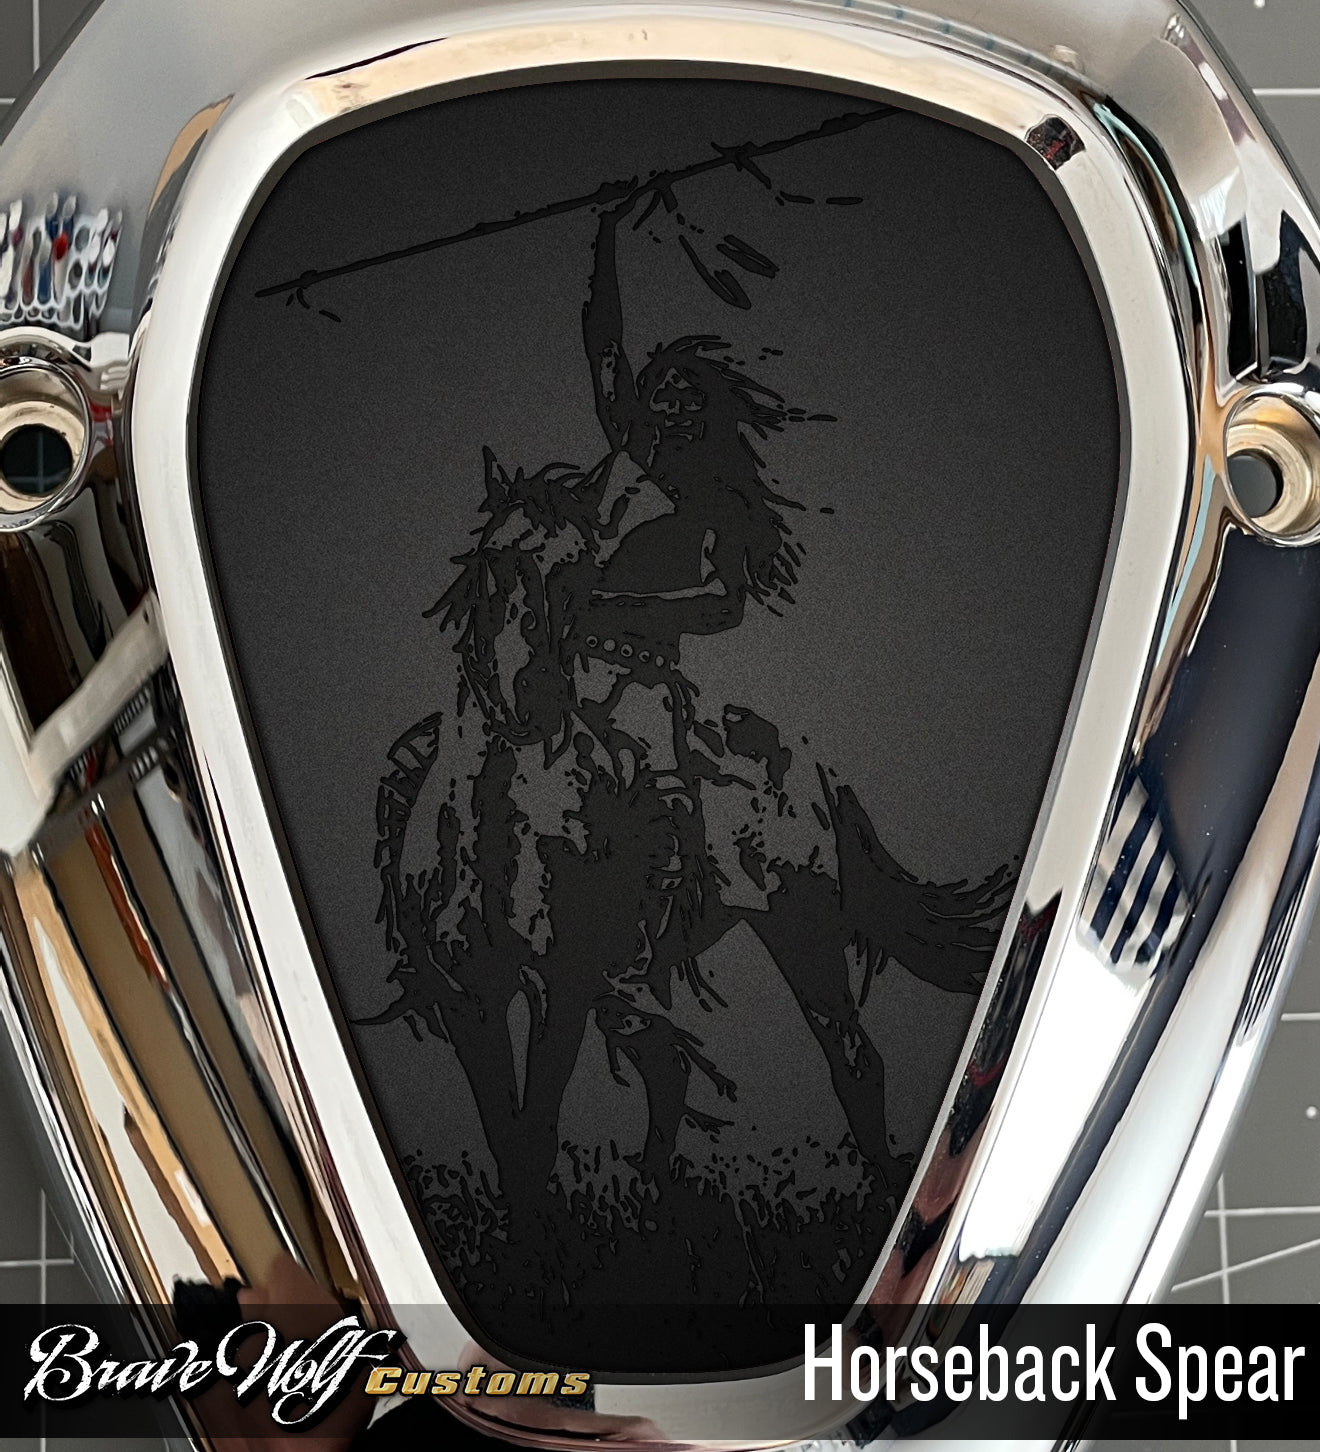

Powerplus V-Cover Decal - Horseback Spear
Regular price $20.00/
Shipping calculated at checkout.
We usually have this product in stock and can ship right away but there can be a wait if it sells out before the restock arrives.
Buy 2 and get an automatic 10% off both v-covers
Fits the Indian Powerplus engine found on the Challenger, Pursuit, Powerplus Chieftain, and Powerplus Roadmaster models.
This premium finish badge cover takes minutes to install and provides a completely custom look. They fit both the left and right v-cover so if you haven't removed the right side cover for another intake, don't forget to grab two!
The v-cover decals are heavy-duty 12 mil laminated gloss vinyl that flow over the curves of the badge for a bespoke custom look.
These self-adhesive decals are applied by hand to the 1901 badge. If you've already removed the badge, you can use poster putty to fill in the embossed letters before applying our decal over it.
Installation: Be sure your v-cover badge is clean before installing the decal. Peel the decal off of the backing sheet, careful not to touch the adhesive side of the decal too much. Carefully align it to a centered position (the decal is slightly smaller than the badge). Press the decal firmly down in the center to stick it in place, then use your thumbs to push out from the center to the edges. Repeat this process until you've stretched/pressed it firmly down around the curves. And that's it!
How-to Video:


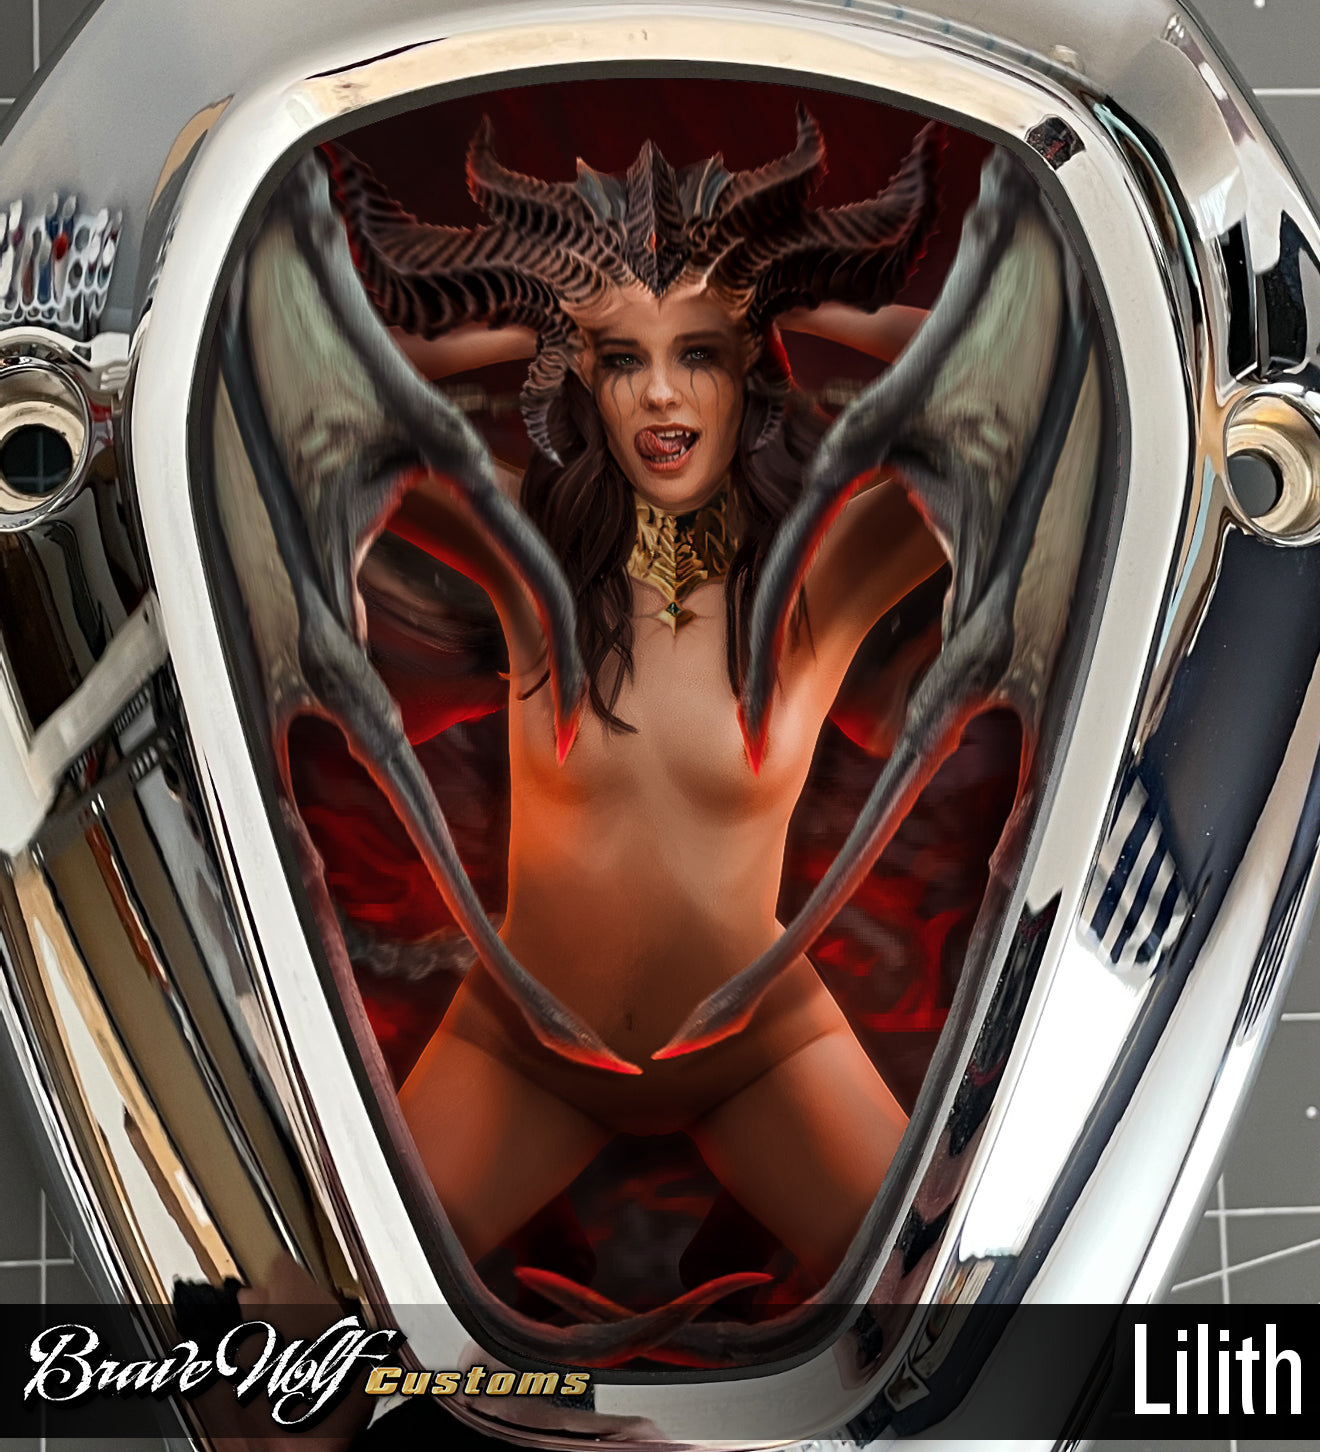
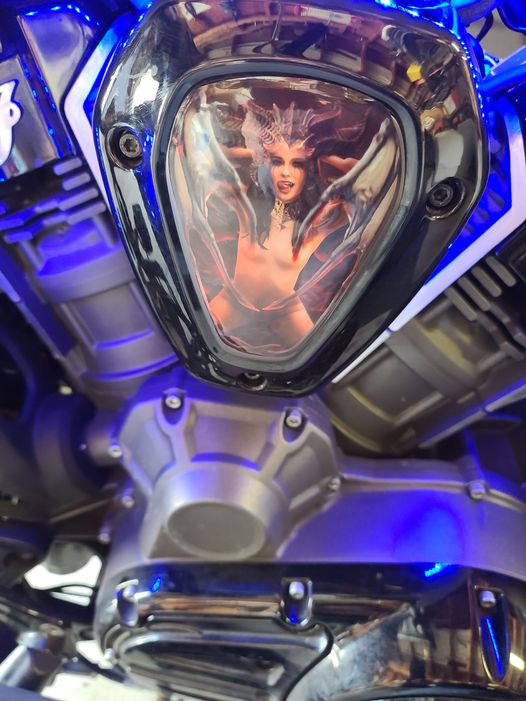
Powerplus V-Cover Decal - Lilith
Regular price $20.00/
Shipping calculated at checkout.
We usually have this product in stock and can ship right away but there can be a wait if it sells out before the restock arrives.
Buy 2 and get an automatic 10% off both v-covers
Fits the Indian Powerplus engine found on the Challenger, Pursuit, Powerplus Chieftain, and Powerplus Roadmaster models.
This premium finish badge cover takes minutes to install and provides a completely custom look. They fit both the left and right v-cover so if you haven't removed the right side cover for another intake, don't forget to grab two!
The v-cover decals are heavy-duty 12 mil laminated gloss vinyl that flow over the curves of the badge for a bespoke custom look.
These self-adhesive decals are applied by hand to the 1901 badge. If you've already removed the badge, you can use poster putty to fill in the embossed letters before applying our decal over it.
Installation: Be sure your v-cover badge is clean before installing the decal. Peel the decal off of the backing sheet, careful not to touch the adhesive side of the decal too much. Carefully align it to a centered position (the decal is slightly smaller than the badge). Press the decal firmly down in the center to stick it in place, then use your thumbs to push out from the center to the edges. Repeat this process until you've stretched/pressed it firmly down around the curves. And that's it!
How-to Video:

Powerplus V-Cover Decal - M3 - 112
Regular price $20.00/
Shipping calculated at checkout.
If not in stock at the time of your order, it could take approximately 2-3 weeks before we can ship out.
Buy 2 and get an automatic 10% off both v-covers
Fits the Indian Powerplus engine found on the Challenger, Pursuit, Powerplus Chieftain, and Powerplus Roadmaster models.
This premium finish badge cover takes minutes to install and provides a completely custom look. They fit both the left and right v-cover so if you haven't removed the right side cover for another intake, don't forget to grab two!
The v-cover decals are heavy-duty 12 mil laminated gloss vinyl that flow over the curves of the badge for a bespoke custom look.
These self-adhesive decals are applied by hand to the 1901 badge. If you've already removed the badge, or if your model has embossed letters on the v-cover, you can fill those in with silicon or putty or cover it with some vinyl or tape before applying our decal over it.
Installation: Be sure your v-cover badge is clean before installing the decal. Peel the decal off of the backing sheet, careful not to touch the adhesive side of the decal too much. Carefully align it to a centered position (the decal is slightly smaller than the badge). Press the decal firmly down in the center to stick it in place, then use your thumbs to push out from the center to the edges. Repeat this process until you've stretched/pressed it firmly down around the curves. And that's it!
How-to Video:


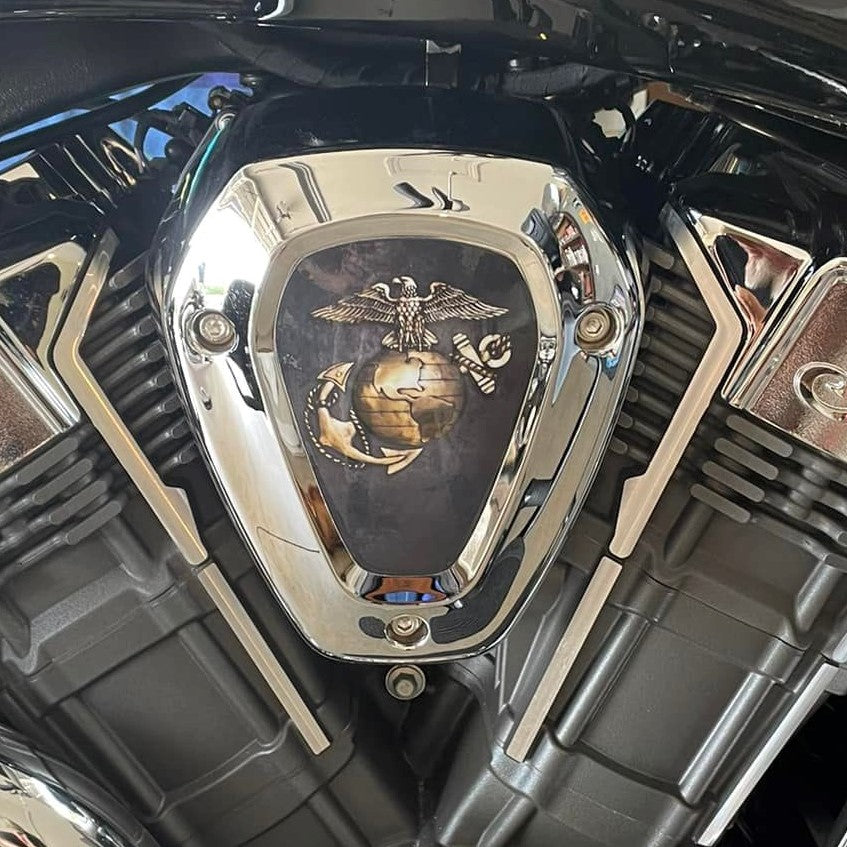
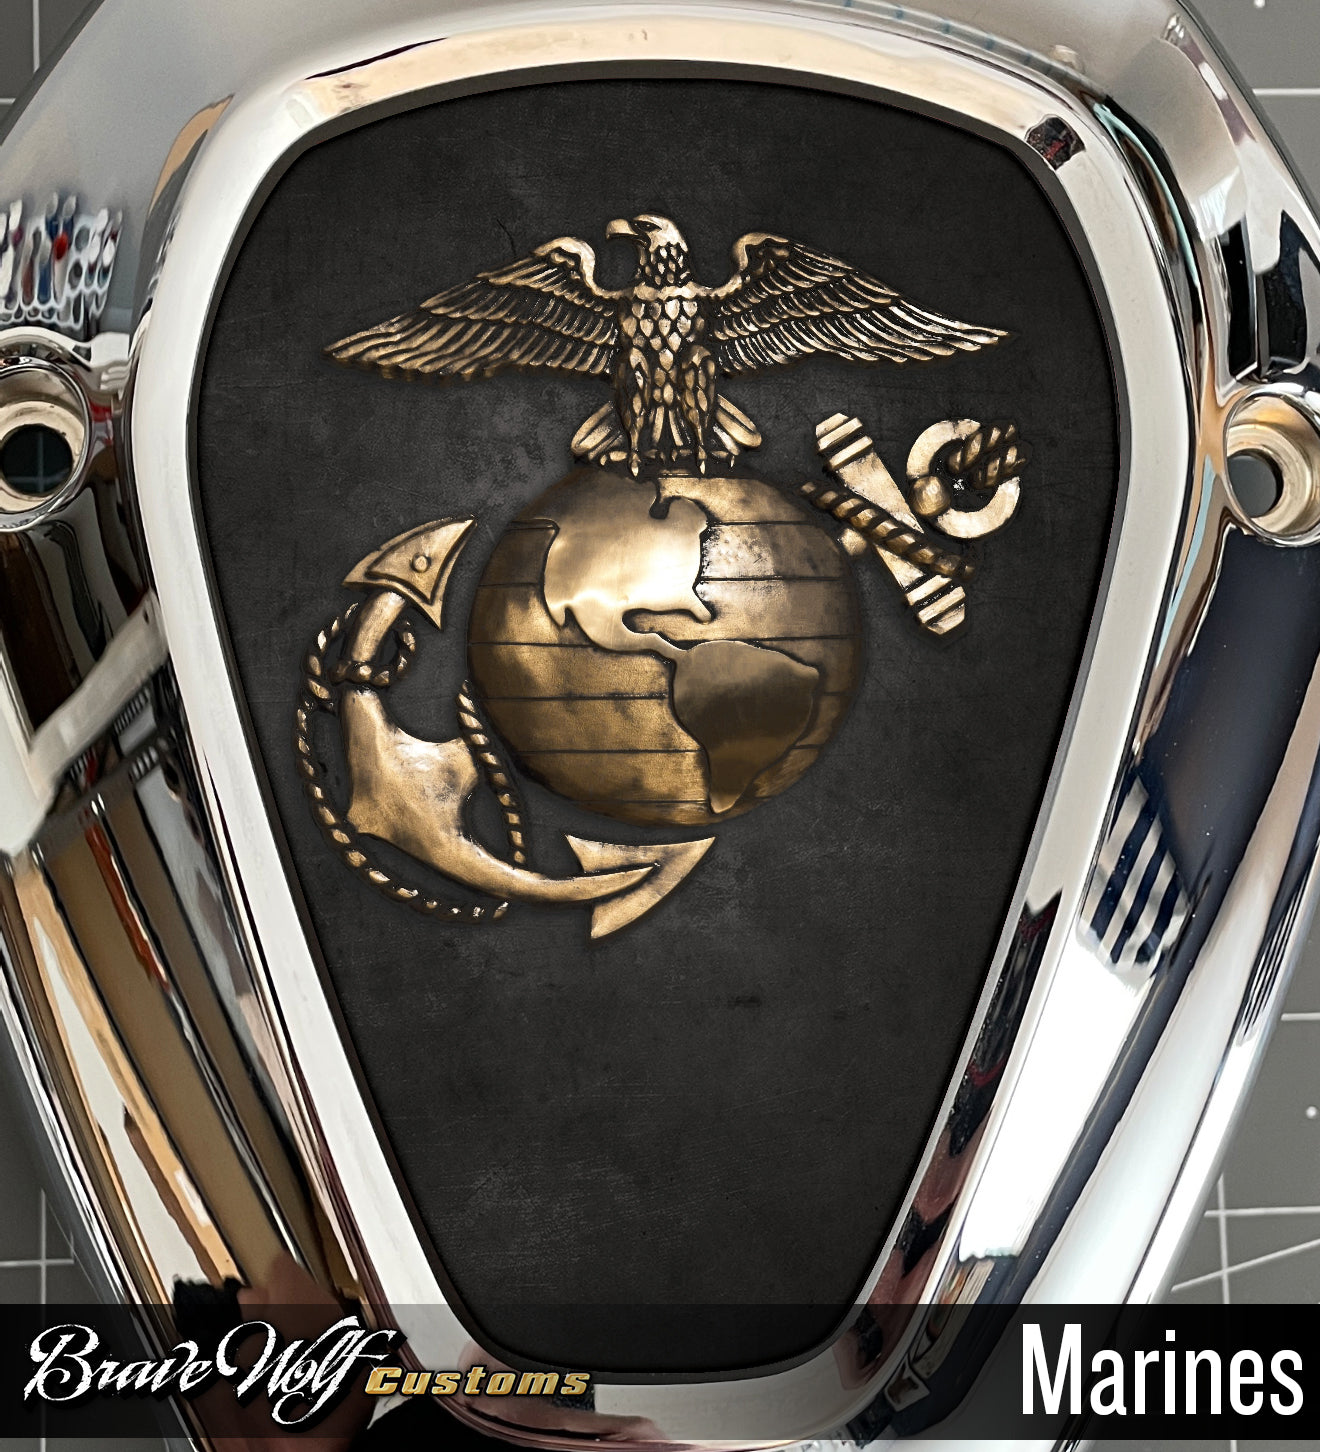
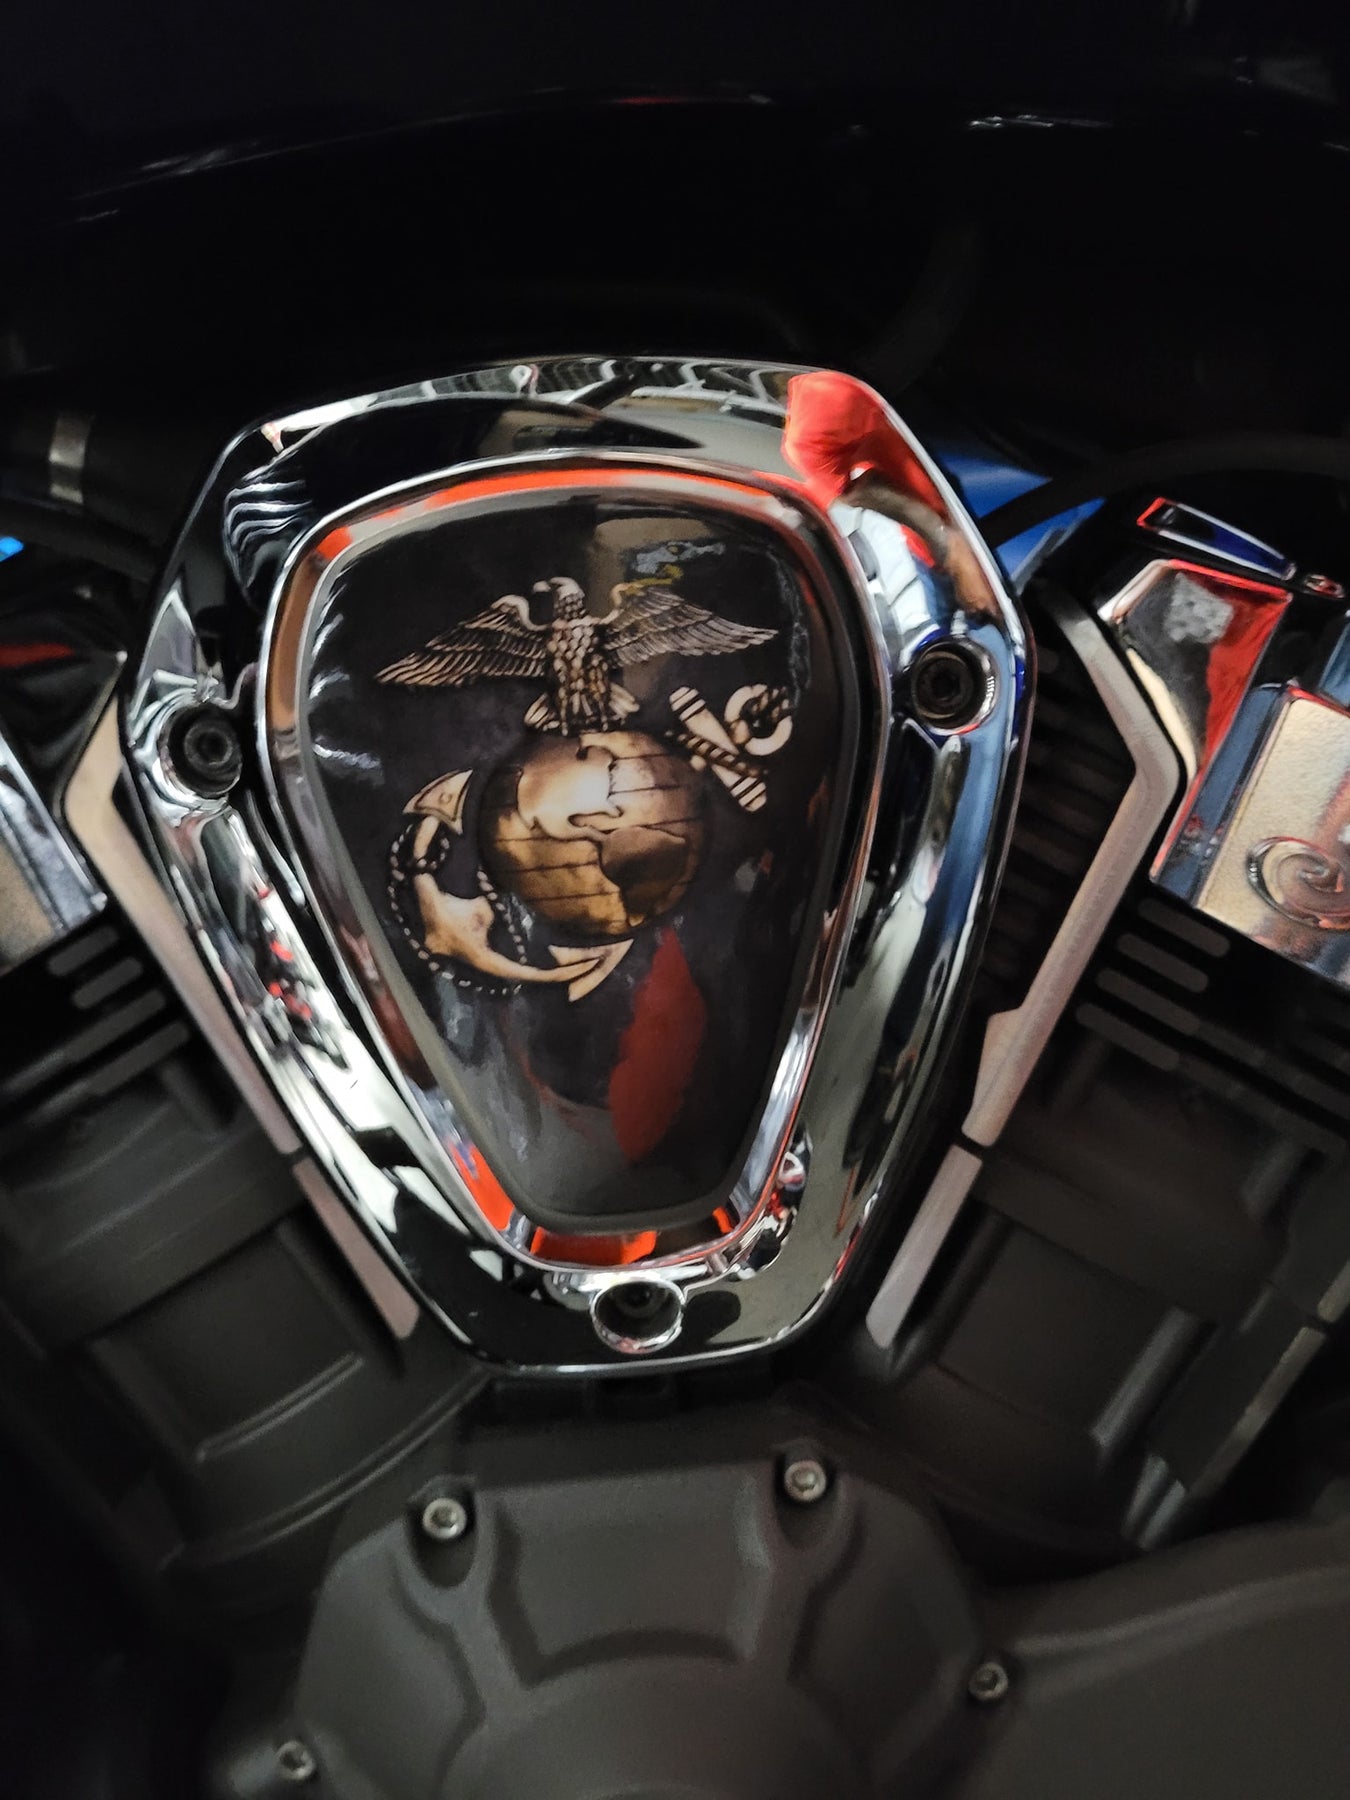
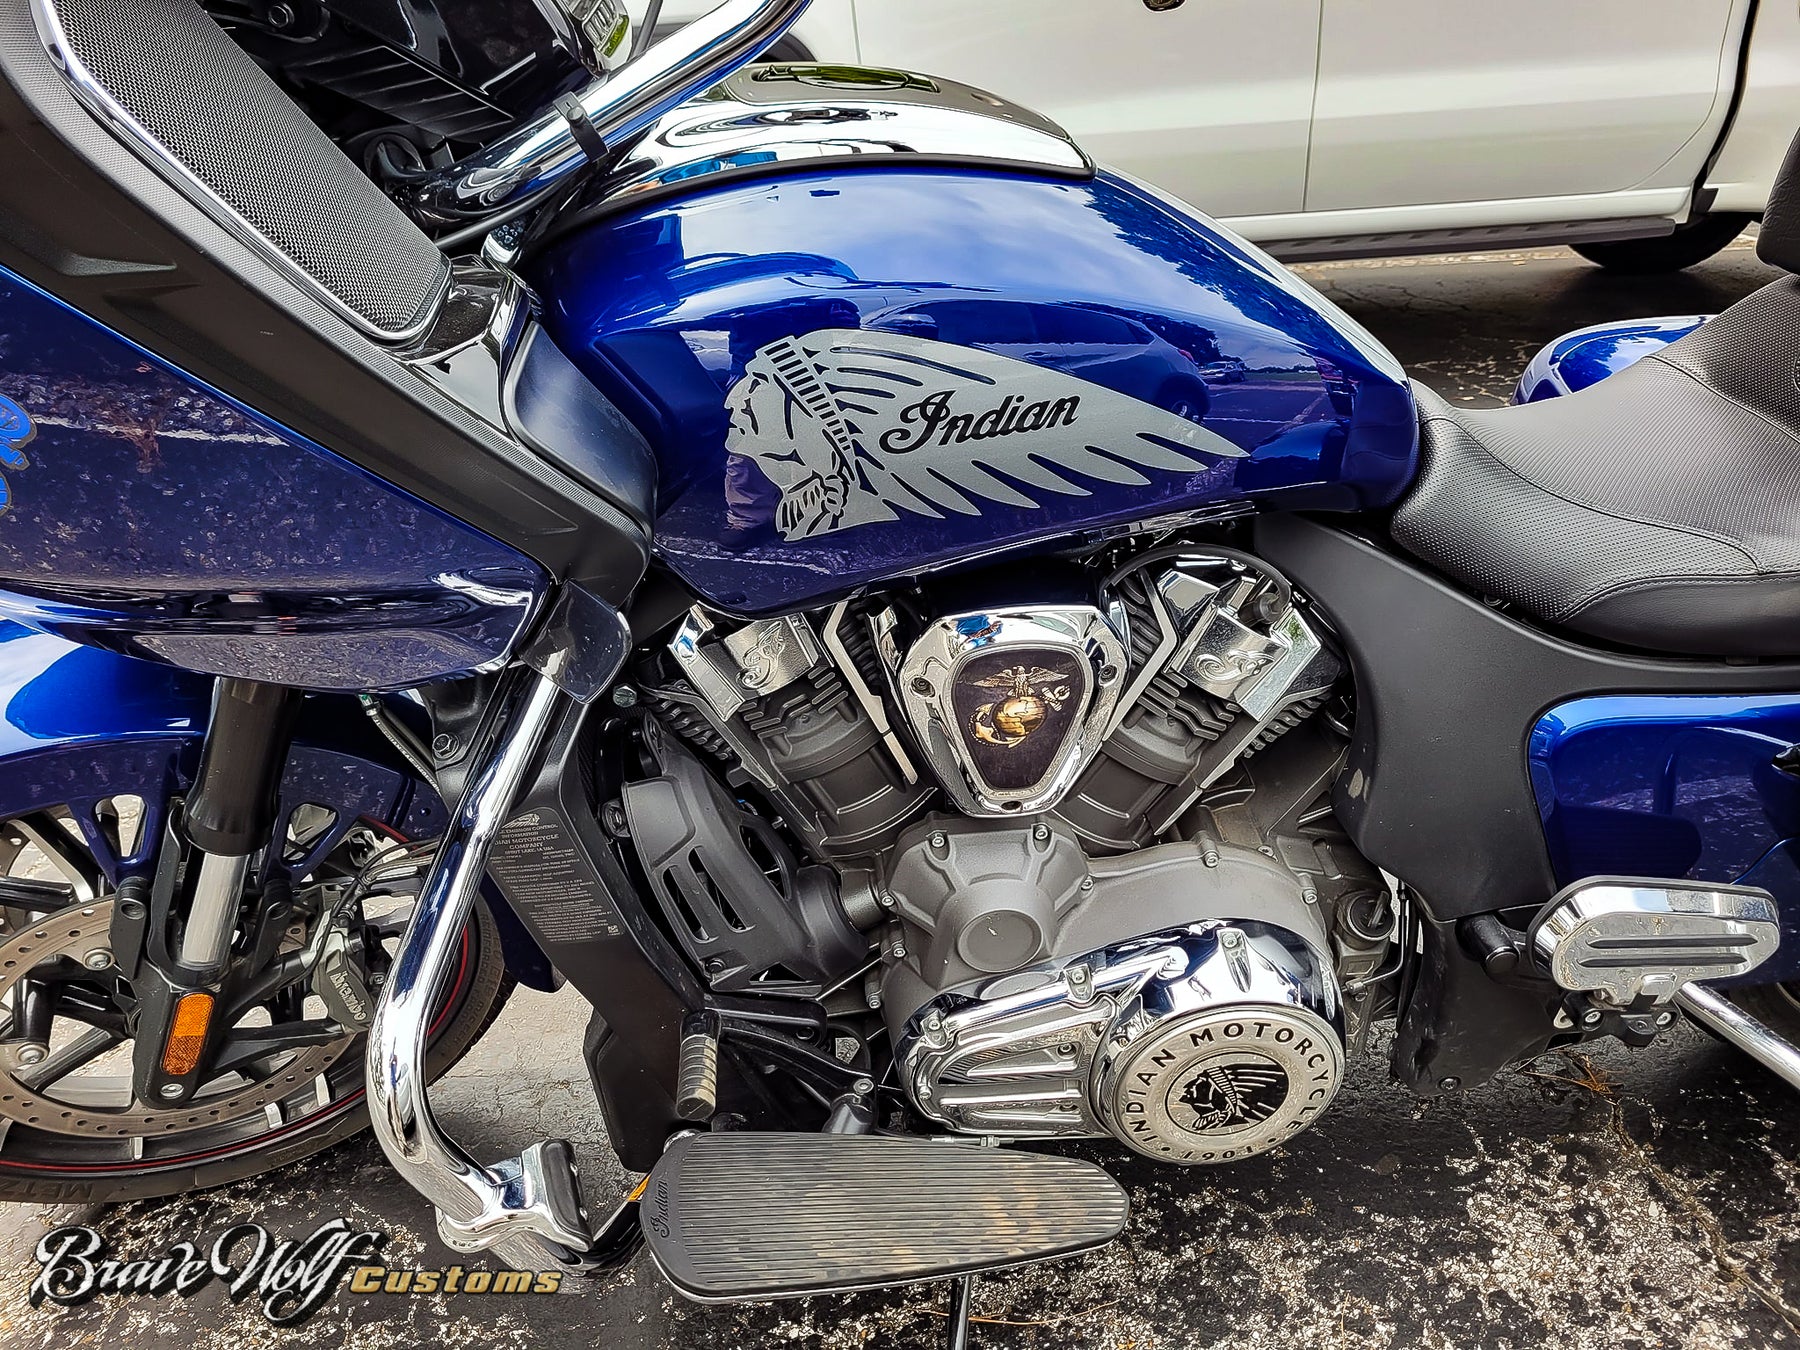
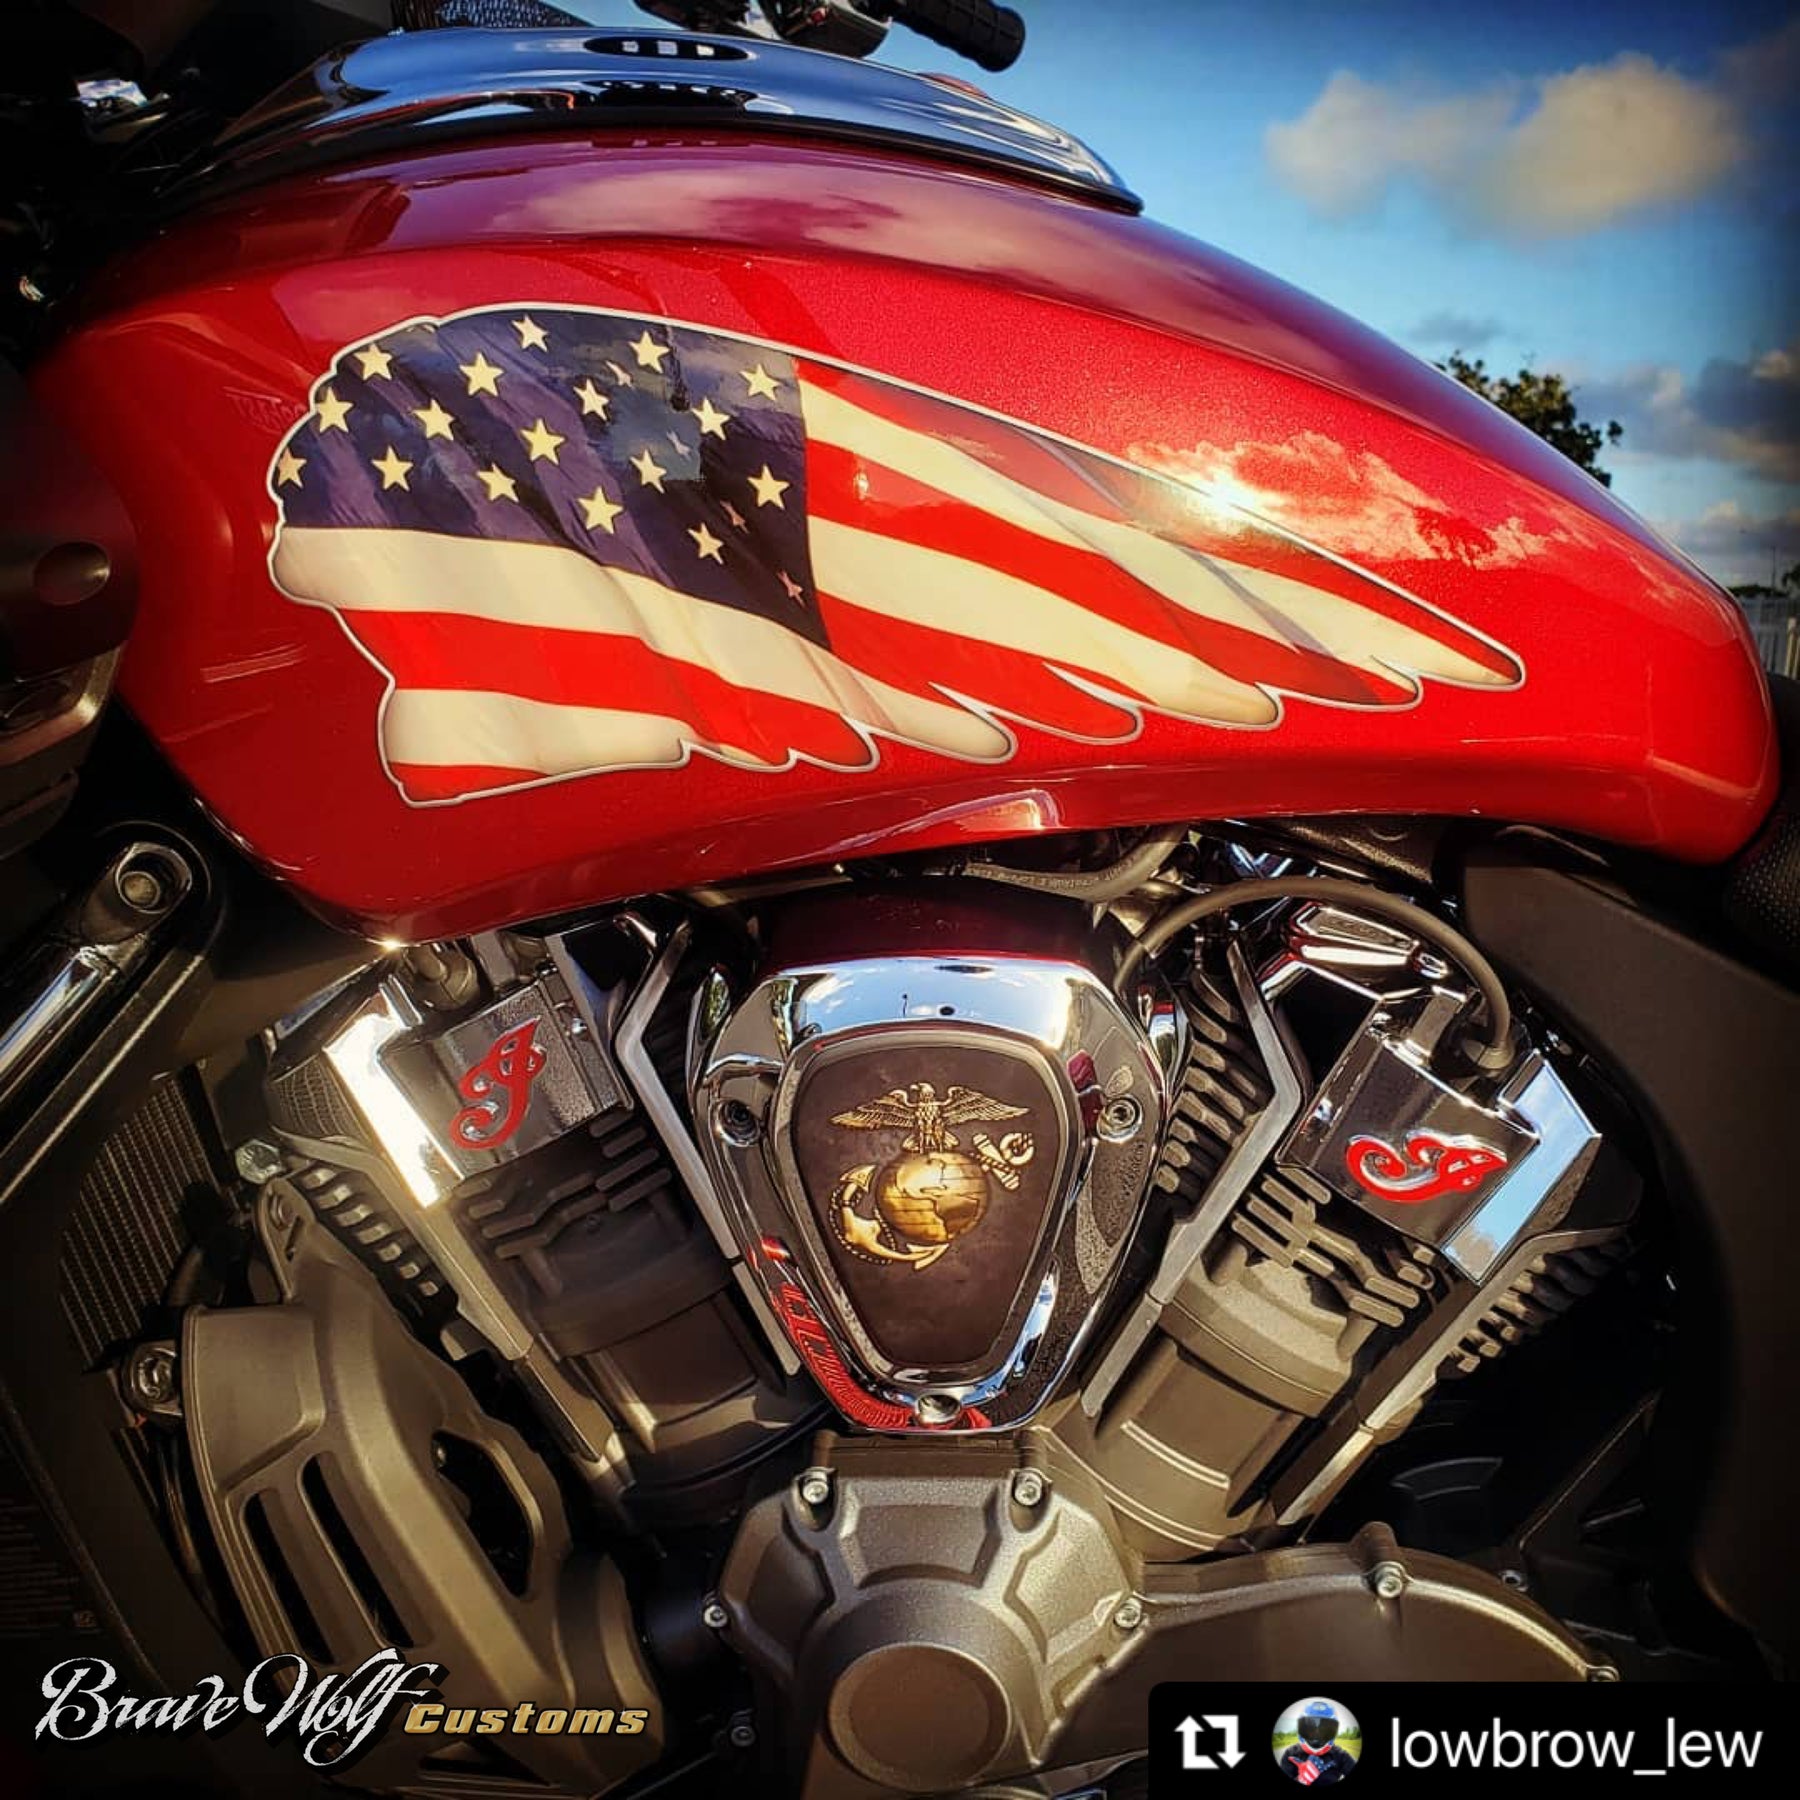
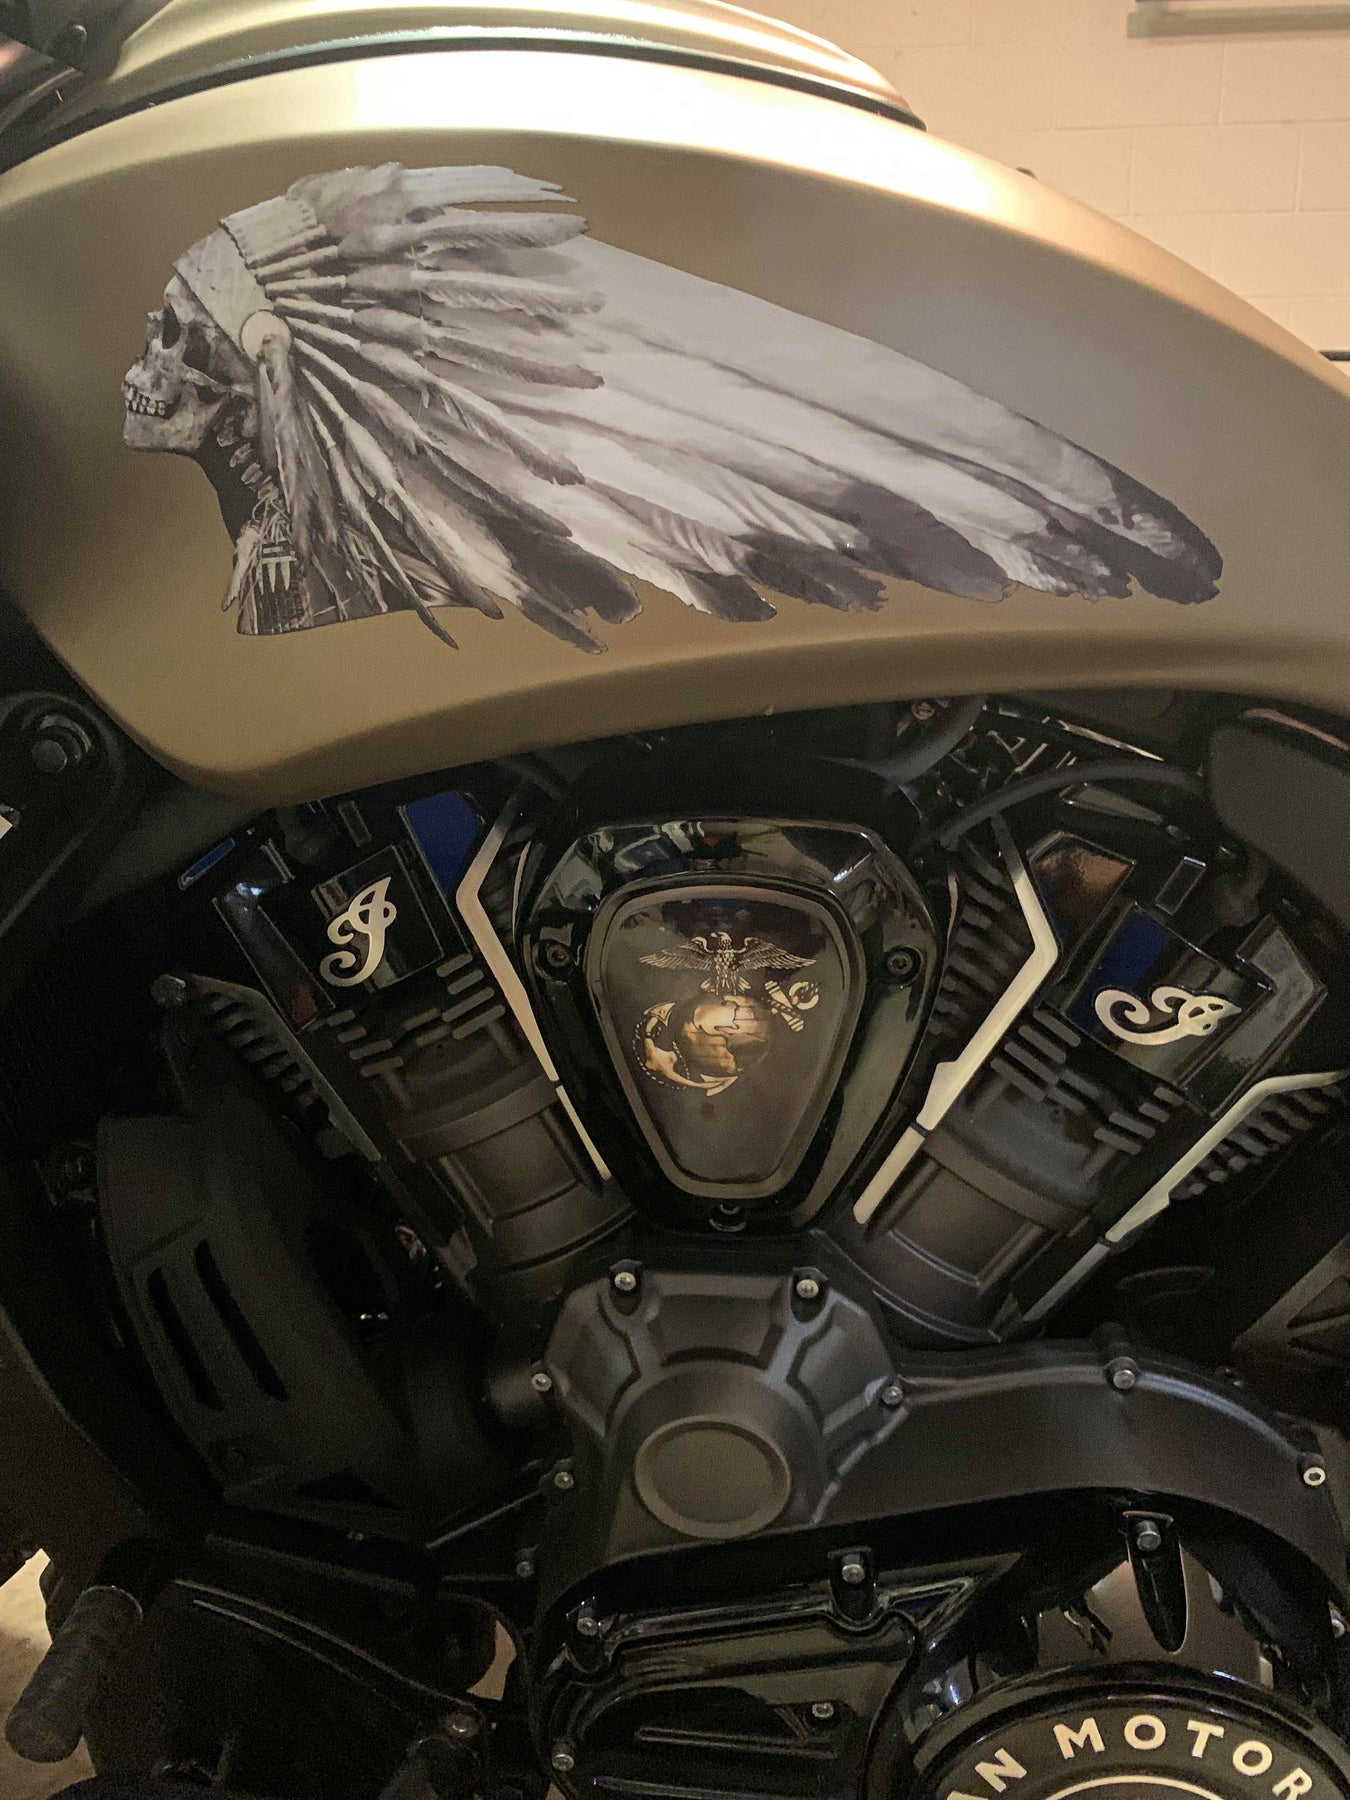
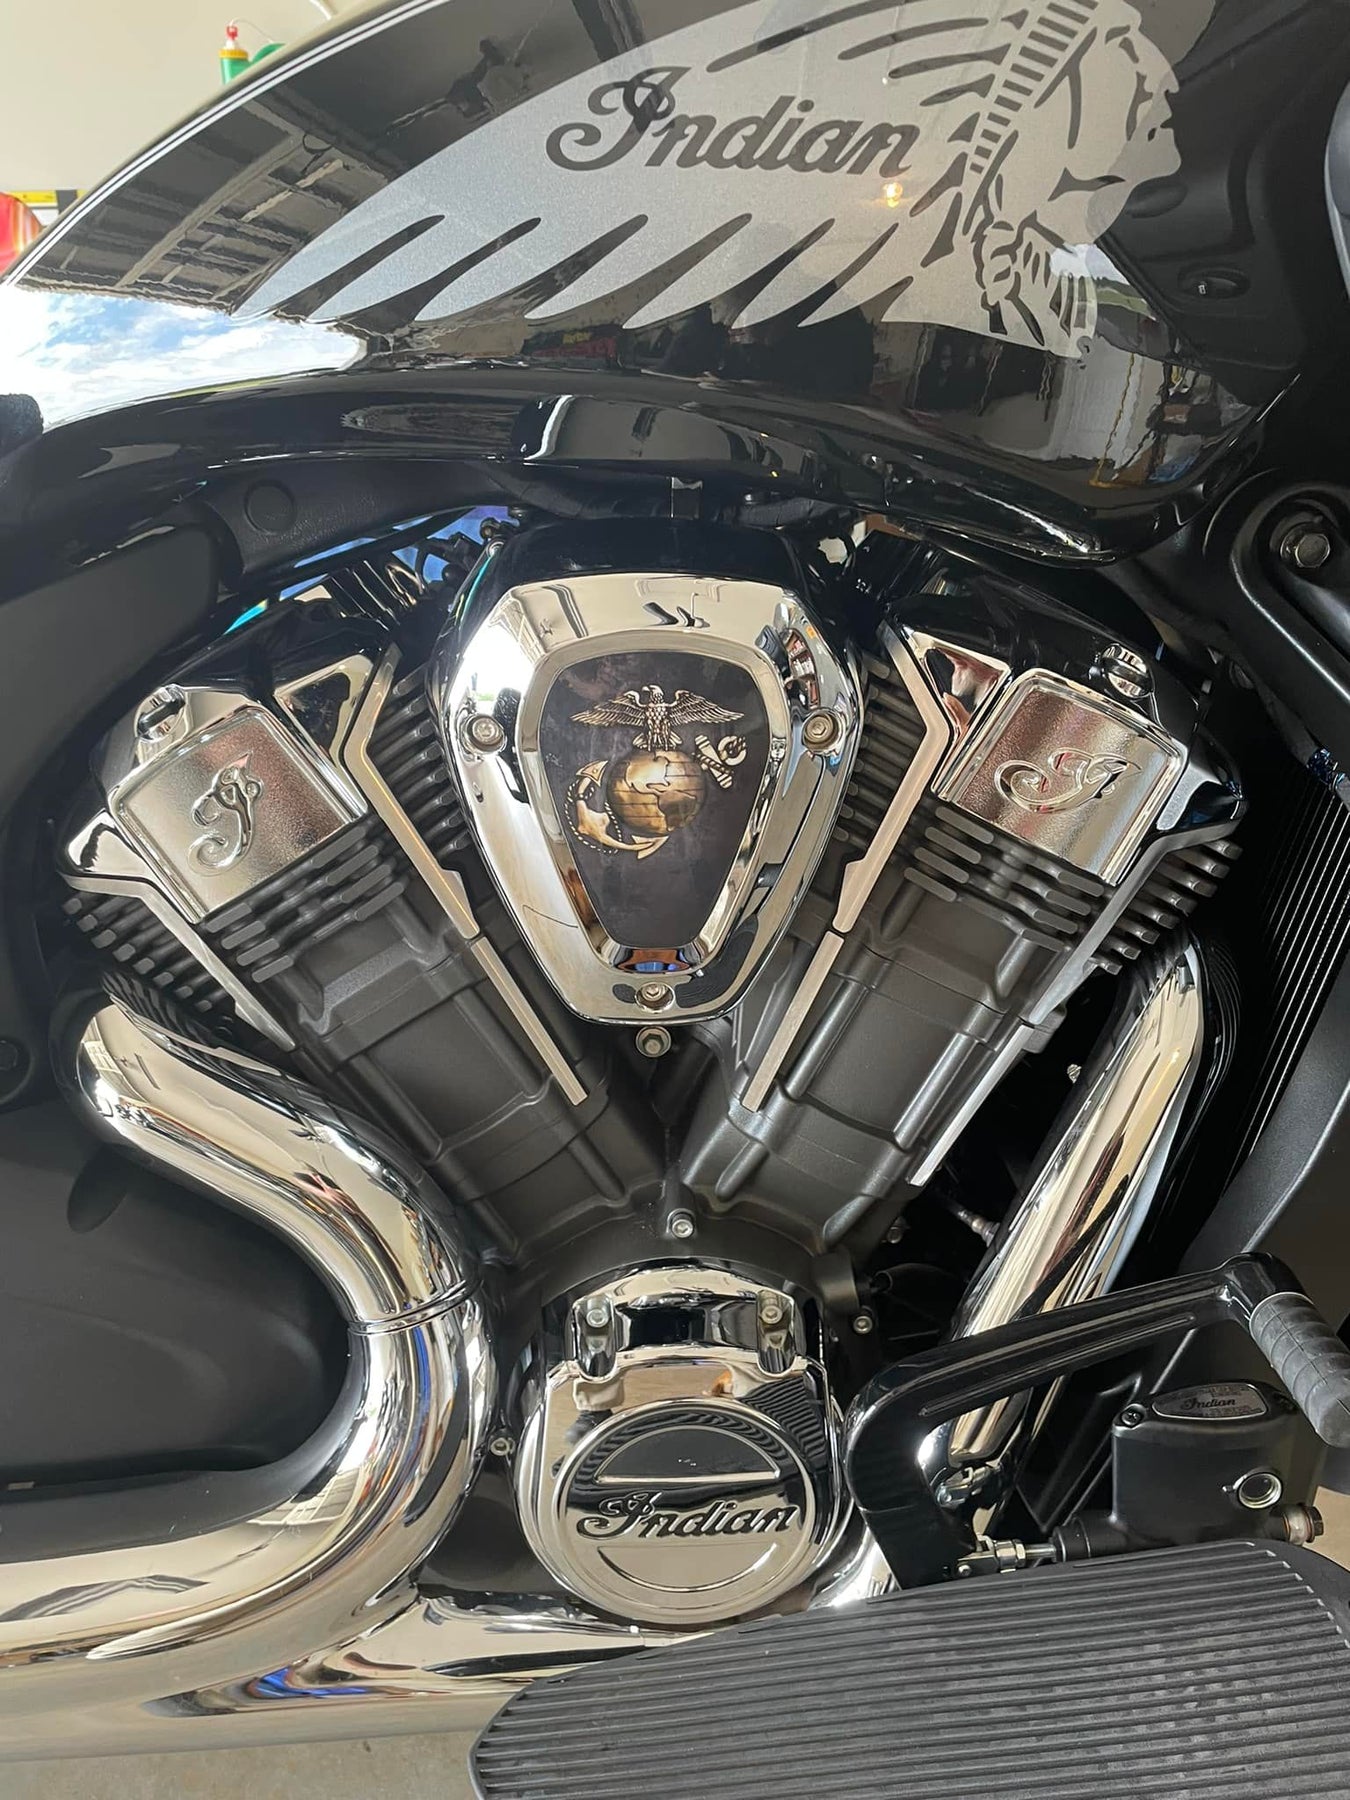
Powerplus V-Cover Decal - Marines
Regular price $20.00/
Shipping calculated at checkout.
We usually have this product in stock and can ship right away but there can be a wait if it sells out before the restock arrives.
Buy 2 and get an automatic 10% off both v-covers
Fits the Indian Powerplus engine found on the Challenger, Pursuit, Powerplus Chieftain, and Powerplus Roadmaster models.
This premium finish badge cover takes minutes to install and provides a completely custom look. They fit both the left and right v-cover so if you haven't removed the right side cover for another intake, don't forget to grab two!
The v-cover decals are heavy-duty 12 mil laminated gloss vinyl that flow over the curves of the badge for a bespoke custom look.
These self-adhesive decals are applied by hand to the 1901 badge. If you've already removed the badge, you can use poster putty to fill in the embossed letters before applying our decal over it.
Installation: Be sure your v-cover badge is clean before installing the decal. Peel the decal off of the backing sheet, careful not to touch the adhesive side of the decal too much. Carefully align it to a centered position (the decal is slightly smaller than the badge). Press the decal firmly down in the center to stick it in place, then use your thumbs to push out from the center to the edges. Repeat this process until you've stretched/pressed it firmly down around the curves. And that's it!
How-to Video:

Powerplus V-Cover Decal - Mayan Calendar (B&W) - V2
Regular price $20.00 Sale price $10.00 Save $10.00/
Shipping calculated at checkout.
We usually have this product in stock and can ship right away but there can be a wait if it sells out before the restock arrives.
Buy 2 and get an automatic 10% off both v-covers
Fits the Indian Powerplus engine found on the Challenger, Pursuit, Powerplus Chieftain, and Powerplus Roadmaster models.
This is the NEW Version 2 of our Black & White Mayan Calendar
This premium finish badge cover takes minutes to install and provides a completely custom look. They fit both the left and right v-cover so if you haven't removed the right side cover for another intake, don't forget to grab two!
The v-cover decals are heavy-duty 12 mil laminated gloss vinyl that flow over the curves of the badge for a bespoke custom look.
These self-adhesive decals are applied by hand to the 1901 badge. If you've already removed the badge, you can use poster putty to fill in the embossed letters before applying our decal over it.
Installation: Be sure your v-cover badge is clean before installing the decal. Peel the decal off of the backing sheet, careful not to touch the adhesive side of the decal too much. Carefully align it to a centered position (the decal is slightly smaller than the badge). Press the decal firmly down in the center to stick it in place, then use your thumbs to push out from the center to the edges. Repeat this process until you've stretched/pressed it firmly down around the curves. And that's it!
How-to Video:


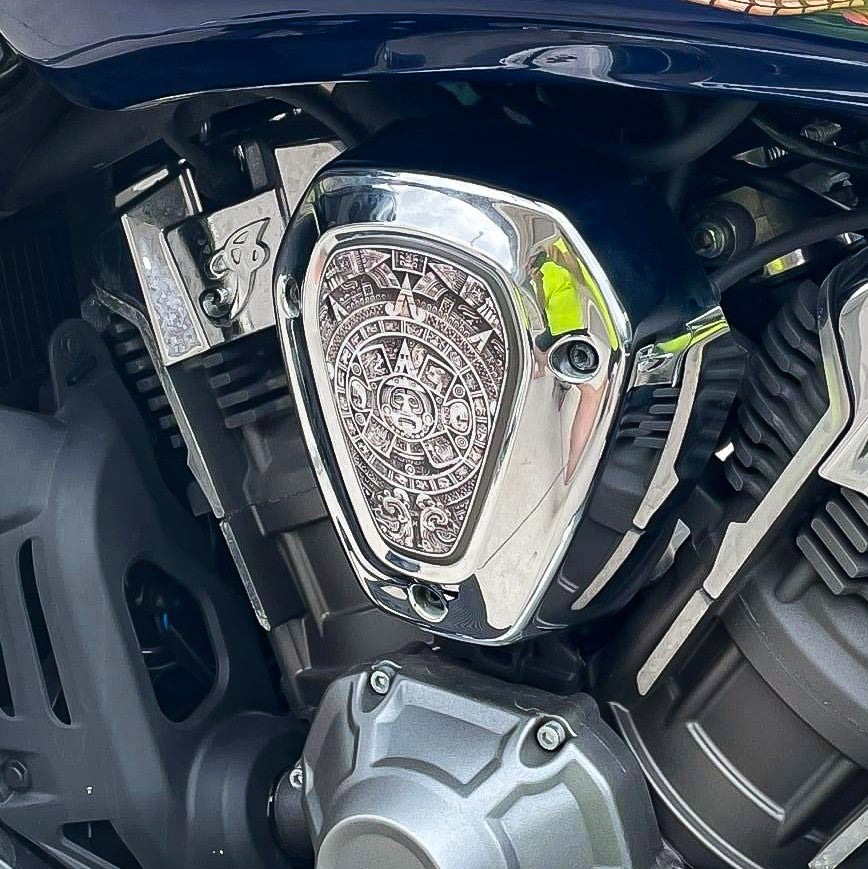
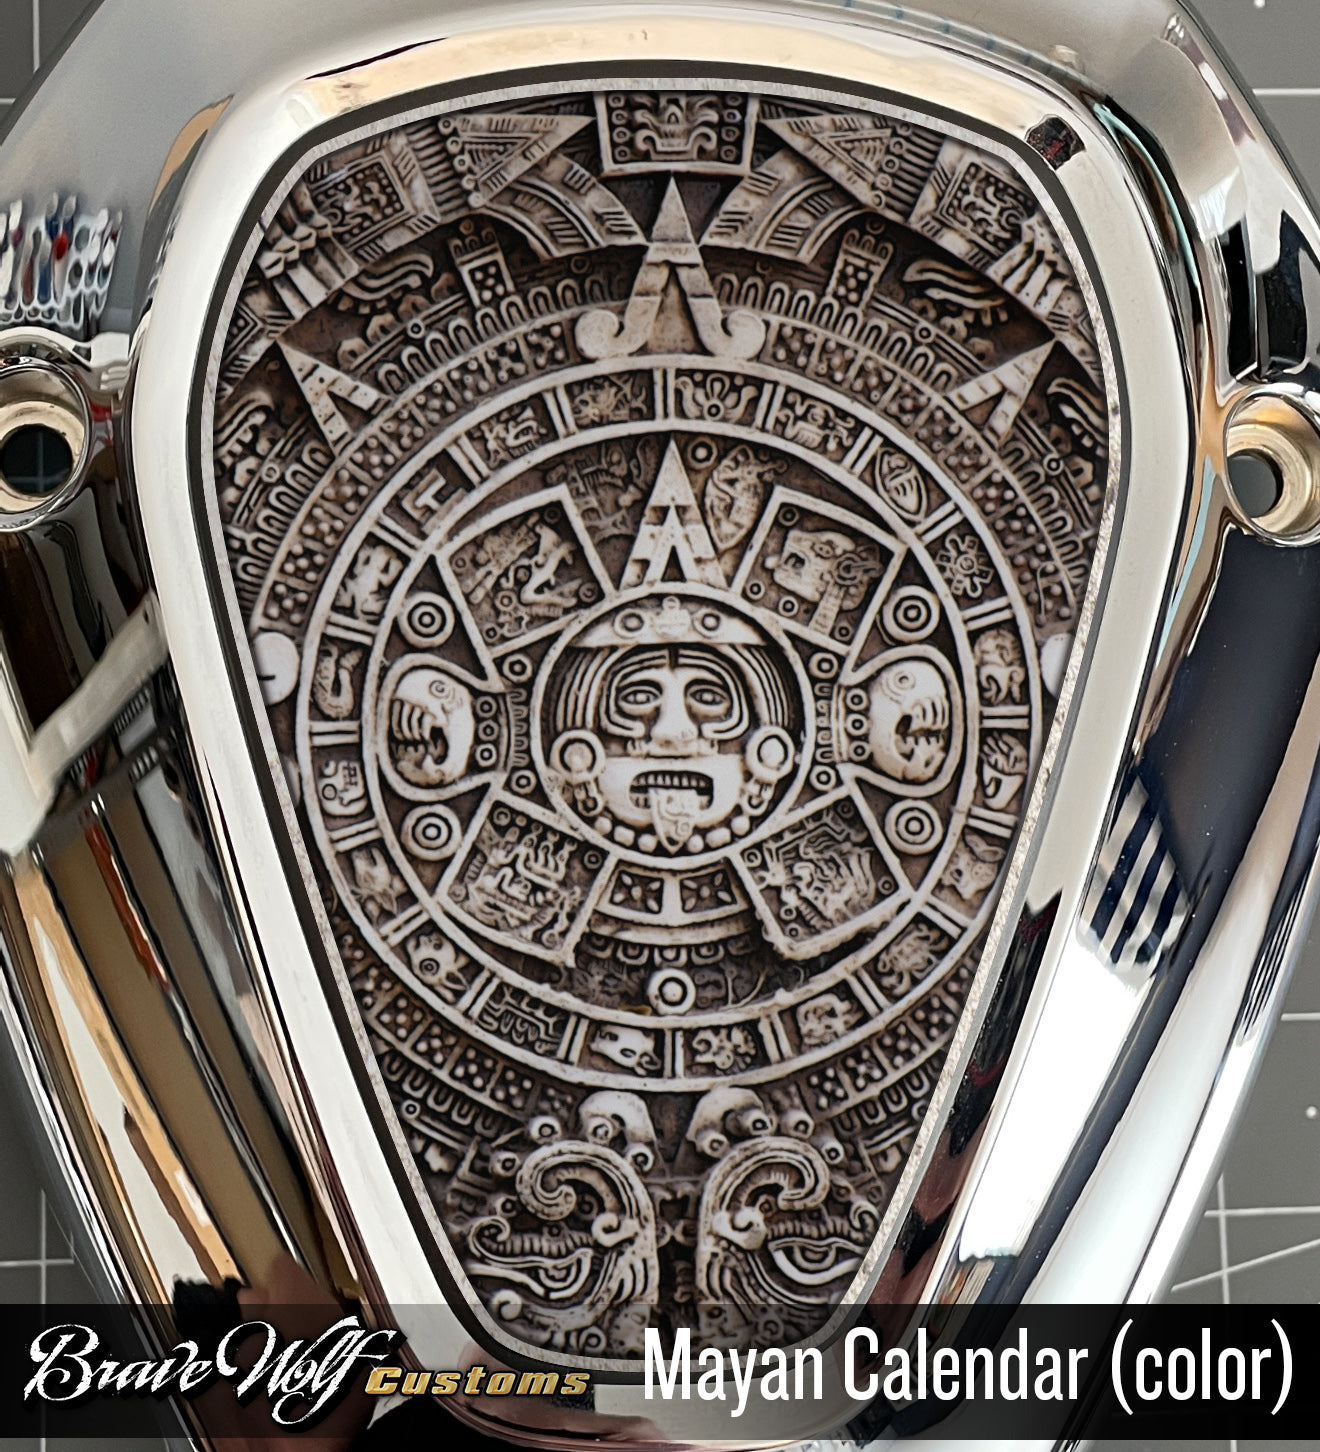
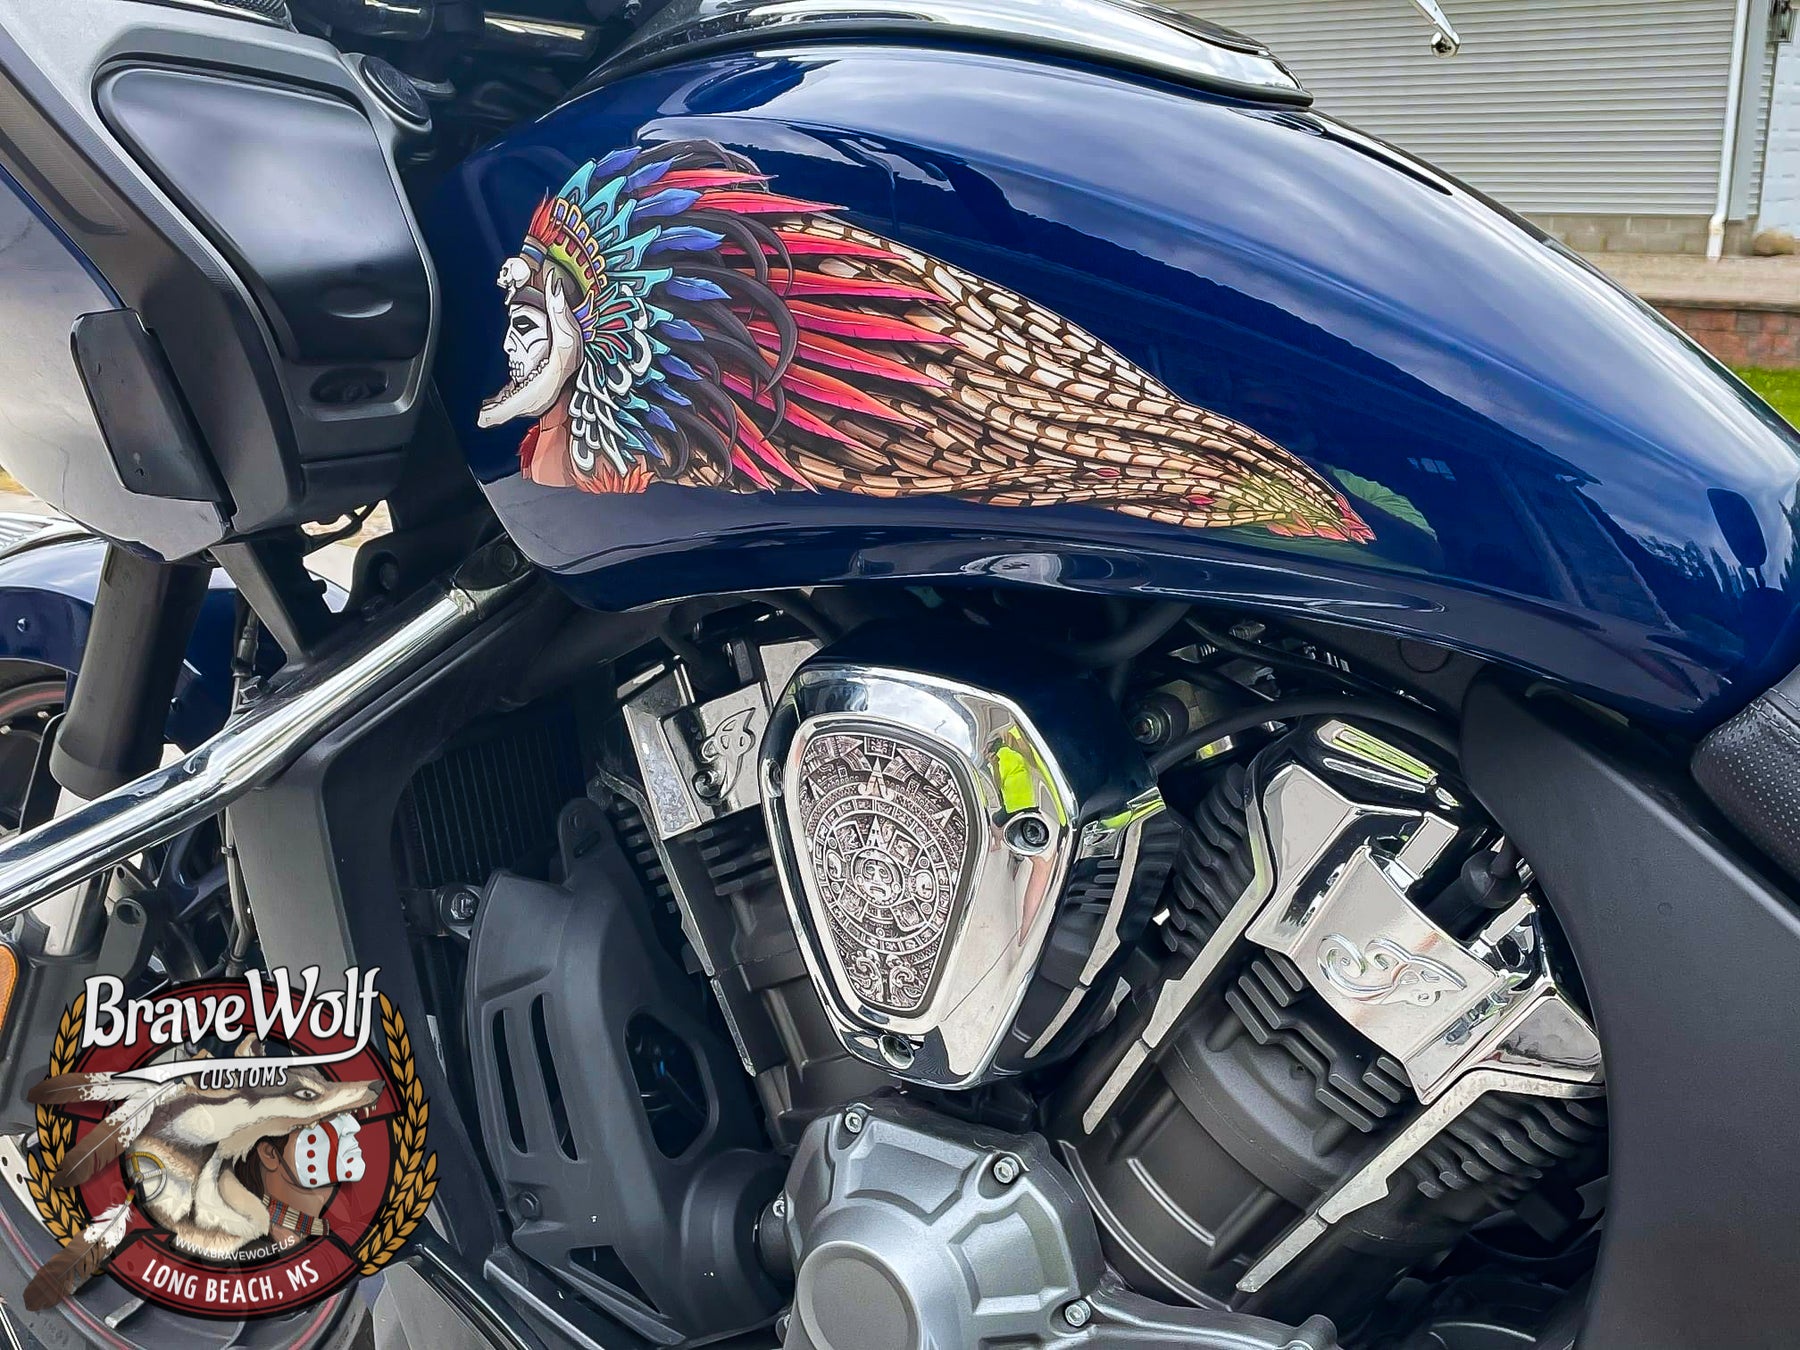
Powerplus V-Cover Decal - Mayan Calendar (color)
Regular price $20.00/
Shipping calculated at checkout.
We usually have this product in stock and can ship right away but there can be a wait if it sells out before the restock arrives.
Buy 2 and get an automatic 10% off both v-covers
Fits the Indian Powerplus engine found on the Challenger, Pursuit, Powerplus Chieftain, and Powerplus Roadmaster models.
This premium finish badge cover takes minutes to install and provides a completely custom look. They fit both the left and right v-cover so if you haven't removed the right side cover for another intake, don't forget to grab two!
The v-cover decals are heavy-duty 12 mil laminated gloss vinyl that flow over the curves of the badge for a bespoke custom look.
These self-adhesive decals are applied by hand to the 1901 badge. If you've already removed the badge, you can use poster putty to fill in the embossed letters before applying our decal over it.
Installation: Be sure your v-cover badge is clean before installing the decal. Peel the decal off of the backing sheet, careful not to touch the adhesive side of the decal too much. Carefully align it to a centered position (the decal is slightly smaller than the badge). Press the decal firmly down in the center to stick it in place, then use your thumbs to push out from the center to the edges. Repeat this process until you've stretched/pressed it firmly down around the curves. And that's it!
How-to Video:

Powerplus V-Cover Decal - Mayan Chief
Regular price $20.00 Sale price $9.00 Save $11.00/
Shipping calculated at checkout.
We usually have this product in stock and can ship right away but there can be a wait if it sells out before the restock arrives.
Buy 2 and get an automatic 10% off both v-covers
Fits the Indian Powerplus engine found on the Challenger, Pursuit, Powerplus Chieftain, and Powerplus Roadmaster models.
This premium finish badge cover takes minutes to install and provides a completely custom look. They fit both the left and right v-cover so if you haven't removed the right side cover for another intake, don't forget to grab two!
The v-cover decals are heavy-duty 12 mil laminated gloss vinyl that flow over the curves of the badge for a bespoke custom look.
These self-adhesive decals are applied by hand to the 1901 badge. If you've already removed the badge, you can use poster putty to fill in the embossed letters before applying our decal over it.
Installation: Be sure your v-cover badge is clean before installing the decal. Peel the decal off of the backing sheet, careful not to touch the adhesive side of the decal too much. Carefully align it to a centered position (the decal is slightly smaller than the badge). Press the decal firmly down in the center to stick it in place, then use your thumbs to push out from the center to the edges. Repeat this process until you've stretched/pressed it firmly down around the curves. And that's it!
How-to Video:


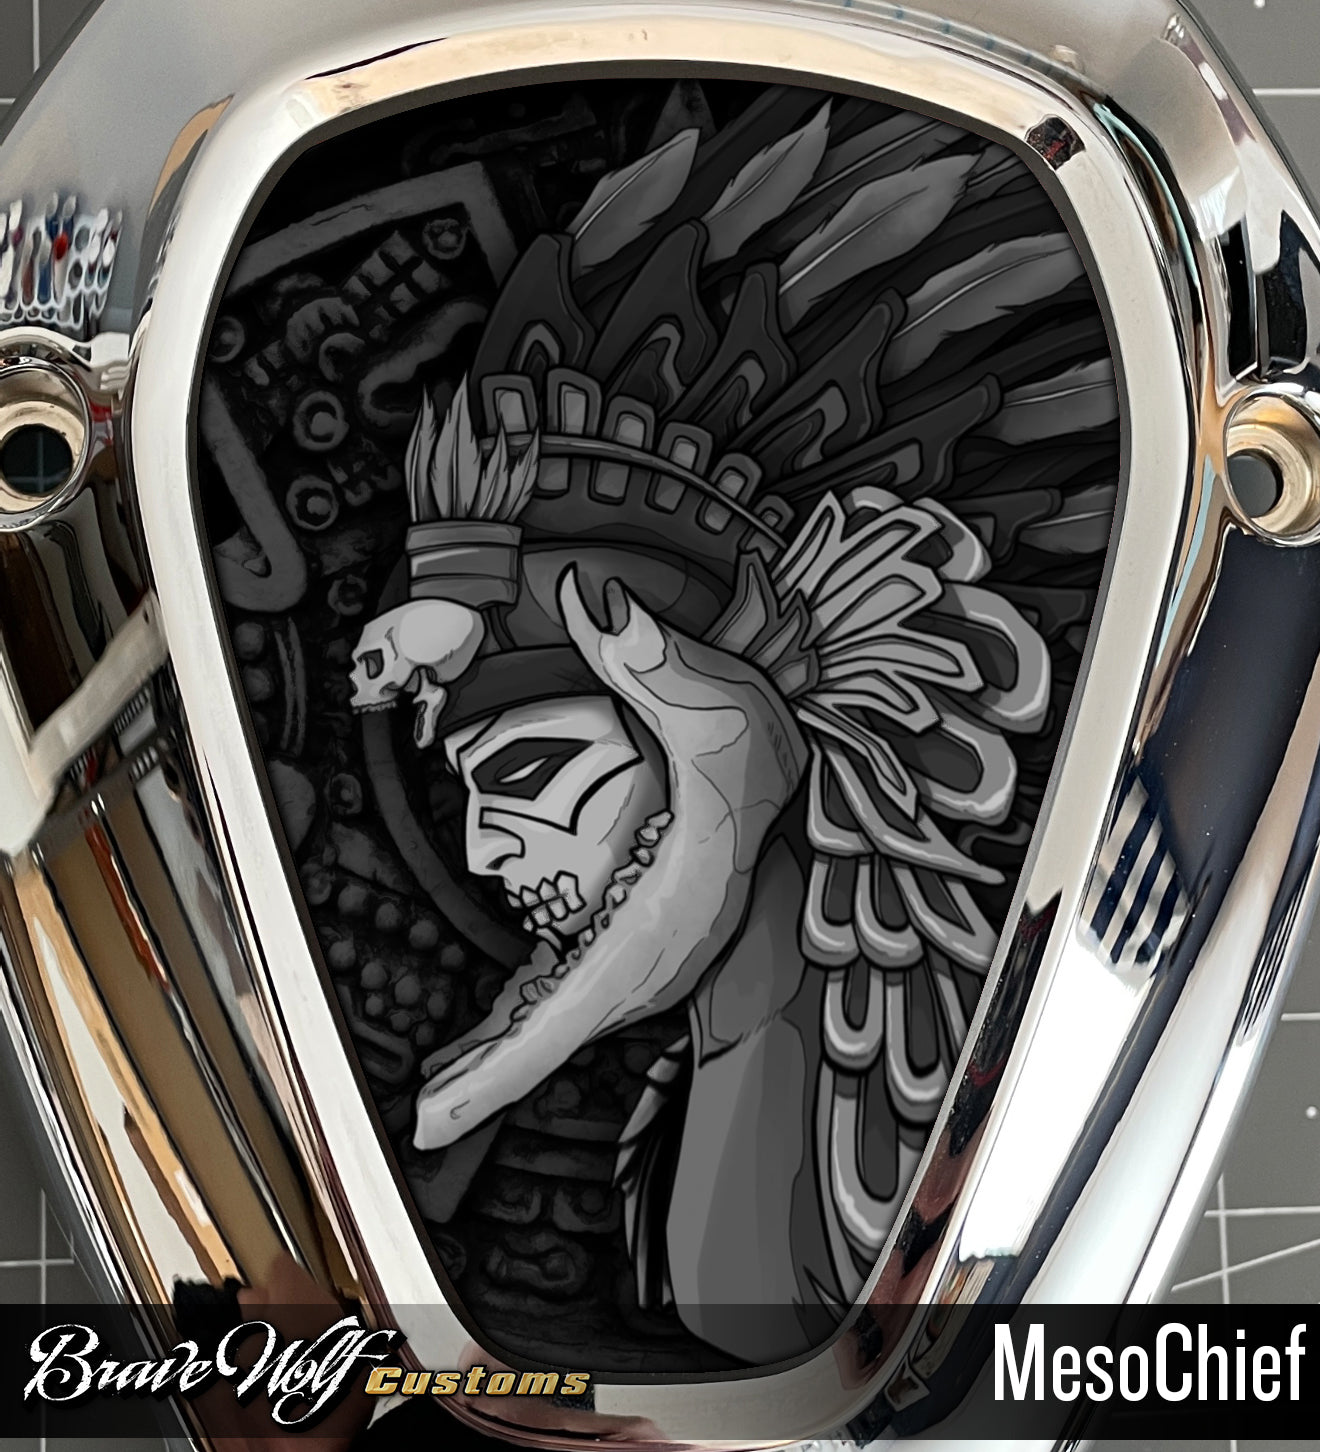
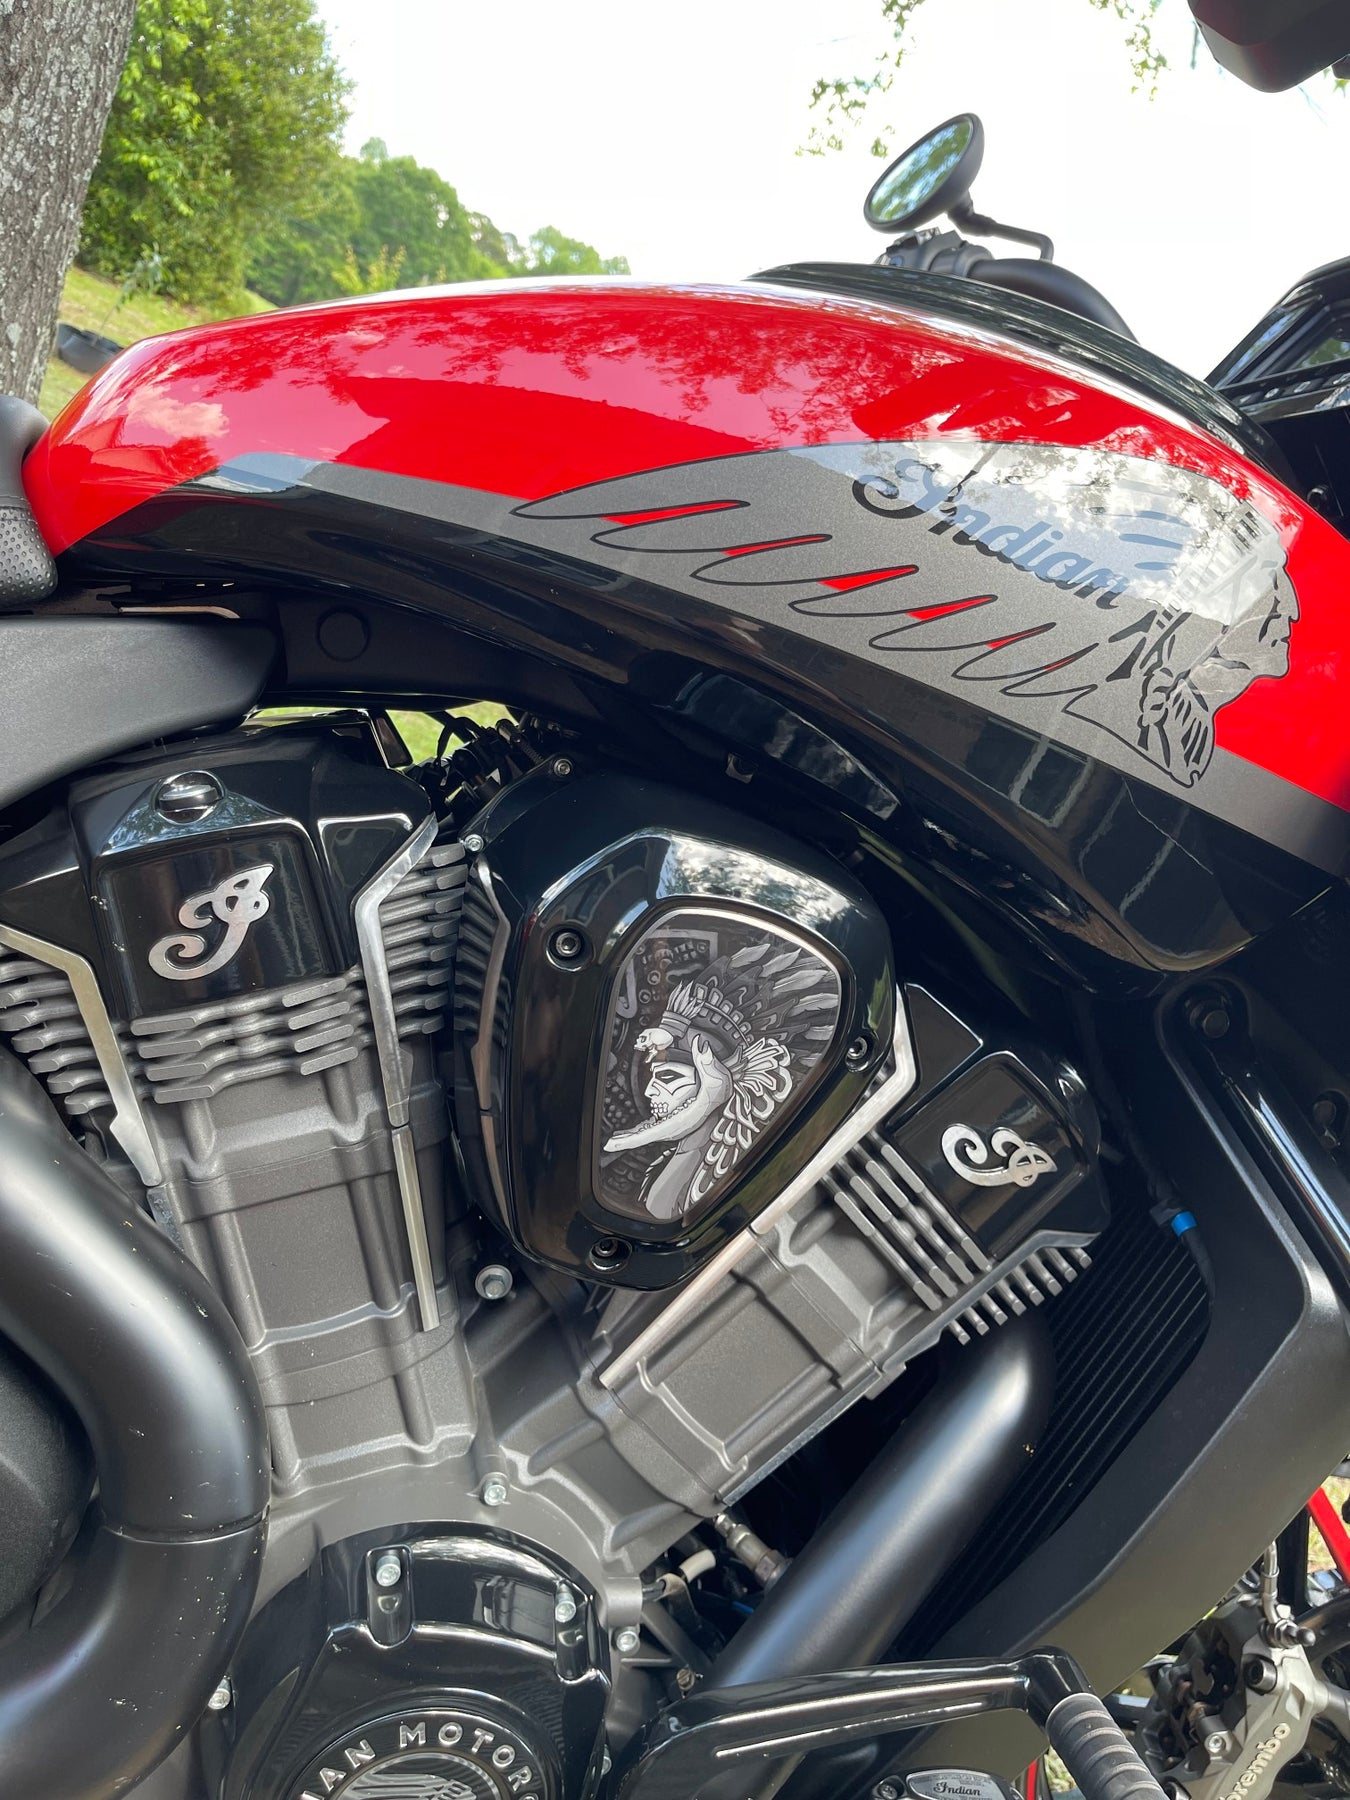

Powerplus V-Cover Decal - MesoChief
Regular price $20.00/
Shipping calculated at checkout.
We usually have this product in stock and can ship right away but there can be a wait if it sells out before the restock arrives.
Buy 2 and get an automatic 10% off both v-covers
Fits the Indian Powerplus engine found on the Challenger, Pursuit, Powerplus Chieftain, and Powerplus Roadmaster models.
This premium finish badge cover takes minutes to install and provides a completely custom look. They fit both the left and right v-cover so if you haven't removed the right side cover for another intake, don't forget to grab two!
The v-cover decals are heavy-duty 12 mil laminated gloss vinyl that flow over the curves of the badge for a bespoke custom look.
These self-adhesive decals are applied by hand to the 1901 badge. If you've already removed the badge, you can use poster putty to fill in the embossed letters before applying our decal over it.
Installation: Be sure your v-cover badge is clean before installing the decal. Peel the decal off of the backing sheet, careful not to touch the adhesive side of the decal too much. Carefully align it to a centered position (the decal is slightly smaller than the badge). Press the decal firmly down in the center to stick it in place, then use your thumbs to push out from the center to the edges. Repeat this process until you've stretched/pressed it firmly down around the curves. And that's it!
How-to Video:

Powerplus V-Cover Decal - MesoDancer
Regular price $20.00/
Shipping calculated at checkout.
We usually have this product in stock and can ship right away but there can be a wait if it sells out before the restock arrives.
Buy 2 and get an automatic 10% off both v-covers
Fits the Indian Powerplus engine found on the Challenger, Pursuit, Powerplus Chieftain, and Powerplus Roadmaster models.
This premium finish badge cover takes minutes to install and provides a completely custom look. They fit both the left and right v-cover so if you haven't removed the right side cover for another intake, don't forget to grab two!
The v-cover decals are heavy-duty 12 mil laminated gloss vinyl that flow over the curves of the badge for a bespoke custom look.
These self-adhesive decals are applied by hand to the 1901 badge. If you've already removed the badge, you can use poster putty to fill in the embossed letters before applying our decal over it.
Installation: Be sure your v-cover badge is clean before installing the decal. Peel the decal off of the backing sheet, careful not to touch the adhesive side of the decal too much. Carefully align it to a centered position (the decal is slightly smaller than the badge). Press the decal firmly down in the center to stick it in place, then use your thumbs to push out from the center to the edges. Repeat this process until you've stretched/pressed it firmly down around the curves. And that's it!
How-to Video:


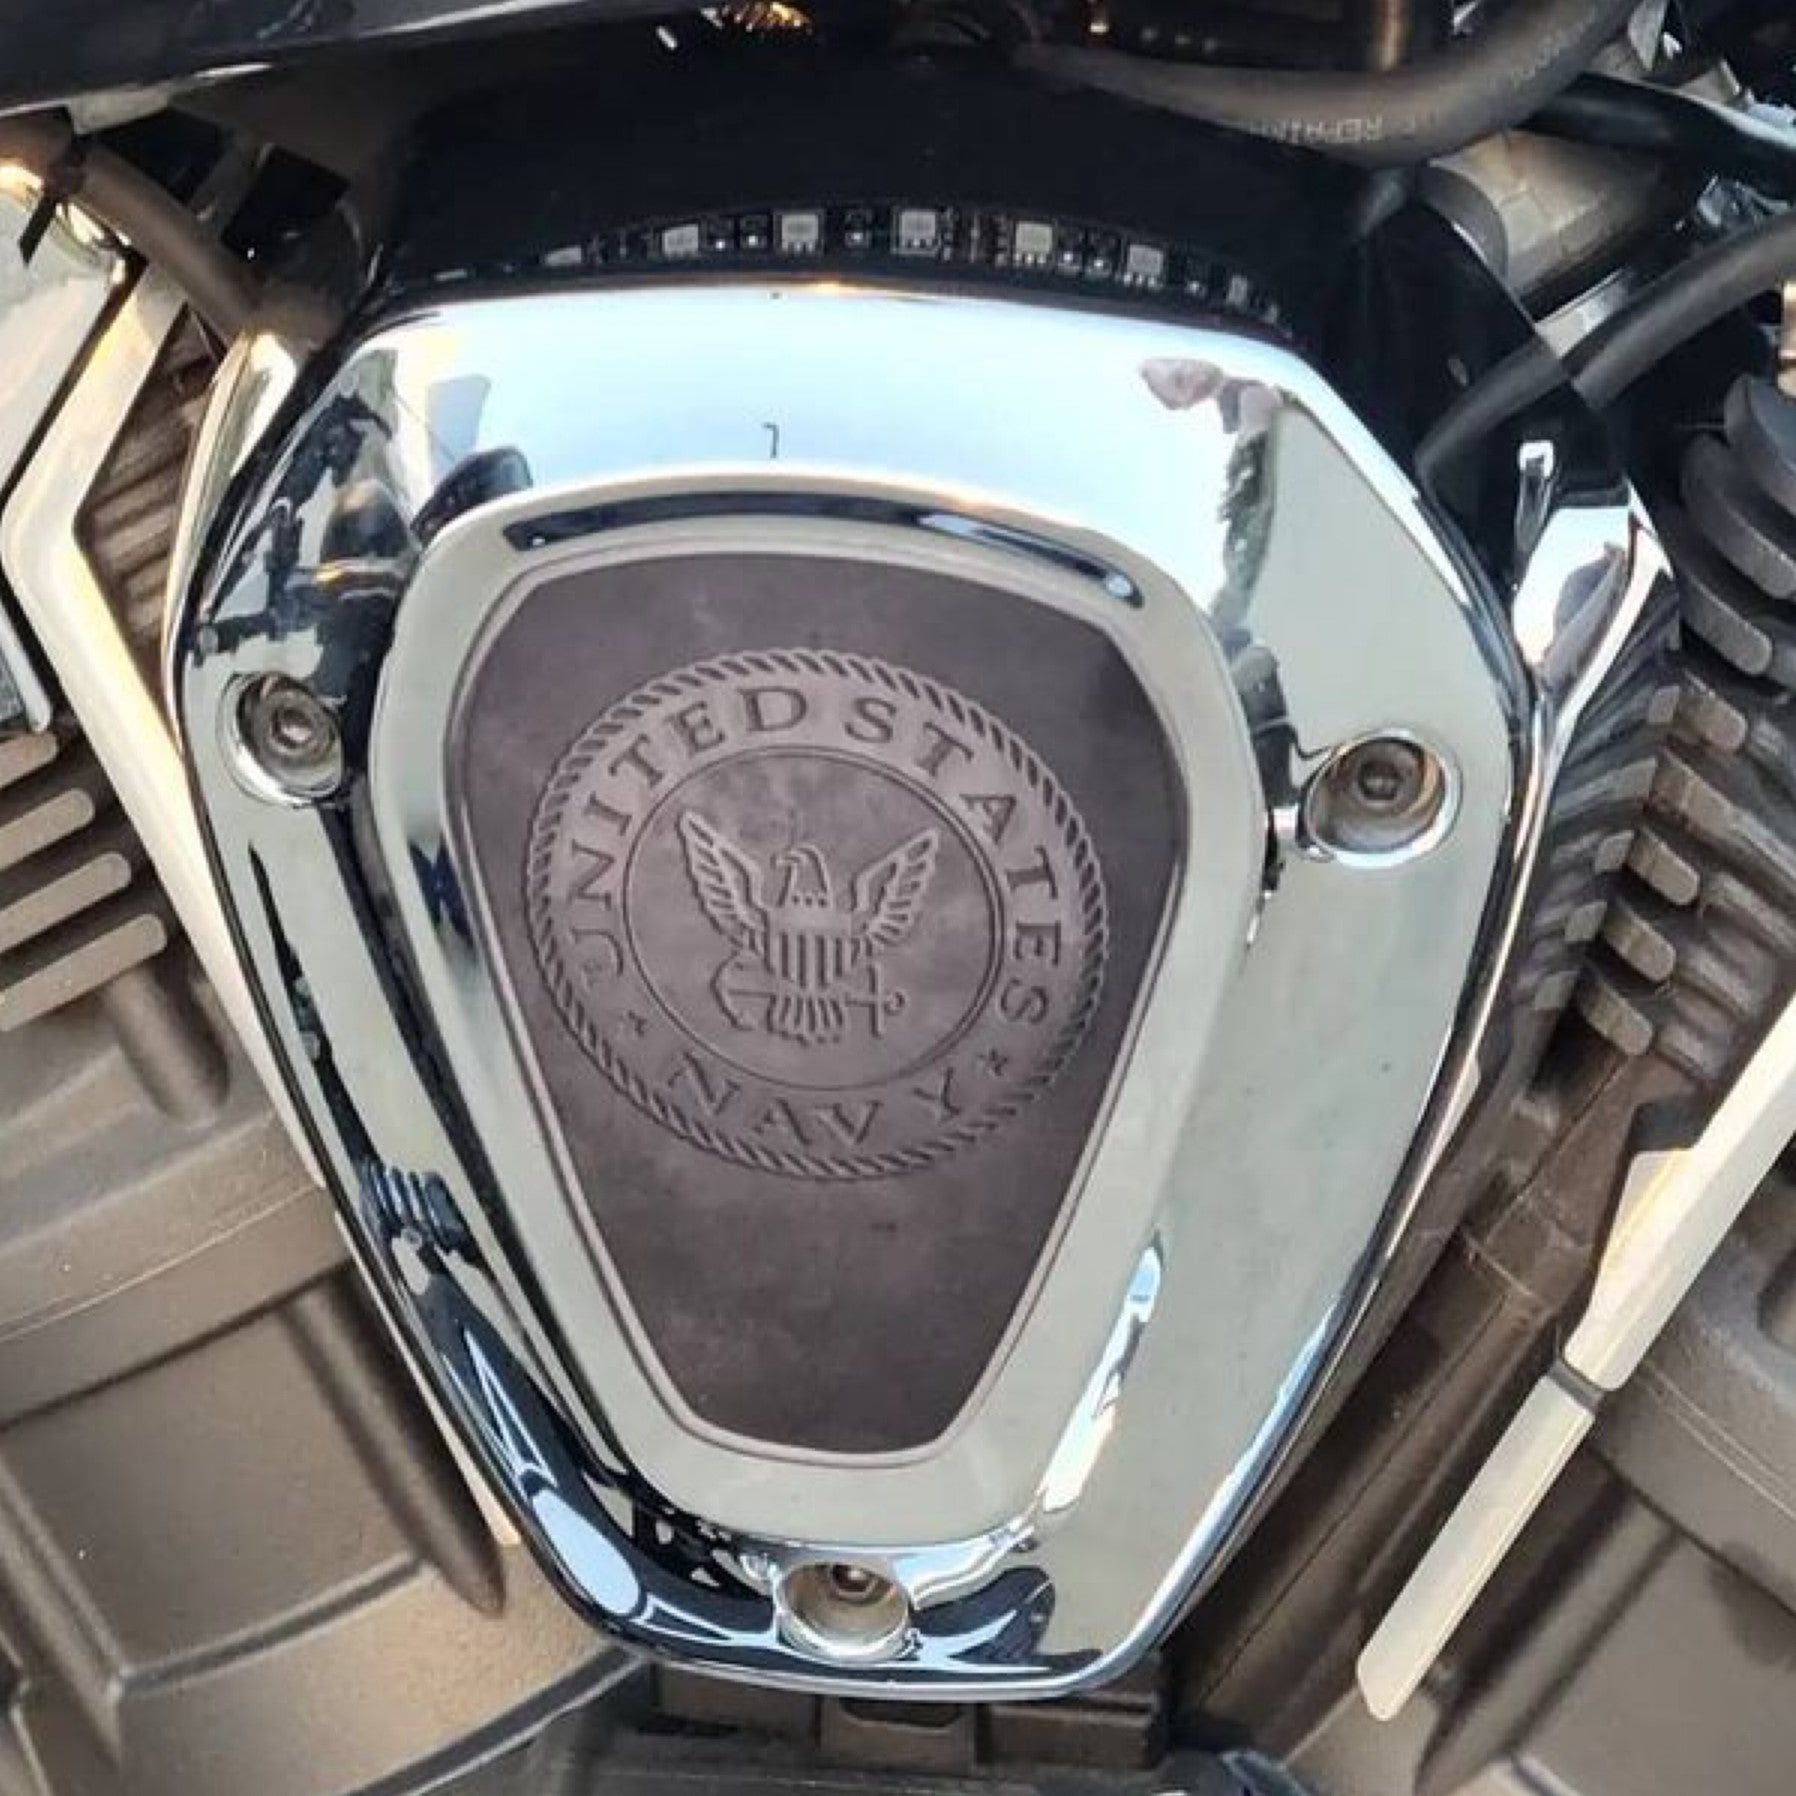
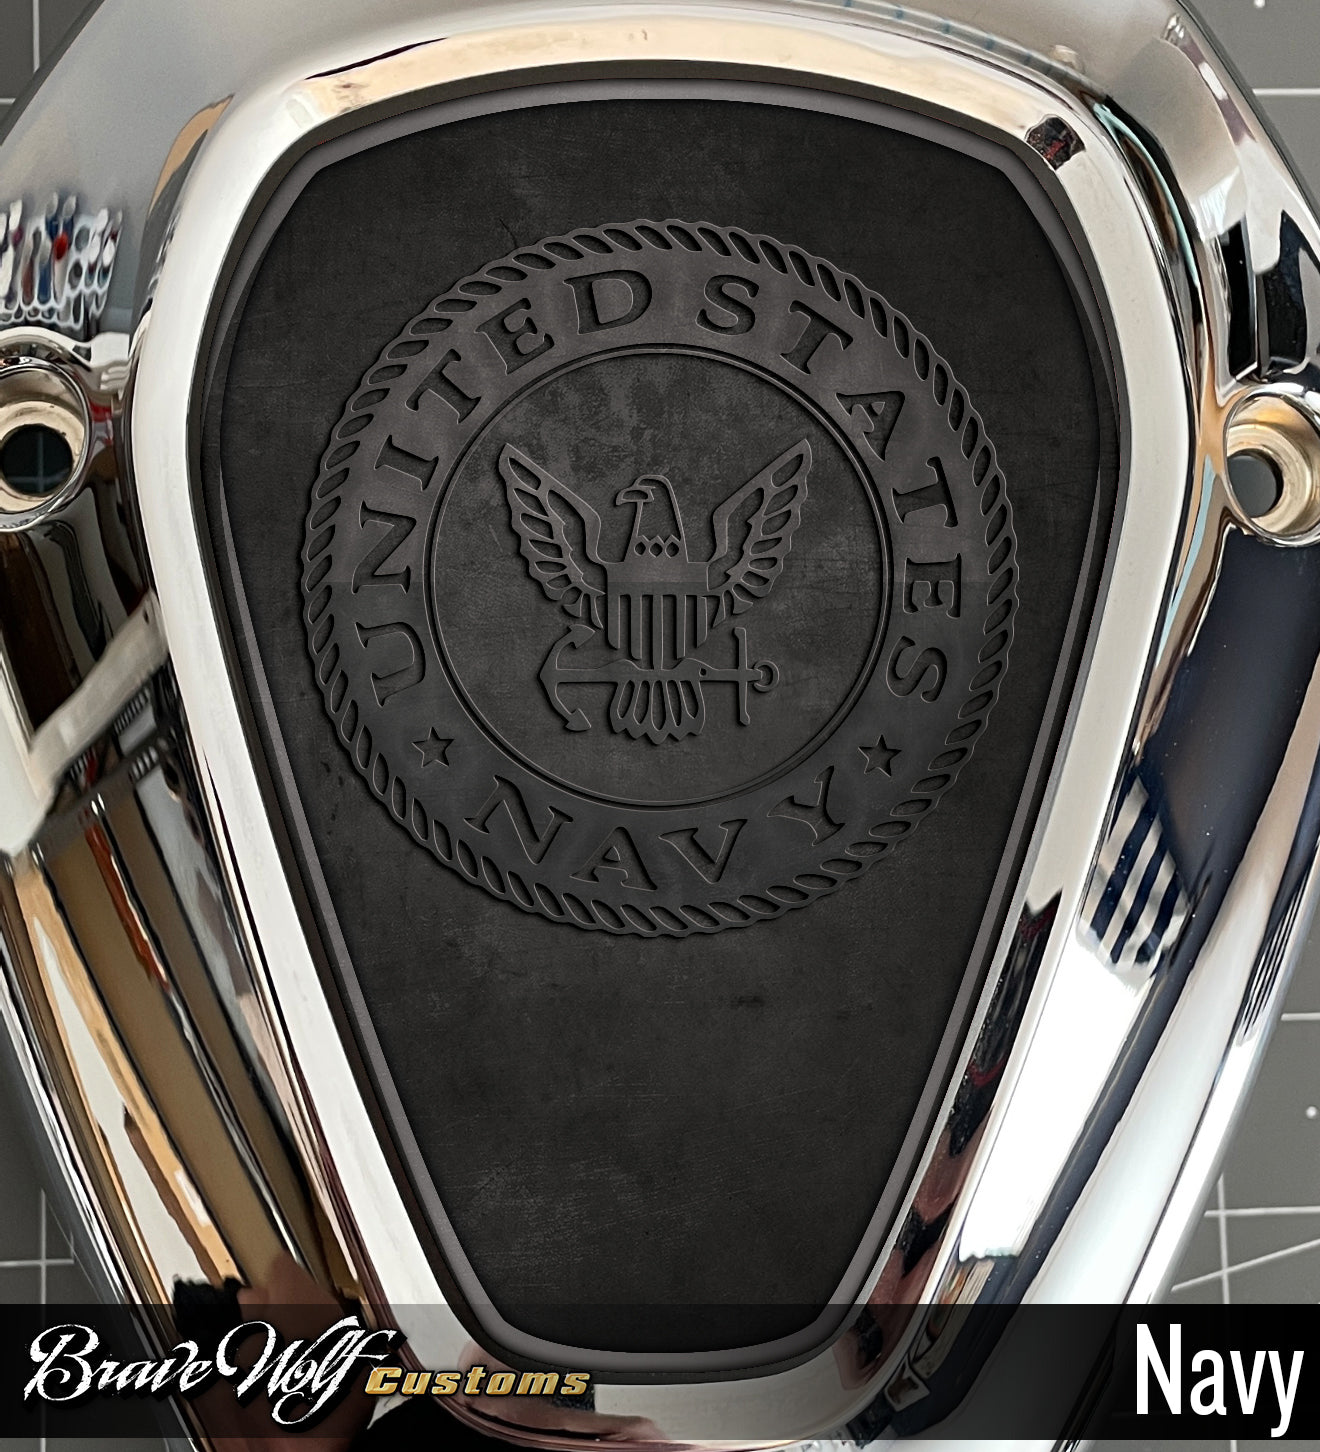
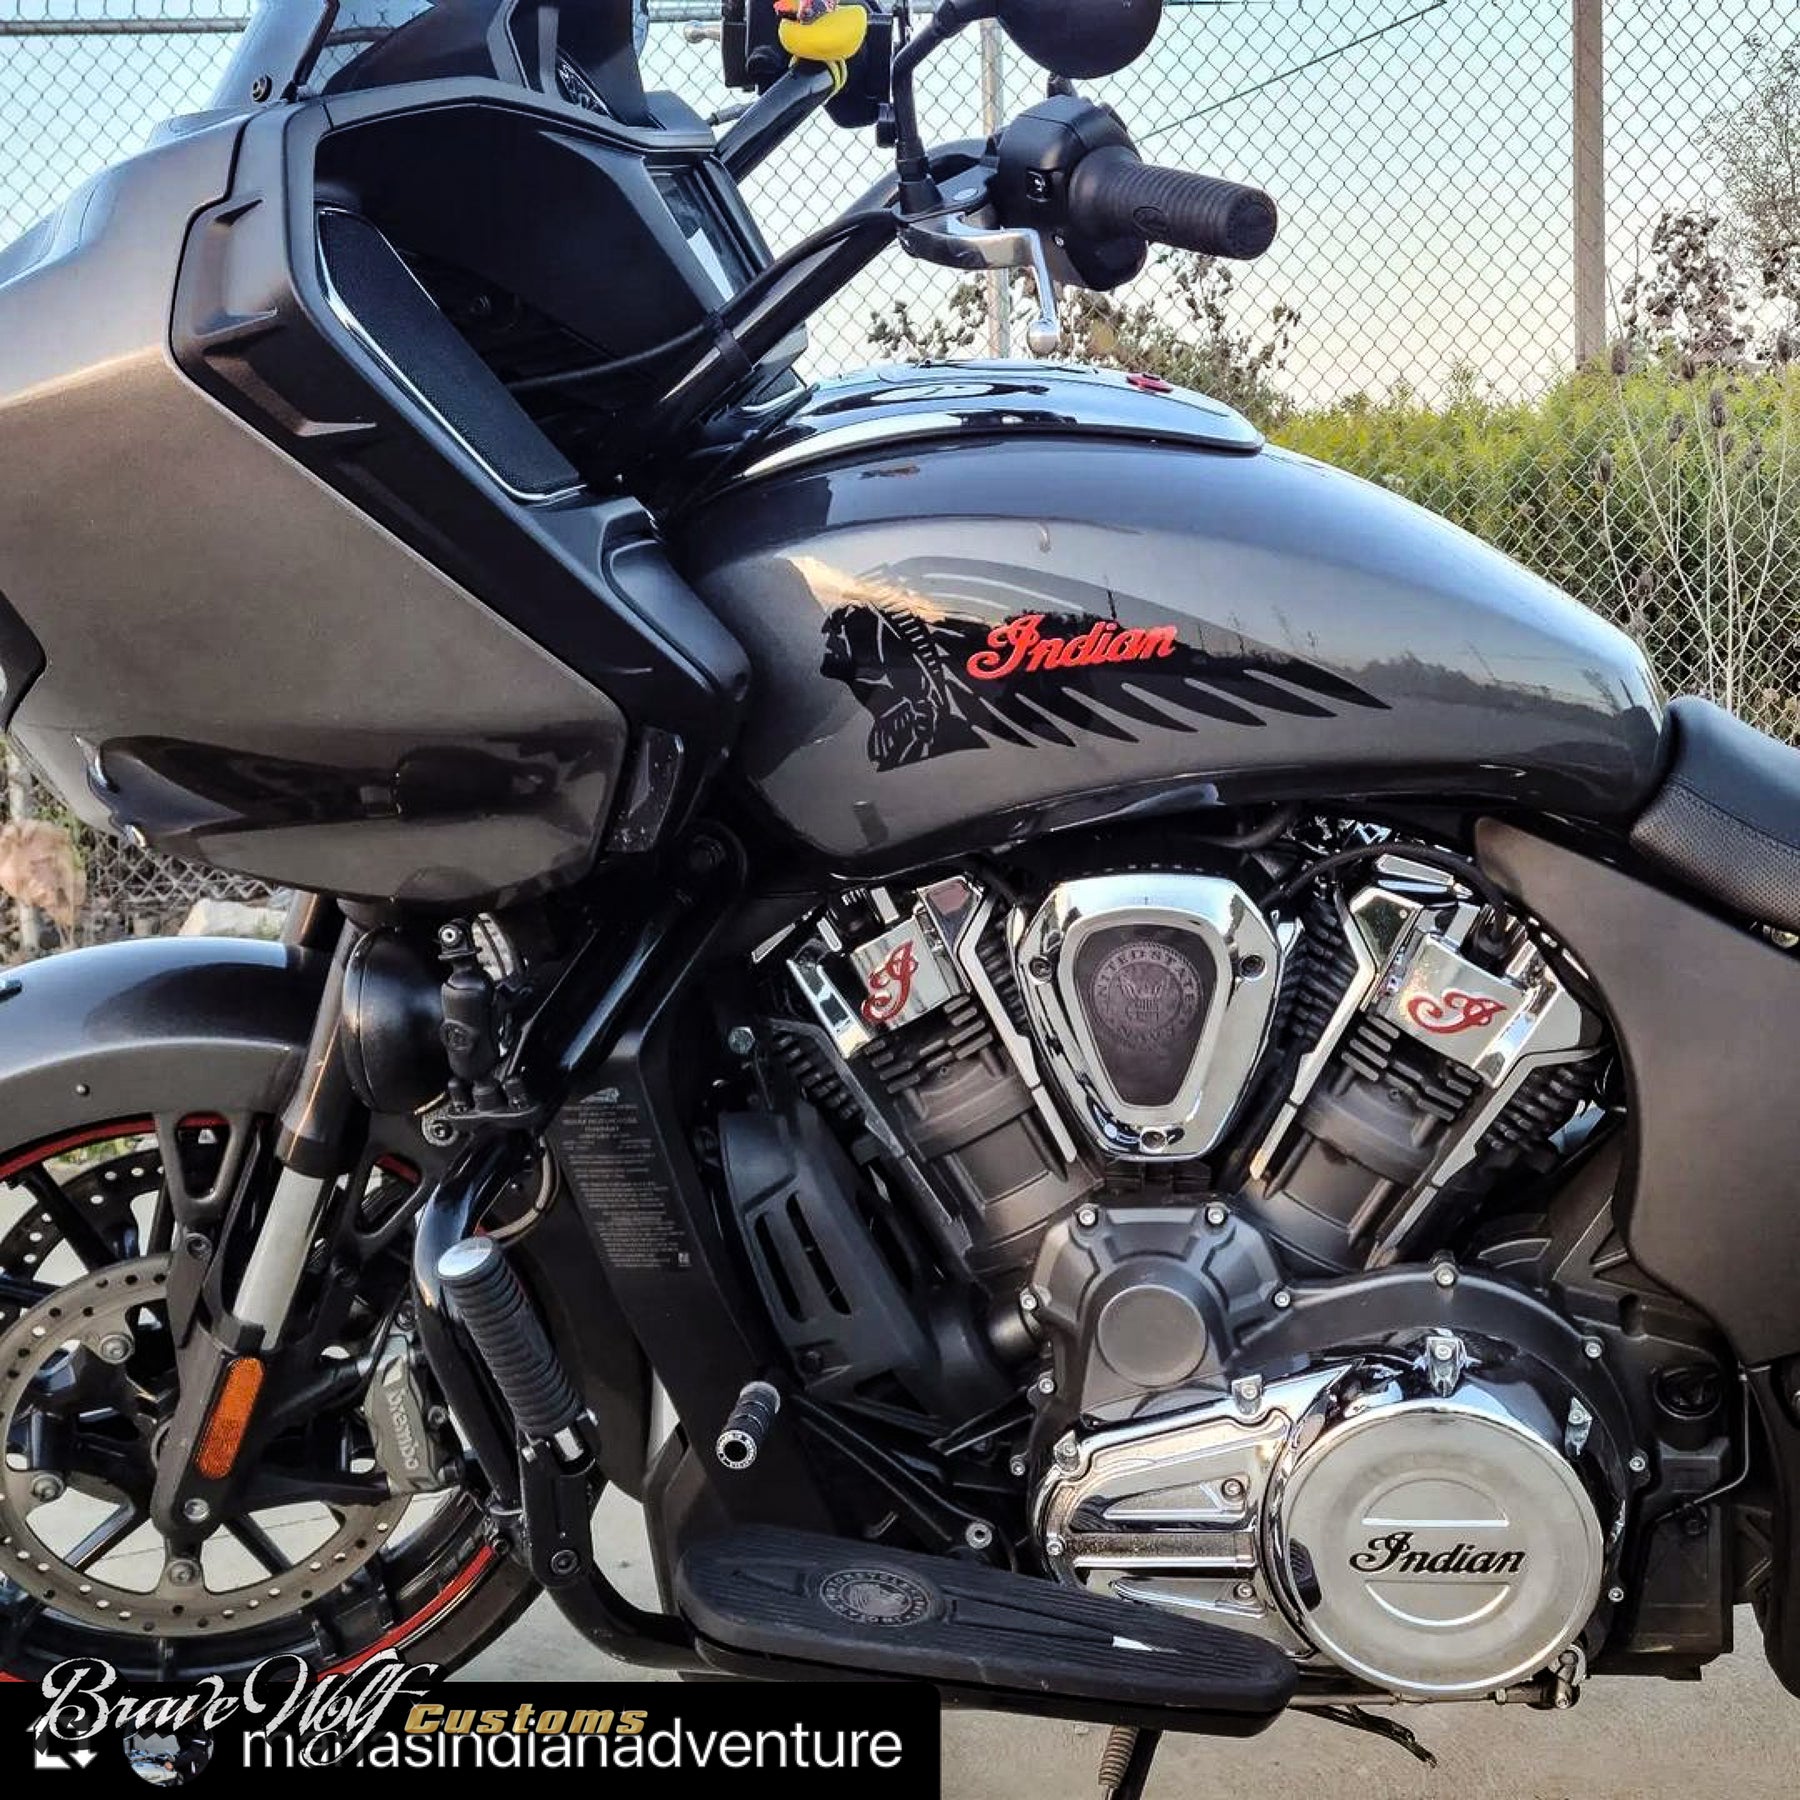
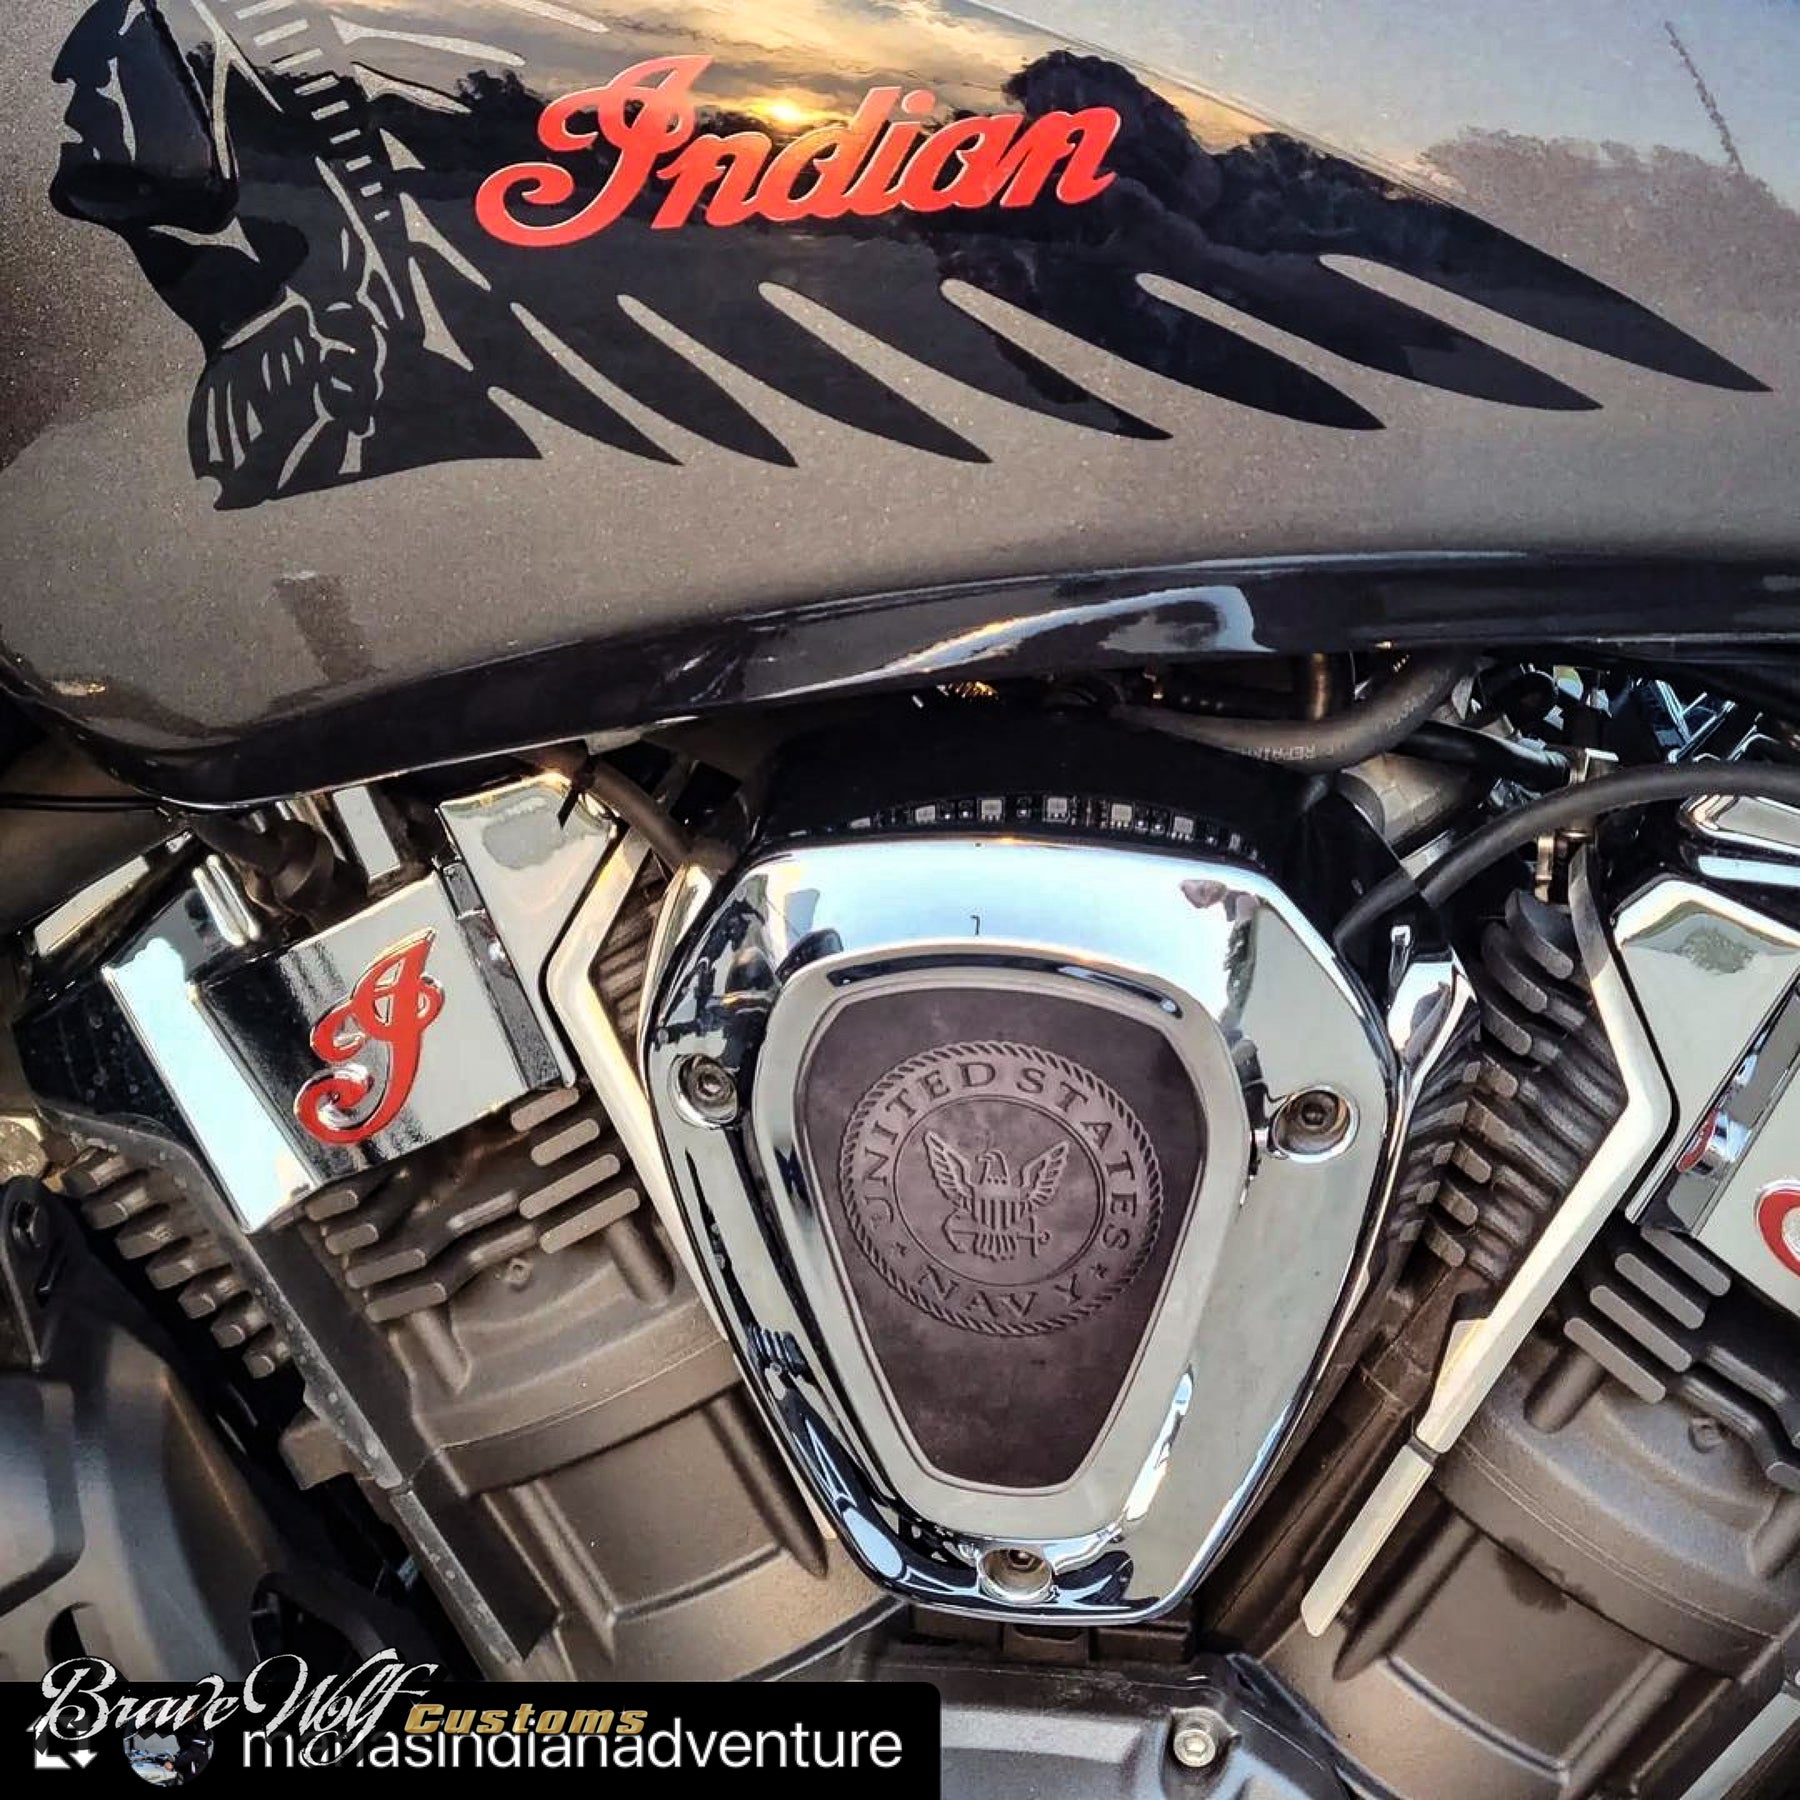
Powerplus V-Cover Decal - Navy
Regular price $20.00/
Shipping calculated at checkout.
We usually have this product in stock and can ship right away but there can be a wait if it sells out before the restock arrives.
Buy 2 and get an automatic 10% off both v-covers
Fits the Indian Powerplus engine found on the Challenger, Pursuit, Powerplus Chieftain, and Powerplus Roadmaster models.
This premium finish badge cover takes minutes to install and provides a completely custom look. They fit both the left and right v-cover so if you haven't removed the right side cover for another intake, don't forget to grab two!
The v-cover decals are heavy-duty 12 mil laminated gloss vinyl that flow over the curves of the badge for a bespoke custom look.
These self-adhesive decals are applied by hand to the 1901 badge. If you've already removed the badge, you can use poster putty to fill in the embossed letters before applying our decal over it.
Installation: Be sure your v-cover badge is clean before installing the decal. Peel the decal off of the backing sheet, careful not to touch the adhesive side of the decal too much. Carefully align it to a centered position (the decal is slightly smaller than the badge). Press the decal firmly down in the center to stick it in place, then use your thumbs to push out from the center to the edges. Repeat this process until you've stretched/pressed it firmly down around the curves. And that's it!
How-to Video:


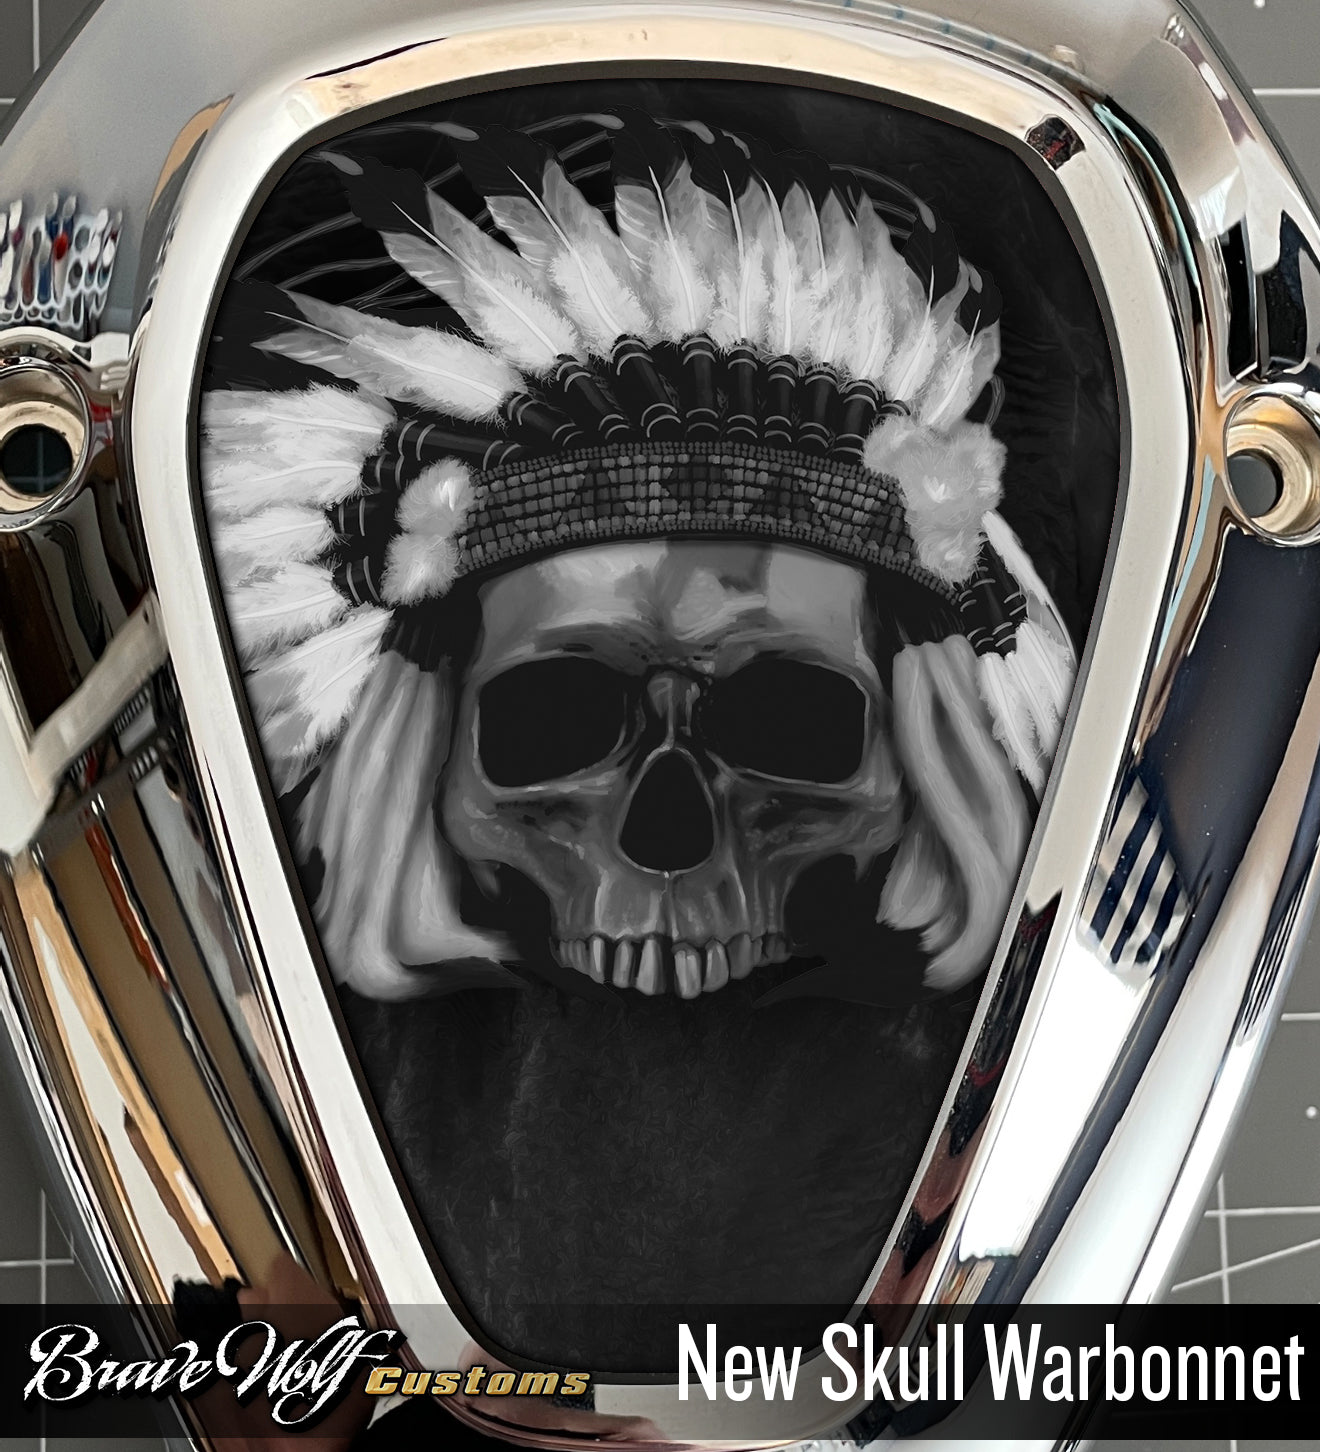
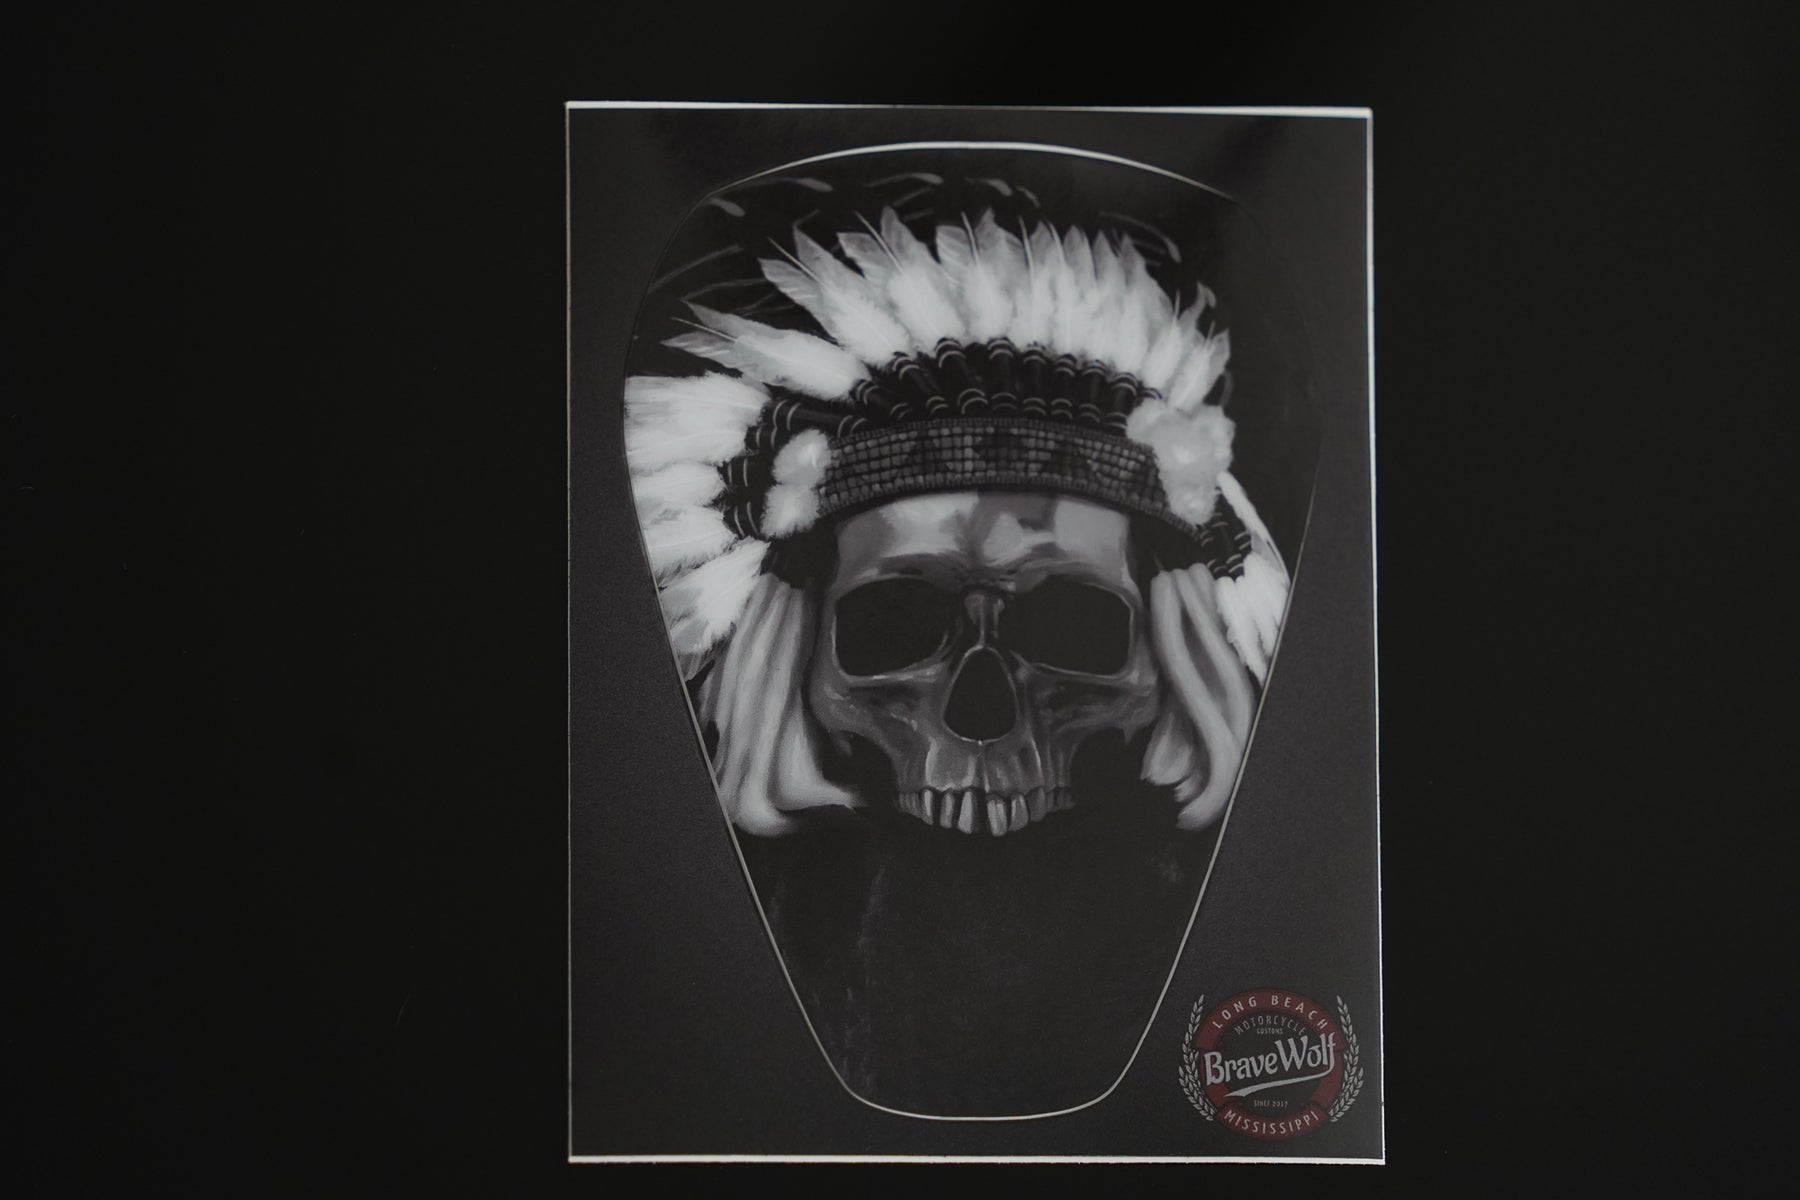
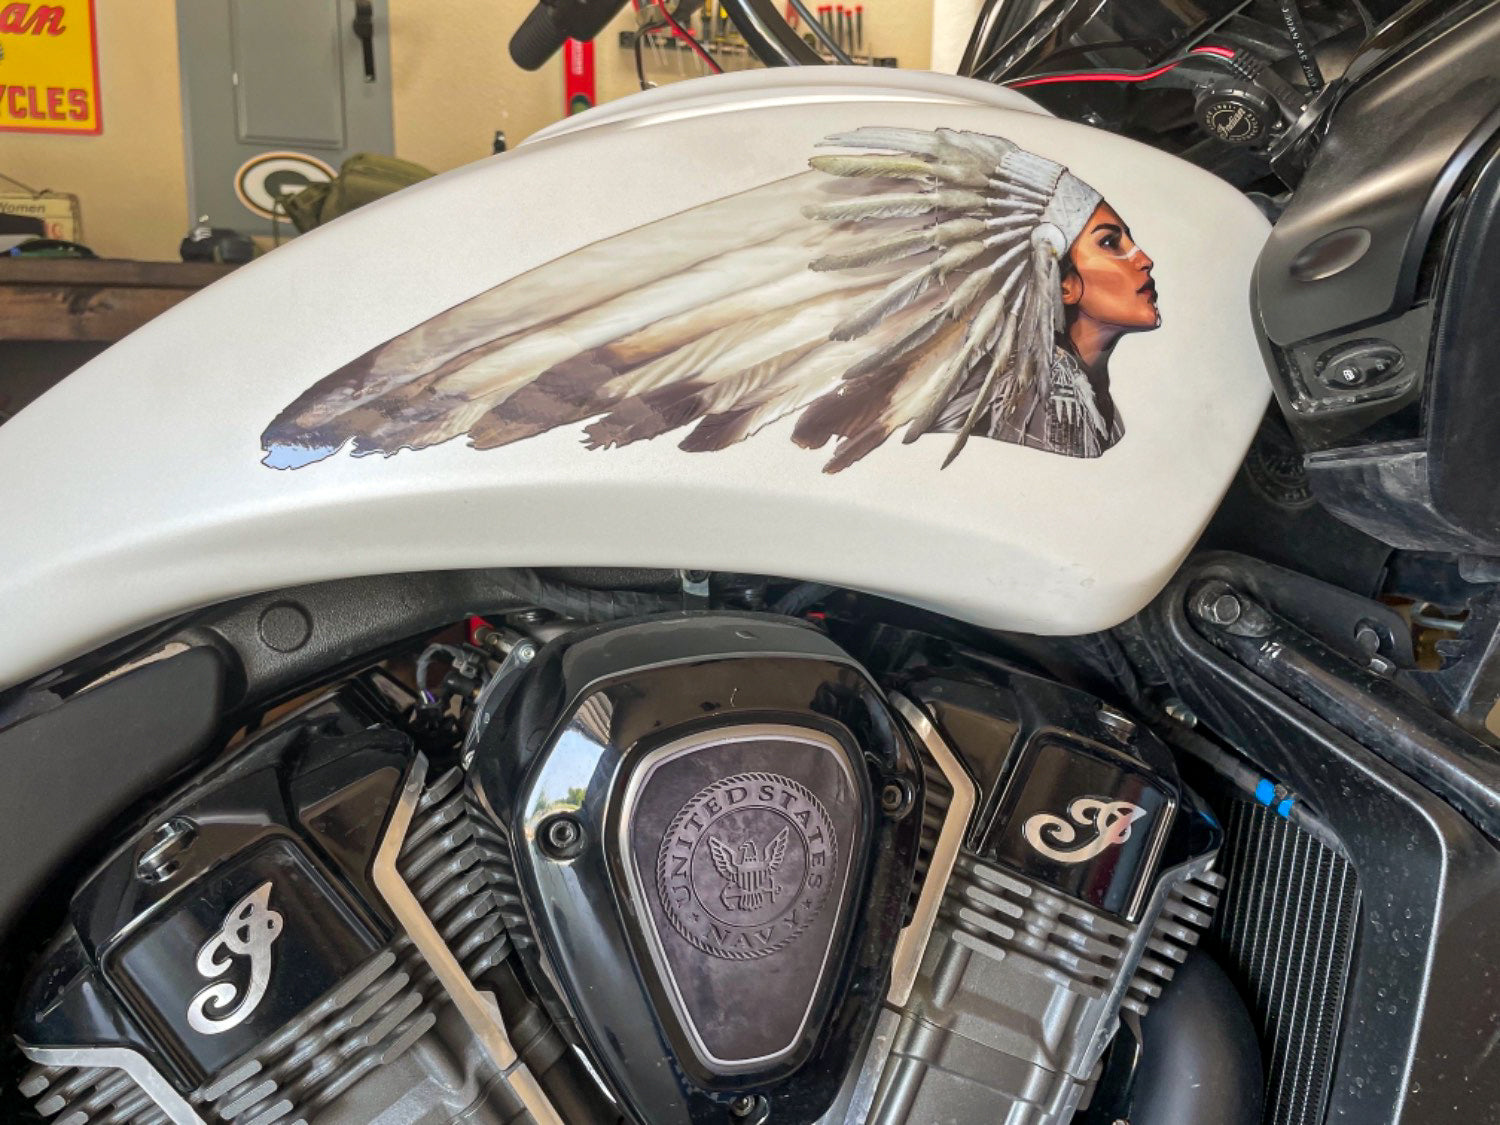
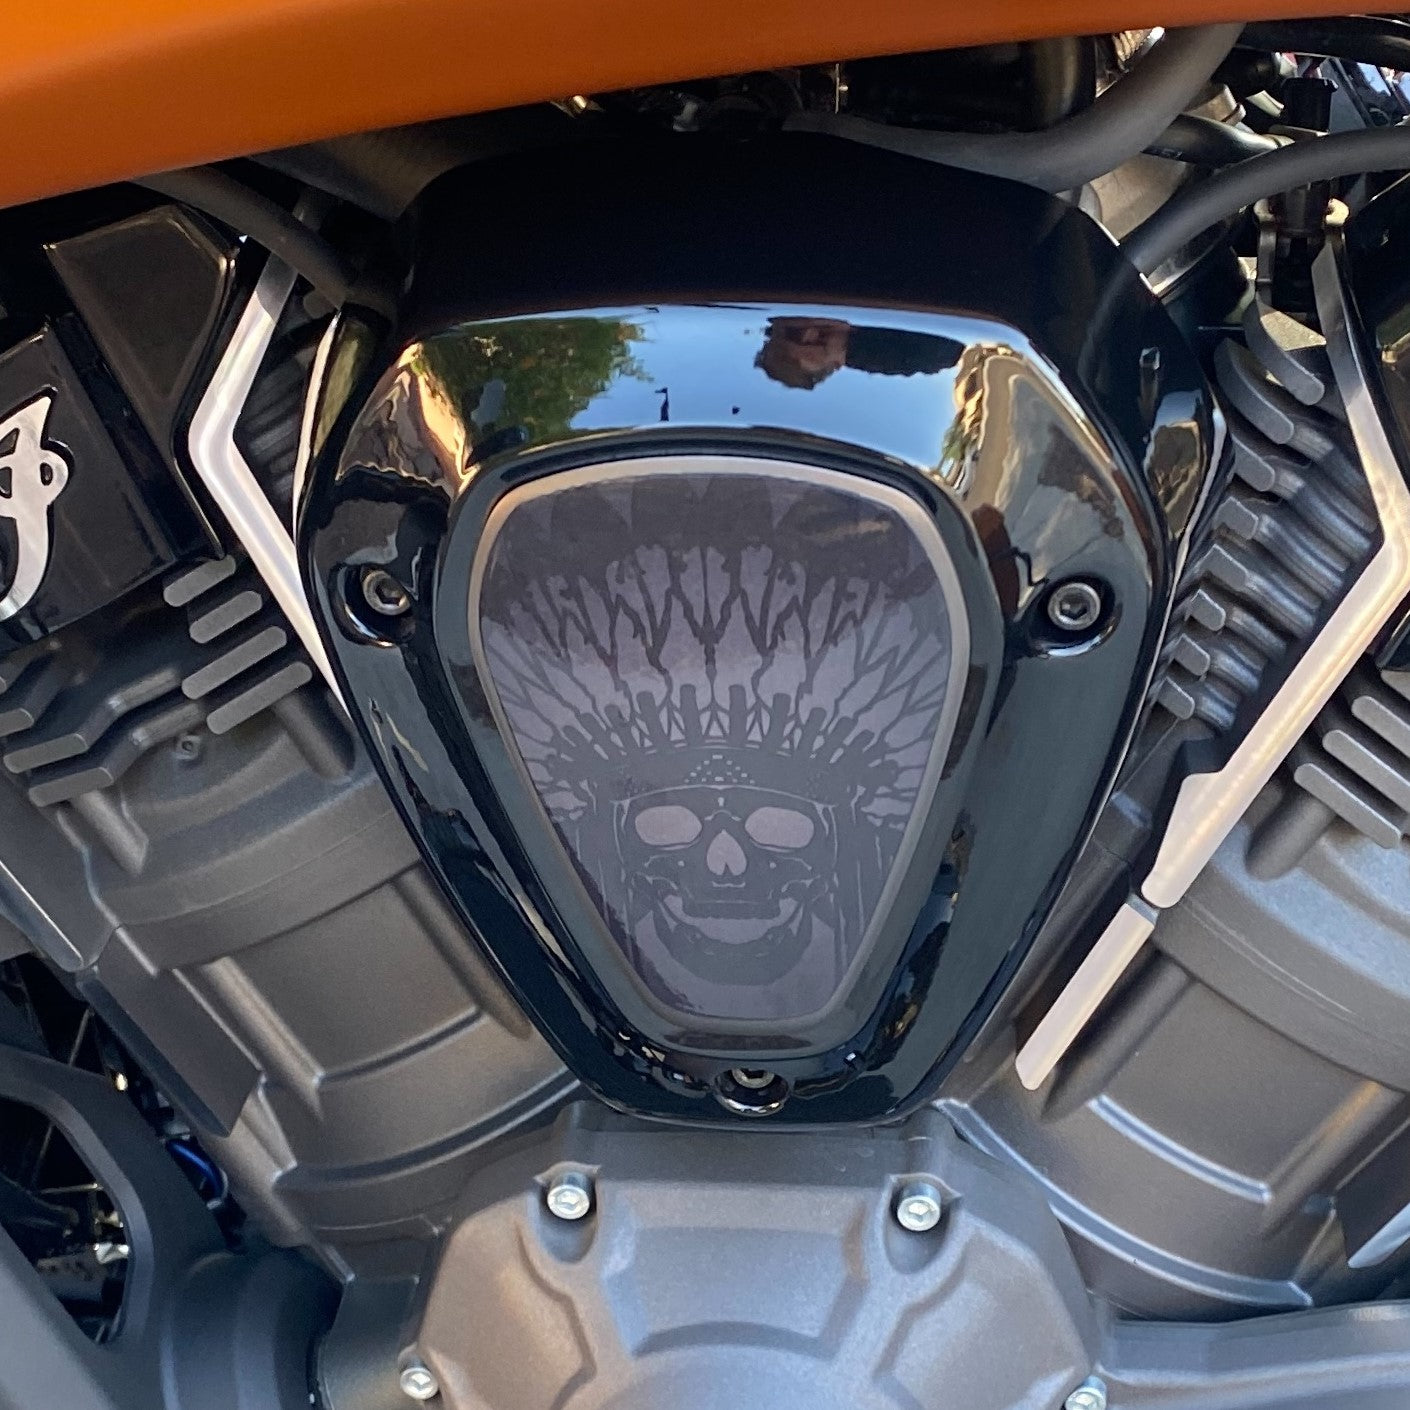
Powerplus V-Cover Decal - New Skull Warbonnet
Regular price $20.00/
Shipping calculated at checkout.
We usually have this product in stock and can ship right away but there can be a wait if it sells out before the restock arrives.
Buy 2 and get an automatic 10% off both v-covers
Fits the Indian Powerplus engine found on the Challenger, Pursuit, Powerplus Chieftain, and Powerplus Roadmaster models.
This premium finish badge cover takes minutes to install and provides a completely custom look. They fit both the left and right v-cover so if you haven't removed the right side cover for another intake, don't forget to grab two!
The v-cover decals are heavy-duty 12 mil laminated gloss vinyl that flow over the curves of the badge for a bespoke custom look.
These self-adhesive decals are applied by hand to the 1901 badge. If you've already removed the badge, you can use poster putty to fill in the embossed letters before applying our decal over it.

Installation: Be sure your v-cover badge is clean before installing the decal. Peel the decal off of the backing sheet, careful not to touch the adhesive side of the decal too much. Carefully align it to a centered position (the decal is slightly smaller than the badge). Press the decal firmly down in the center to stick it in place, then use your thumbs to push out from the center to the edges. Repeat this process until you've stretched/pressed it firmly down around the curves. And that's it!
How-to Video:

Powerplus V-Cover Decal - Nizhoni
Regular price $20.00/
Shipping calculated at checkout.
We usually have this product in stock and can ship right away but there can be a wait if it sells out before the restock arrives.
Buy 2 and get an automatic 10% off both v-covers
Fits the Indian Powerplus engine found on the Challenger, Pursuit, Powerplus Chieftain, and Powerplus Roadmaster models.
This premium finish badge cover takes minutes to install and provides a completely custom look. They fit both the left and right v-cover so if you haven't removed the right side cover for another intake, don't forget to grab two!
The v-cover decals are heavy-duty 12 mil laminated gloss vinyl that flow over the curves of the badge for a bespoke custom look.
These self-adhesive decals are applied by hand to the 1901 badge. If you've already removed the badge, you can use poster putty to fill in the embossed letters before applying our decal over it.
Installation: Be sure your v-cover badge is clean before installing the decal. Peel the decal off of the backing sheet, careful not to touch the adhesive side of the decal too much. Carefully align it to a centered position (the decal is slightly smaller than the badge). Press the decal firmly down in the center to stick it in place, then use your thumbs to push out from the center to the edges. Repeat this process until you've stretched/pressed it firmly down around the curves. And that's it!
How-to Video:

Powerplus V-Cover Decal - Nizhoni B&W
Regular price $20.00/
Shipping calculated at checkout.
We usually have this product in stock and can ship right away but there can be a wait if it sells out before the restock arrives.
Buy 2 and get an automatic 10% off both v-covers
Fits the Indian Powerplus engine found on the Challenger, Pursuit, Powerplus Chieftain, and Powerplus Roadmaster models.
This premium finish badge cover takes minutes to install and provides a completely custom look. They fit both the left and right v-cover so if you haven't removed the right side cover for another intake, don't forget to grab two!
The v-cover decals are heavy-duty 12 mil laminated gloss vinyl that flow over the curves of the badge for a bespoke custom look.
These self-adhesive decals are applied by hand to the 1901 badge. If you've already removed the badge, you can use poster putty to fill in the embossed letters before applying our decal over it.
Installation: Be sure your v-cover badge is clean before installing the decal. Peel the decal off of the backing sheet, careful not to touch the adhesive side of the decal too much. Carefully align it to a centered position (the decal is slightly smaller than the badge). Press the decal firmly down in the center to stick it in place, then use your thumbs to push out from the center to the edges. Repeat this process until you've stretched/pressed it firmly down around the curves. And that's it!
How-to Video:

Powerplus V-Cover Decal - Panama Flag
Regular price $20.00 Sale price $10.00 Save $10.00/
Shipping calculated at checkout.
We usually have this product in stock and can ship right away but there can be a wait if it sells out before the restock arrives.
Buy 2 and get an automatic 10% off both v-covers
Fits the Indian Powerplus engine found on the Challenger, Pursuit, Powerplus Chieftain, and Powerplus Roadmaster models.
This premium finish badge cover takes minutes to install and provides a completely custom look. They fit both the left and right v-cover so if you haven't removed the right side cover for another intake, don't forget to grab two!
The v-cover decals are heavy-duty 12 mil laminated gloss vinyl that flow over the curves of the badge for a bespoke custom look.
These self-adhesive decals are applied by hand to the 1901 badge. If you've already removed the badge, or if your model has embossed letters on the v-cover, you can fill those in with silicon or putty or cover it with some vinyl or tape before applying our decal over it.
Installation: Be sure your v-cover badge is clean before installing the decal. Peel the decal off of the backing sheet, careful not to touch the adhesive side of the decal too much. Carefully align it to a centered position (the decal is slightly smaller than the badge). Press the decal firmly down in the center to stick it in place, then use your thumbs to push out from the center to the edges. Repeat this process until you've stretched/pressed it firmly down around the curves. And that's it!
How-to Video:

Powerplus V-Cover Decal - Quetzalcoatl (B&W)
Regular price $20.00/
Shipping calculated at checkout.
We usually have this product in stock and can ship right away but there can be a wait if it sells out before the restock arrives.
Buy 2 and get an automatic 10% off both v-covers
Fits the Indian Powerplus engine found on the Challenger, Pursuit, Powerplus Chieftain, and Powerplus Roadmaster models.
This premium finish badge cover takes minutes to install and provides a completely custom look. They fit both the left and right v-cover so if you haven't removed the right side cover for another intake, don't forget to grab two!
The v-cover decals are heavy-duty 12 mil laminated gloss vinyl that flow over the curves of the badge for a bespoke custom look.
These self-adhesive decals are applied by hand to the 1901 badge. If you've already removed the badge, you can use poster putty to fill in the embossed letters before applying our decal over it.
Installation: Be sure your v-cover badge is clean before installing the decal. Peel the decal off of the backing sheet, careful not to touch the adhesive side of the decal too much. Carefully align it to a centered position (the decal is slightly smaller than the badge). Press the decal firmly down in the center to stick it in place, then use your thumbs to push out from the center to the edges. Repeat this process until you've stretched/pressed it firmly down around the curves. And that's it!
How-to Video:


Powerplus V-Cover Decal - Quetzalcoatl (Color)
Regular price $20.00/
Shipping calculated at checkout.
We usually have this product in stock and can ship right away but there can be a wait if it sells out before the restock arrives.
Buy 2 and get an automatic 10% off both v-covers
Fits the Indian Powerplus engine found on the Challenger, Pursuit, Powerplus Chieftain, and Powerplus Roadmaster models.
This premium finish badge cover takes minutes to install and provides a completely custom look. They fit both the left and right v-cover so if you haven't removed the right side cover for another intake, don't forget to grab two!
The v-cover decals are heavy-duty 12 mil laminated gloss vinyl that flow over the curves of the badge for a bespoke custom look.
These self-adhesive decals are applied by hand to the 1901 badge. If you've already removed the badge, you can use poster putty to fill in the embossed letters before applying our decal over it.
Installation: Be sure your v-cover badge is clean before installing the decal. Peel the decal off of the backing sheet, careful not to touch the adhesive side of the decal too much. Carefully align it to a centered position (the decal is slightly smaller than the badge). Press the decal firmly down in the center to stick it in place, then use your thumbs to push out from the center to the edges. Repeat this process until you've stretched/pressed it firmly down around the curves. And that's it!
How-to Video:


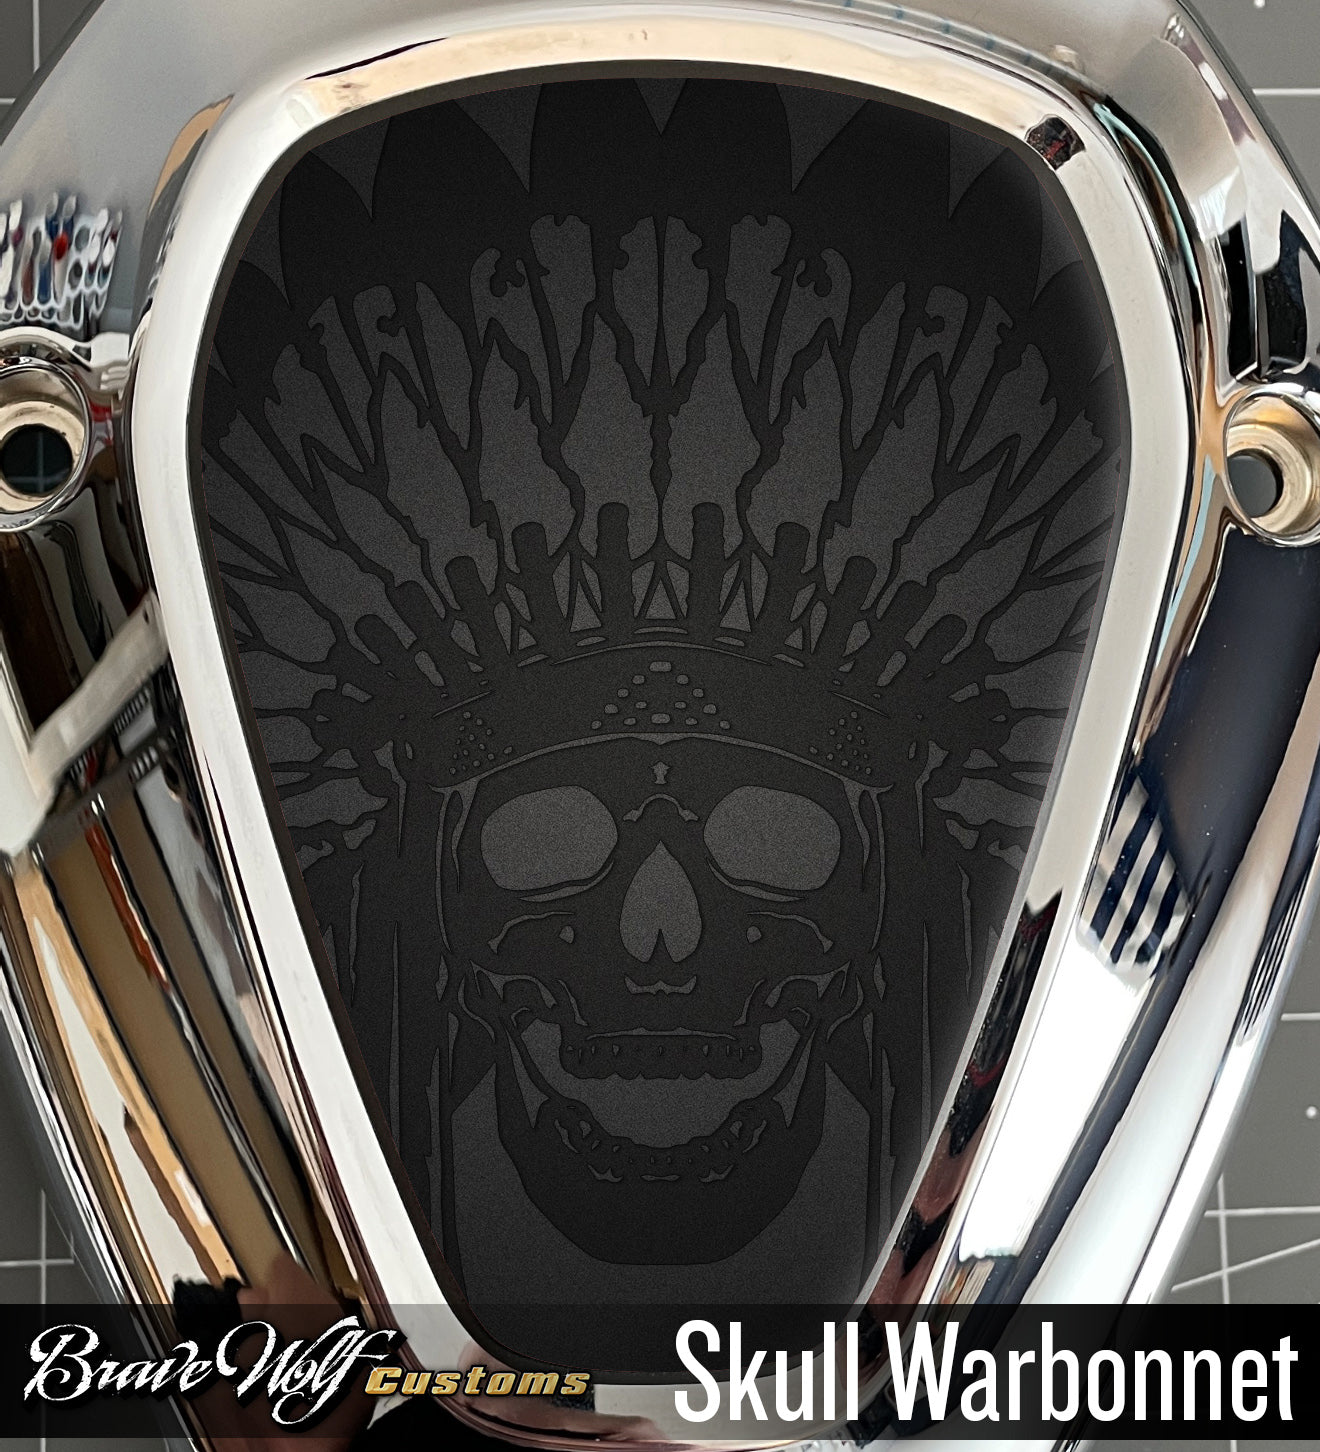
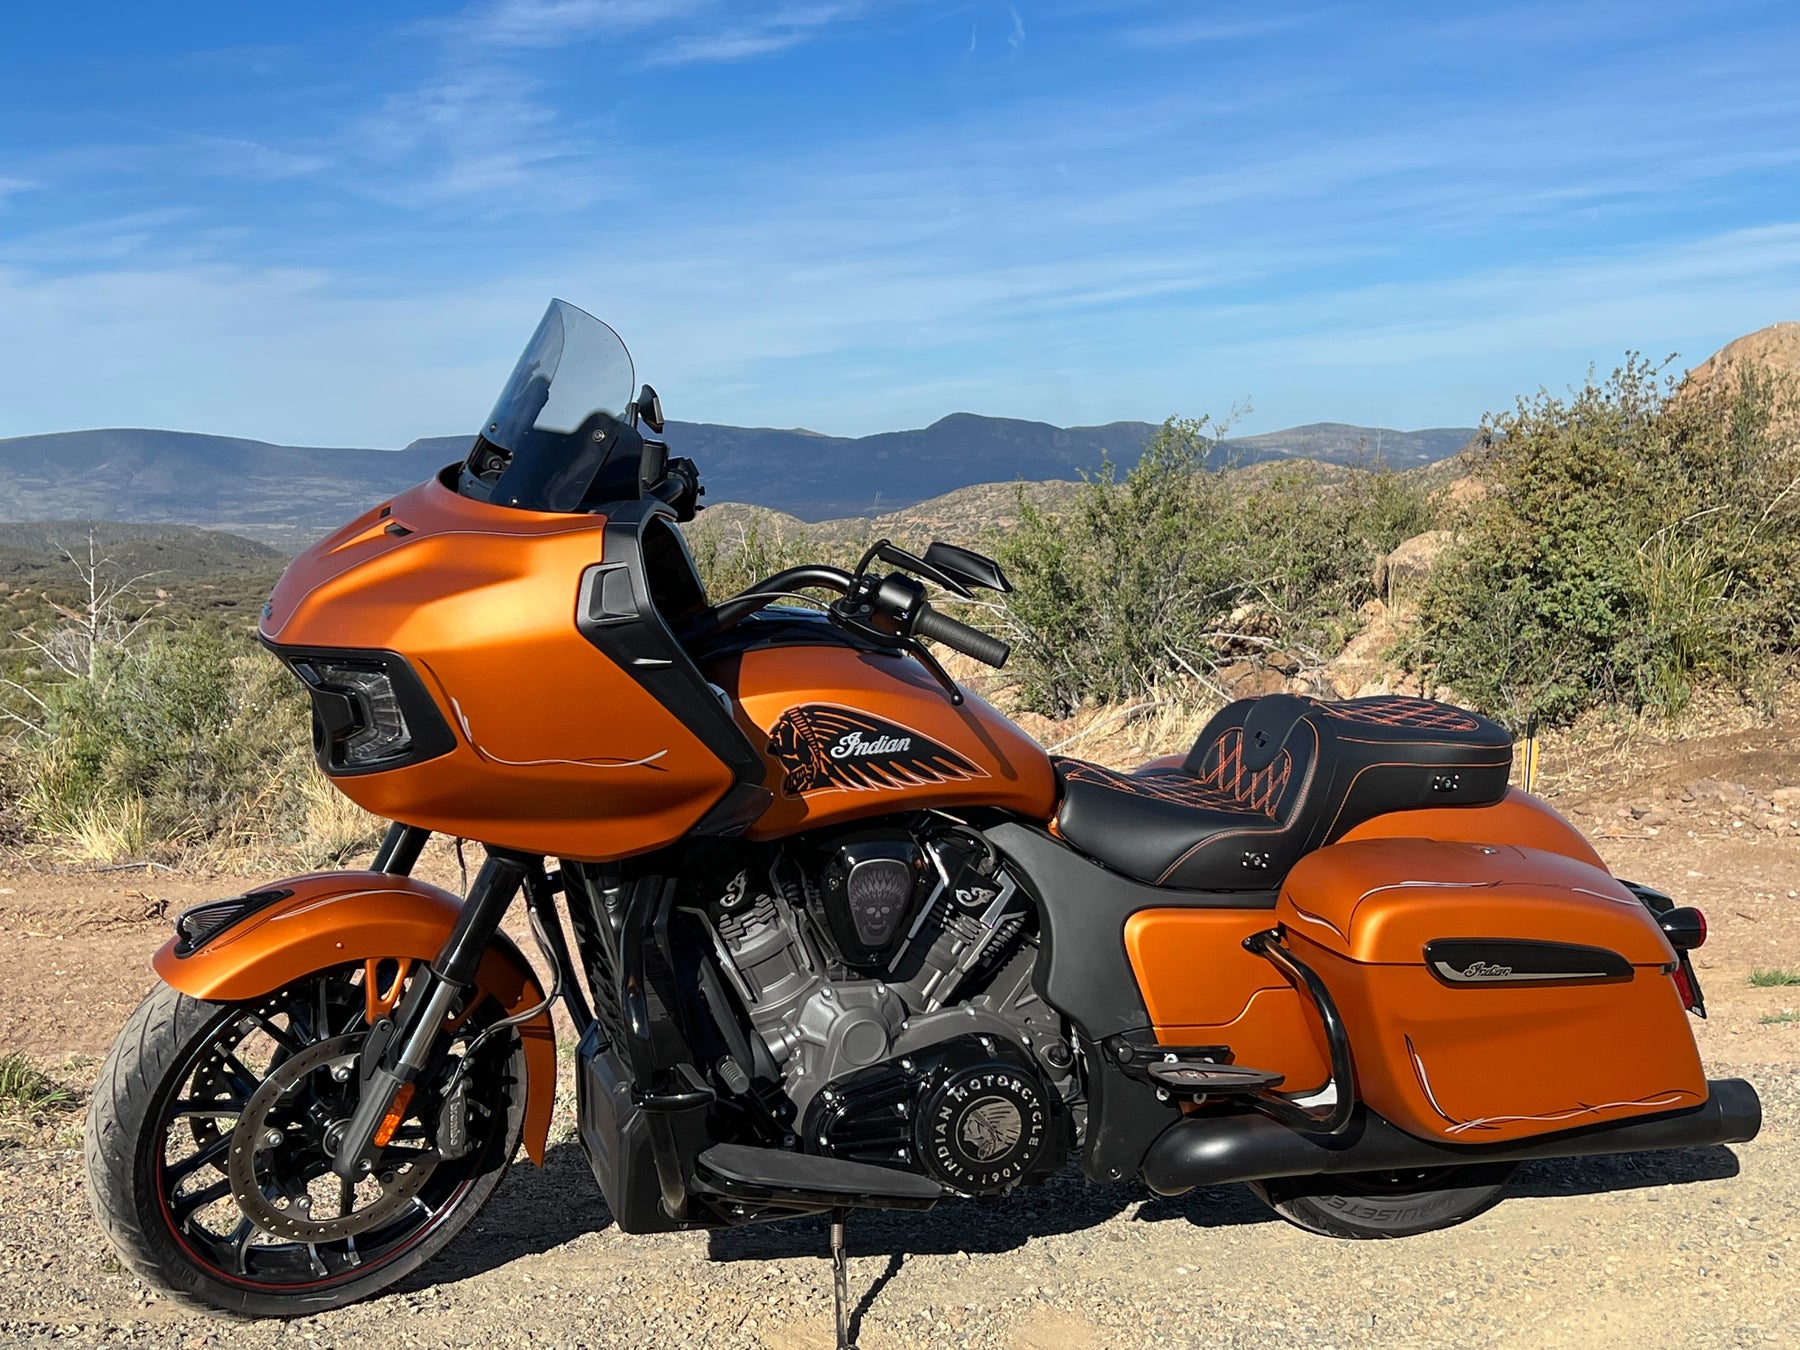
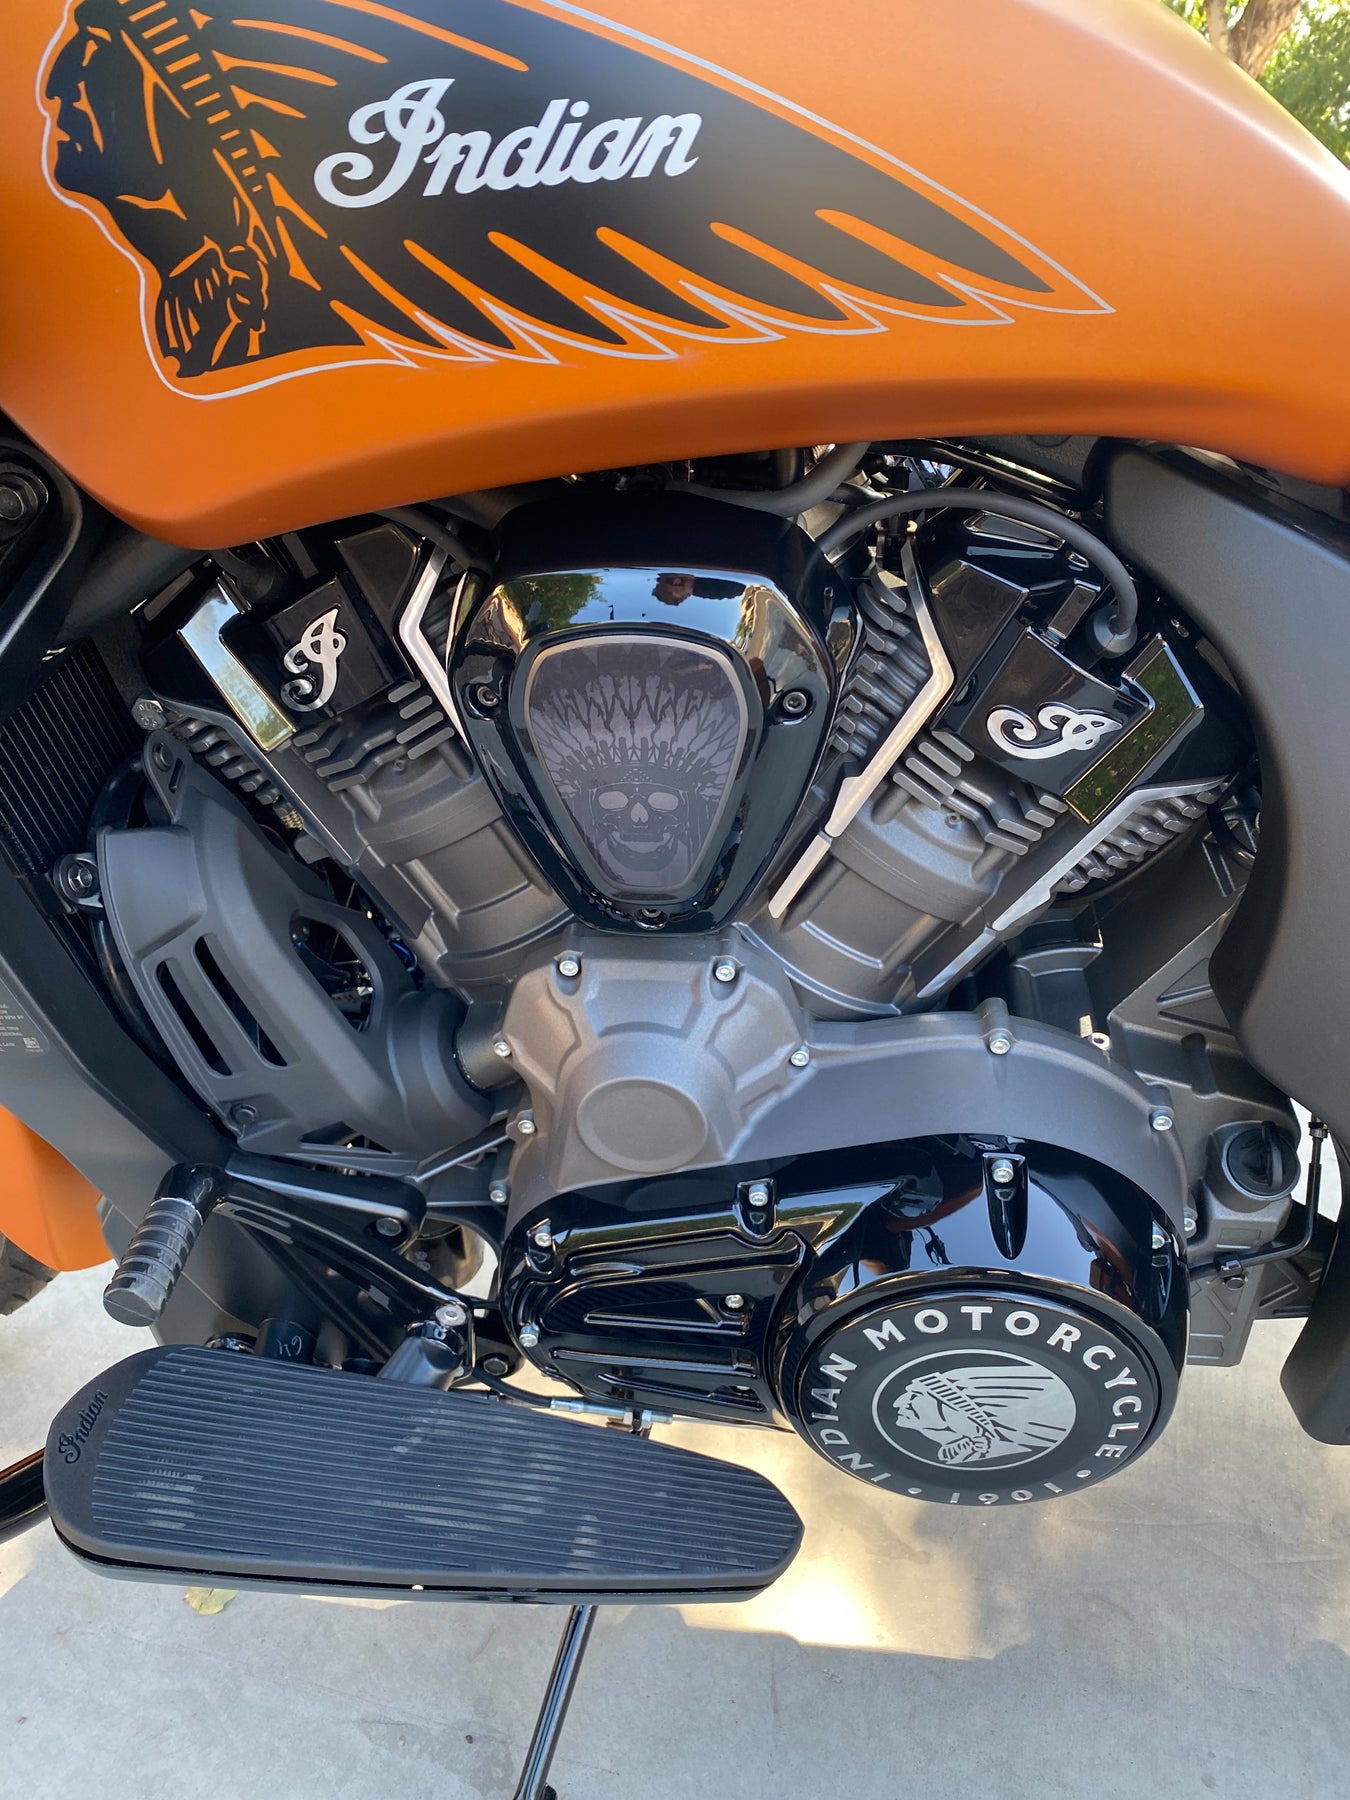
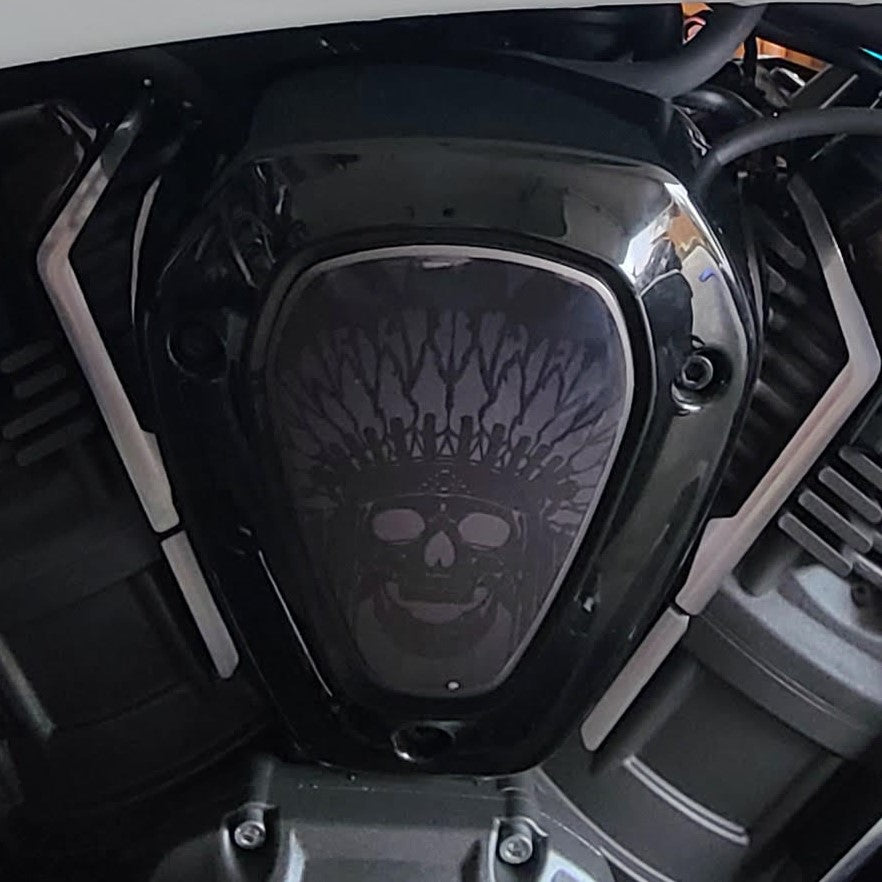
Powerplus V-Cover Decal - Skull Warbonnet
Regular price $20.00/
Shipping calculated at checkout.
We usually have this product in stock and can ship right away but there can be a wait if it sells out before the restock arrives.
Buy 2 and get an automatic 10% off both v-covers
Fits the Indian Powerplus engine found on the Challenger, Pursuit, Powerplus Chieftain, and Powerplus Roadmaster models.
This premium finish badge cover takes minutes to install and provides a completely custom look. They fit both the left and right v-cover so if you haven't removed the right side cover for another intake, don't forget to grab two!
The v-cover decals are heavy-duty 12 mil laminated gloss vinyl that flow over the curves of the badge for a bespoke custom look.
These self-adhesive decals are applied by hand to the 1901 badge. If you've already removed the badge, you can use poster putty to fill in the embossed letters before applying our decal over it.
Installation: Be sure your v-cover badge is clean before installing the decal. Peel the decal off of the backing sheet, careful not to touch the adhesive side of the decal too much. Carefully align it to a centered position (the decal is slightly smaller than the badge). Press the decal firmly down in the center to stick it in place, then use your thumbs to push out from the center to the edges. Repeat this process until you've stretched/pressed it firmly down around the curves. And that's it!
How-to Video:


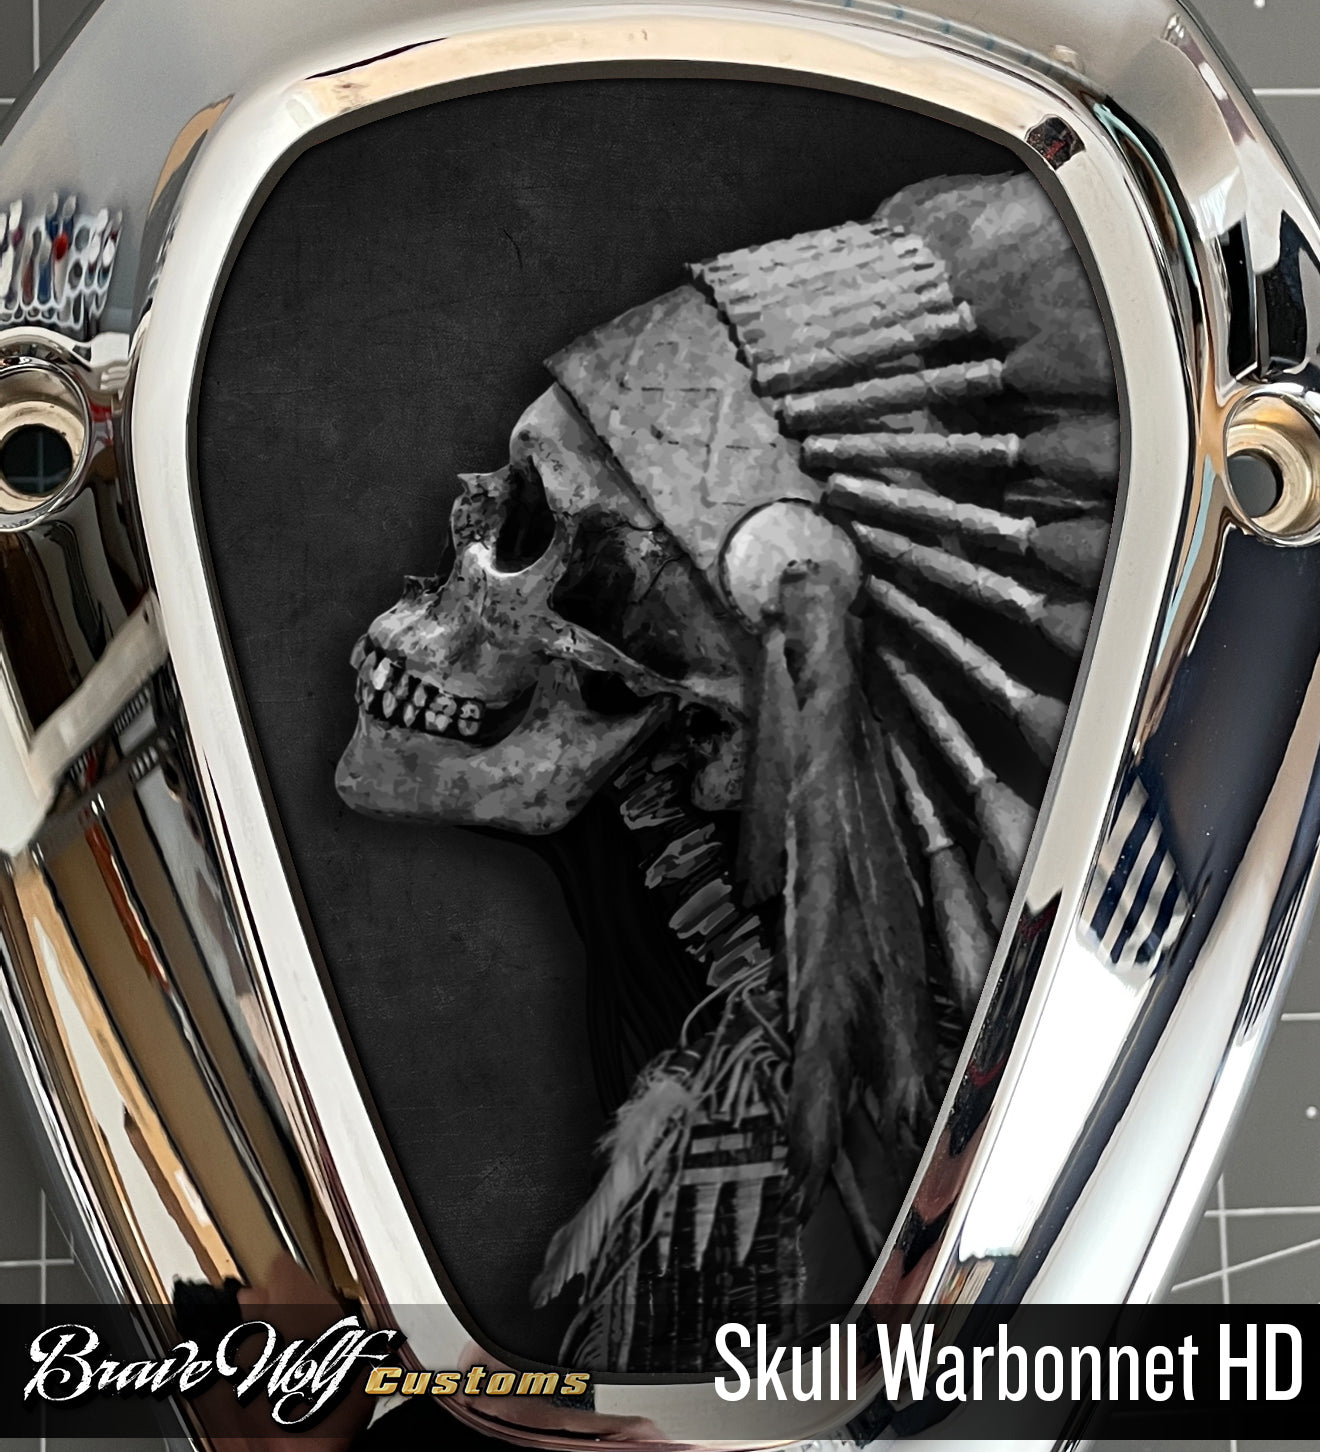


Powerplus V-Cover Decal - Skull Warbonnet HD
Regular price $20.00/
Shipping calculated at checkout.
We usually have this product in stock and can ship right away but there can be a wait if it sells out before the restock arrives.
Buy 2 and get an automatic 10% off both v-covers
Fits the Indian Powerplus engine found on the Challenger, Pursuit, Powerplus Chieftain, and Powerplus Roadmaster models.
This premium finish badge cover takes minutes to install and provides a completely custom look. They fit both the left and right v-cover so if you haven't removed the right side cover for another intake, don't forget to grab two!
The v-cover decals are heavy-duty 12 mil laminated gloss vinyl that flow over the curves of the badge for a bespoke custom look.
These self-adhesive decals are applied by hand to the 1901 badge. If you've already removed the badge, you can use poster putty to fill in the embossed letters before applying our decal over it.
Installation: Be sure your v-cover badge is clean before installing the decal. Peel the decal off of the backing sheet, careful not to touch the adhesive side of the decal too much. Carefully align it to a centered position (the decal is slightly smaller than the badge). Press the decal firmly down in the center to stick it in place, then use your thumbs to push out from the center to the edges. Repeat this process until you've stretched/pressed it firmly down around the curves. And that's it!
How-to Video:

Powerplus V-Cover Decal - Space Force
Regular price $20.00/
Shipping calculated at checkout.
We usually have this product in stock and can ship right away but there can be a wait if it sells out before the restock arrives.
Buy 2 and get an automatic 10% off both v-covers
Fits the Indian Powerplus engine found on the Challenger, Pursuit, Powerplus Chieftain, and Powerplus Roadmaster models.
This premium finish badge cover takes minutes to install and provides a completely custom look. They fit both the left and right v-cover so if you haven't removed the right side cover for another intake, don't forget to grab two!
The v-cover decals are heavy-duty 12 mil laminated gloss vinyl that flow over the curves of the badge for a bespoke custom look.
These self-adhesive decals are applied by hand to the 1901 badge. If you've already removed the badge, you can use poster putty to fill in the embossed letters before applying our decal over it.
Installation: Be sure your v-cover badge is clean before installing the decal. Peel the decal off of the backing sheet, careful not to touch the adhesive side of the decal too much. Carefully align it to a centered position (the decal is slightly smaller than the badge). Press the decal firmly down in the center to stick it in place, then use your thumbs to push out from the center to the edges. Repeat this process until you've stretched/pressed it firmly down around the curves. And that's it!
How-to Video:


Powerplus V-Cover Decal - SWB 108 B&W
Regular price $20.00/
Shipping calculated at checkout.
We usually have this product in stock and can ship right away but there can be a wait if it sells out before the restock arrives.
Buy 2 and get an automatic 10% off both v-covers
Fits the Indian Powerplus engine found on the Challenger, Pursuit, Powerplus Chieftain, and Powerplus Roadmaster models.
This premium finish badge cover takes minutes to install and provides a completely custom look. They fit both the left and right v-cover so if you haven't removed the right side cover for another intake, don't forget to grab two!
The v-cover decals are heavy-duty 12 mil laminated gloss vinyl that flow over the curves of the badge for a bespoke custom look.
These self-adhesive decals are applied by hand to the 1901 badge. If you've already removed the badge, you can use poster putty to fill in the embossed letters before applying our decal over it.
Installation: Be sure your v-cover badge is clean before installing the decal. Peel the decal off of the backing sheet, careful not to touch the adhesive side of the decal too much. Carefully align it to a centered position (the decal is slightly smaller than the badge). Press the decal firmly down in the center to stick it in place, then use your thumbs to push out from the center to the edges. Repeat this process until you've stretched/pressed it firmly down around the curves. And that's it!
How-to Video:


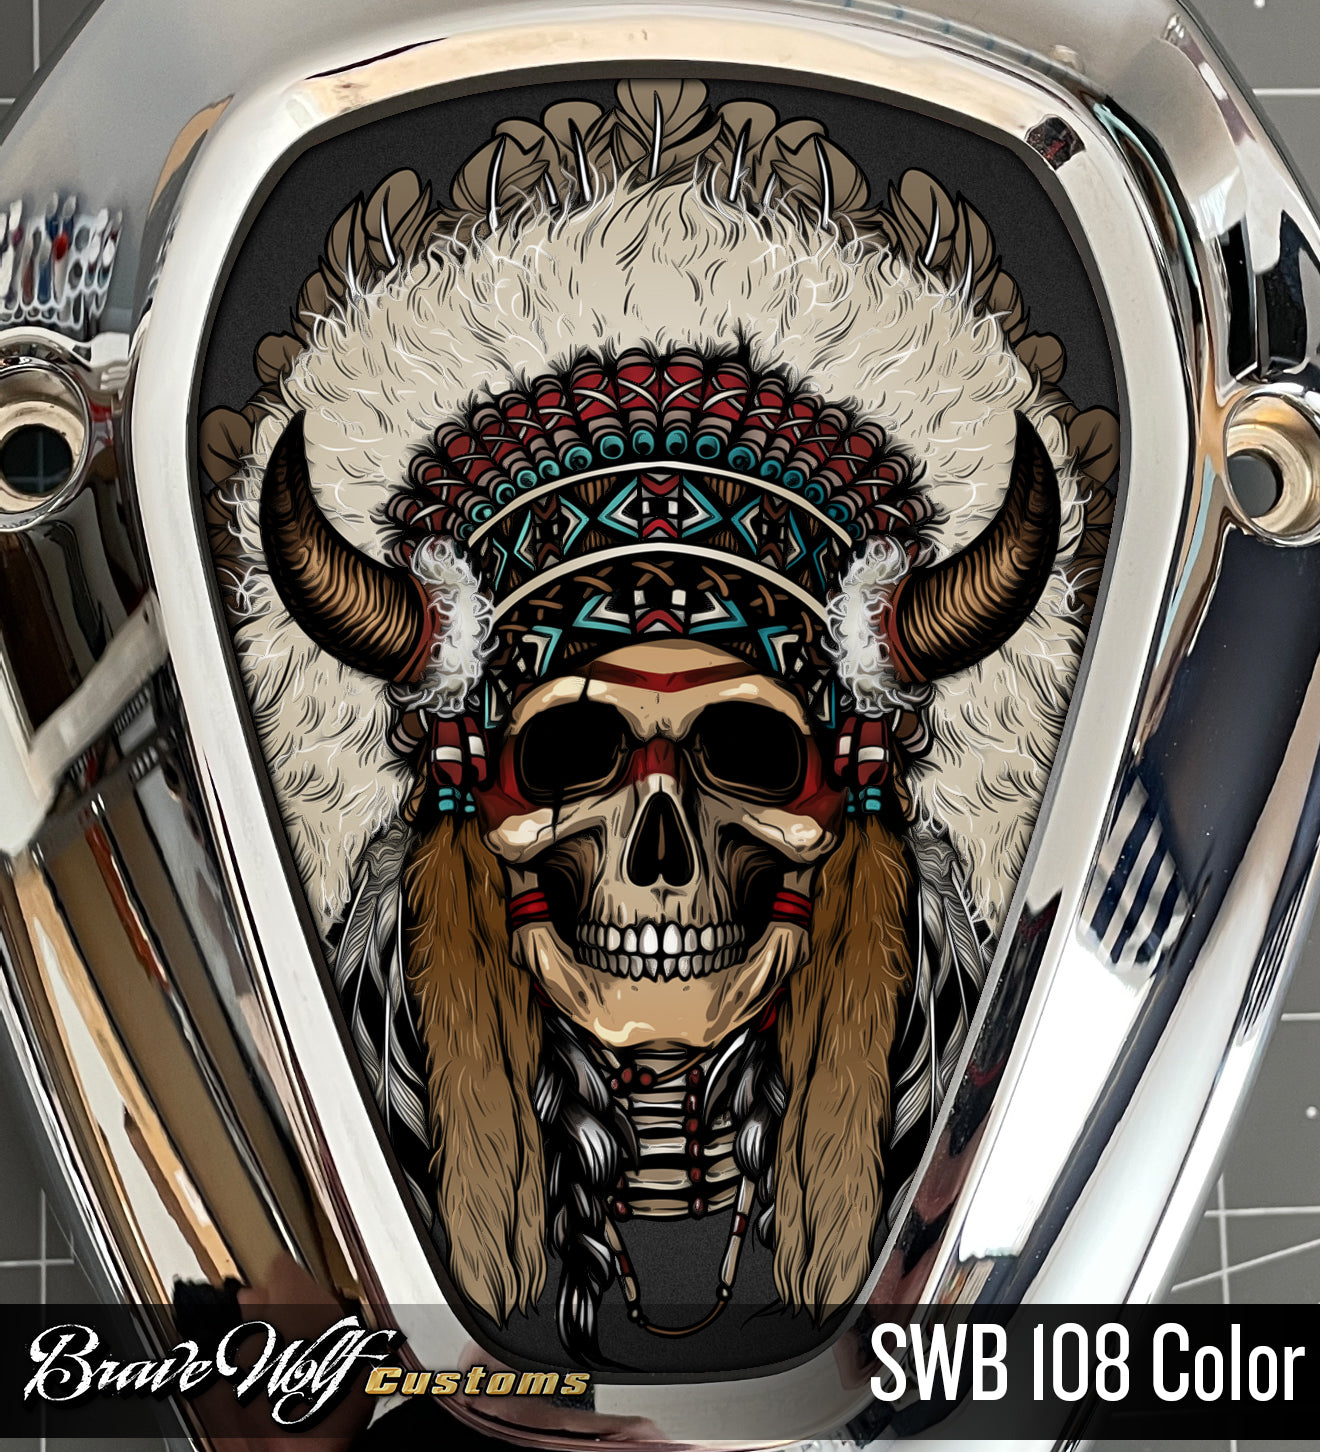
Powerplus V-Cover Decal - SWB 108 Color
Regular price $20.00/
Shipping calculated at checkout.
We usually have this product in stock and can ship right away but there can be a wait if it sells out before the restock arrives.
Buy 2 and get an automatic 10% off both v-covers
Fits the Indian Powerplus engine found on the Challenger, Pursuit, Powerplus Chieftain, and Powerplus Roadmaster models.
This premium finish badge cover takes minutes to install and provides a completely custom look. They fit both the left and right v-cover so if you haven't removed the right side cover for another intake, don't forget to grab two!
The v-cover decals are heavy-duty 12 mil laminated gloss vinyl that flow over the curves of the badge for a bespoke custom look.
These self-adhesive decals are applied by hand to the 1901 badge. If you've already removed the badge, you can use poster putty to fill in the embossed letters before applying our decal over it.
Installation: Be sure your v-cover badge is clean before installing the decal. Peel the decal off of the backing sheet, careful not to touch the adhesive side of the decal too much. Carefully align it to a centered position (the decal is slightly smaller than the badge). Press the decal firmly down in the center to stick it in place, then use your thumbs to push out from the center to the edges. Repeat this process until you've stretched/pressed it firmly down around the curves. And that's it!
How-to Video:


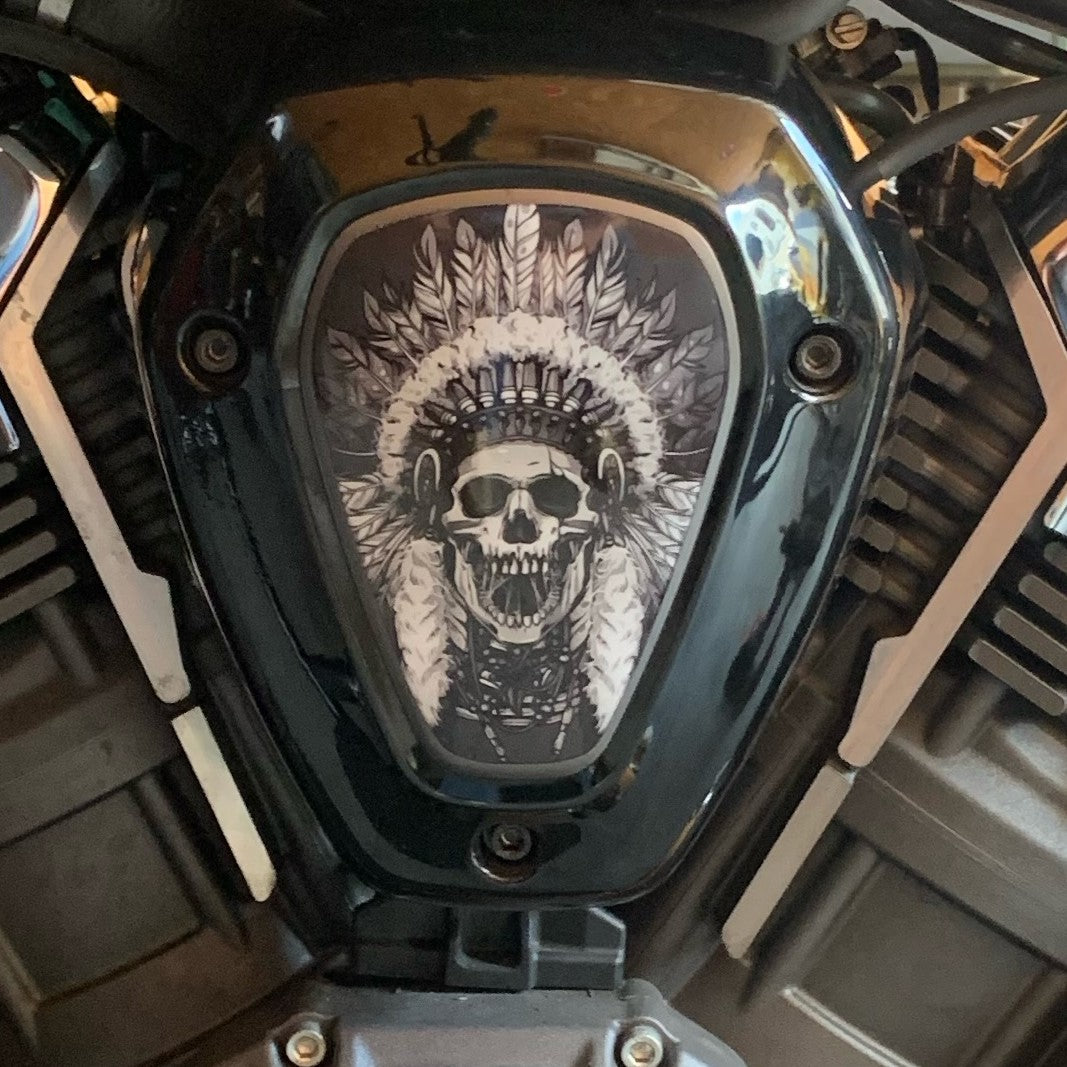
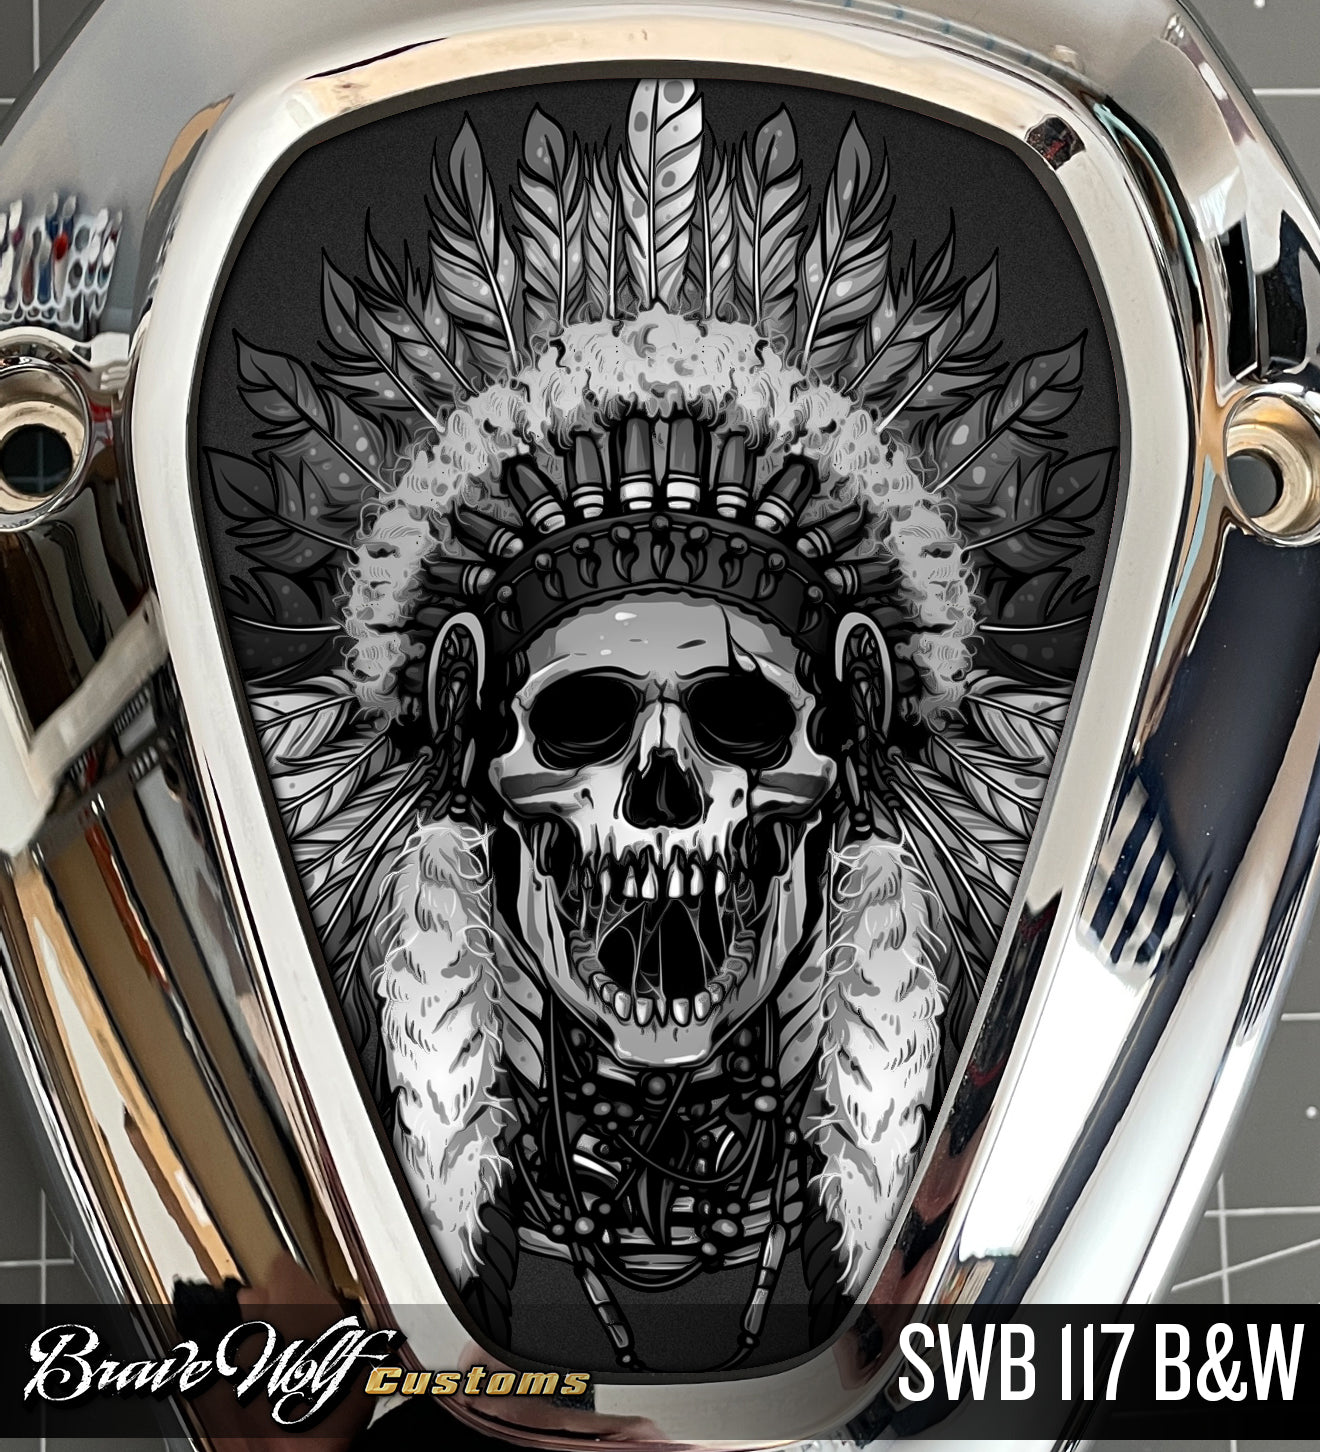

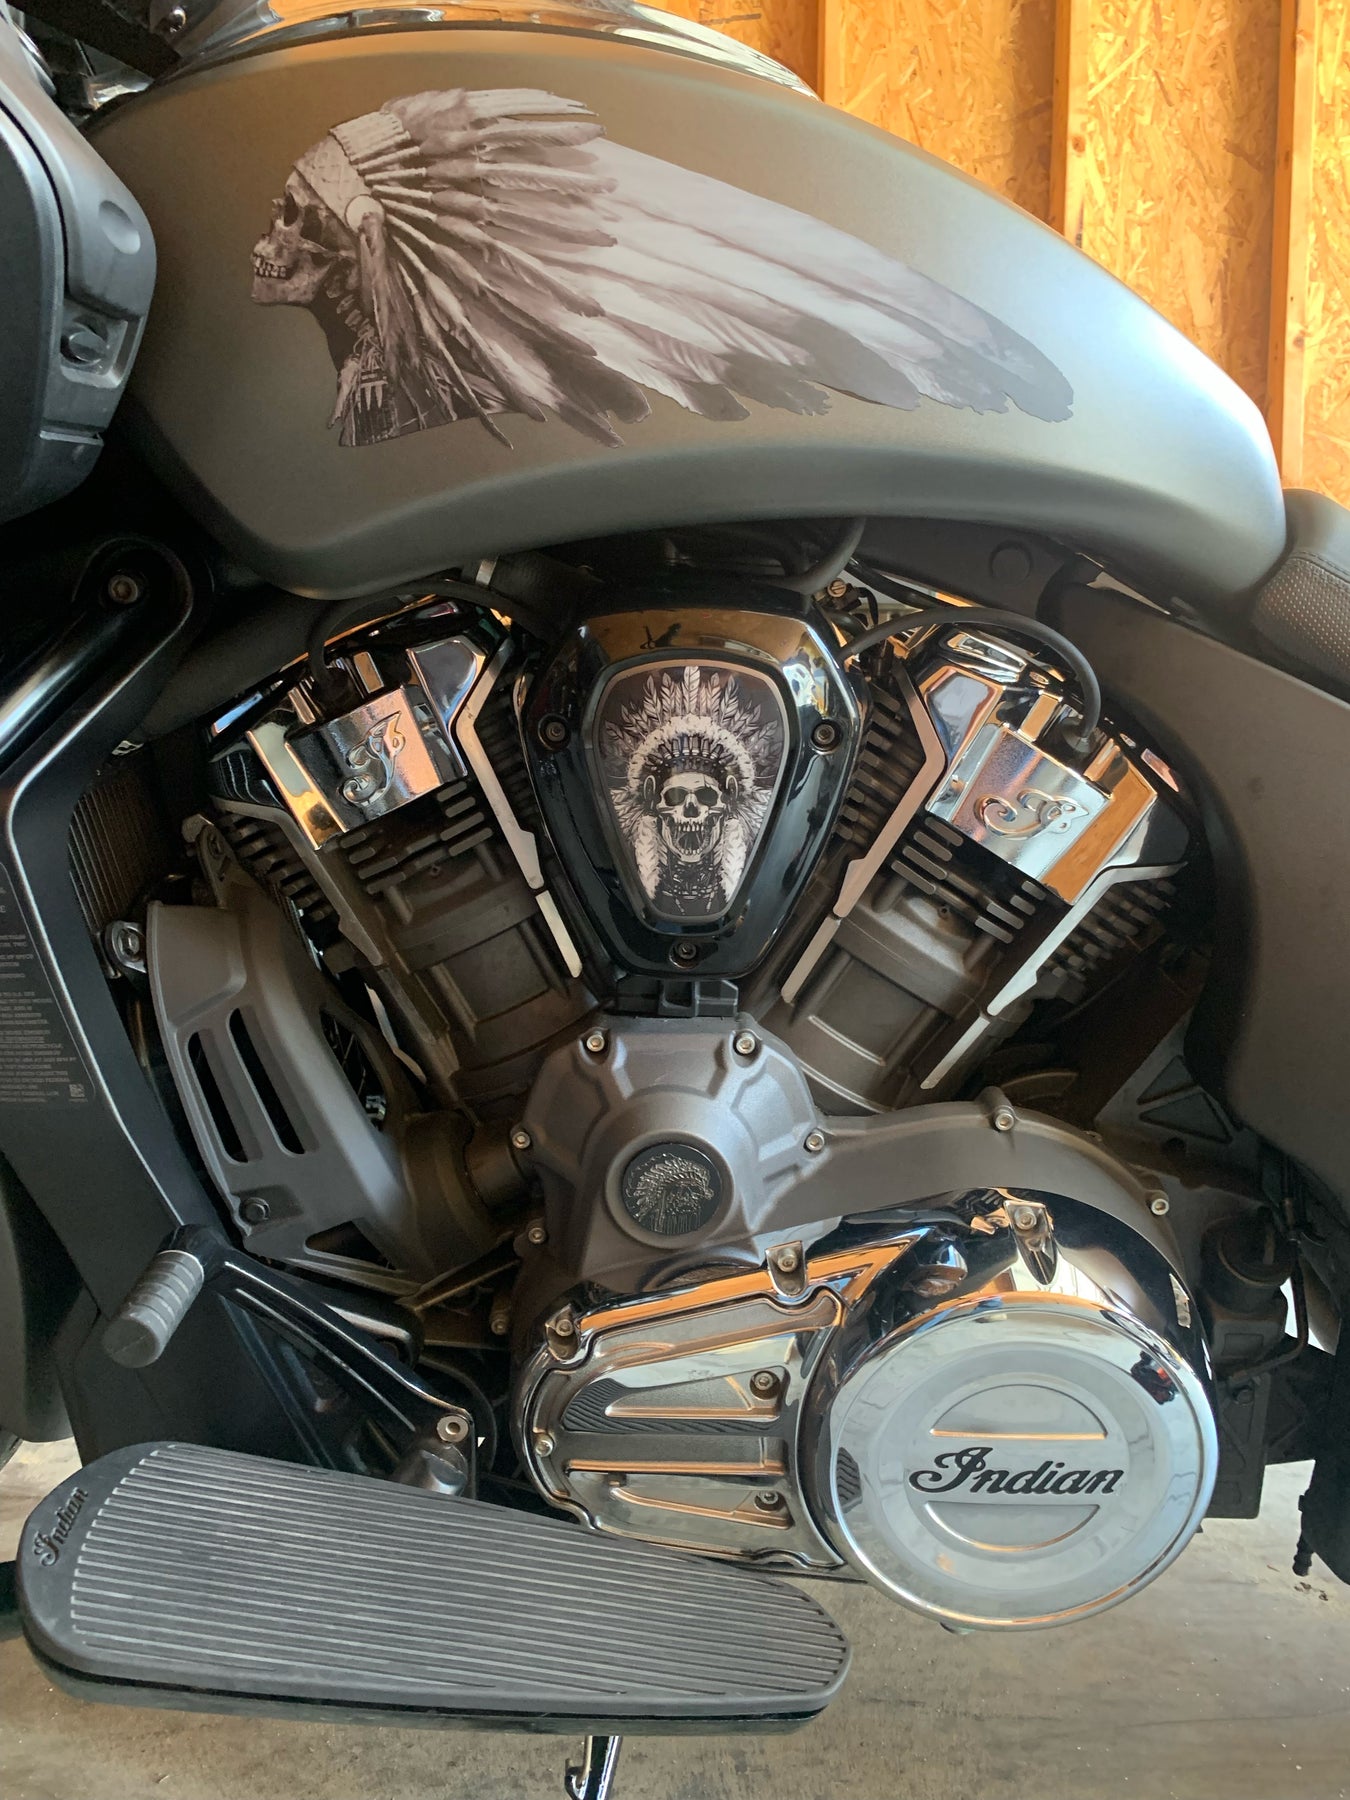
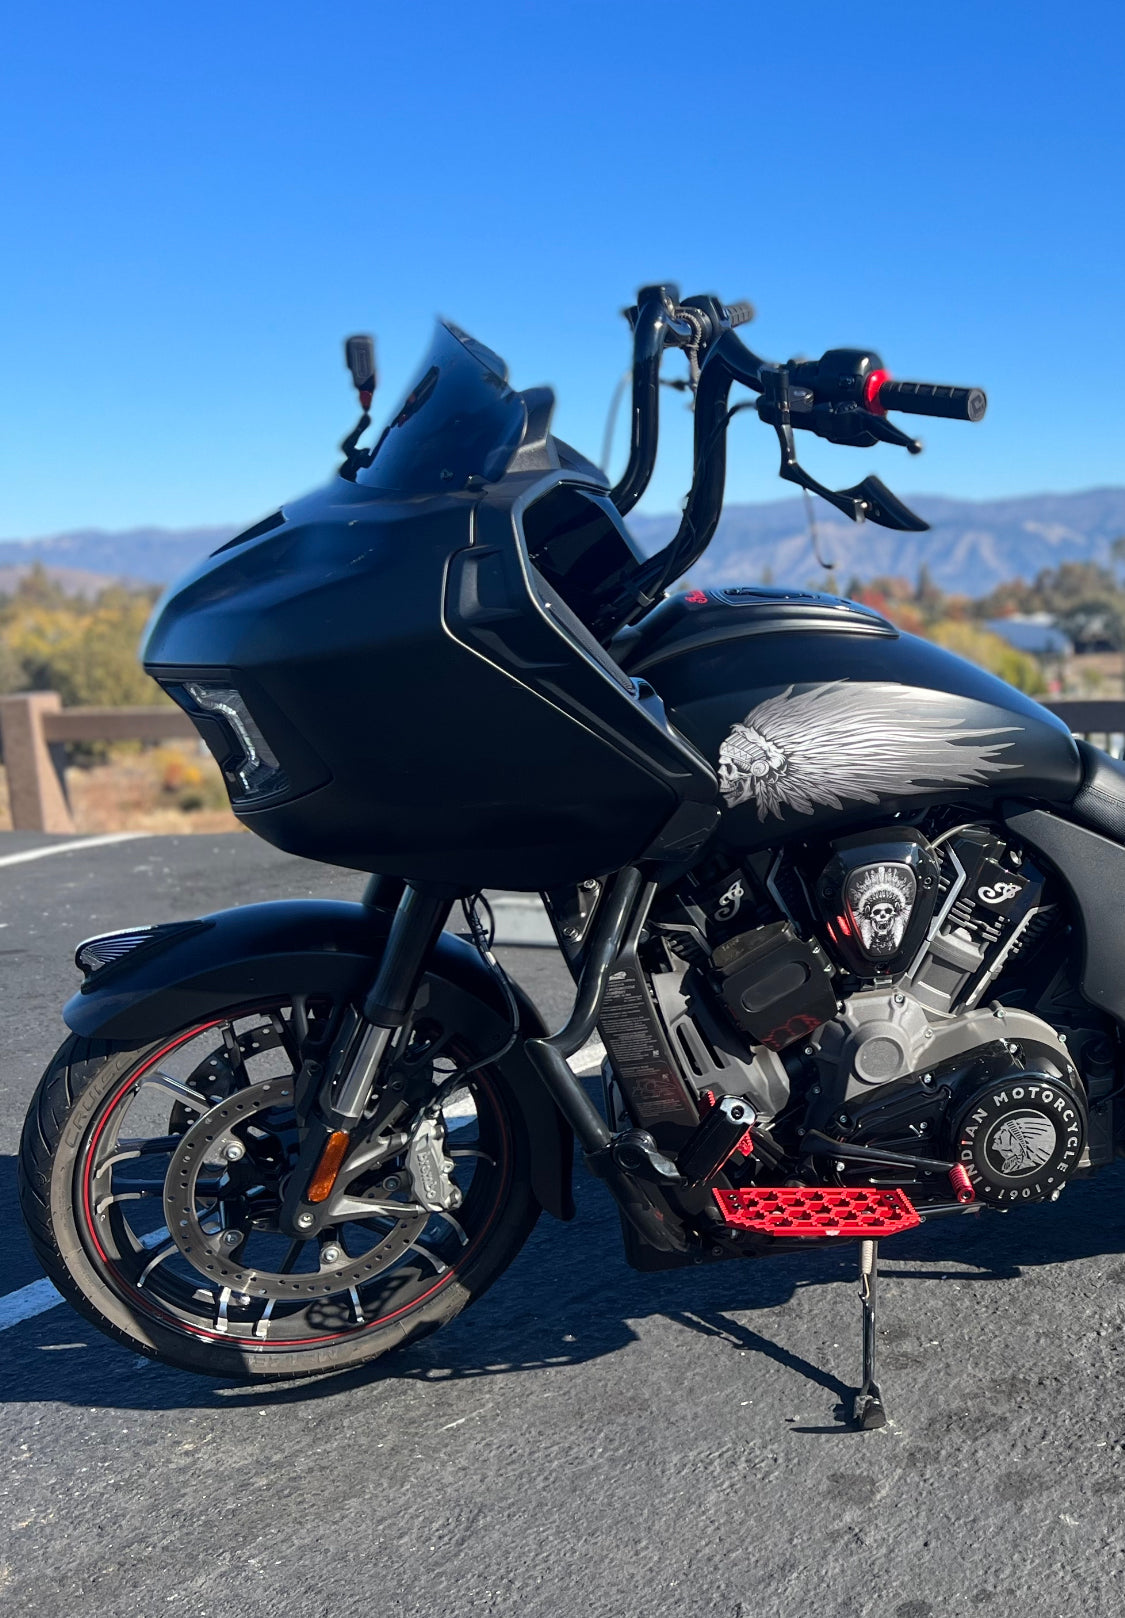
Powerplus V-Cover Decal - SWB 117 B&W
Regular price $20.00/
Shipping calculated at checkout.
We usually have this product in stock and can ship right away but there can be a wait if it sells out before the restock arrives.
Buy 2 and get an automatic 10% off both v-covers
Fits the Indian Powerplus engine found on the Challenger, Pursuit, Powerplus Chieftain, and Powerplus Roadmaster models.
This premium finish badge cover takes minutes to install and provides a completely custom look. They fit both the left and right v-cover so if you haven't removed the right side cover for another intake, don't forget to grab two!
The v-cover decals are heavy-duty 12 mil laminated gloss vinyl that flow over the curves of the badge for a bespoke custom look.
These self-adhesive decals are applied by hand to the 1901 badge. If you've already removed the badge, you can use poster putty to fill in the embossed letters before applying our decal over it.
Installation: Be sure your v-cover badge is clean before installing the decal. Peel the decal off of the backing sheet, careful not to touch the adhesive side of the decal too much. Carefully align it to a centered position (the decal is slightly smaller than the badge). Press the decal firmly down in the center to stick it in place, then use your thumbs to push out from the center to the edges. Repeat this process until you've stretched/pressed it firmly down around the curves. And that's it!
How-to Video:


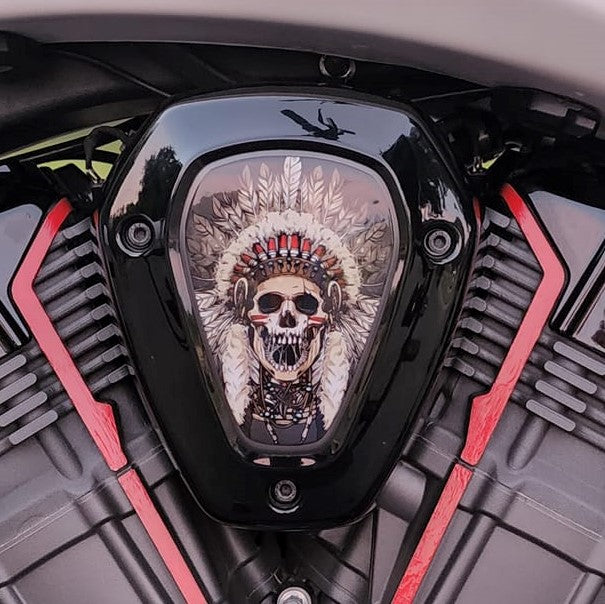
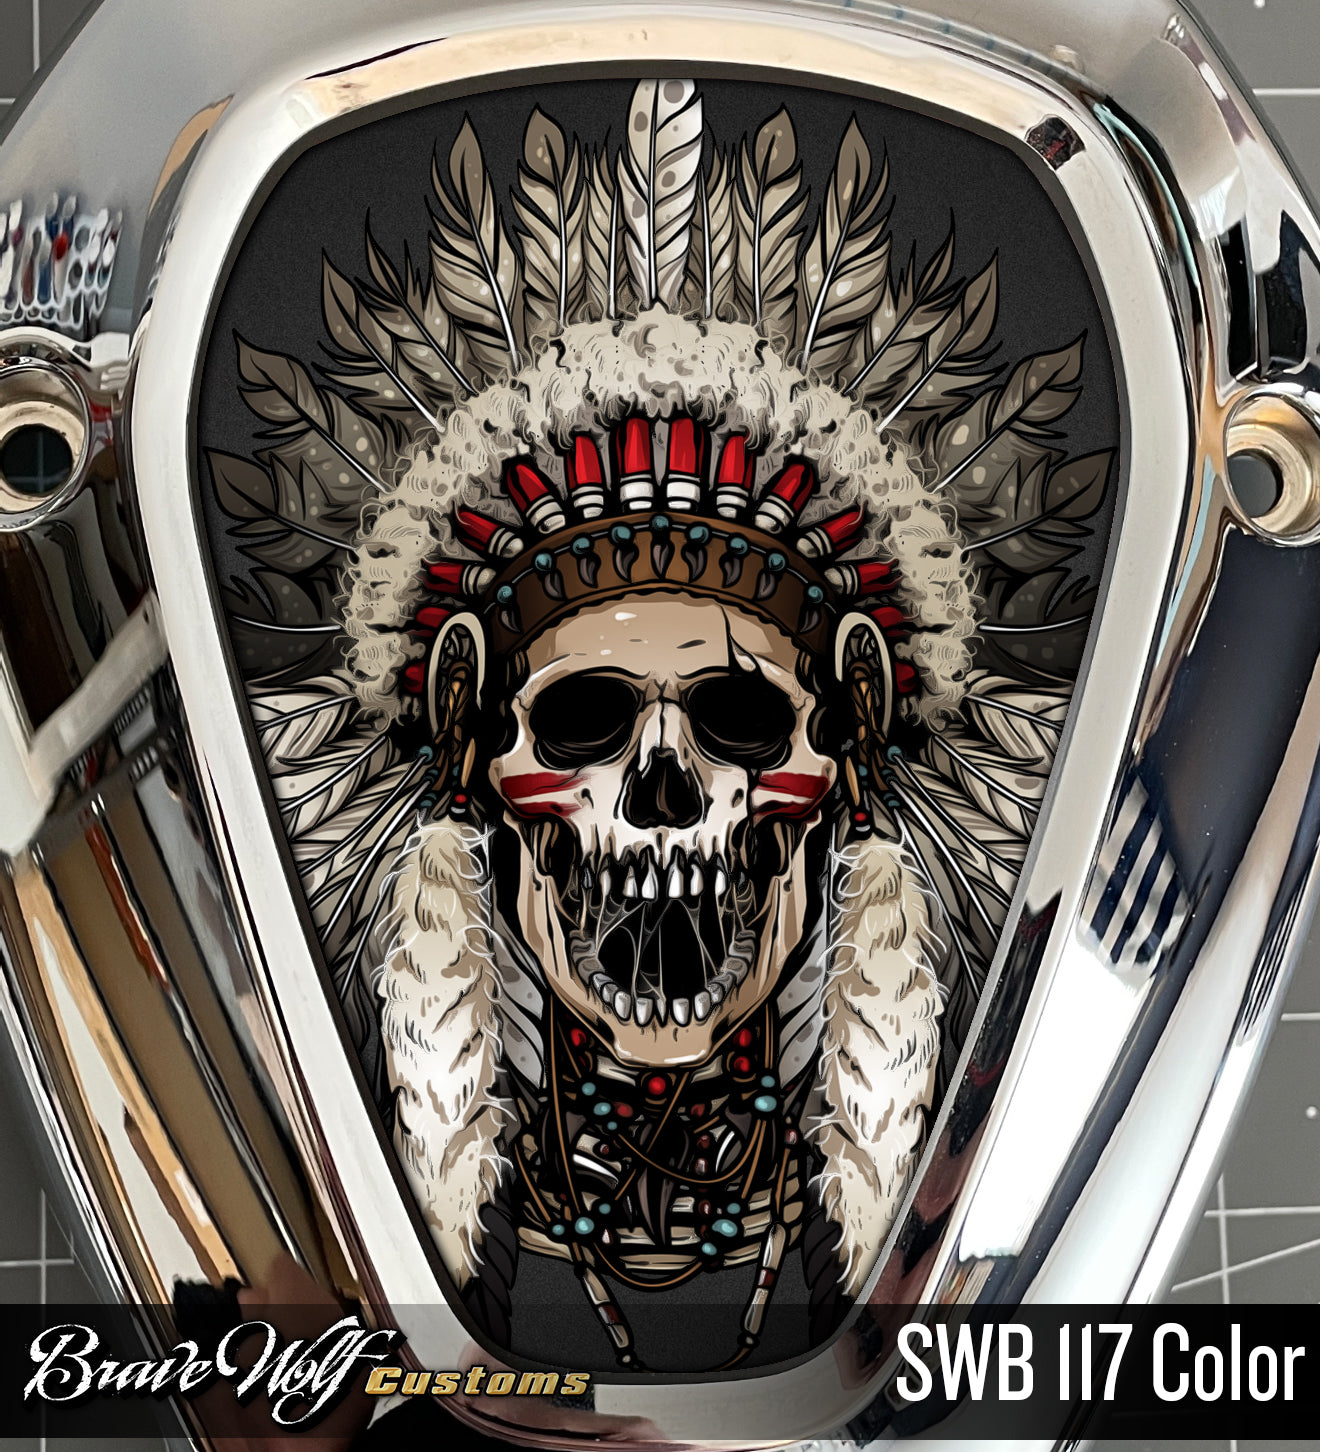
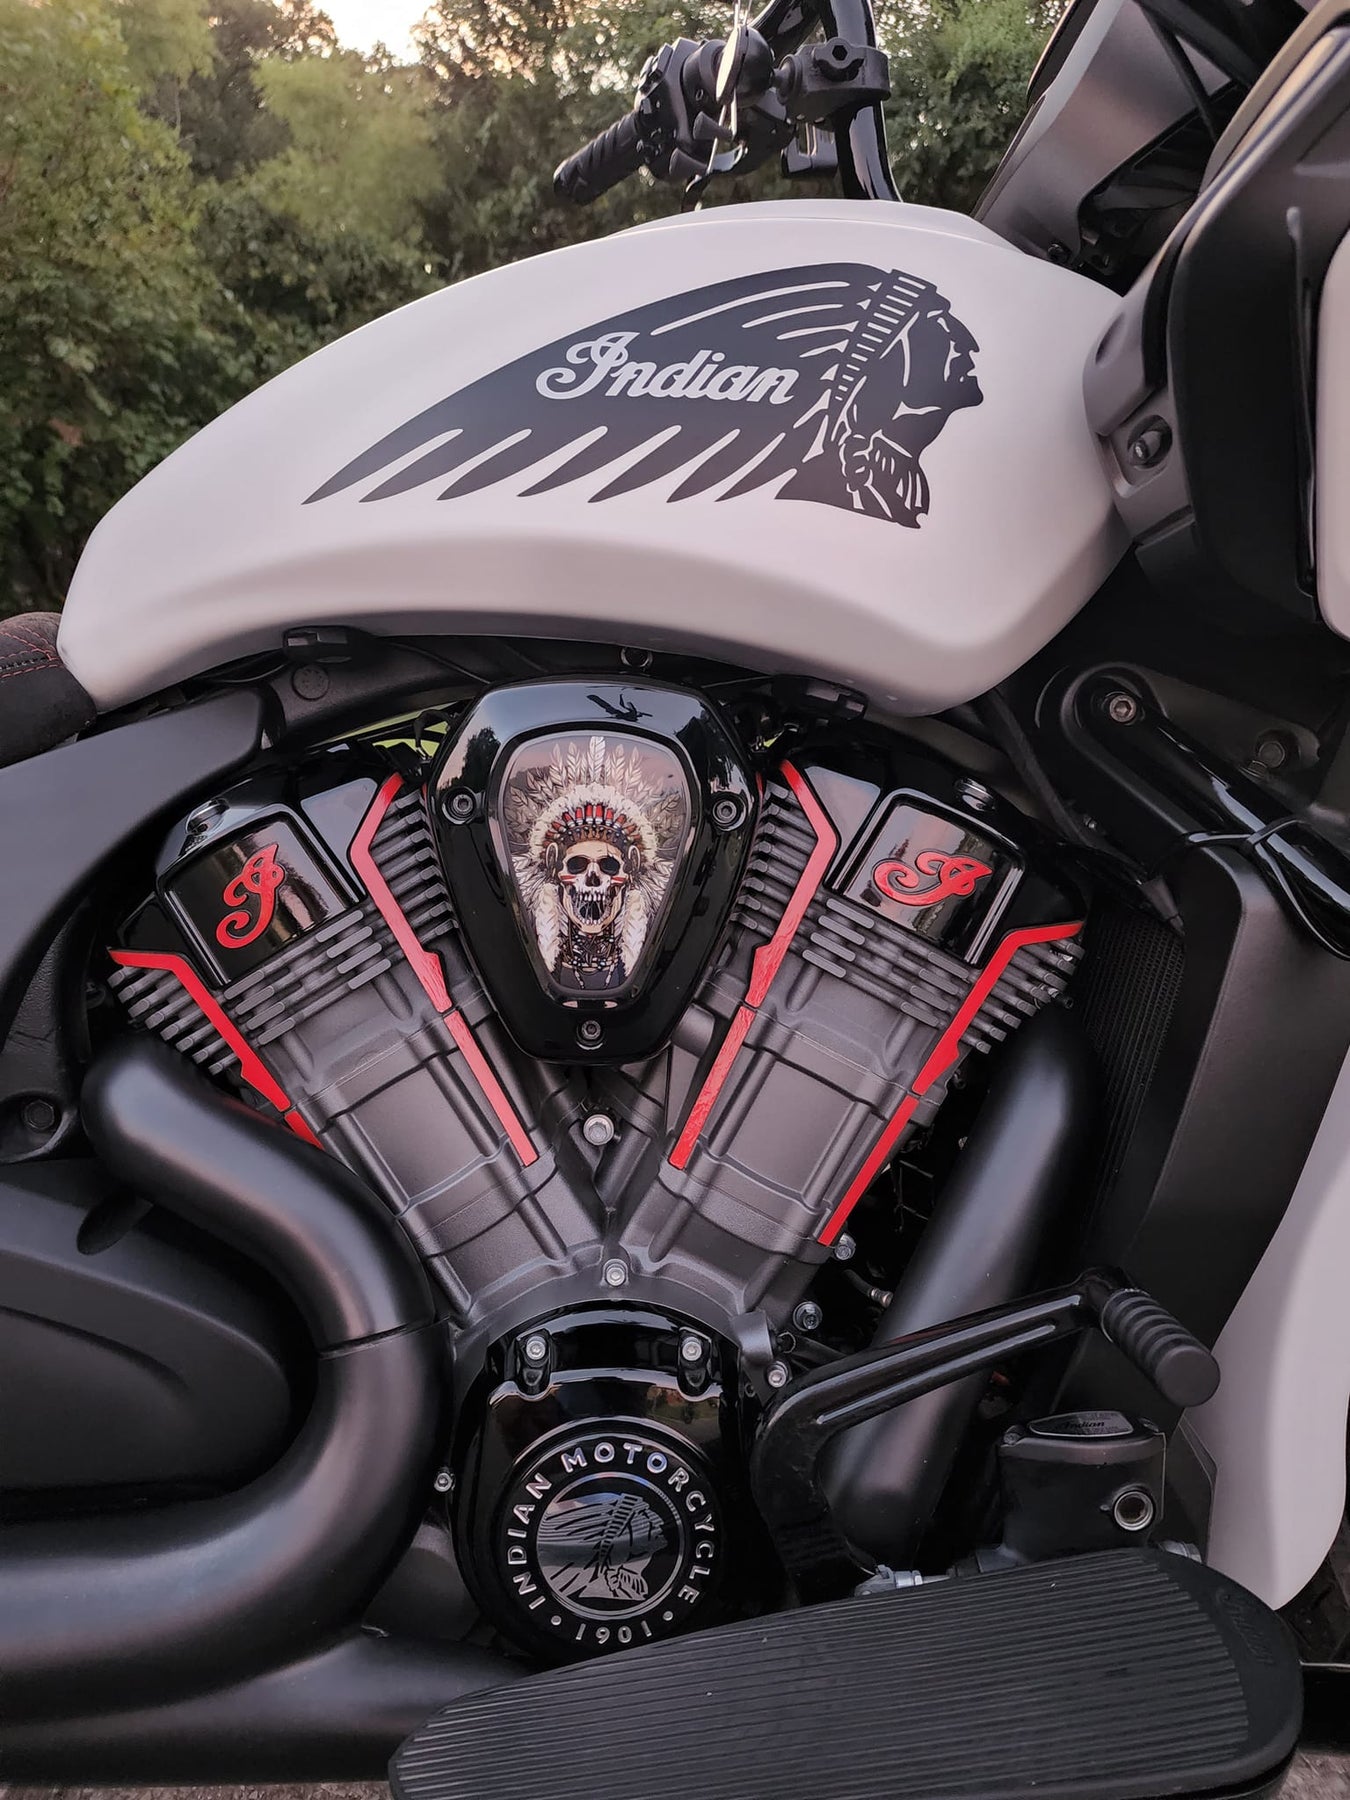
Powerplus V-Cover Decal - SWB 117 Color
Regular price $20.00/
Shipping calculated at checkout.
We usually have this product in stock and can ship right away but there can be a wait if it sells out before the restock arrives.
Buy 2 and get an automatic 10% off both v-covers
Fits the Indian Powerplus engine found on the Challenger, Pursuit, Powerplus Chieftain, and Powerplus Roadmaster models.
This premium finish badge cover takes minutes to install and provides a completely custom look. They fit both the left and right v-cover so if you haven't removed the right side cover for another intake, don't forget to grab two!
The v-cover decals are heavy-duty 12 mil laminated gloss vinyl that flow over the curves of the badge for a bespoke custom look.
These self-adhesive decals are applied by hand to the 1901 badge. If you've already removed the badge, you can use poster putty to fill in the embossed letters before applying our decal over it.
Installation: Be sure your v-cover badge is clean before installing the decal. Peel the decal off of the backing sheet, careful not to touch the adhesive side of the decal too much. Carefully align it to a centered position (the decal is slightly smaller than the badge). Press the decal firmly down in the center to stick it in place, then use your thumbs to push out from the center to the edges. Repeat this process until you've stretched/pressed it firmly down around the curves. And that's it!
How-to Video:

Powerplus V-Cover Decal - Wendy 108 (B&W)
Regular price $20.00 Sale price $15.00 Save $5.00/
Shipping calculated at checkout.
We usually have this product in stock and can ship right away but there can be a wait if it sells out before the restock arrives.
Buy 2 and get an automatic 10% off both v-covers
Fits the Indian Powerplus engine found on the Challenger, Pursuit, Powerplus Chieftain, and Powerplus Roadmaster models.
This premium finish badge cover takes minutes to install and provides a completely custom look. They fit both the left and right v-cover so if you haven't removed the right side cover for another intake, don't forget to grab two!
The v-cover decals are heavy-duty 12 mil laminated gloss vinyl that flow over the curves of the badge for a bespoke custom look.
These self-adhesive decals are applied by hand to the 1901 badge. If you've already removed the badge, you can use poster putty to fill in the embossed letters before applying our decal over it.
Installation: Be sure your v-cover badge is clean before installing the decal. Peel the decal off of the backing sheet, careful not to touch the adhesive side of the decal too much. Carefully align it to a centered position (the decal is slightly smaller than the badge). Press the decal firmly down in the center to stick it in place, then use your thumbs to push out from the center to the edges. Repeat this process until you've stretched/pressed it firmly down around the curves. And that's it!
How-to Video:

Powerplus V-Cover Decal - Wendy 108 (color)
Regular price $20.00 Sale price $15.00 Save $5.00/
Shipping calculated at checkout.
We usually have this product in stock and can ship right away but there can be a wait if it sells out before the restock arrives.
Buy 2 and get an automatic 10% off both v-covers
Fits the Indian Powerplus engine found on the Challenger, Pursuit, Powerplus Chieftain, and Powerplus Roadmaster models.
This premium finish badge cover takes minutes to install and provides a completely custom look. They fit both the left and right v-cover so if you haven't removed the right side cover for another intake, don't forget to grab two!
The v-cover decals are heavy-duty 12 mil laminated gloss vinyl that flow over the curves of the badge for a bespoke custom look.
These self-adhesive decals are applied by hand to the 1901 badge. If you've already removed the badge, you can use poster putty to fill in the embossed letters before applying our decal over it.
Installation: Be sure your v-cover badge is clean before installing the decal. Peel the decal off of the backing sheet, careful not to touch the adhesive side of the decal too much. Carefully align it to a centered position (the decal is slightly smaller than the badge). Press the decal firmly down in the center to stick it in place, then use your thumbs to push out from the center to the edges. Repeat this process until you've stretched/pressed it firmly down around the curves. And that's it!
How-to Video:

Powerplus V-Cover Decal - Wendy Warbonnet
Regular price $20.00/
Shipping calculated at checkout.
We usually have this product in stock and can ship right away but there can be a wait if it sells out before the restock arrives.
Buy 2 and get an automatic 10% off both v-covers
Fits the Indian Powerplus engine found on the Challenger, Pursuit, Powerplus Chieftain, and Powerplus Roadmaster models.
This premium finish badge cover takes minutes to install and provides a completely custom look. They fit both the left and right v-cover so if you haven't removed the right side cover for another intake, don't forget to grab two!
The v-cover decals are heavy-duty 12 mil laminated gloss vinyl that flow over the curves of the badge for a bespoke custom look.
These self-adhesive decals are applied by hand to the 1901 badge. If you've already removed the badge, you can use poster putty to fill in the embossed letters before applying our decal over it.
Installation: Be sure your v-cover badge is clean before installing the decal. Peel the decal off of the backing sheet, careful not to touch the adhesive side of the decal too much. Carefully align it to a centered position (the decal is slightly smaller than the badge). Press the decal firmly down in the center to stick it in place, then use your thumbs to push out from the center to the edges. Repeat this process until you've stretched/pressed it firmly down around the curves. And that's it!
How-to Video:

Powerplus V-Cover Decal - Zombies (Color)
Regular price $20.00/
Shipping calculated at checkout.
We usually have this product in stock and can ship right away but there can be a wait if it sells out before the restock arrives.
Buy 2 and get an automatic 10% off both v-covers
Fits the Indian Powerplus engine found on the Challenger, Pursuit, Powerplus Chieftain, and Powerplus Roadmaster models.
This premium finish badge cover takes minutes to install and provides a completely custom look. They fit both the left and right v-cover so if you haven't removed the right side cover for another intake, don't forget to grab two!
The v-cover decals are heavy-duty 12 mil laminated gloss vinyl that flow over the curves of the badge for a bespoke custom look.
These self-adhesive decals are applied by hand to the 1901 badge. If you've already removed the badge, you can use poster putty to fill in the embossed letters before applying our decal over it.
Installation: Be sure your v-cover badge is clean before installing the decal. Peel the decal off of the backing sheet, careful not to touch the adhesive side of the decal too much. Carefully align it to a centered position (the decal is slightly smaller than the badge). Press the decal firmly down in the center to stick it in place, then use your thumbs to push out from the center to the edges. Repeat this process until you've stretched/pressed it firmly down around the curves. And that's it!
How-to Video: