

30 products
30 products
Sale
Quick view


MMIW Red Hand - Anywhere Decal
Regular price $40.00 Sale price $30.00 Save $10.00
Shipping calculated at checkout.
Stock Notice: Usually in stock (may take approximately 2-3 weeks before shipping if not in stock at the time of your order)
“MMIW Red Hand” Anywhere Decal - A Charity Drive Project
Missing and Murdered Indigenous Women is an epidemic of violence against Indigenous women in Canada, the United States, and Latin America; notably those in the FNIM and Native American communities. Across Latin America, it is estimated that Indigenous women and girls are disproportionately the victims of femicide.
STATISTICS
- Indigenous Women (girls +) murdered 10x higher than all other ethnicities.
- Murder is the 3rd leading cause of death for Indigenous Women (Centers for Disease Control).
- More than 4 out of 5 Indigenous Women have experienced violence (84.3%) (National Institute of Justice Report).
- More than half Indigenous Women experience sexual violence (56.1%).
- More than half Indigenous Women have been physically abused by their intimate partners (55.5 percent).
- 48.8% of Indigenous Women have been stalked in their lifetime.
- Indigenous Women are 1.7 times more likely than Anglo-American women to experience violence.
- Indigenous Women are 2xs more likely to be raped than Anglo-American white women.
- Murder rate of Indigenous Women is 3xs higher than Anglo-American women.
These decals are meant to bring awareness to this issue and can be used anywhere. Brave Wolf Customs will donate $15 from each order to a non-profit charitable organization whose mission is to offer support to the MMIW demographic.
Size: 7.5 x 7.2 inches each when displayed in the orientation of the image below

Weatherproof HD Gloss finish vinyl decals are self adhesive. We recommend using the wet method to install these decals: A spray bottle with water and dish soap can be used to wet the surface and the back of the decal, allowing you to slide the decal into place. Once you have it aligned properly, use your thumbs to push the moisture out from behind the decal, working from the center outwards to the edges and it will adhere to your bike. Using the wet method allows the decal surface to evenly distribute over the curved surface. A hair dryer to apply heat will make the process easier since the vinyl becomes more soft and flexible when warm.


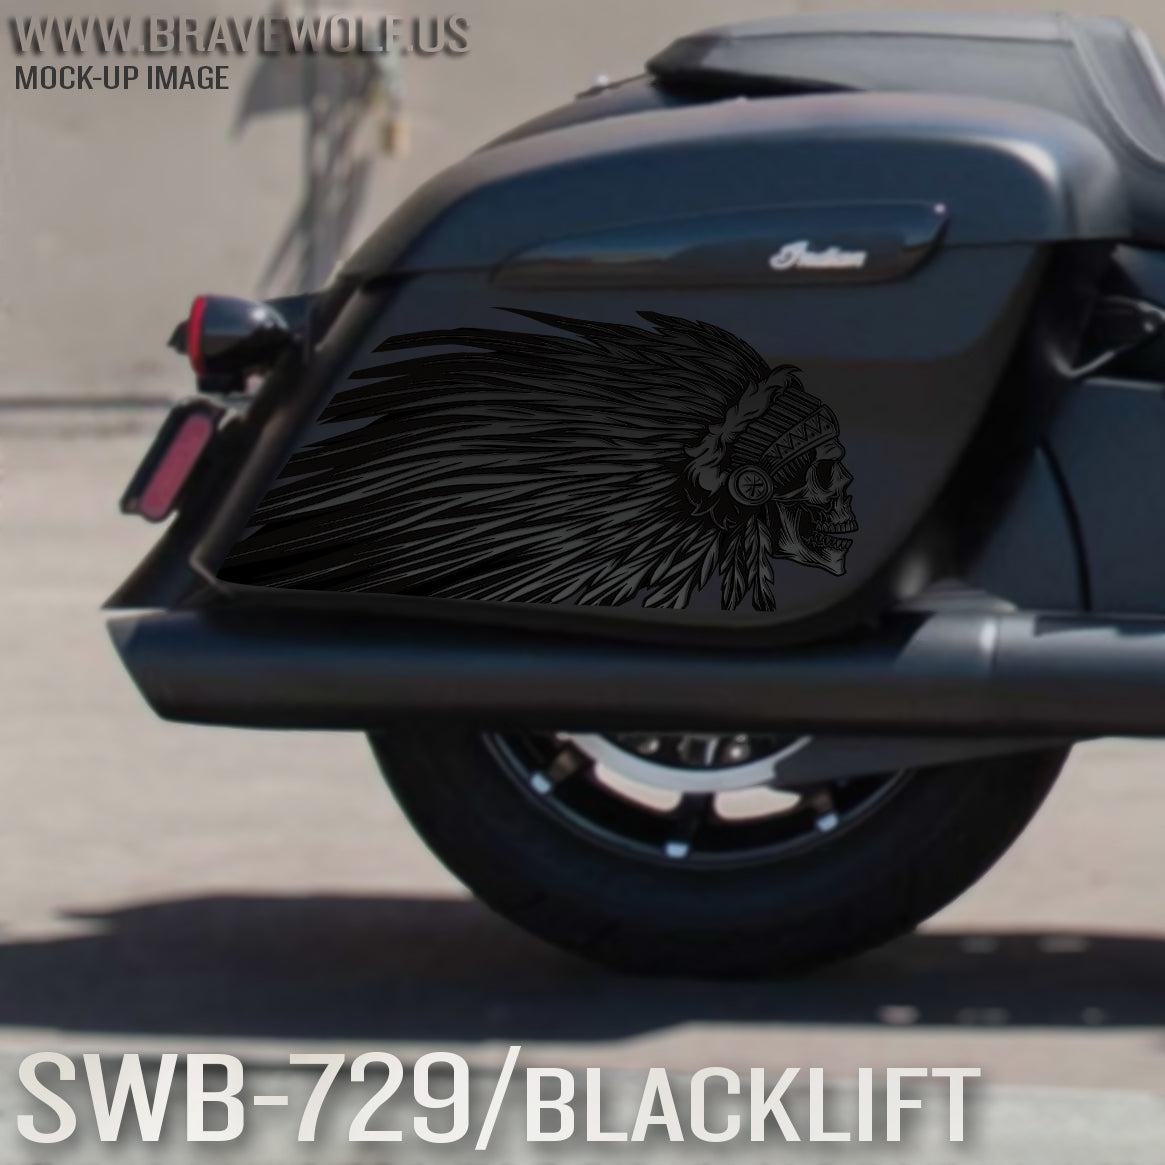
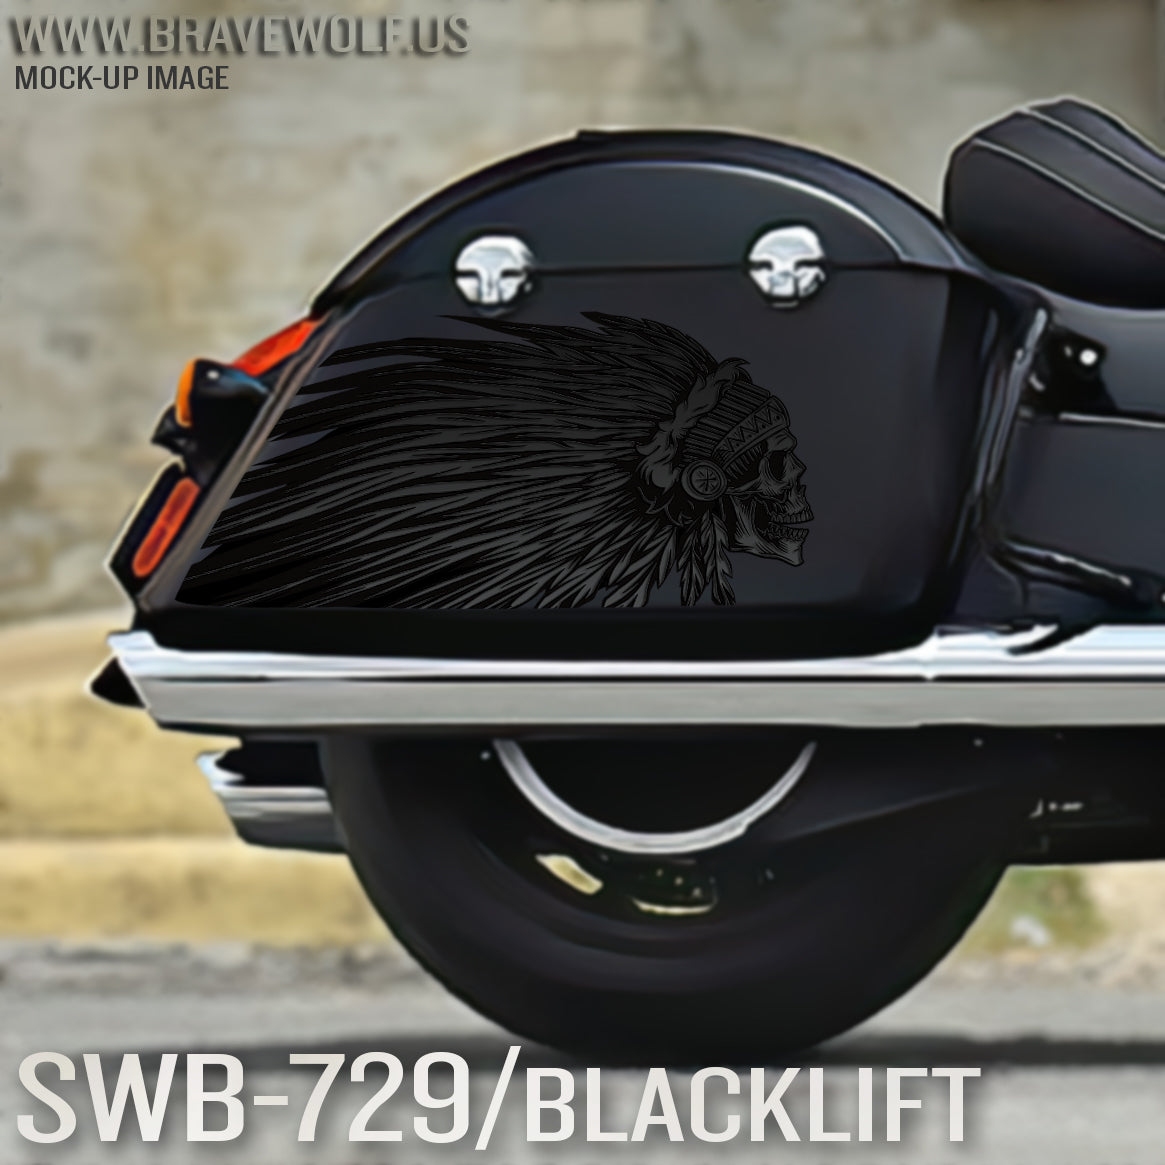
Indian Saddlebag Decals-SWB729-Blacklift
Regular price $180.00
Shipping calculated at checkout.
Stock Notice: (may take approximately 2-3 weeks before shipping if not in stock at the time of your order)
Our saddlebag decals are made from premium weatherproof hi-tack vinyl with a long lifespan that will keep them looking new for years. They are available in two finishes, heavy-duty 12 mil laminated Gloss (looks like it's painted on), or a heavy-duty sandy matte textured premium finish.
|
Fitment Guide: Fits both styles of Indian OEM saddlebags (rounded and squared). Also fits the Challenger & Pursuit when the plastic bag guard is removed. |

Installation:
Installing our decals is easy to do yourself at home. We recommend removing all of the excess decal material (the background image) before installing the decals. This will allow you to dispose of all the small cut-out pieces so that the pieces do not get trapped underneath your decal when installing it on the bike. Once you have all of the small pieces and background removed, you can use the "wet method" to install the decals to your saddlebags. The wet method involves using a spray bottle of water with a couple drops of dish soap in the mixture and spraying the surface of your saddlebags to wet the entire surface. Then carefully remove the backing from your decal and use the spray bottle to wet the adhesive side of the decal. Now you can gently place the decal on your saddlebag. Because the surfaces are wet, you can pull the decal up to reposition it until you get it where you want it. Once it's in place, use a squeegee or other object such as a credit card wrapped in a microfiber towel to squeeze the water out from behind the decal. You can also use your hands to do this. You should take care not to use a hard/abrasive object that can scratch the decals or your bike's paint. The high-tack adhesive will begin to set/adhere to the bike as soon as the liquid is push out from behind the decal. Use caution to ensure the towel or object you are using does not catch any edges of the decal and pull it off your bike. If you take your time and be gentle during installation, it should be an easy process. A hair dryer can be used to speed up the drying process if needed.
Feel free to visit our How-To page on the website to watch a "wet method" installation video TAB Performance made while installing our Zombie decals.


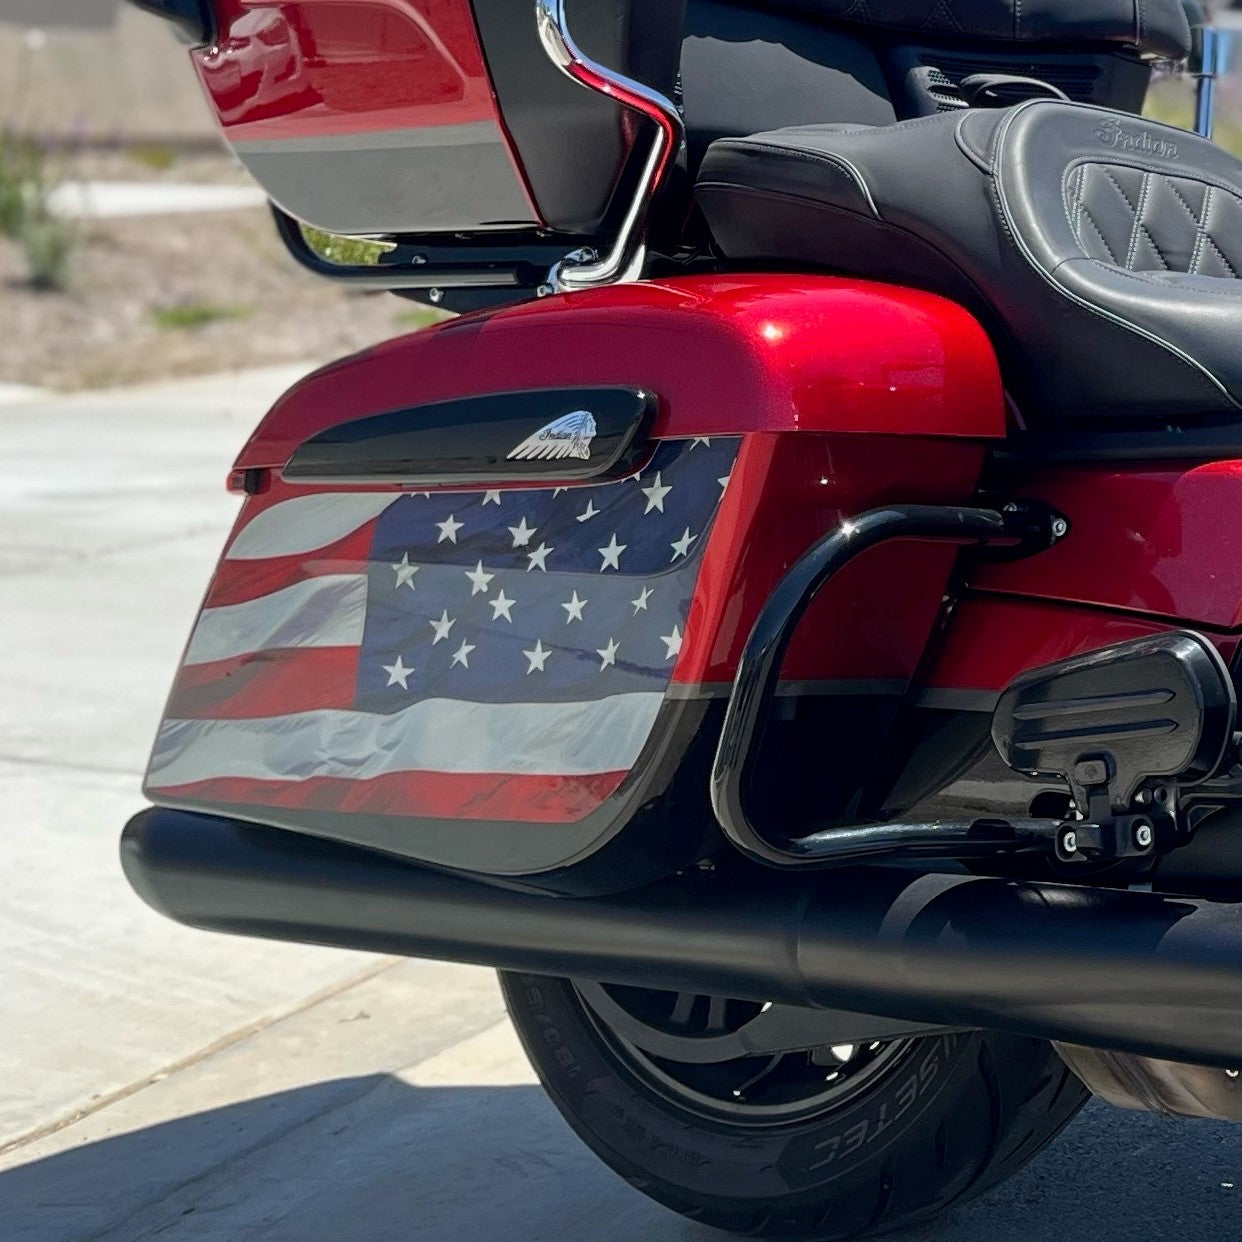


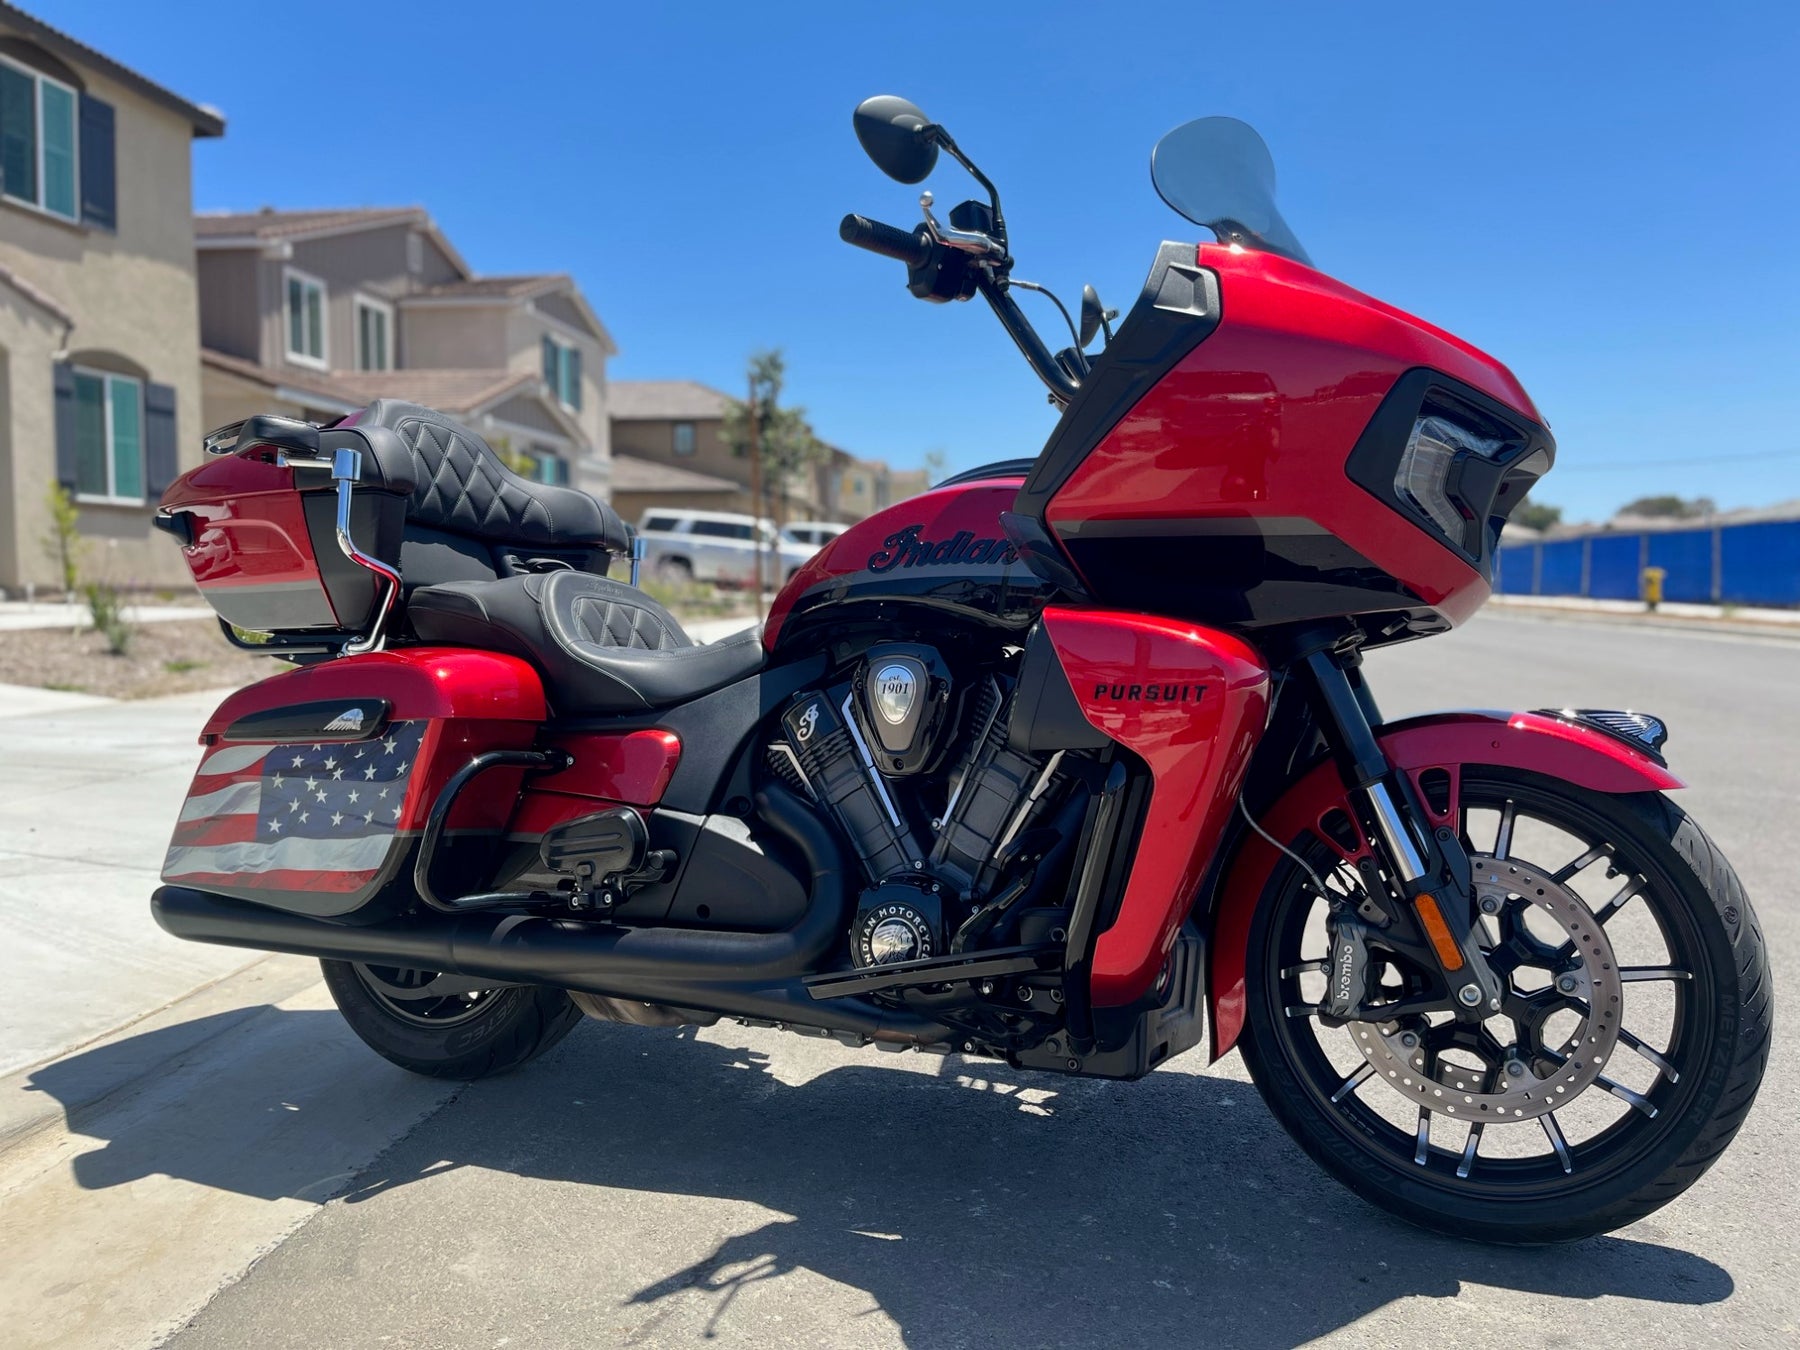


American Flag Decal Set - New Style Indian Saddlebags
Regular price $150.00
Shipping calculated at checkout.
Stock Notice: (may take approximately two-three weeks before shipping if not in stock at the time of your order)
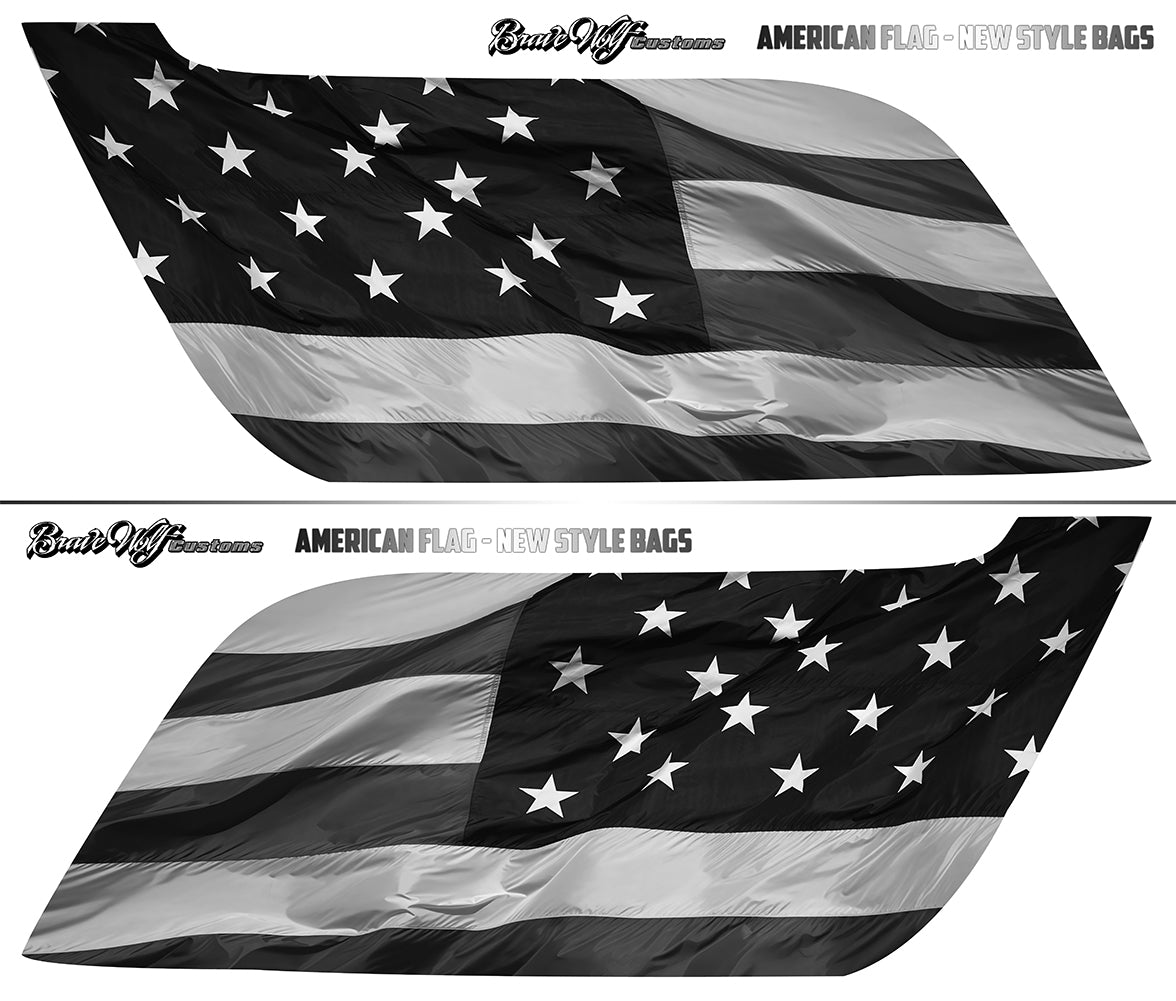
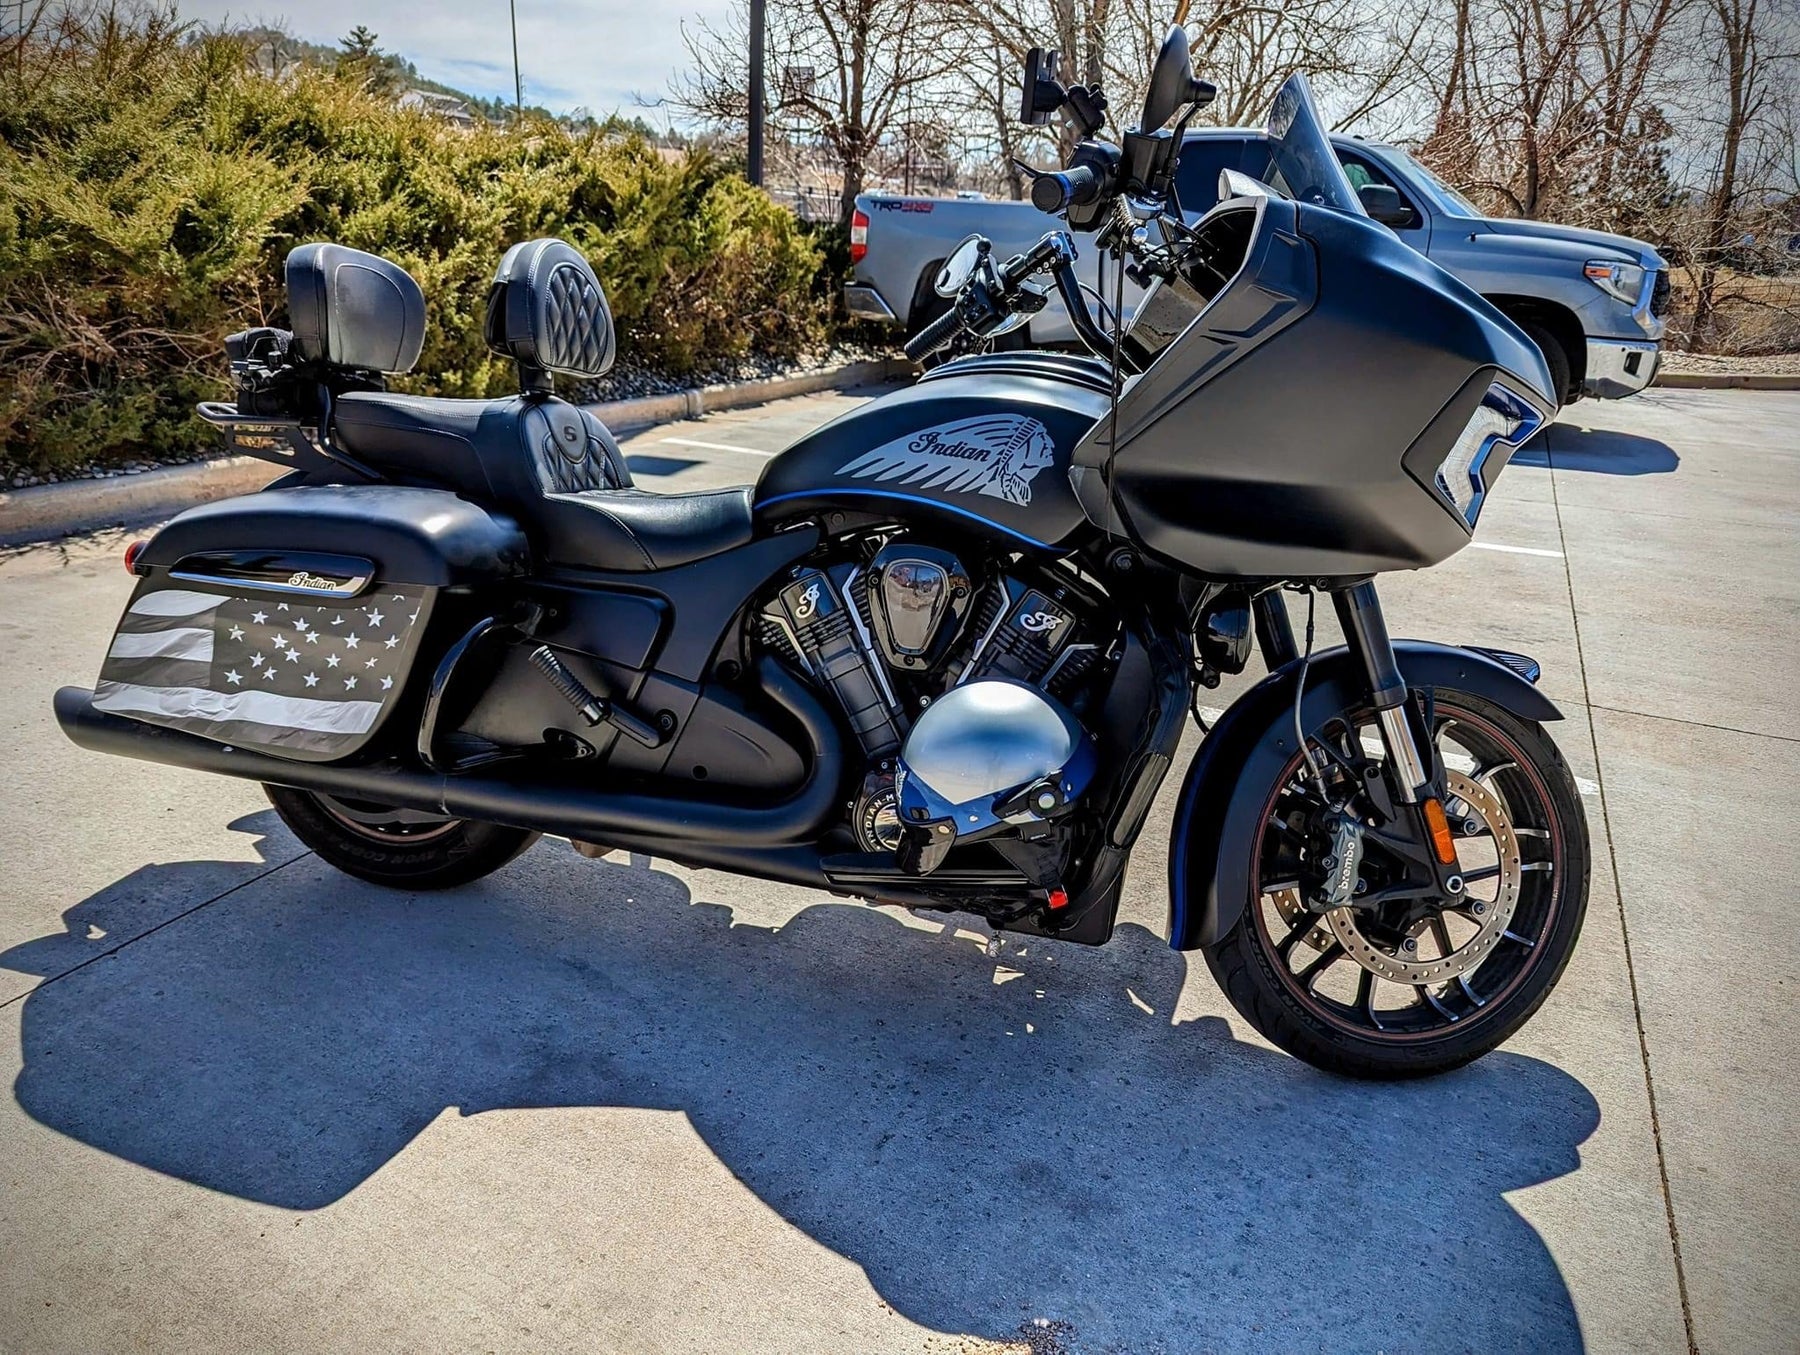
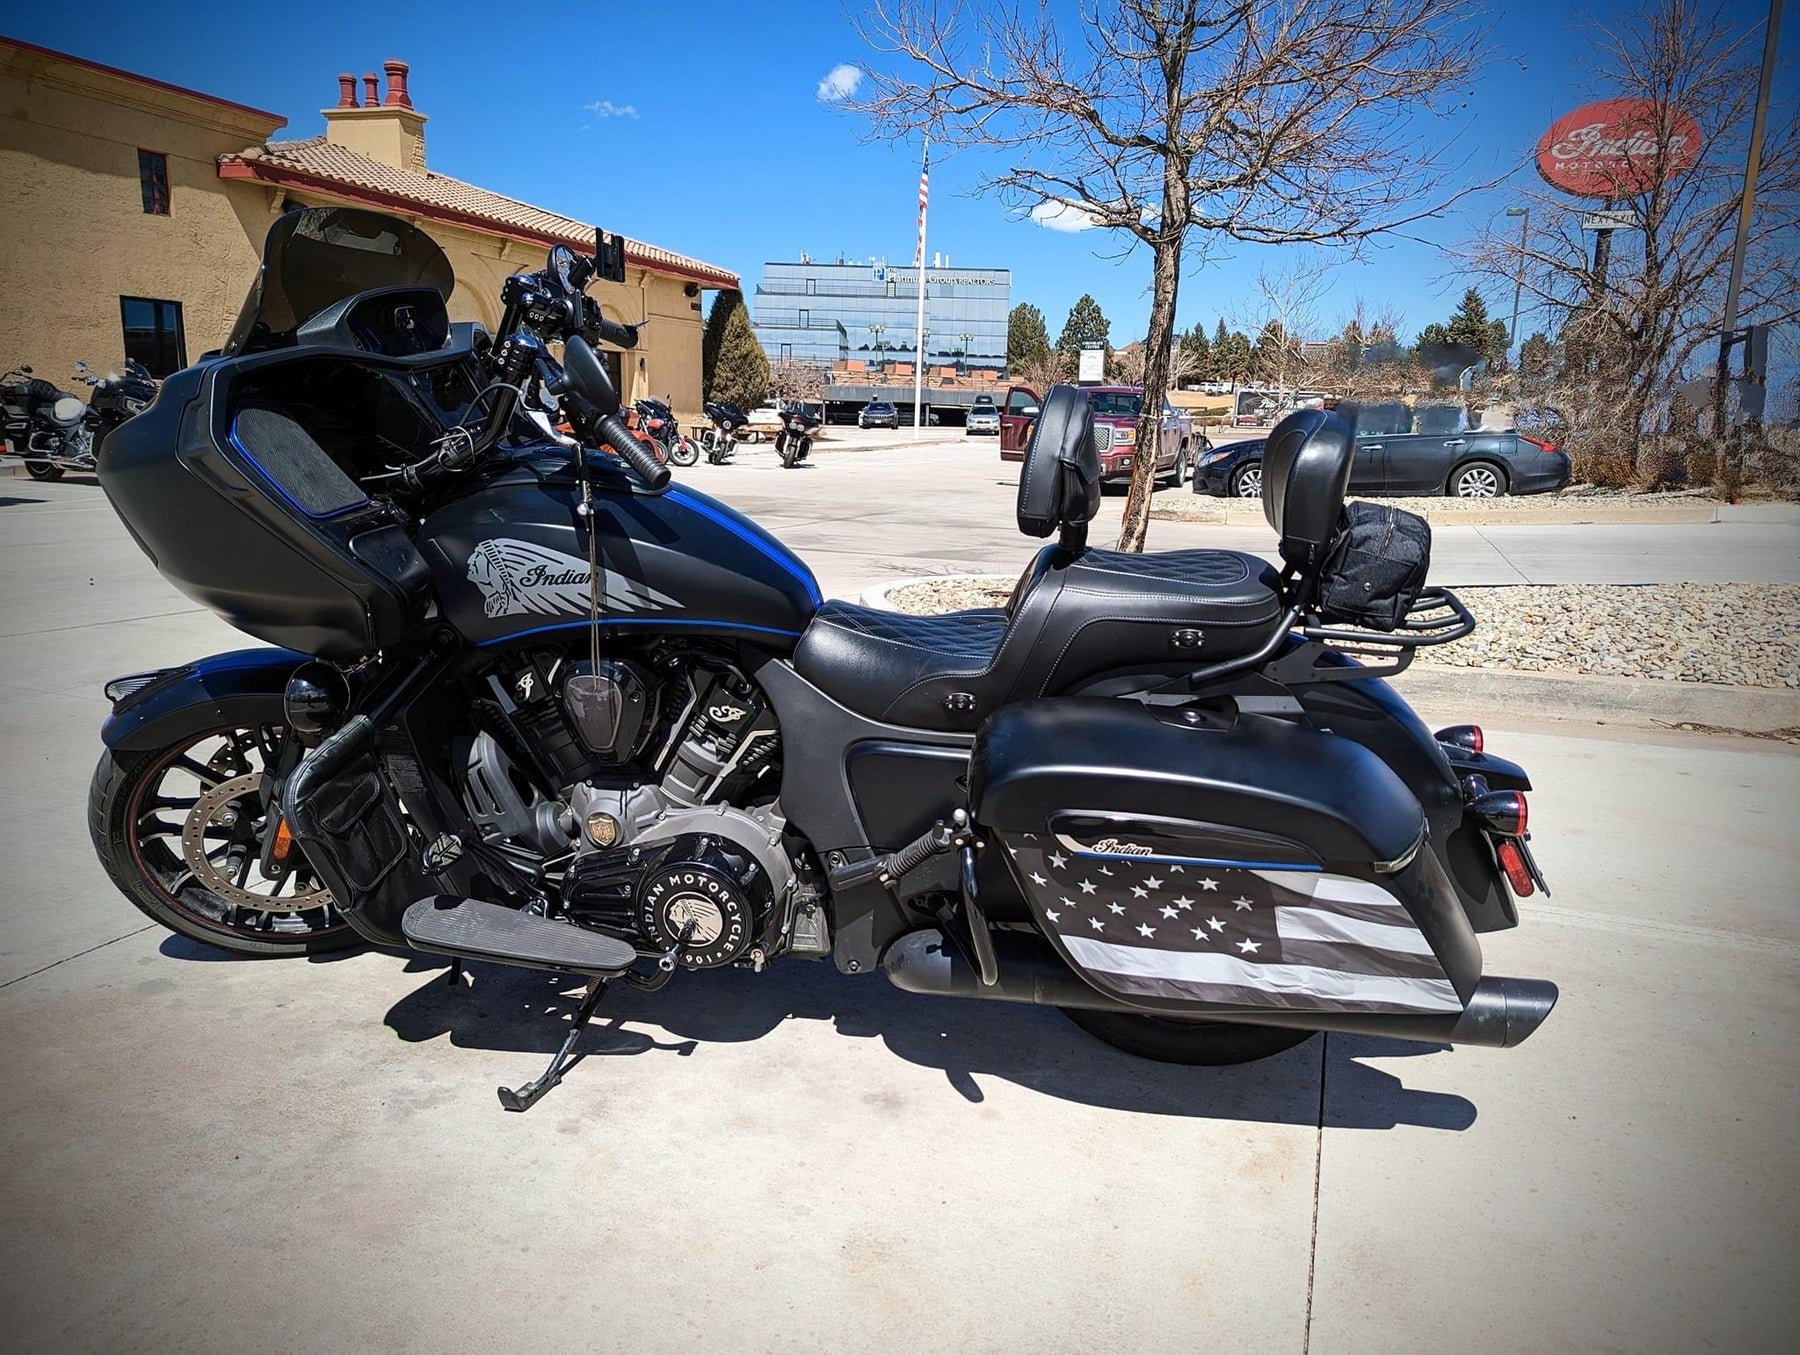
American Flag Decal Set for new style Indian Saddlebags
Size: Fits the side of the left and right saddlebag for the newer style (non-rounded) Indian hard bags. For models that have the plastic bag guard on the front/bottom corner, the guard must be removed to use these decals. (See Mock-up images)

Weatherproof laminated decals are self adhesive.
How To Install: <-Visit our How To page for videos
We recommend using the wet method to install larger decals: A spray bottle with water and dish soap can be used to wet the tank and the back of the decal, allowing you to slide the decal into place. To get the proper soap/water mix, start with a squirt of soap into your spray bottle. Shake it up and then spray it on your hand. Rub your finger tips together. You should feel the slipperiness of the soap. If it just feels like water, add more soap and try again. Once you have it aligned properly, use a squeegee or some non-abrasive tool (even your fingers) to push the moisture out from behind the decal and it will adhere to your tank. A plastic putty scraper with a thin cloth wrapped around it will work great and prevent scratching your decals.


American Flag B&W Decal Set - New Style Indian Saddlebags
Regular price $150.00
Shipping calculated at checkout.
Stock Notice: (may take approximately two-three weeks before shipping if not in stock at the time of your order)
American Flag Decal Set for new style Indian Saddlebags
Size: Fits the side of the left and right saddlebag for the newer style (non-rounded) Indian hard bags. For models that have the plastic bag guard on the front/bottom corner, the guard must be removed to use these decals. (See Mock-up images)

Weatherproof laminated decals are self adhesive.
How To Install: <-Visit our How To page for videos
We recommend using the wet method to install larger decals: A spray bottle with water and dish soap can be used to wet the tank and the back of the decal, allowing you to slide the decal into place. To get the proper soap/water mix, start with a squirt of soap into your spray bottle. Shake it up and then spray it on your hand. Rub your finger tips together. You should feel the slipperiness of the soap. If it just feels like water, add more soap and try again. Once you have it aligned properly, use a squeegee or some non-abrasive tool (even your fingers) to push the moisture out from behind the decal and it will adhere to your tank. A plastic putty scraper with a thin cloth wrapped around it will work great and prevent scratching your decals.


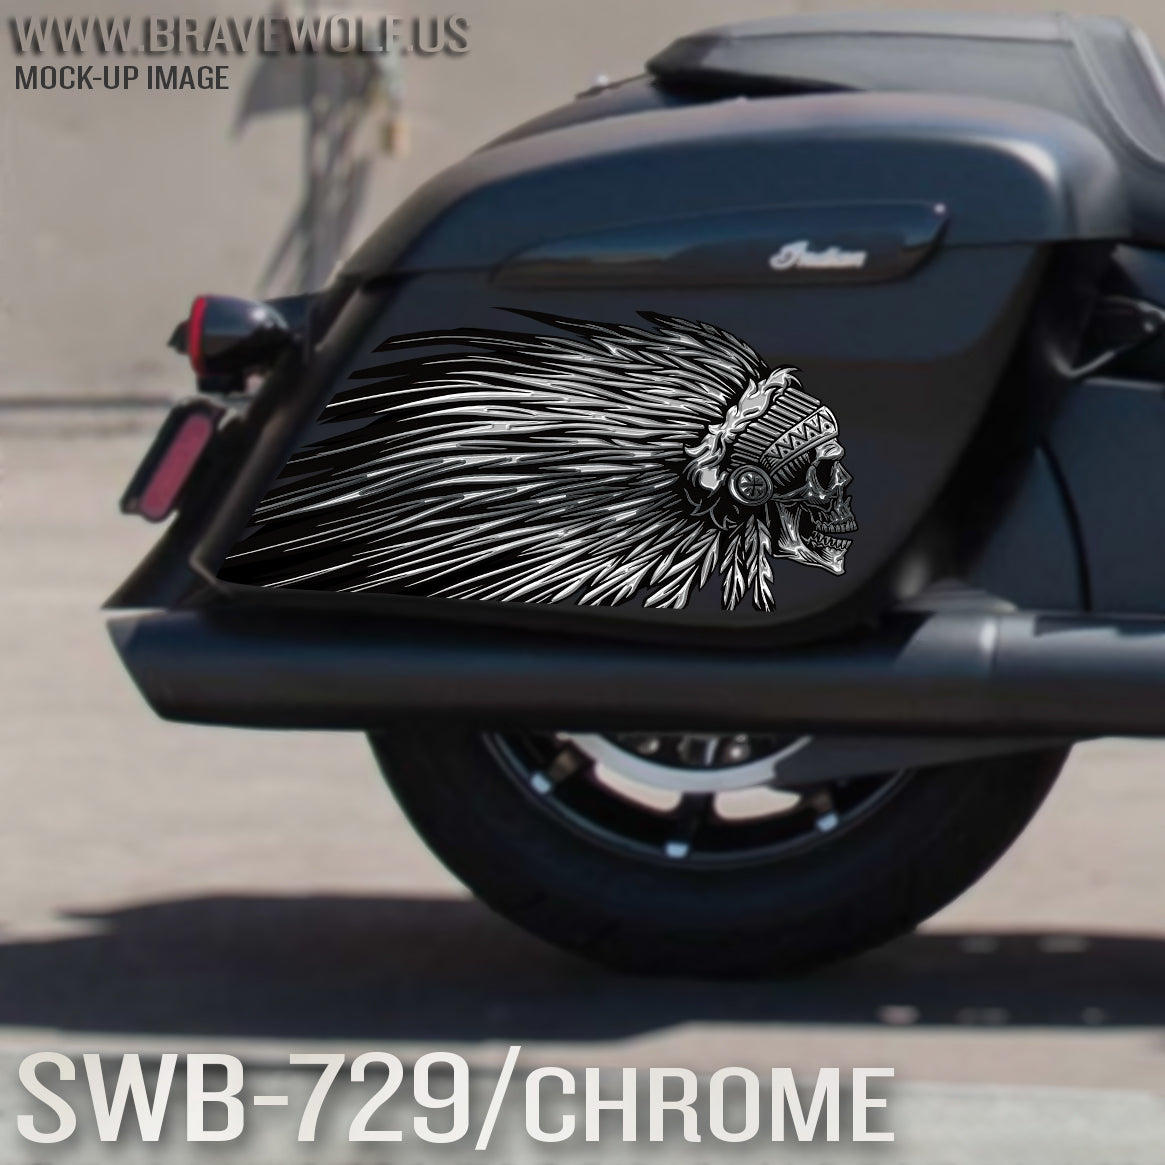
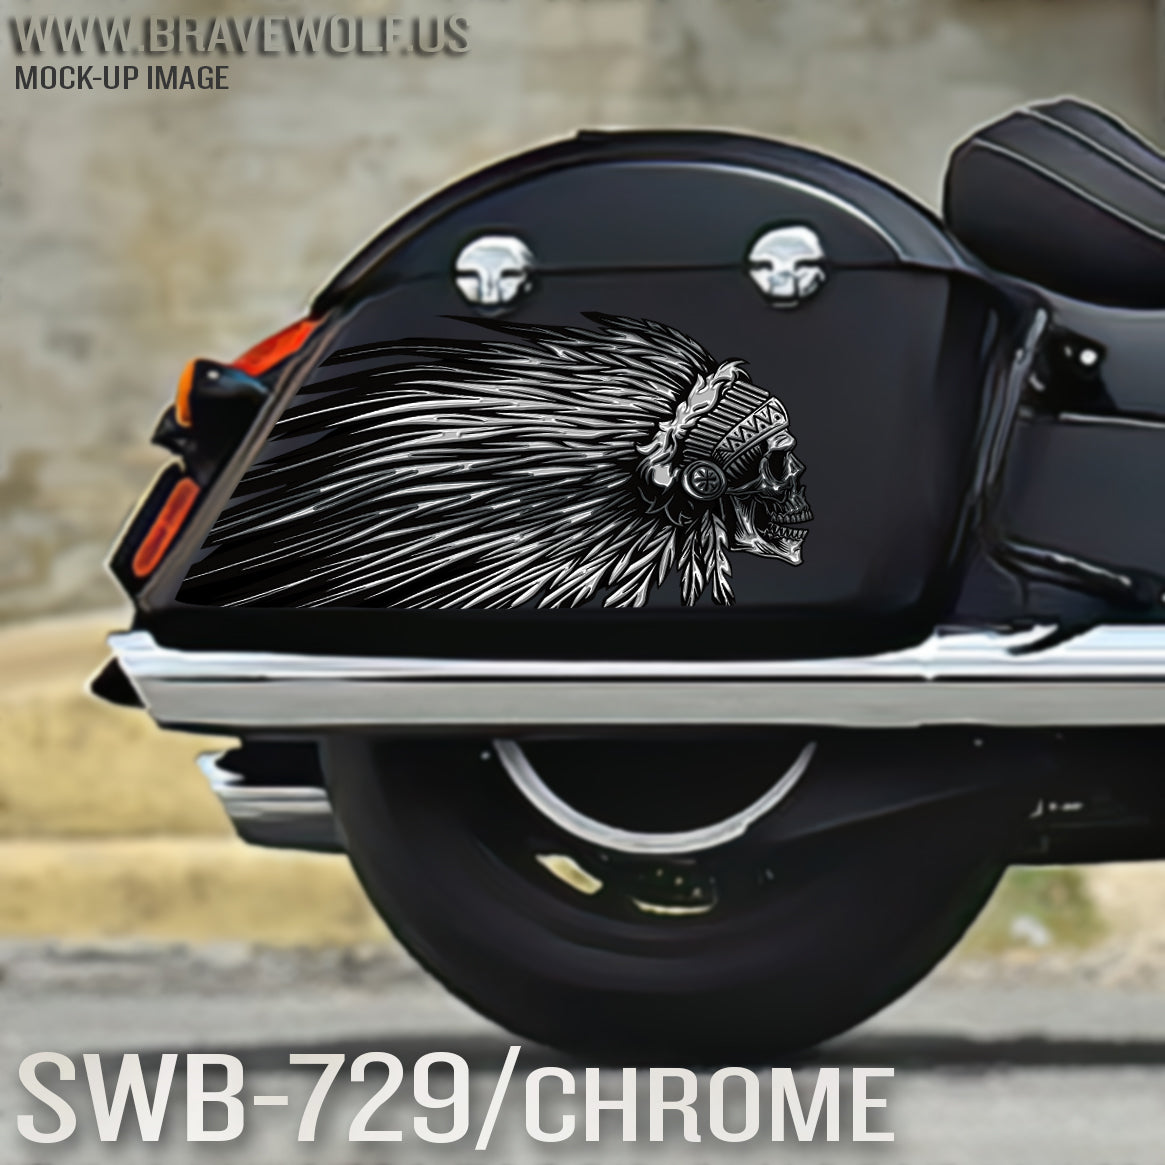


Saddlebag Decals-SWB729-Chrome
Regular price $180.00
Shipping calculated at checkout.
Stock Notice - Special Order (may take approximately 2-3 weeks before shipping if not in stock at time of order)
Our saddlebag decals are made from premium weatherproof hi-tack vinyl with a long lifespan that will keep them looking new for years. They are available in two finishes, heavy-duty 12 mil laminated Gloss (looks like it's painted on), or a heavy-duty sandy matte textured premium finish.
|
Fitment Guide: Fits both styles of Indian OEM saddlebags (rounded and squared). Also fits the Challenger & Pursuit when the plastic bag guard is removed. |
Installation:
Installing our decals is easy to do yourself at home. We recommend removing all of the excess decal material (the background image) before installing the decals. This will allow you to dispose of all the small cut-out pieces so that the pieces do not get trapped underneath your decal when installing it on the bike. Once you have all of the small pieces and background removed, you can use the "wet method" to install the decals to your saddlebags. The wet method involves using a spray bottle of water with a couple drops of dish soap in the mixture and spraying the surface of your saddlebags to wet the entire surface. Then carefully remove the backing from your decal and use the spray bottle to wet the adhesive side of the decal. Now you can gently place the decal on your saddlebag. Because the surfaces are wet, you can pull the decal up to reposition it until you get it where you want it. Once it's in place, use a squeegee or other object such as a credit card wrapped in a microfiber towel to squeeze the water out from behind the decal. You can also use your hands to do this. You should take care not to use a hard/abrasive object that can scratch the decals or your bike's paint. The high-tack adhesive will begin to set/adhere to the bike as soon as the liquid is push out from behind the decal. Use caution to ensure the towel or object you are using does not catch any edges of the decal and pull it off your bike. If you take your time and be gentle during installation, it should be an easy process. A hair dryer can be used to speed up the drying process if needed.
Feel free to visit our How-To page on the website to watch a "wet method" installation video.


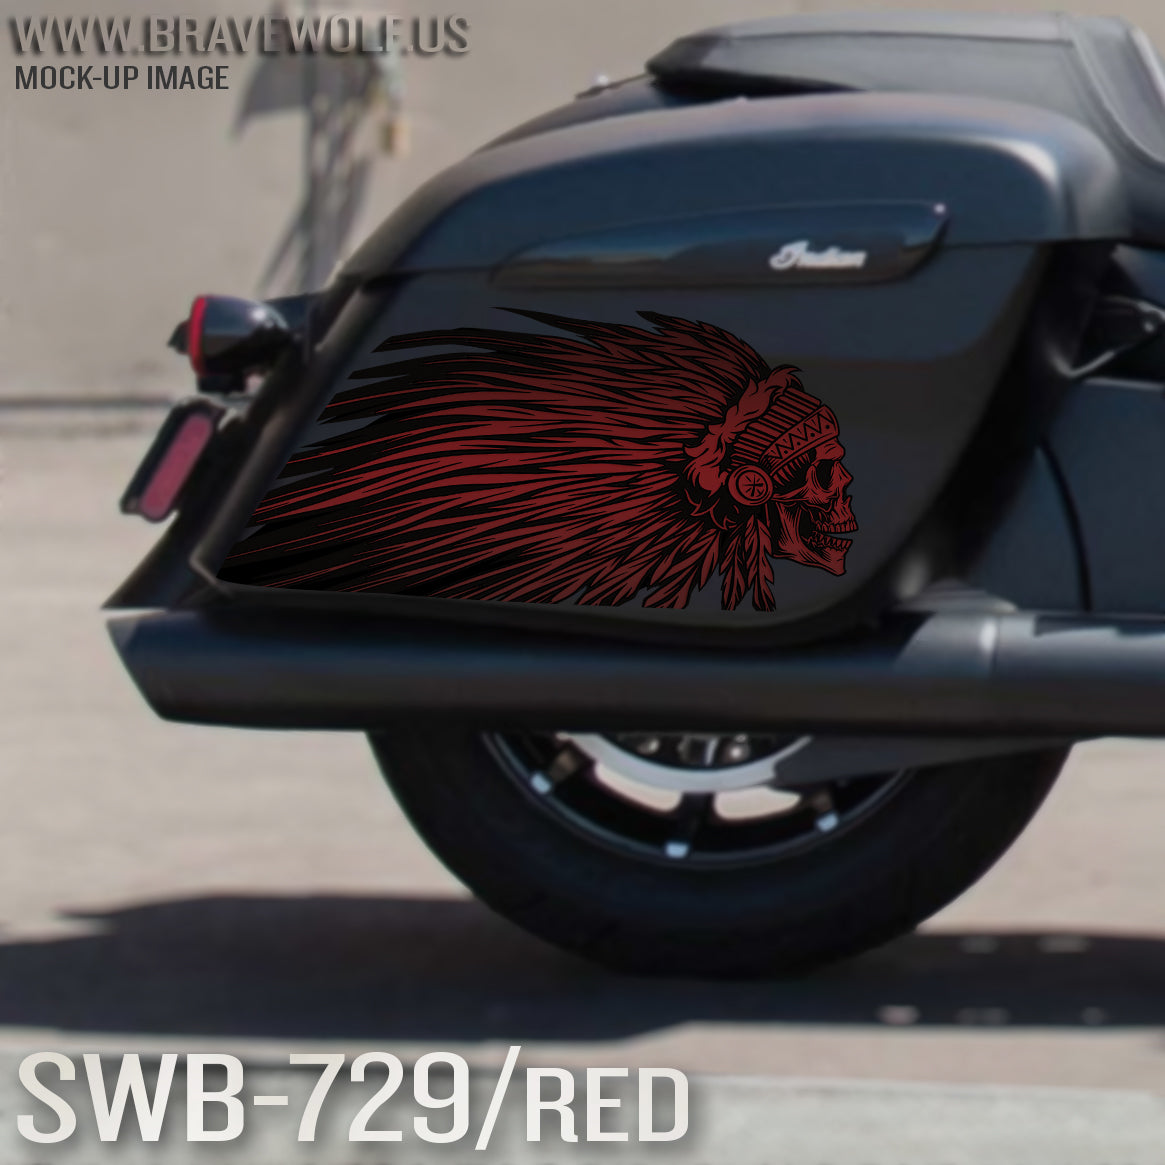

Saddlebag Decals-SWB729-Red
Regular price $180.00
Shipping calculated at checkout.
Stock Notice: (may take approximately 2-3 weeks before shipping if not in stock at the time of your order)
Our saddlebag decals are made from premium weatherproof hi-tack vinyl with a long lifespan that will keep them looking new for years. They are available in two finishes, heavy-duty 12 mil laminated Gloss (looks like it's painted on), or a heavy-duty sandy matte textured premium finish.
|
Fitment Guide: Fits both styles of Indian OEM saddlebags (rounded and squared). Also fits the Challenger & Pursuit when the plastic bag guard is removed. |
Installation:
Installing our decals is easy to do yourself at home. We recommend removing all of the excess decal material (the background image) before installing the decals. This will allow you to dispose of all the small cut-out pieces so that the pieces do not get trapped underneath your decal when installing it on the bike. Once you have all of the small pieces and background removed, you can use the "wet method" to install the decals to your saddlebags. The wet method involves using a spray bottle of water with a couple drops of dish soap in the mixture and spraying the surface of your saddlebags to wet the entire surface. Then carefully remove the backing from your decal and use the spray bottle to wet the adhesive side of the decal. Now you can gently place the decal on your saddlebag. Because the surfaces are wet, you can pull the decal up to reposition it until you get it where you want it. Once it's in place, use a squeegee or other object such as a credit card wrapped in a microfiber towel to squeeze the water out from behind the decal. You can also use your hands to do this. You should take care not to use a hard/abrasive object that can scratch the decals or your bike's paint. The high-tack adhesive will begin to set/adhere to the bike as soon as the liquid is push out from behind the decal. Use caution to ensure the towel or object you are using does not catch any edges of the decal and pull it off your bike. If you take your time and be gentle during installation, it should be an easy process. A hair dryer can be used to speed up the drying process if needed.
Feel free to visit our How-To page on the website to watch a "wet method" installation video TAB Performance made while installing our Zombie decals.


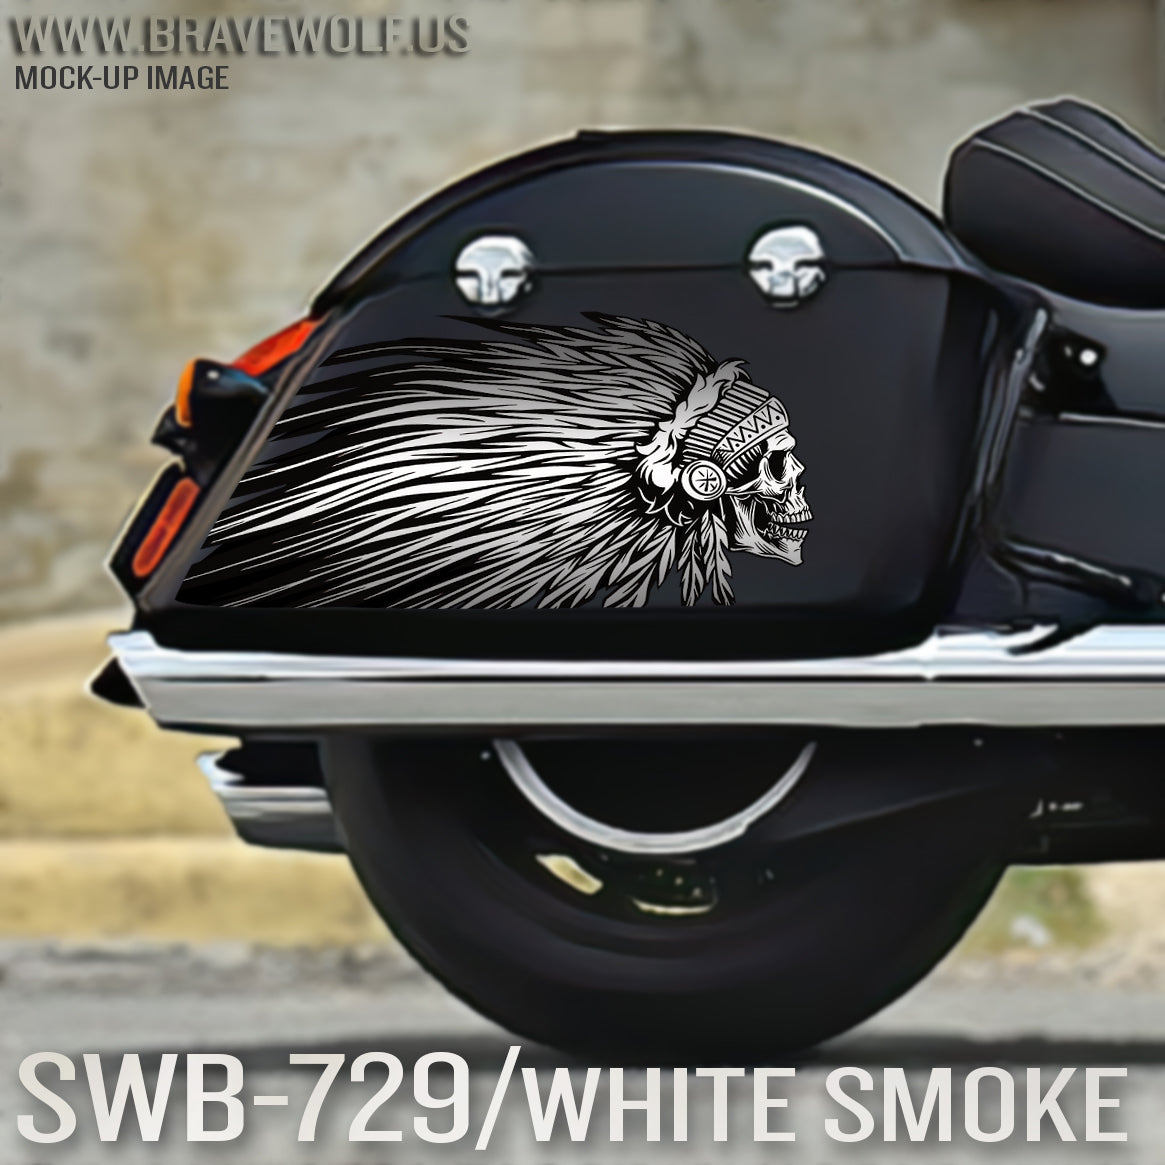
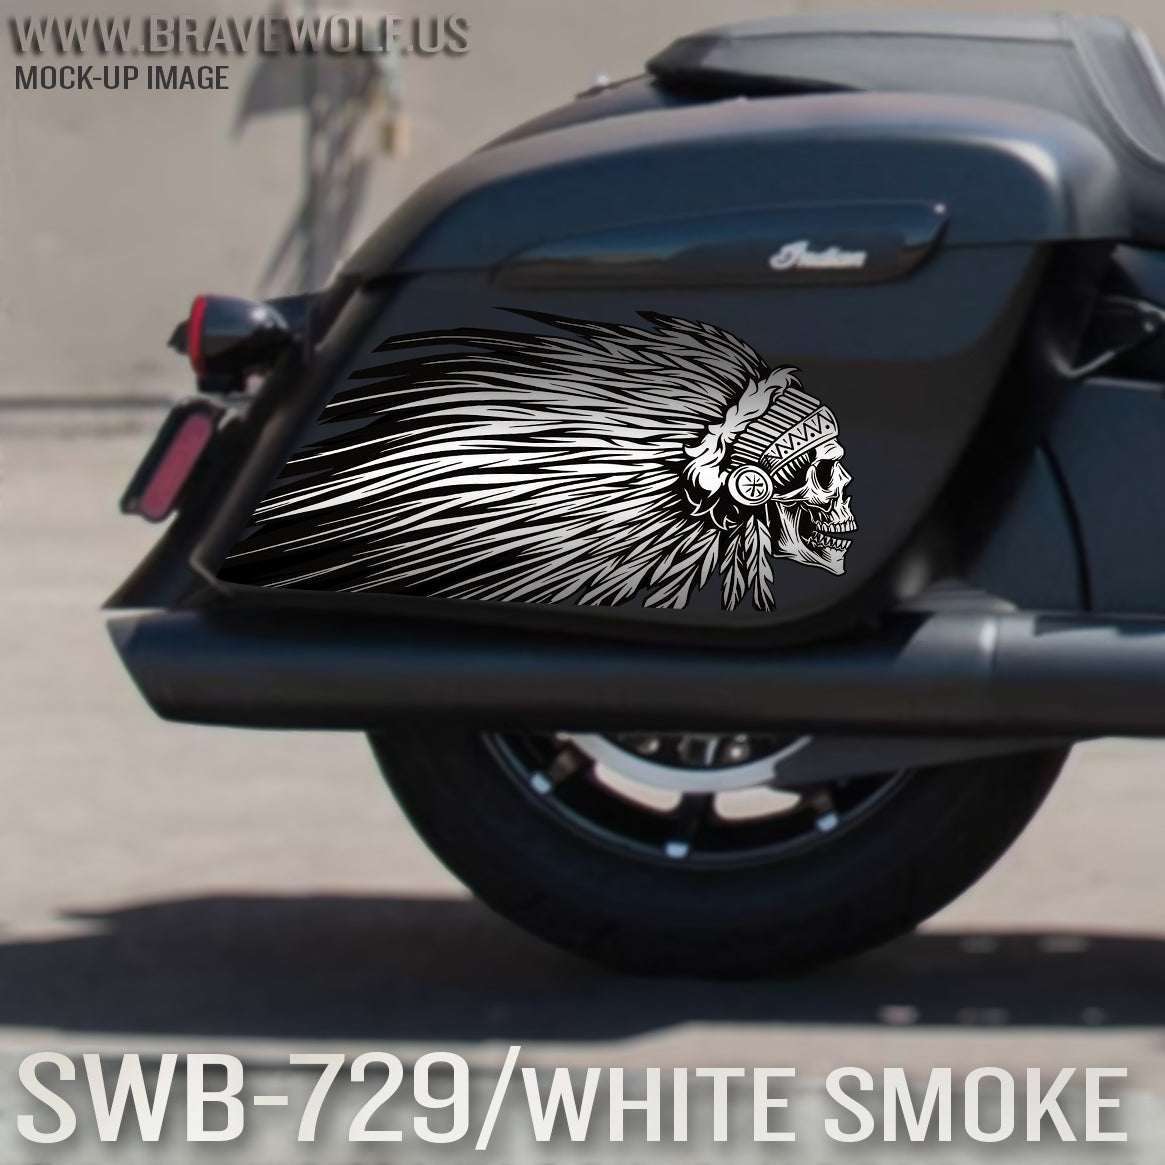
Indian Saddlebag Decals-SWB729-WhiteSmoke
Regular price $180.00
Shipping calculated at checkout.
Stock Notice: (may take approximately 2-3 weeks before shipping if not in stock at the time of your order)
Our saddlebag decals are made from premium weatherproof hi-tack vinyl with a long lifespan that will keep them looking new for years. They are available in two finishes, heavy-duty 12 mil laminated Gloss (looks like it's painted on), or a heavy-duty sandy matte textured premium finish.
|
Fitment Guide: Fits both styles of Indian OEM saddlebags (rounded and squared). Also fits the Challenger & Pursuit when the plastic bag guard is removed. |
Installation:
Installing our decals is easy to do yourself at home. We recommend removing all of the excess decal material (the background image) before installing the decals. This will allow you to dispose of all the small cut-out pieces so that the pieces do not get trapped underneath your decal when installing it on the bike. Once you have all of the small pieces and background removed, you can use the "wet method" to install the decals to your saddlebags. The wet method involves using a spray bottle of water with a couple drops of dish soap in the mixture and spraying the surface of your saddlebags to wet the entire surface. Then carefully remove the backing from your decal and use the spray bottle to wet the adhesive side of the decal. Now you can gently place the decal on your saddlebag. Because the surfaces are wet, you can pull the decal up to reposition it until you get it where you want it. Once it's in place, use a squeegee or other object such as a credit card wrapped in a microfiber towel to squeeze the water out from behind the decal. You can also use your hands to do this. You should take care not to use a hard/abrasive object that can scratch the decals or your bike's paint. The high-tack adhesive will begin to set/adhere to the bike as soon as the liquid is push out from behind the decal. Use caution to ensure the towel or object you are using does not catch any edges of the decal and pull it off your bike. If you take your time and be gentle during installation, it should be an easy process. A hair dryer can be used to speed up the drying process if needed.
Feel free to visit our How-To page on the website to watch a "wet method" installation video TAB Performance made while installing our Zombie decals.


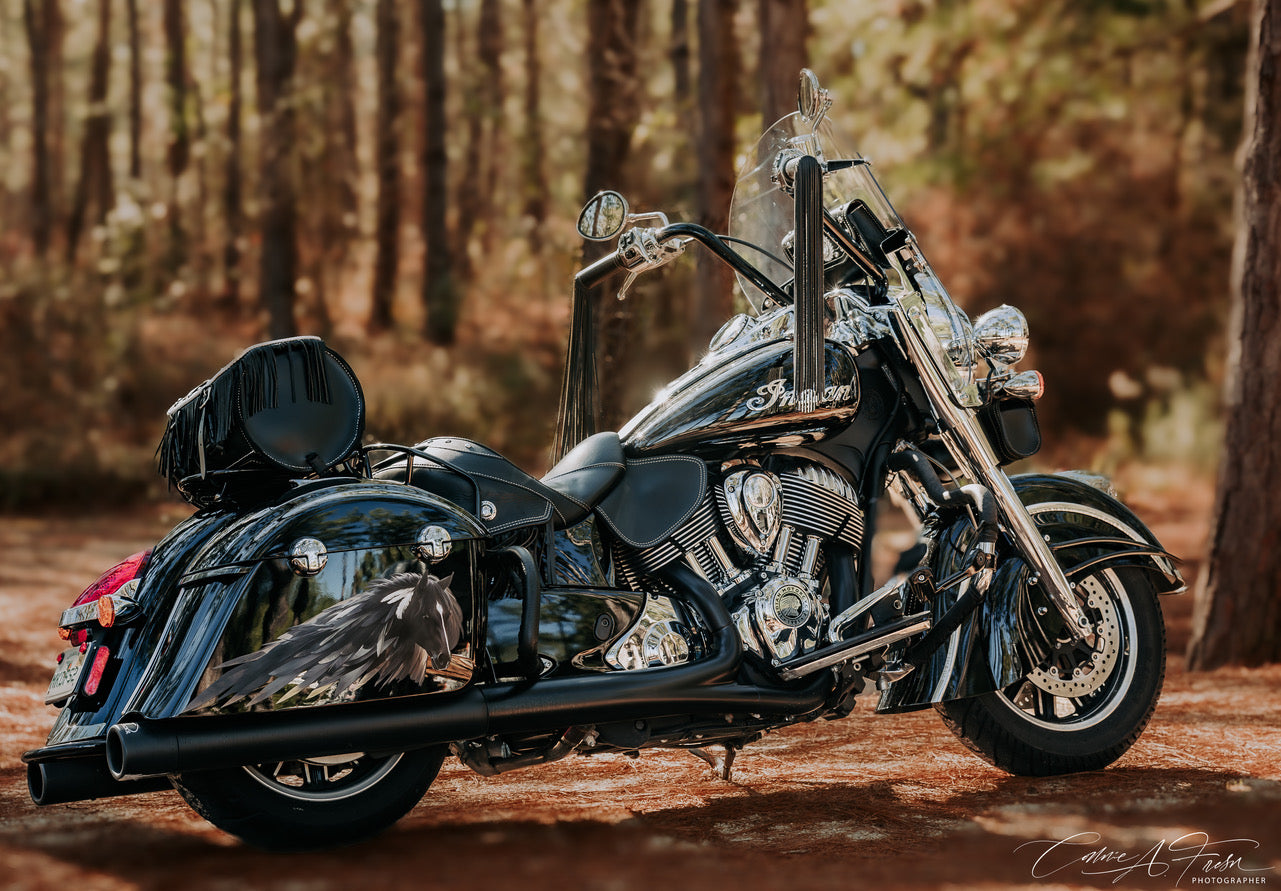
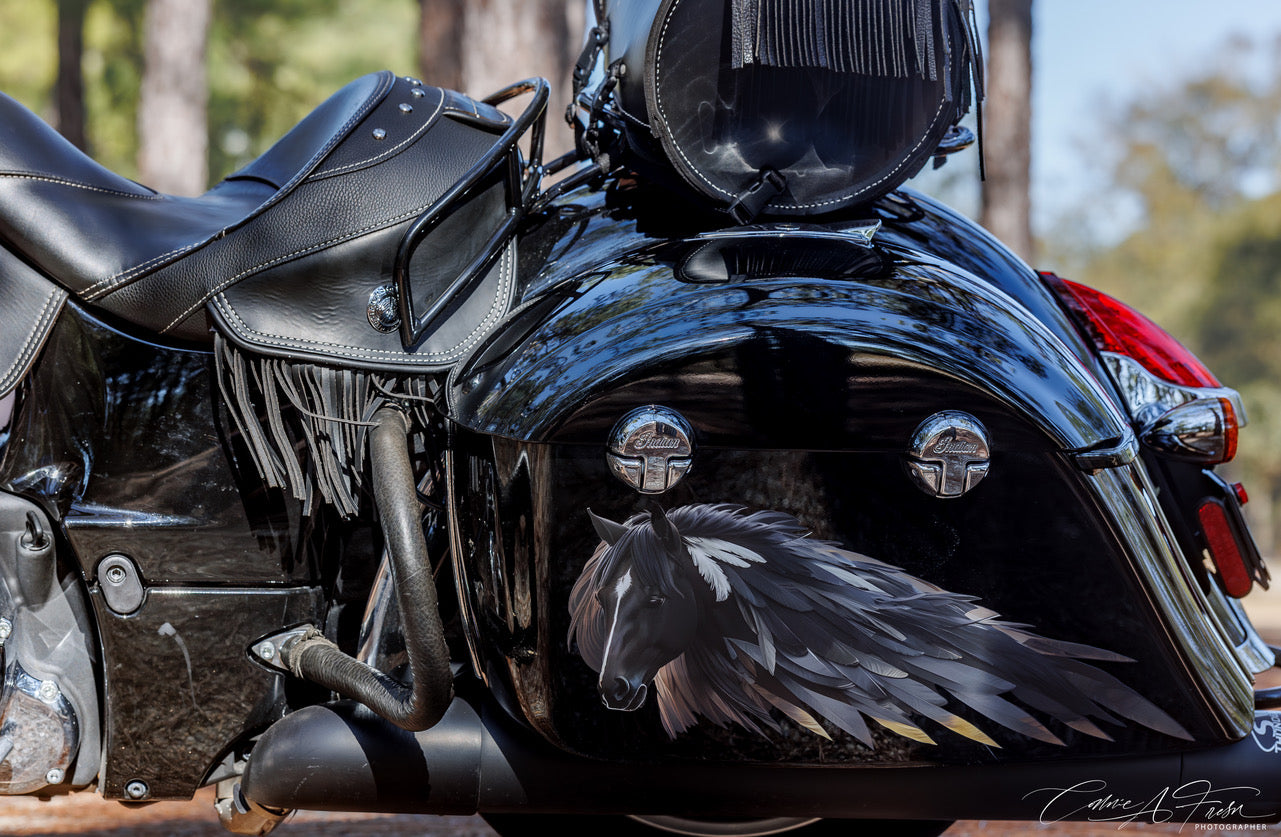
Dark Horse 2023 (color) Saddlebag Decal Set for Indian Motorcycles
Regular price $160.00
Shipping calculated at checkout.
Stock Notice: (may take approximately 2-3 weeks before shipping if not in stock at time of order)
Our saddlebag decals are made from premium weatherproof hi-tack vinyl with a long lifespan that will keep them looking new for years. They are available in two finishes, heavy-duty 12 mil laminated Gloss (looks like it's painted on), or a heavy-duty sandy matte textured premium finish.
|
Fitment Guide: Fits both styles of Indian OEM saddlebags (rounded and squared). Also fits the Challenger & Pursuit when the plastic bag guard is removed. |
Installation:
Installing our decals is easy to do yourself at home. We recommend removing all of the excess decal material (the background image) before installing the decals. This will allow you to dispose of all the small cut-out pieces so that the pieces do not get trapped underneath your decal when installing it on the bike. Once you have all of the small pieces and background removed, you can use the "wet method" to install the decals to your saddlebags. The wet method involves using a spray bottle of water with a couple drops of dish soap in the mixture and spraying the surface of your saddlebags to wet the entire surface. Then carefully remove the backing from your decal and use the spray bottle to wet the adhesive side of the decal. Now you can gently place the decal on your saddlebag. Because the surfaces are wet, you can pull the decal up to reposition it until you get it where you want it. Once it's in place, use a squeegee or other object such as a credit card wrapped in a microfiber towel to squeeze the water out from behind the decal. You can also use your hands to do this. You should take care not to use a hard/abrasive object that can scratch the decals or your bike's paint. The high-tack adhesive will begin to set/adhere to the bike as soon as the liquid is push out from behind the decal. Use caution to ensure the towel or object you are using does not catch any edges of the decal and pull it off your bike. If you take your time and be gentle during installation, it should be an easy process. A hair dryer can be used to speed up the drying process if needed.
Feel free to visit our How-To page on the website to watch a "wet method" installation video.


Ragnarok - New Style Indian Saddlebag Decal Set - B&W
Regular price $180.00
Shipping calculated at checkout.
Stock Notice: (may take approximately 2-3 weeks before shipping if not in stock at the time of your order)
"Ragnarok" depicts Fenrir facing off against Jörmungandr the World Serpent during the apocalyptical events of the Twilight of the Gods.
Our saddlebag decals are made from premium weatherproof hi-tack vinyl with a long lifespan that will keep them looking new for years. They are available in two finishes, heavy-duty 12 mil laminated Gloss (looks like it's painted on), or a heavy-duty sandy matte textured premium finish.
|
Fitment Guide: Fits the new style (squared) Indian OEM saddlebags. Also fits the Challenger & Pursuit when the plastic bag guard is removed. |
Installation:
Installing our decals is easy to do yourself at home. We recommend removing all of the excess decal material (the background image) before installing the decals. This will allow you to dispose of all the small cut-out pieces so that the pieces do not get trapped underneath your decal when installing it on the bike. Once you have all of the small pieces and background removed, you can use the "wet method" to install the decals to your saddlebags. The wet method involves using a spray bottle of water with a couple drops of dish soap in the mixture and spraying the surface of your saddlebags to wet the entire surface. Then carefully remove the backing from your decal and use the spray bottle to wet the adhesive side of the decal. Now you can gently place the decal on your saddlebag. Because the surfaces are wet, you can pull the decal up to reposition it until you get it where you want it. Once it's in place, use a squeegee or other object such as a credit card wrapped in a microfiber towel to squeeze the water out from behind the decal. You can also use your hands to do this. You should take care not to use a hard/abrasive object that can scratch the decals or your bike's paint. The high-tack adhesive will begin to set/adhere to the bike as soon as the liquid is push out from behind the decal. Use caution to ensure the towel or object you are using does not catch any edges of the decal and pull it off your bike. If you take your time and be gentle during installation, it should be an easy process. A hair dryer can be used to speed up the drying process if needed.
Feel free to visit our How-To page on the website to watch a "wet method" installation video.


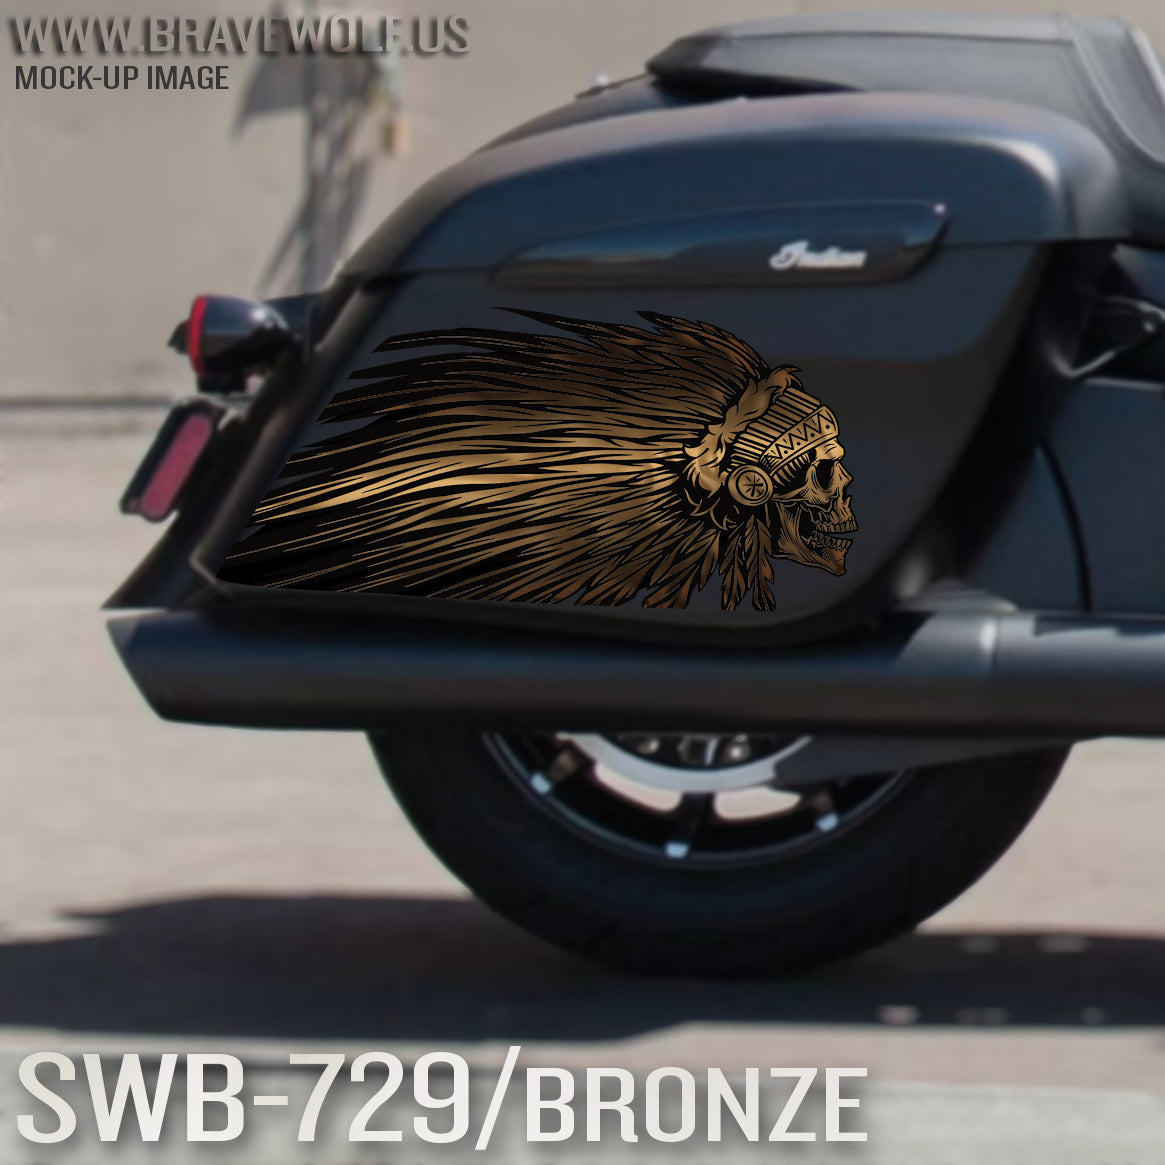
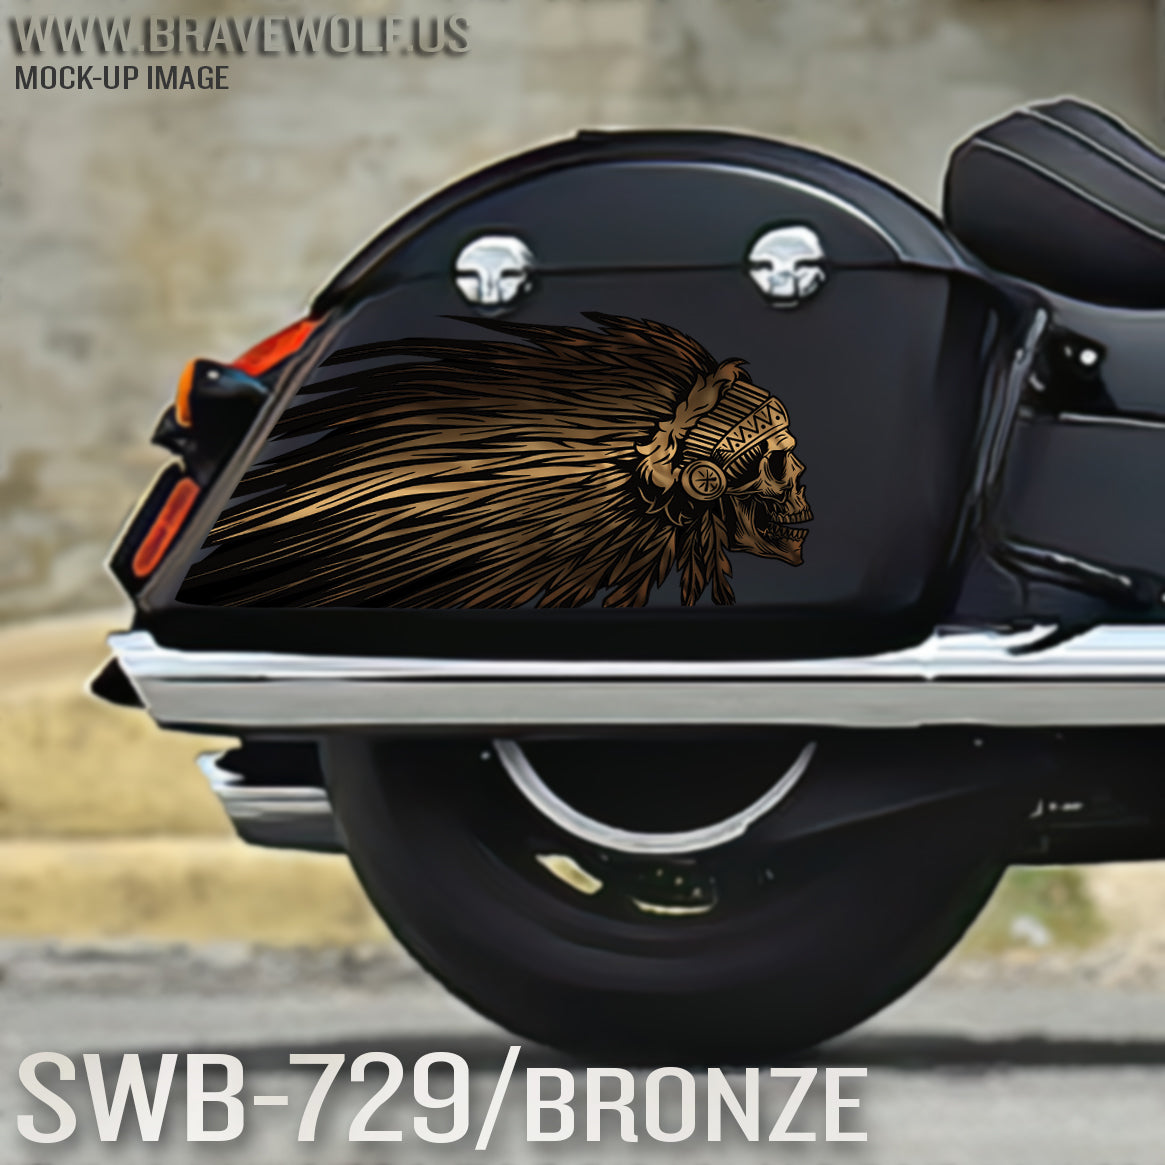
Indian Saddlebag Decals-SWB729-Bronze
Regular price $180.00
Shipping calculated at checkout.
Stock Notice: (may take approximately 2-3 weeks before shipping if not in stock at the time of your order)
Our saddlebag decals are made from premium weatherproof hi-tack vinyl with a long lifespan that will keep them looking new for years. They are available in two finishes, heavy-duty 12 mil laminated Gloss (looks like it's painted on), or a heavy-duty sandy matte textured premium finish.
|
Fitment Guide: Fits both styles of Indian OEM saddlebags (rounded and squared). Also fits the Challenger & Pursuit when the plastic bag guard is removed. |
Installation:
Installing our decals is easy to do yourself at home. We recommend removing all of the excess decal material (the background image) before installing the decals. This will allow you to dispose of all the small cut-out pieces so that the pieces do not get trapped underneath your decal when installing it on the bike. Once you have all of the small pieces and background removed, you can use the "wet method" to install the decals to your saddlebags. The wet method involves using a spray bottle of water with a couple drops of dish soap in the mixture and spraying the surface of your saddlebags to wet the entire surface. Then carefully remove the backing from your decal and use the spray bottle to wet the adhesive side of the decal. Now you can gently place the decal on your saddlebag. Because the surfaces are wet, you can pull the decal up to reposition it until you get it where you want it. Once it's in place, use a squeegee or other object such as a credit card wrapped in a microfiber towel to squeeze the water out from behind the decal. You can also use your hands to do this. You should take care not to use a hard/abrasive object that can scratch the decals or your bike's paint. The high-tack adhesive will begin to set/adhere to the bike as soon as the liquid is push out from behind the decal. Use caution to ensure the towel or object you are using does not catch any edges of the decal and pull it off your bike. If you take your time and be gentle during installation, it should be an easy process. A hair dryer can be used to speed up the drying process if needed.
Feel free to visit our How-To page on the website to watch a "wet method" installation video TAB Performance made while installing our Zombie decals.


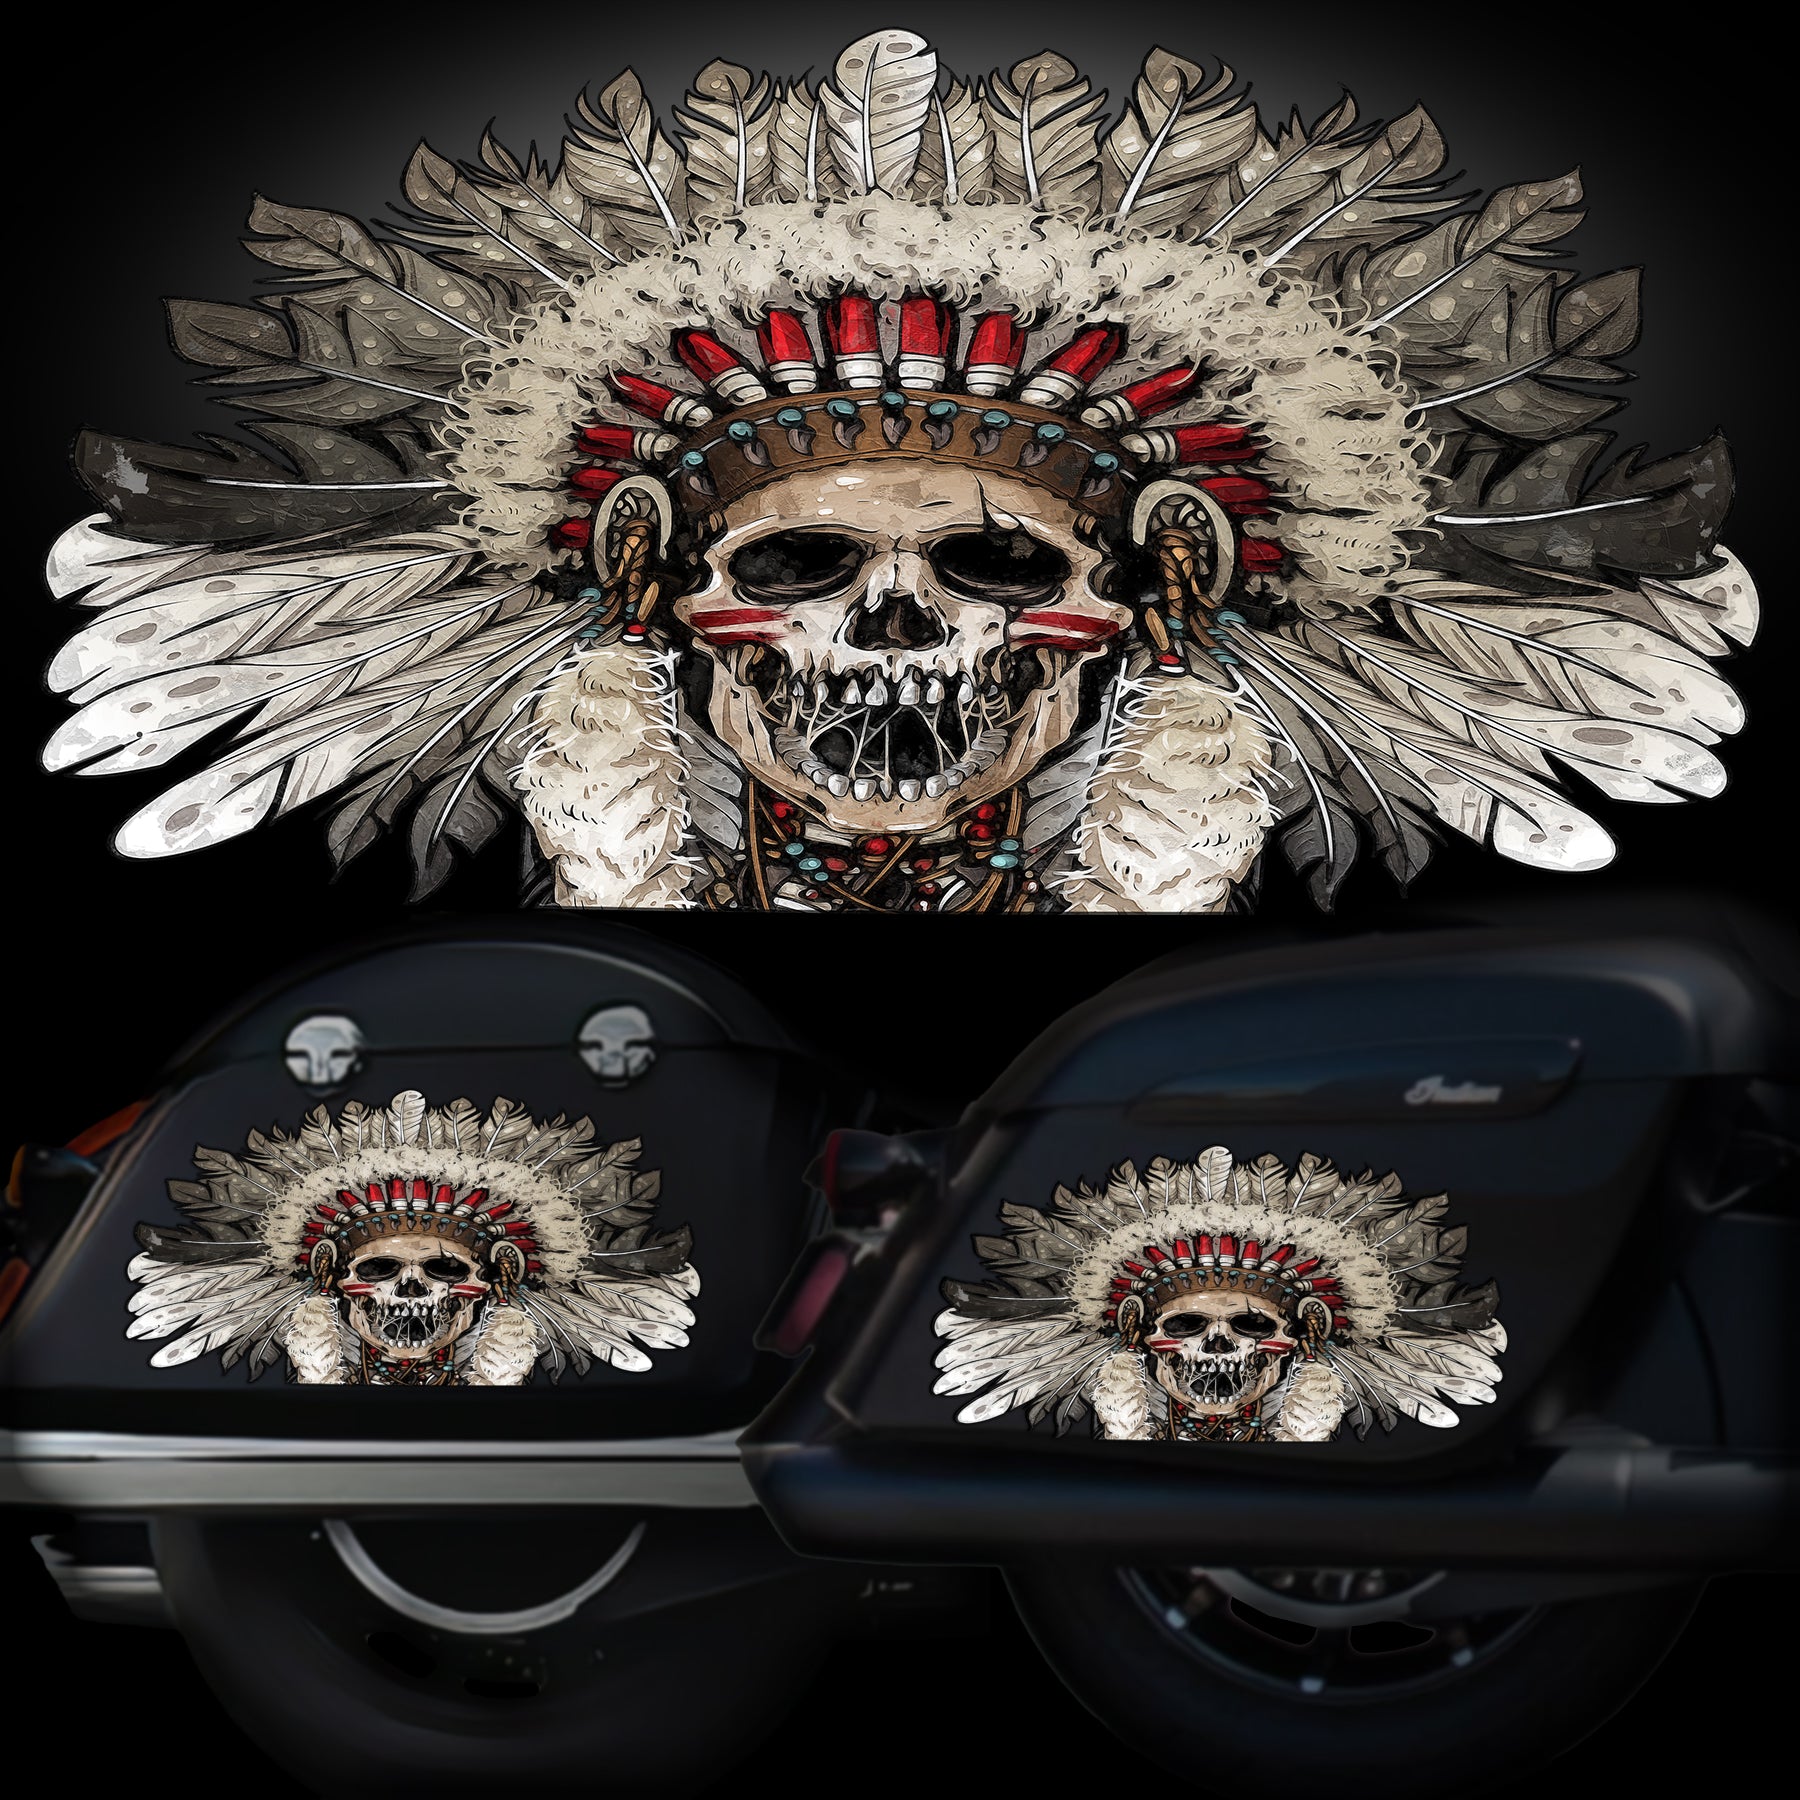
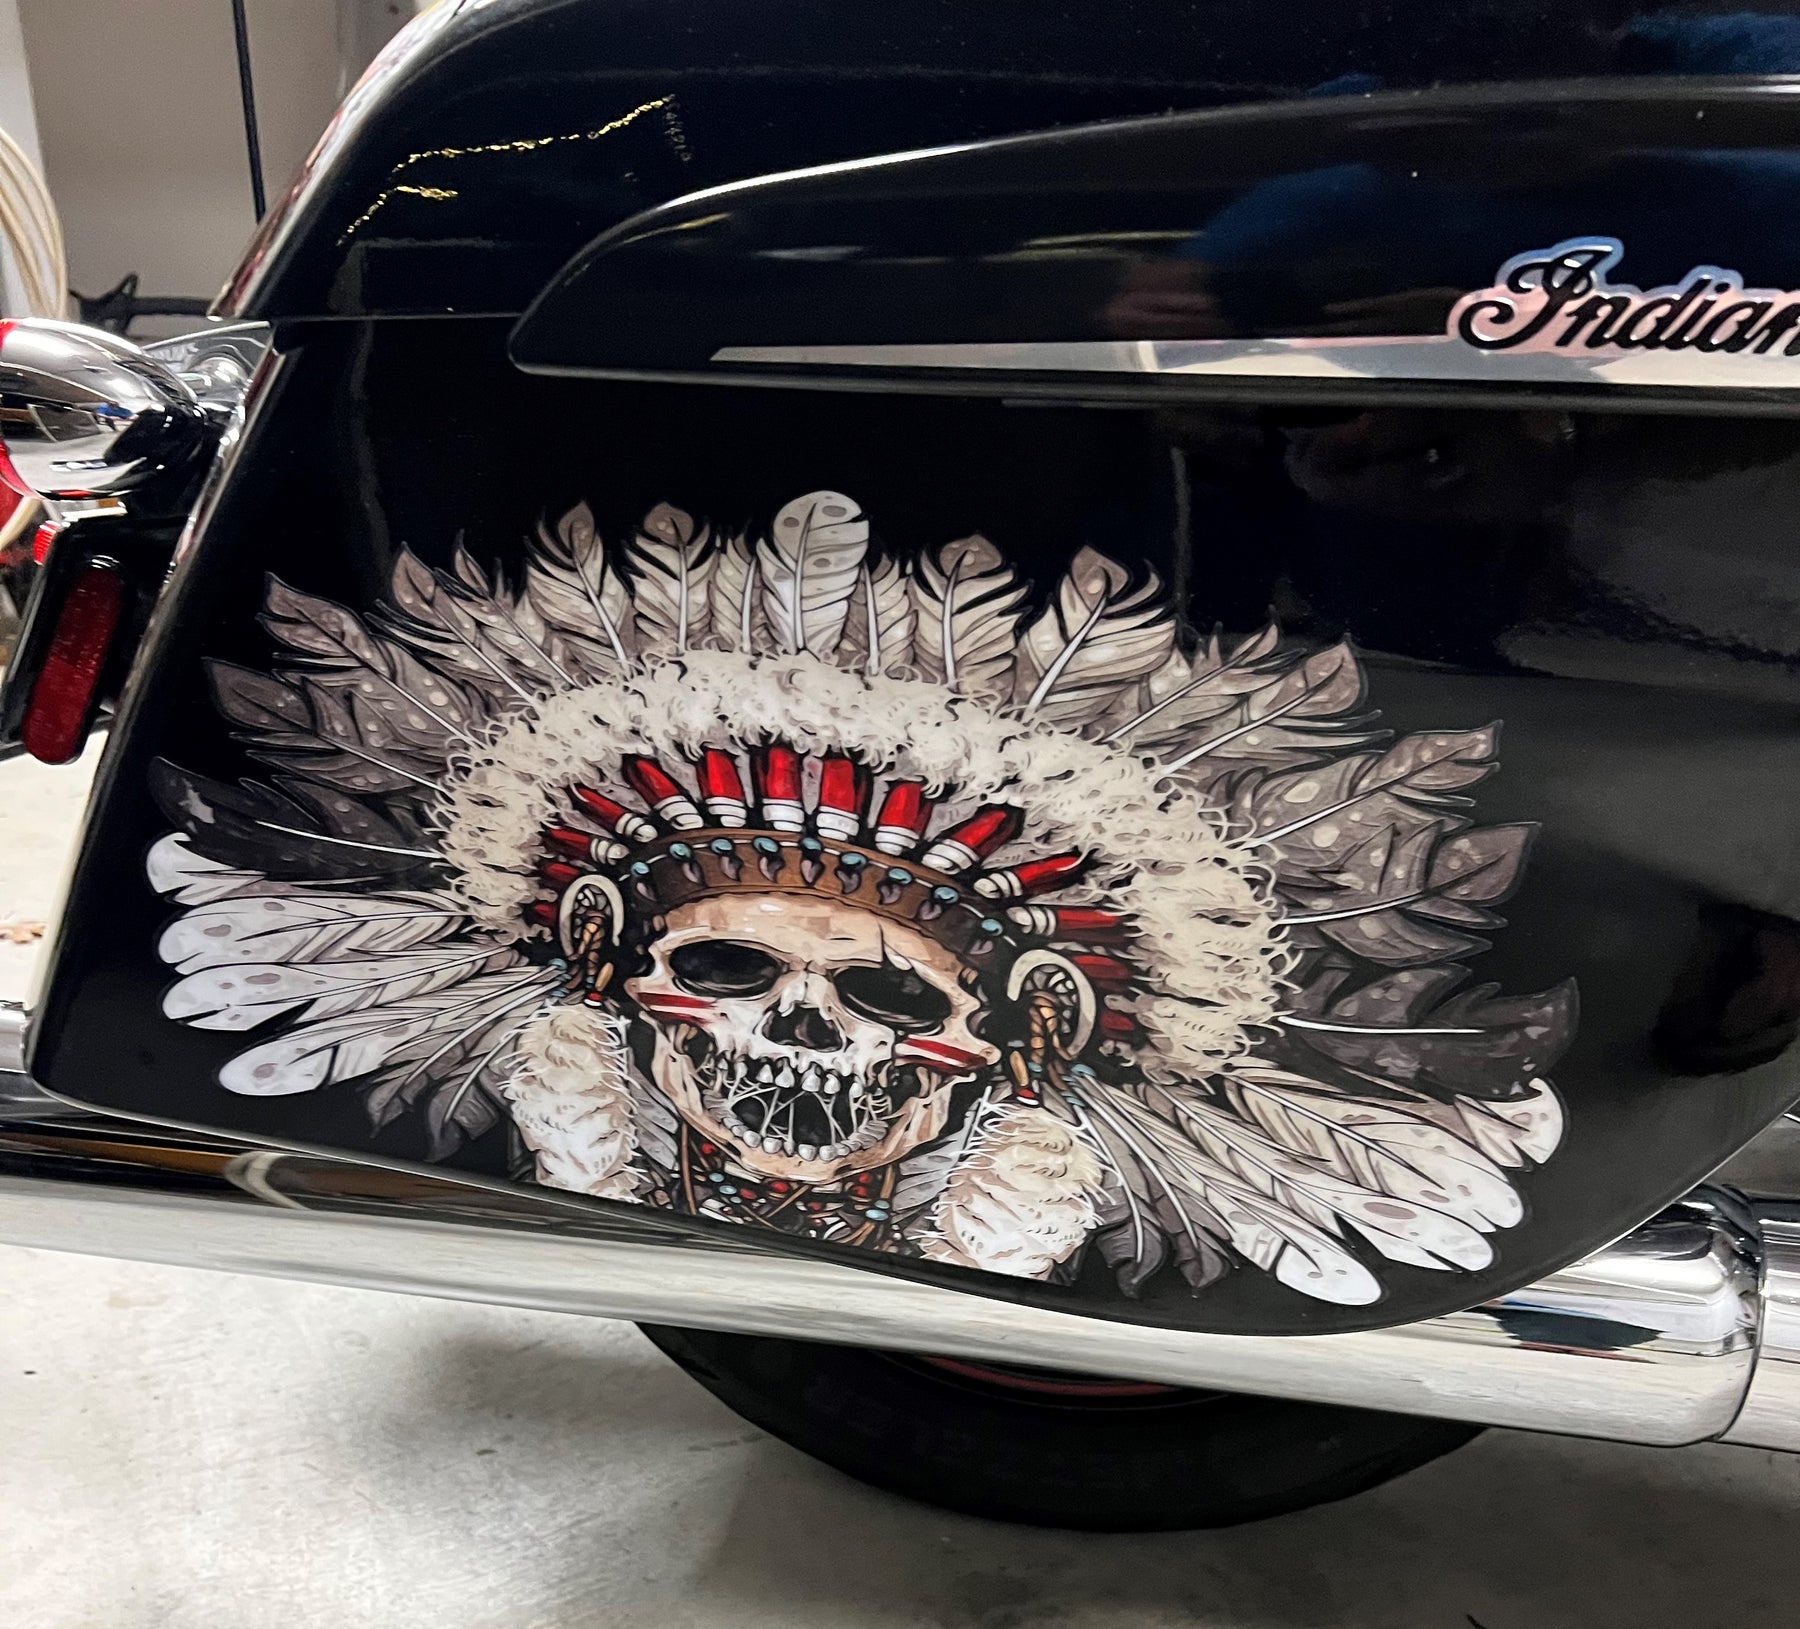
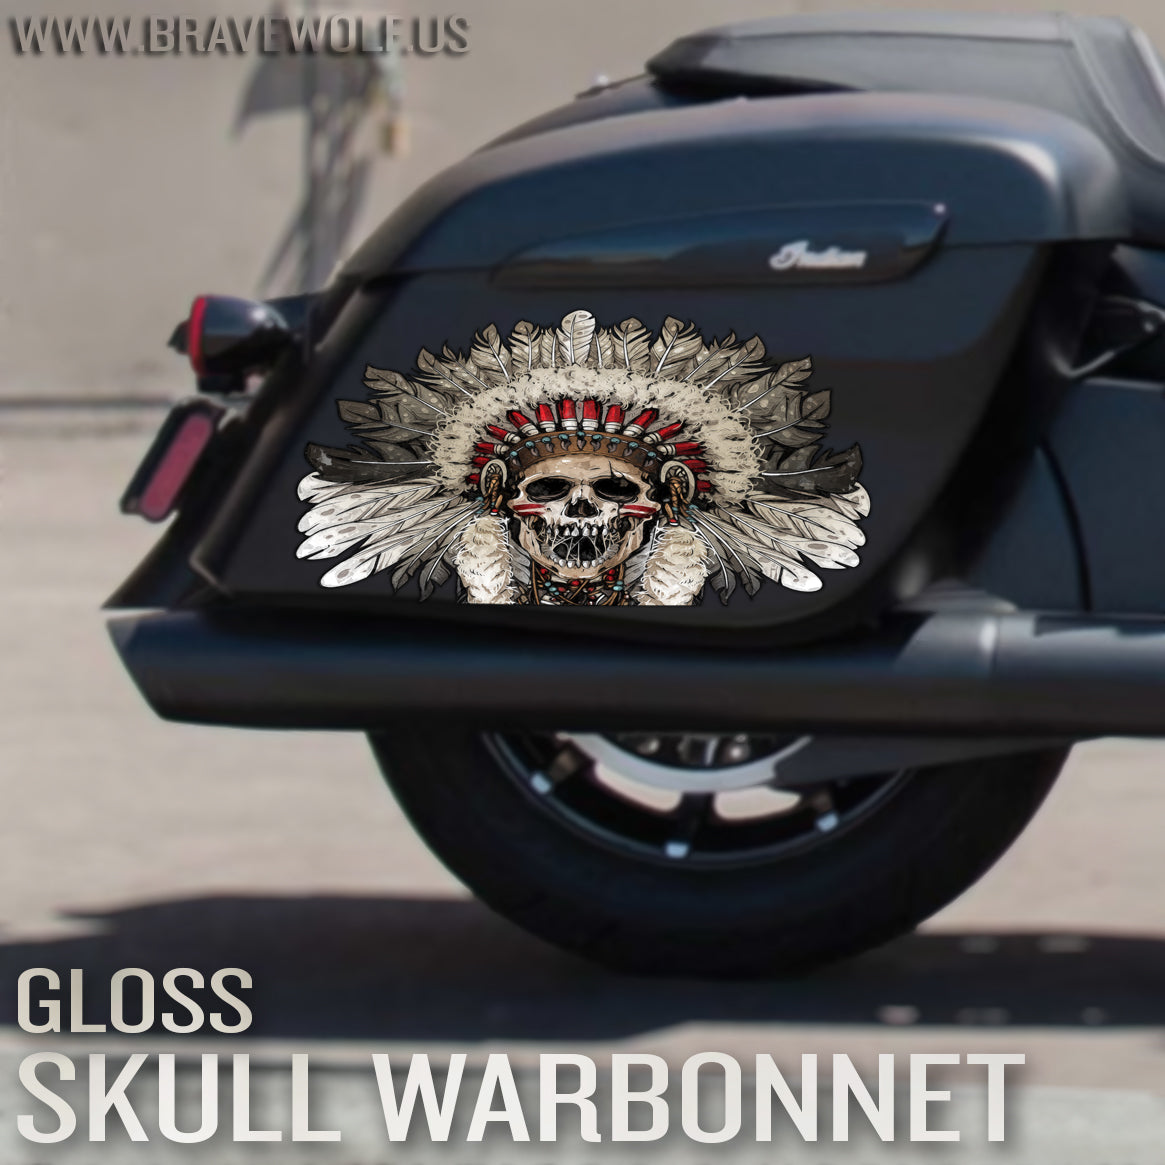
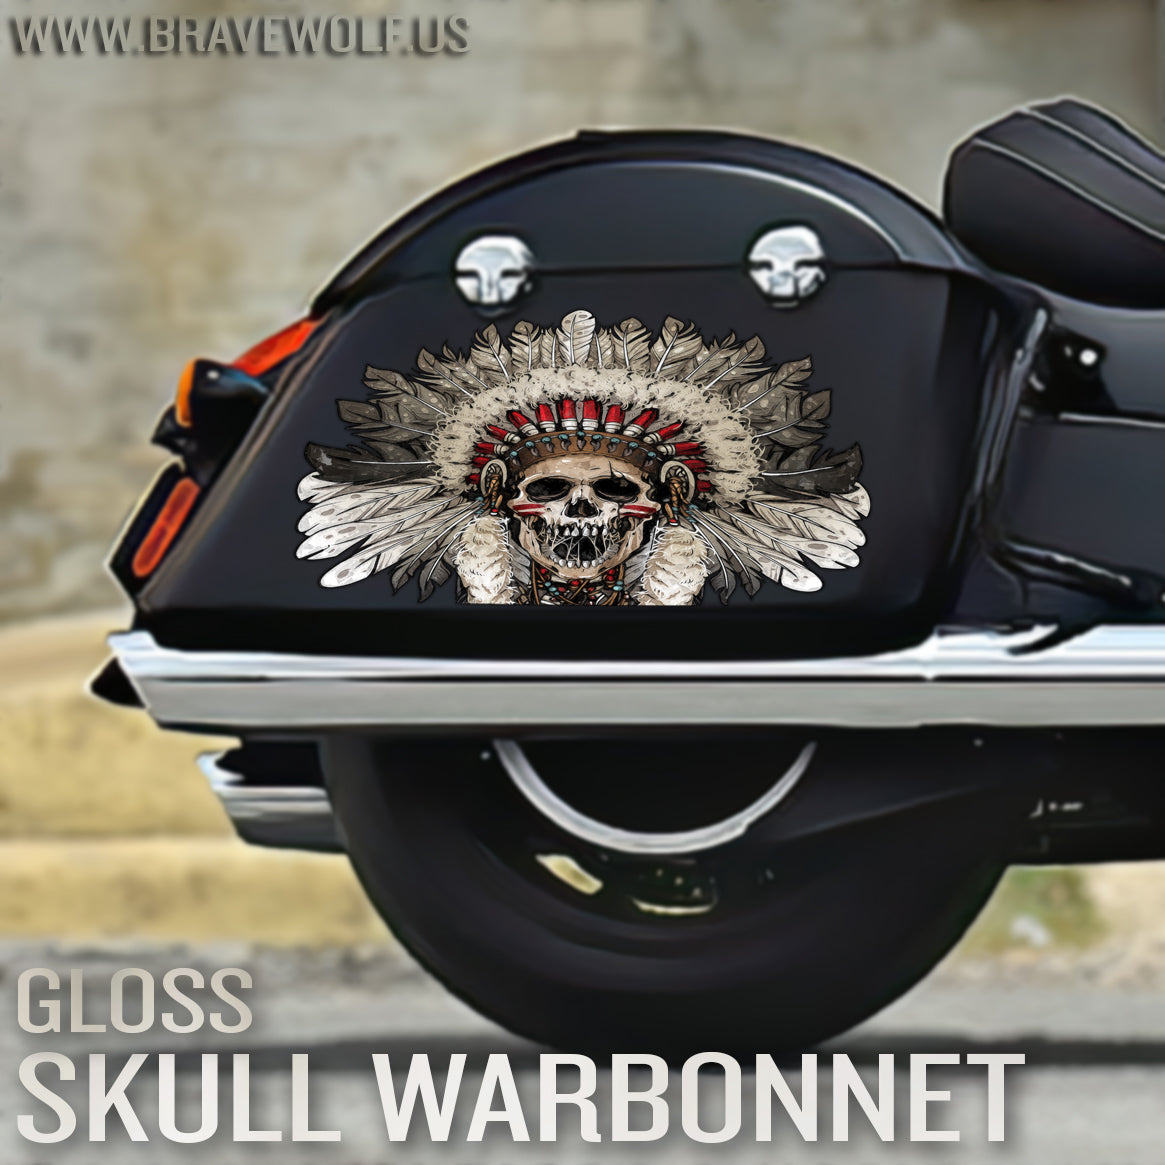
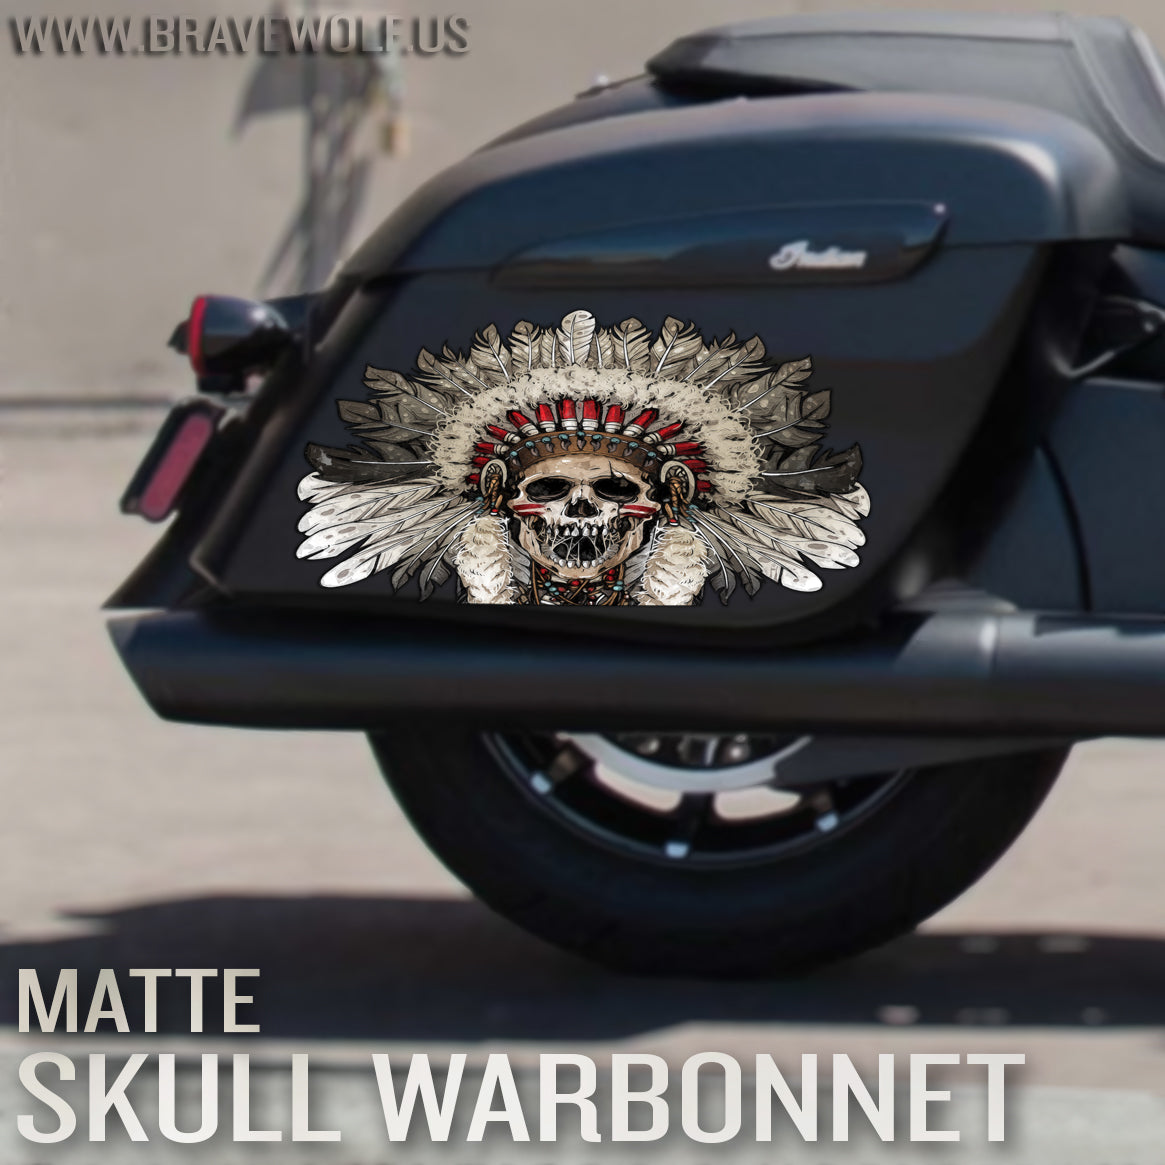

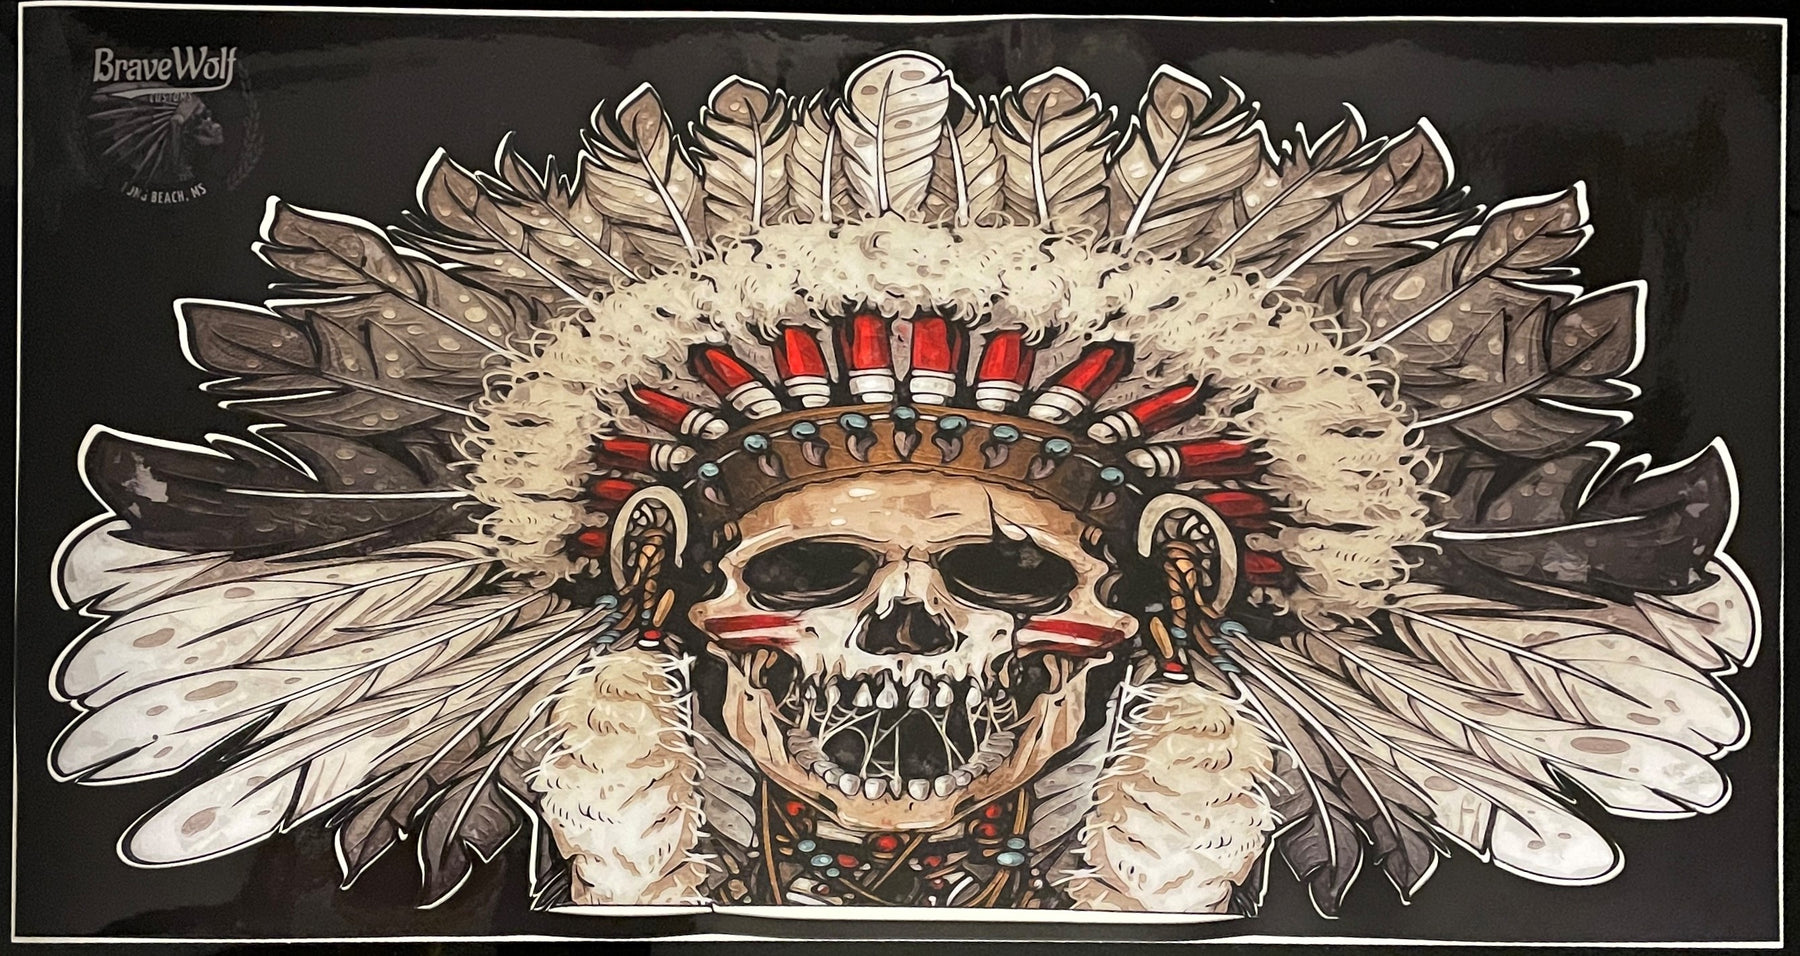

Indian Saddlebag Decals - Skull Warbonnet - Color
Regular price $150.00
Shipping calculated at checkout.
Stock Notice: (may take approximately 2-3 weeks before shipping if not in stock at the time of your order)
Our saddlebag decals are made from premium weatherproof hi-tack vinyl with a long lifespan that will keep them looking new for years. They are available in two finishes, heavy-duty 12 mil laminated Gloss (looks like it's painted on), or a heavy-duty sandy matte textured premium finish.
|
Fitment Guide: Fits both styles of Indian OEM saddlebags (rounded and squared). Also fits the Challenger when the plastic bag guard is removed. |
Installation:
Installing our decals is easy to do yourself at home. We recommend removing all of the excess decal material (the background image) before installing the decals. This will allow you to dispose of all the small cut-out pieces so that the pieces do not get trapped underneath your decal when installing it on the bike. Once you have all of the small pieces and background removed, you can use the "wet method" to install the decals to your saddlebags. The wet method involves using a spray bottle of water with a couple drops of dish soap in the mixture and spraying the surface of your saddlebags to wet the entire surface. Then carefully remove the backing from your decal and use the spray bottle to wet the adhesive side of the decal. Now you can gently place the decal on your saddlebag. Because the surfaces are wet, you can pull the decal up to reposition it until you get it where you want it. Once it's in place, use a squeegee or other object such as a credit card wrapped in a microfiber towel to squeeze the water out from behind the decal. You can also use your hands to do this. You should take care not to use a hard/abrasive object that can scratch the decals or your bike's paint. The high-tack adhesive will begin to set/adhere to the bike as soon as the liquid is push out from behind the decal. Use caution to ensure the towel or object you are using does not catch any edges of the decal and pull it off your bike. If you take your time and be gentle during installation, it should be an easy process. A hair dryer can be used to speed up the drying process if needed.
Feel free to visit our How-To page on the website to watch a "wet method" installation video TAB Performance made while installing our Zombie decals.


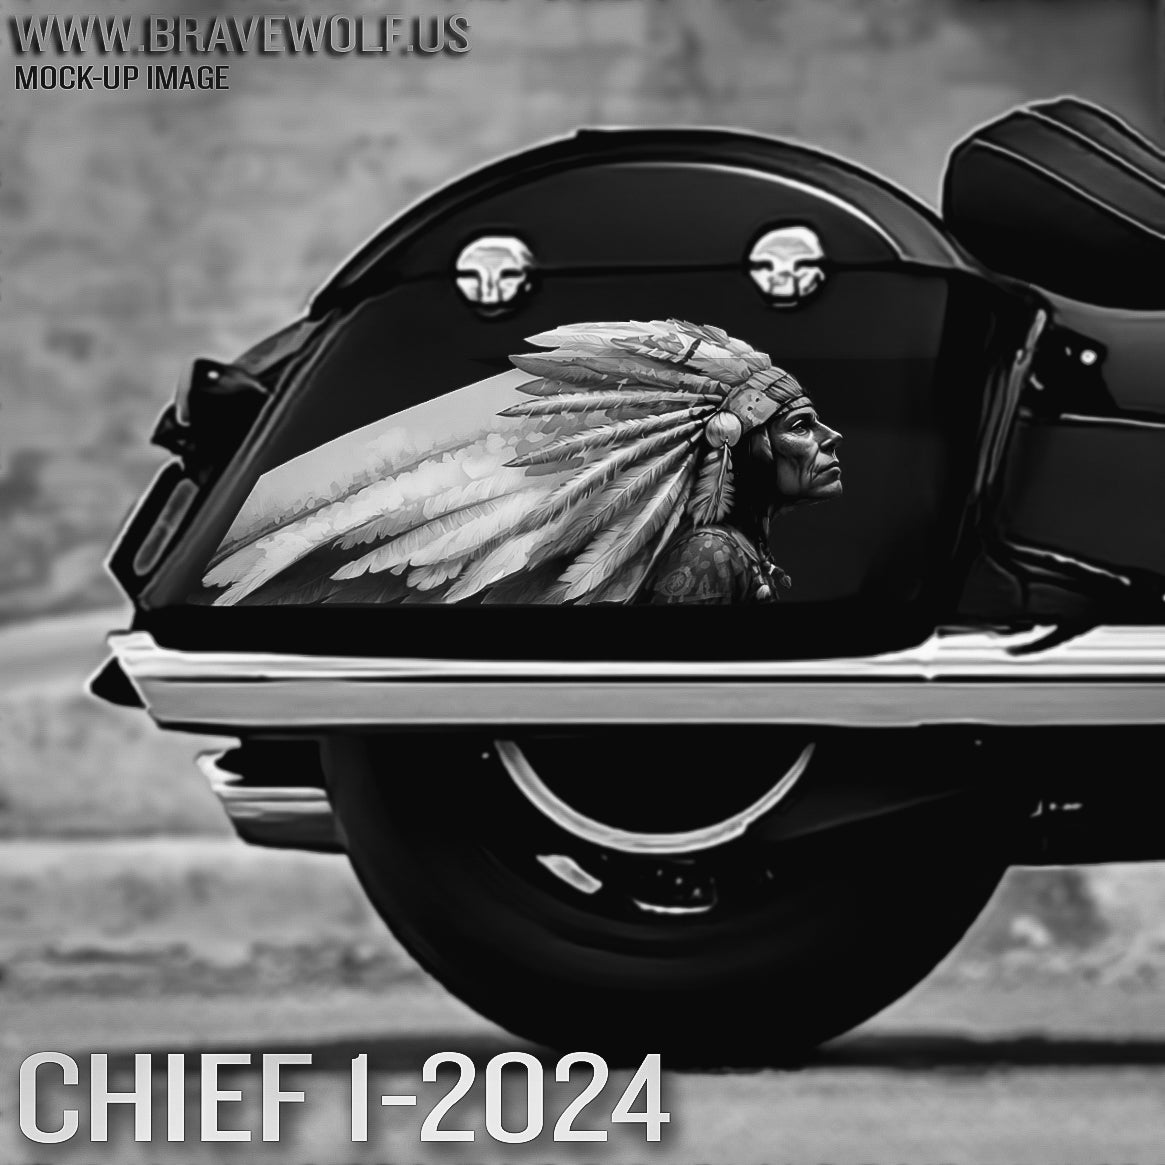
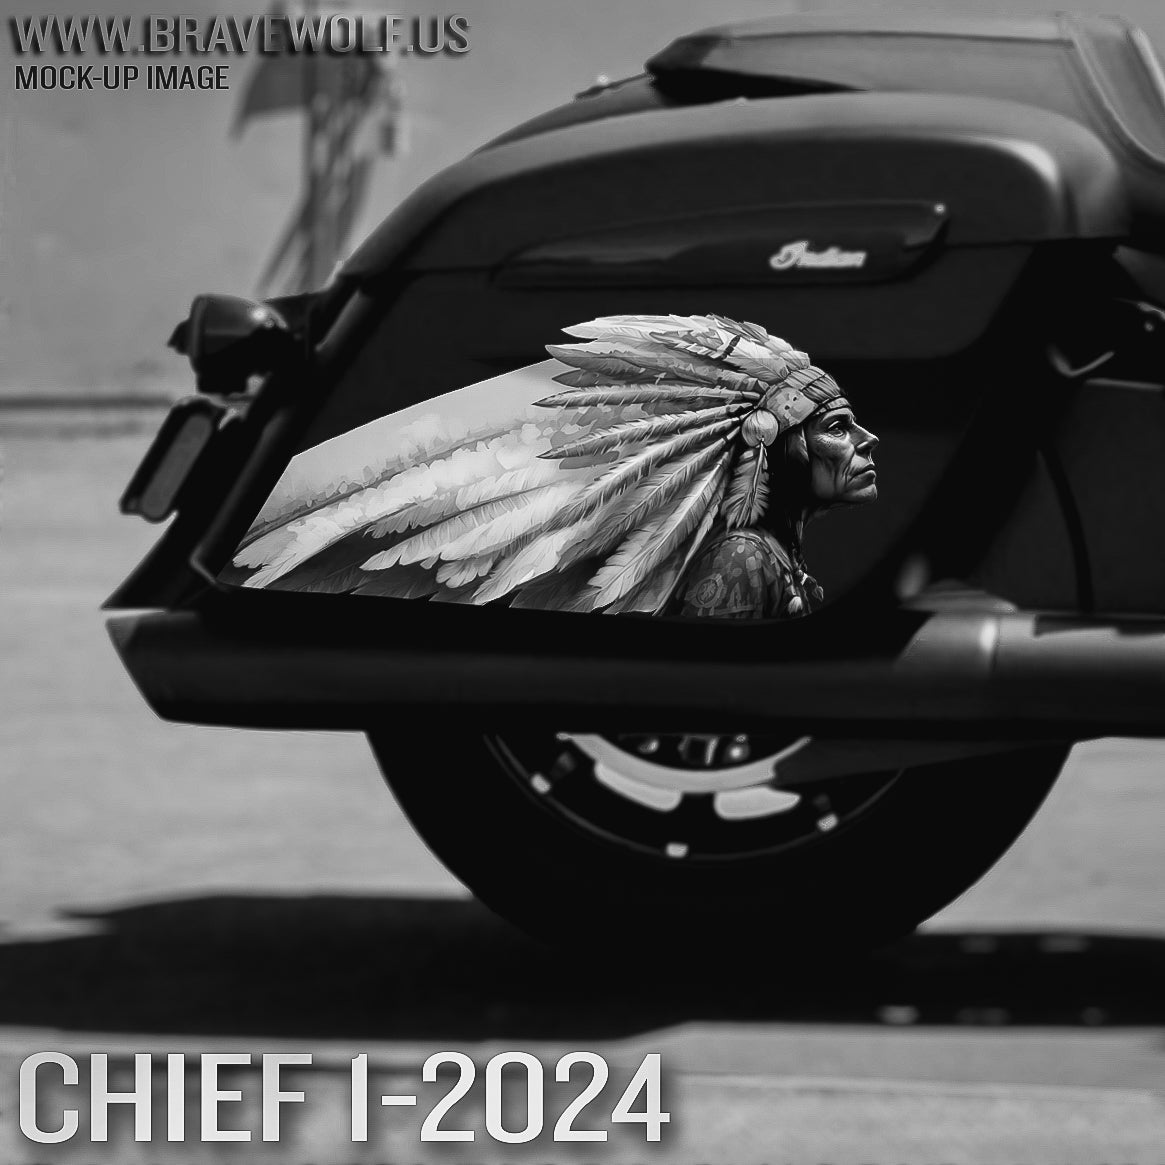
Chief 1-2024 (B&W) Saddlebag Decal Set for Indian Motorcycles
Regular price $160.00
Shipping calculated at checkout.
Stock Notice: Special Order (may take approximately 2-3 weeks before shipping if not in stock at time of order)
Our saddlebag decals are made from premium weatherproof hi-tack vinyl with a long lifespan that will keep them looking new for years. They are available in two finishes, heavy-duty 12 mil laminated Gloss (looks like it's painted on), or a heavy-duty sandy matte textured premium finish.
|
Fitment Guide: Fits both styles of Indian OEM saddlebags (rounded and squared). Also fits the Challenger & Pursuit when the plastic bag guard is removed. |
Installation:
Installing our decals is easy to do yourself at home. We recommend removing all of the excess decal material (the background image) before installing the decals. This will allow you to dispose of all the small cut-out pieces so that the pieces do not get trapped underneath your decal when installing it on the bike. Once you have all of the small pieces and background removed, you can use the "wet method" to install the decals to your saddlebags. The wet method involves using a spray bottle of water with a couple drops of dish soap in the mixture and spraying the surface of your saddlebags to wet the entire surface. Then carefully remove the backing from your decal and use the spray bottle to wet the adhesive side of the decal. Now you can gently place the decal on your saddlebag. Because the surfaces are wet, you can pull the decal up to reposition it until you get it where you want it. Once it's in place, use a squeegee or other object such as a credit card wrapped in a microfiber towel to squeeze the water out from behind the decal. You can also use your hands to do this. You should take care not to use a hard/abrasive object that can scratch the decals or your bike's paint. The high-tack adhesive will begin to set/adhere to the bike as soon as the liquid is push out from behind the decal. Use caution to ensure the towel or object you are using does not catch any edges of the decal and pull it off your bike. If you take your time and be gentle during installation, it should be an easy process. A hair dryer can be used to speed up the drying process if needed.
Feel free to visit our How-To page on the website to watch a "wet method" installation video.


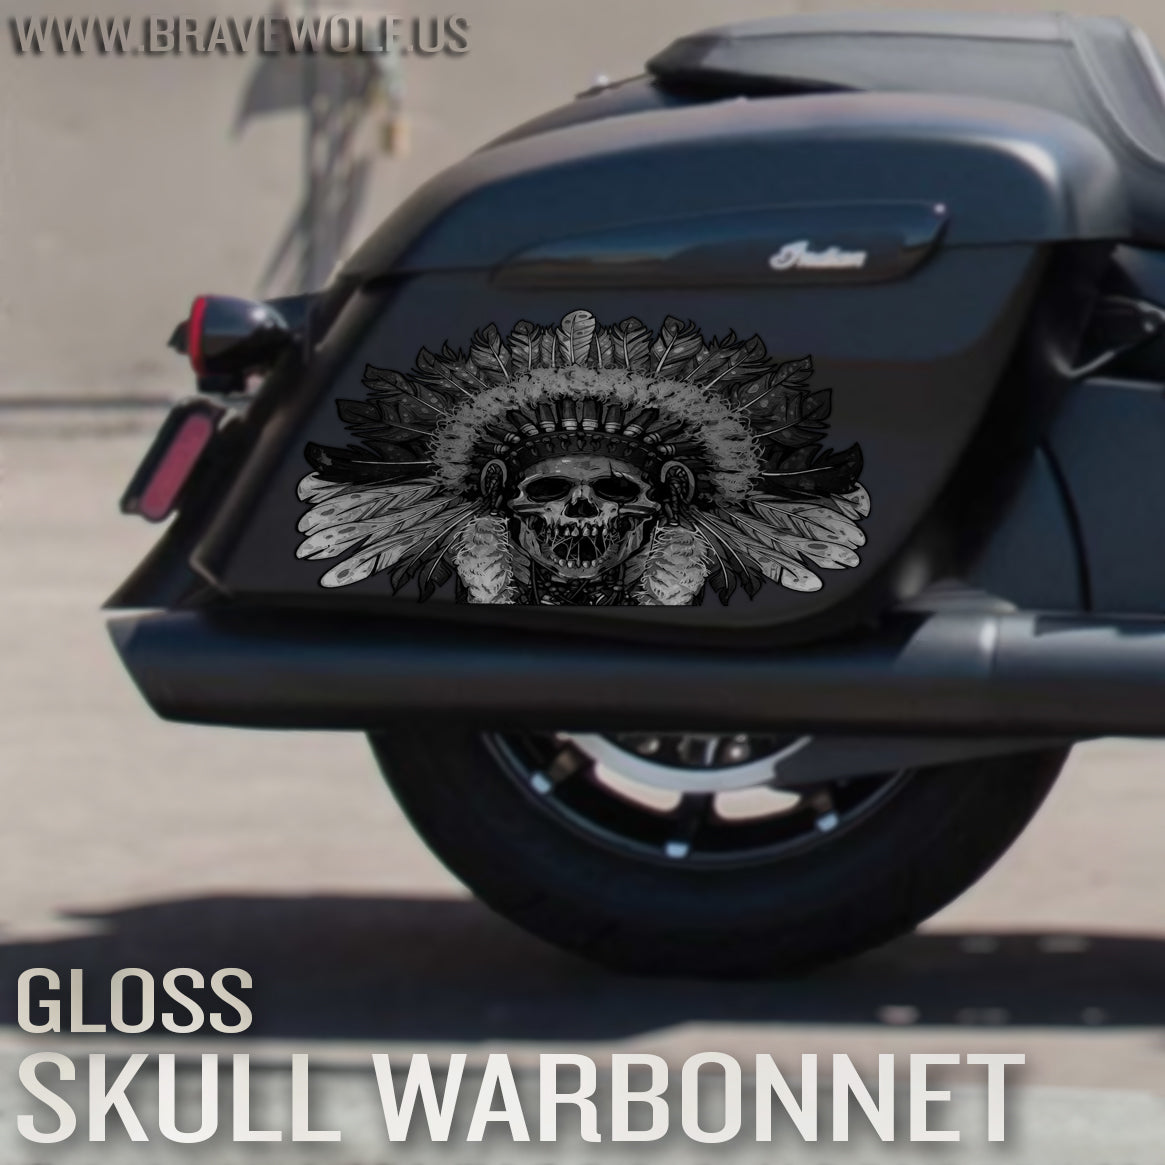
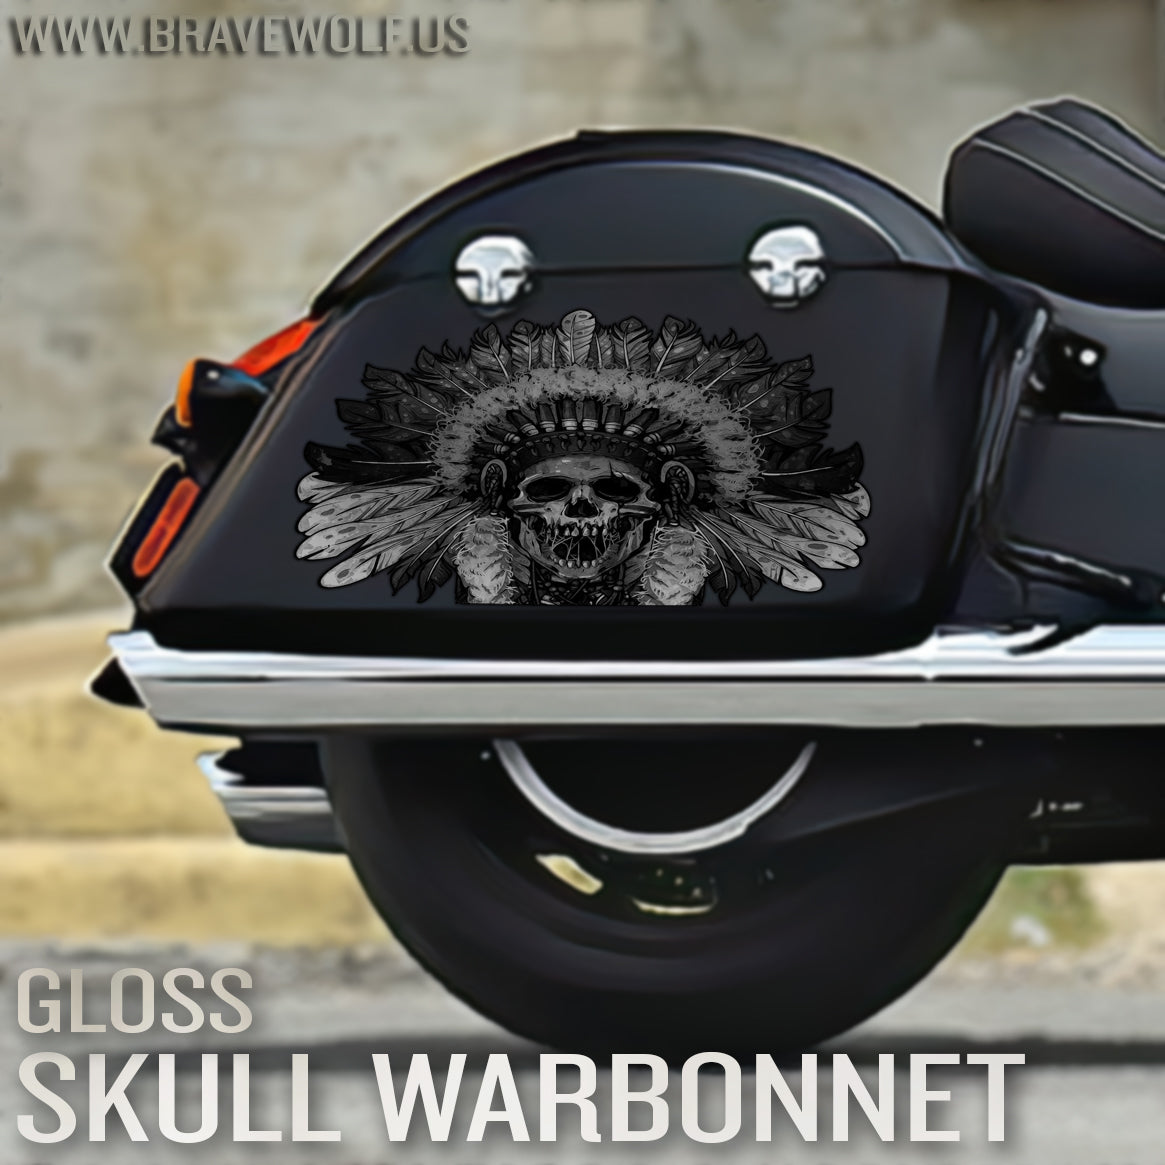


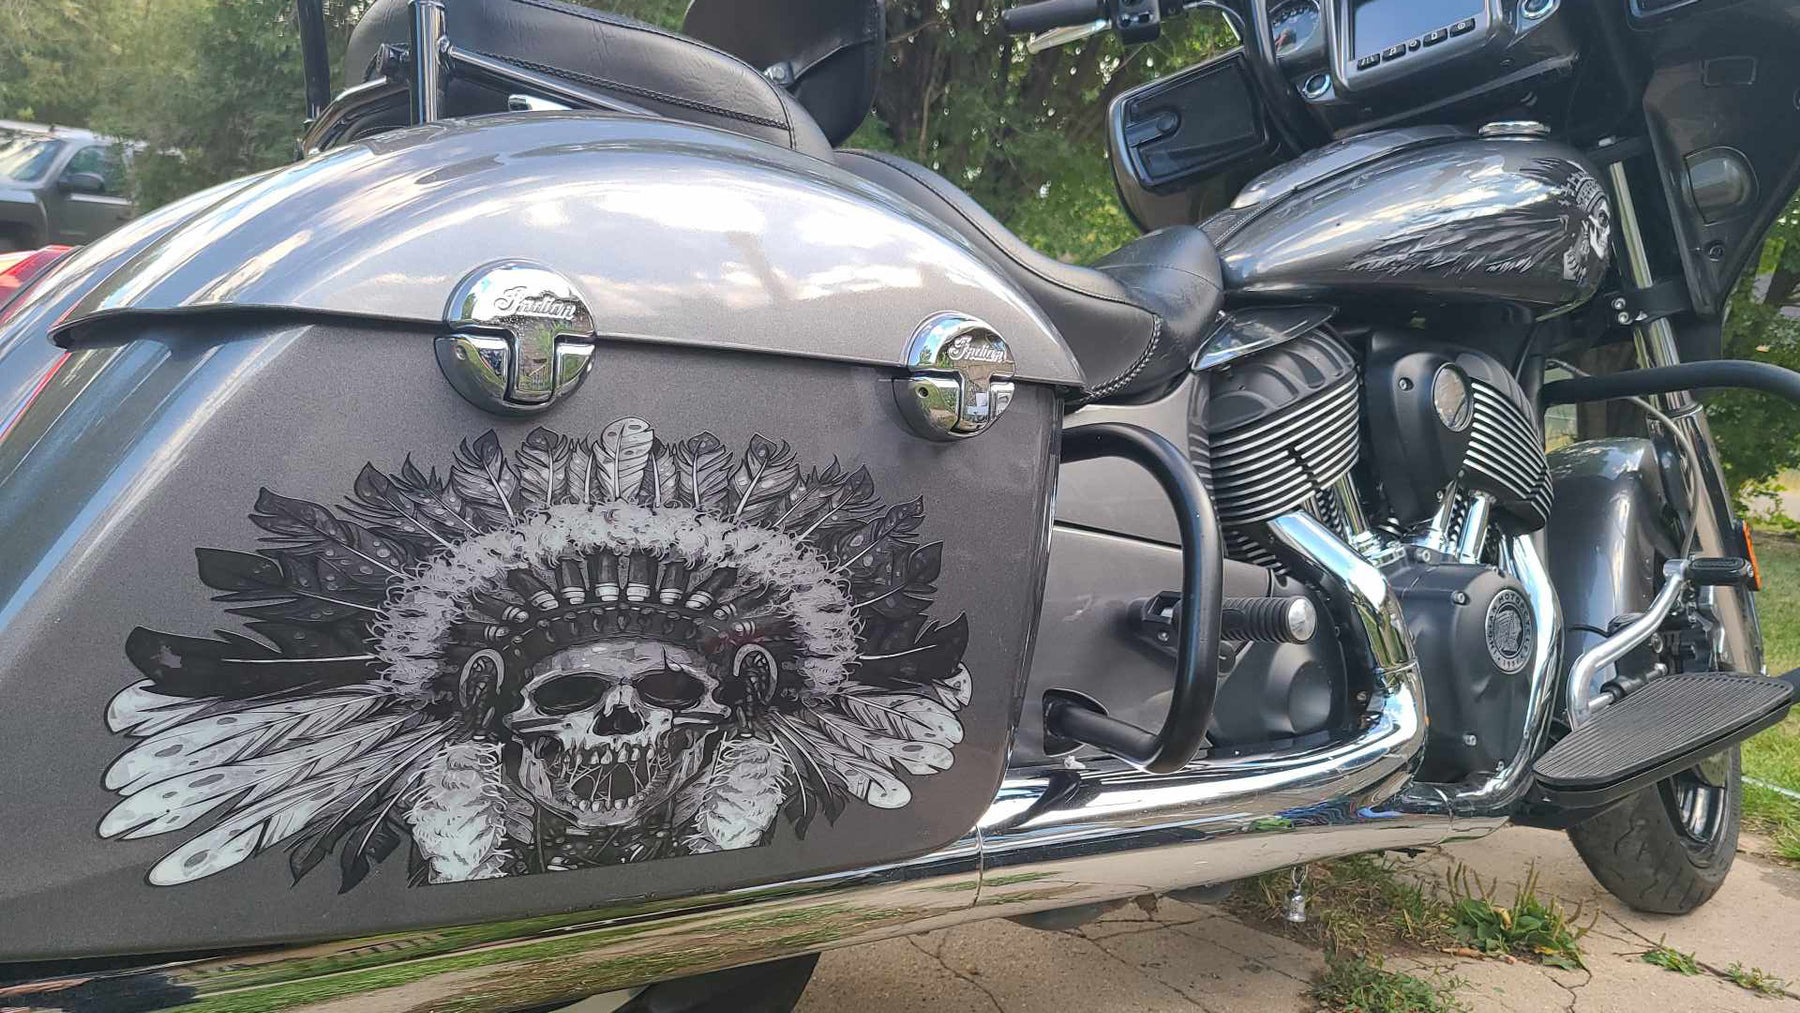
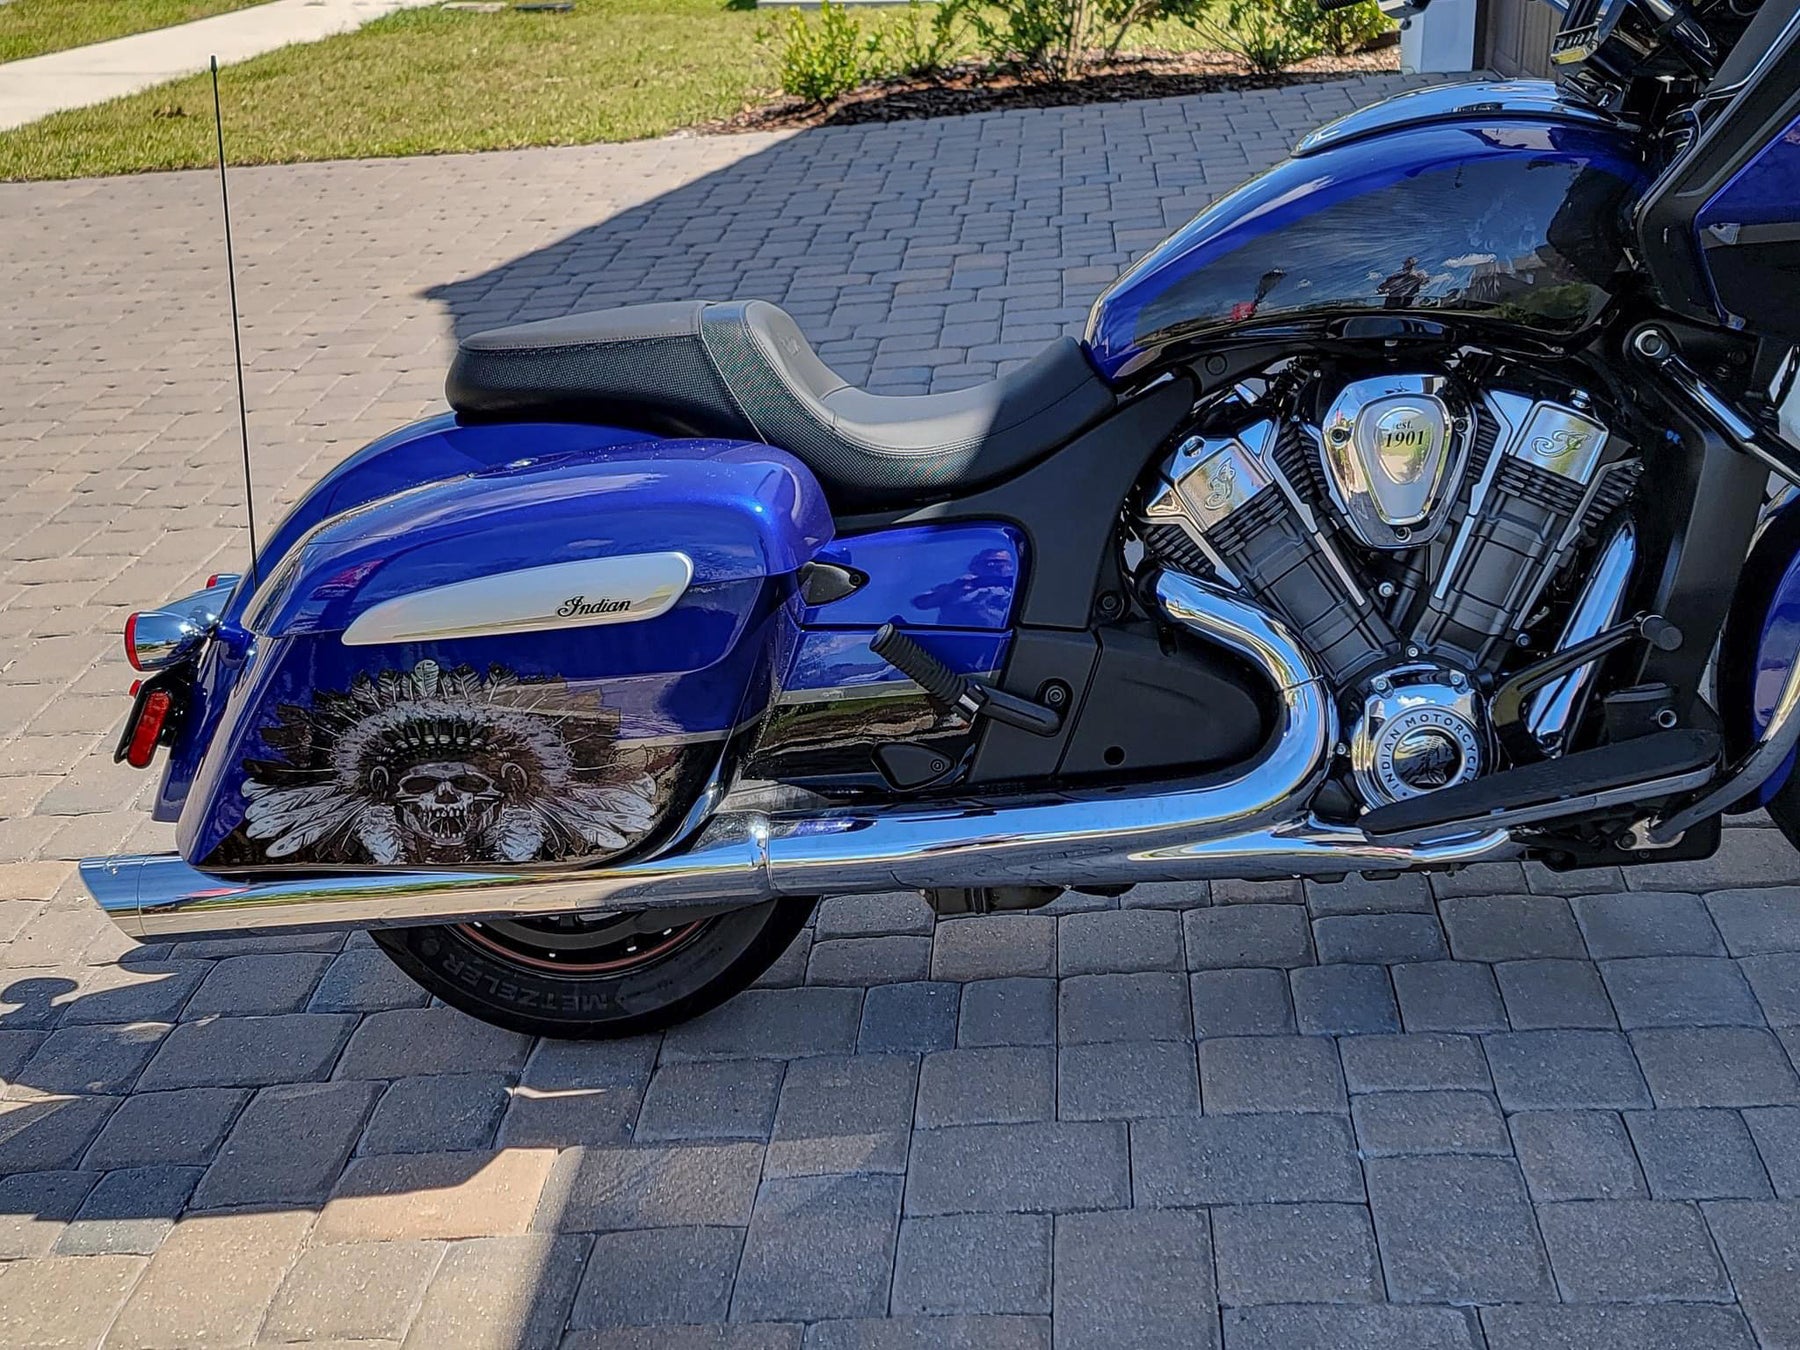

Indian Saddlebag Decals - Skull Warbonnet - B&W
Regular price $150.00
Shipping calculated at checkout.
Stock Notice: (may take approximately 2-3 weeks before shipping if not in stock at the time of your order)
Our saddlebag decals are made from premium weatherproof hi-tack vinyl with a long lifespan that will keep them looking new for years. They are available in two finishes, heavy-duty 12 mil laminated Gloss (looks like it's painted on), or a heavy-duty sandy matte textured premium finish.
|
Fitment Guide: Fits both styles of Indian OEM saddlebags (rounded and squared). Also fits the Challenger when the plastic bag guard is removed. |
Installation:
Installing our decals is easy to do yourself at home. We recommend removing all of the excess decal material (the background image) before installing the decals. This will allow you to dispose of all the small cut-out pieces so that the pieces do not get trapped underneath your decal when installing it on the bike. Once you have all of the small pieces and background removed, you can use the "wet method" to install the decals to your saddlebags. The wet method involves using a spray bottle of water with a couple drops of dish soap in the mixture and spraying the surface of your saddlebags to wet the entire surface. Then carefully remove the backing from your decal and use the spray bottle to wet the adhesive side of the decal. Now you can gently place the decal on your saddlebag. Because the surfaces are wet, you can pull the decal up to reposition it until you get it where you want it. Once it's in place, use a squeegee or other object such as a credit card wrapped in a microfiber towel to squeeze the water out from behind the decal. You can also use your hands to do this. You should take care not to use a hard/abrasive object that can scratch the decals or your bike's paint. The high-tack adhesive will begin to set/adhere to the bike as soon as the liquid is push out from behind the decal. Use caution to ensure the towel or object you are using does not catch any edges of the decal and pull it off your bike. If you take your time and be gentle during installation, it should be an easy process. A hair dryer can be used to speed up the drying process if needed.
Feel free to visit our How-To page on the website to watch a "wet method" installation video TAB Performance made while installing our Zombie decals.


Ragnarok - New Style Indian Saddlebag Decal Set
Regular price $180.00
Shipping calculated at checkout.
Stock Notice: (may take approximately 2-3 weeks before shipping if not in stock at the time of your order)
"Ragnarok" depicts Fenrir facing off against Jörmungandr the World Serpent during the apocalyptical events of the Twilight of the Gods.
Our saddlebag decals are made from premium weatherproof hi-tack vinyl with a long lifespan that will keep them looking new for years. They are available in two finishes, heavy-duty 12 mil laminated Gloss (looks like it's painted on), or a heavy-duty sandy matte textured premium finish.
|
Fitment Guide: Fits the new style (squared) Indian OEM saddlebags. Also fits the Challenger & Pursuit when the plastic bag guard is removed. |
Installation:
Installing our decals is easy to do yourself at home. We recommend removing all of the excess decal material (the background image) before installing the decals. This will allow you to dispose of all the small cut-out pieces so that the pieces do not get trapped underneath your decal when installing it on the bike. Once you have all of the small pieces and background removed, you can use the "wet method" to install the decals to your saddlebags. The wet method involves using a spray bottle of water with a couple drops of dish soap in the mixture and spraying the surface of your saddlebags to wet the entire surface. Then carefully remove the backing from your decal and use the spray bottle to wet the adhesive side of the decal. Now you can gently place the decal on your saddlebag. Because the surfaces are wet, you can pull the decal up to reposition it until you get it where you want it. Once it's in place, use a squeegee or other object such as a credit card wrapped in a microfiber towel to squeeze the water out from behind the decal. You can also use your hands to do this. You should take care not to use a hard/abrasive object that can scratch the decals or your bike's paint. The high-tack adhesive will begin to set/adhere to the bike as soon as the liquid is push out from behind the decal. Use caution to ensure the towel or object you are using does not catch any edges of the decal and pull it off your bike. If you take your time and be gentle during installation, it should be an easy process. A hair dryer can be used to speed up the drying process if needed.
Feel free to visit our How-To page on the website to watch a "wet method" installation video.


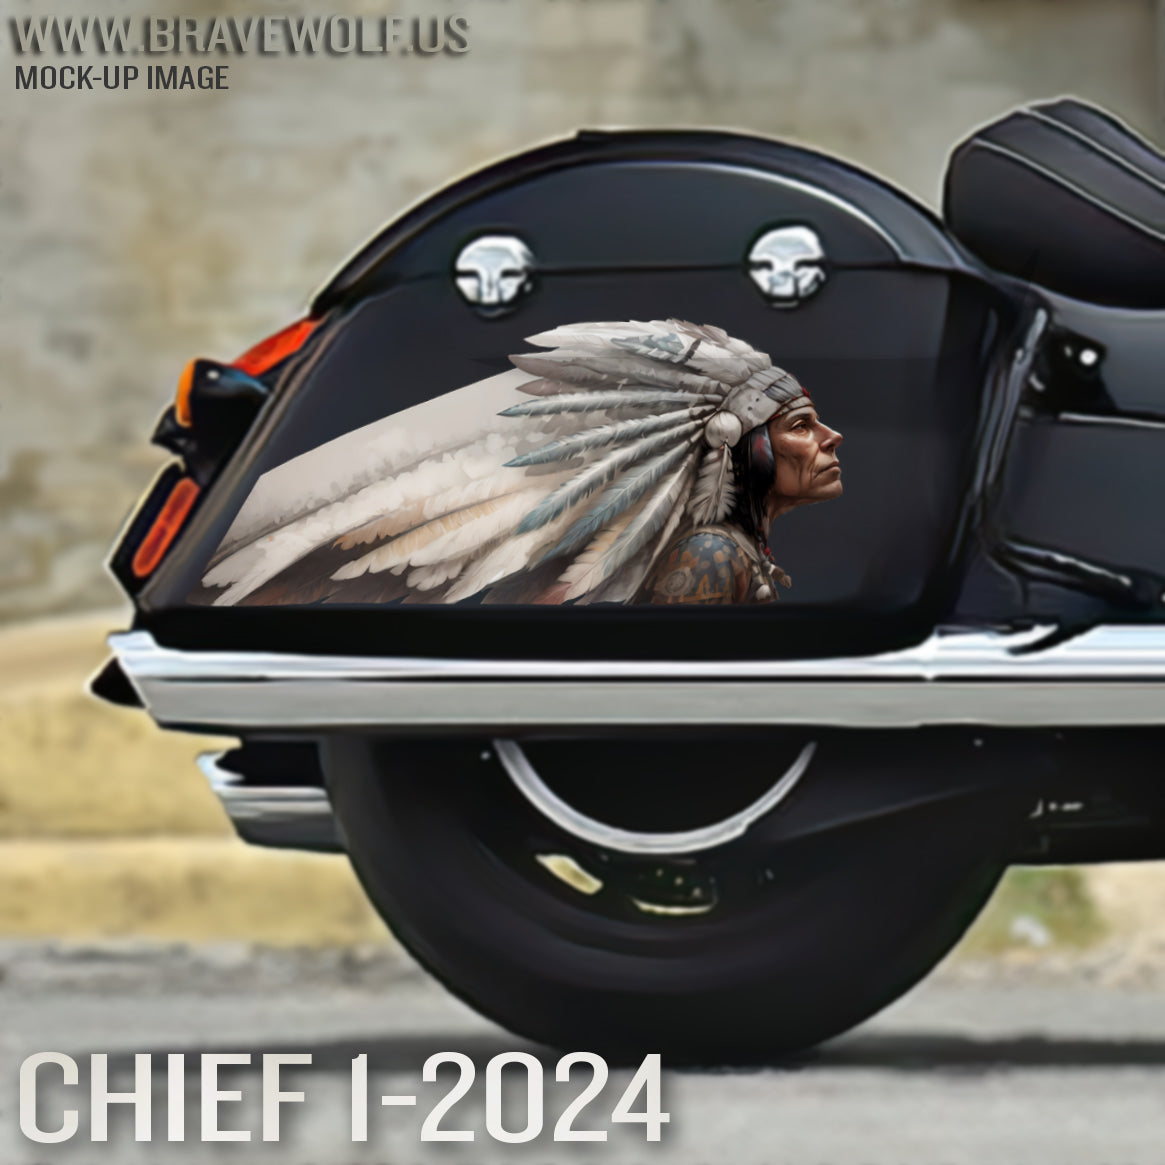
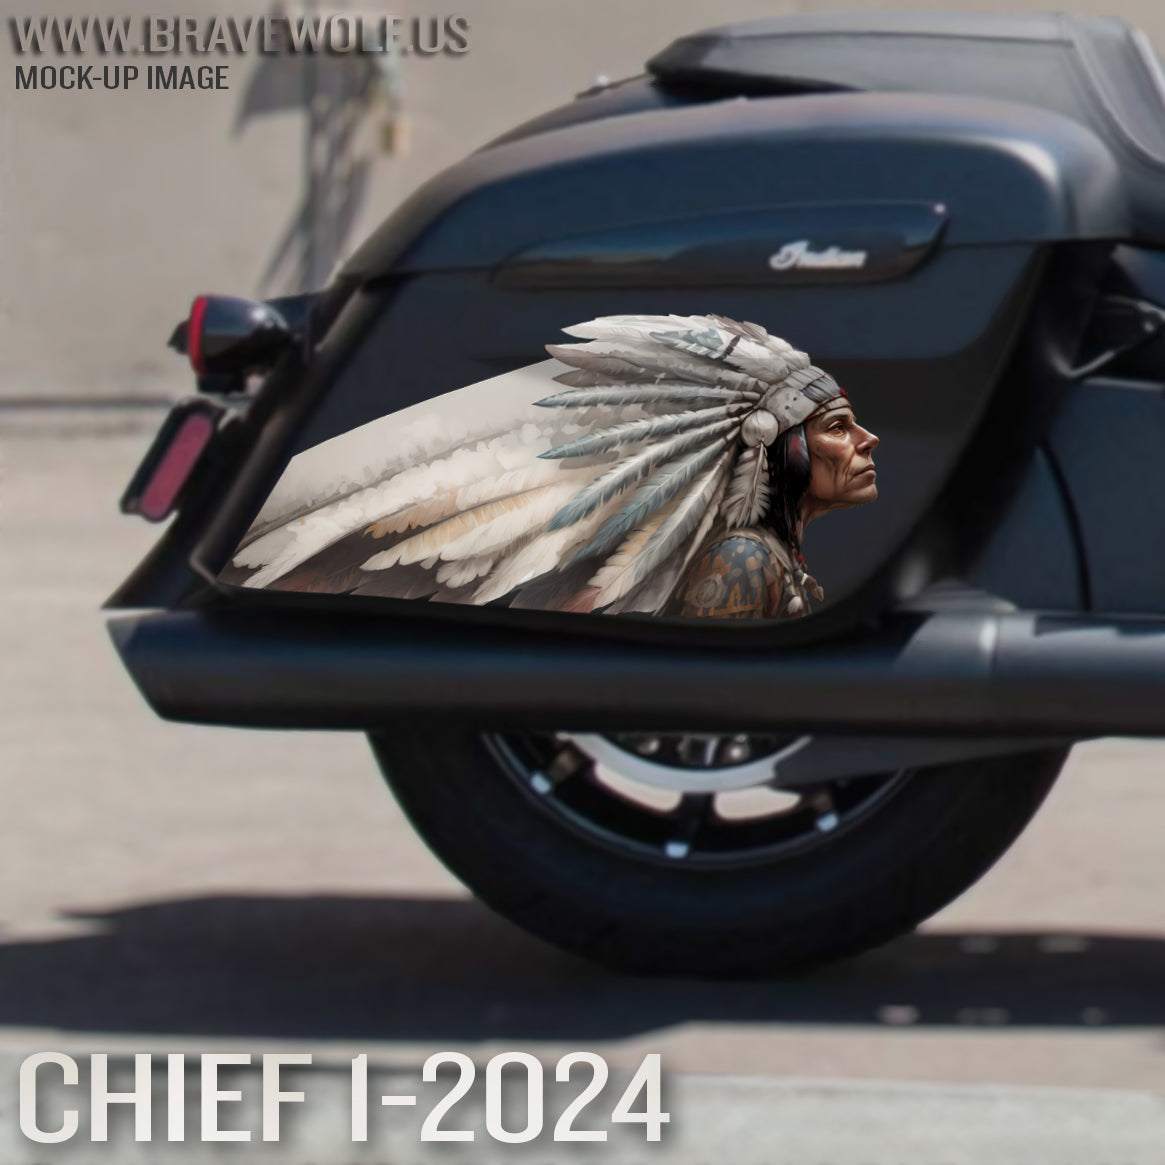
Chief 1-2024 (Color) Saddlebag Decal Set for Indian Motorcycles
Regular price $160.00
Shipping calculated at checkout.
Stock Notice - Special Order (may take approximately 2-3 weeks before shipping if not in stock at time of order)
Our saddlebag decals are made from premium weatherproof hi-tack vinyl with a long lifespan that will keep them looking new for years. They are available in two finishes, heavy-duty 12 mil laminated Gloss (looks like it's painted on), or a heavy-duty sandy matte textured premium finish.
|
Fitment Guide: Fits both styles of Indian OEM saddlebags (rounded and squared). Also fits the Challenger & Pursuit when the plastic bag guard is removed. |
Installation:
Installing our decals is easy to do yourself at home. We recommend removing all of the excess decal material (the background image) before installing the decals. This will allow you to dispose of all the small cut-out pieces so that the pieces do not get trapped underneath your decal when installing it on the bike. Once you have all of the small pieces and background removed, you can use the "wet method" to install the decals to your saddlebags. The wet method involves using a spray bottle of water with a couple drops of dish soap in the mixture and spraying the surface of your saddlebags to wet the entire surface. Then carefully remove the backing from your decal and use the spray bottle to wet the adhesive side of the decal. Now you can gently place the decal on your saddlebag. Because the surfaces are wet, you can pull the decal up to reposition it until you get it where you want it. Once it's in place, use a squeegee or other object such as a credit card wrapped in a microfiber towel to squeeze the water out from behind the decal. You can also use your hands to do this. You should take care not to use a hard/abrasive object that can scratch the decals or your bike's paint. The high-tack adhesive will begin to set/adhere to the bike as soon as the liquid is push out from behind the decal. Use caution to ensure the towel or object you are using does not catch any edges of the decal and pull it off your bike. If you take your time and be gentle during installation, it should be an easy process. A hair dryer can be used to speed up the drying process if needed.
Feel free to visit our How-To page on the website to watch a "wet method" installation video.


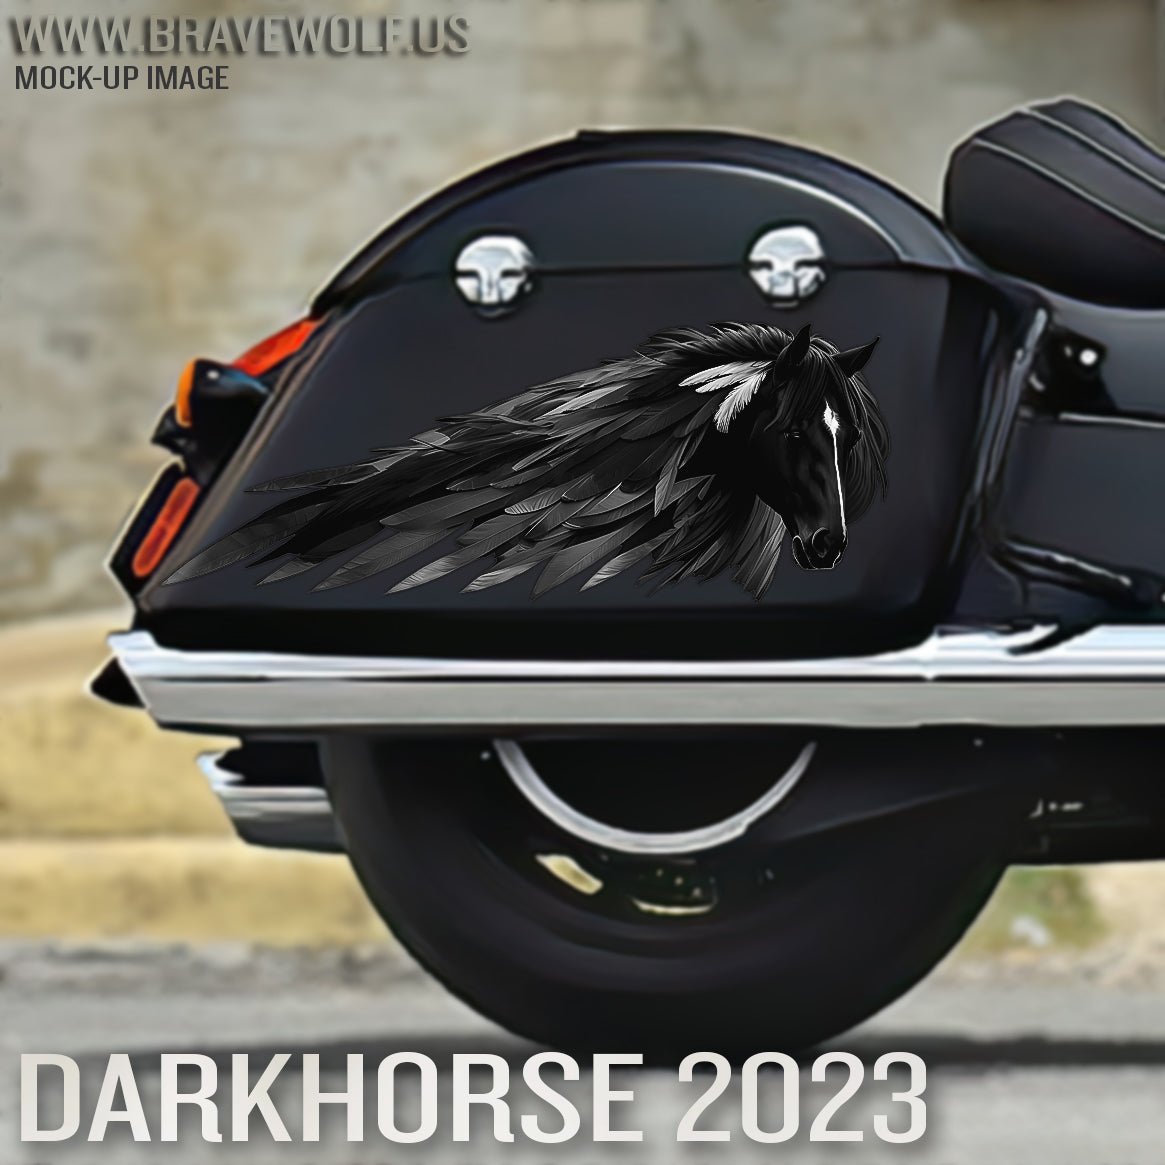
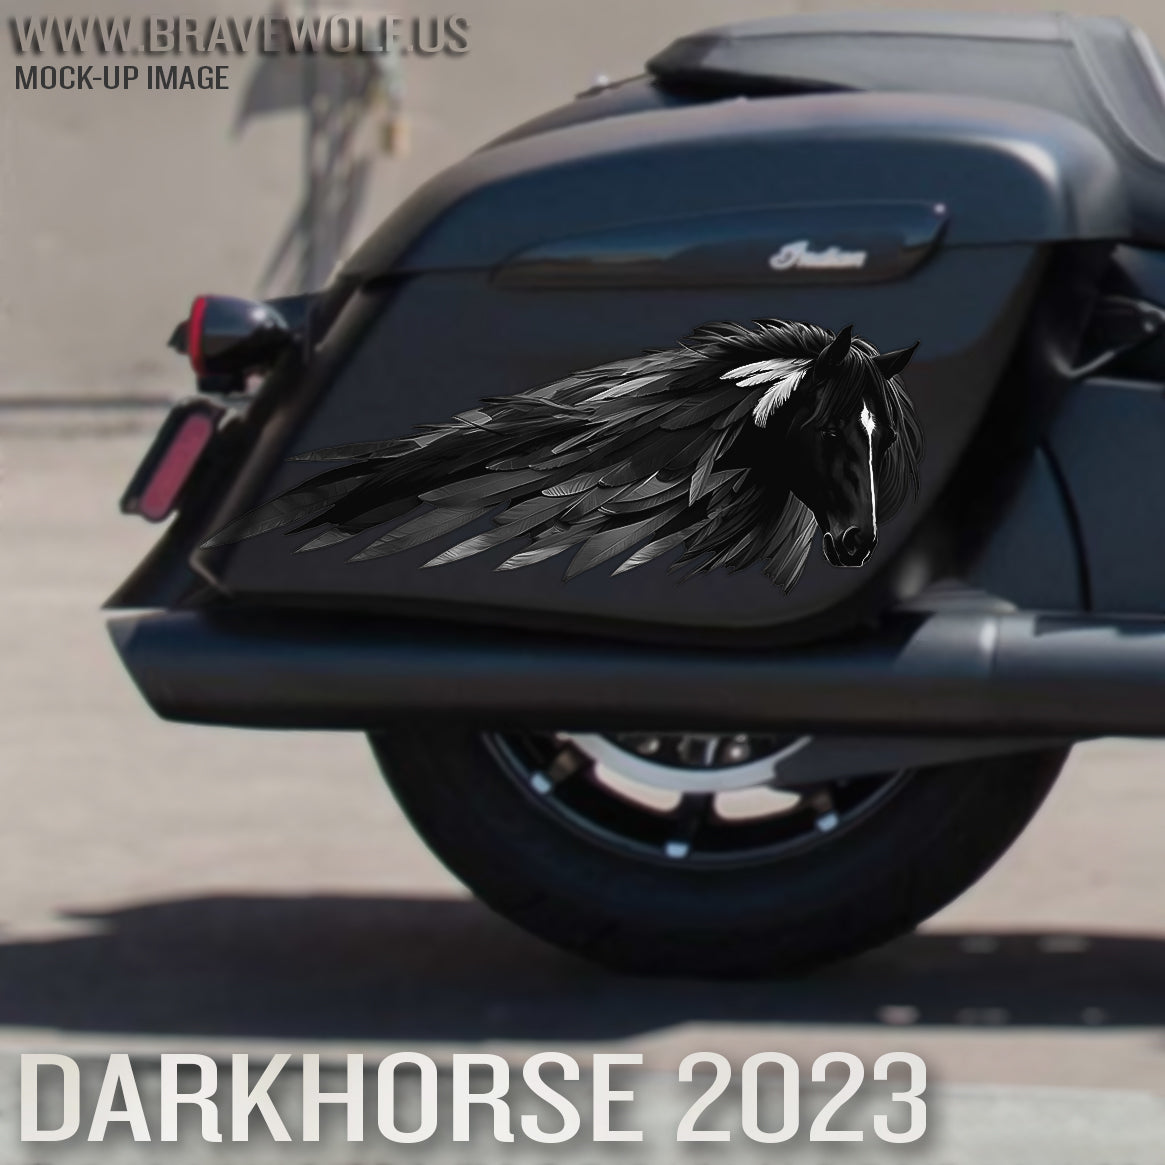
Dark Horse 2023 (B&W) Saddlebag Decal Set for Indian motorcycles
Regular price $160.00
Shipping calculated at checkout.
Stock Notice: (may take approximately 2-3 weeks before shipping if not in stock at time of order)
Our saddlebag decals are made from premium weatherproof hi-tack vinyl with a long lifespan that will keep them looking new for years. They are available in two finishes, heavy-duty 12 mil laminated Gloss (looks like it's painted on), or a heavy-duty sandy matte textured premium finish.
|
Fitment Guide: Fits both styles of Indian OEM saddlebags (rounded and squared). Also fits the Challenger & Pursuit when the plastic bag guard is removed. |
Installation:
Installing our decals is easy to do yourself at home. We recommend removing all of the excess decal material (the background image) before installing the decals. This will allow you to dispose of all the small cut-out pieces so that the pieces do not get trapped underneath your decal when installing it on the bike. Once you have all of the small pieces and background removed, you can use the "wet method" to install the decals to your saddlebags. The wet method involves using a spray bottle of water with a couple drops of dish soap in the mixture and spraying the surface of your saddlebags to wet the entire surface. Then carefully remove the backing from your decal and use the spray bottle to wet the adhesive side of the decal. Now you can gently place the decal on your saddlebag. Because the surfaces are wet, you can pull the decal up to reposition it until you get it where you want it. Once it's in place, use a squeegee or other object such as a credit card wrapped in a microfiber towel to squeeze the water out from behind the decal. You can also use your hands to do this. You should take care not to use a hard/abrasive object that can scratch the decals or your bike's paint. The high-tack adhesive will begin to set/adhere to the bike as soon as the liquid is push out from behind the decal. Use caution to ensure the towel or object you are using does not catch any edges of the decal and pull it off your bike. If you take your time and be gentle during installation, it should be an easy process. A hair dryer can be used to speed up the drying process if needed.
Feel free to visit our How-To page on the website to watch a "wet method" installation video.


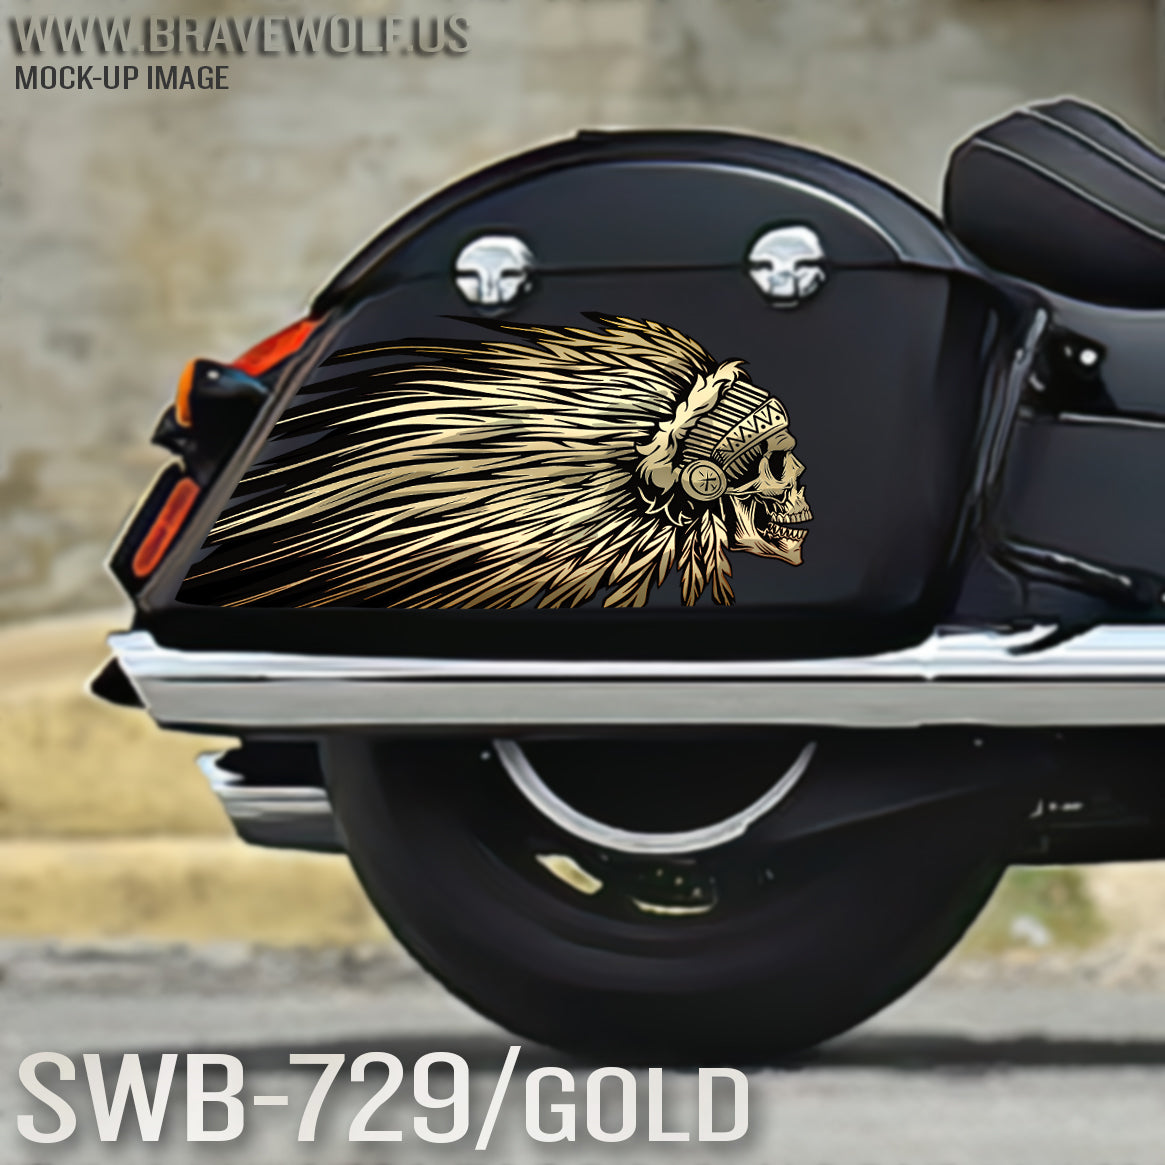
Indian Saddlebag Decals-SWB729-Gold
Regular price $180.00
Shipping calculated at checkout.
Stock Notice - Special Order (may take approximately 2-3 weeks before shipping if not in stock at time of order)
Our saddlebag decals are made from premium weatherproof hi-tack vinyl with a long lifespan that will keep them looking new for years. They are available in two finishes, heavy-duty 12 mil laminated Gloss (looks like it's painted on), or a heavy-duty sandy matte textured premium finish.
|
Fitment Guide: Fits both styles of Indian OEM saddlebags (rounded and squared). Also fits the Challenger & Pursuit when the plastic bag guard is removed. |
Installation:
Installing our decals is easy to do yourself at home. We recommend removing all of the excess decal material (the background image) before installing the decals. This will allow you to dispose of all the small cut-out pieces so that the pieces do not get trapped underneath your decal when installing it on the bike. Once you have all of the small pieces and background removed, you can use the "wet method" to install the decals to your saddlebags. The wet method involves using a spray bottle of water with a couple drops of dish soap in the mixture and spraying the surface of your saddlebags to wet the entire surface. Then carefully remove the backing from your decal and use the spray bottle to wet the adhesive side of the decal. Now you can gently place the decal on your saddlebag. Because the surfaces are wet, you can pull the decal up to reposition it until you get it where you want it. Once it's in place, use a squeegee or other object such as a credit card wrapped in a microfiber towel to squeeze the water out from behind the decal. You can also use your hands to do this. You should take care not to use a hard/abrasive object that can scratch the decals or your bike's paint. The high-tack adhesive will begin to set/adhere to the bike as soon as the liquid is push out from behind the decal. Use caution to ensure the towel or object you are using does not catch any edges of the decal and pull it off your bike. If you take your time and be gentle during installation, it should be an easy process. A hair dryer can be used to speed up the drying process if needed.
Feel free to visit our How-To page on the website to watch a "wet method" installation video TAB Performance made while installing our Zombie decals.

CLEARANCE Hoist the Black Flag - Saddlebag Decal Set-BW matte
Regular price $80.00
Shipping calculated at checkout.
CLEARANCE SALE - We are clearing out our old stock of retired designs and other non-current products at an extremely reduced price!
This listing is for 1 set of saddlebag decals. These were tank decals that misprinted too large, making them perfect for saddlebags. See photos for details.

“Hoist the Black Flag" Universal Tank Decals for all Brands and Models of Motorcycles
"Every normal man must be tempted, at times, to spit on his hands, hoist the black flag, and begin slitting throats." - H. L. Mencken
These decals were designed to fit nearly any brand or model of bike.
We recommend checking the measurements to ensure a good fit.
Size: 5.83 inches x 13.26 inches

These decals are designed for all brands/models of motorcycles. Check the measurements to ensure a proper fit on your bike before ordering. If your tank already has a graphic, we can’t guarantee these decals will cover it completely.
How To Install: <-Visit our How To page for videos
Weatherproof HD Gloss finish vinyl decals are self adhesive. We recommend using the wet method to install these decals: A spray bottle with water and dish soap can be used to wet the surface and the back of the decal, allowing you to slide the decal into place. Once you have it aligned properly, use your thumbs to push the moisture out from behind the decal, working from the center outwards to the edges and it will adhere to your bike. Using the wet method allows the decal surface to evenly distribute over the curved surface. A hair dryer to apply heat will make the process easier since the vinyl becomes more soft and flexible when warm.


Dark Horse - Saddlebag - V1 - Rounded & Square Bags
Regular price $100.00
Shipping calculated at checkout.
LAST CHANCE - Order now while supplies last!
We are retiring many of our designs, making them limited in nature. We want this process to help make your bike unique. If you've been thinking about scoring a set of these custom decals, get them now before they're gone!
Give your motorcycle a custom look with these Dark Horse saddlebag decals! They are designed for both versions of Indian saddlebags, the common style, and the newer style. Although they were designed for the saddlebags, you can use these decals wherever you want. Just be sure to measure the size of where you want to apply them to ensure they will fit.
Size:
| Style | Inches | Centimeters |
|
Version 1 (Common Rounded style bags and New Square style bags) |
22.4999 in x 7.9098 in | 57.15 x 20 cm |
Material: A material originally made for motocross, these decals can really take a beating. They are not your everyday "sticker". These decals are printed on a hi-tack vinyl and laminated with a 12-mil glossy PVC laminate or with a sandy matte texture (your choice). It is weather proof, temperature and UV resistant, and will maintain its quality for years.
What is included: Matching set of left and right facing decals. Application suitable for Motorcycles, cars, trucks, windows, tables and more.
Installation: We recommend using the wet method to install decals of this size. Take a look at this video made by TAB Performance during their installation of our decals.


Vikings - New Style Indian Saddlebag Decal Set - B&W
Regular price $180.00
Shipping calculated at checkout.
Stock Notice - Usually in stock (may take approximately 2-3 weeks before shipping if not in stock at time of order)
Our saddlebag decals are made from premium weatherproof hi-tack vinyl with a long lifespan that will keep them looking new for years. They are available in two finishes, heavy-duty 12 mil laminated Gloss (looks like it's painted on), or a heavy-duty sandy matte textured premium finish.
|
Fitment Guide: Fits the new style (squared) Indian OEM saddlebags. Also fits the Challenger & Pursuit when the plastic bag guard is removed. |
Installation:
Installing our decals is easy to do yourself at home. We recommend removing all of the excess decal material (the background image) before installing the decals. This will allow you to dispose of all the small cut-out pieces so that the pieces do not get trapped underneath your decal when installing it on the bike. Once you have all of the small pieces and background removed, you can use the "wet method" to install the decals to your saddlebags. The wet method involves using a spray bottle of water with a couple drops of dish soap in the mixture and spraying the surface of your saddlebags to wet the entire surface. Then carefully remove the backing from your decal and use the spray bottle to wet the adhesive side of the decal. Now you can gently place the decal on your saddlebag. Because the surfaces are wet, you can pull the decal up to reposition it until you get it where you want it. Once it's in place, use a squeegee or other object such as a credit card wrapped in a microfiber towel to squeeze the water out from behind the decal. You can also use your hands to do this. You should take care not to use a hard/abrasive object that can scratch the decals or your bike's paint. The high-tack adhesive will begin to set/adhere to the bike as soon as the liquid is push out from behind the decal. Use caution to ensure the towel or object you are using does not catch any edges of the decal and pull it off your bike. If you take your time and be gentle during installation, it should be an easy process. A hair dryer can be used to speed up the drying process if needed.
Feel free to visit our How-To page on the website to watch a "wet method" installation video.


Odin - New Style Indian Saddlebag Decal Set
Regular price $180.00
Shipping calculated at checkout.
Stock Notice: (may take approximately 2-3 weeks before shipping if not in stock at the time of your order)
Our saddlebag decals are made from premium weatherproof hi-tack vinyl with a long lifespan that will keep them looking new for years. They are available in two finishes, heavy-duty 12 mil laminated Gloss (looks like it's painted on), or a heavy-duty sandy matte textured premium finish.
|
Fitment Guide: Fits the new style (squared) Indian OEM saddlebags. Also fits the Challenger & Pursuit when the plastic bag guard is removed. |
Installation:
Installing our decals is easy to do yourself at home. We recommend removing all of the excess decal material (the background image) before installing the decals. This will allow you to dispose of all the small cut-out pieces so that the pieces do not get trapped underneath your decal when installing it on the bike. Once you have all of the small pieces and background removed, you can use the "wet method" to install the decals to your saddlebags. The wet method involves using a spray bottle of water with a couple drops of dish soap in the mixture and spraying the surface of your saddlebags to wet the entire surface. Then carefully remove the backing from your decal and use the spray bottle to wet the adhesive side of the decal. Now you can gently place the decal on your saddlebag. Because the surfaces are wet, you can pull the decal up to reposition it until you get it where you want it. Once it's in place, use a squeegee or other object such as a credit card wrapped in a microfiber towel to squeeze the water out from behind the decal. You can also use your hands to do this. You should take care not to use a hard/abrasive object that can scratch the decals or your bike's paint. The high-tack adhesive will begin to set/adhere to the bike as soon as the liquid is push out from behind the decal. Use caution to ensure the towel or object you are using does not catch any edges of the decal and pull it off your bike. If you take your time and be gentle during installation, it should be an easy process. A hair dryer can be used to speed up the drying process if needed.
Feel free to visit our How-To page on the website to watch a "wet method" installation video.


Vikings - New Style Indian Saddlebag Decal Set
Regular price $180.00
Shipping calculated at checkout.
Stock Notice - Usually in stock (may take approximately 2-3 weeks before shipping if not in stock at time of order)
Our saddlebag decals are made from premium weatherproof hi-tack vinyl with a long lifespan that will keep them looking new for years. They are available in two finishes, heavy-duty 12 mil laminated Gloss (looks like it's painted on), or a heavy-duty sandy matte textured premium finish.
|
Fitment Guide: Fits the new style (squared) Indian OEM saddlebags. Also fits the Challenger & Pursuit when the plastic bag guard is removed. |
Installation:
Installing our decals is easy to do yourself at home. We recommend removing all of the excess decal material (the background image) before installing the decals. This will allow you to dispose of all the small cut-out pieces so that the pieces do not get trapped underneath your decal when installing it on the bike. Once you have all of the small pieces and background removed, you can use the "wet method" to install the decals to your saddlebags. The wet method involves using a spray bottle of water with a couple drops of dish soap in the mixture and spraying the surface of your saddlebags to wet the entire surface. Then carefully remove the backing from your decal and use the spray bottle to wet the adhesive side of the decal. Now you can gently place the decal on your saddlebag. Because the surfaces are wet, you can pull the decal up to reposition it until you get it where you want it. Once it's in place, use a squeegee or other object such as a credit card wrapped in a microfiber towel to squeeze the water out from behind the decal. You can also use your hands to do this. You should take care not to use a hard/abrasive object that can scratch the decals or your bike's paint. The high-tack adhesive will begin to set/adhere to the bike as soon as the liquid is push out from behind the decal. Use caution to ensure the towel or object you are using does not catch any edges of the decal and pull it off your bike. If you take your time and be gentle during installation, it should be an easy process. A hair dryer can be used to speed up the drying process if needed.
Feel free to visit our How-To page on the website to watch a "wet method" installation video.


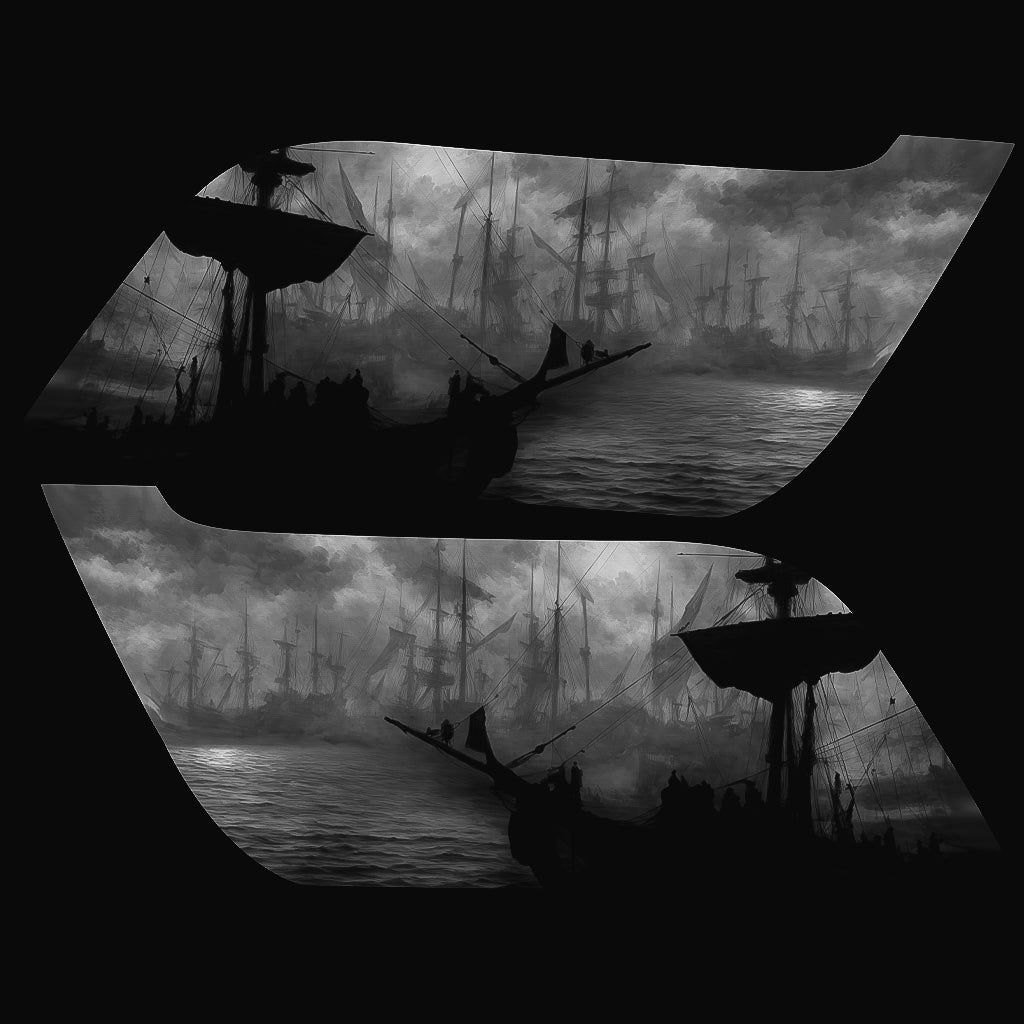
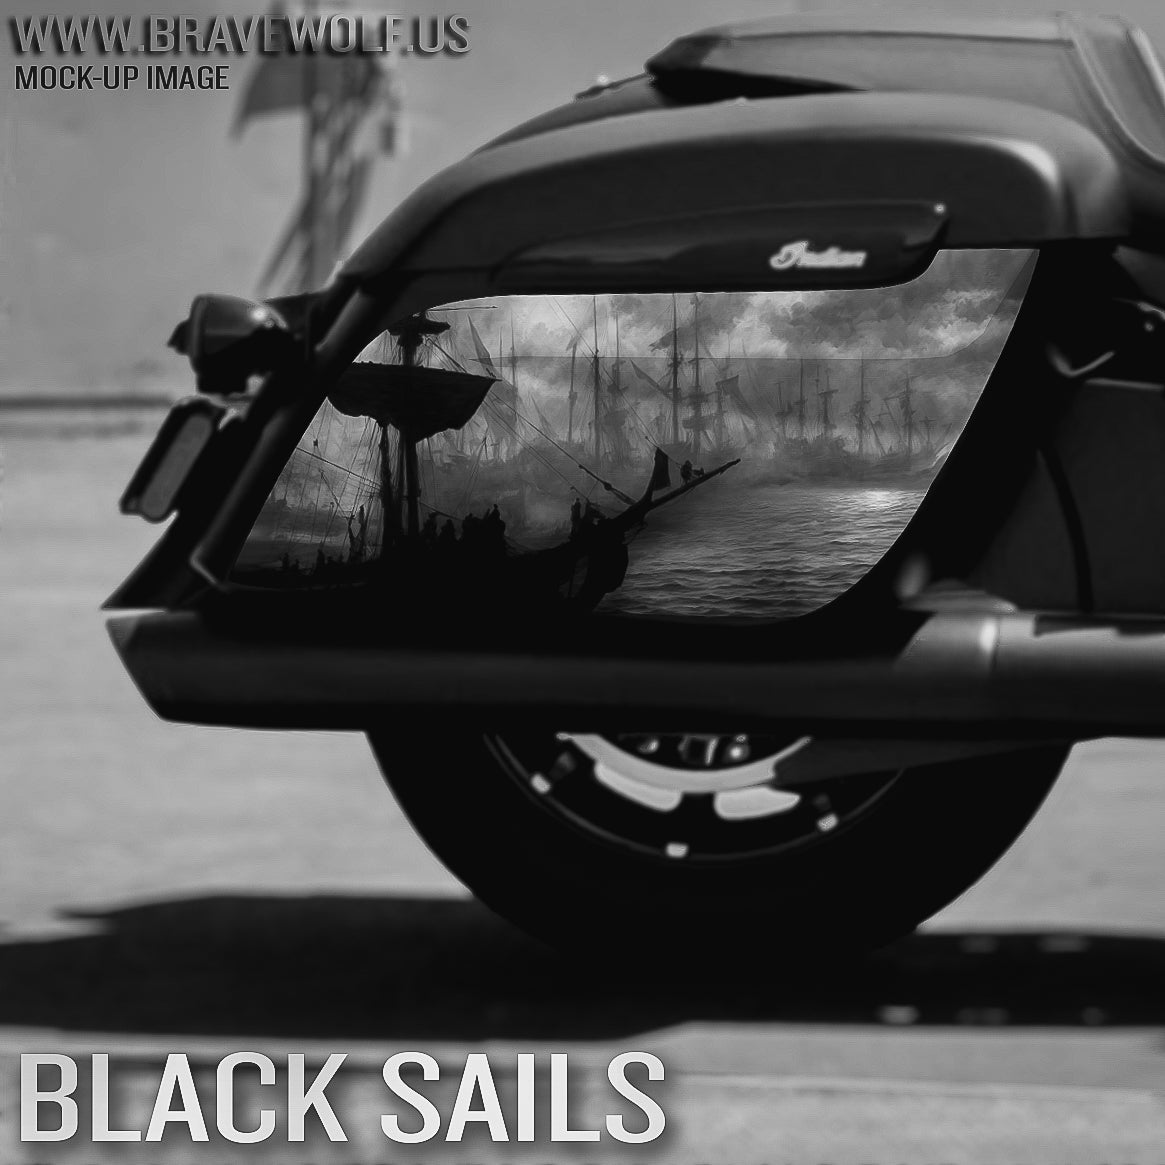
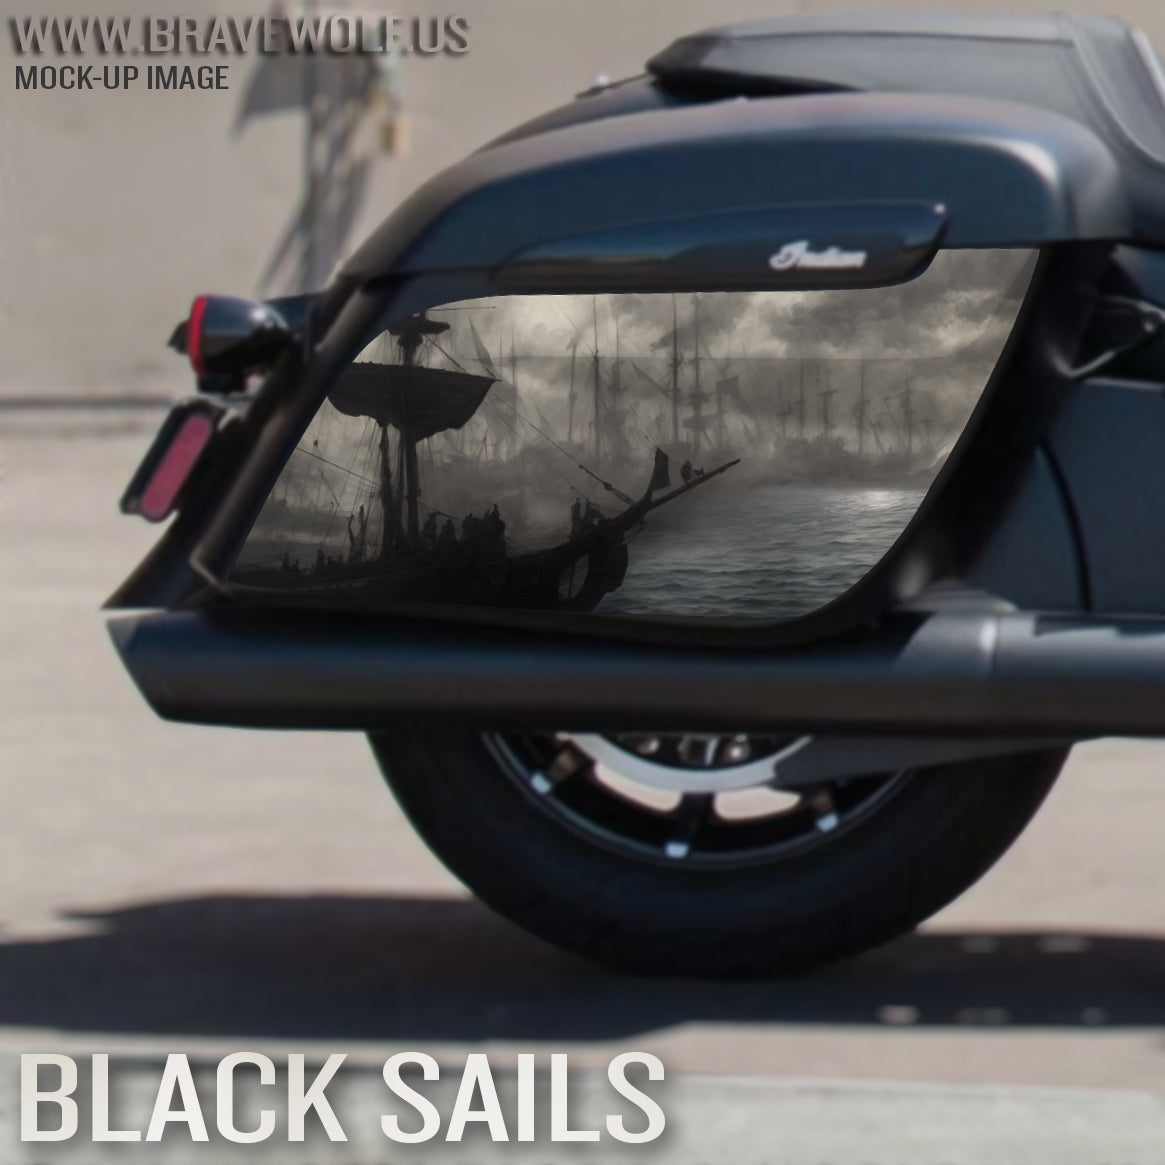
Saddlebag Decals-Black Sails-New Style Indian Bags-B&W
Regular price $180.00
Shipping calculated at checkout.
Stock Notice: (may take approximately 2-3 weeks before shipping if not in stock at the time of your order)
Our saddlebag decals are made from premium weatherproof hi-tack vinyl with a long lifespan that will keep them looking new for years. They are available in two finishes, heavy-duty 12 mil laminated Gloss (looks like it's painted on), or a heavy-duty sandy matte textured premium finish.
|
Fitment Guide: Fits the new style (squared) Indian OEM saddlebags. Also fits the Challenger & Pursuit when the plastic bag guard is removed. |
Installation:
Installing our decals is easy to do yourself at home. We recommend removing all of the excess decal material (the background image) before installing the decals. This will allow you to dispose of all the small cut-out pieces so that the pieces do not get trapped underneath your decal when installing it on the bike. Once you have all of the small pieces and background removed, you can use the "wet method" to install the decals to your saddlebags. The wet method involves using a spray bottle of water with a couple drops of dish soap in the mixture and spraying the surface of your saddlebags to wet the entire surface. Then carefully remove the backing from your decal and use the spray bottle to wet the adhesive side of the decal. Now you can gently place the decal on your saddlebag. Because the surfaces are wet, you can pull the decal up to reposition it until you get it where you want it. Once it's in place, use a squeegee or other object such as a credit card wrapped in a microfiber towel to squeeze the water out from behind the decal. You can also use your hands to do this. You should take care not to use a hard/abrasive object that can scratch the decals or your bike's paint. The high-tack adhesive will begin to set/adhere to the bike as soon as the liquid is push out from behind the decal. Use caution to ensure the towel or object you are using does not catch any edges of the decal and pull it off your bike. If you take your time and be gentle during installation, it should be an easy process. A hair dryer can be used to speed up the drying process if needed.
Feel free to visit our How-To page on the website to watch a "wet method" installation video.


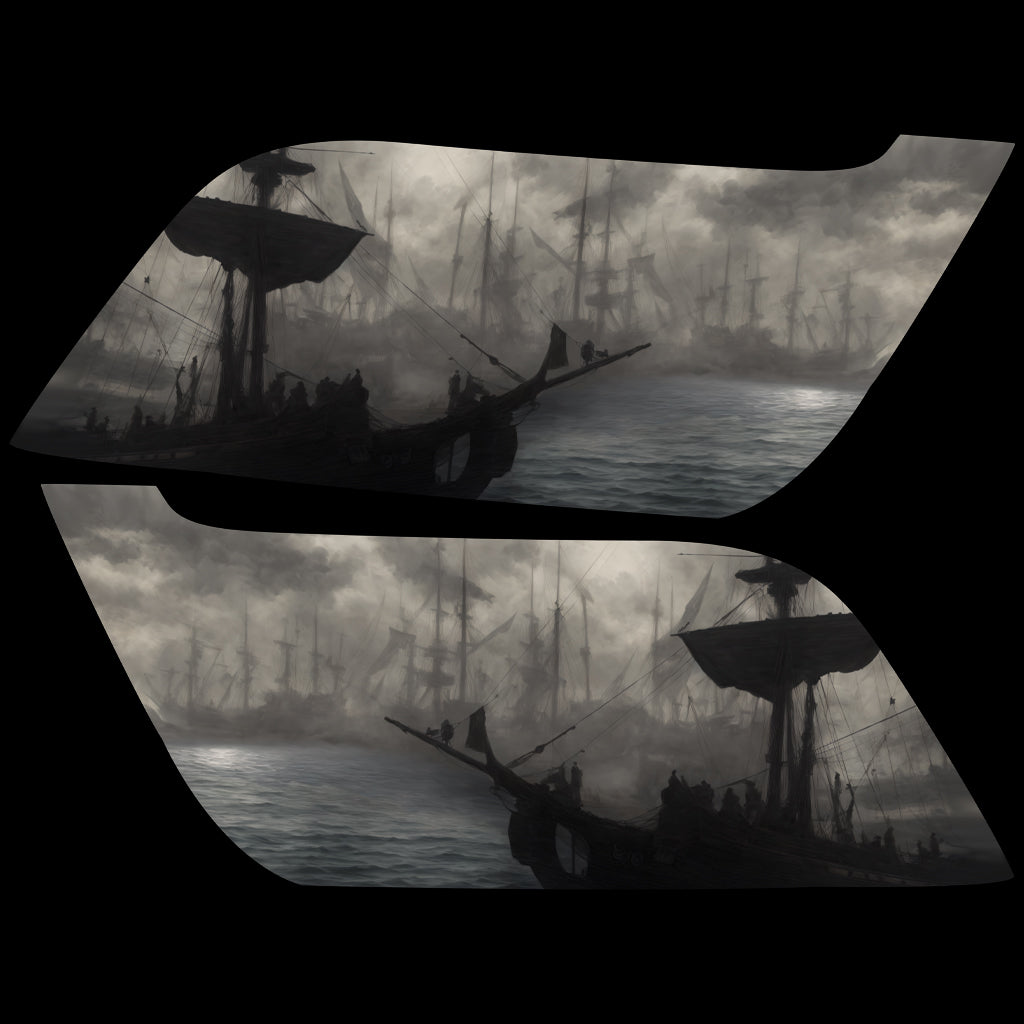
Saddlebag Decals-Black Sails-New Style Indian Bags-Color
Regular price $180.00
Shipping calculated at checkout.
Stock Notice: (may take approximately 2-3 weeks before shipping if not in stock at the time of your order)
Our saddlebag decals are made from premium weatherproof hi-tack vinyl with a long lifespan that will keep them looking new for years. They are available in two finishes, heavy-duty 12 mil laminated Gloss (looks like it's painted on), or a heavy-duty sandy matte textured premium finish.
|
Fitment Guide: Fits the new style (squared) Indian OEM saddlebags. Also fits the Challenger & Pursuit when the plastic bag guard is removed. |
Installation:
Installing our decals is easy to do yourself at home. We recommend removing all of the excess decal material (the background image) before installing the decals. This will allow you to dispose of all the small cut-out pieces so that the pieces do not get trapped underneath your decal when installing it on the bike. Once you have all of the small pieces and background removed, you can use the "wet method" to install the decals to your saddlebags. The wet method involves using a spray bottle of water with a couple drops of dish soap in the mixture and spraying the surface of your saddlebags to wet the entire surface. Then carefully remove the backing from your decal and use the spray bottle to wet the adhesive side of the decal. Now you can gently place the decal on your saddlebag. Because the surfaces are wet, you can pull the decal up to reposition it until you get it where you want it. Once it's in place, use a squeegee or other object such as a credit card wrapped in a microfiber towel to squeeze the water out from behind the decal. You can also use your hands to do this. You should take care not to use a hard/abrasive object that can scratch the decals or your bike's paint. The high-tack adhesive will begin to set/adhere to the bike as soon as the liquid is push out from behind the decal. Use caution to ensure the towel or object you are using does not catch any edges of the decal and pull it off your bike. If you take your time and be gentle during installation, it should be an easy process. A hair dryer can be used to speed up the drying process if needed.
Feel free to visit our How-To page on the website to watch a "wet method" installation video.


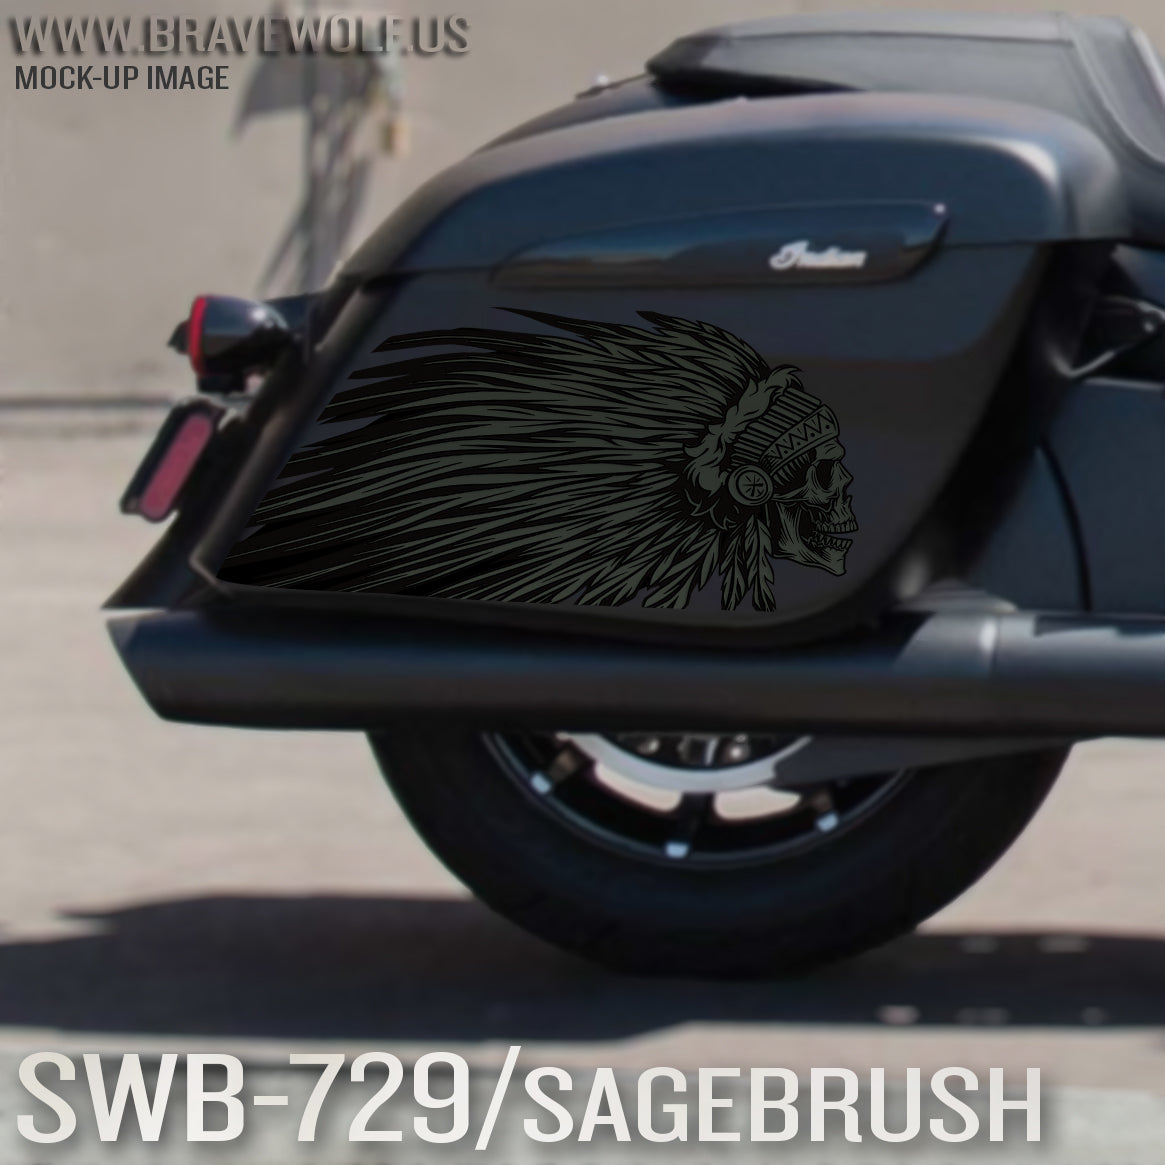
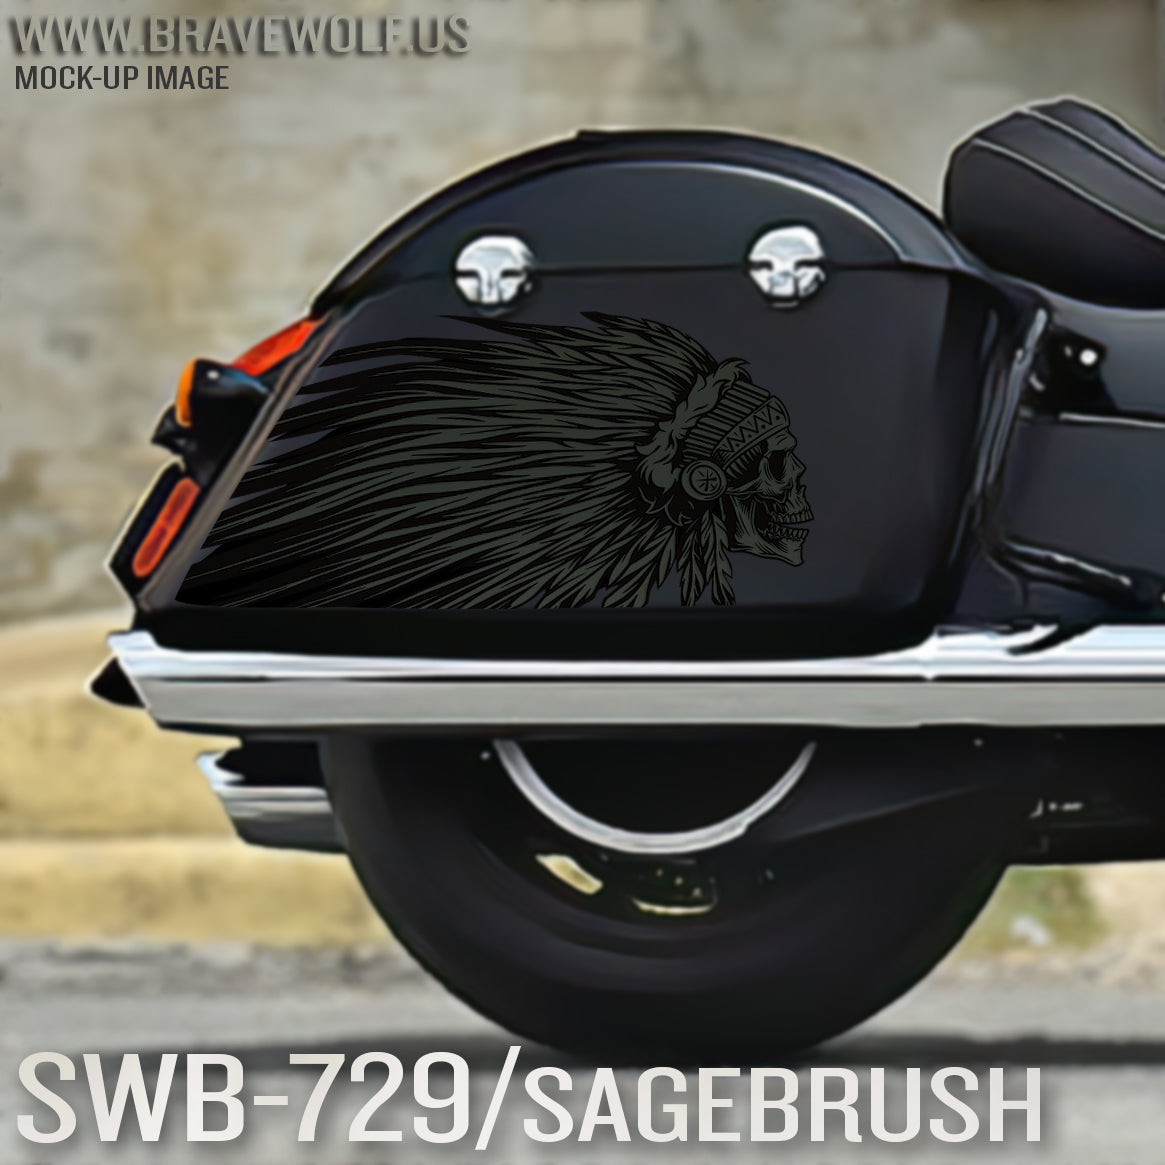
Saddlebag Decals-SWB729-Sagebrush
Regular price $180.00
Shipping calculated at checkout.
Stock Notice: (may take approximately 2-3 weeks before shipping if not in stock at the time of your order)
Our saddlebag decals are made from premium weatherproof hi-tack vinyl with a long lifespan that will keep them looking new for years. They are available in two finishes, heavy-duty 12 mil laminated Gloss (looks like it's painted on), or a heavy-duty sandy matte textured premium finish.
|
Fitment Guide: Fits both styles of Indian OEM saddlebags (rounded and squared). Also fits the Challenger & Pursuit when the plastic bag guard is removed. |
Installation:
Installing our decals is easy to do yourself at home. We recommend removing all of the excess decal material (the background image) before installing the decals. This will allow you to dispose of all the small cut-out pieces so that the pieces do not get trapped underneath your decal when installing it on the bike. Once you have all of the small pieces and background removed, you can use the "wet method" to install the decals to your saddlebags. The wet method involves using a spray bottle of water with a couple drops of dish soap in the mixture and spraying the surface of your saddlebags to wet the entire surface. Then carefully remove the backing from your decal and use the spray bottle to wet the adhesive side of the decal. Now you can gently place the decal on your saddlebag. Because the surfaces are wet, you can pull the decal up to reposition it until you get it where you want it. Once it's in place, use a squeegee or other object such as a credit card wrapped in a microfiber towel to squeeze the water out from behind the decal. You can also use your hands to do this. You should take care not to use a hard/abrasive object that can scratch the decals or your bike's paint. The high-tack adhesive will begin to set/adhere to the bike as soon as the liquid is push out from behind the decal. Use caution to ensure the towel or object you are using does not catch any edges of the decal and pull it off your bike. If you take your time and be gentle during installation, it should be an easy process. A hair dryer can be used to speed up the drying process if needed.
Feel free to visit our How-To page on the website to watch a "wet method" installation video TAB Performance made while installing our Zombie decals.


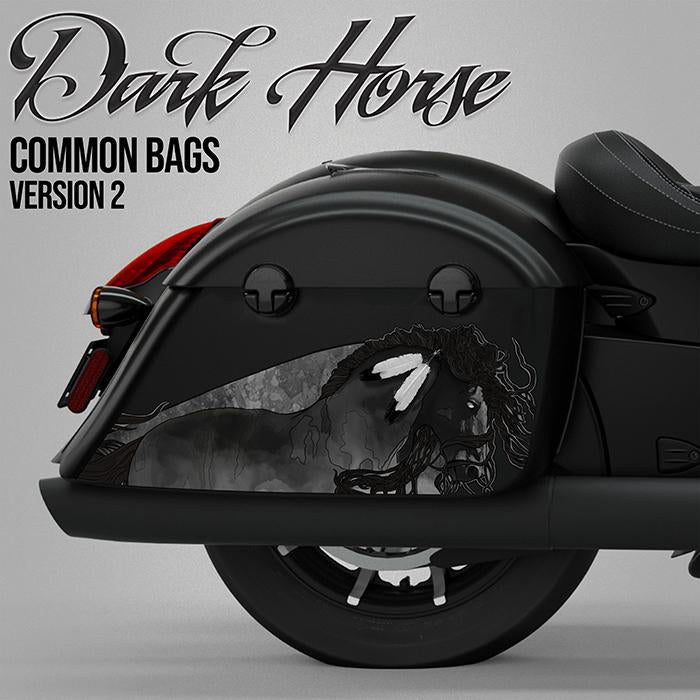
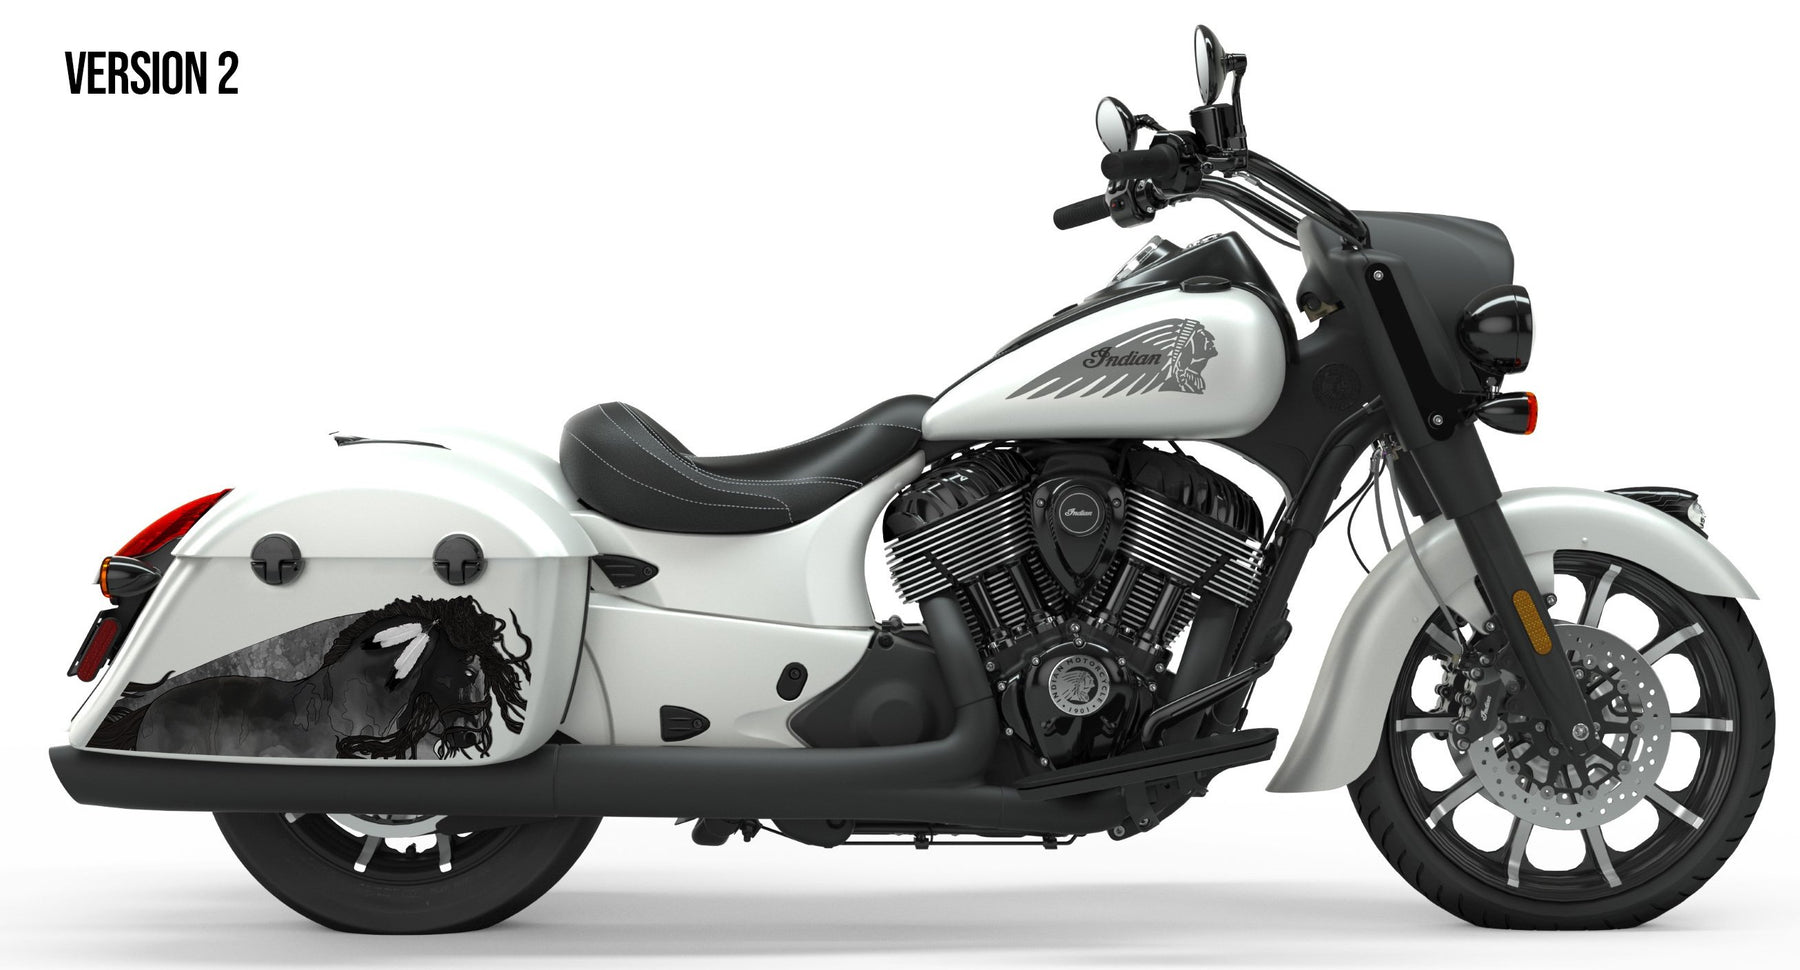
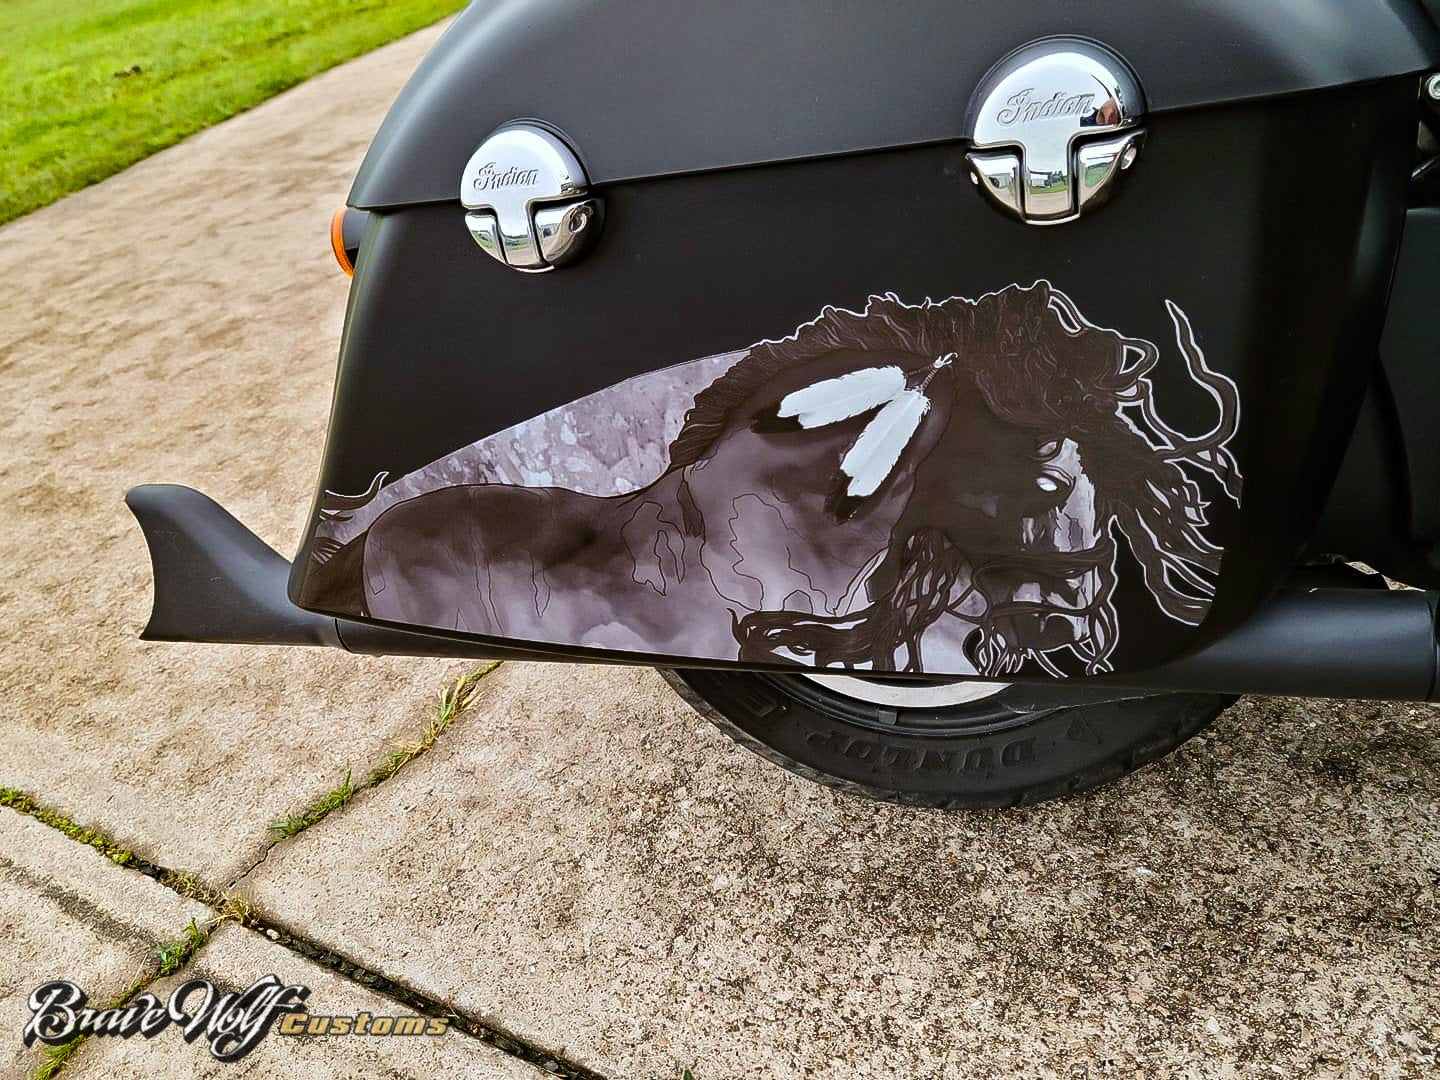
Dark Horse - Saddlebag - V2 - Rounded Bags
Regular price $100.00
Shipping calculated at checkout.
SPECIAL ORDER - these decals may take approximately two weeks before shipping due to manufacturing times
Give your motorcycle a custom look with these Dark Horse saddlebag decals! They are designed for both versions of Indian saddlebags, the common style, and the newer style. Although they were designed for the saddlebags, you can use these decals wherever you want. Just be sure to measure the size of where you want to apply them to ensure they will fit.
Size:
| Style | Inches | Centimeters |
| Version 2 (Common style bags) | 23.3807 in x 8.6321 in | 59.436 x 21.84 cm |
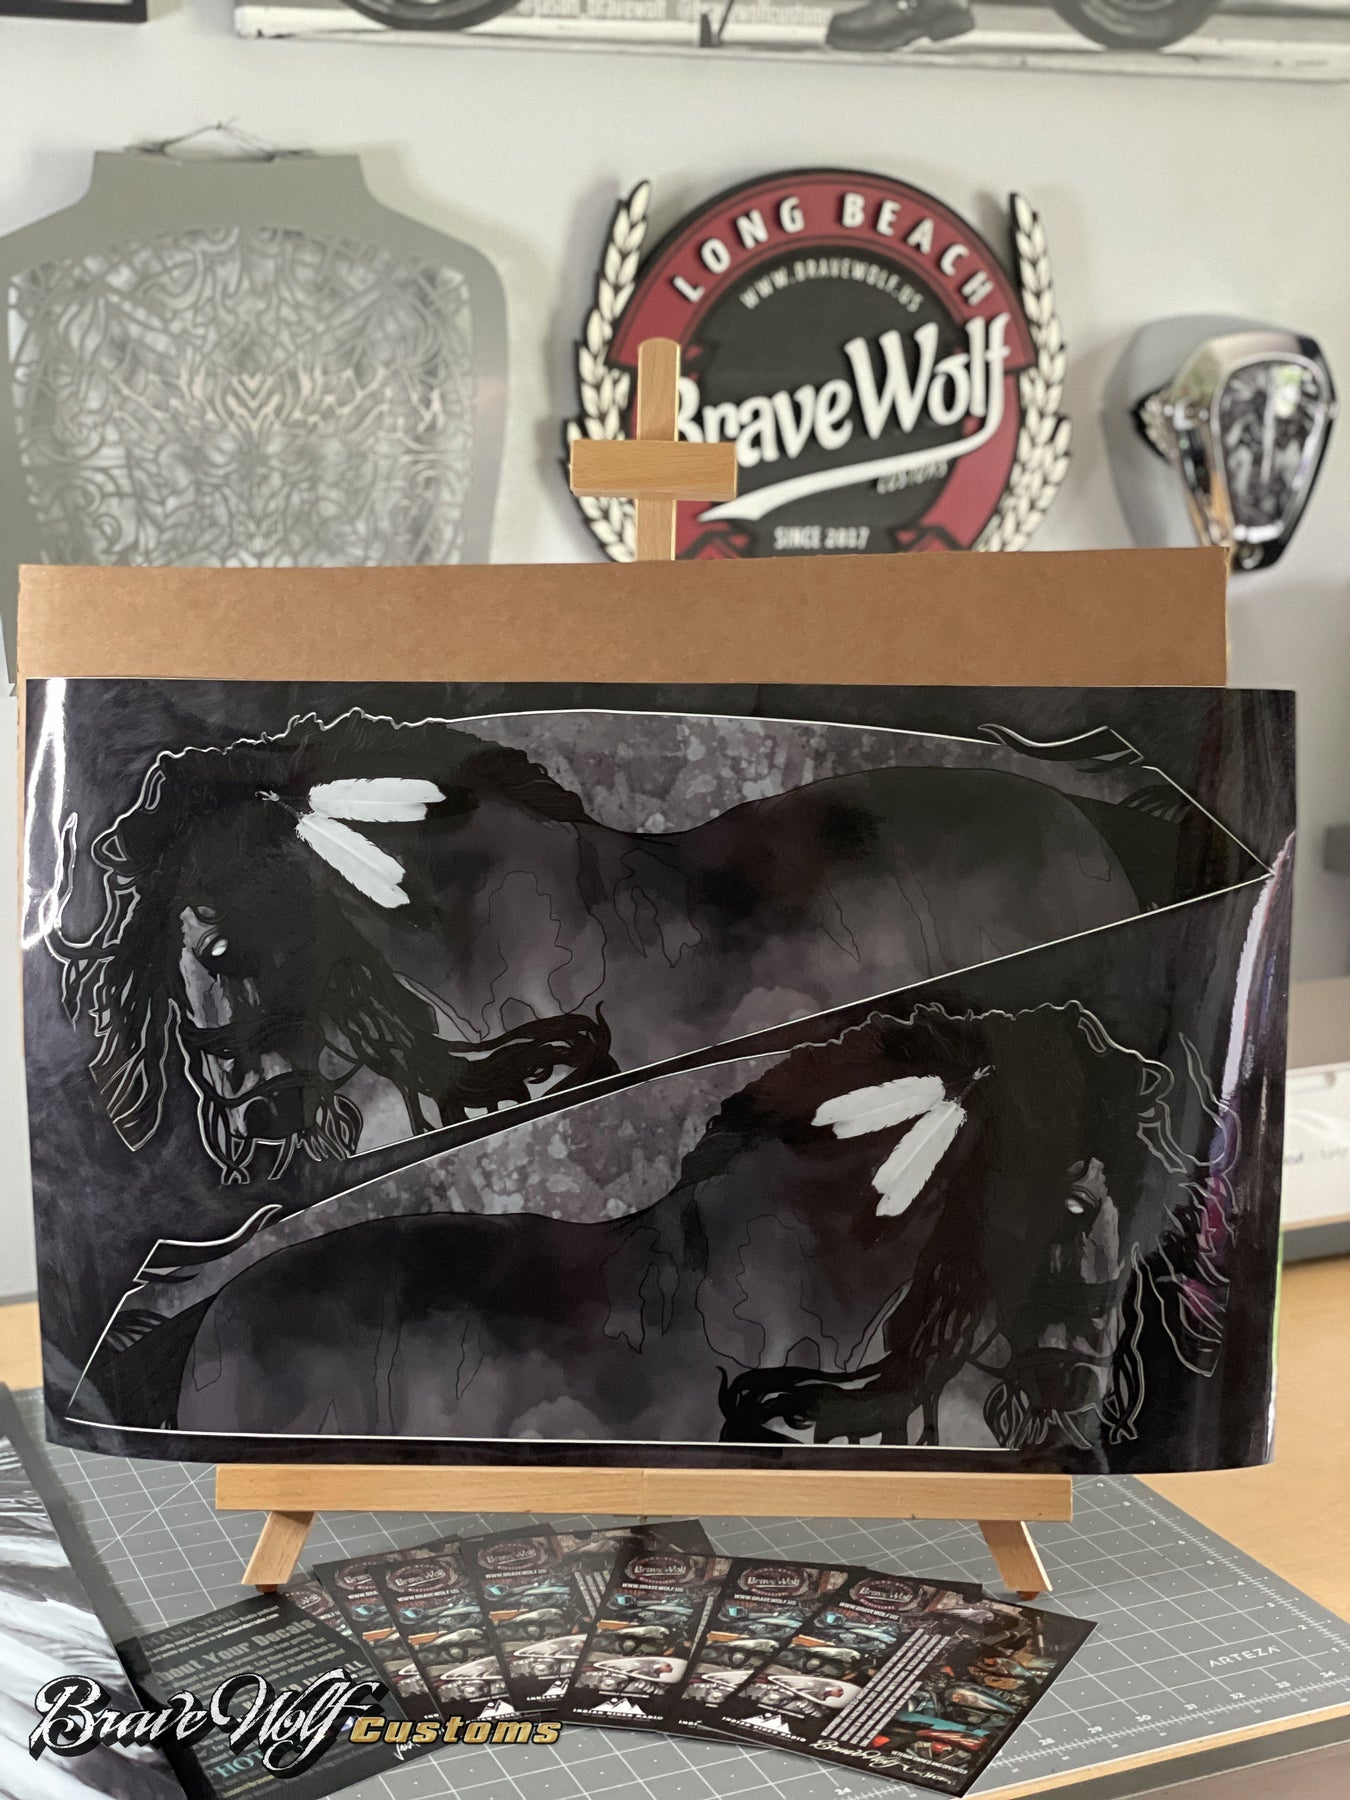
Material: A material originally made for motocross, these decals can really take a beating. They are not your everyday "sticker". These decals are printed on a hi-tack vinyl and laminated with a 12-mil glossy PVC laminate or with a sandy matte texture (your choice). It is weather proof, temperature and UV resistant, and will maintain its quality for years.
What is included: Matching set of left and right facing decals. Application suitable for Motorcycles, cars, trucks, windows, tables and more.
Installation: We recommend using the wet method to install decals of this size. Take a look at this video made by TAB Performance during their installation of our decals.


Surtr in Muspelheim - New Style Indian Saddlebag Decal Set - B&W
Regular price $180.00
Shipping calculated at checkout.
Stock Notice: (may take approximately 2-3 weeks before shipping if not in stock at the time of your order)
Our saddlebag decals are made from premium weatherproof hi-tack vinyl with a long lifespan that will keep them looking new for years. They are available in two finishes, heavy-duty 12 mil laminated Gloss (looks like it's painted on), or a heavy-duty sandy matte textured premium finish.
|
Fitment Guide: Fits the new style (squared) Indian OEM saddlebags. Also fits the Challenger & Pursuit when the plastic bag guard is removed. |
Installation:
Installing our decals is easy to do yourself at home. We recommend removing all of the excess decal material (the background image) before installing the decals. This will allow you to dispose of all the small cut-out pieces so that the pieces do not get trapped underneath your decal when installing it on the bike. Once you have all of the small pieces and background removed, you can use the "wet method" to install the decals to your saddlebags. The wet method involves using a spray bottle of water with a couple drops of dish soap in the mixture and spraying the surface of your saddlebags to wet the entire surface. Then carefully remove the backing from your decal and use the spray bottle to wet the adhesive side of the decal. Now you can gently place the decal on your saddlebag. Because the surfaces are wet, you can pull the decal up to reposition it until you get it where you want it. Once it's in place, use a squeegee or other object such as a credit card wrapped in a microfiber towel to squeeze the water out from behind the decal. You can also use your hands to do this. You should take care not to use a hard/abrasive object that can scratch the decals or your bike's paint. The high-tack adhesive will begin to set/adhere to the bike as soon as the liquid is push out from behind the decal. Use caution to ensure the towel or object you are using does not catch any edges of the decal and pull it off your bike. If you take your time and be gentle during installation, it should be an easy process. A hair dryer can be used to speed up the drying process if needed.
Feel free to visit our How-To page on the website to watch a "wet method" installation video.


Odin - New Style Indian Saddlebag Decal Set - B&W
Regular price $180.00
Shipping calculated at checkout.
Stock Notice: (may take approximately 2-3 weeks before shipping if not in stock at the time of your order)
Our saddlebag decals are made from premium weatherproof hi-tack vinyl with a long lifespan that will keep them looking new for years. They are available in two finishes, heavy-duty 12 mil laminated Gloss (looks like it's painted on), or a heavy-duty sandy matte textured premium finish.
|
Fitment Guide: Fits the new style (squared) Indian OEM saddlebags. Also fits the Challenger & Pursuit when the plastic bag guard is removed. |
Installation:
Installing our decals is easy to do yourself at home. We recommend removing all of the excess decal material (the background image) before installing the decals. This will allow you to dispose of all the small cut-out pieces so that the pieces do not get trapped underneath your decal when installing it on the bike. Once you have all of the small pieces and background removed, you can use the "wet method" to install the decals to your saddlebags. The wet method involves using a spray bottle of water with a couple drops of dish soap in the mixture and spraying the surface of your saddlebags to wet the entire surface. Then carefully remove the backing from your decal and use the spray bottle to wet the adhesive side of the decal. Now you can gently place the decal on your saddlebag. Because the surfaces are wet, you can pull the decal up to reposition it until you get it where you want it. Once it's in place, use a squeegee or other object such as a credit card wrapped in a microfiber towel to squeeze the water out from behind the decal. You can also use your hands to do this. You should take care not to use a hard/abrasive object that can scratch the decals or your bike's paint. The high-tack adhesive will begin to set/adhere to the bike as soon as the liquid is push out from behind the decal. Use caution to ensure the towel or object you are using does not catch any edges of the decal and pull it off your bike. If you take your time and be gentle during installation, it should be an easy process. A hair dryer can be used to speed up the drying process if needed.
Feel free to visit our How-To page on the website to watch a "wet method" installation video.


Surtr in Muspelheim - New Style Indian Saddlebag Decal Set
Regular price $180.00
Shipping calculated at checkout.
Stock Notice: (may take approximately 2-3 weeks before shipping if not in stock at the time of your order)
Our saddlebag decals are made from premium weatherproof hi-tack vinyl with a long lifespan that will keep them looking new for years. They are available in two finishes, heavy-duty 12 mil laminated Gloss (looks like it's painted on), or a heavy-duty sandy matte textured premium finish.
|
Fitment Guide: Fits the new style (squared) Indian OEM saddlebags. Also fits the Challenger & Pursuit when the plastic bag guard is removed. |
Installation:
Installing our decals is easy to do yourself at home. We recommend removing all of the excess decal material (the background image) before installing the decals. This will allow you to dispose of all the small cut-out pieces so that the pieces do not get trapped underneath your decal when installing it on the bike. Once you have all of the small pieces and background removed, you can use the "wet method" to install the decals to your saddlebags. The wet method involves using a spray bottle of water with a couple drops of dish soap in the mixture and spraying the surface of your saddlebags to wet the entire surface. Then carefully remove the backing from your decal and use the spray bottle to wet the adhesive side of the decal. Now you can gently place the decal on your saddlebag. Because the surfaces are wet, you can pull the decal up to reposition it until you get it where you want it. Once it's in place, use a squeegee or other object such as a credit card wrapped in a microfiber towel to squeeze the water out from behind the decal. You can also use your hands to do this. You should take care not to use a hard/abrasive object that can scratch the decals or your bike's paint. The high-tack adhesive will begin to set/adhere to the bike as soon as the liquid is push out from behind the decal. Use caution to ensure the towel or object you are using does not catch any edges of the decal and pull it off your bike. If you take your time and be gentle during installation, it should be an easy process. A hair dryer can be used to speed up the drying process if needed.
Feel free to visit our How-To page on the website to watch a "wet method" installation video.