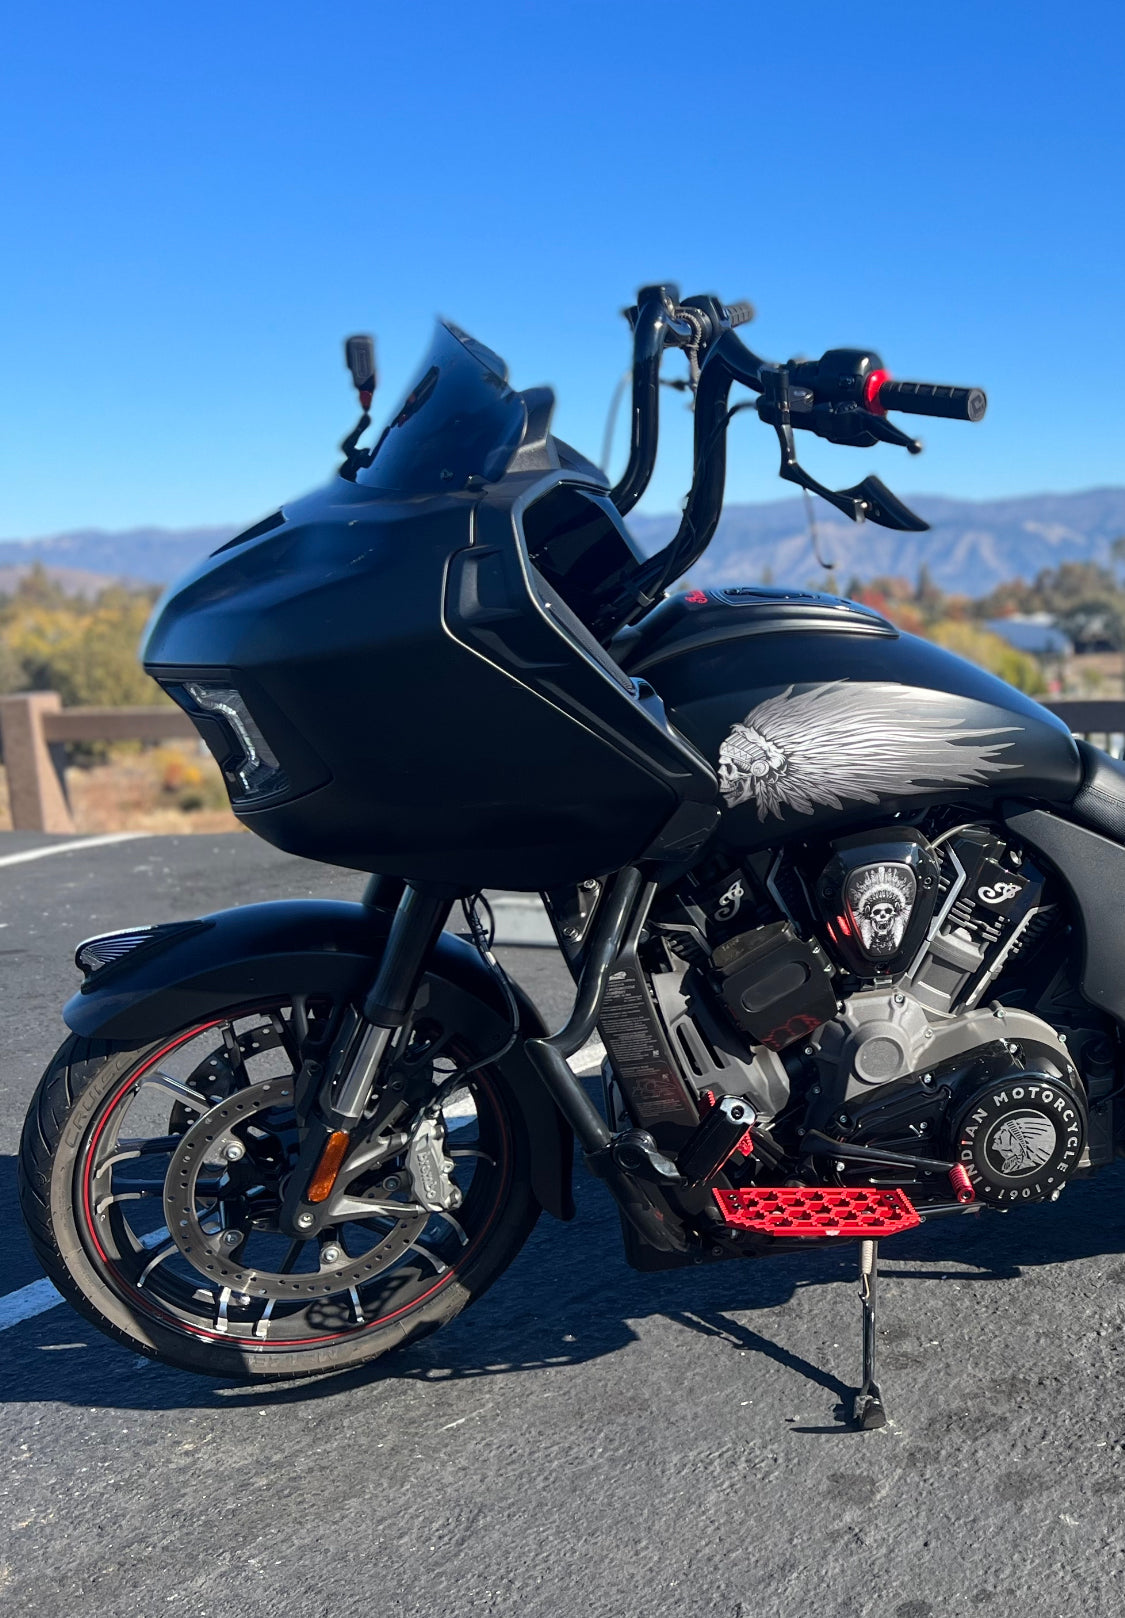
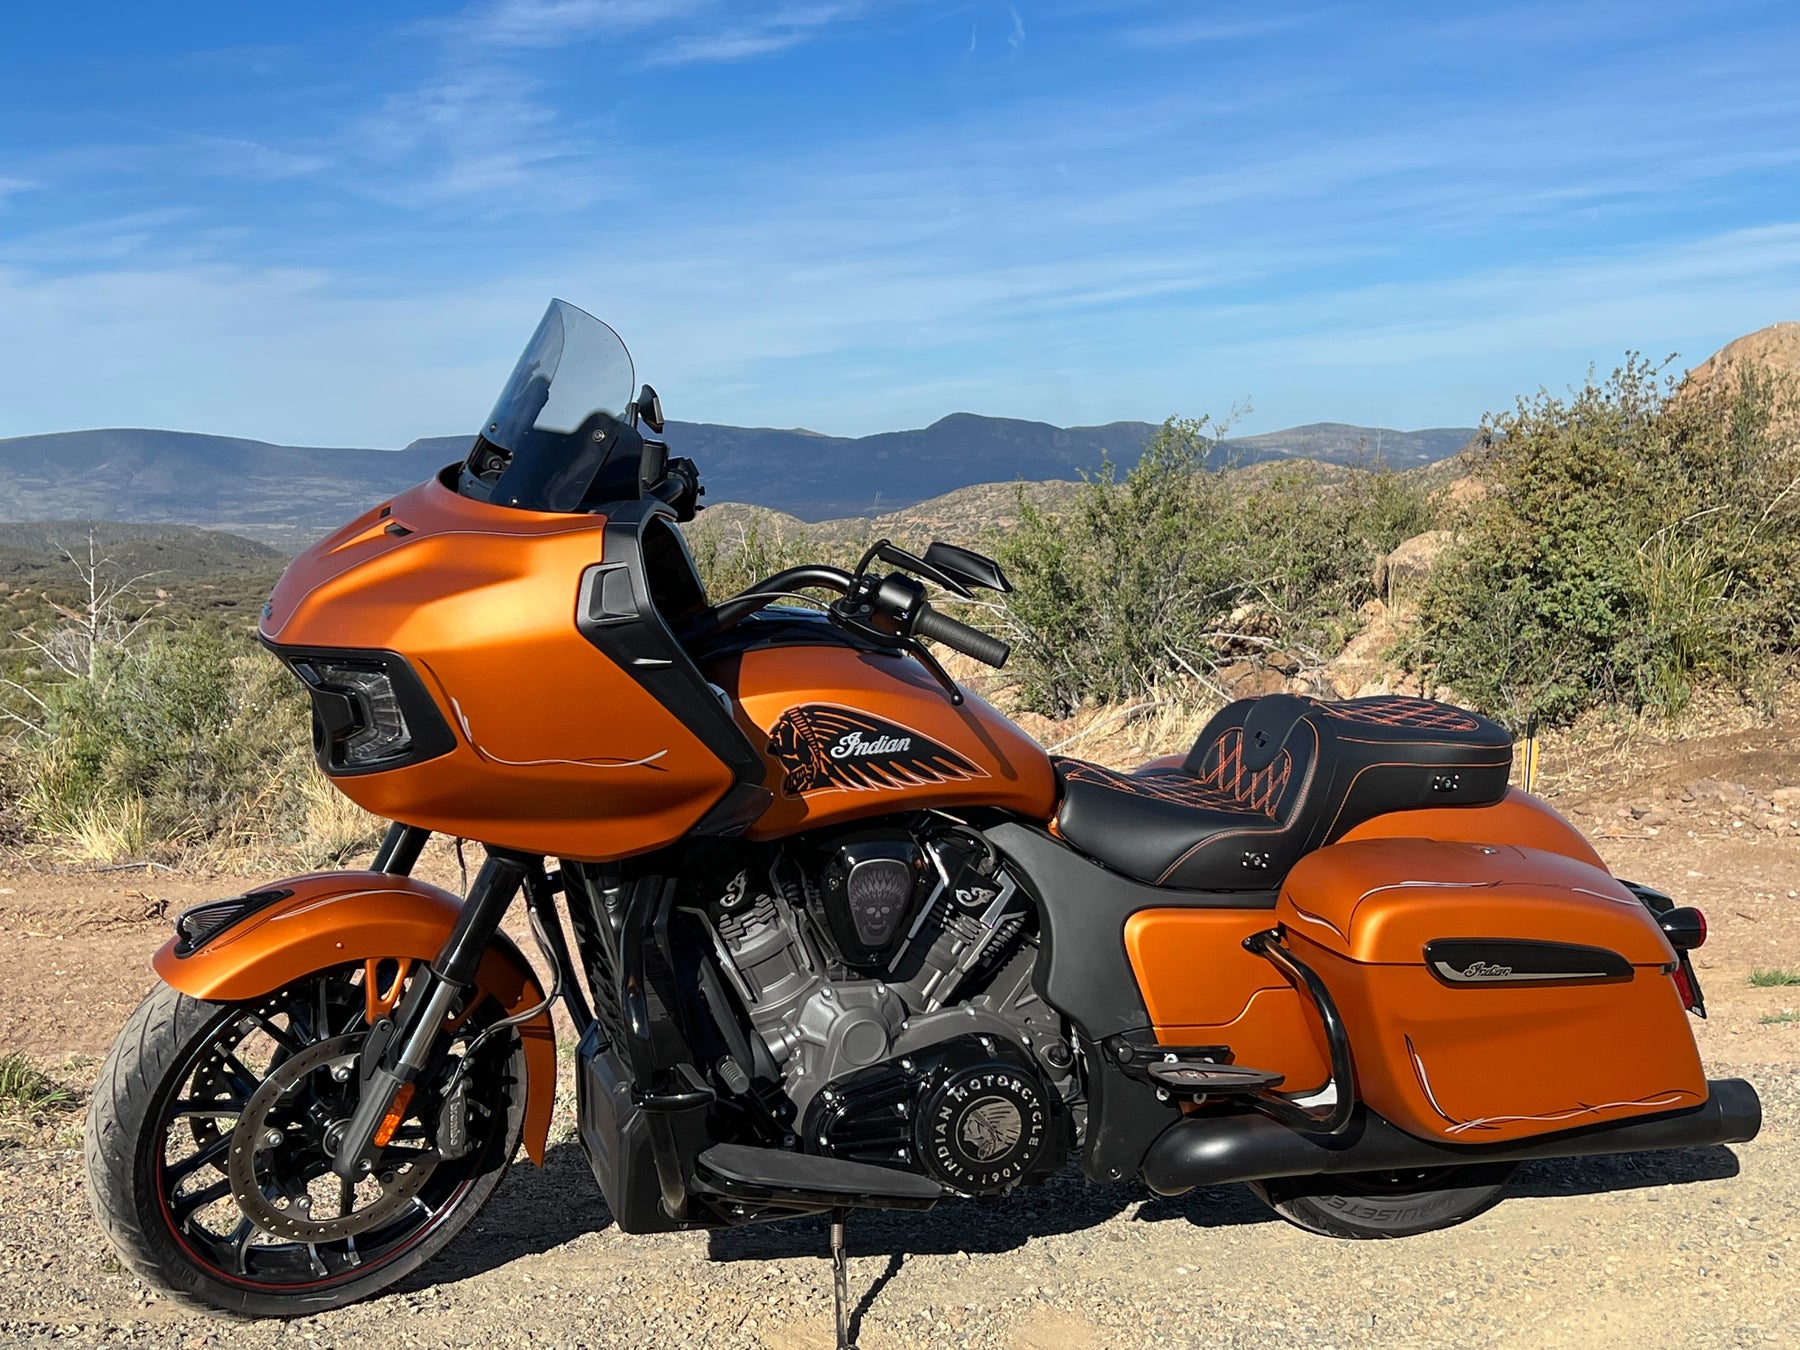
Brave Wolf Customs has a wide assortment of aftermarket products for your Indian Powerplus Roadmaster and Powerplus Chieftain. Because these models are built on the same platform as the Indian Challenger and Pursuit, aftermarket options are expanded. Check out our selection of decals, accents, radiator covers, highway bars, bag lights and more.
104 products
104 products


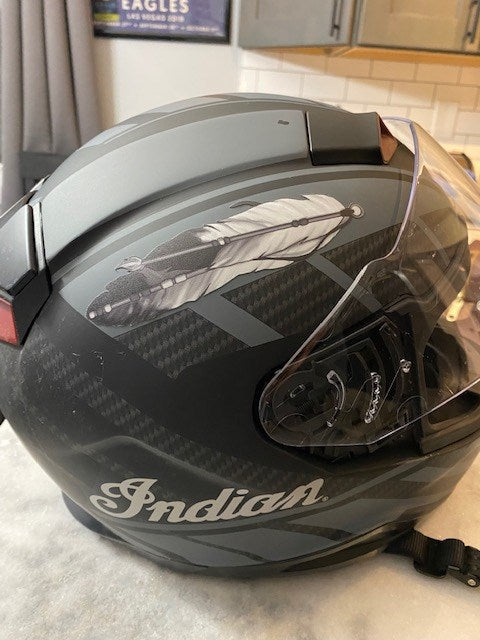


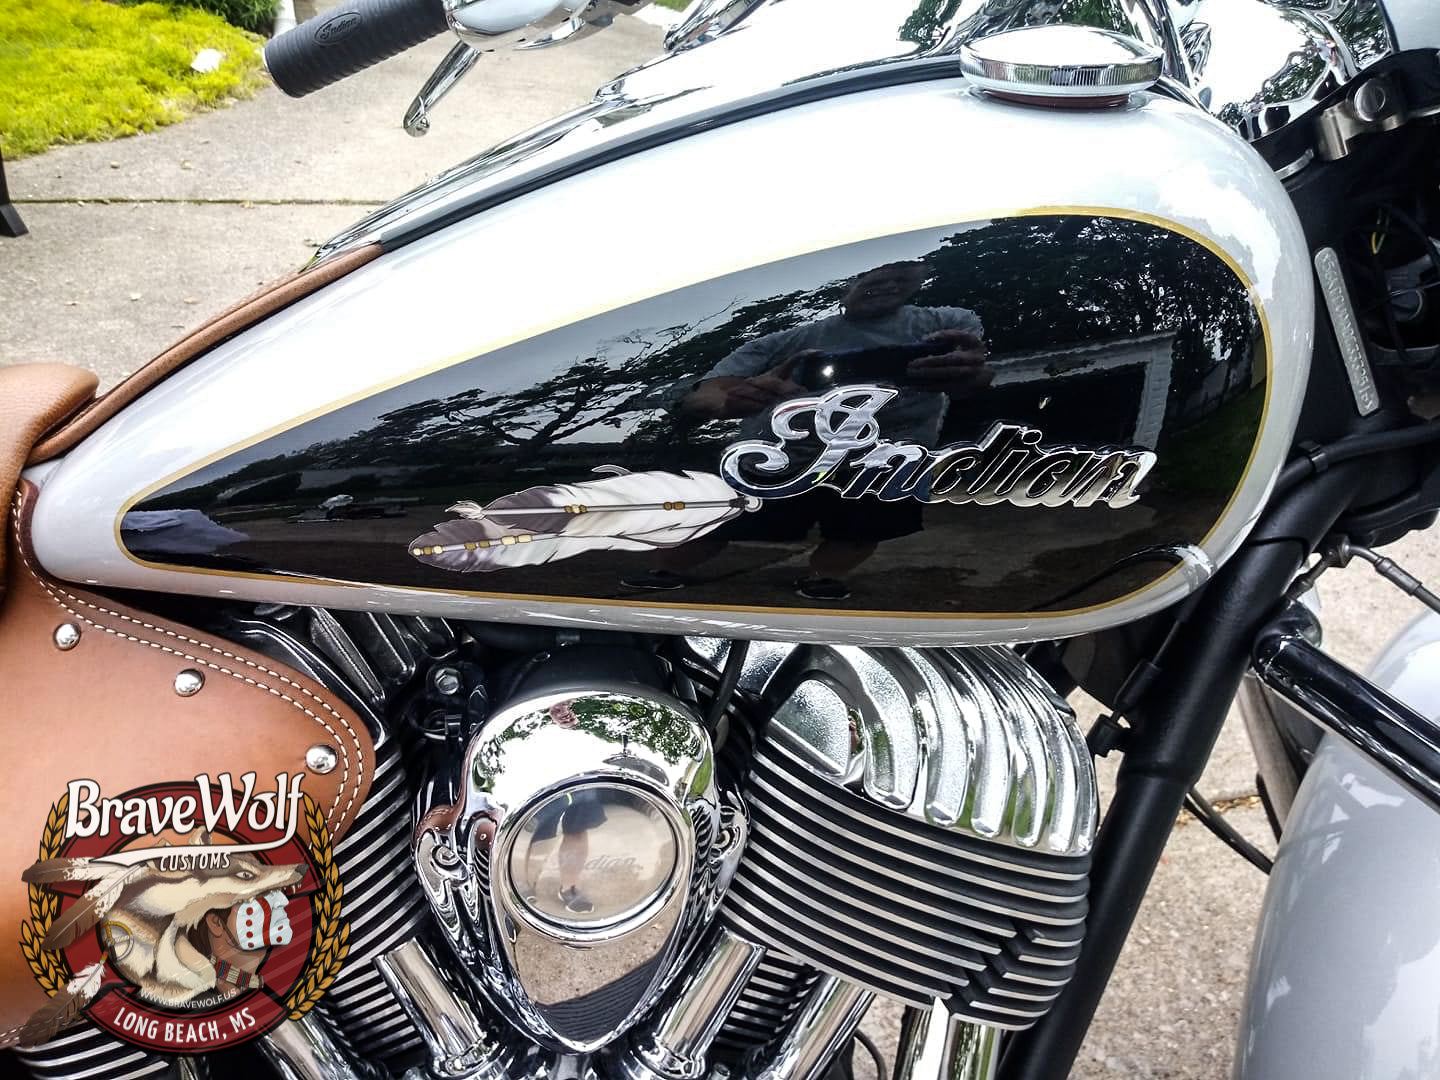
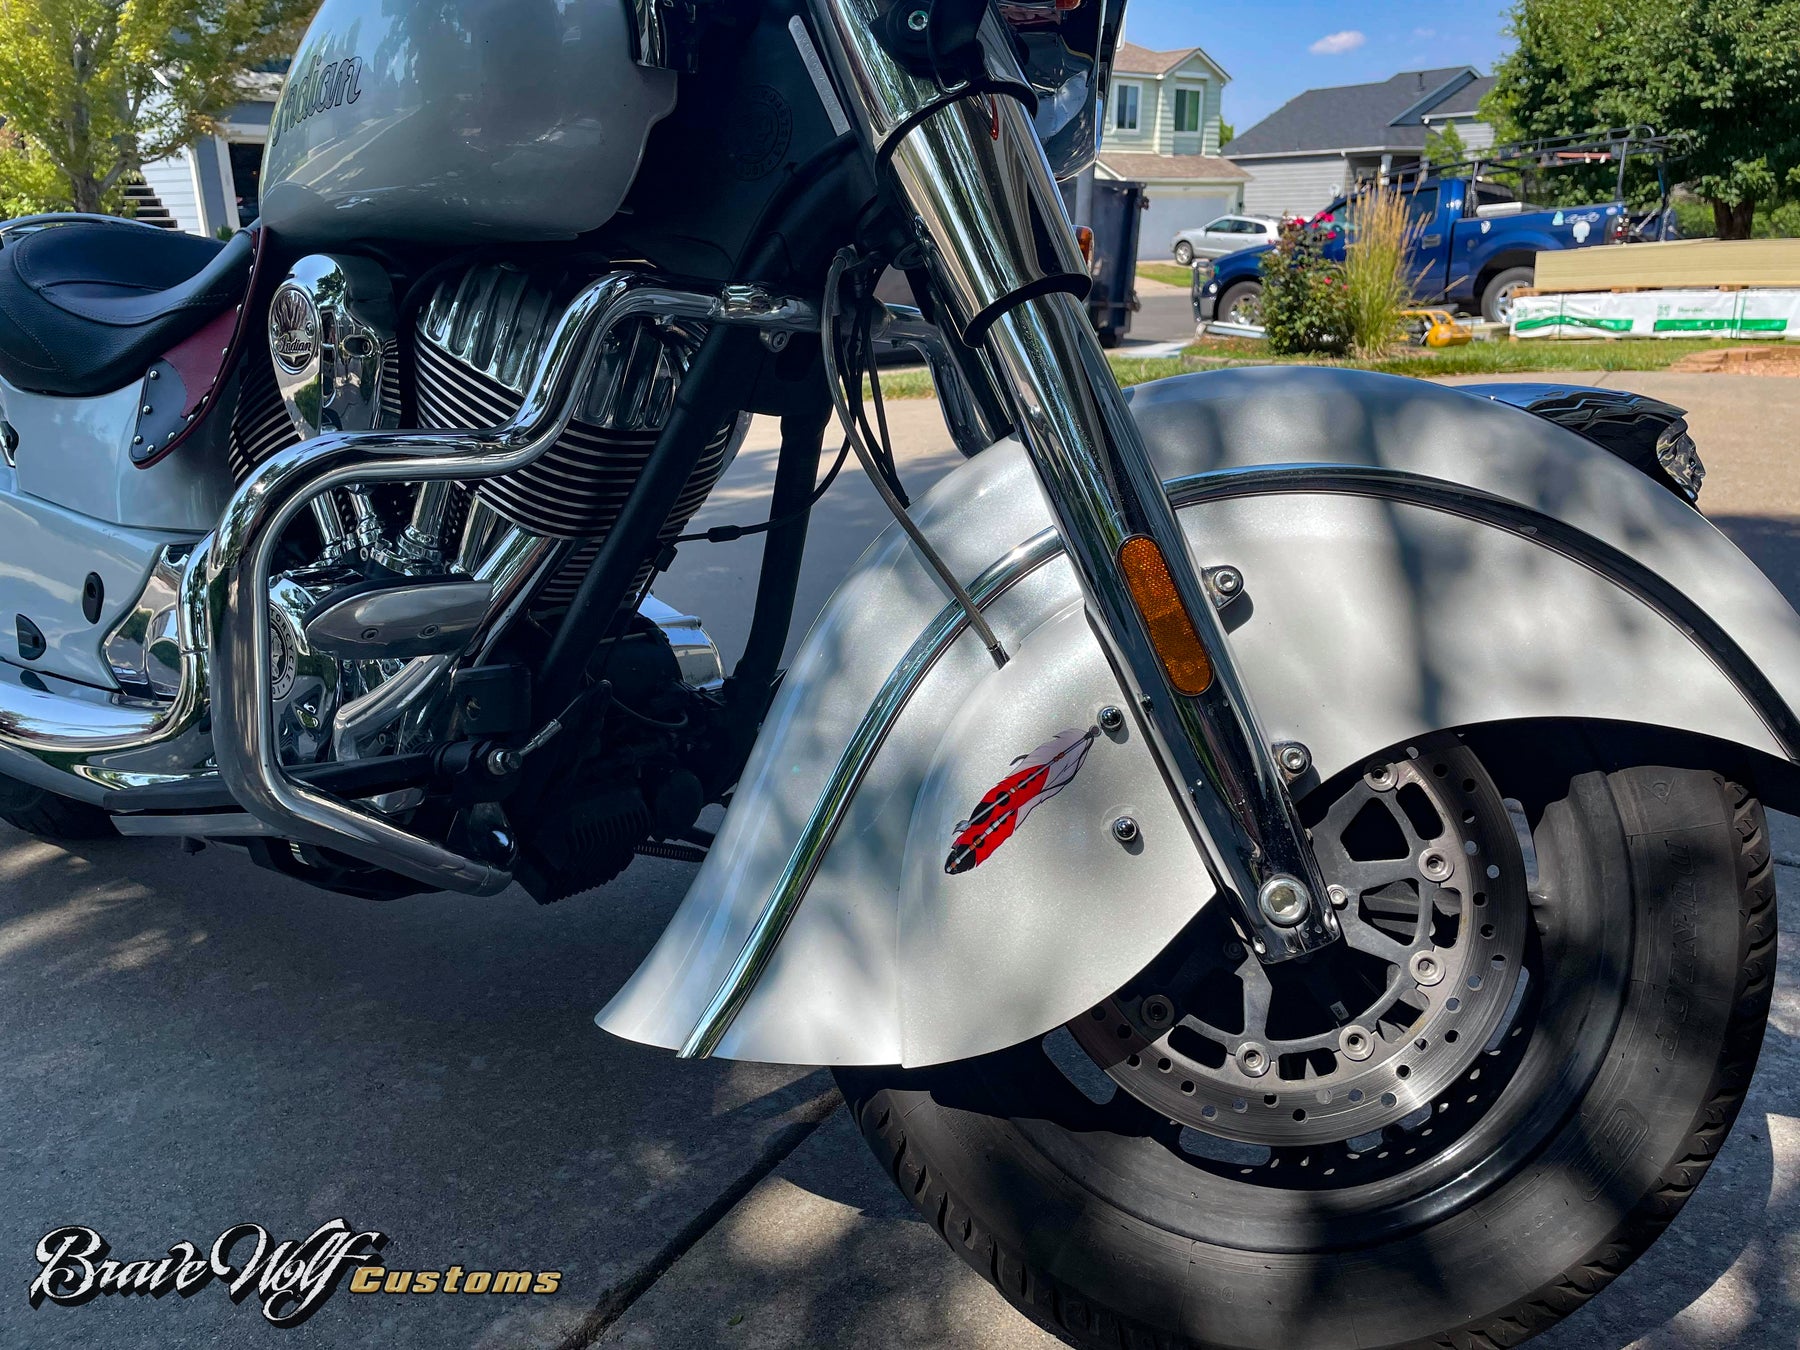
Feather Helmet Decals - 5 Inches long
Regular price $10.00 Sale price $8.50 Save $1.50
Shipping calculated at checkout.
Stock Notice: Most options are in-stock and ship immediately. IF you choose a style that we don’t have in stock, it may take a couple weeks to receive it from our manufacturer before we can ship to you.
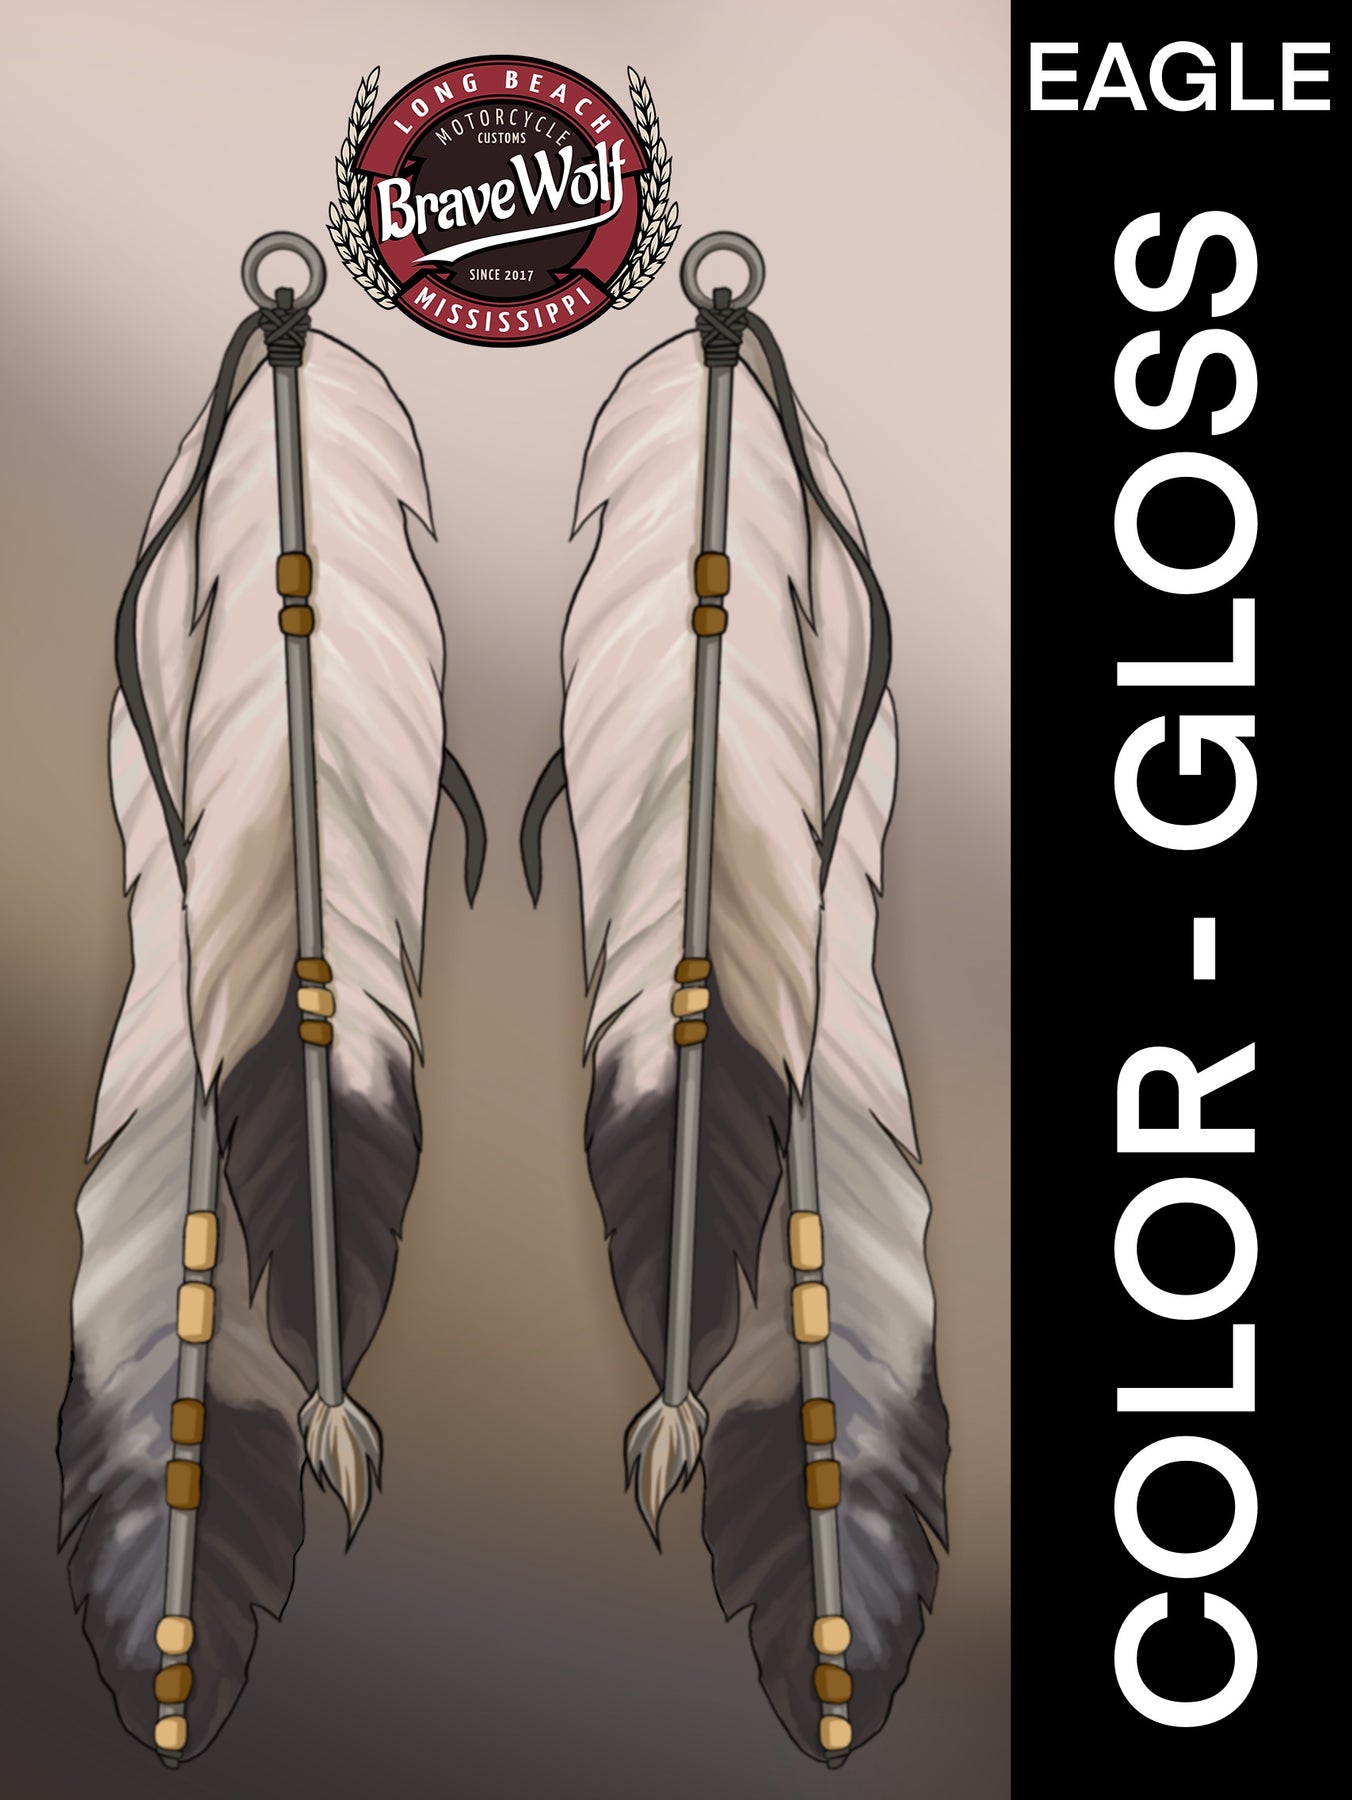
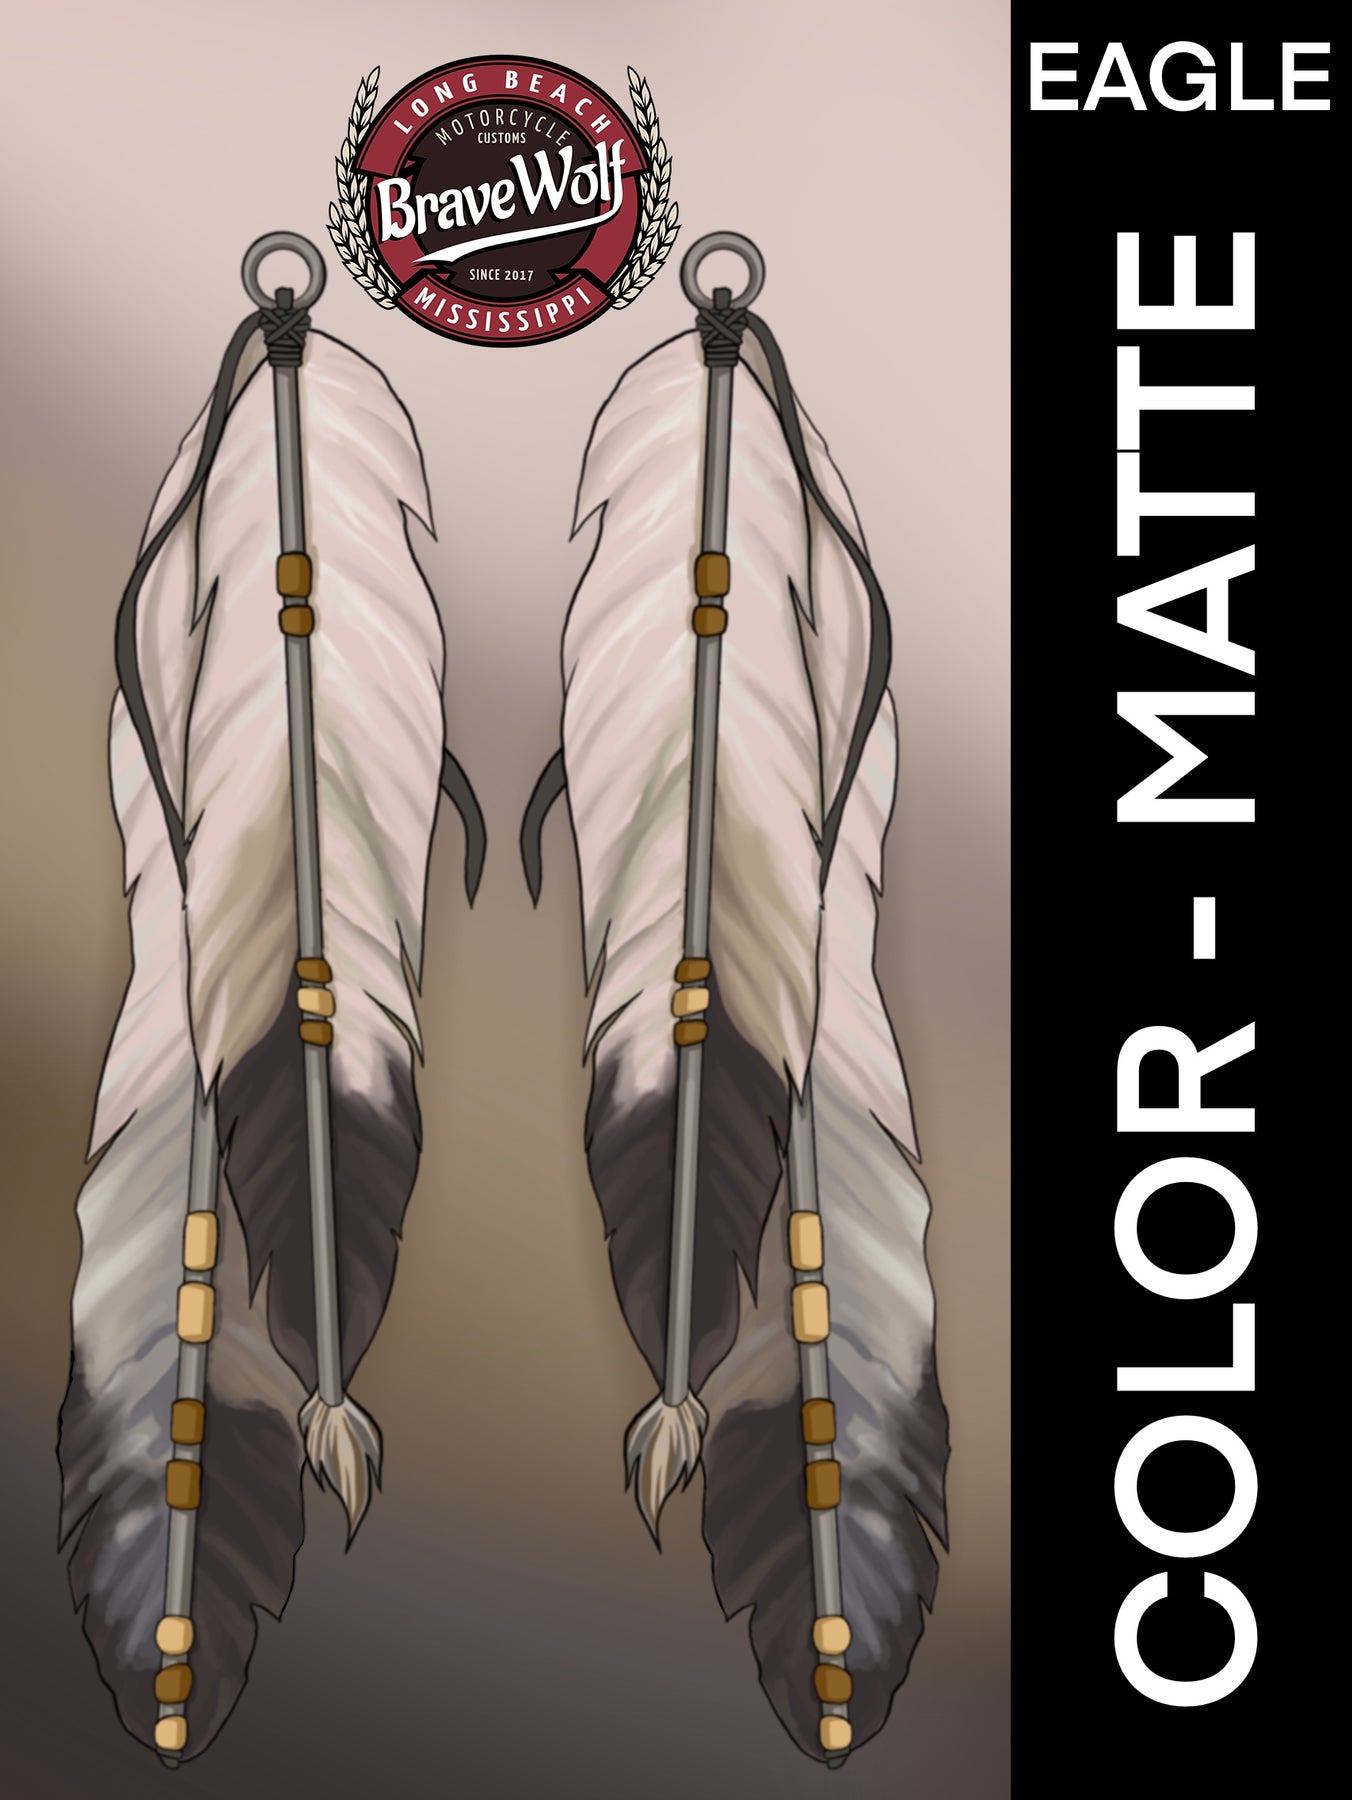
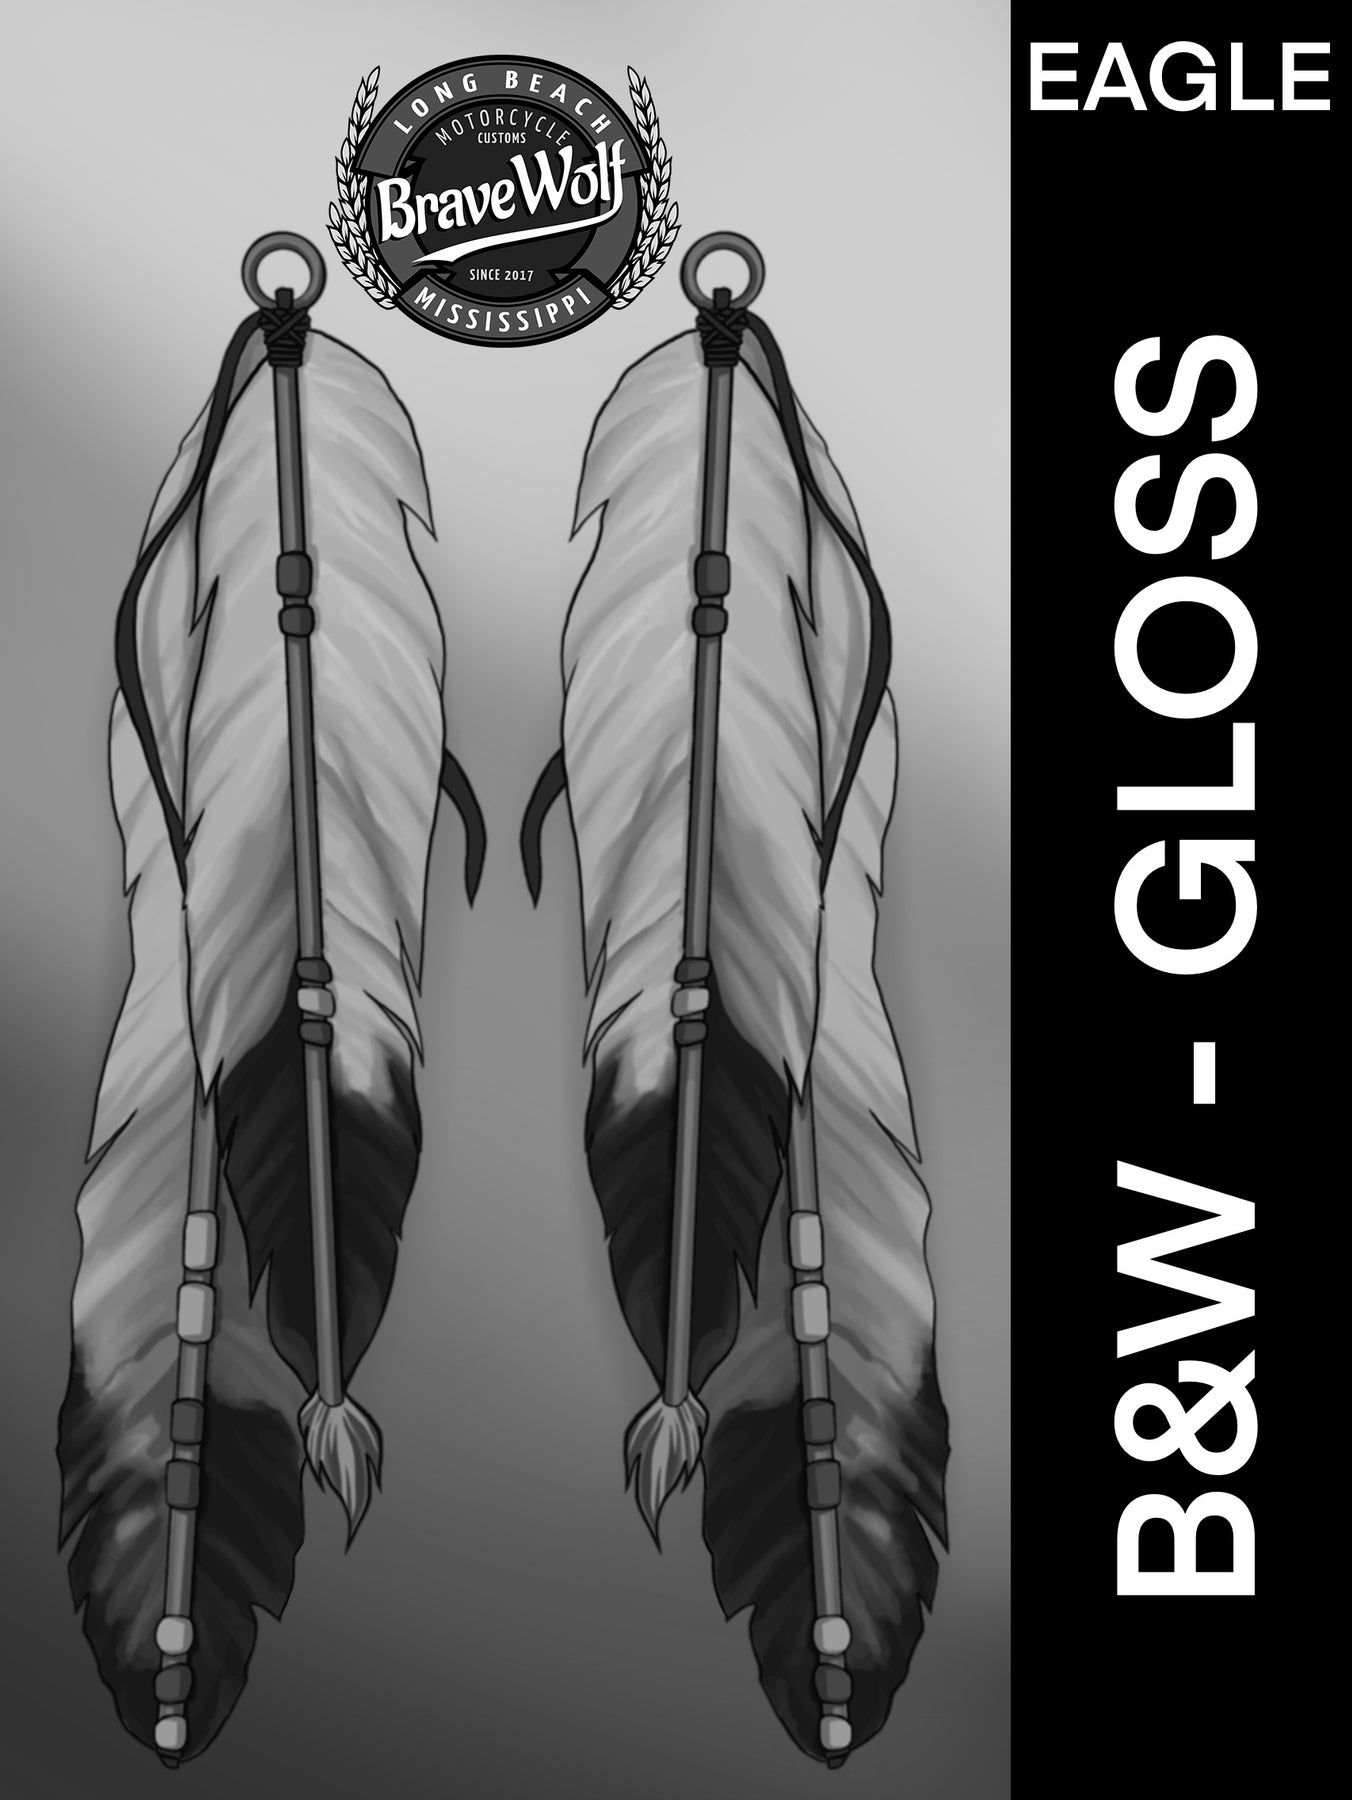
These small feather accent decals are a set of two for placement on both sides of your helmet. Of course, you can put them on anything you like if you don't want them for your helmet. They will work great for tumblers, tool boxes, or small parts of your bike. We've designed them in a variety of colors and styles to match our tank and saddlebag decals and offer you more customization options.
Size: Length = 5.1 inches | Width = 1.4 inches (each)


Material: A material originally made for motocross, these decals can really take a beating. They are not your everyday "sticker". These decals are printed on a hi-tack vinyl with a gloss or sandy matte texture. It is weather proof, temperature and UV resistant, and will maintain its quality for years.
Shipping times: In-stock products ship the same business day before 9AM or the following business day. Special Order items must be ordered from our manufacturer and may require up to 2 weeks lead time before we can ship them to you.
What is included: Matching set of left and right facing decals. Application suitable for Motorcycles, cars, trucks, windows, tables and more.
How to Install: Visit our How-To page for videos on the Dry install and Wet Install methods


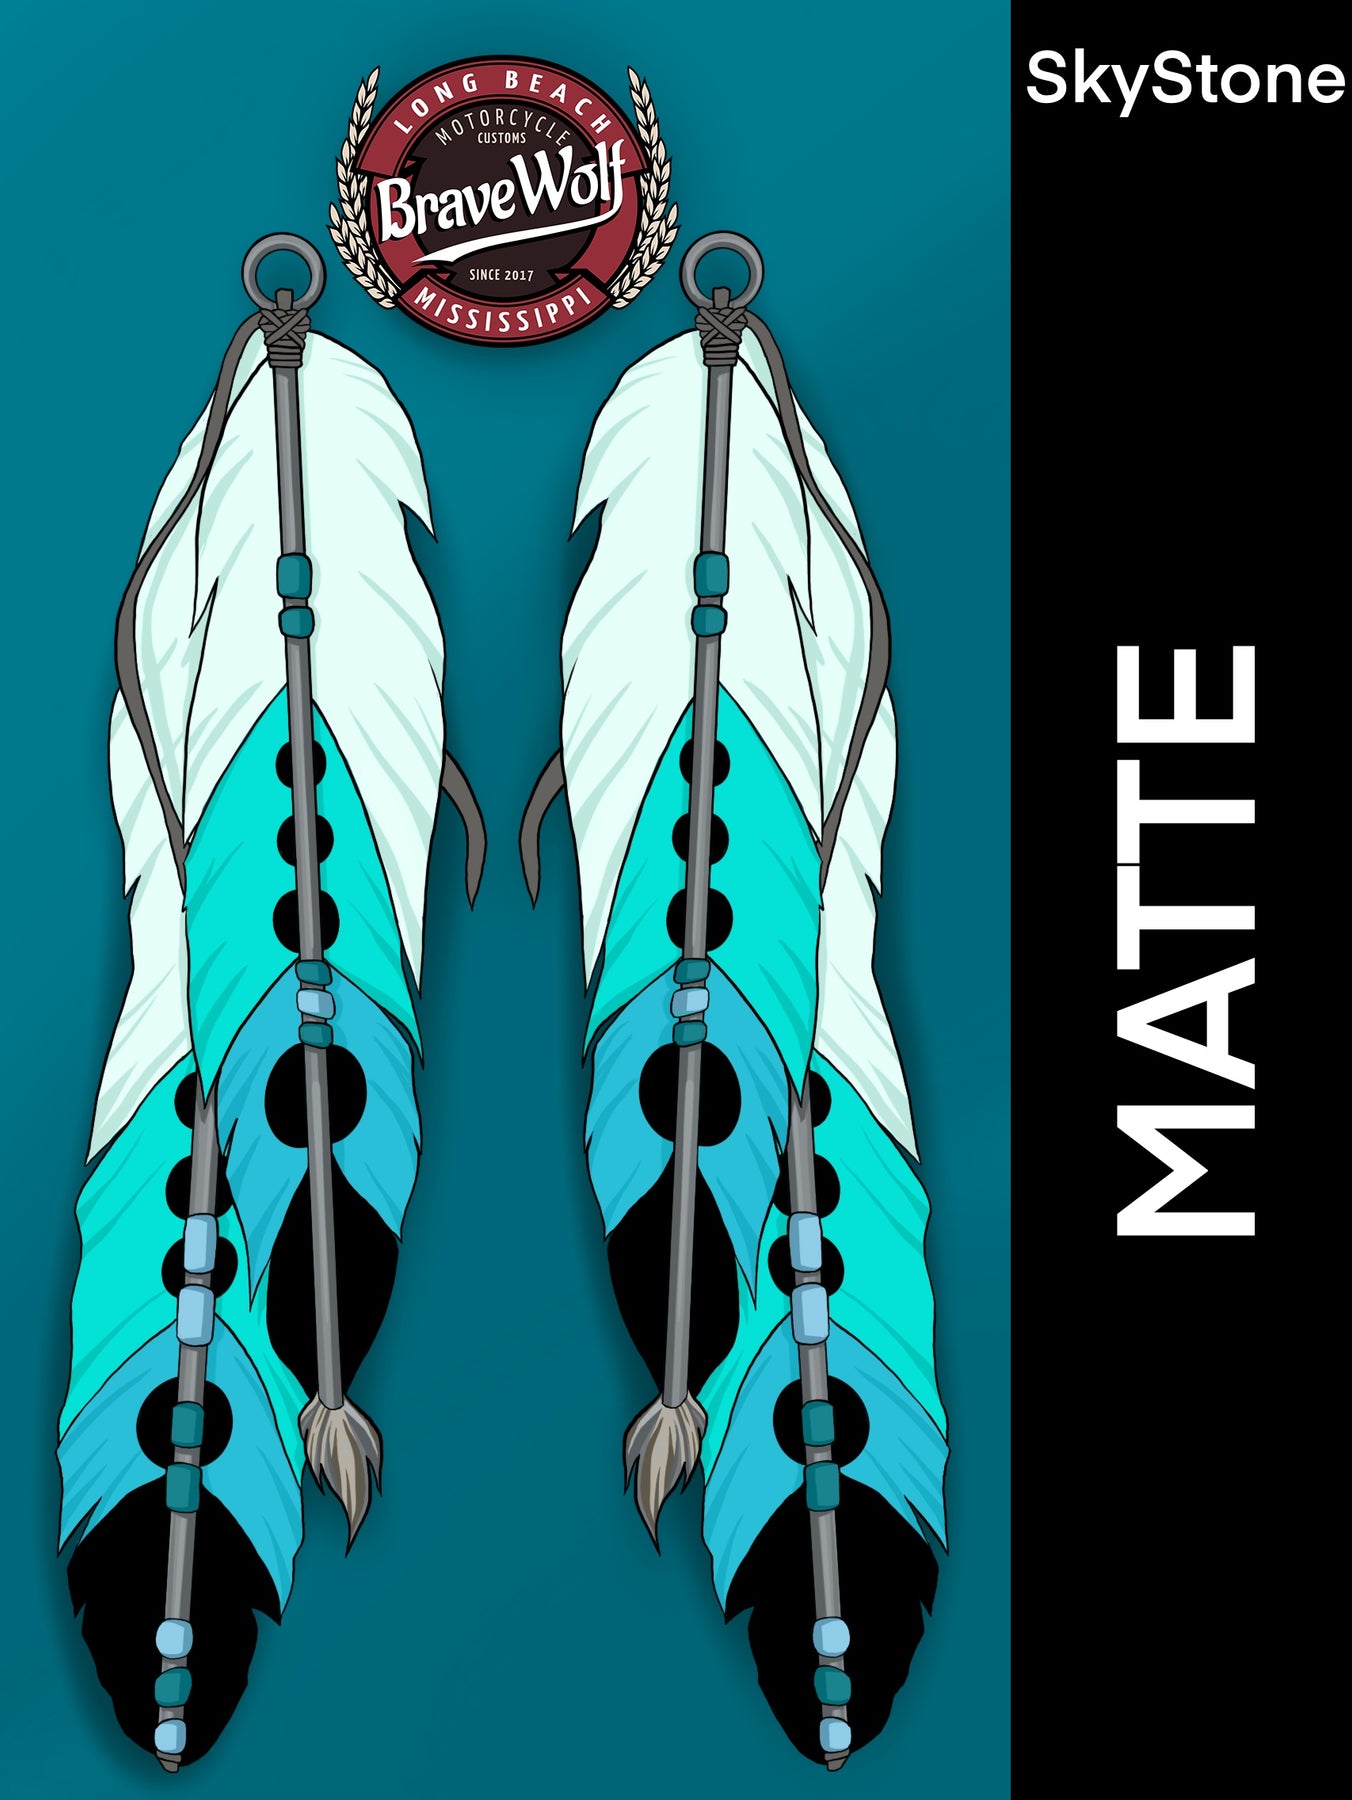

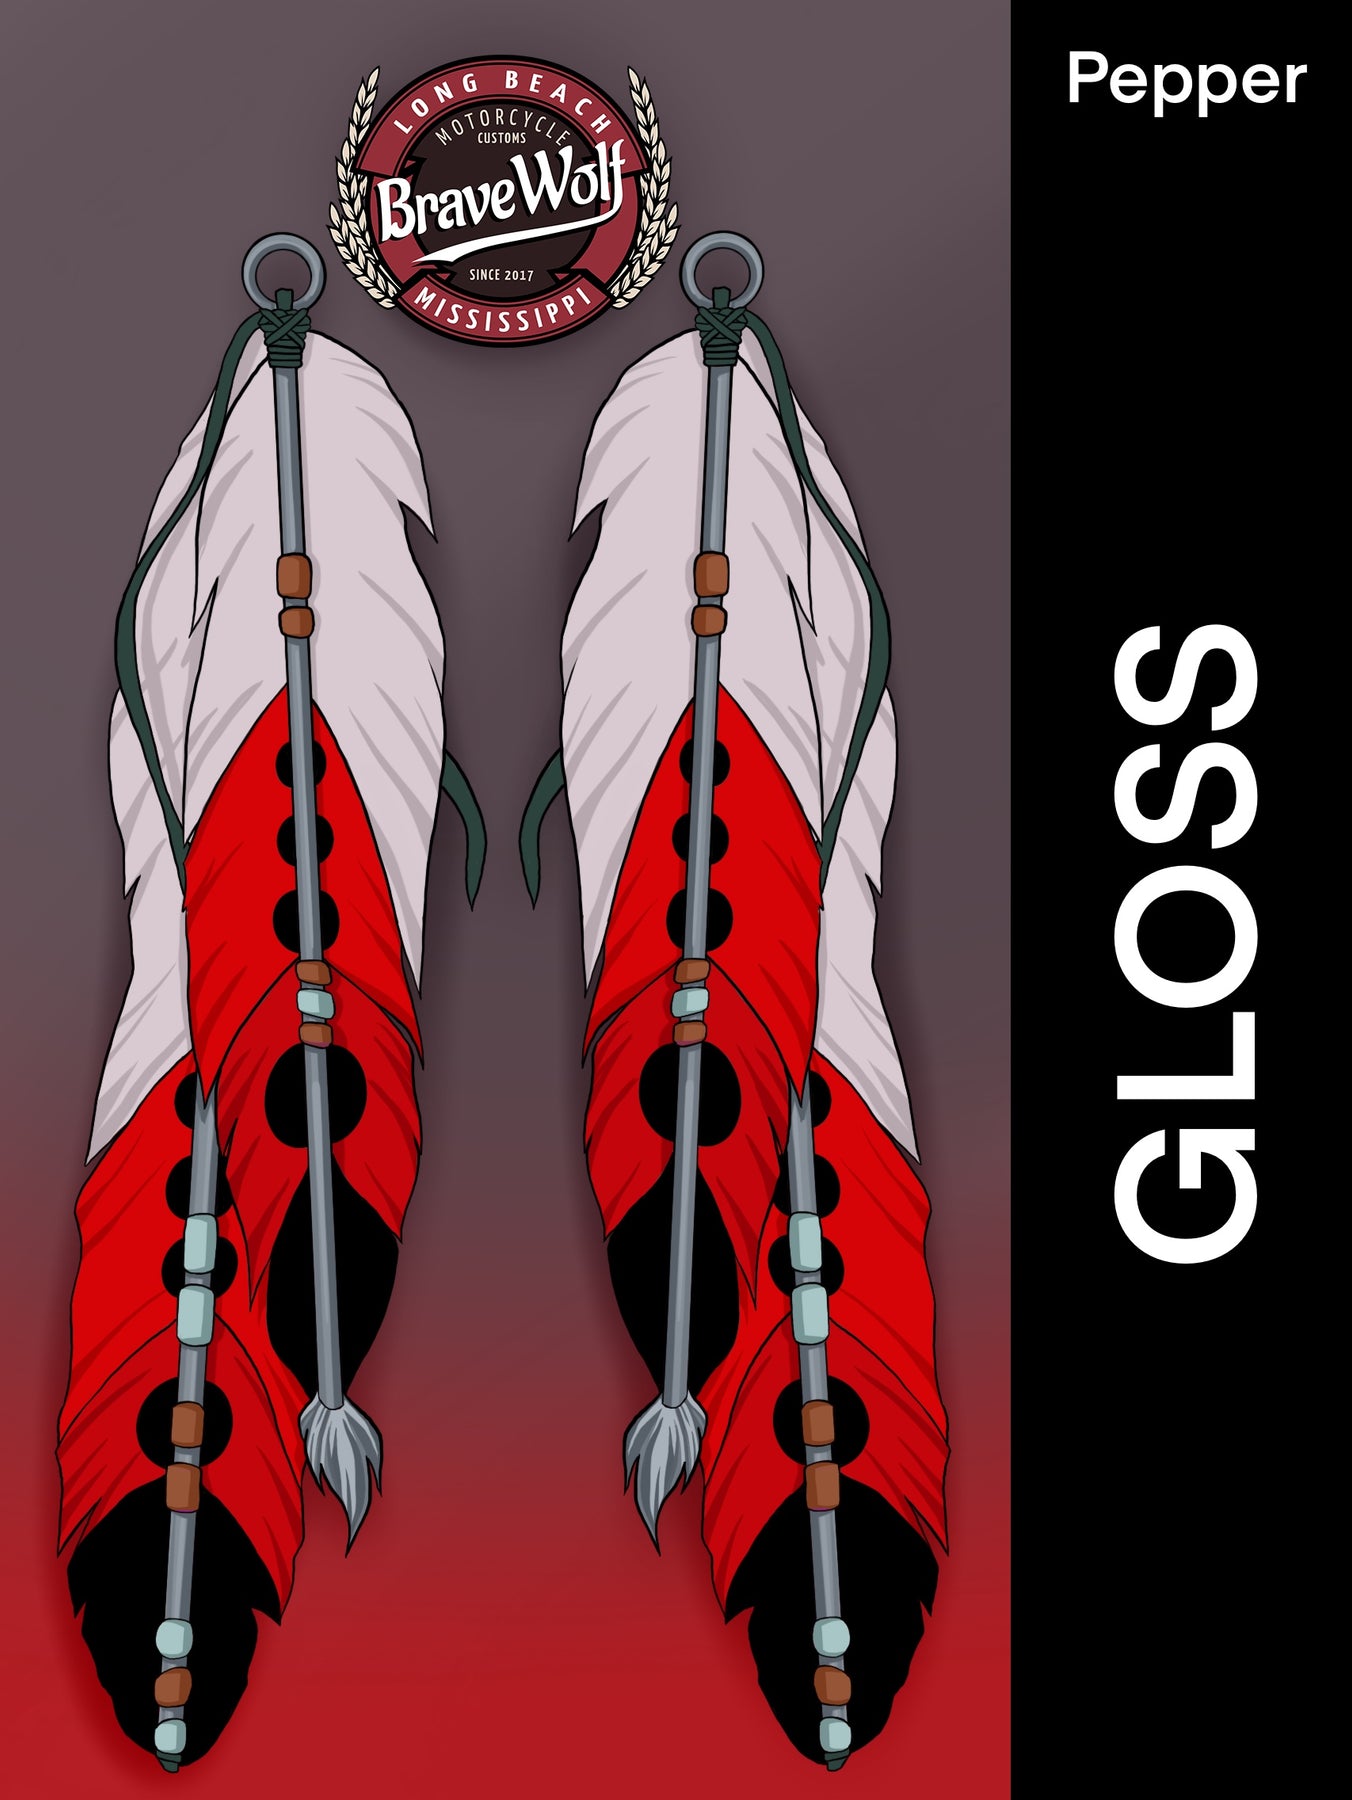
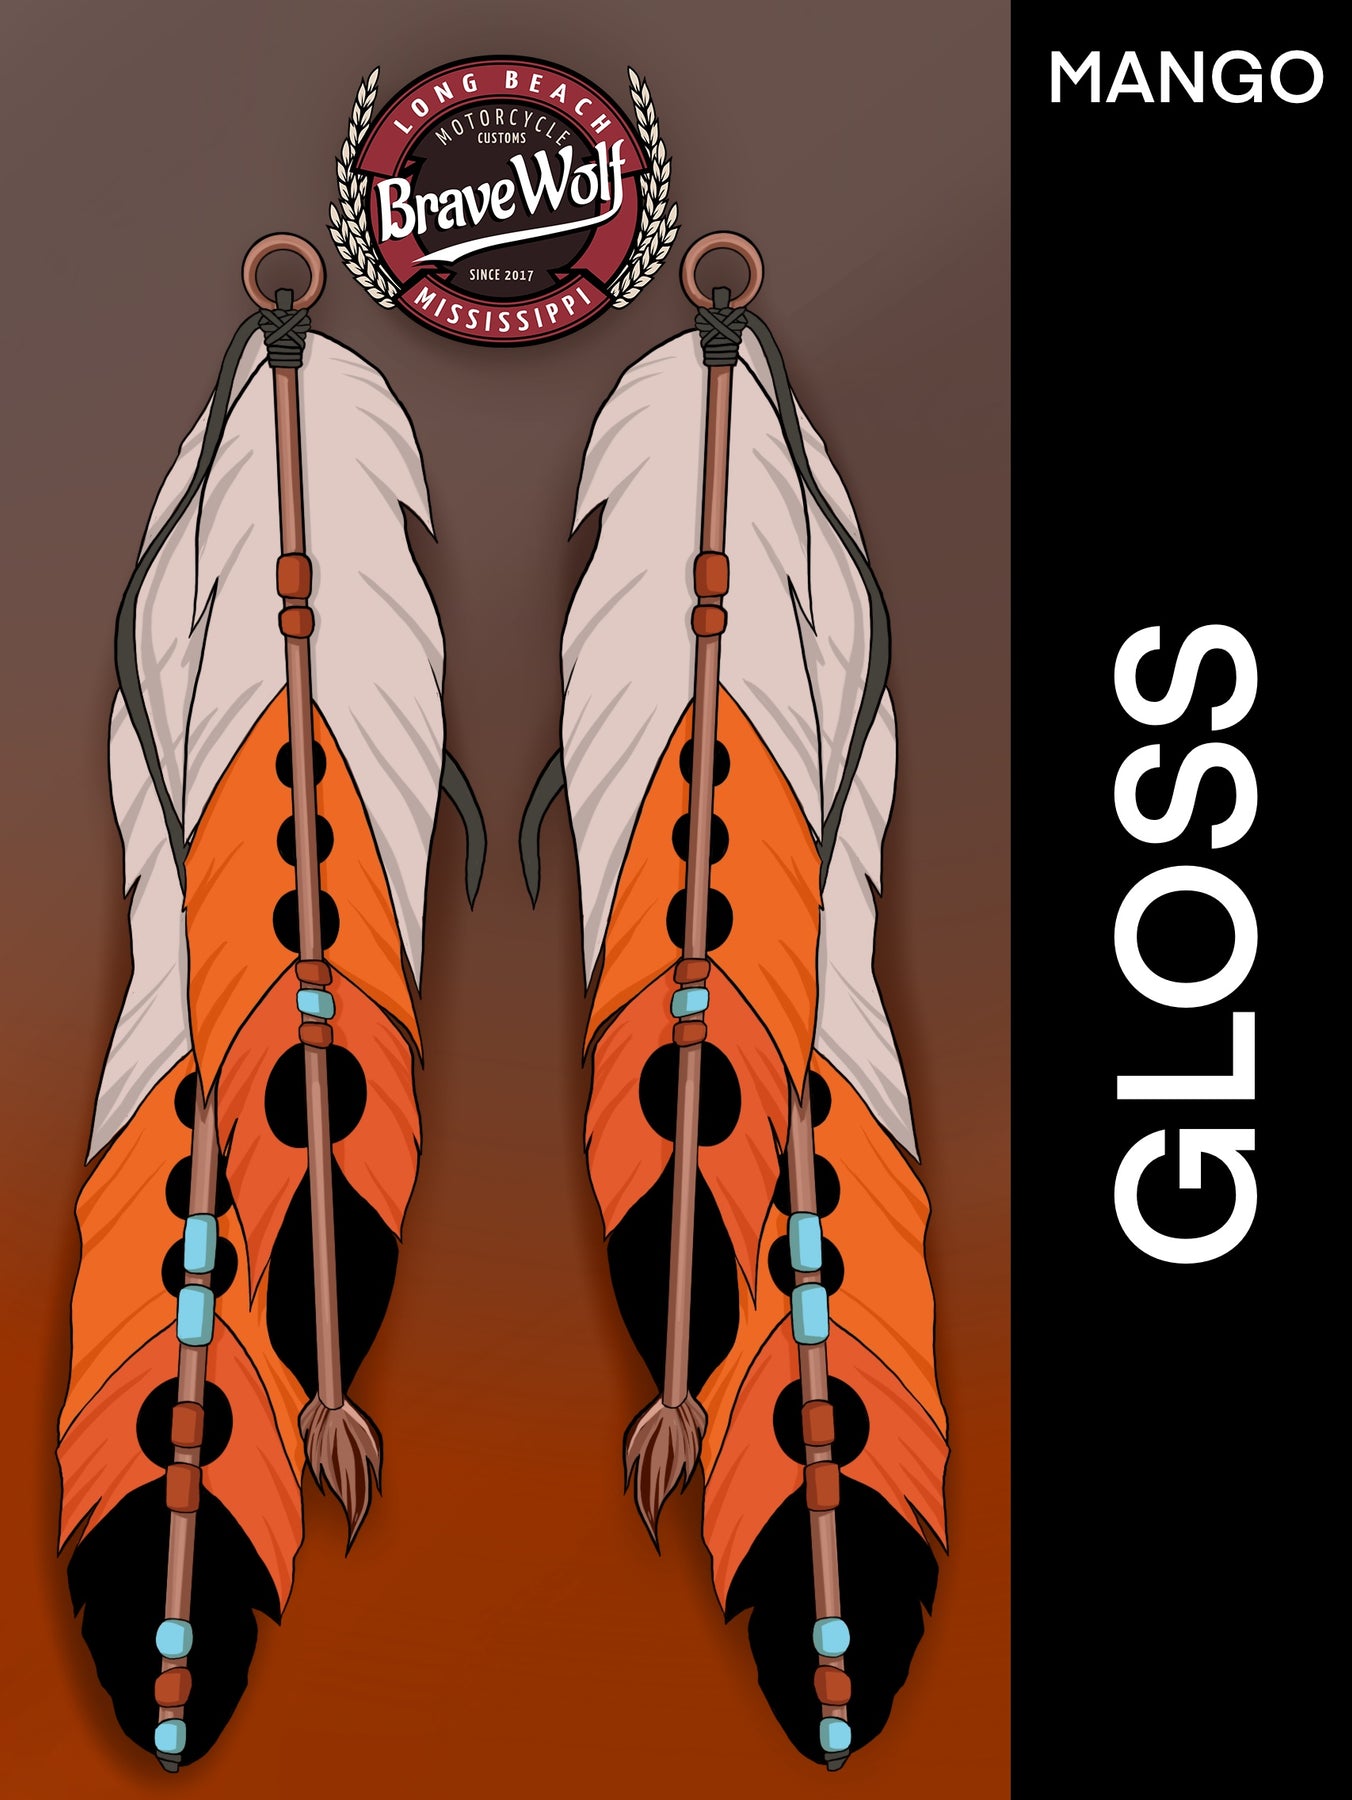

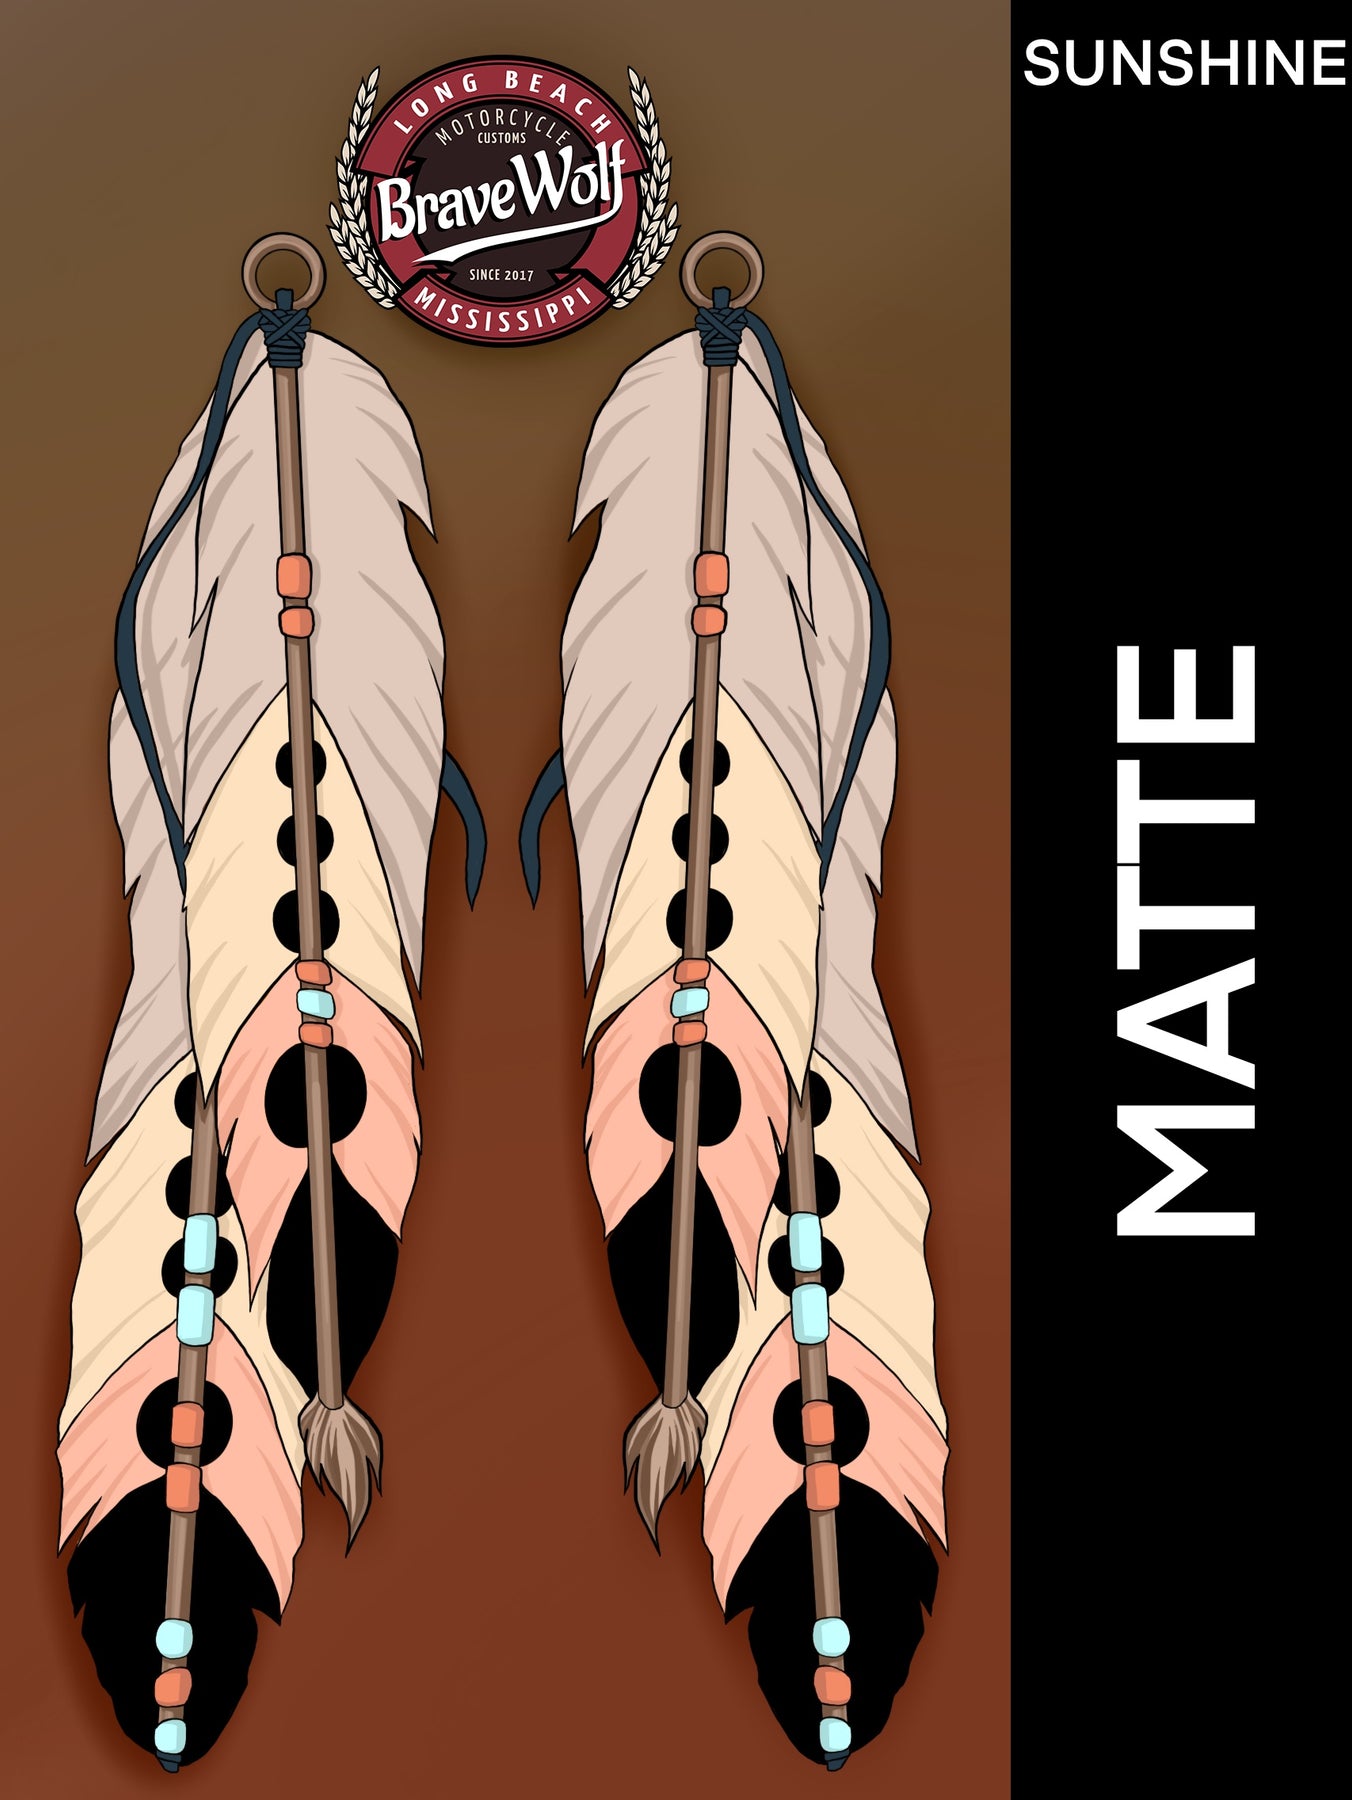
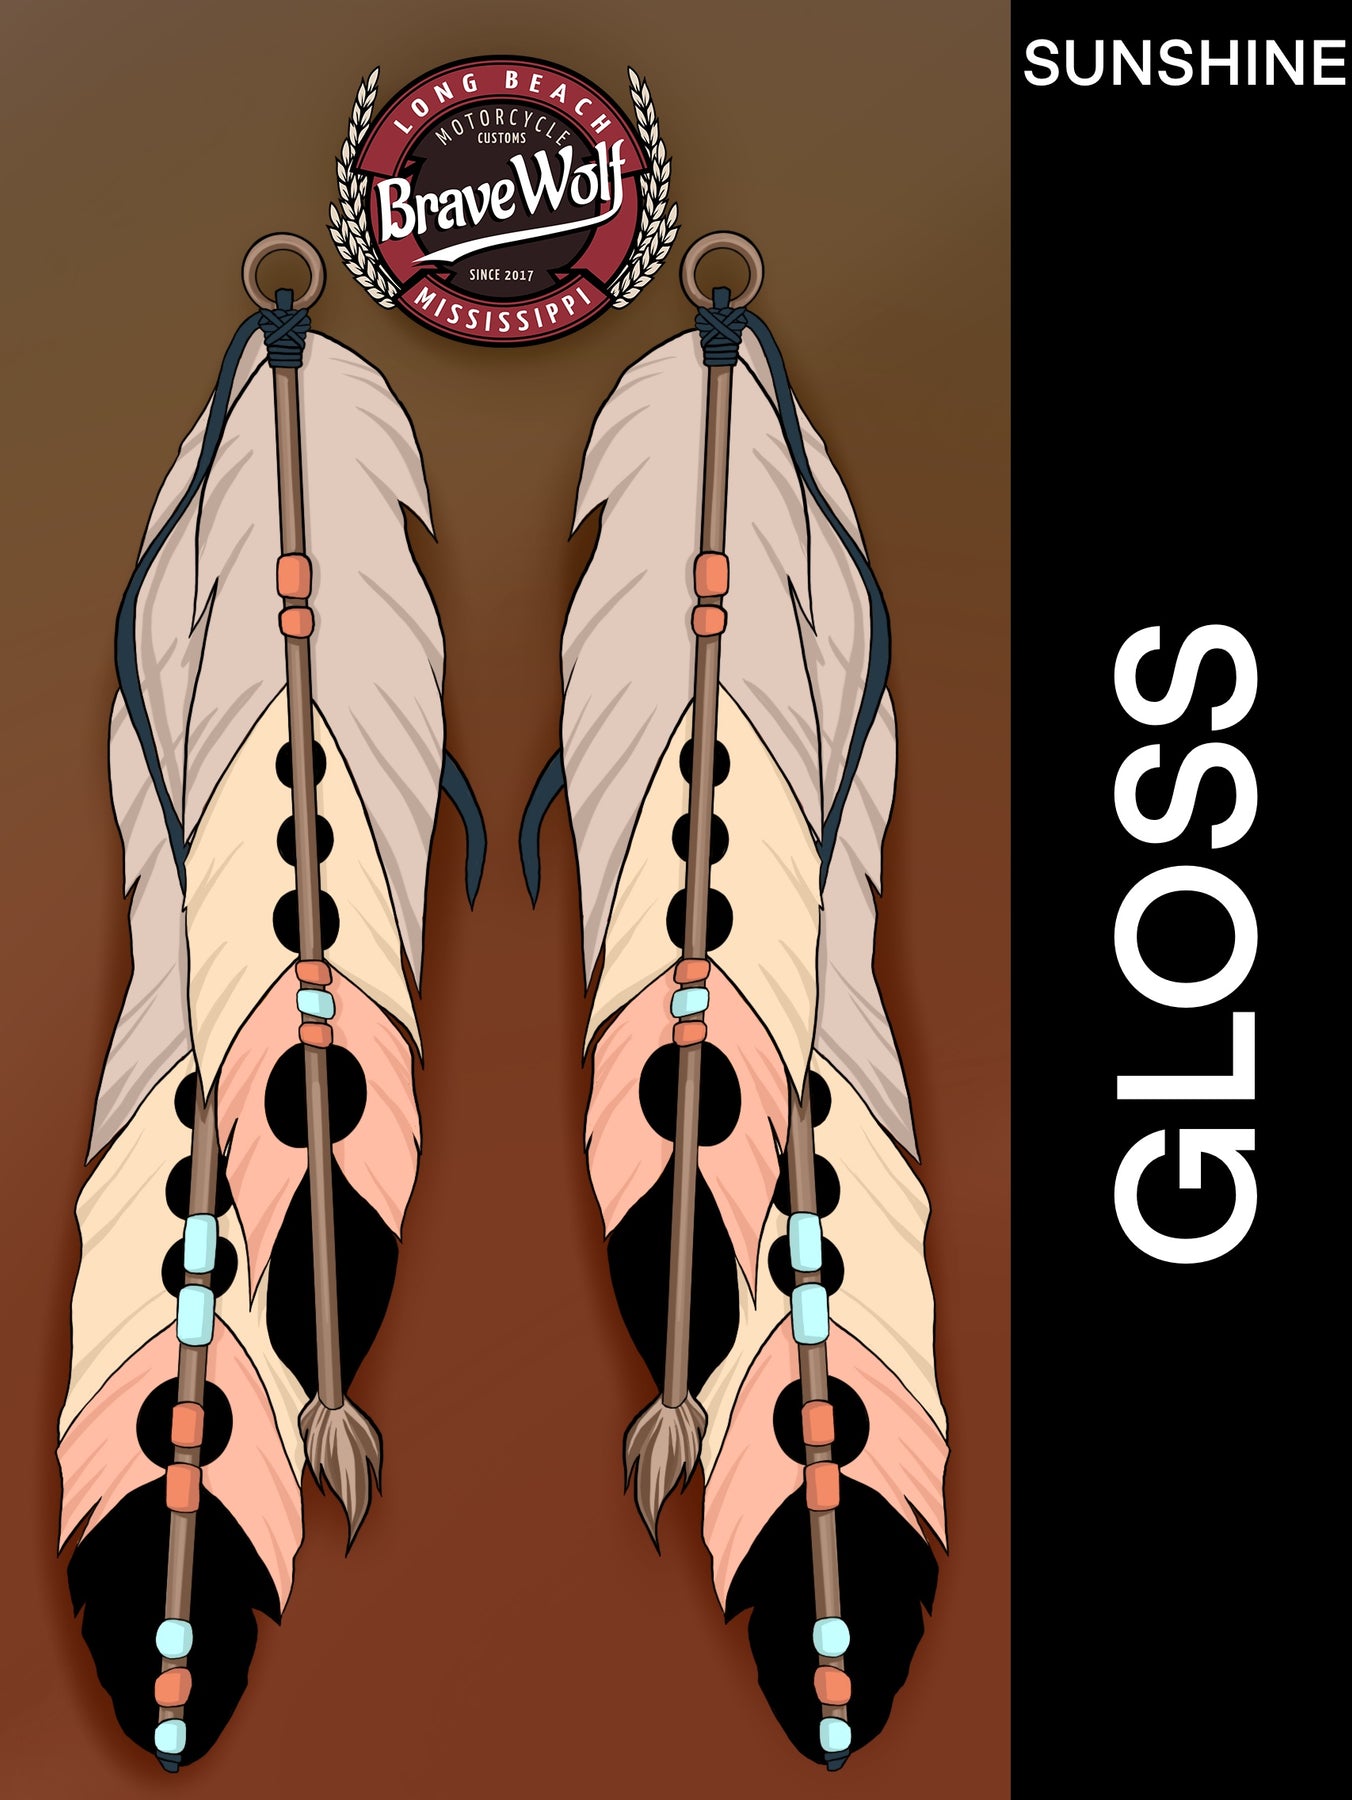


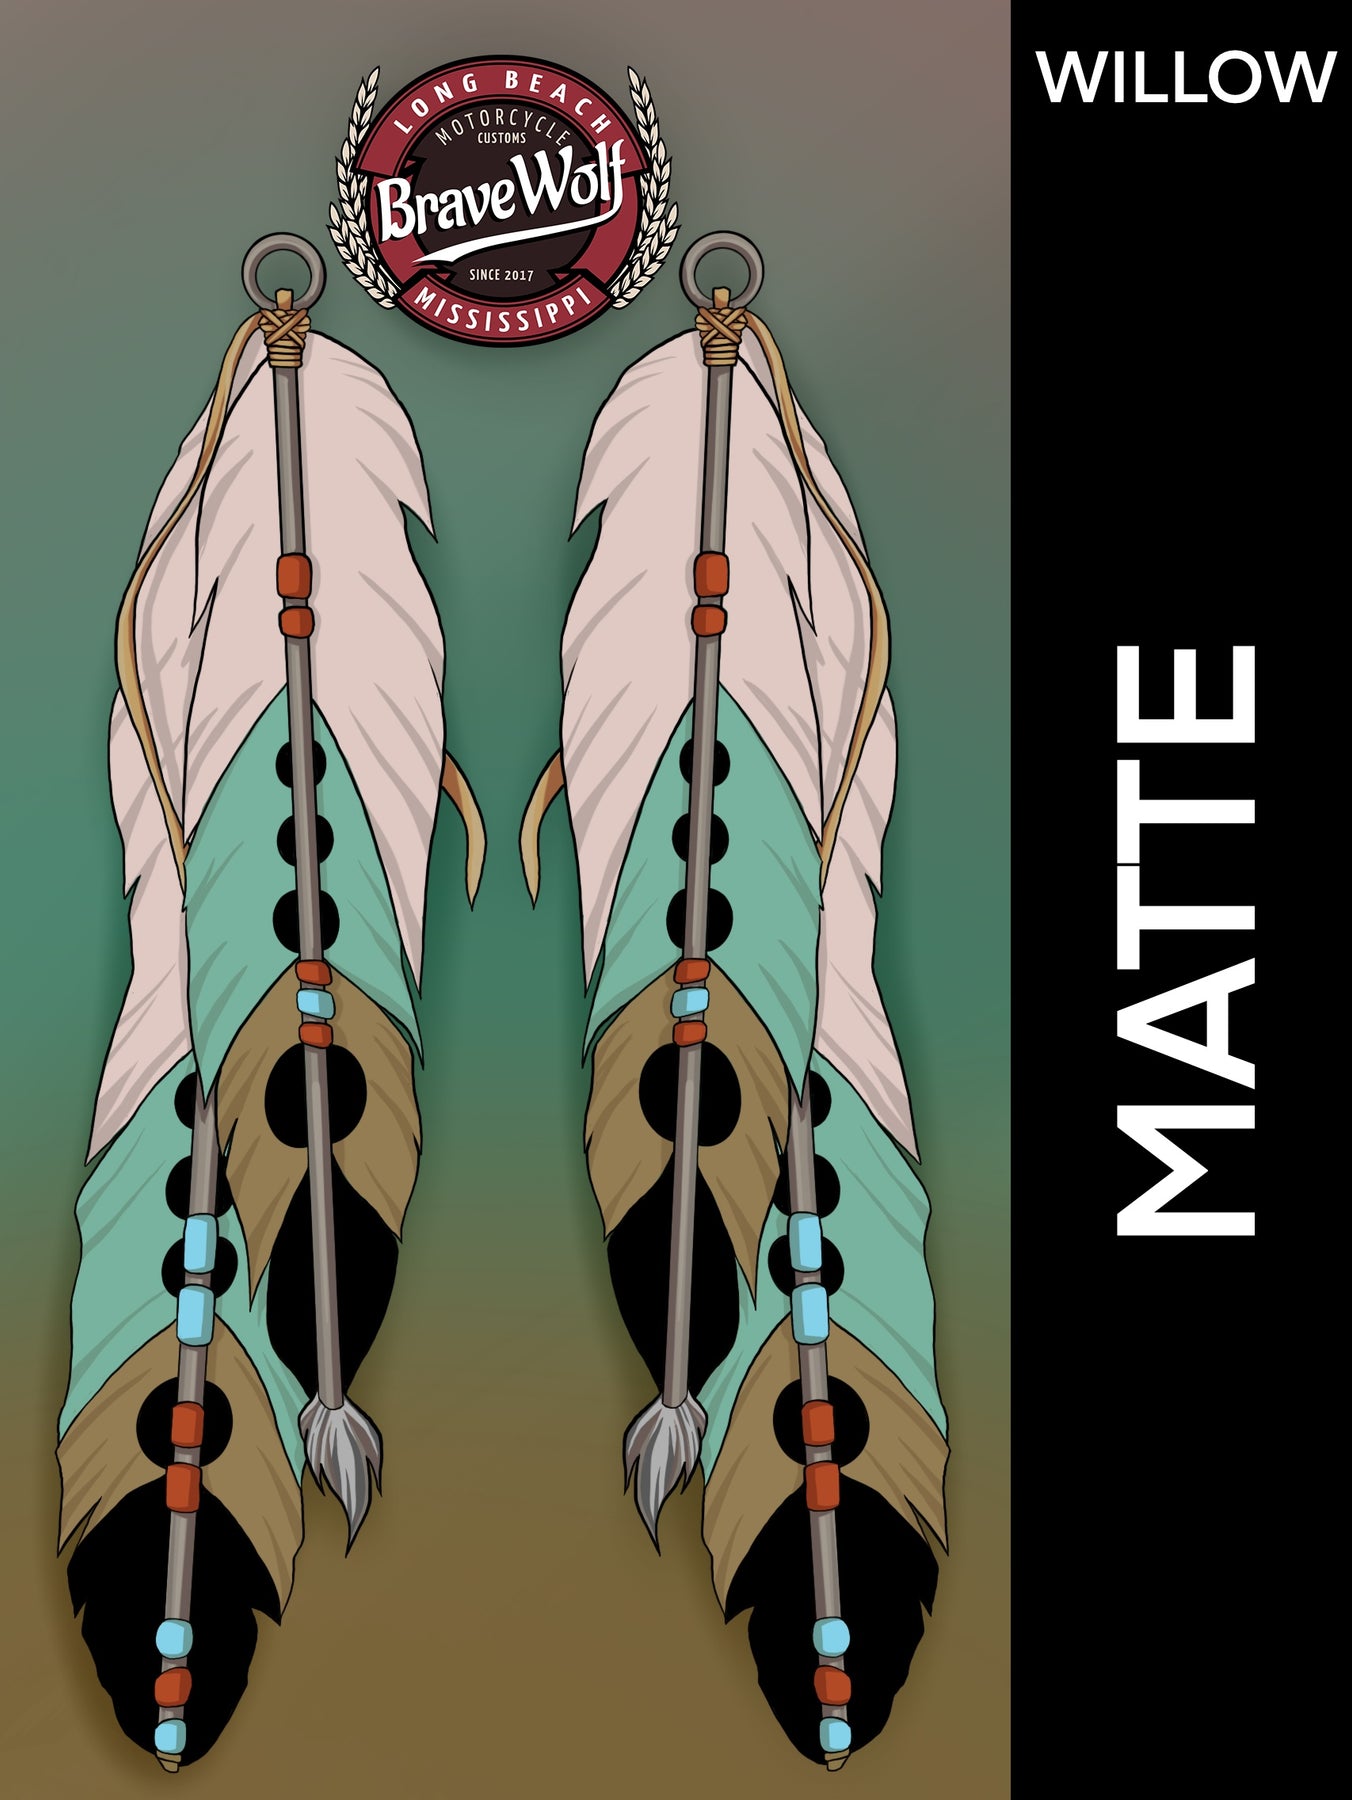


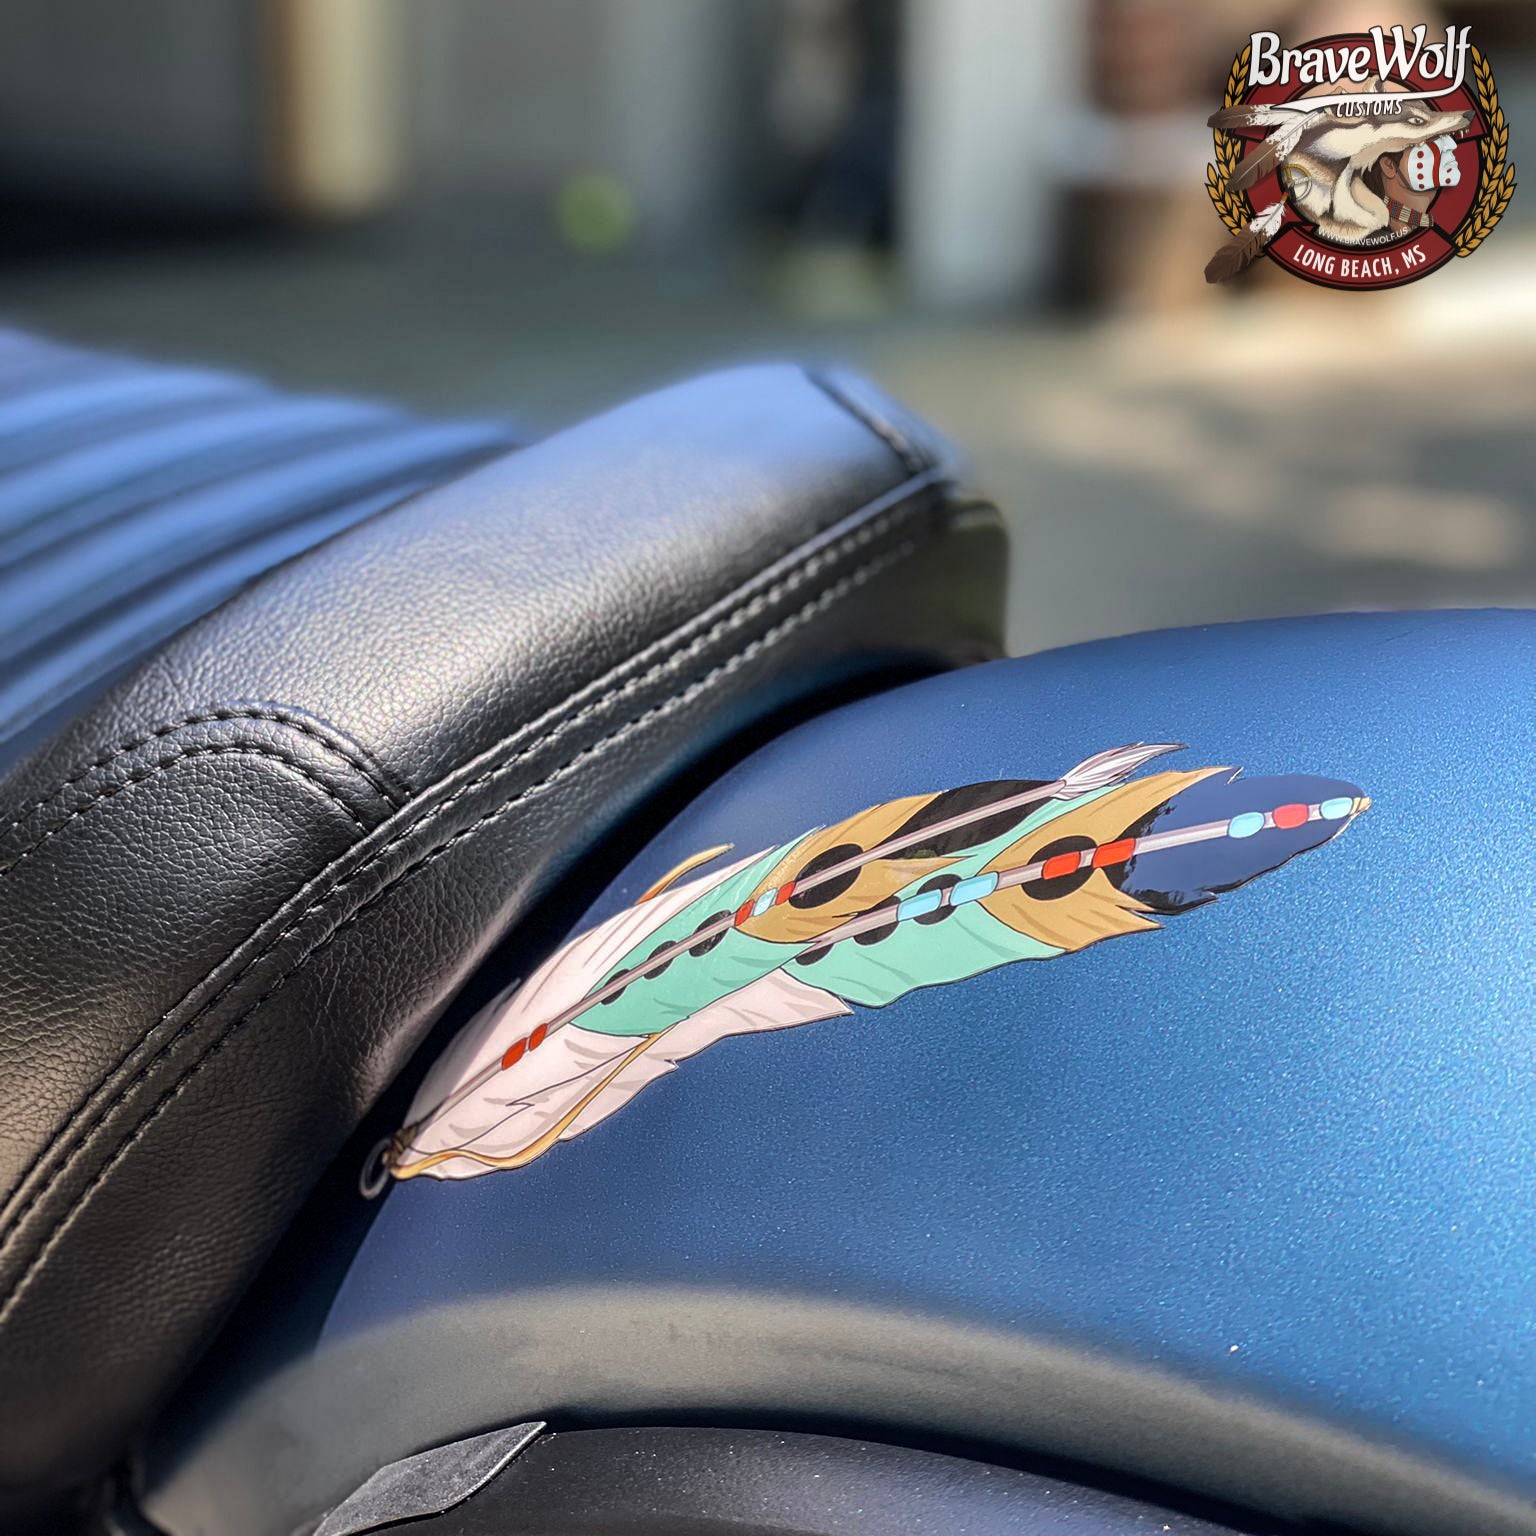
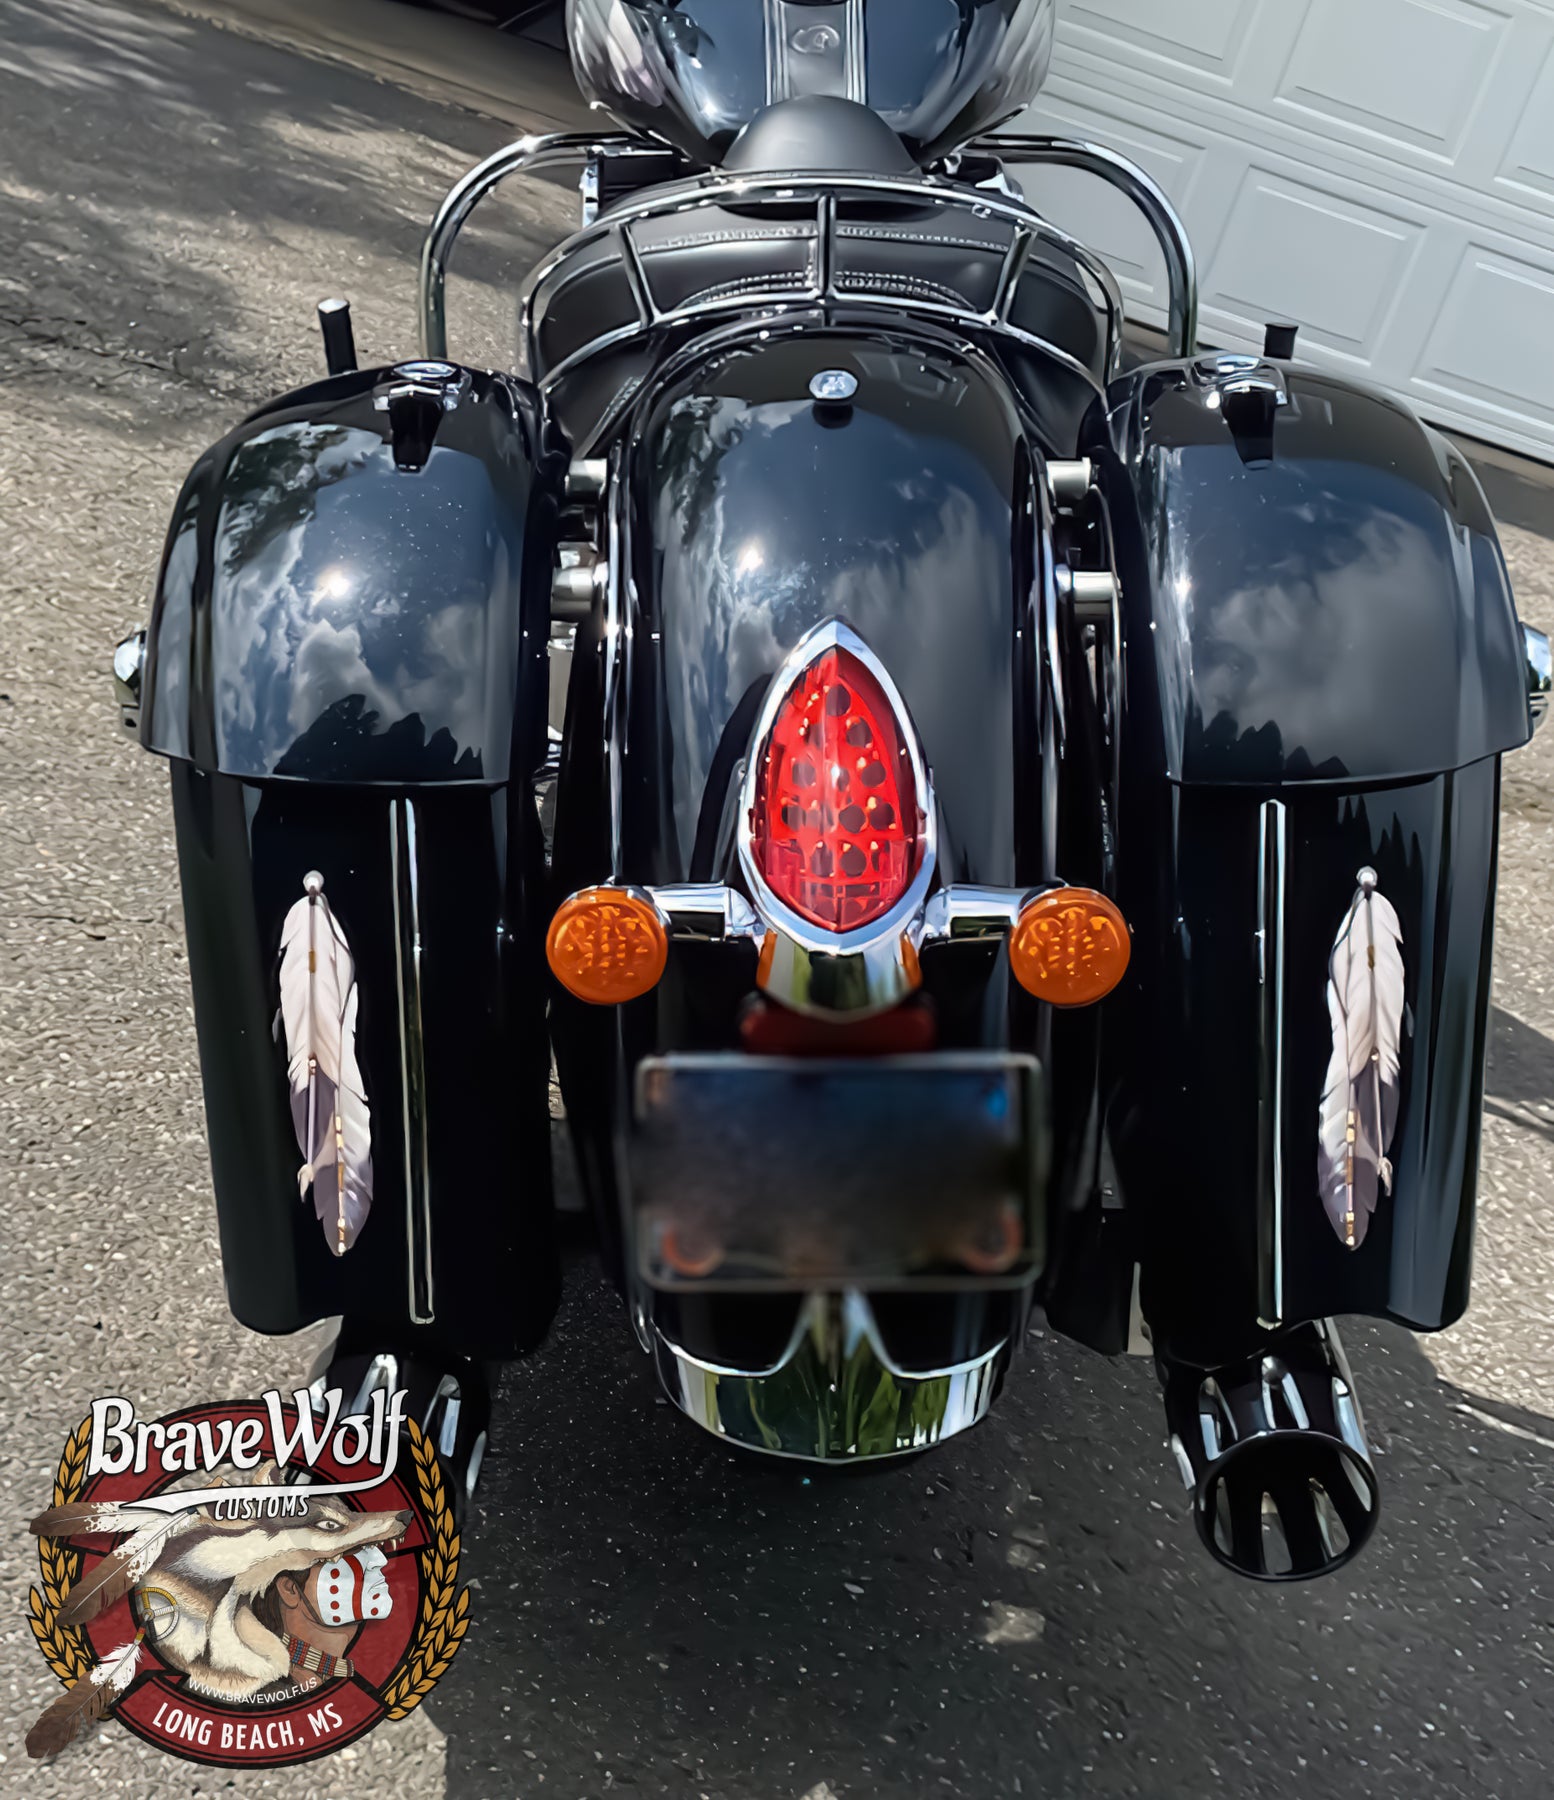
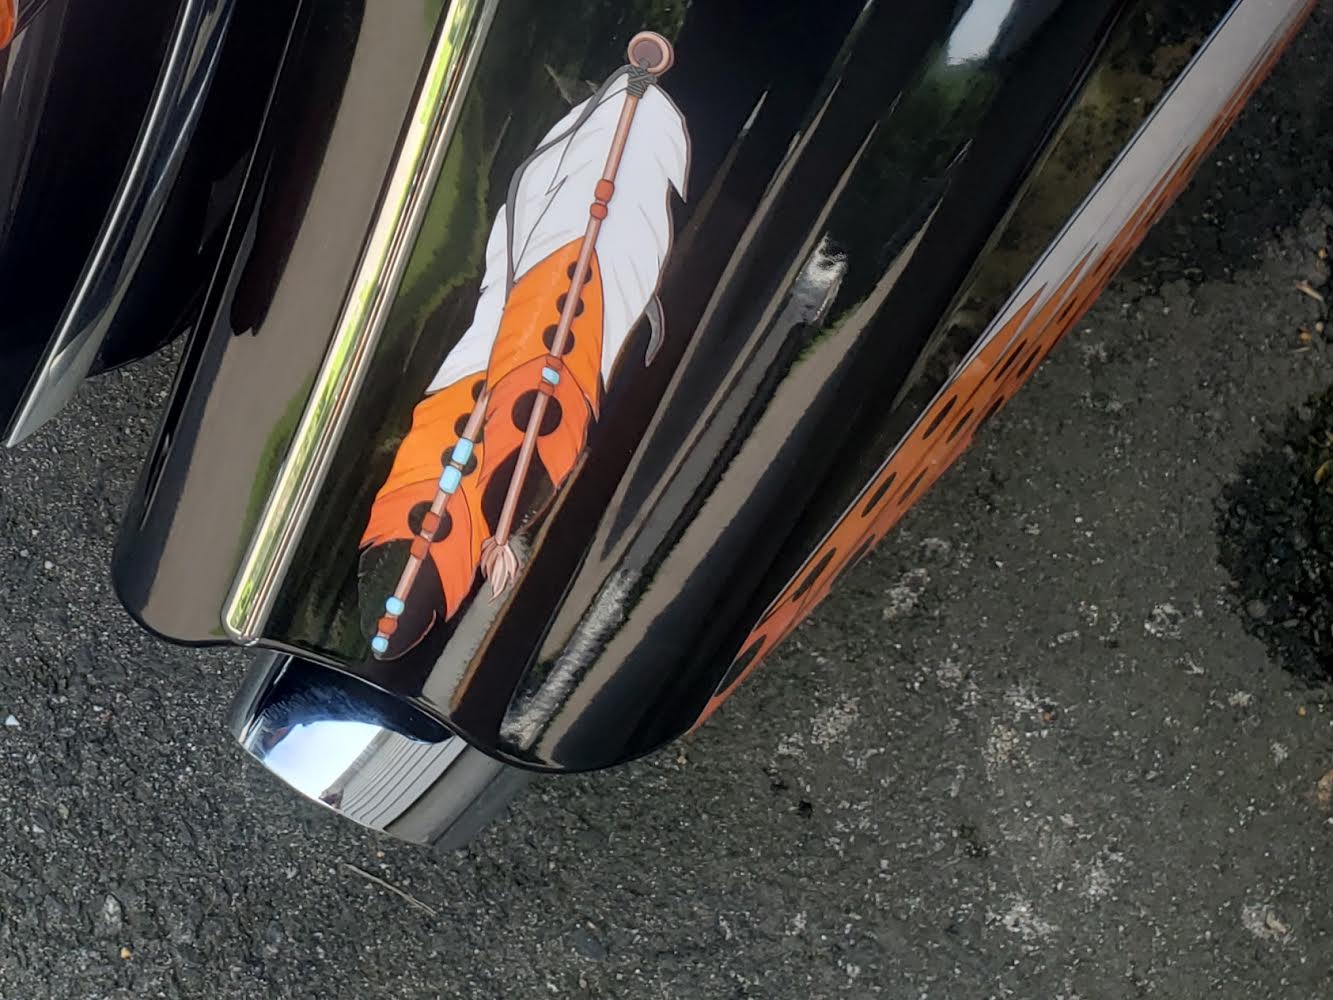
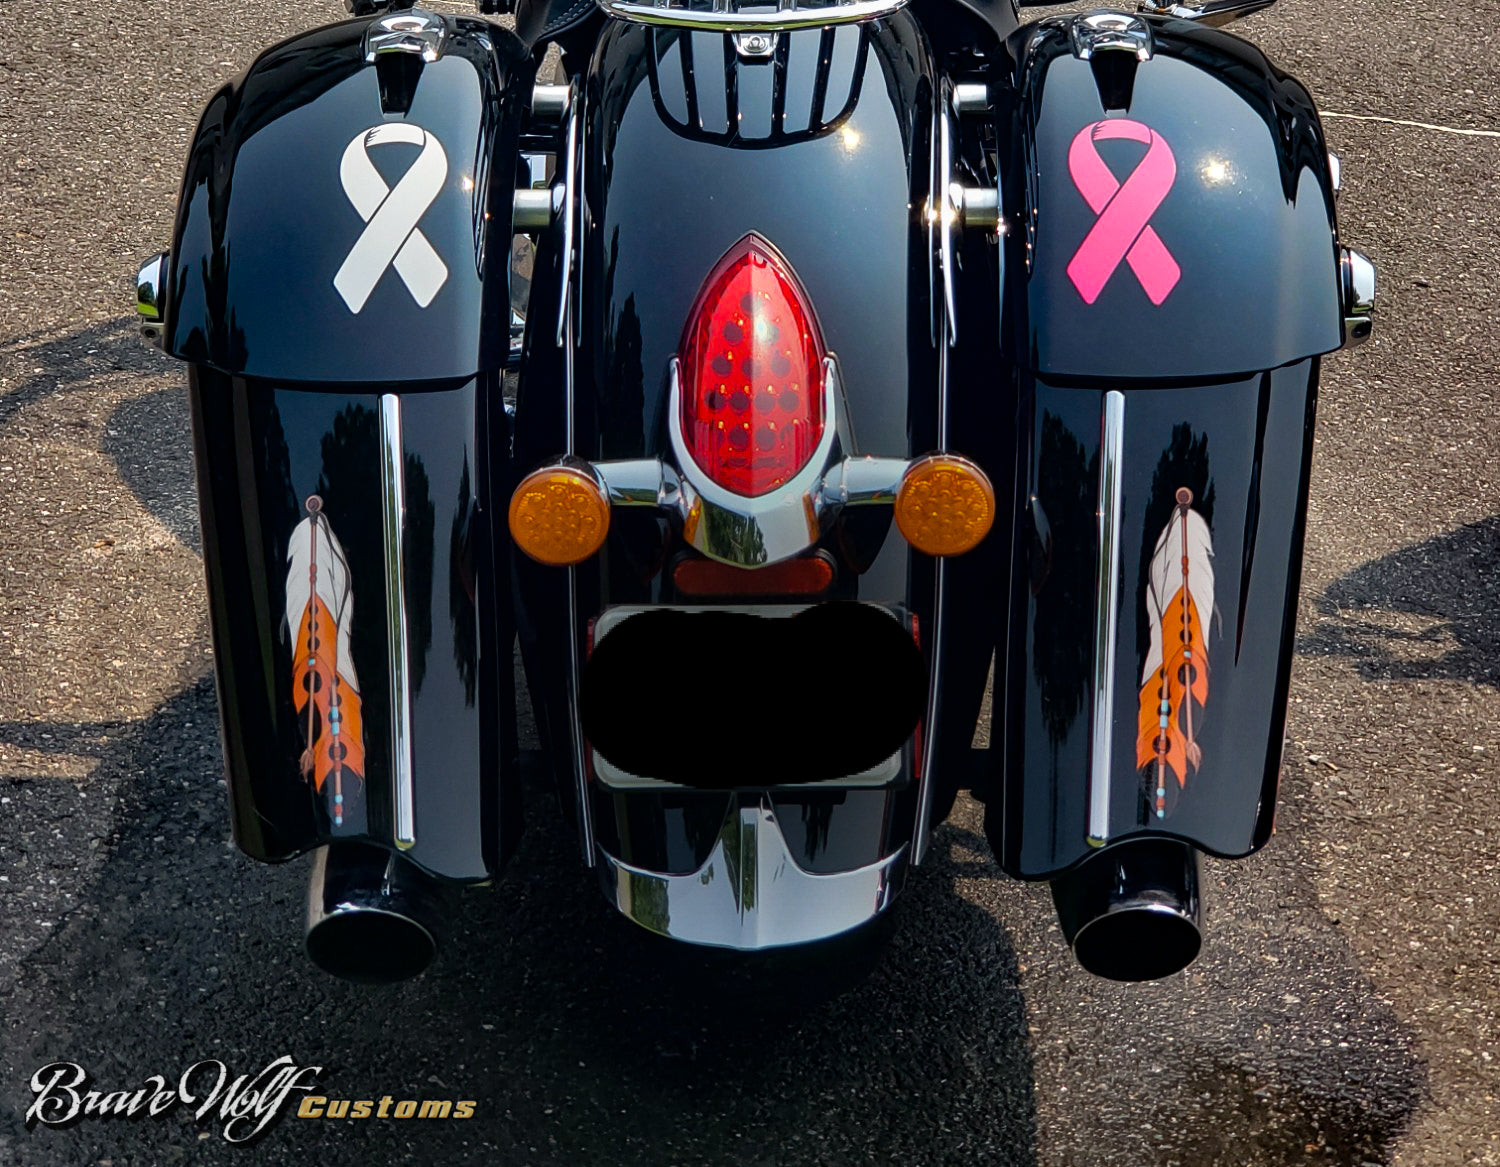
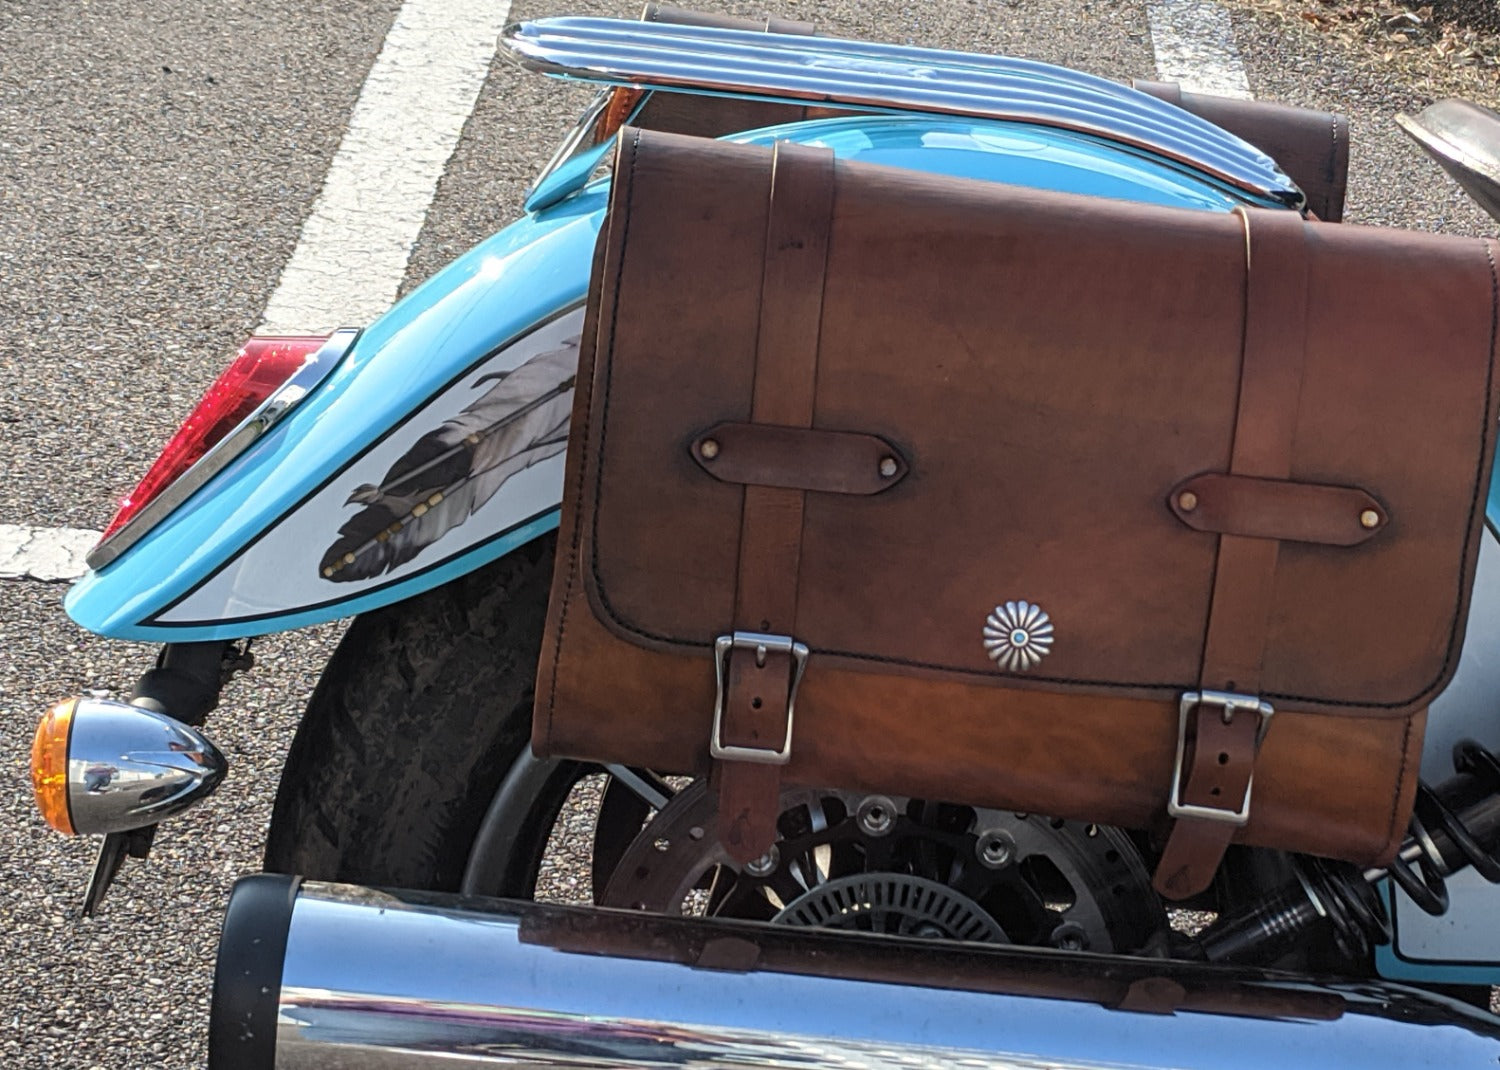
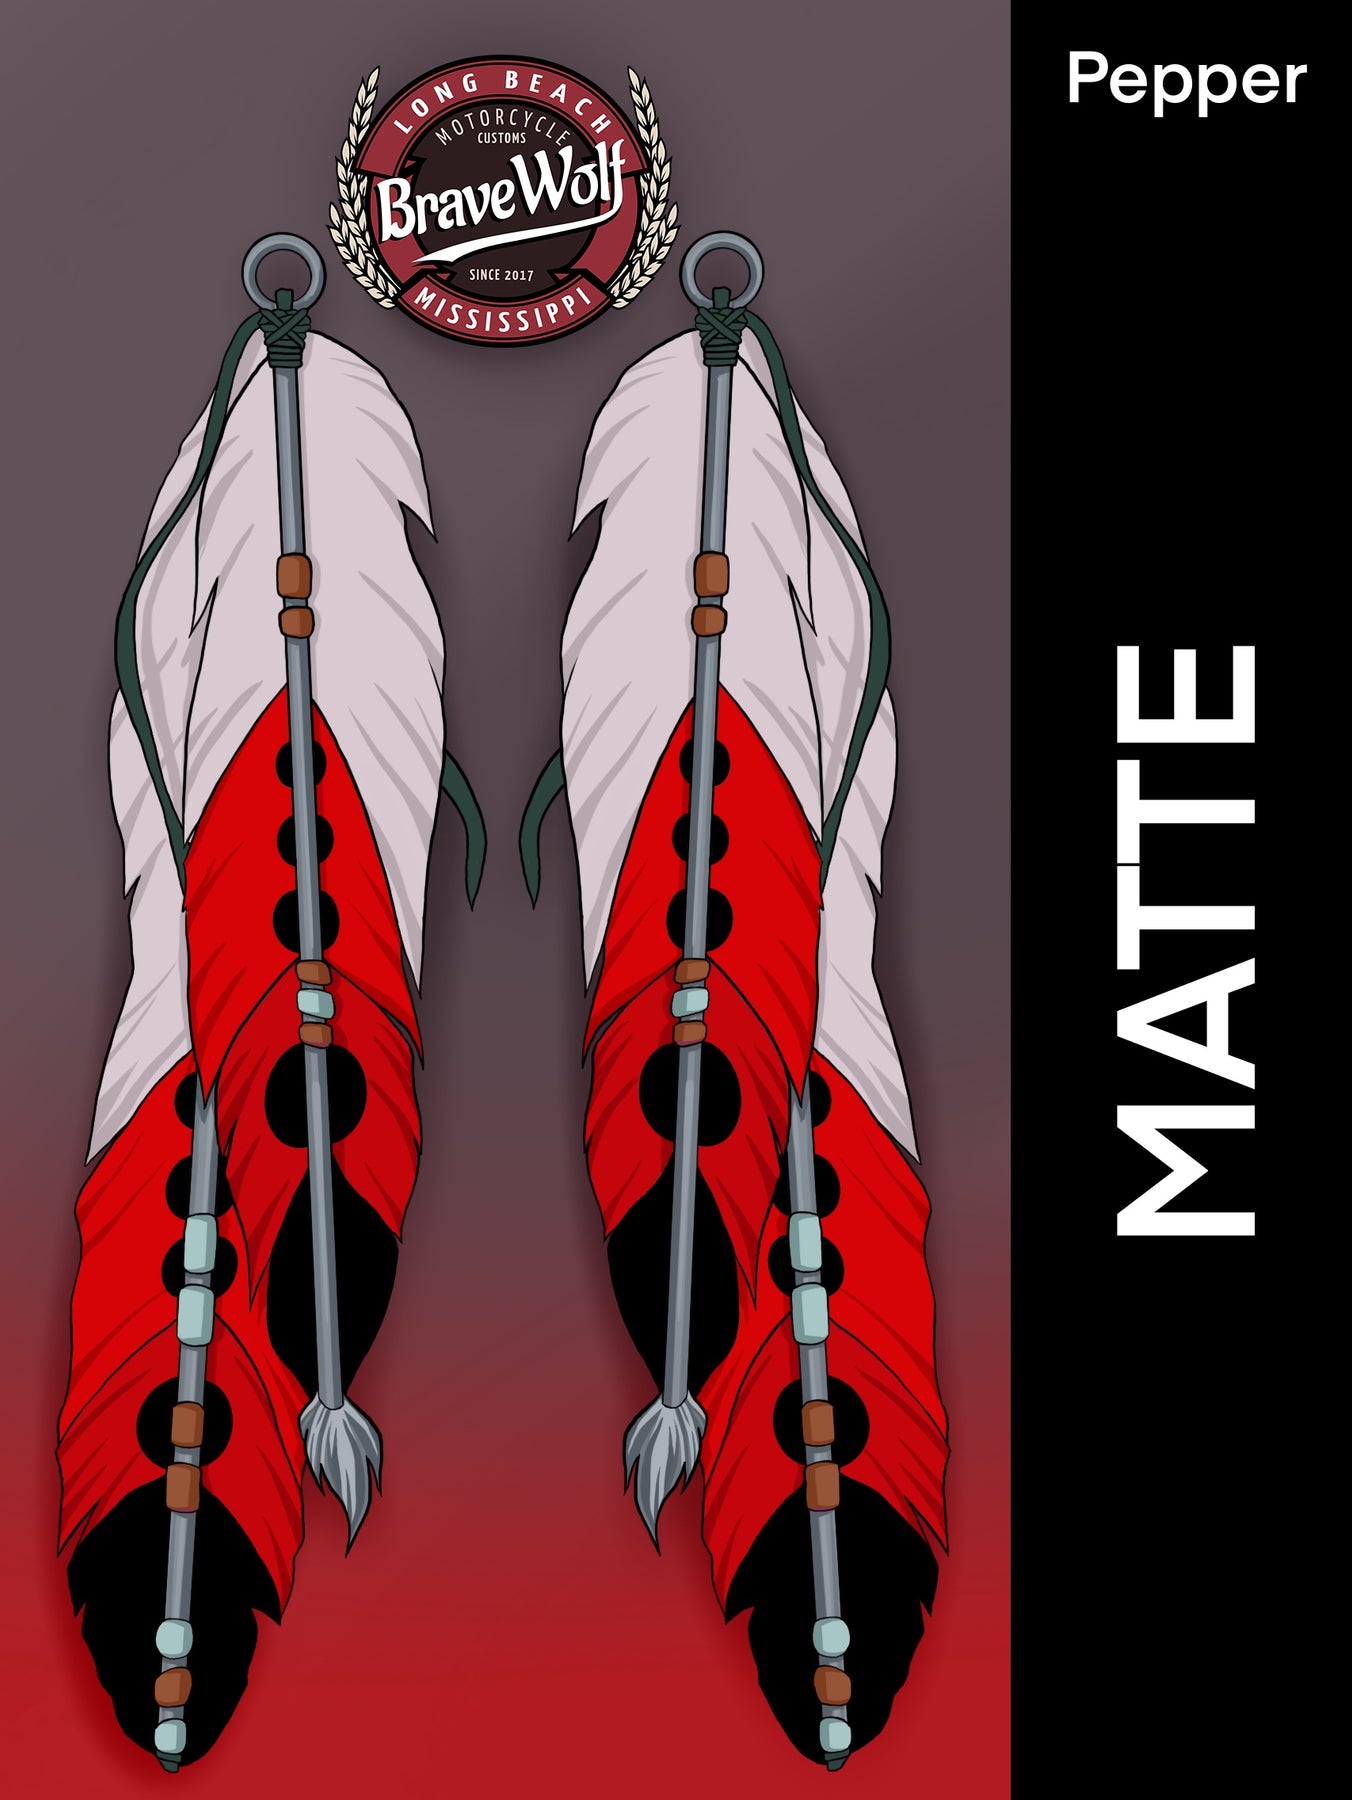
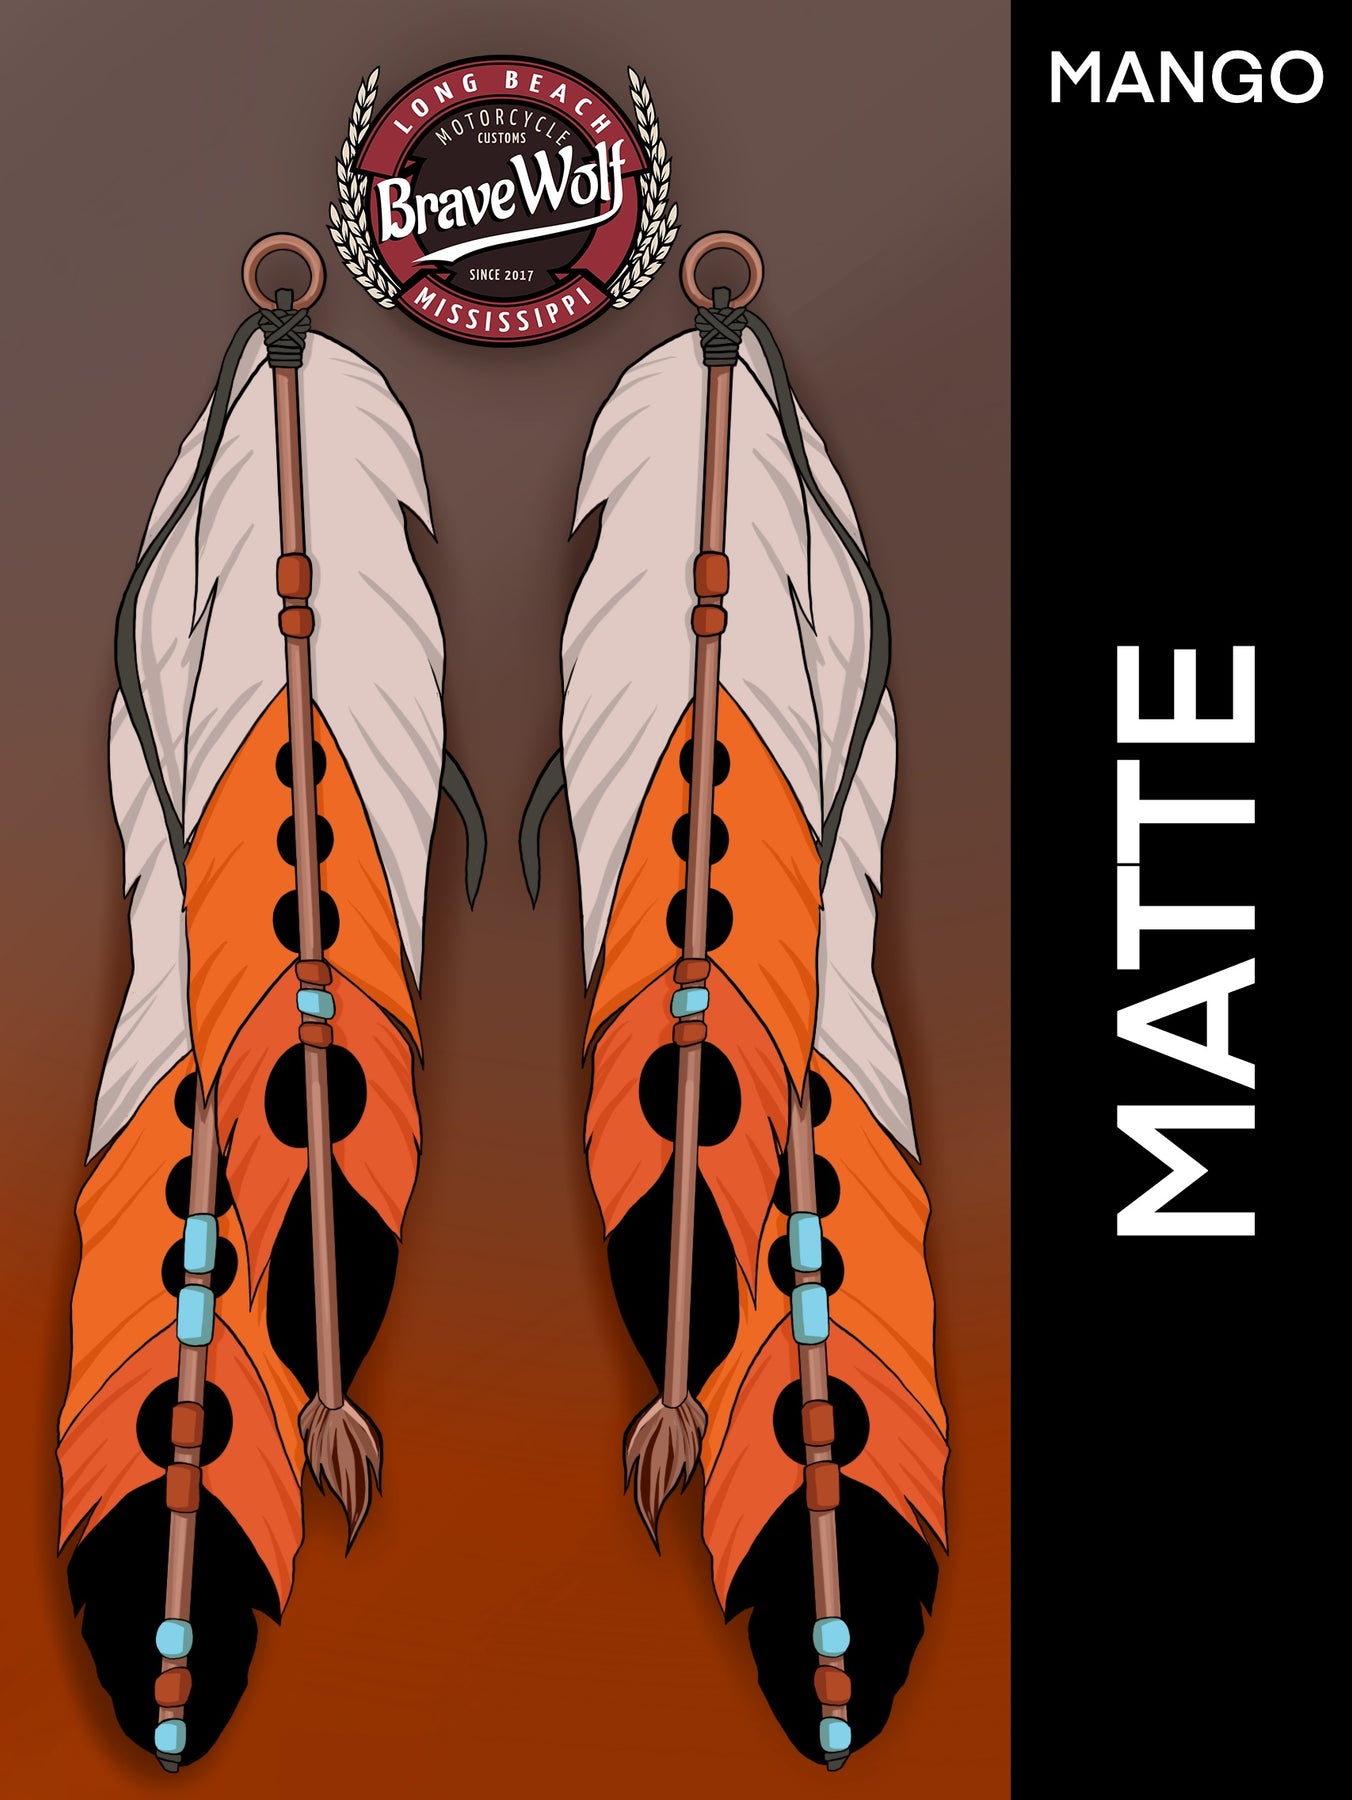
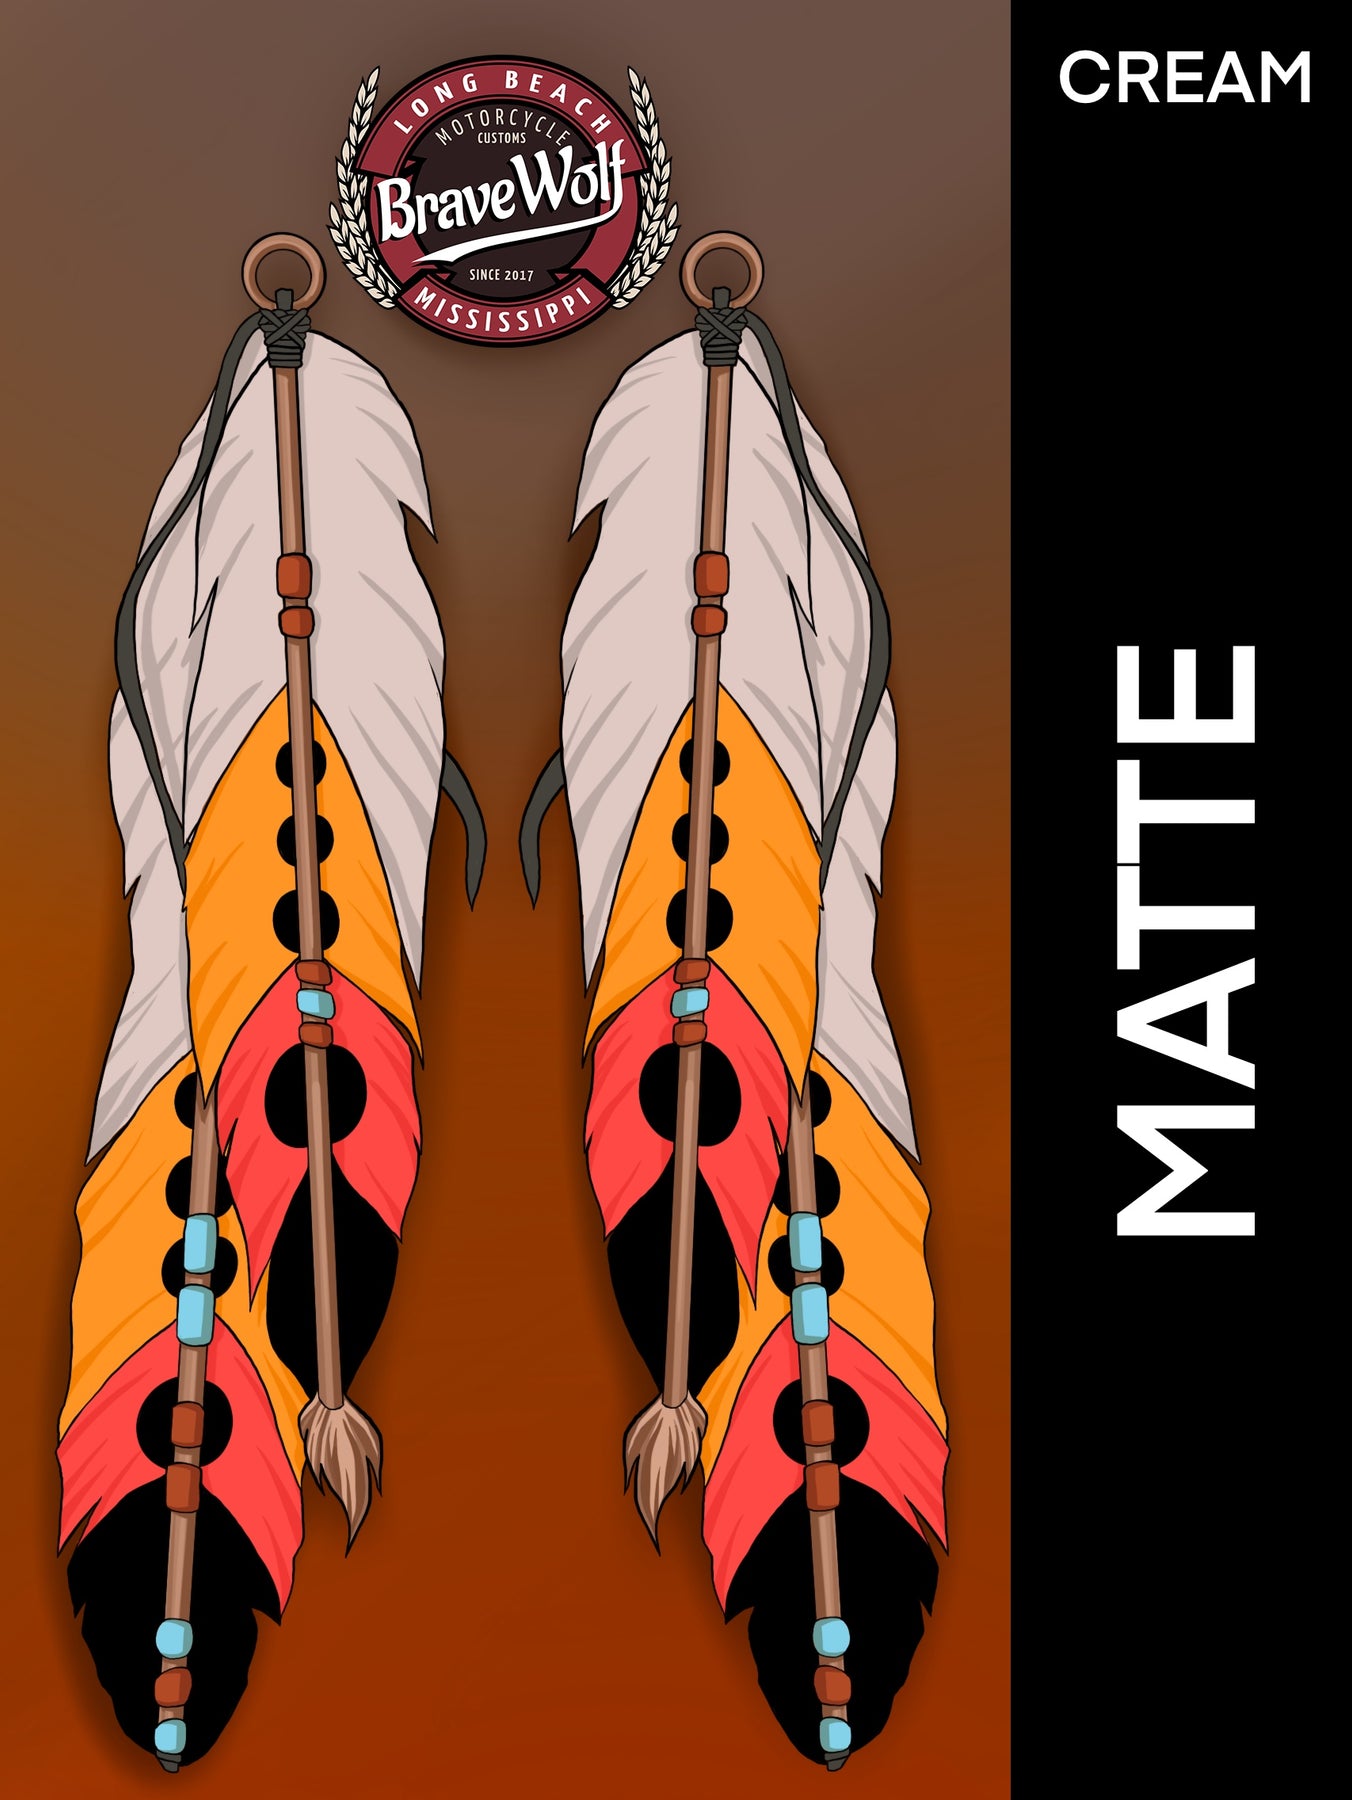
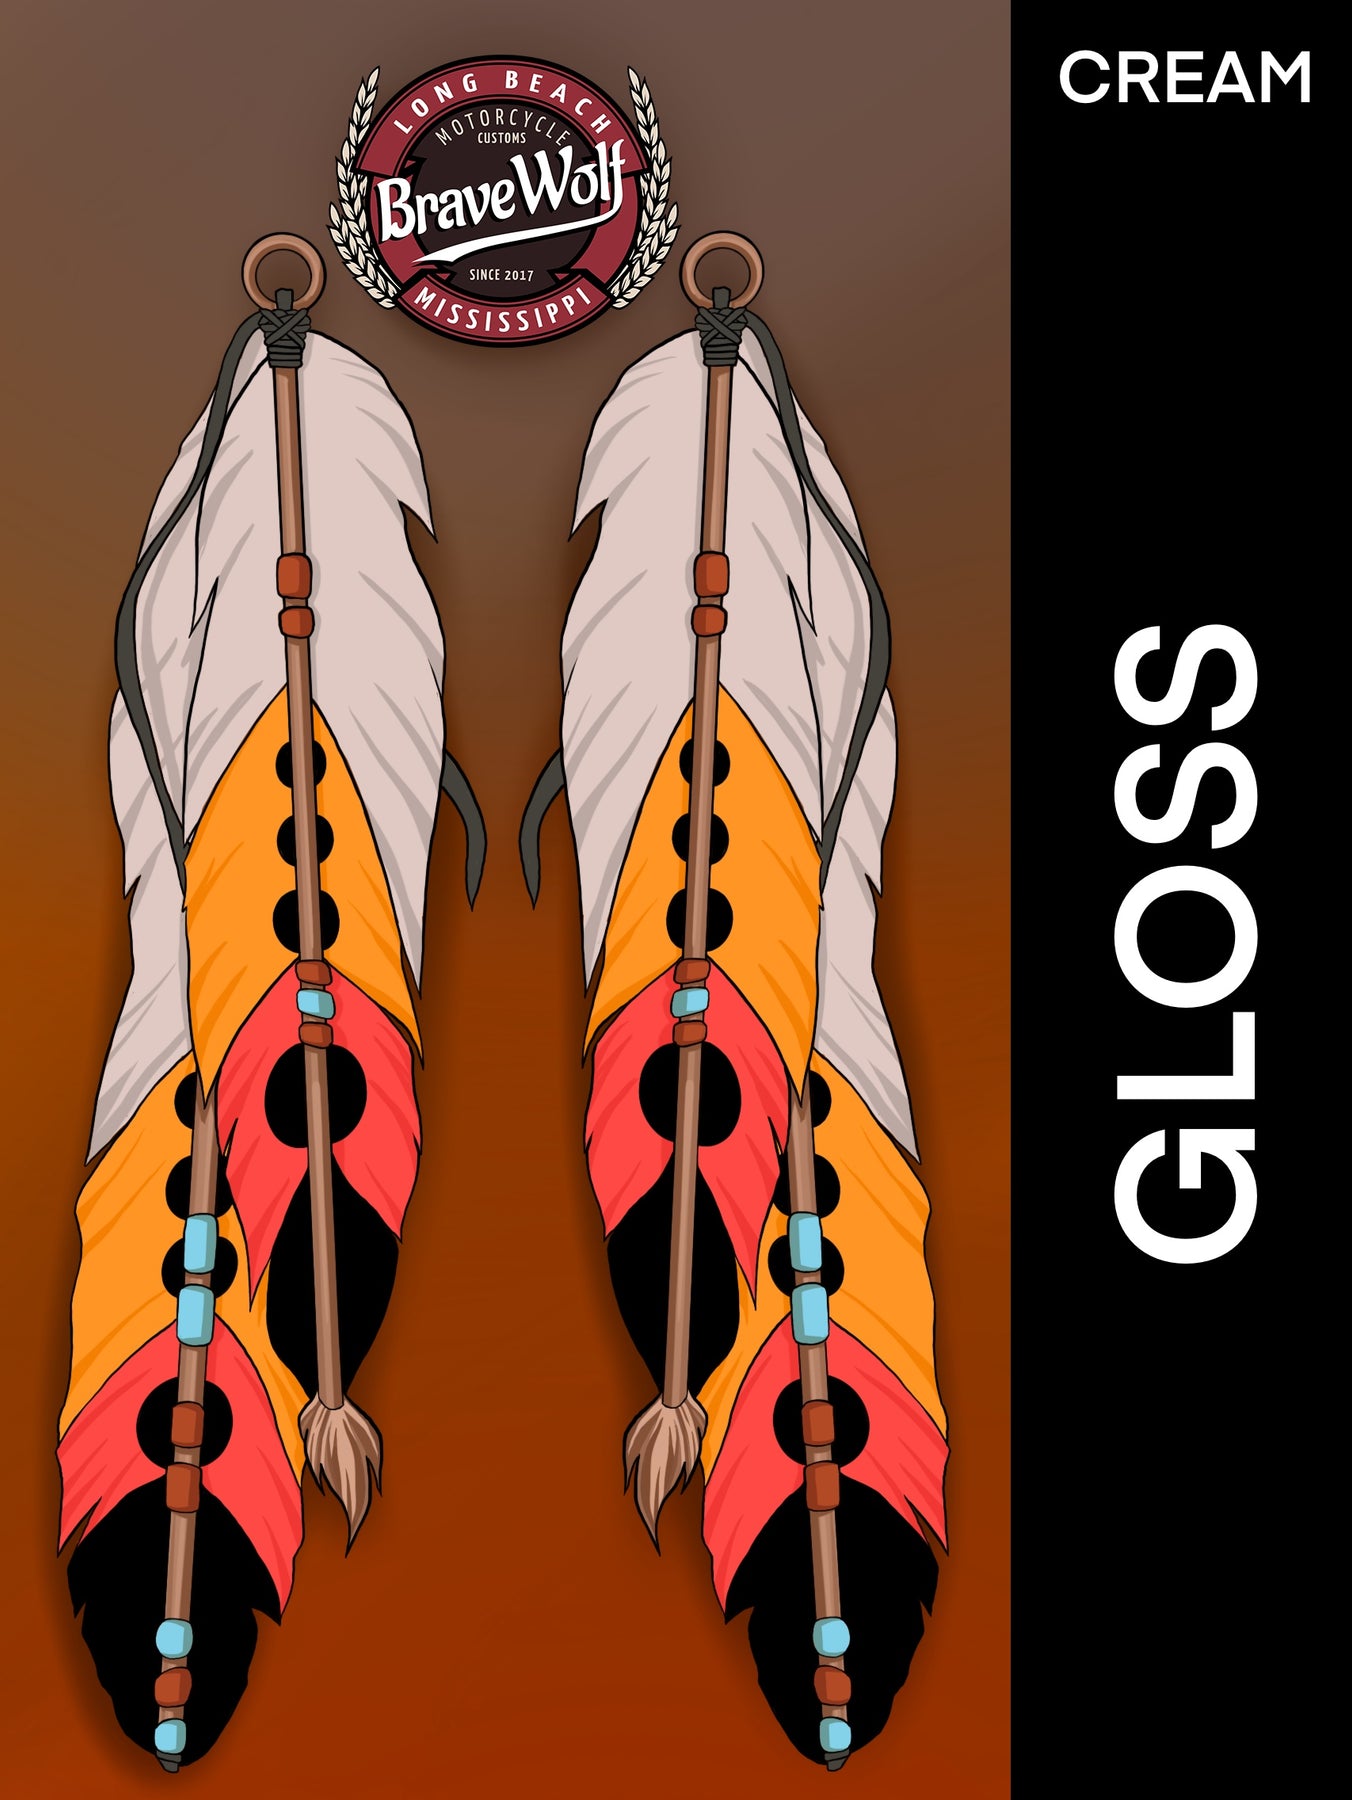
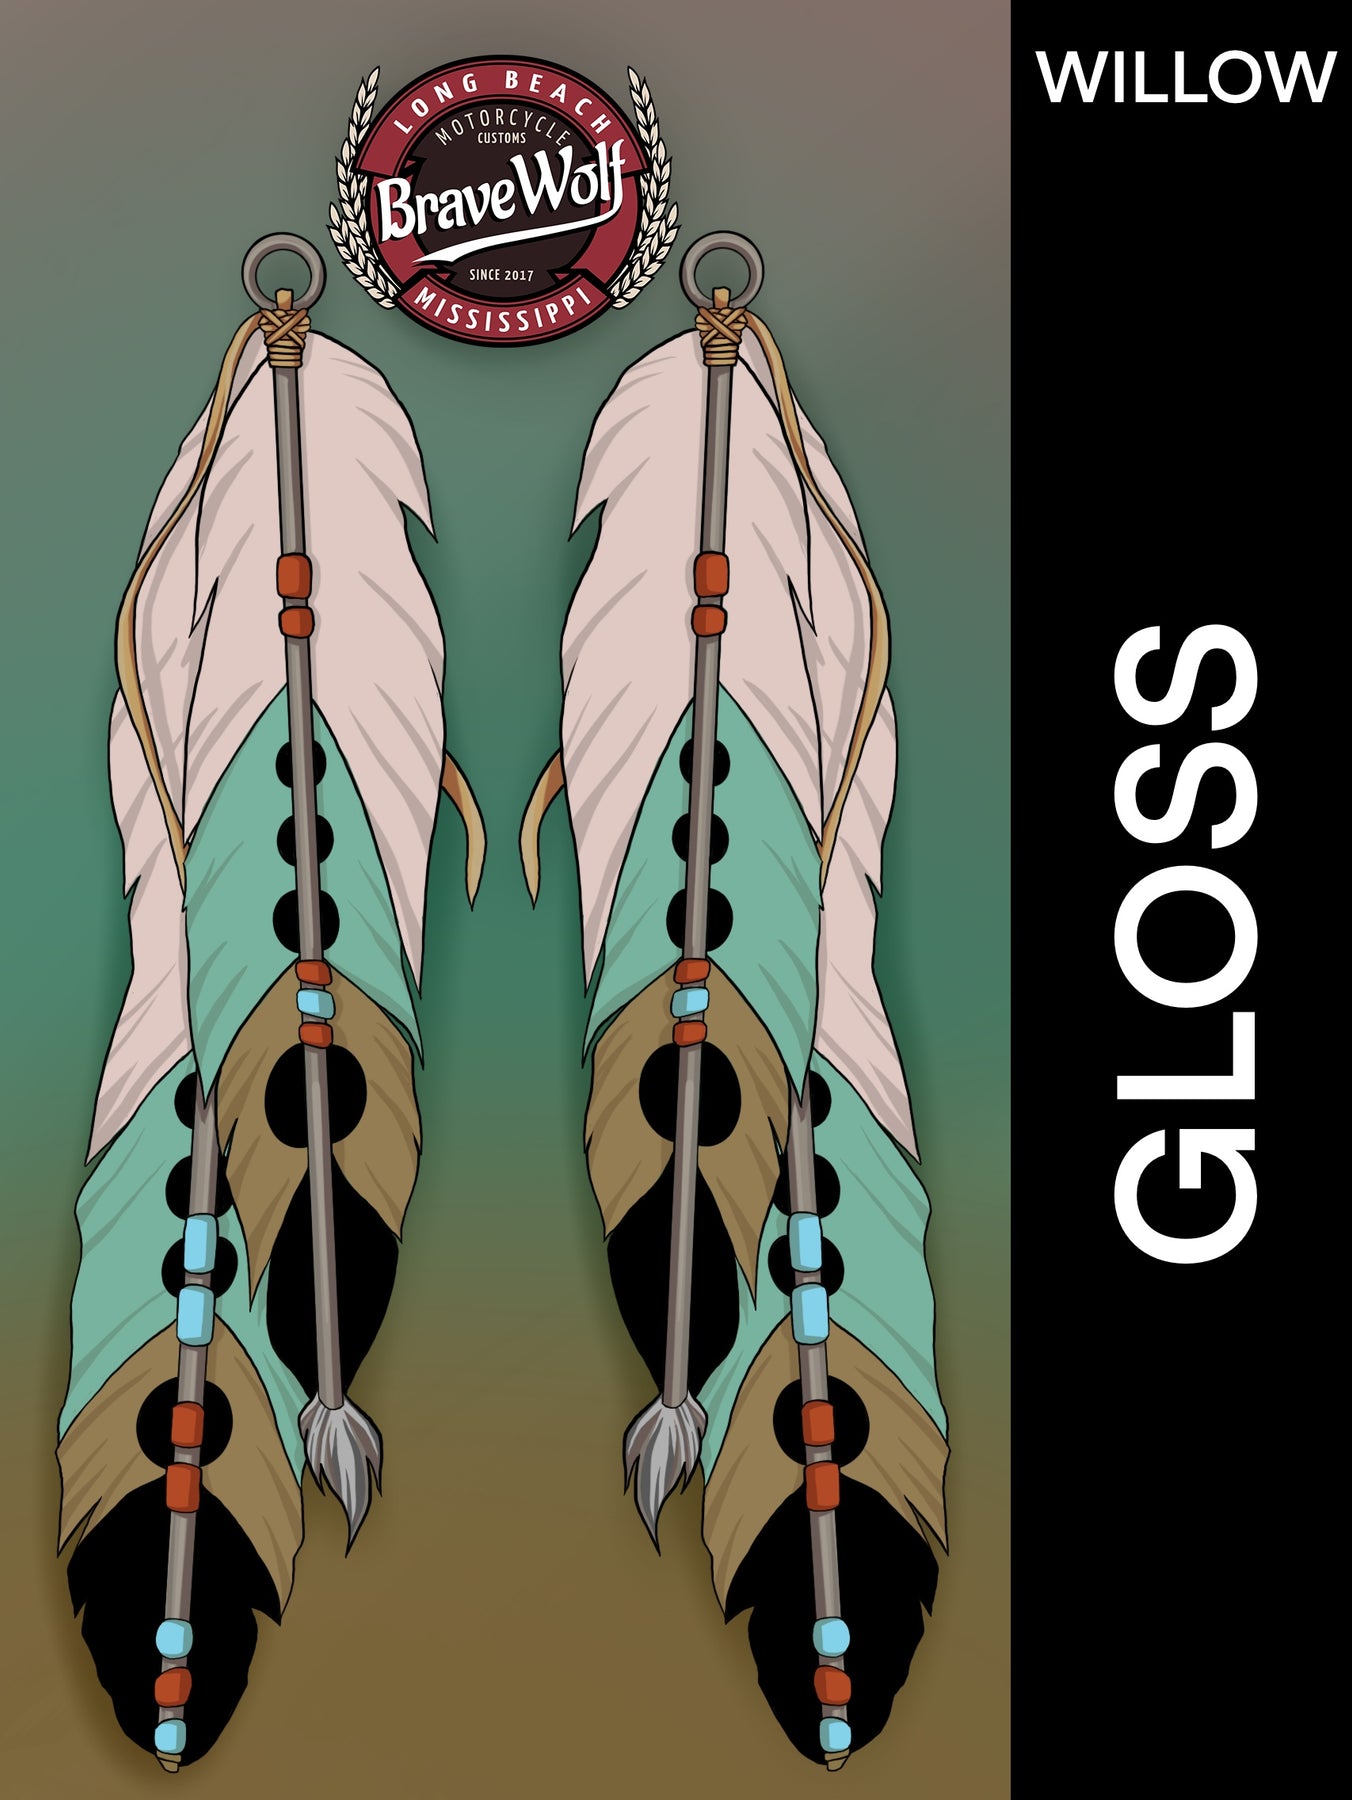
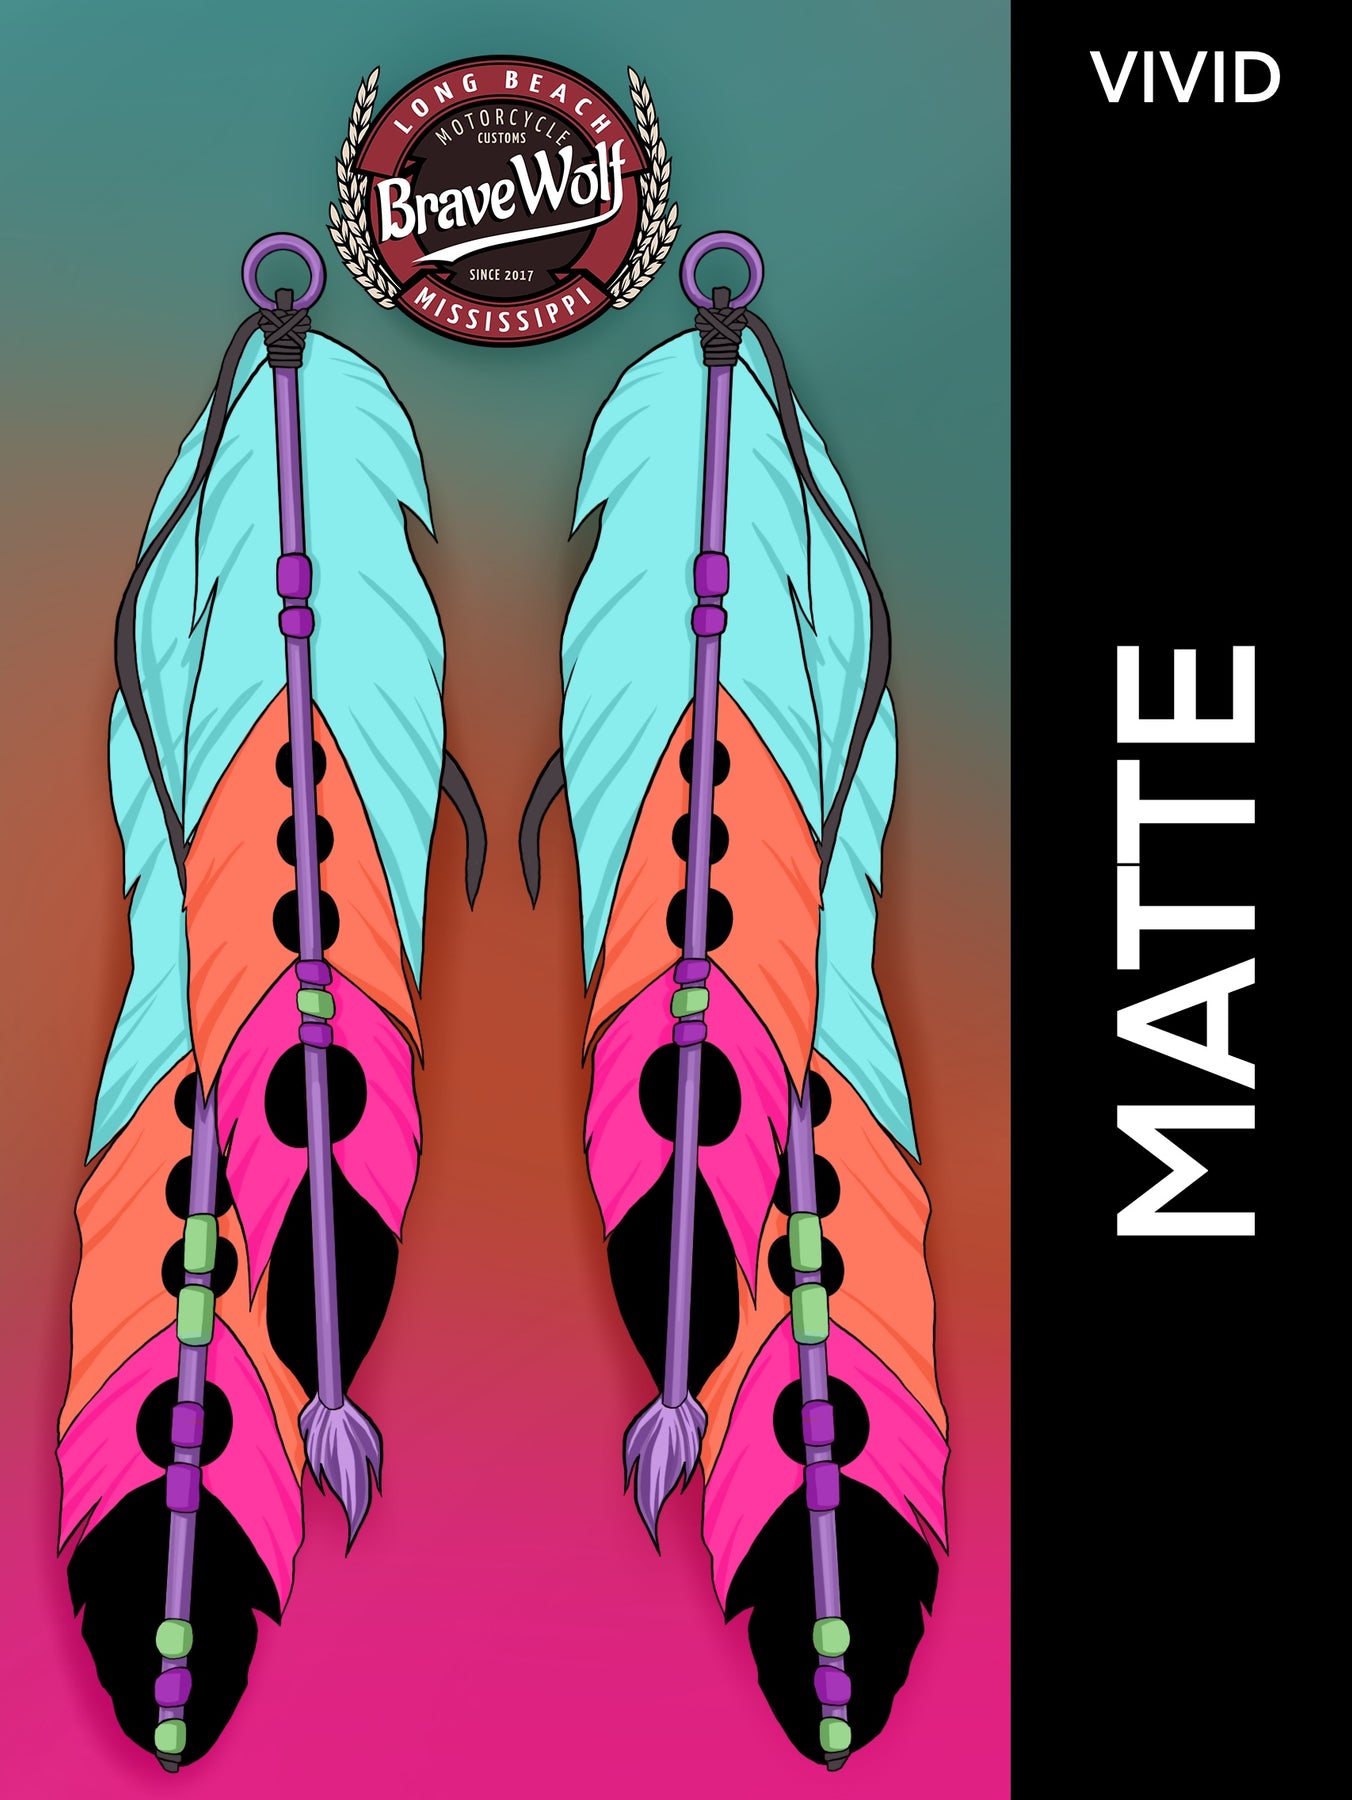
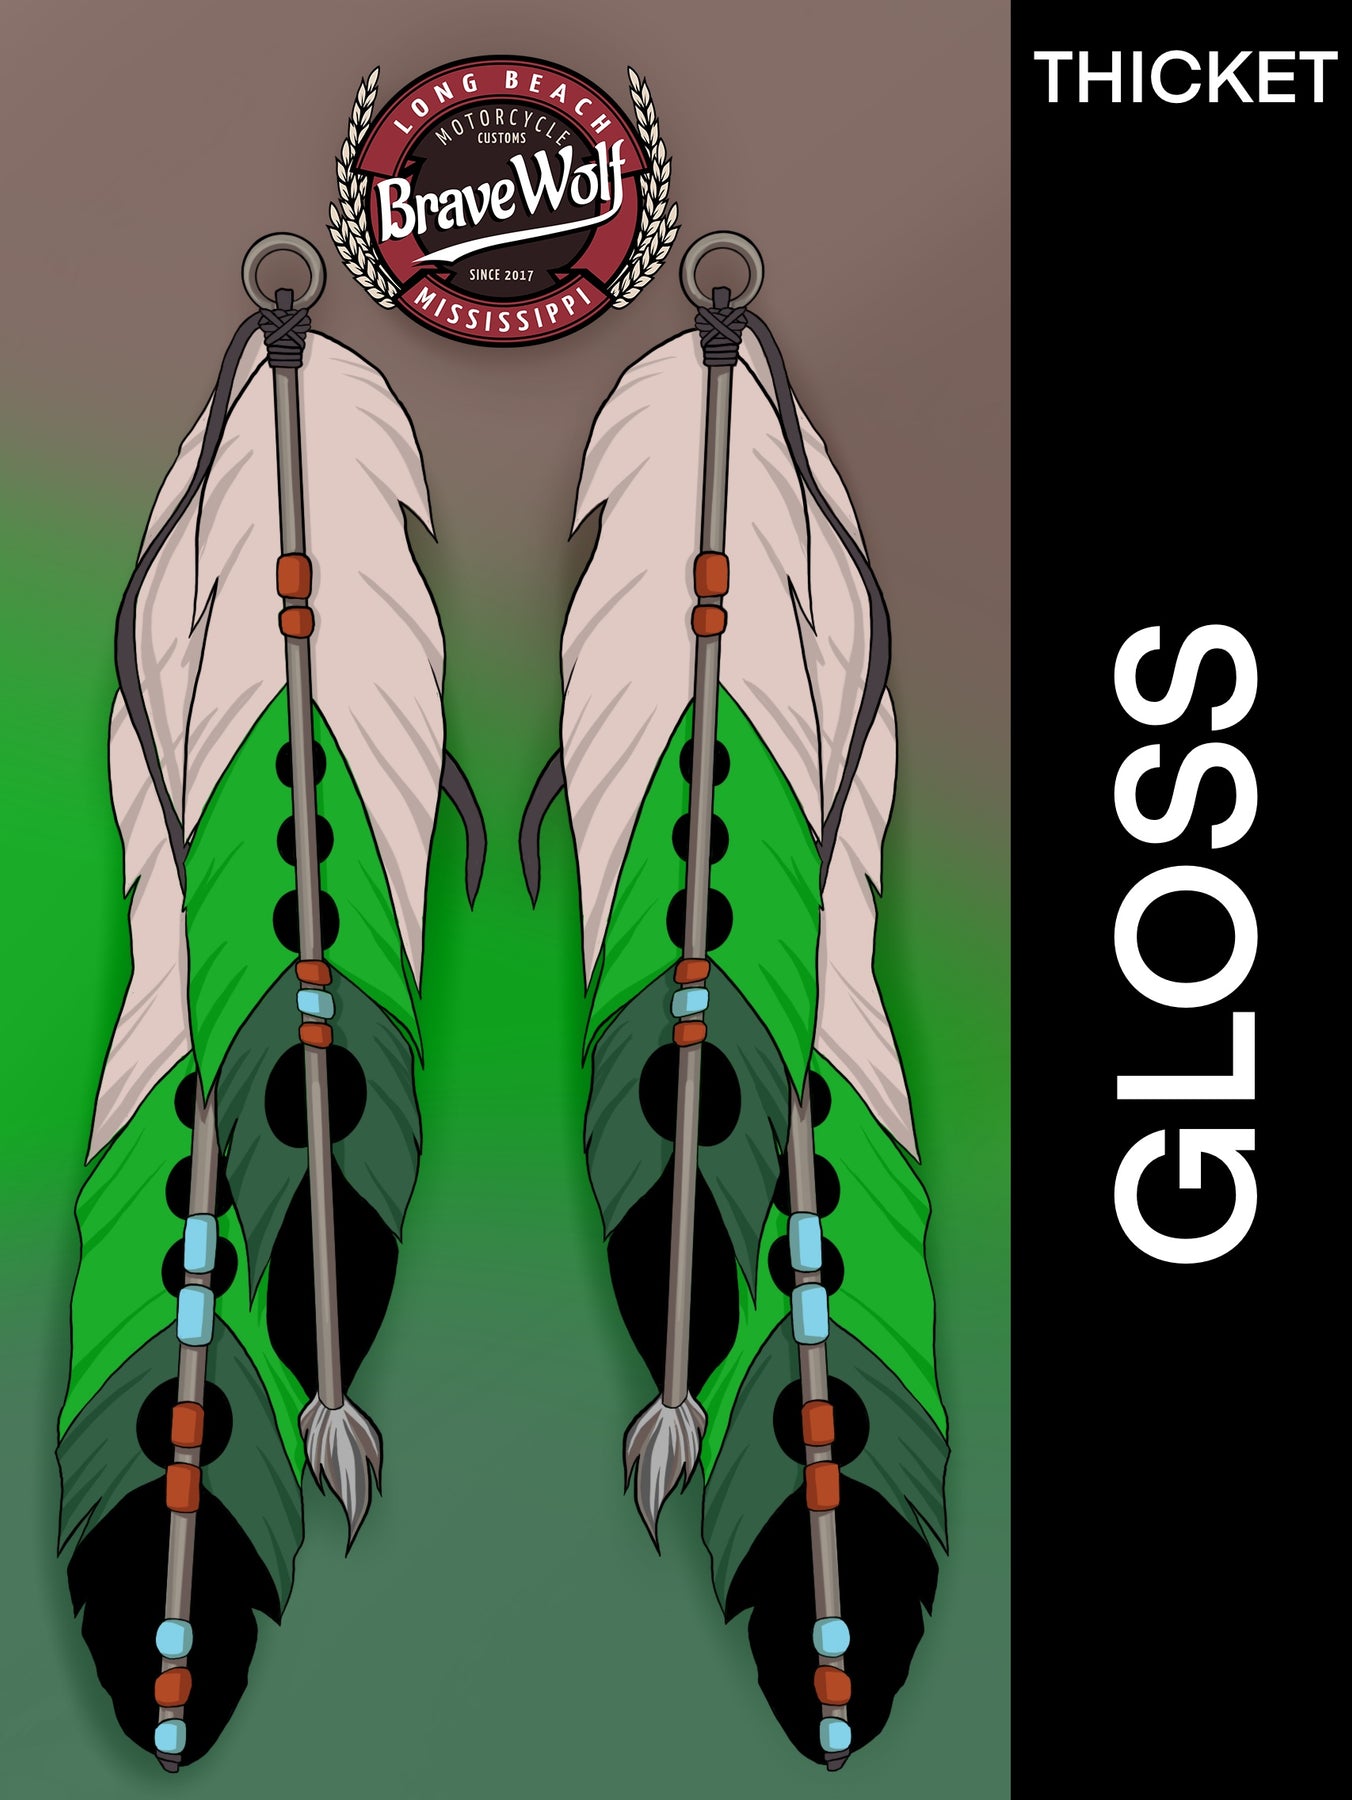
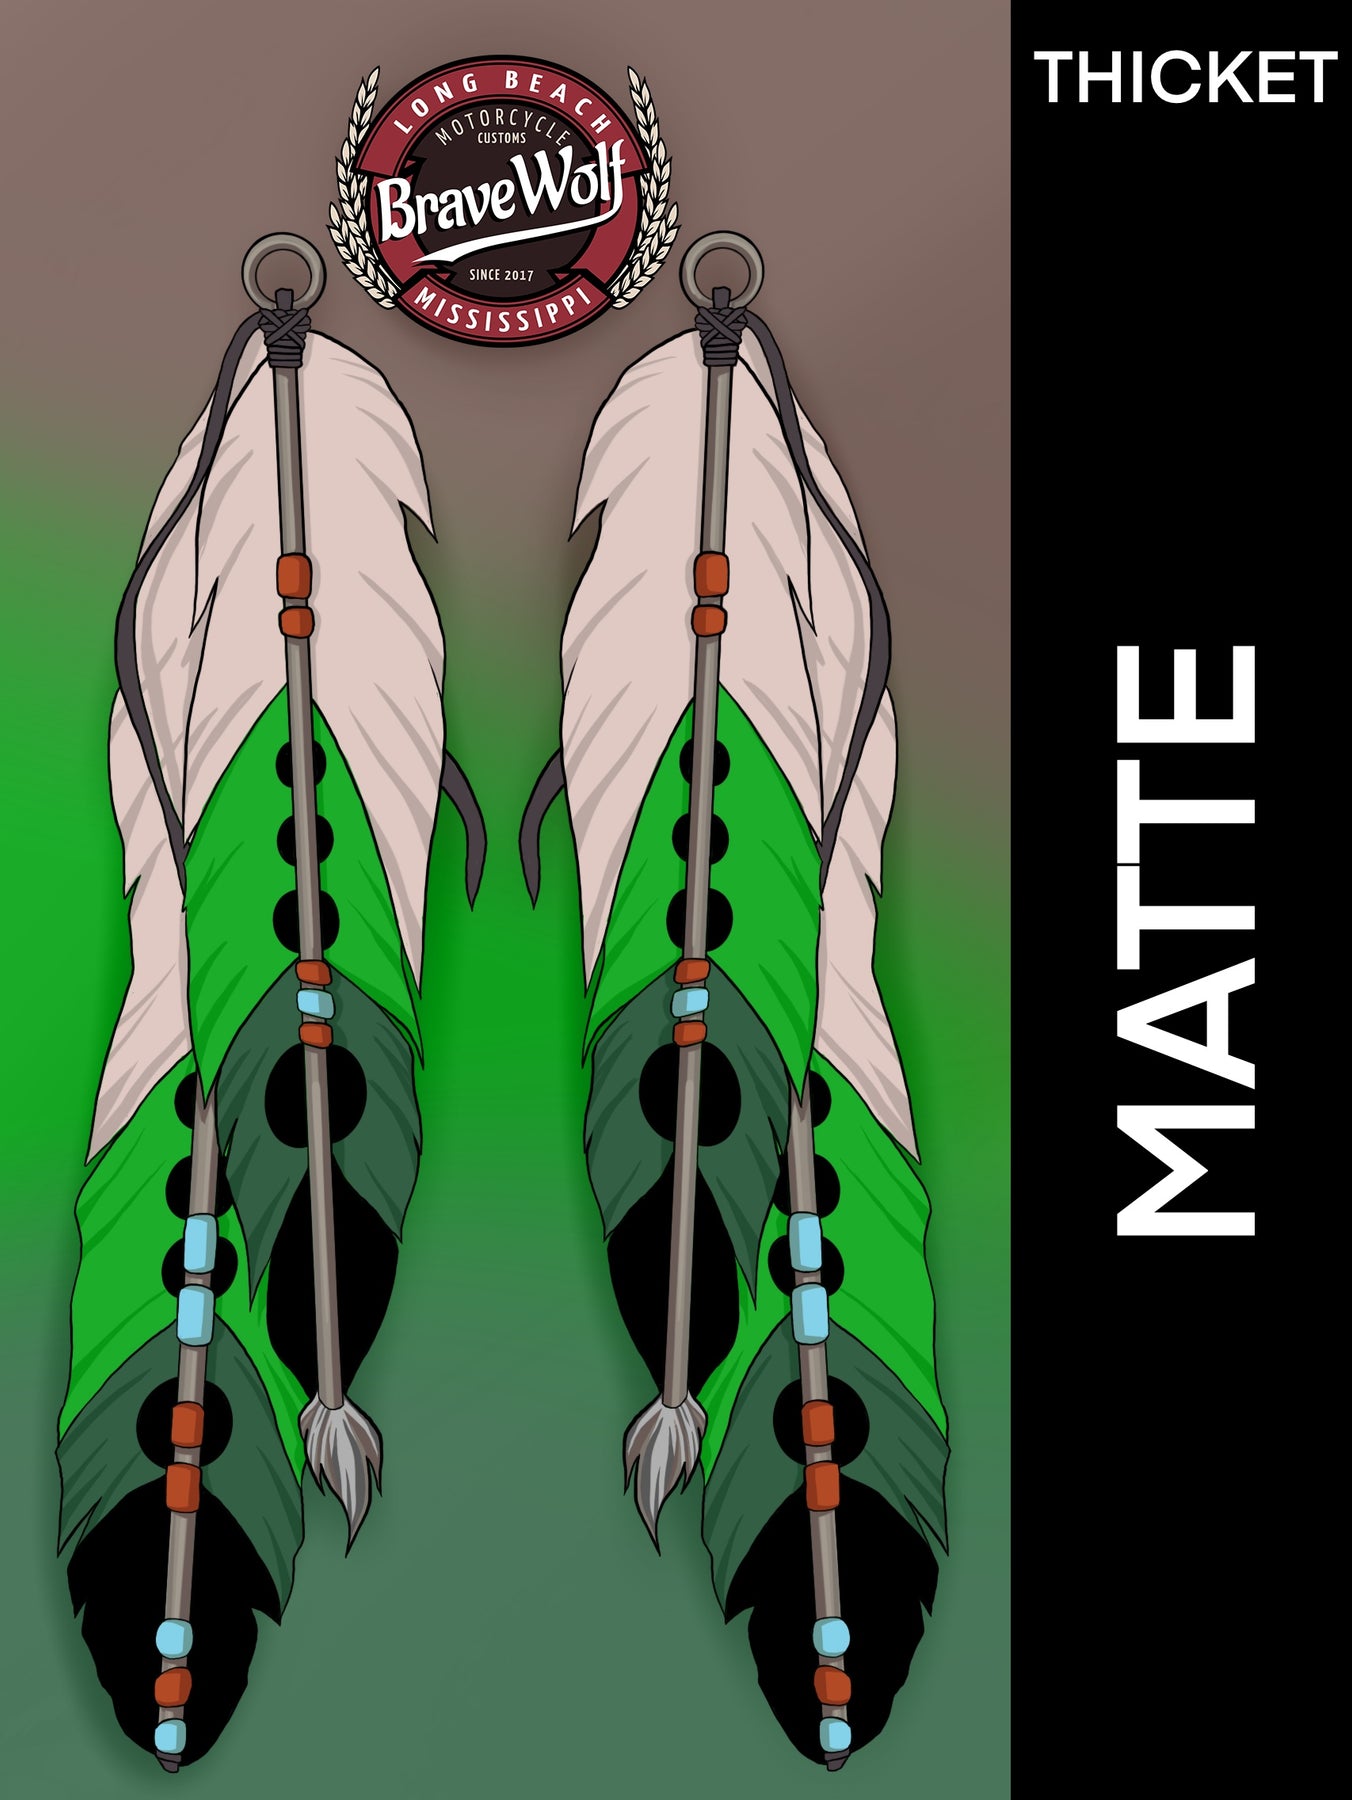
Feather Accent Decals - 8 Inches long
Regular price $25.00 Sale price $20.00 Save $5.00
Shipping calculated at checkout.
Stock Notice: Most options are in-stock and ship immediately. IF you choose a style that we don’t have in stock, it may take a couple weeks to receive it from our manufacturer before we can ship to you.
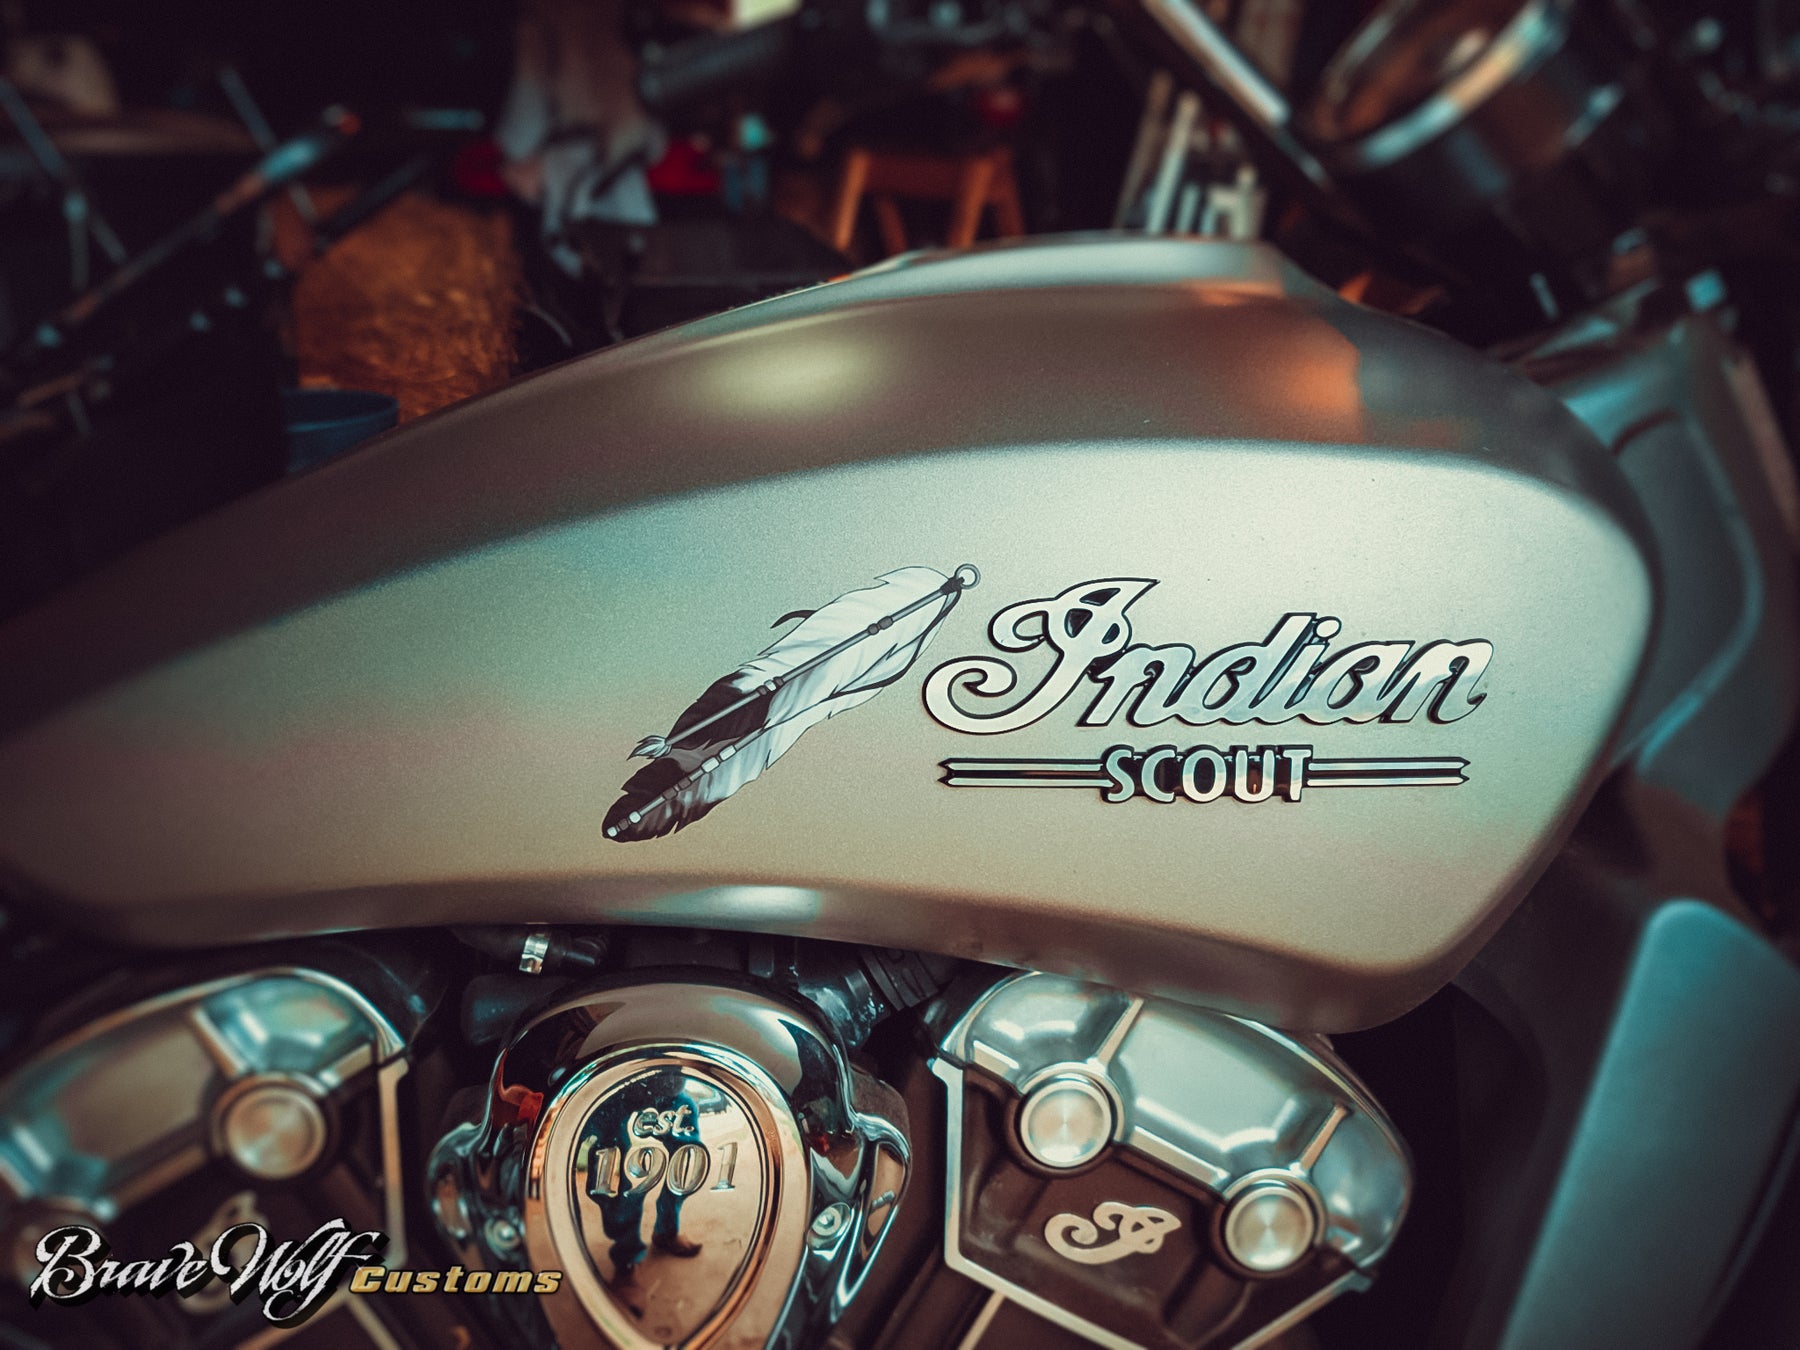
These feather accent decals are a set of two for placement on both sides of your bike. We've designed them in a variety of colors and styles to match our tank and saddlebag decals and offer you more customization options.
Size: Length = 8 inches | Width = 2.25 inches (each)

Material: A material originally made for motocross, these decals can really take a beating. They are not your everyday "sticker". These decals are printed on a hi-tack vinyl with a gloss or sandy matte texture. It is weather proof, temperature and UV resistant, and will maintain its quality for years.
Shipping times: In-stock products ship the same business day before 9AM or the following business day. Special Order items must be ordered from our manufacturer and may require up to 2 weeks lead time before we can ship them to you.
What is included: Matching set of left and right facing decals. Application suitable for Motorcycles, cars, trucks, windows, tables and more.
How to Install: Visit our How-To page for videos on the Dry install and Wet Install methods


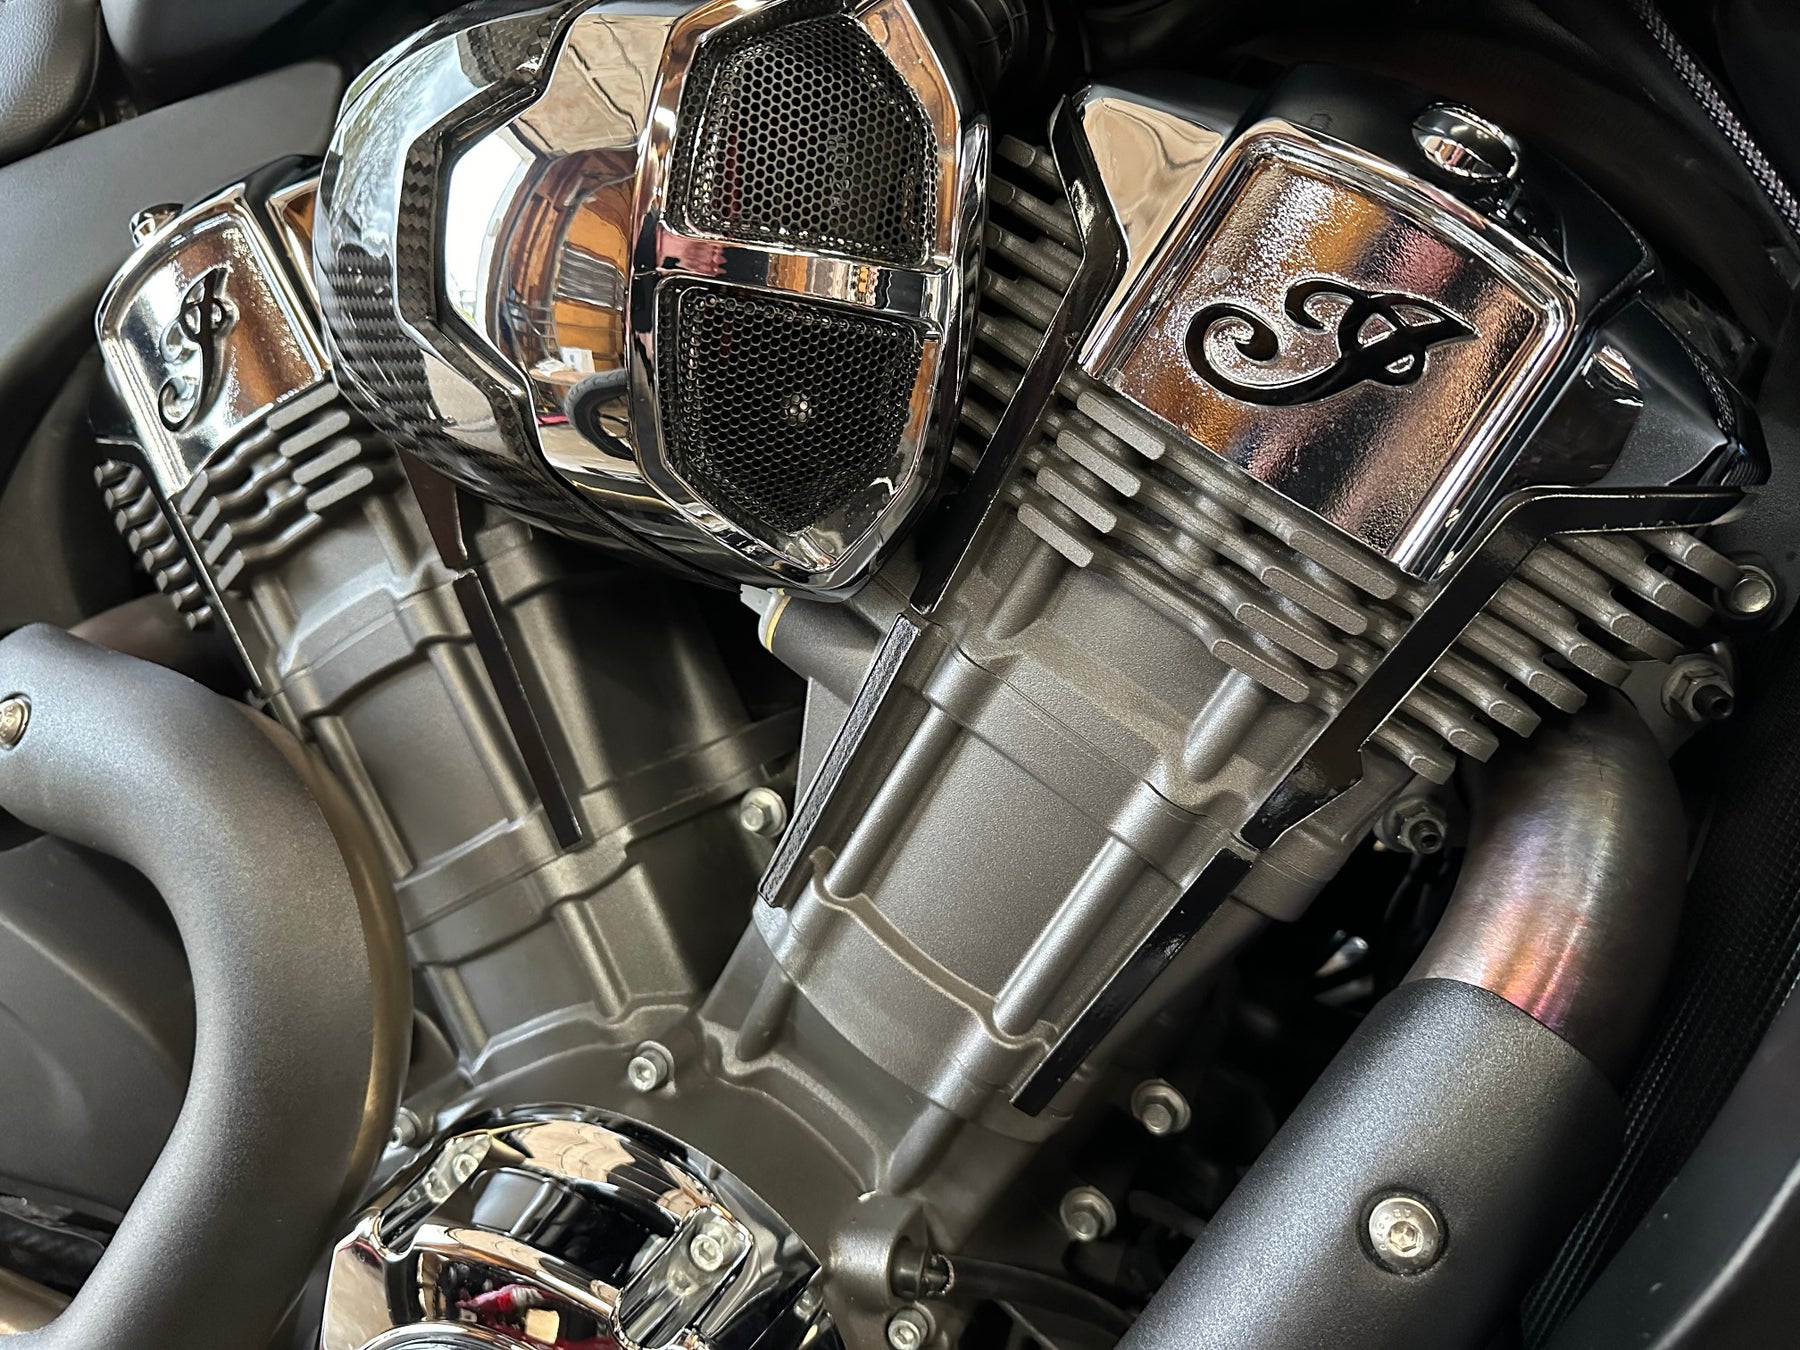
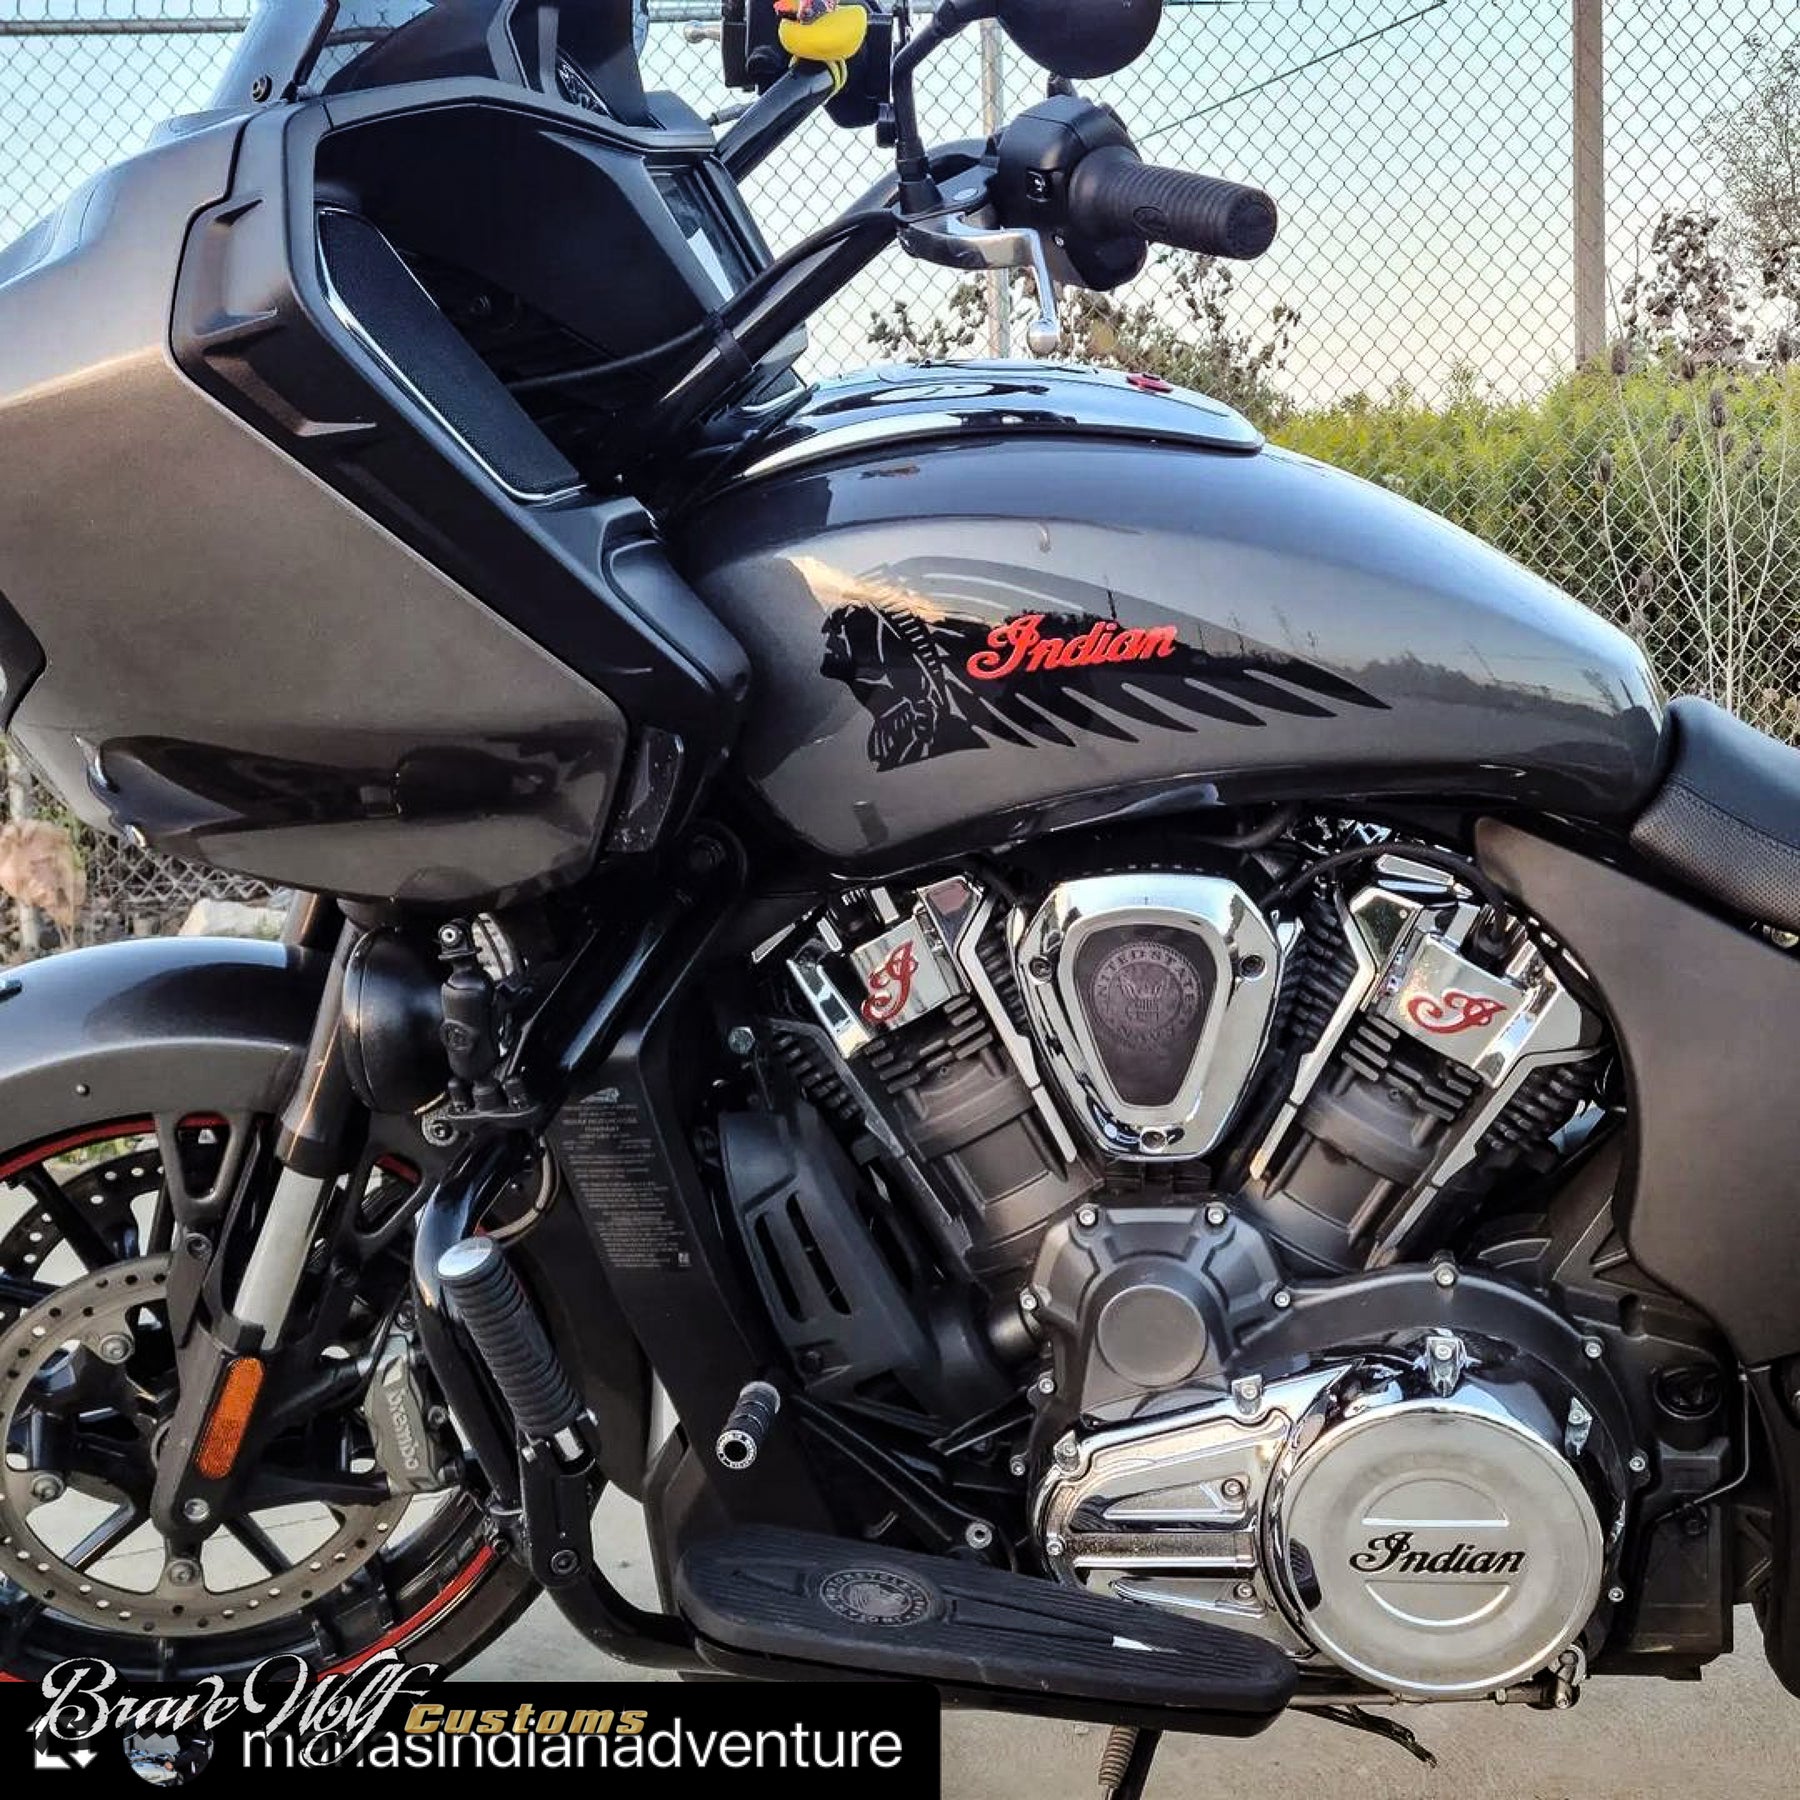
Powerplus Engine Accent Kit - Indy Red
Regular price $35.00
Shipping calculated at checkout.
Stock Notice:
All style options for our Powerplus Engine Accent kits are usually in stock. However, they are produced in manufacturing runs so if they're out of stock at the time of your order, there may be a waiting period before we ship them out. If your order is time sensitive, feel free to contact us to check stock before ordering.
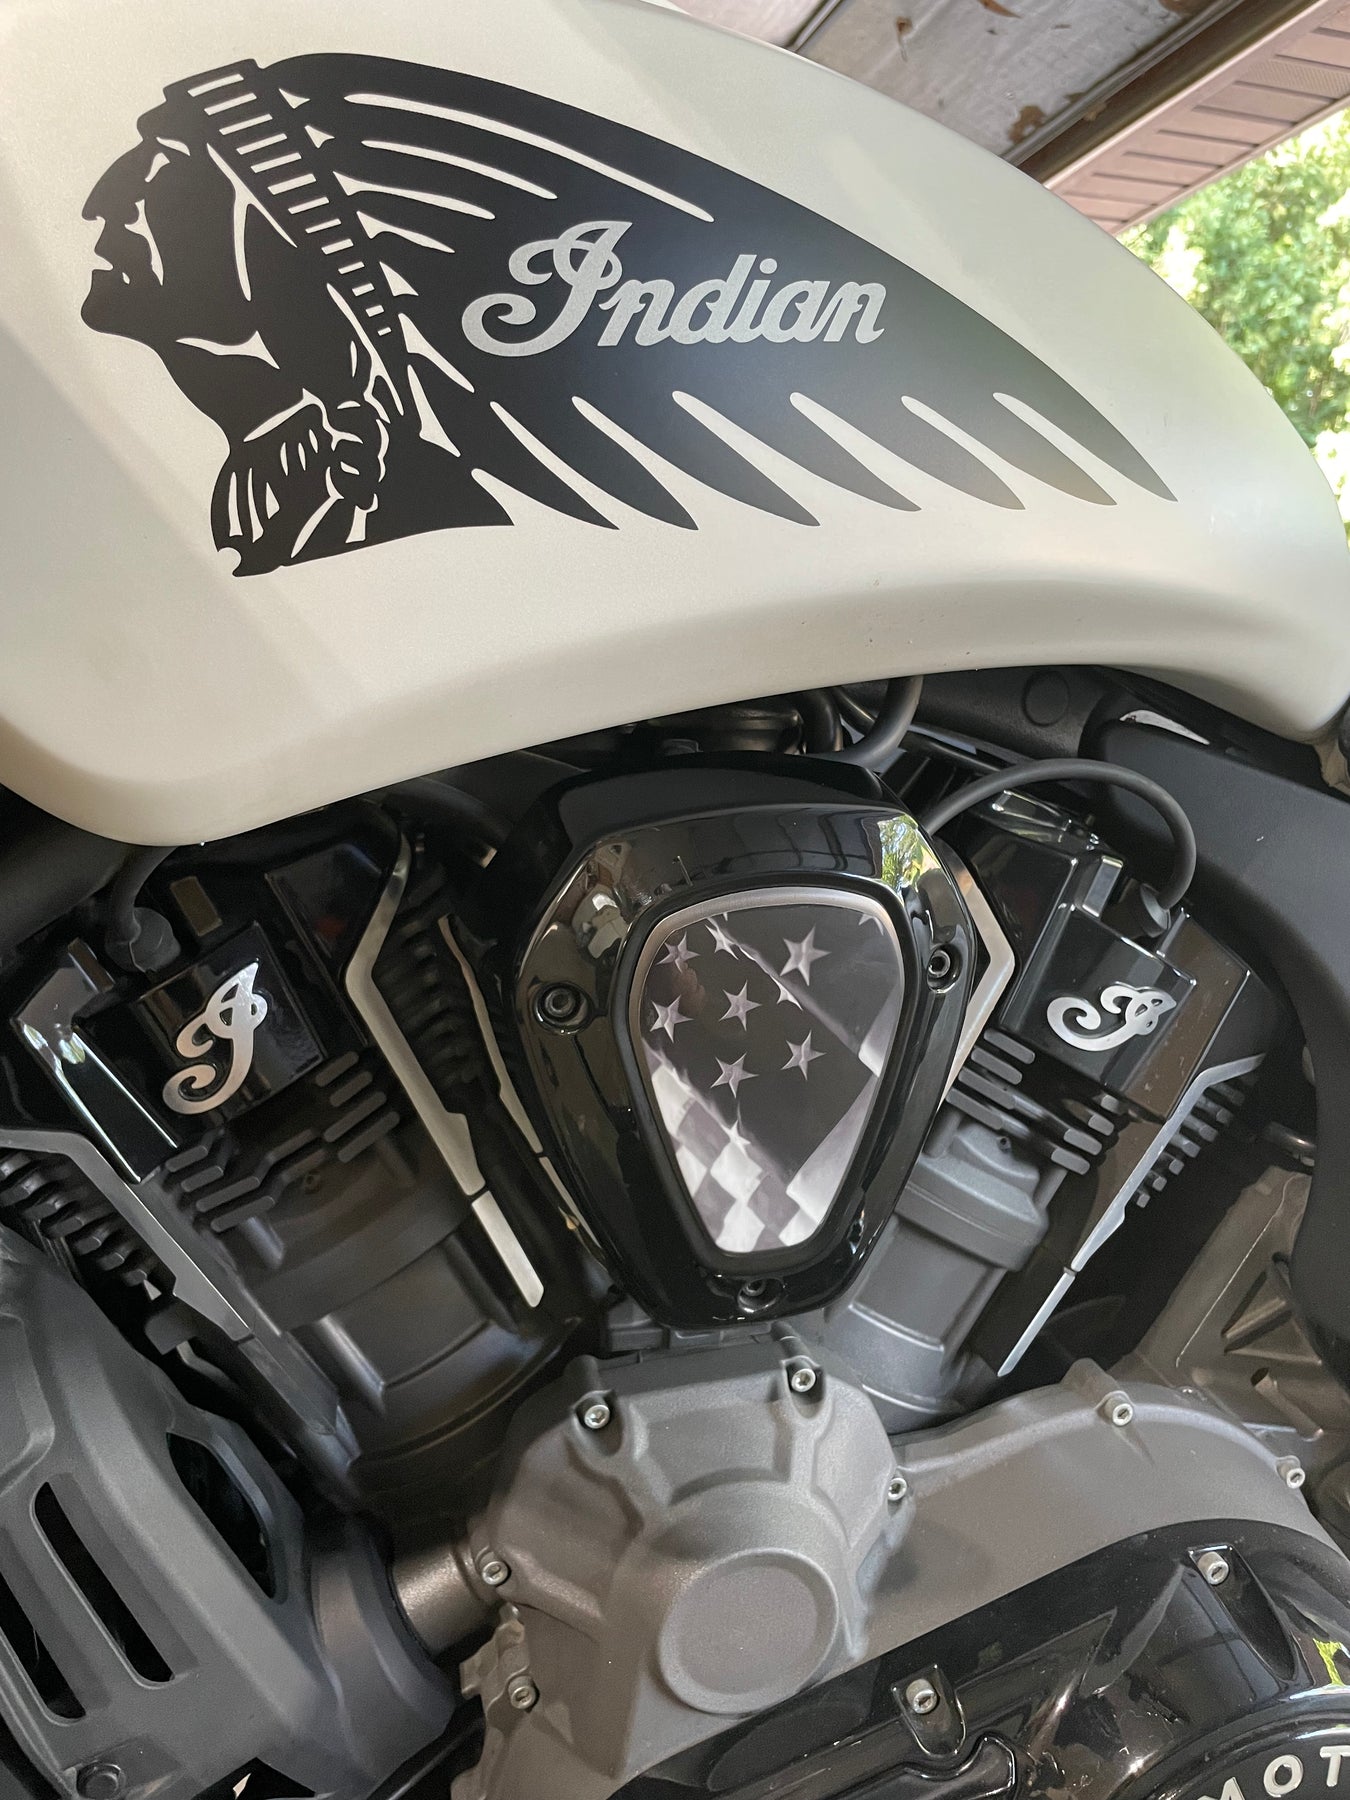
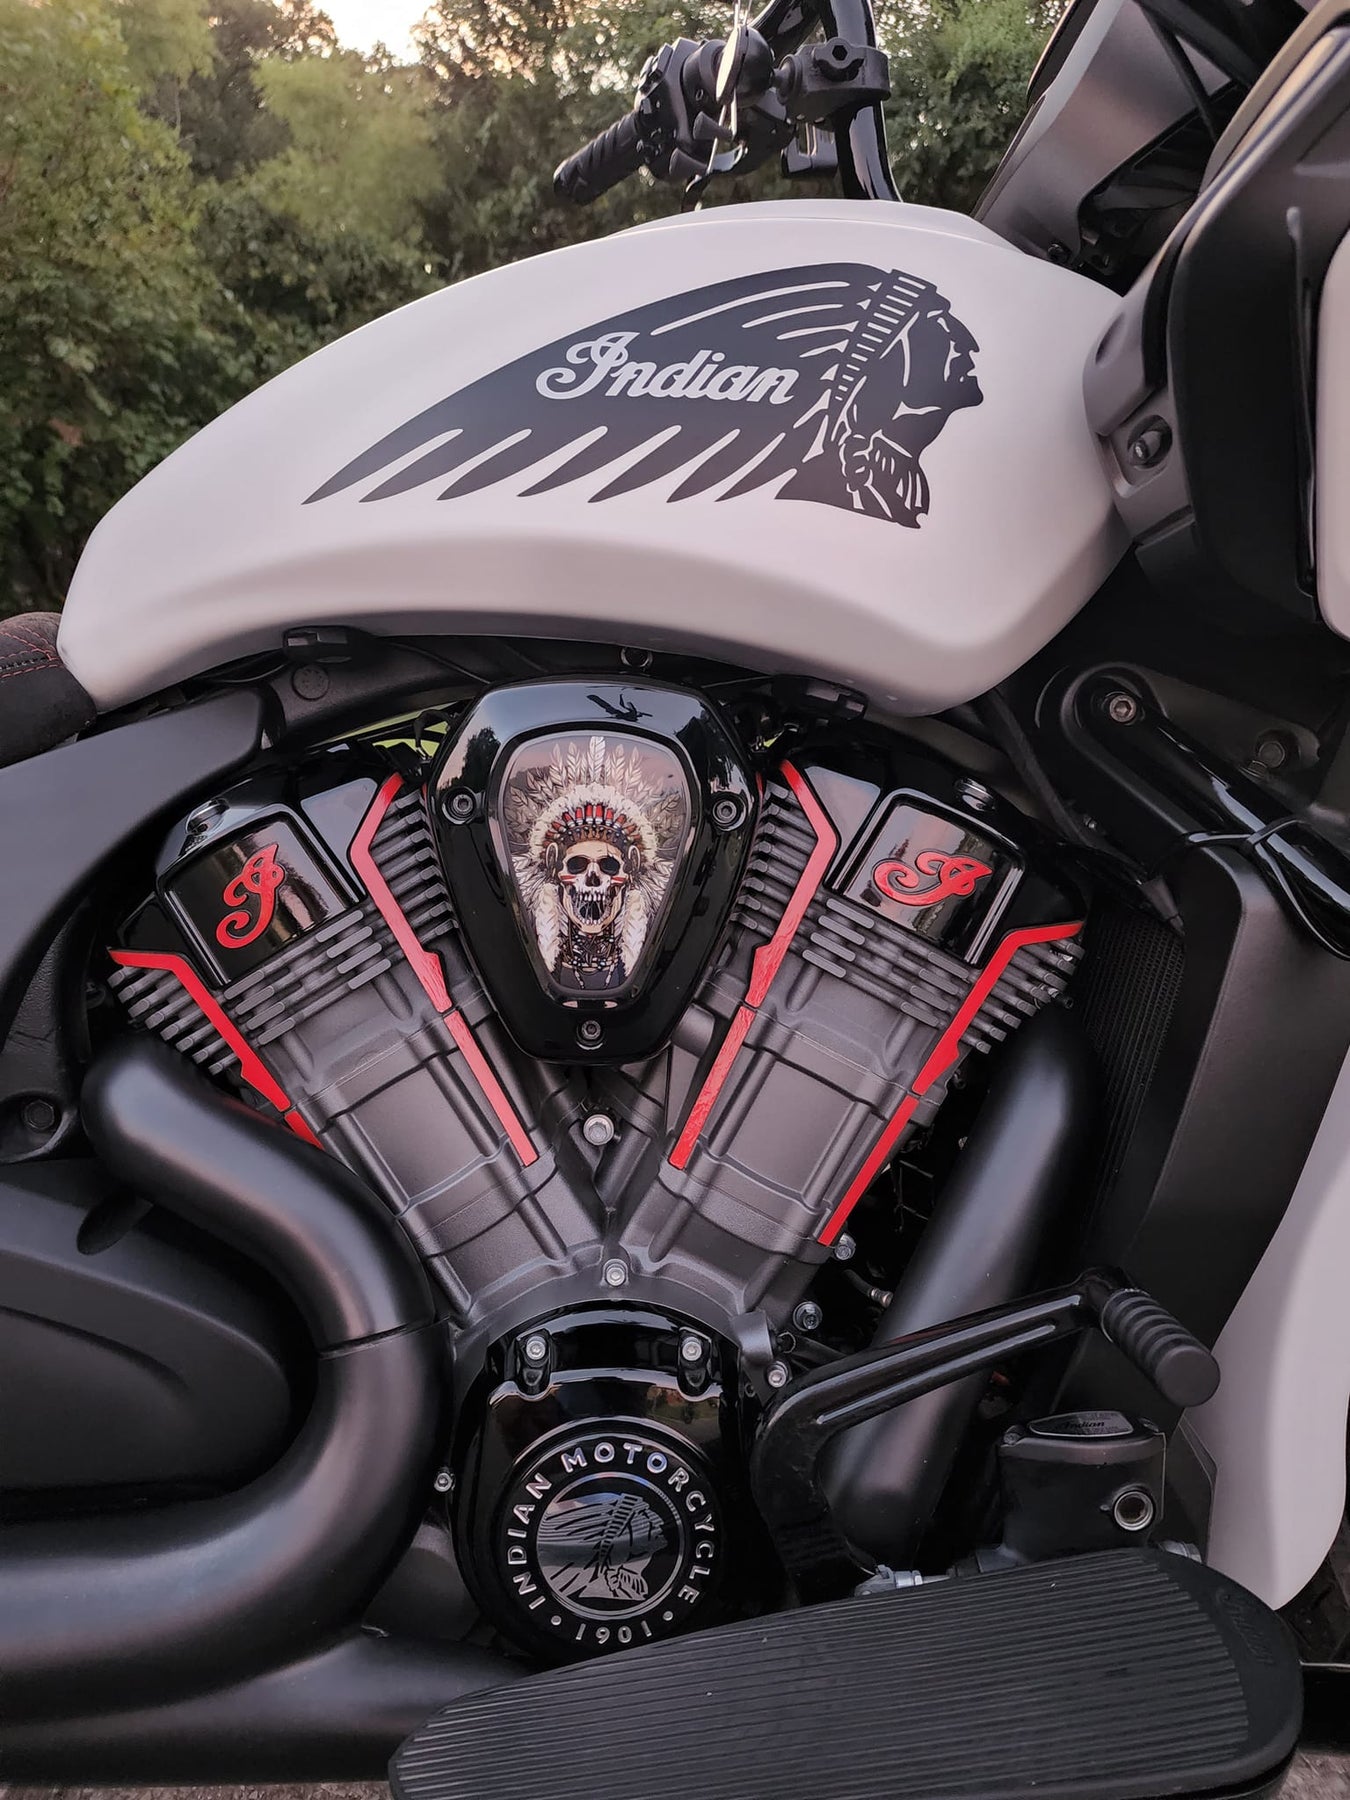
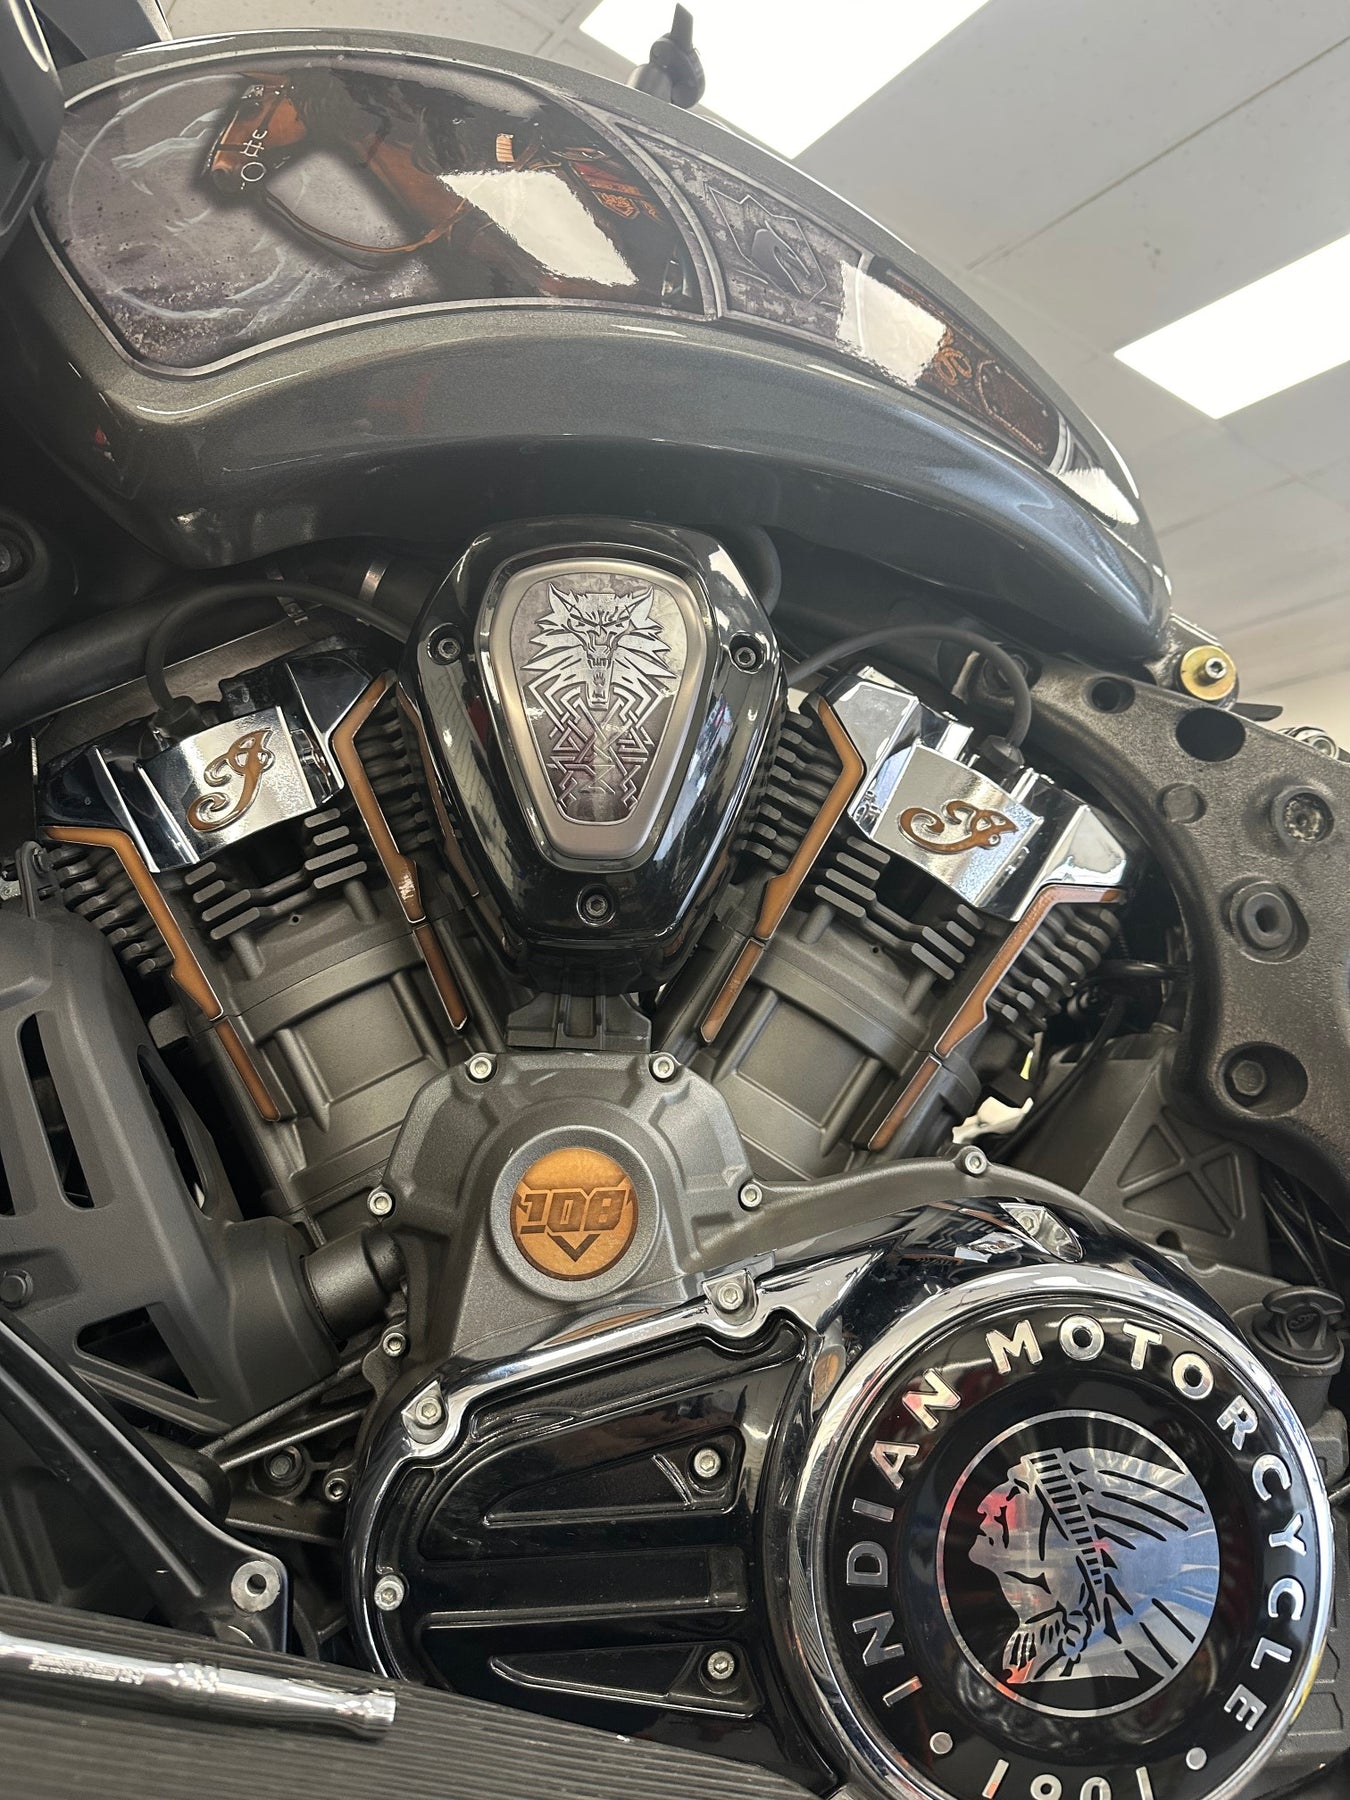
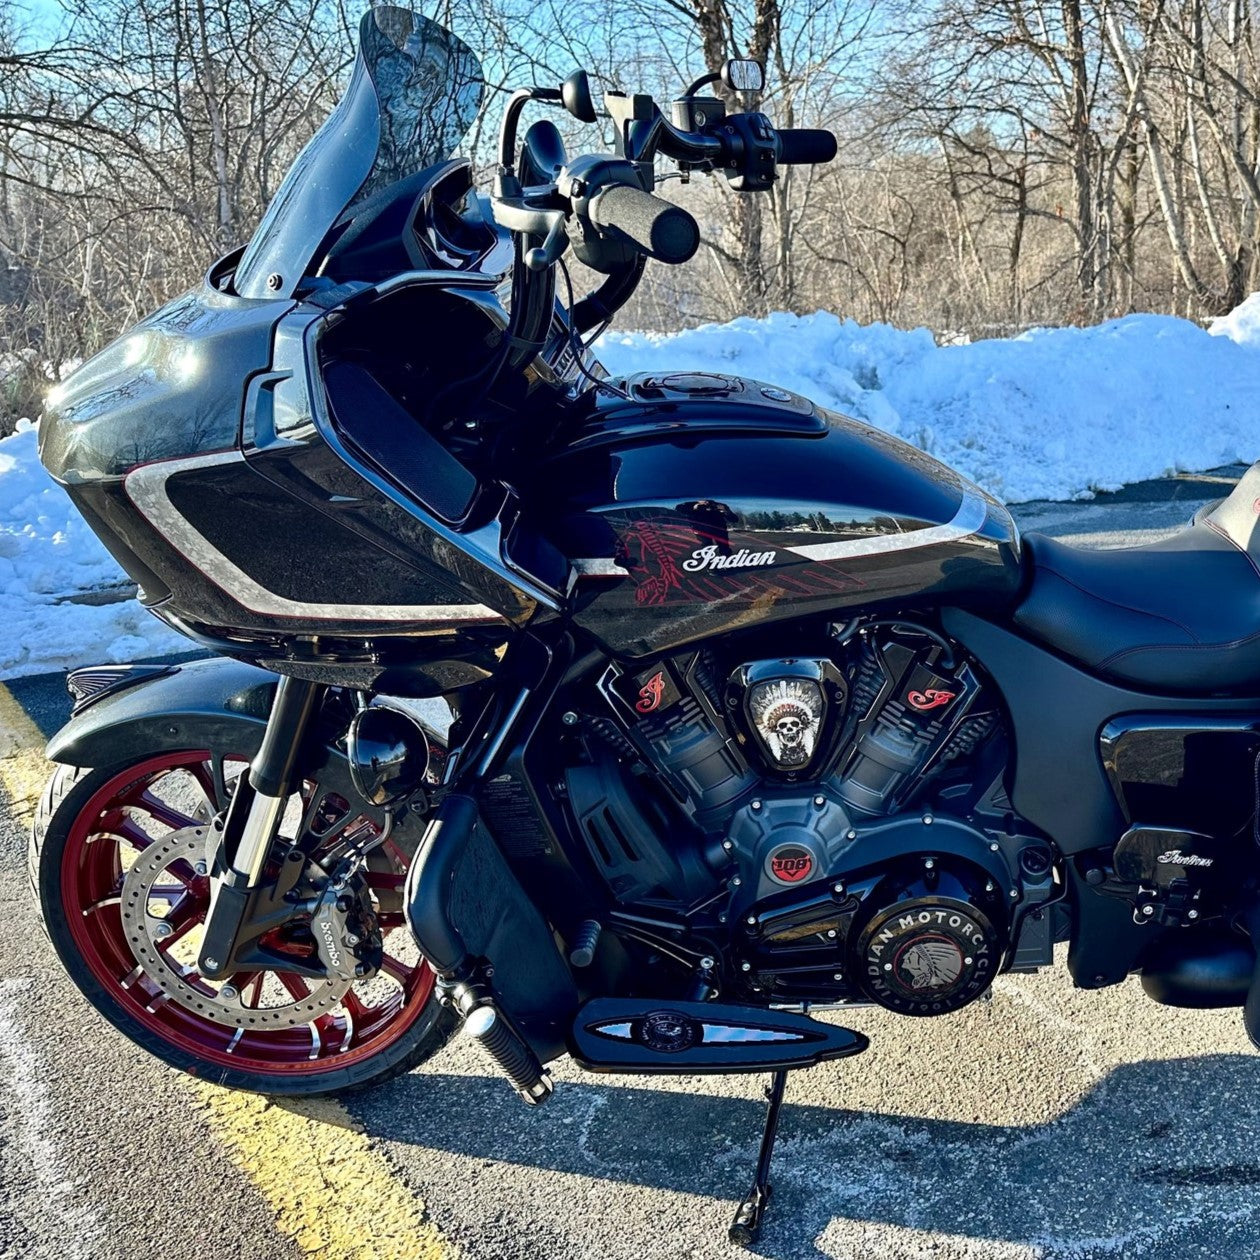
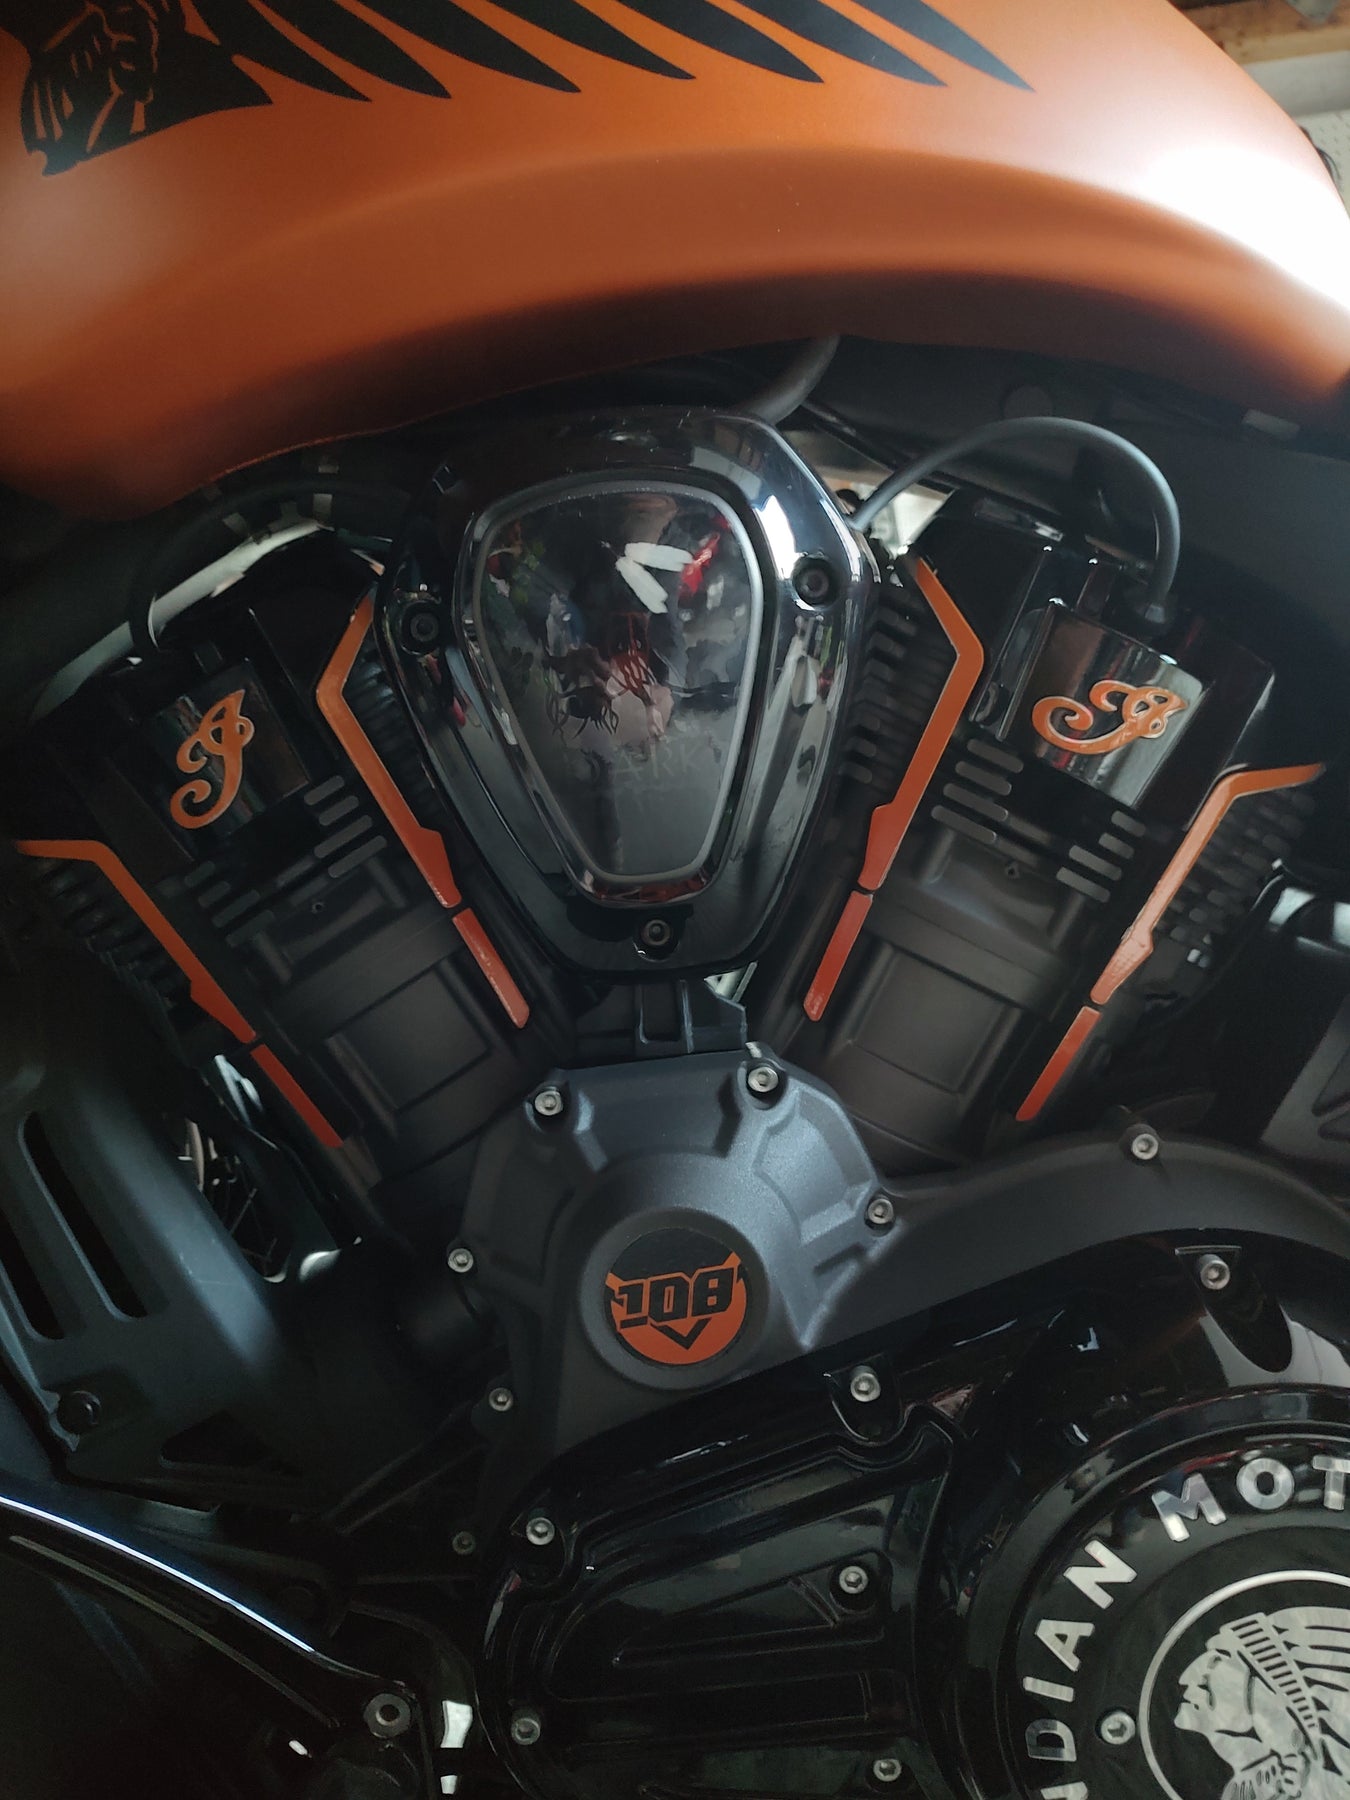
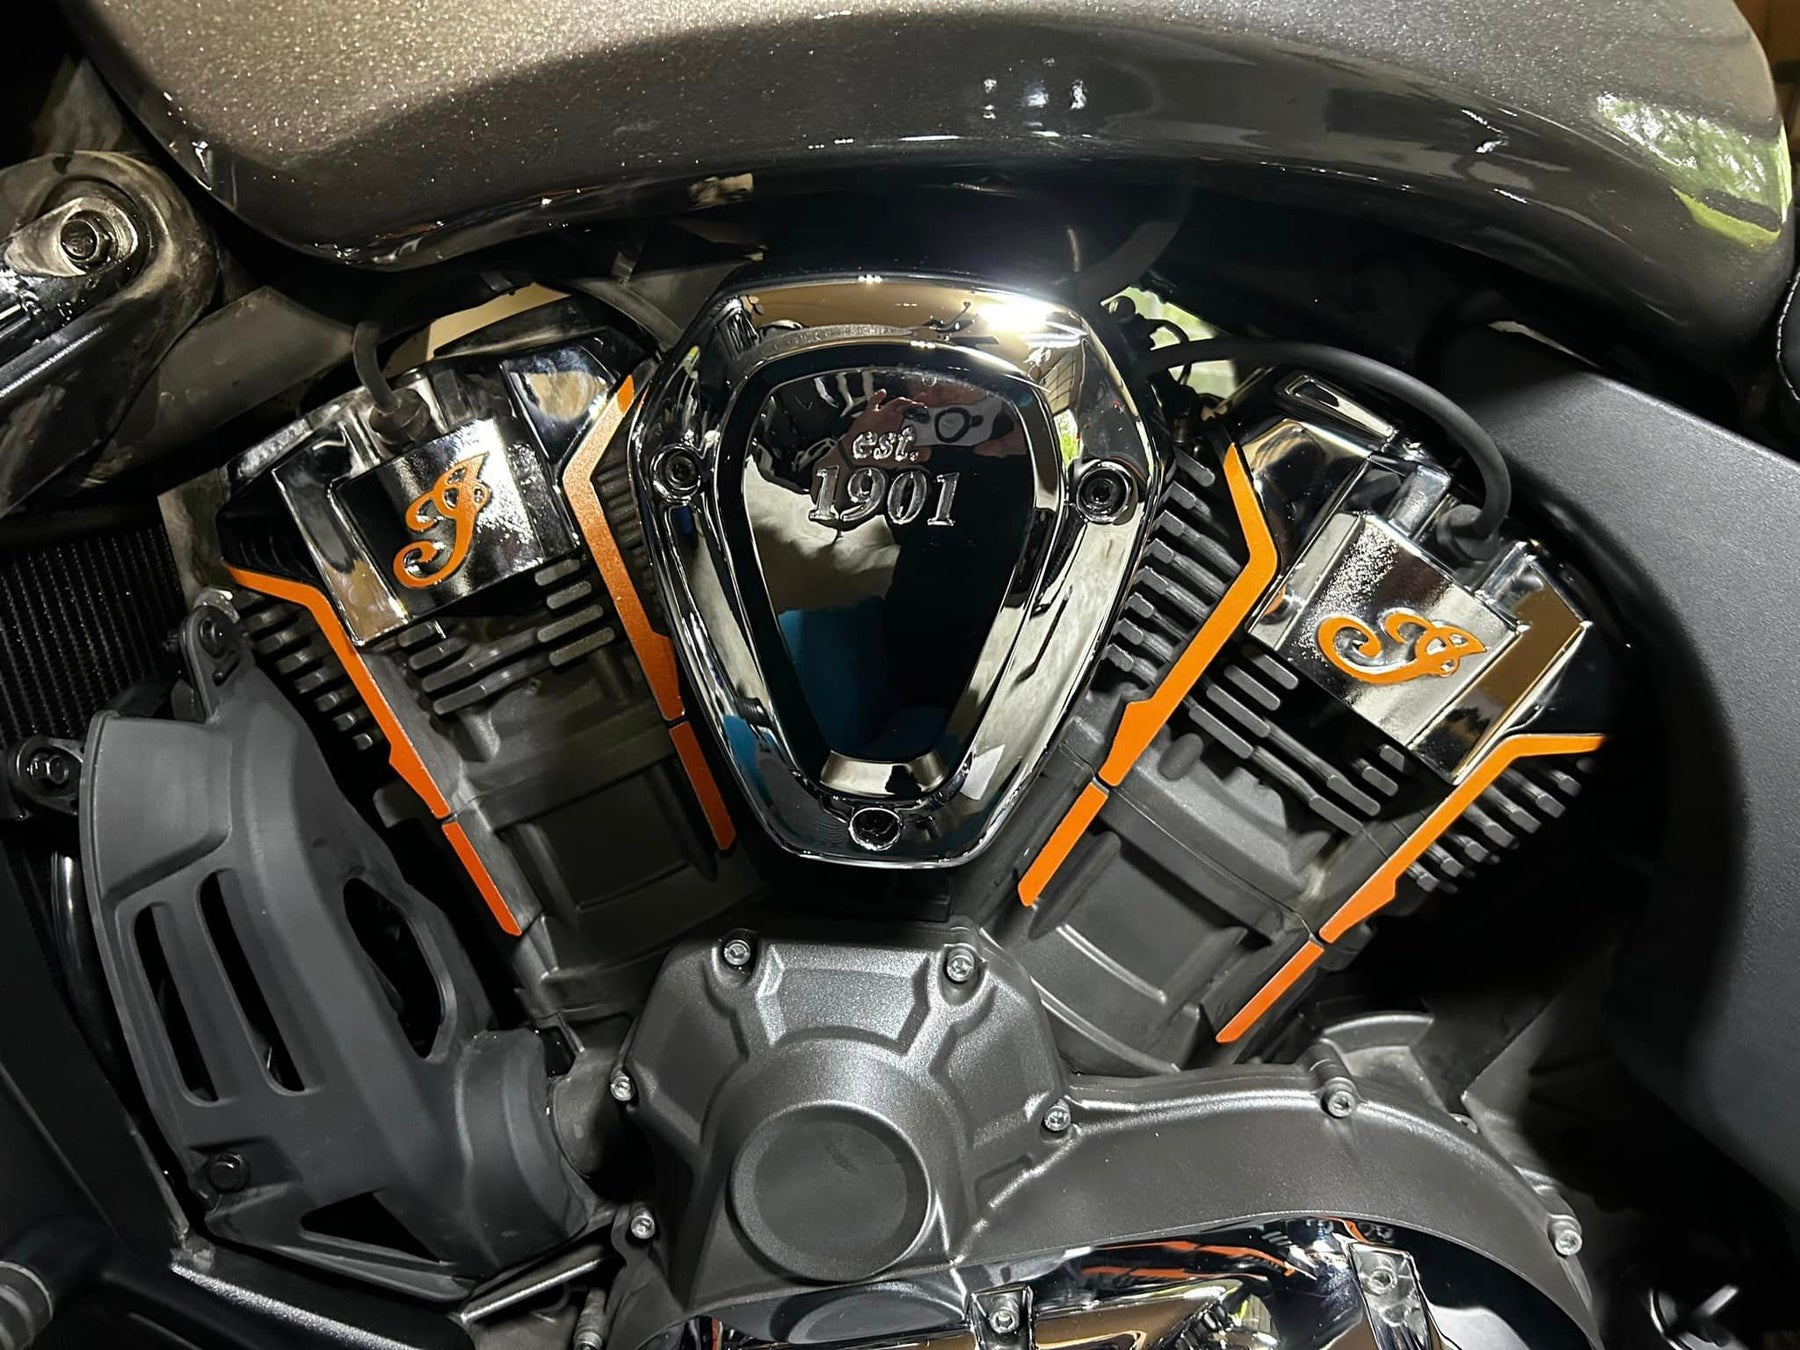
Engine accent kits for Indian Challenger and Pursuit, Powerplus Chieftain, and Powerplus Roadmaster.
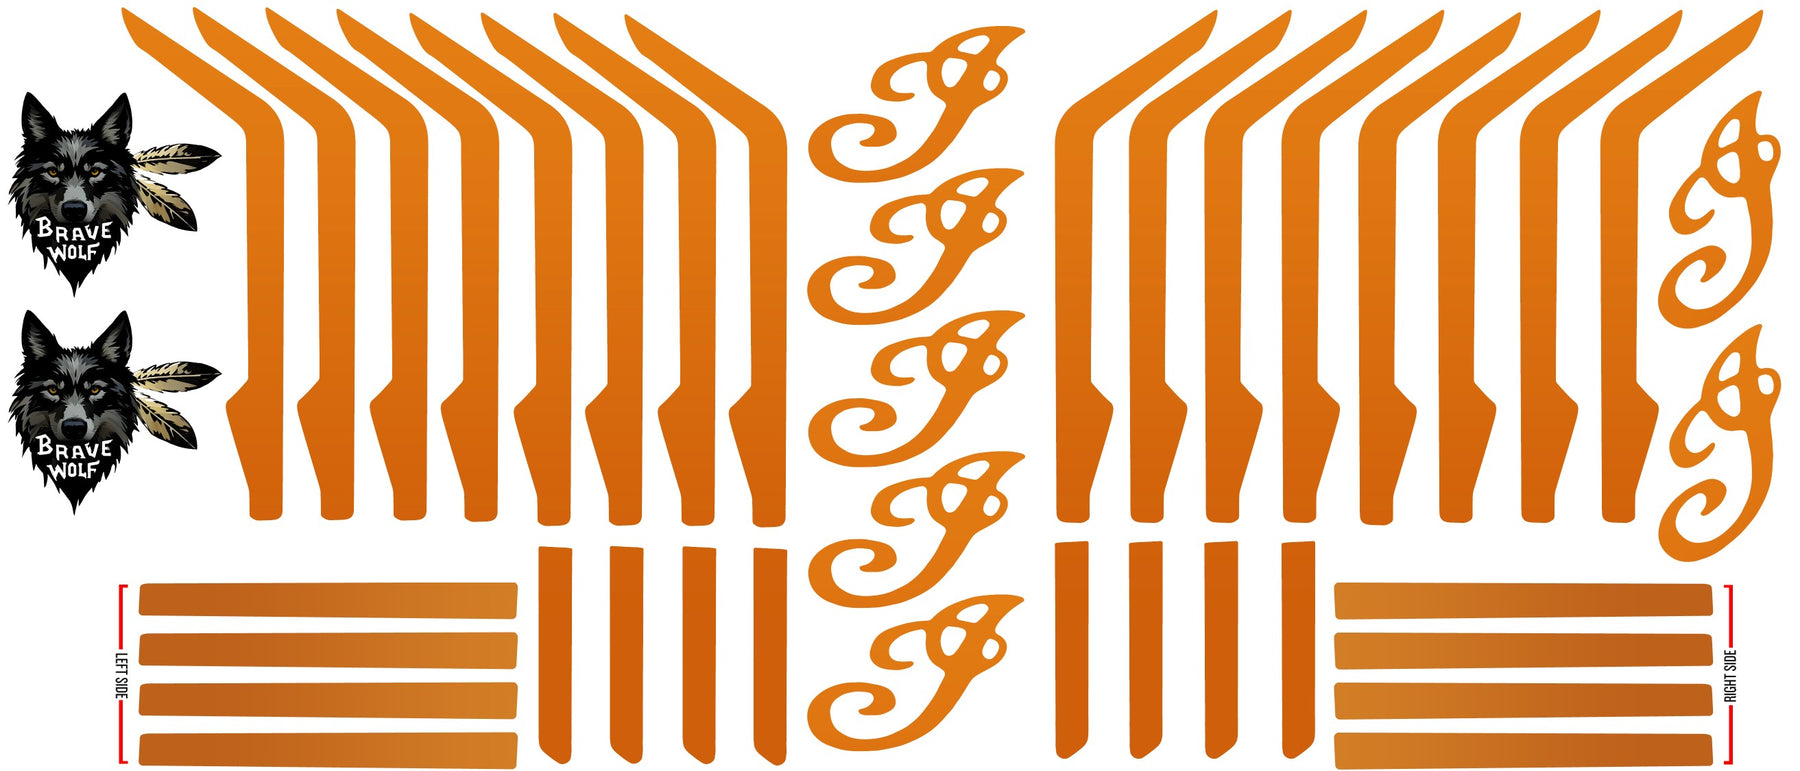
Our UV DTF 3D PermaSticker Engine Accent kits combine the latest UV DTF technology with exceptional adhesive properties, ensuring that your accents will stick around for the long haul. With unparalleled durability, remarkable adhesive properties, and heat resistance capable of direct contact with your engine, they're the perfect material to add a custom touch to your bike.
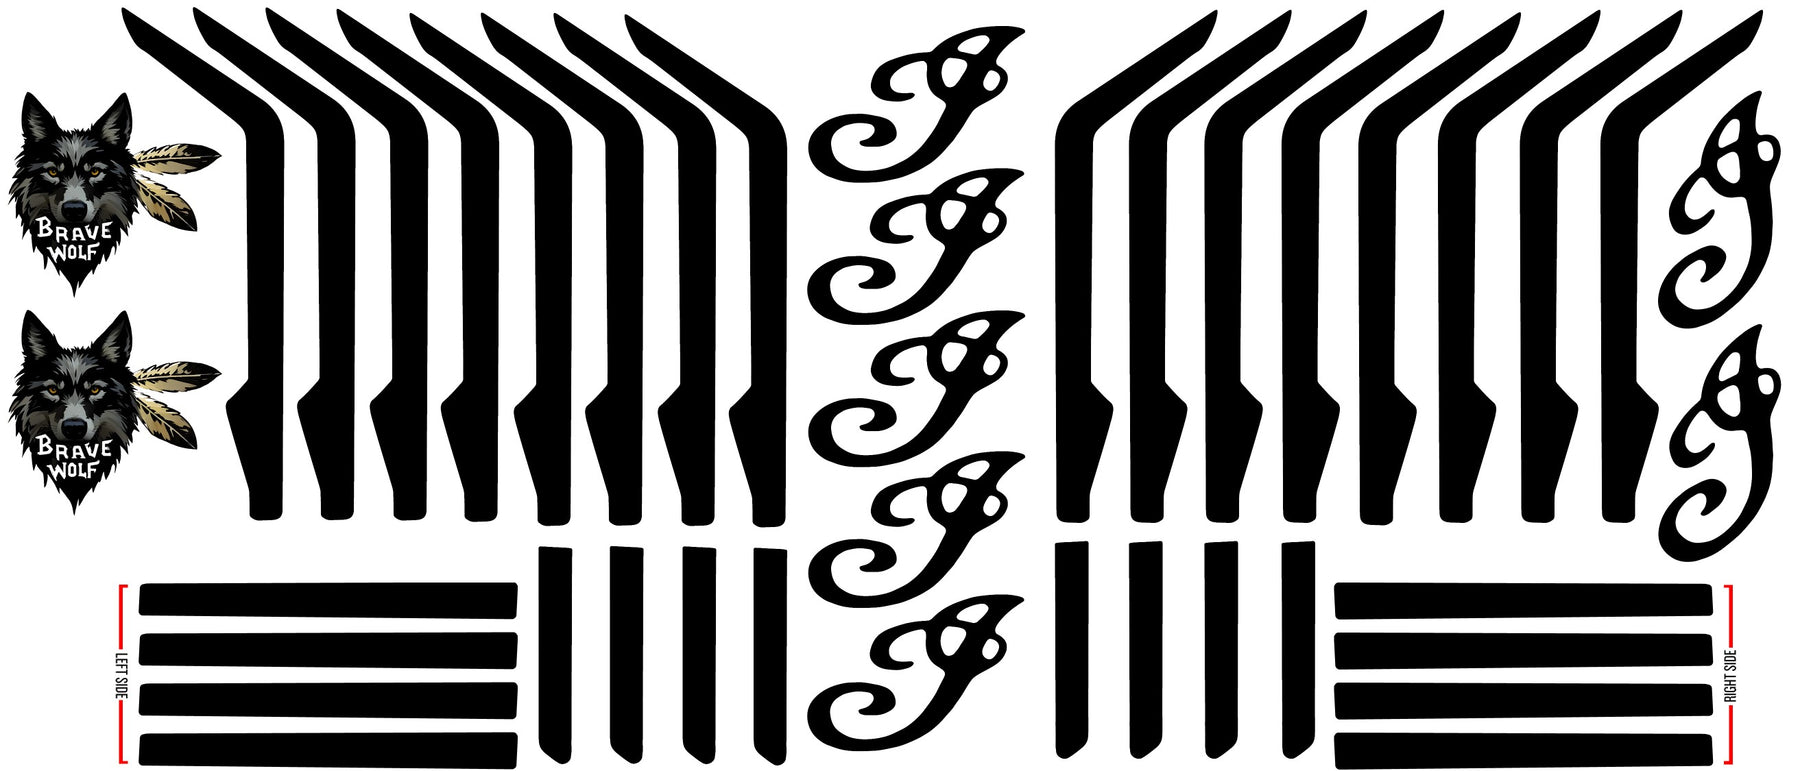
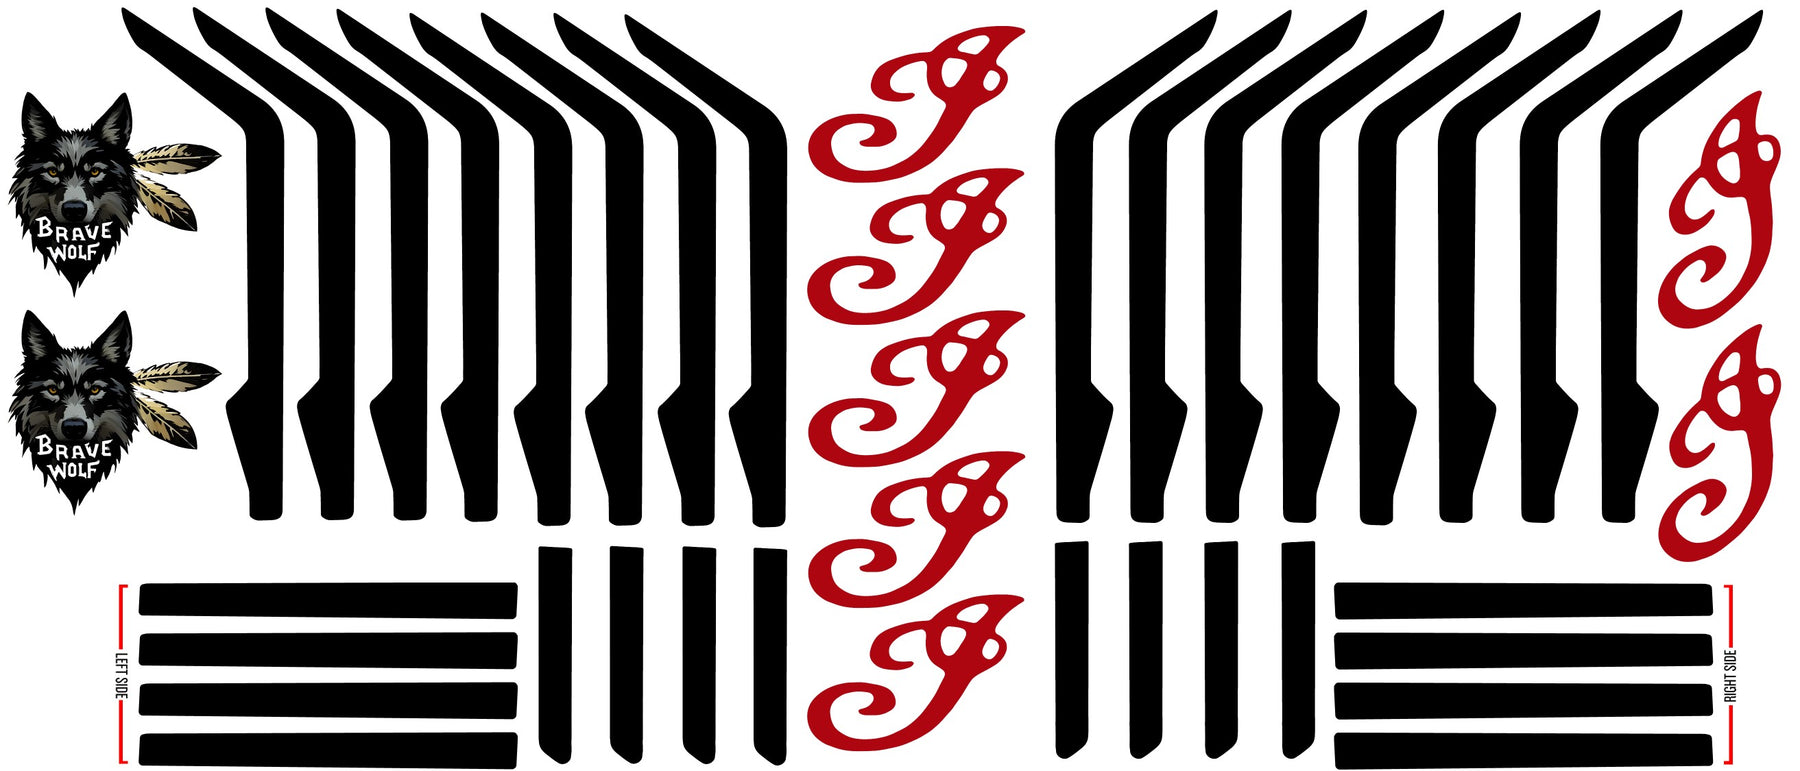
Kit includes a total of 41 pieces. All the accents you need to do both sides of your engine AND plenty of extras in case you make a mistake during installation. + 2 Brave Wolf logos. The kit comes on a 17.5" backing sheet with with a transfer layer on top.
We're offering these in a stunning 20 different color combination styles, but if we don't have the combo you want, consider purchasing multiple sets to mix-and-match and you'll save 20% on each. We've priced them affordably so this should be an option.
Material Finish: an enamel-like finish. I wouldn't classify it as gloss or matte. Similar to egg-shell finish.

Installation:
These accents will need to be installed on a warm, clean, and dry engine. Do not attempt to install them cold or with condensation on the surface. You can run your bike to get the engine warm, but not hot, or use a hair dryer/heat gun. Installing these in winter months will be more difficult. Use scissors to separate each individual piece from the sheet. A pair of tweezers can be helpful to hold the accents in proper placement during installation. Once in place, use a firm object to press/rub over the full surface before peeling off the top transfer layer. Go slow while peeling the transfer layer. If the accent peels up without separating from the transfer, place it back down and press it more firmly into place. Because the surface is curved, the “I” will be the most challenging piece, so cut out around it as closely as possible to make it easier to position.


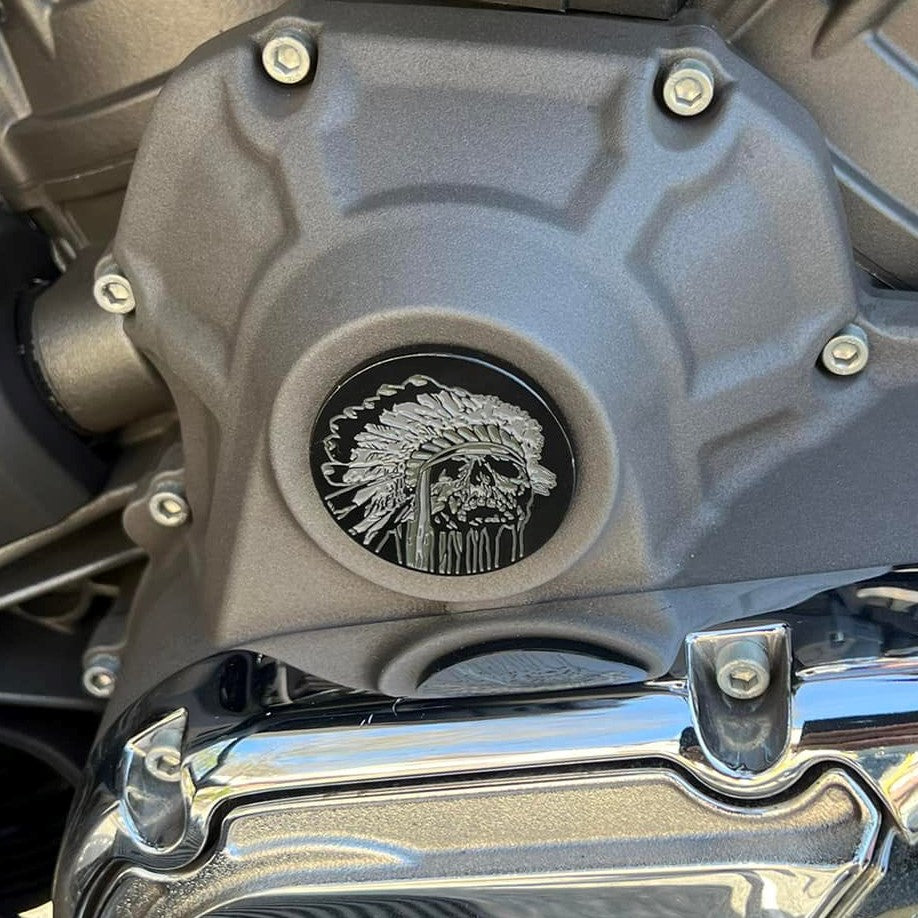
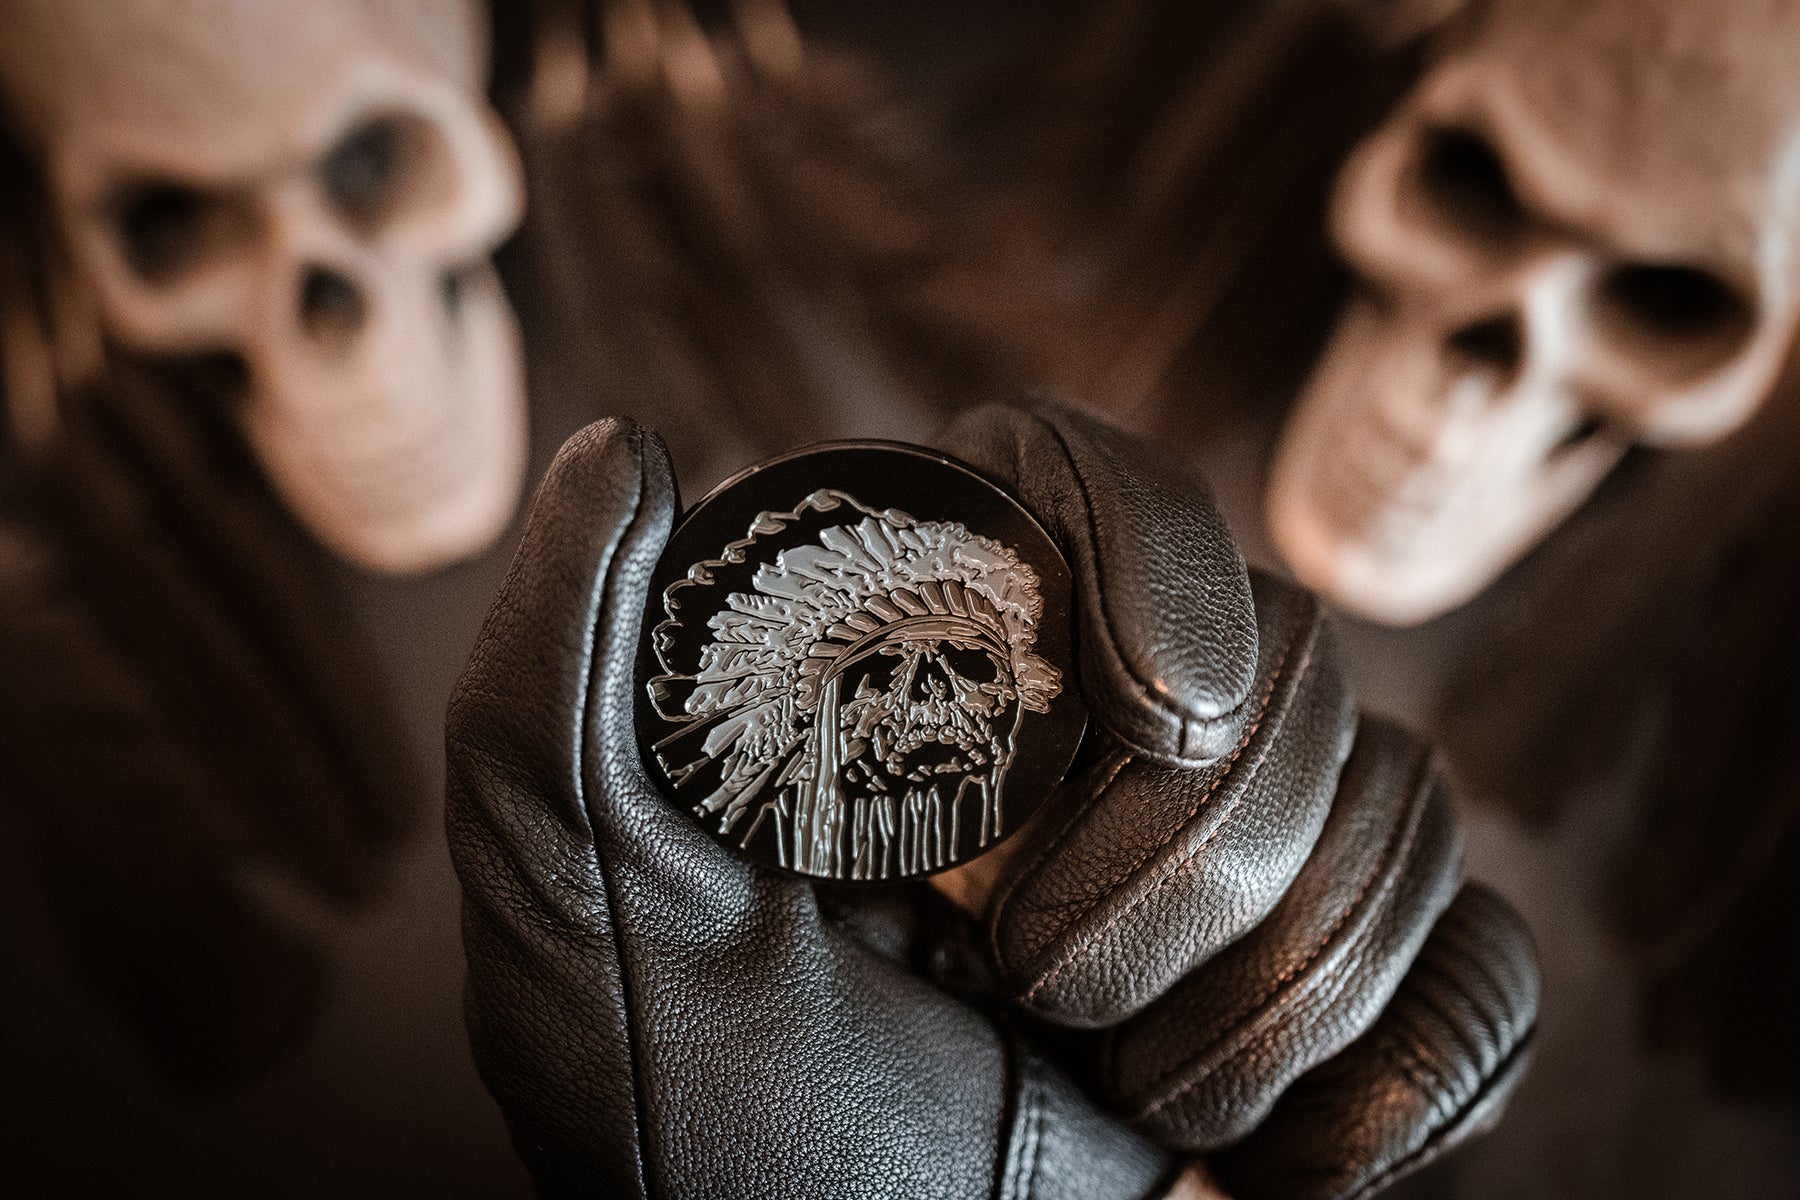
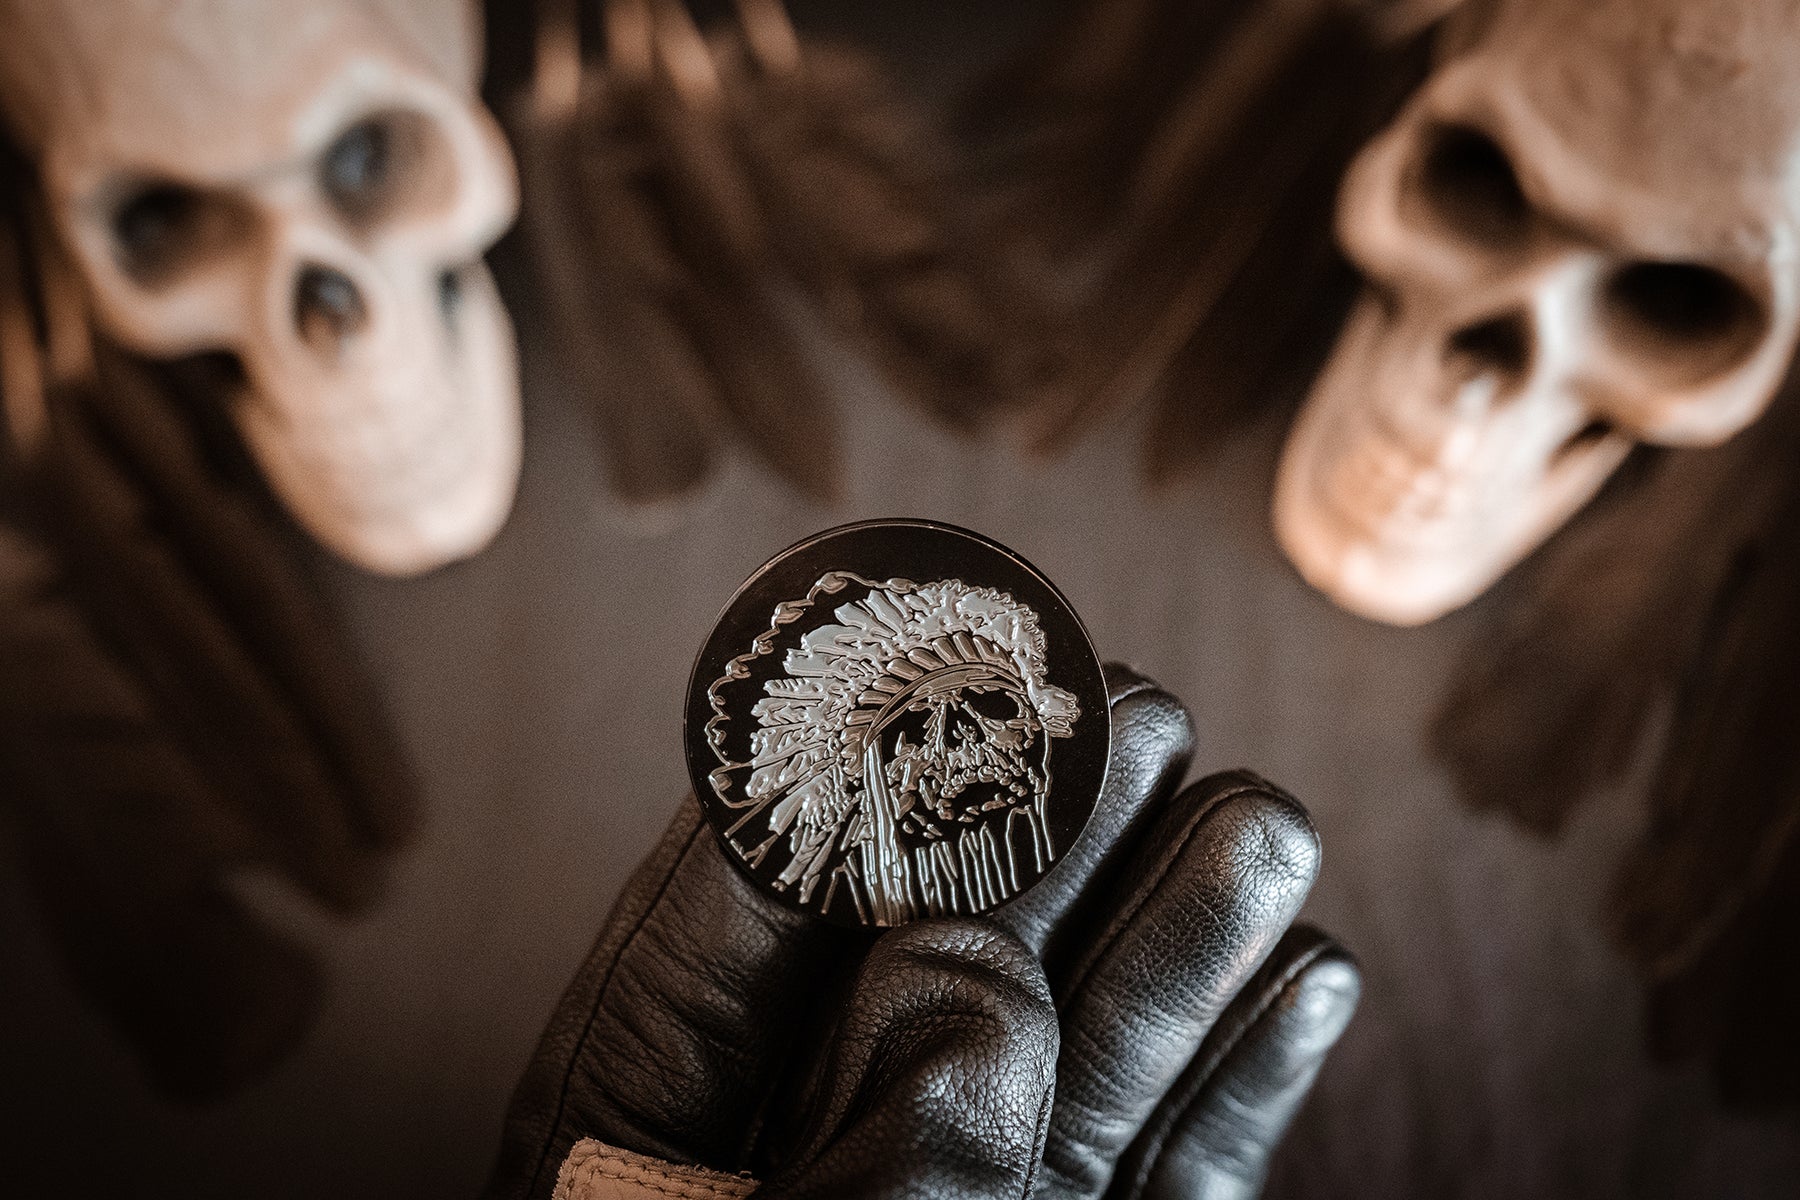
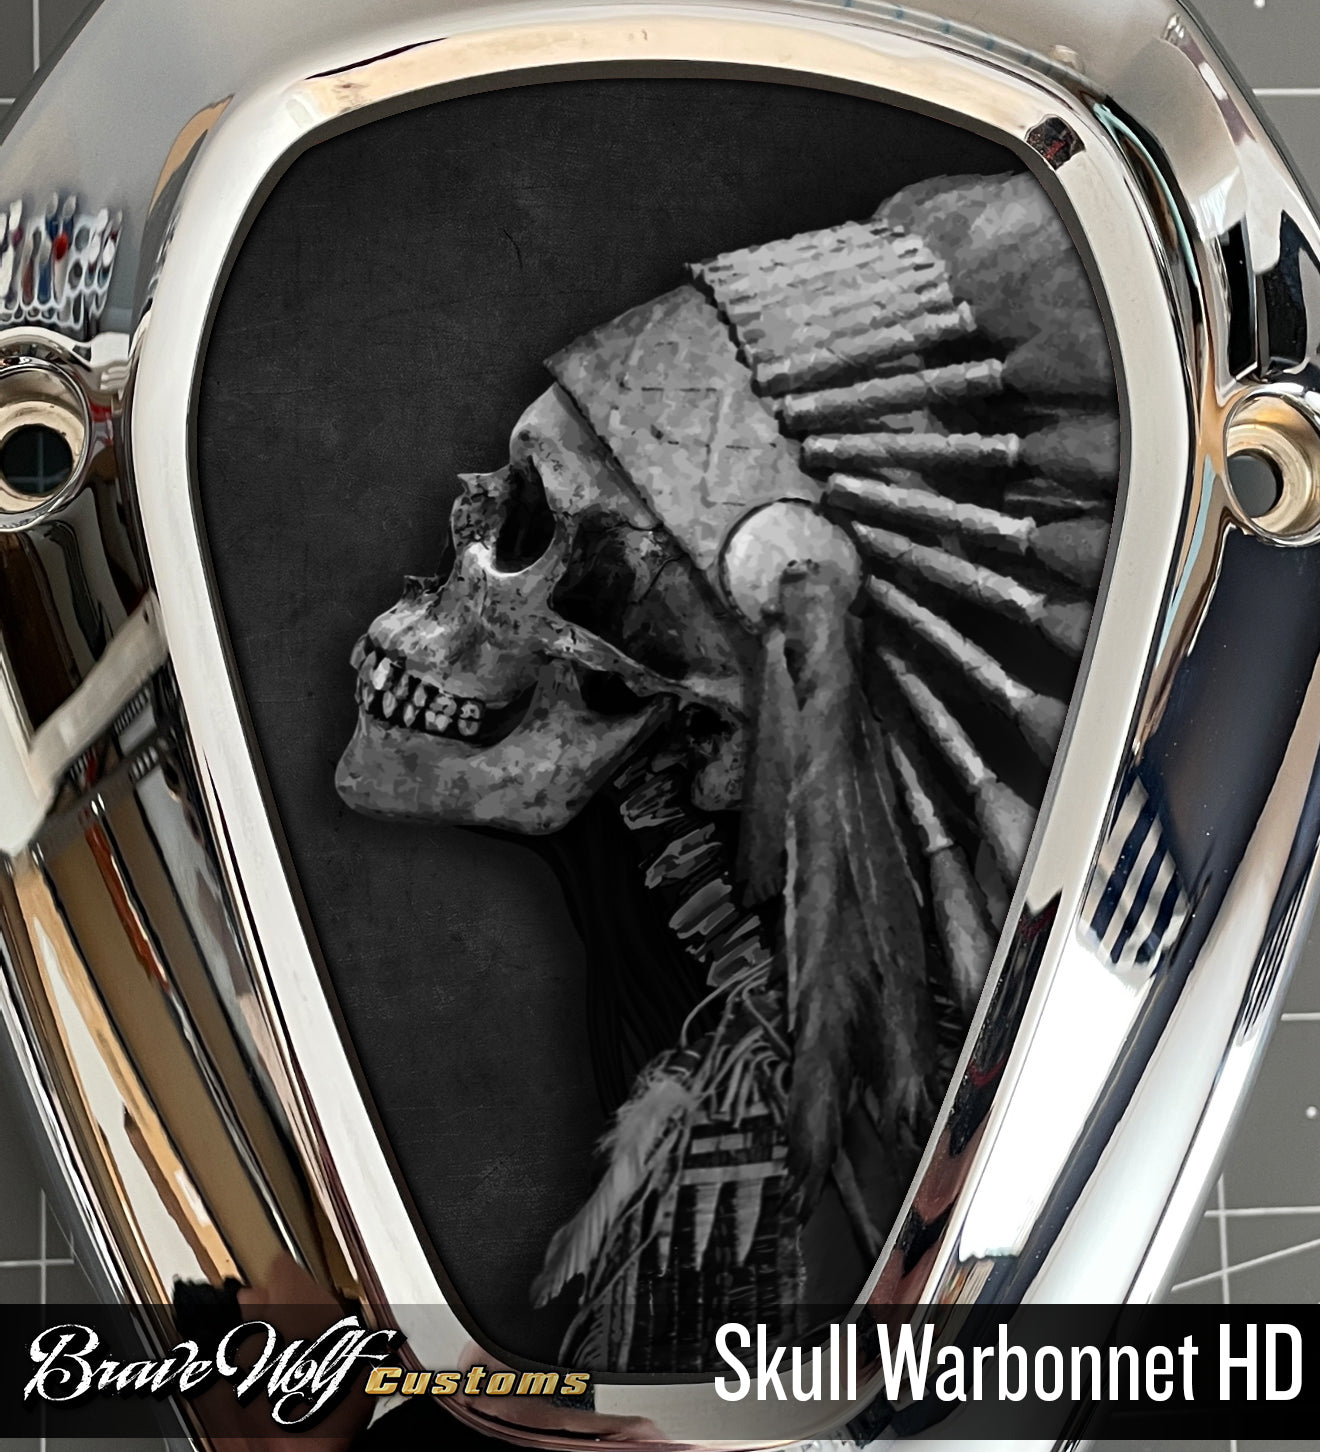
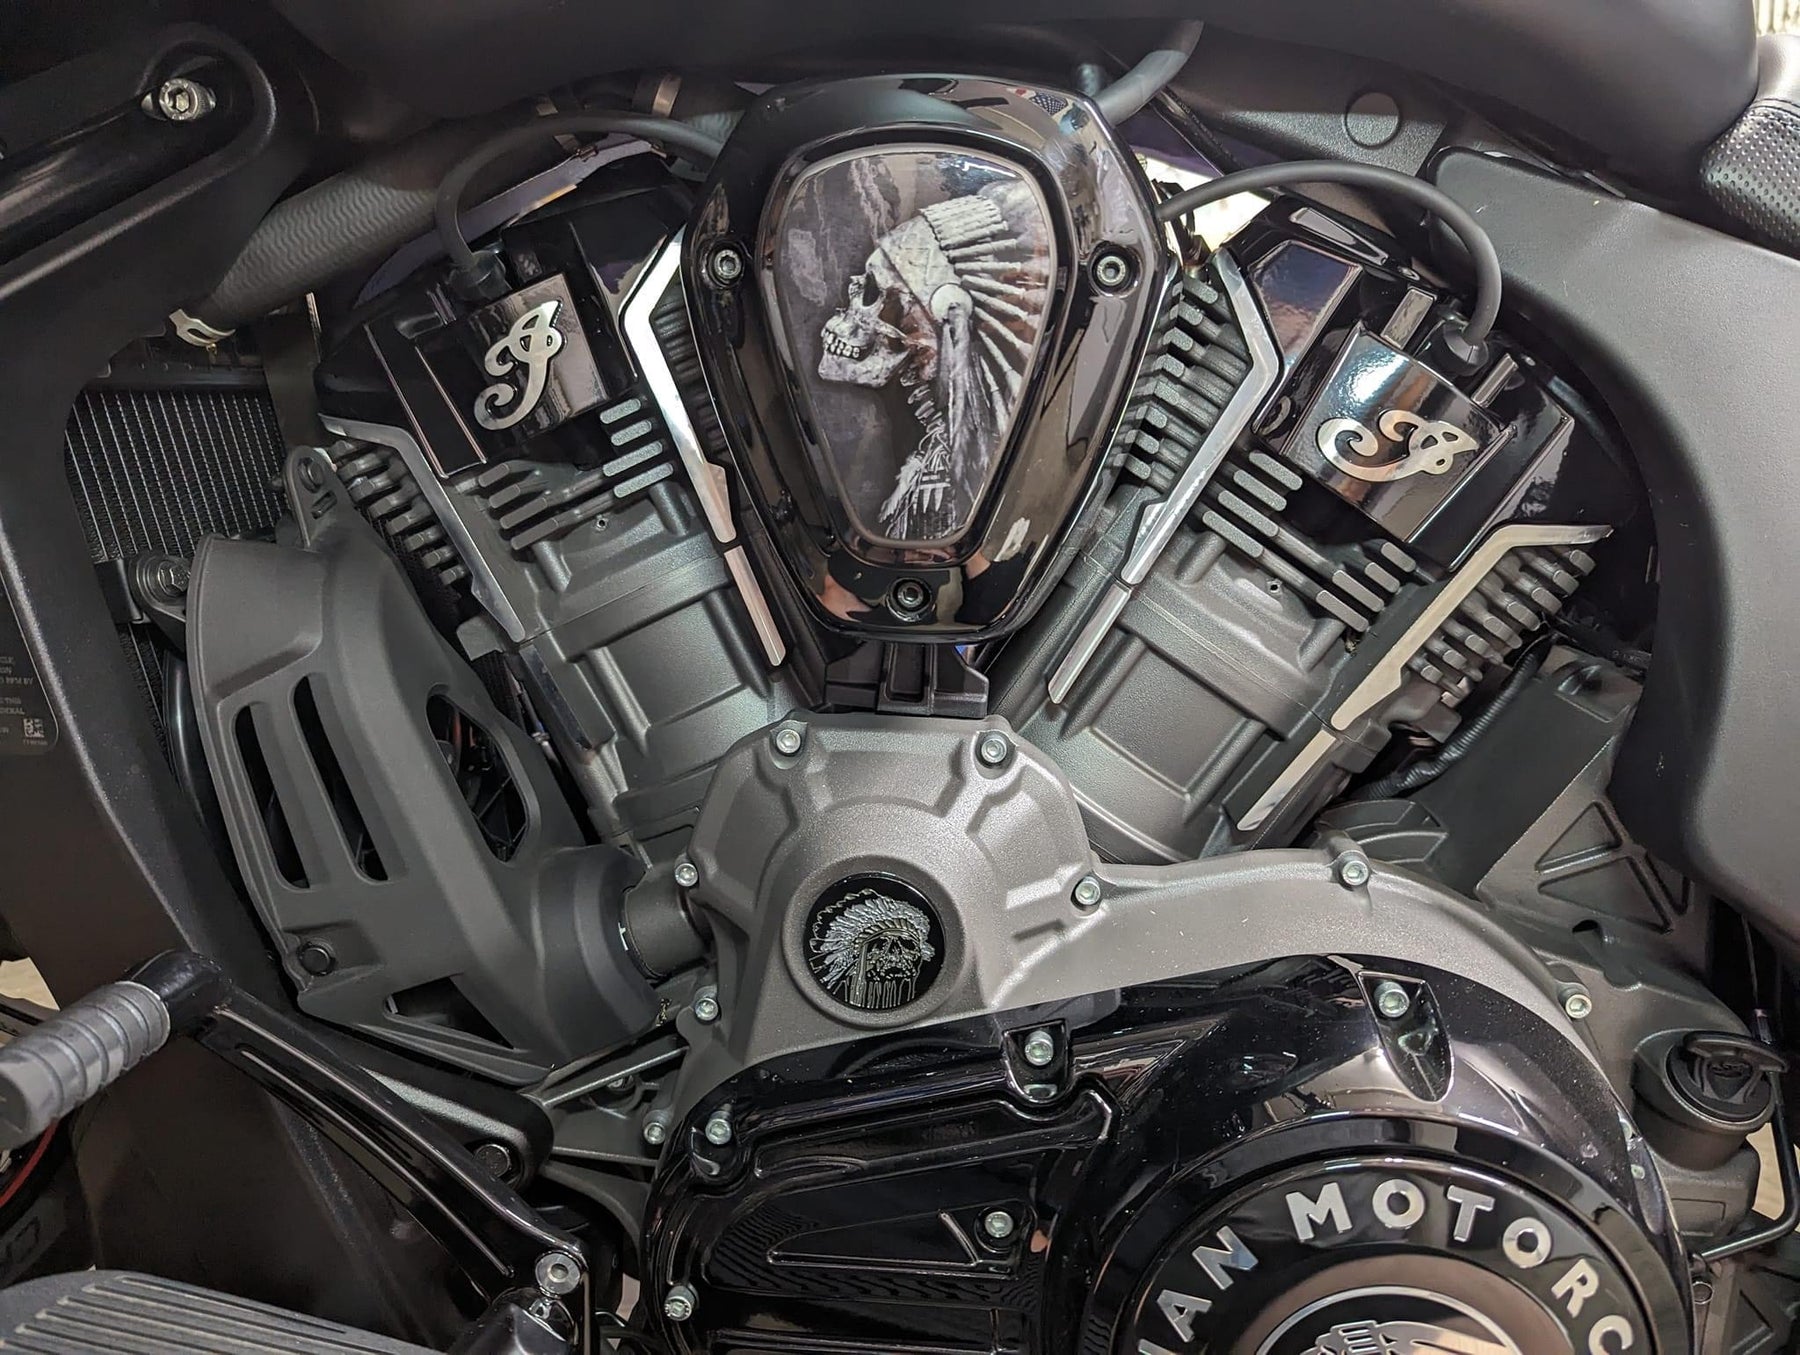
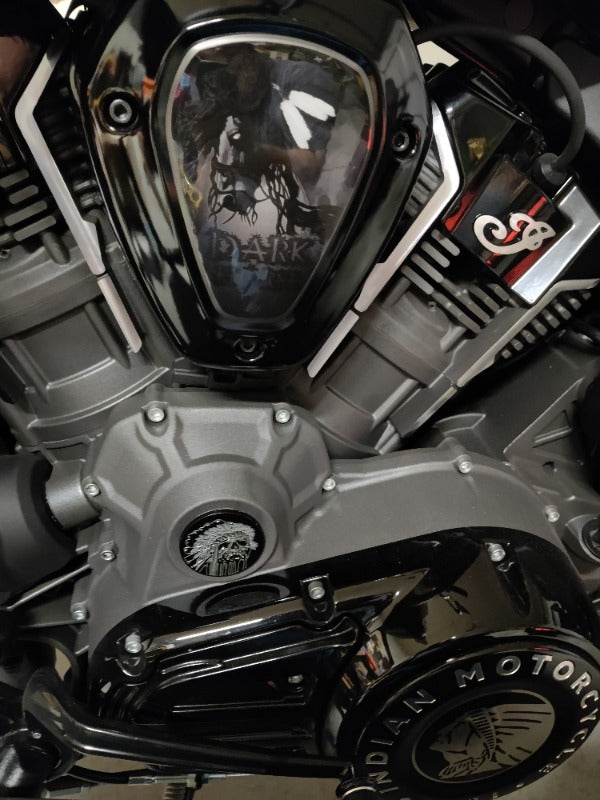
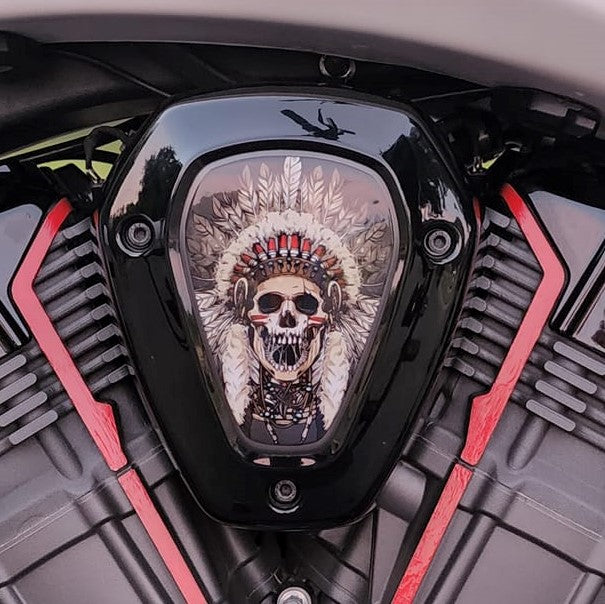
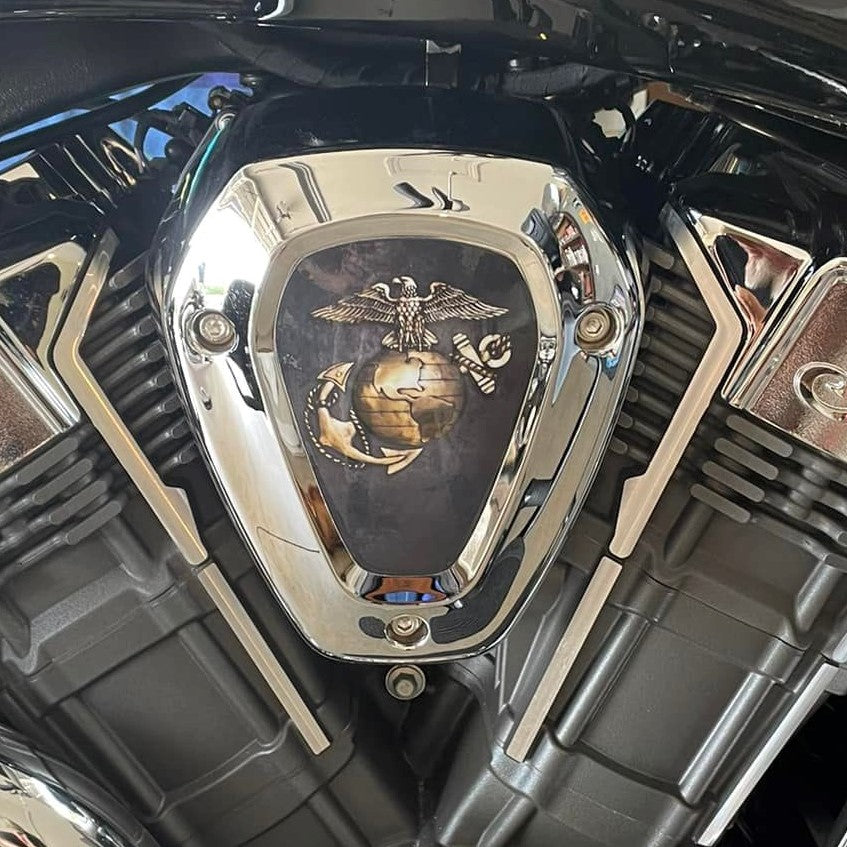
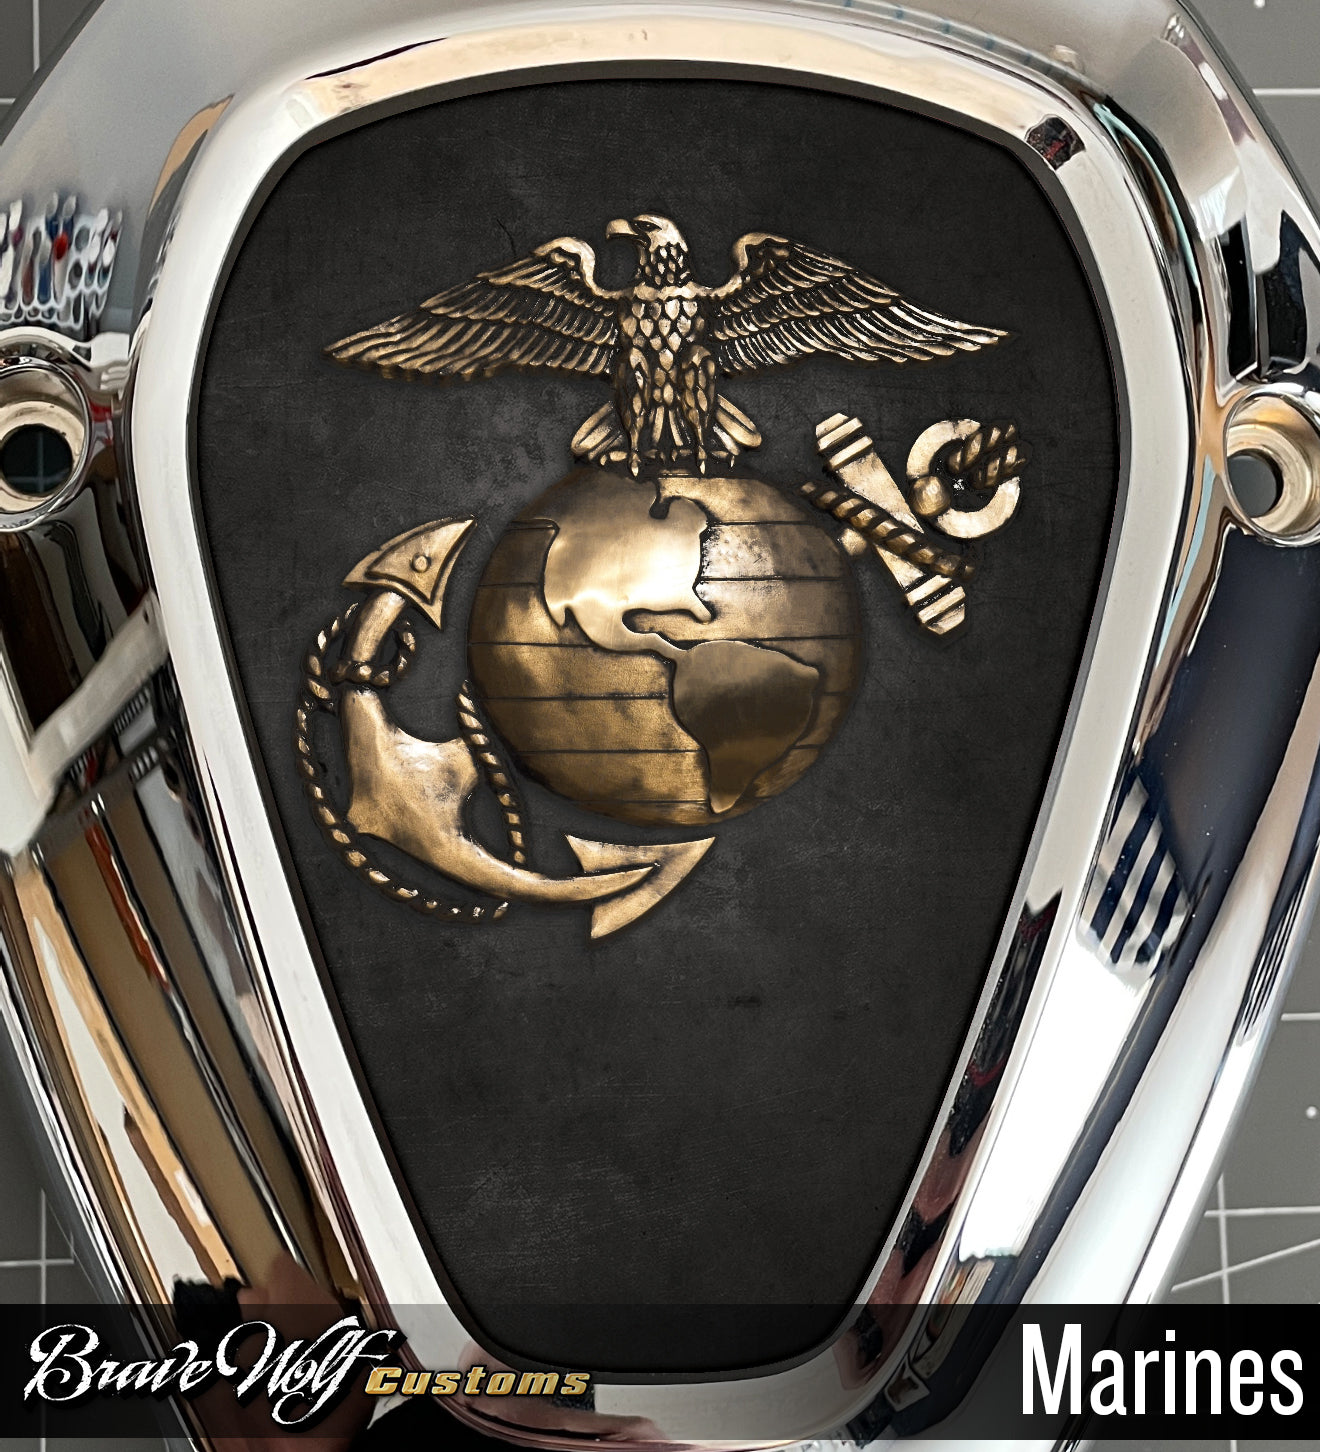
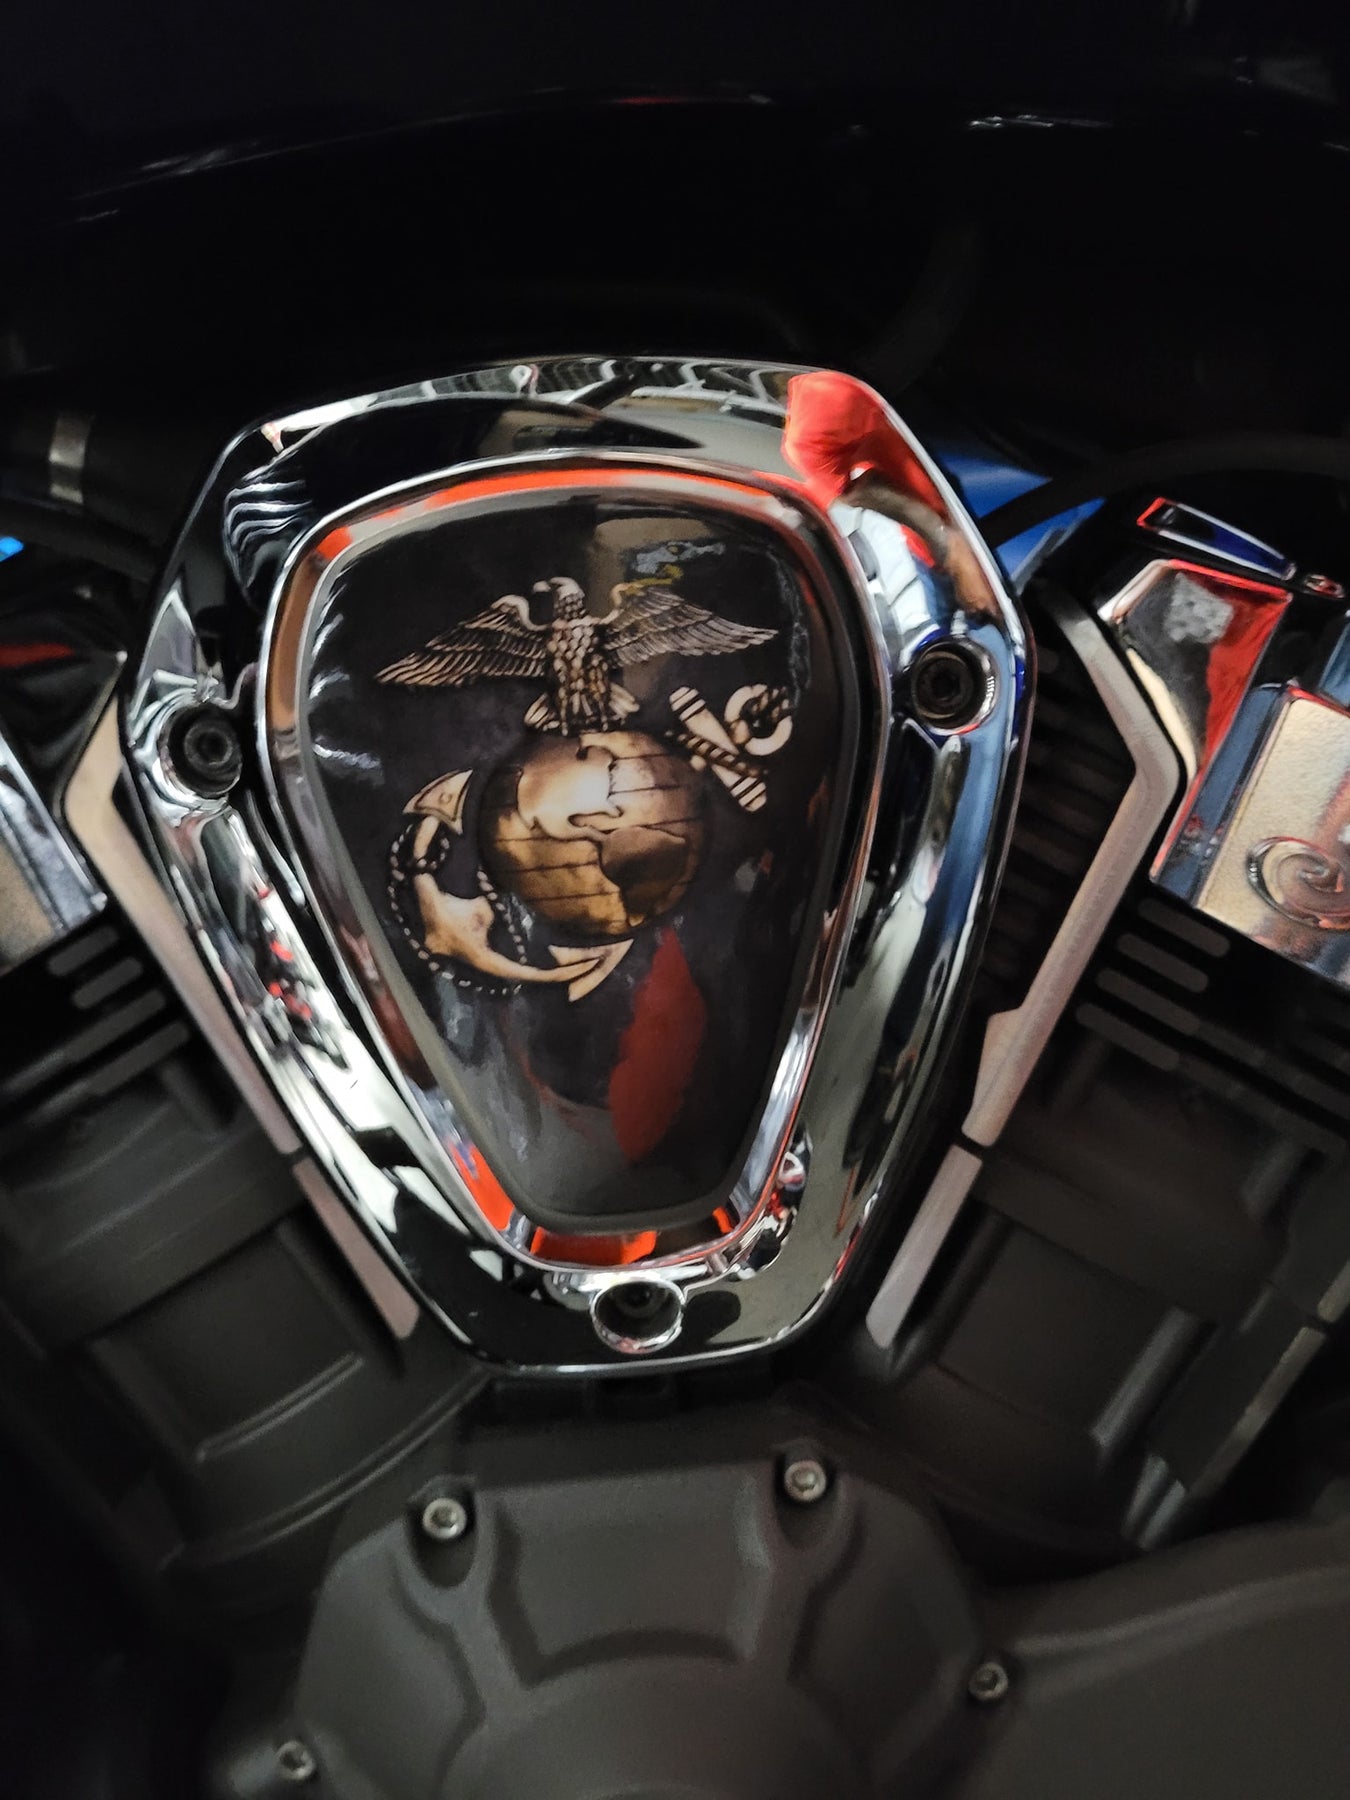
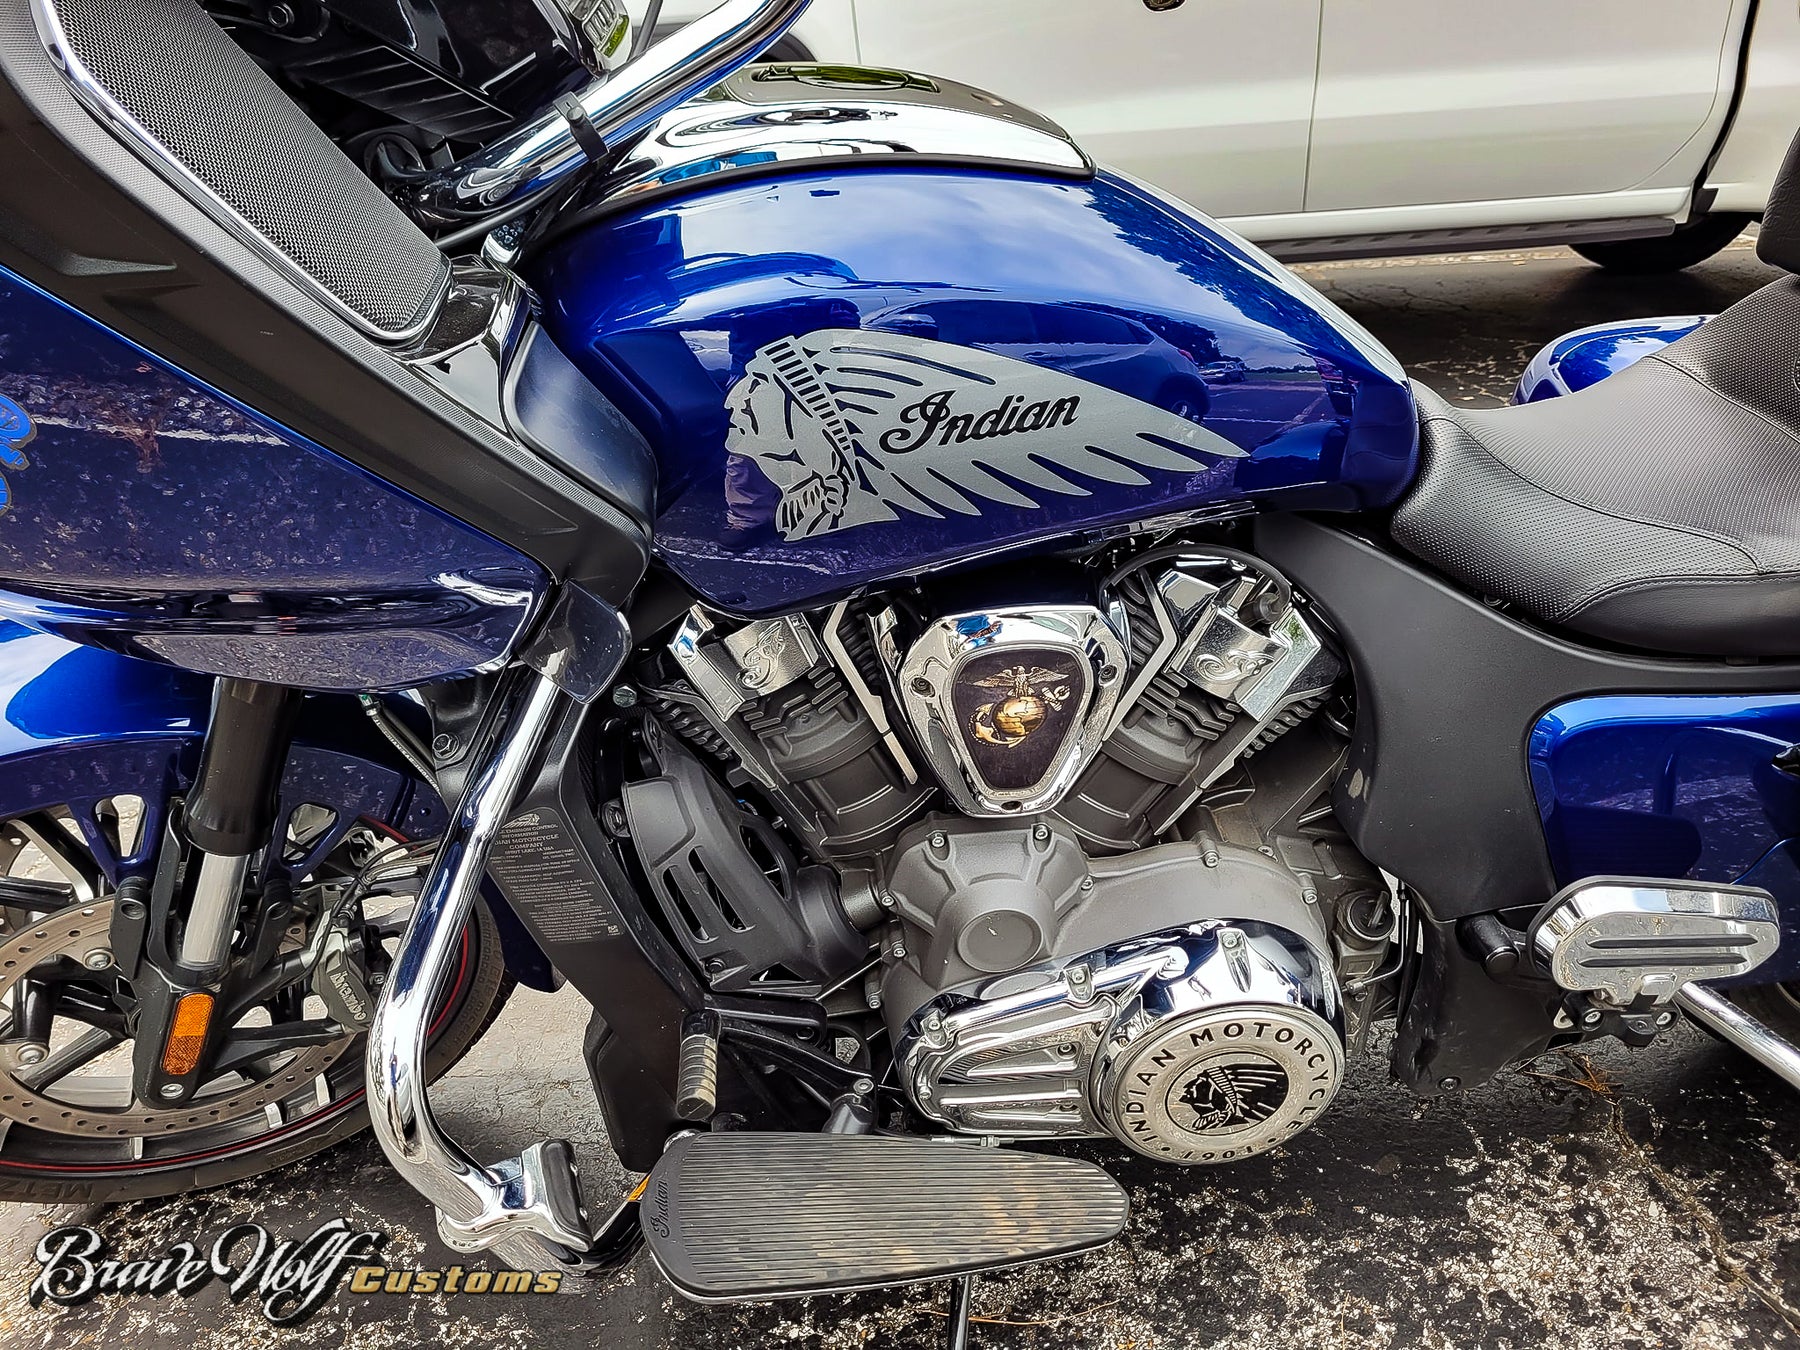
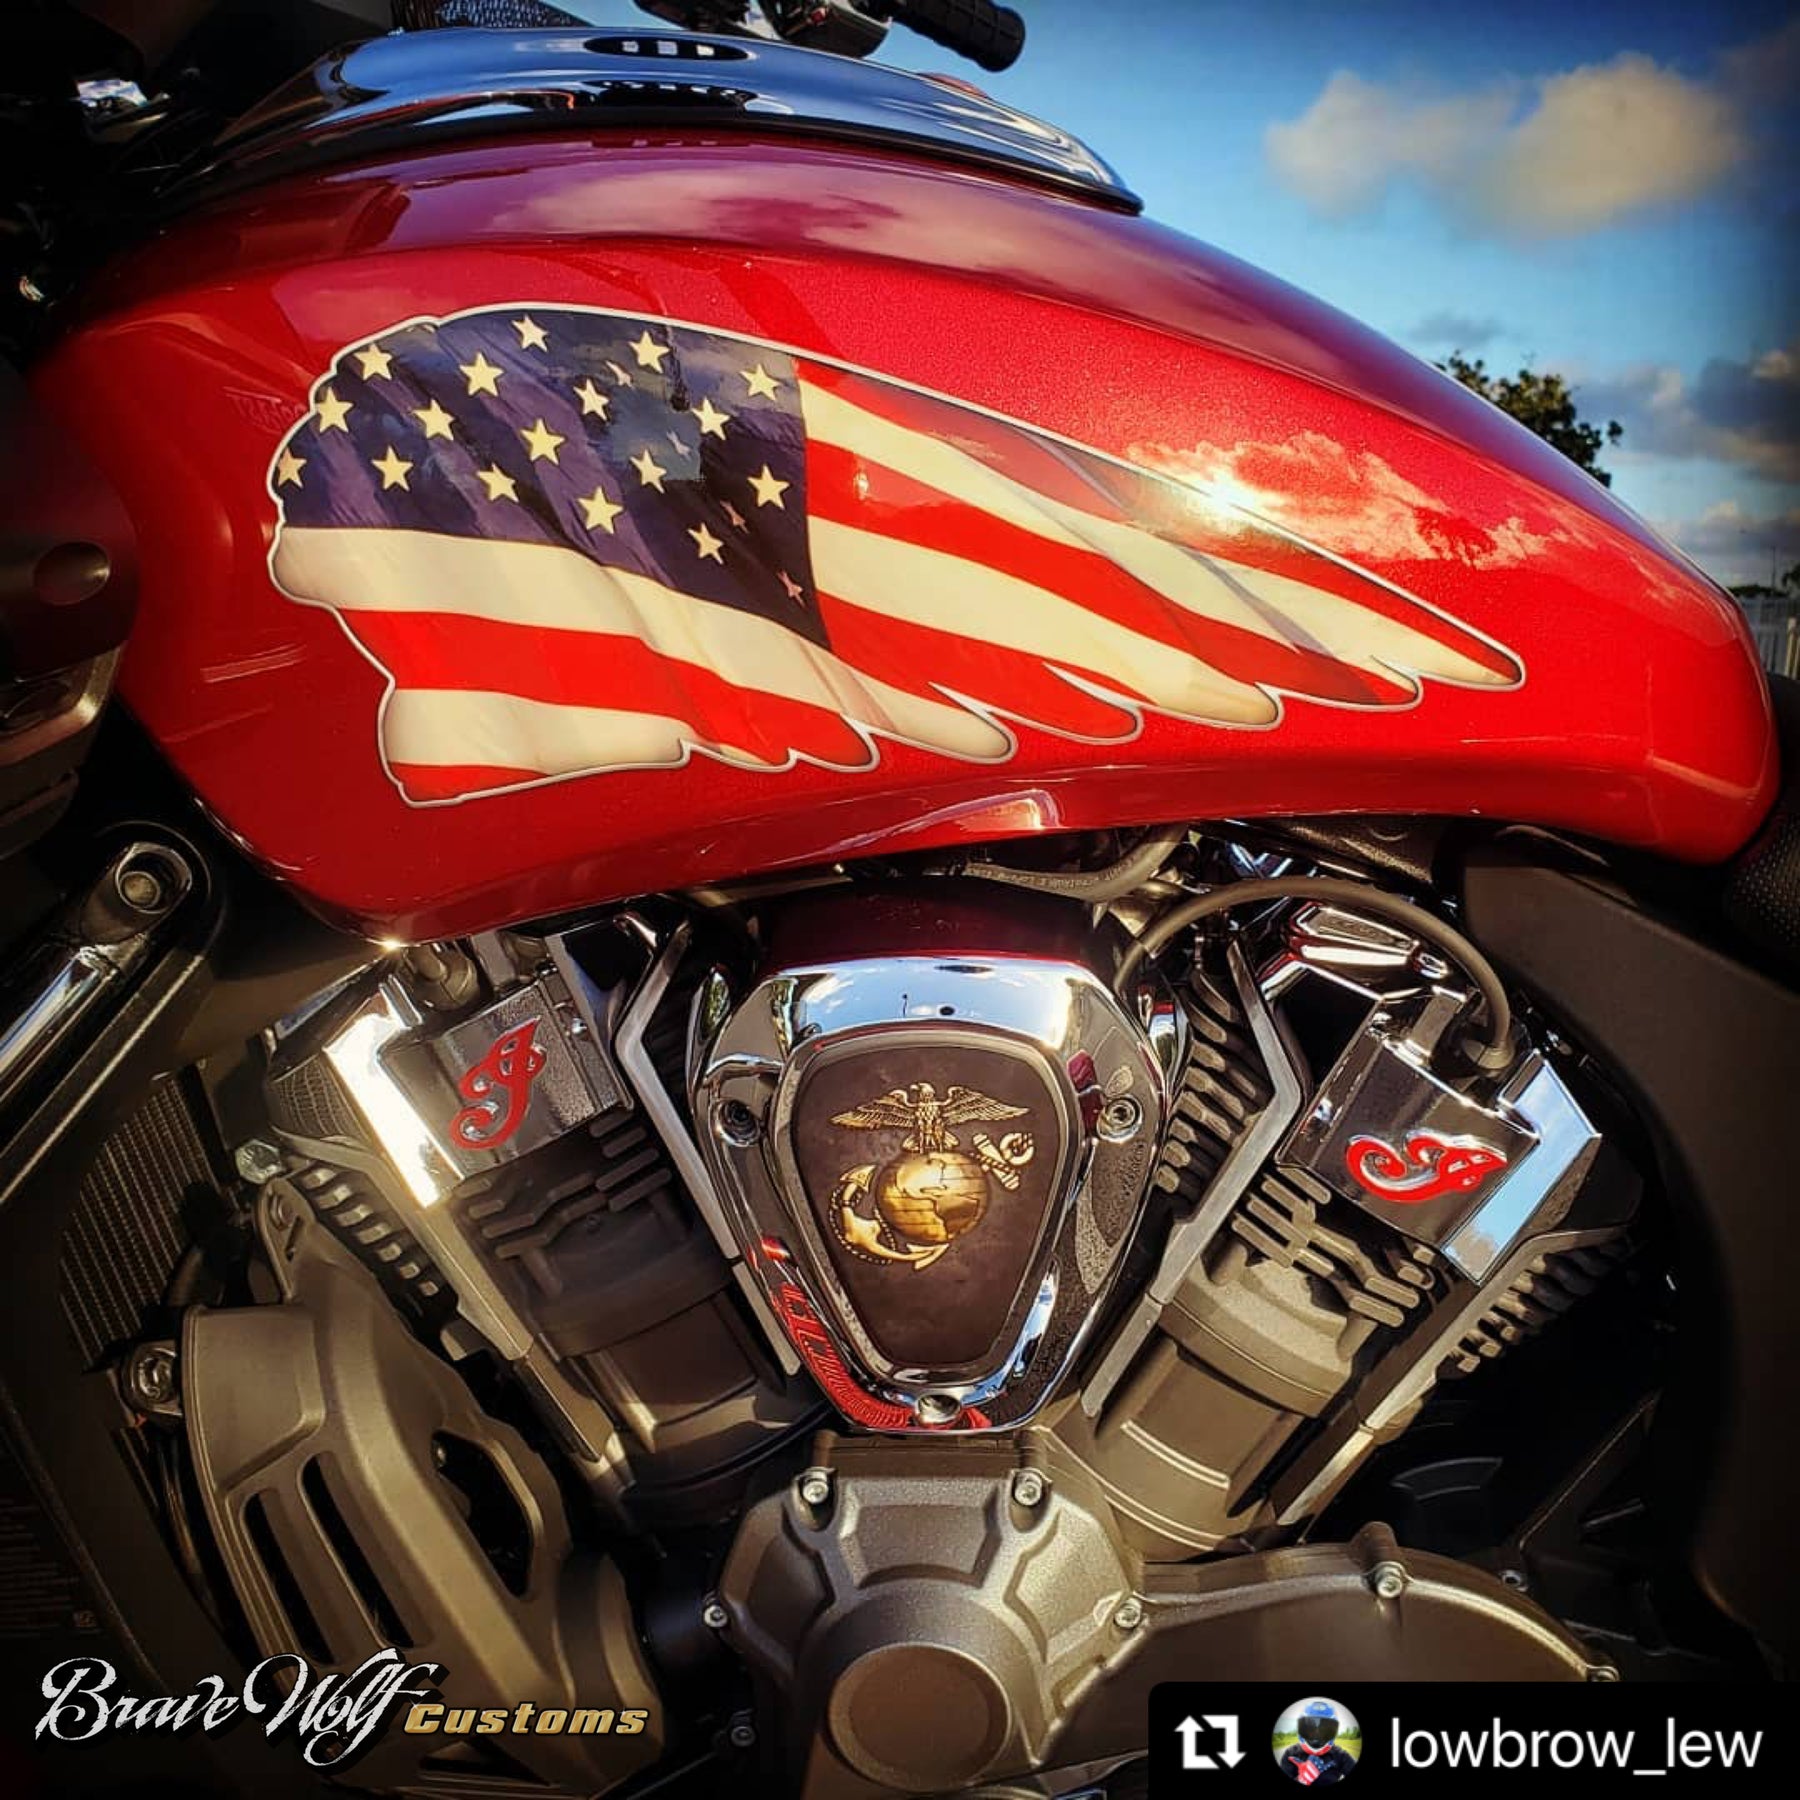
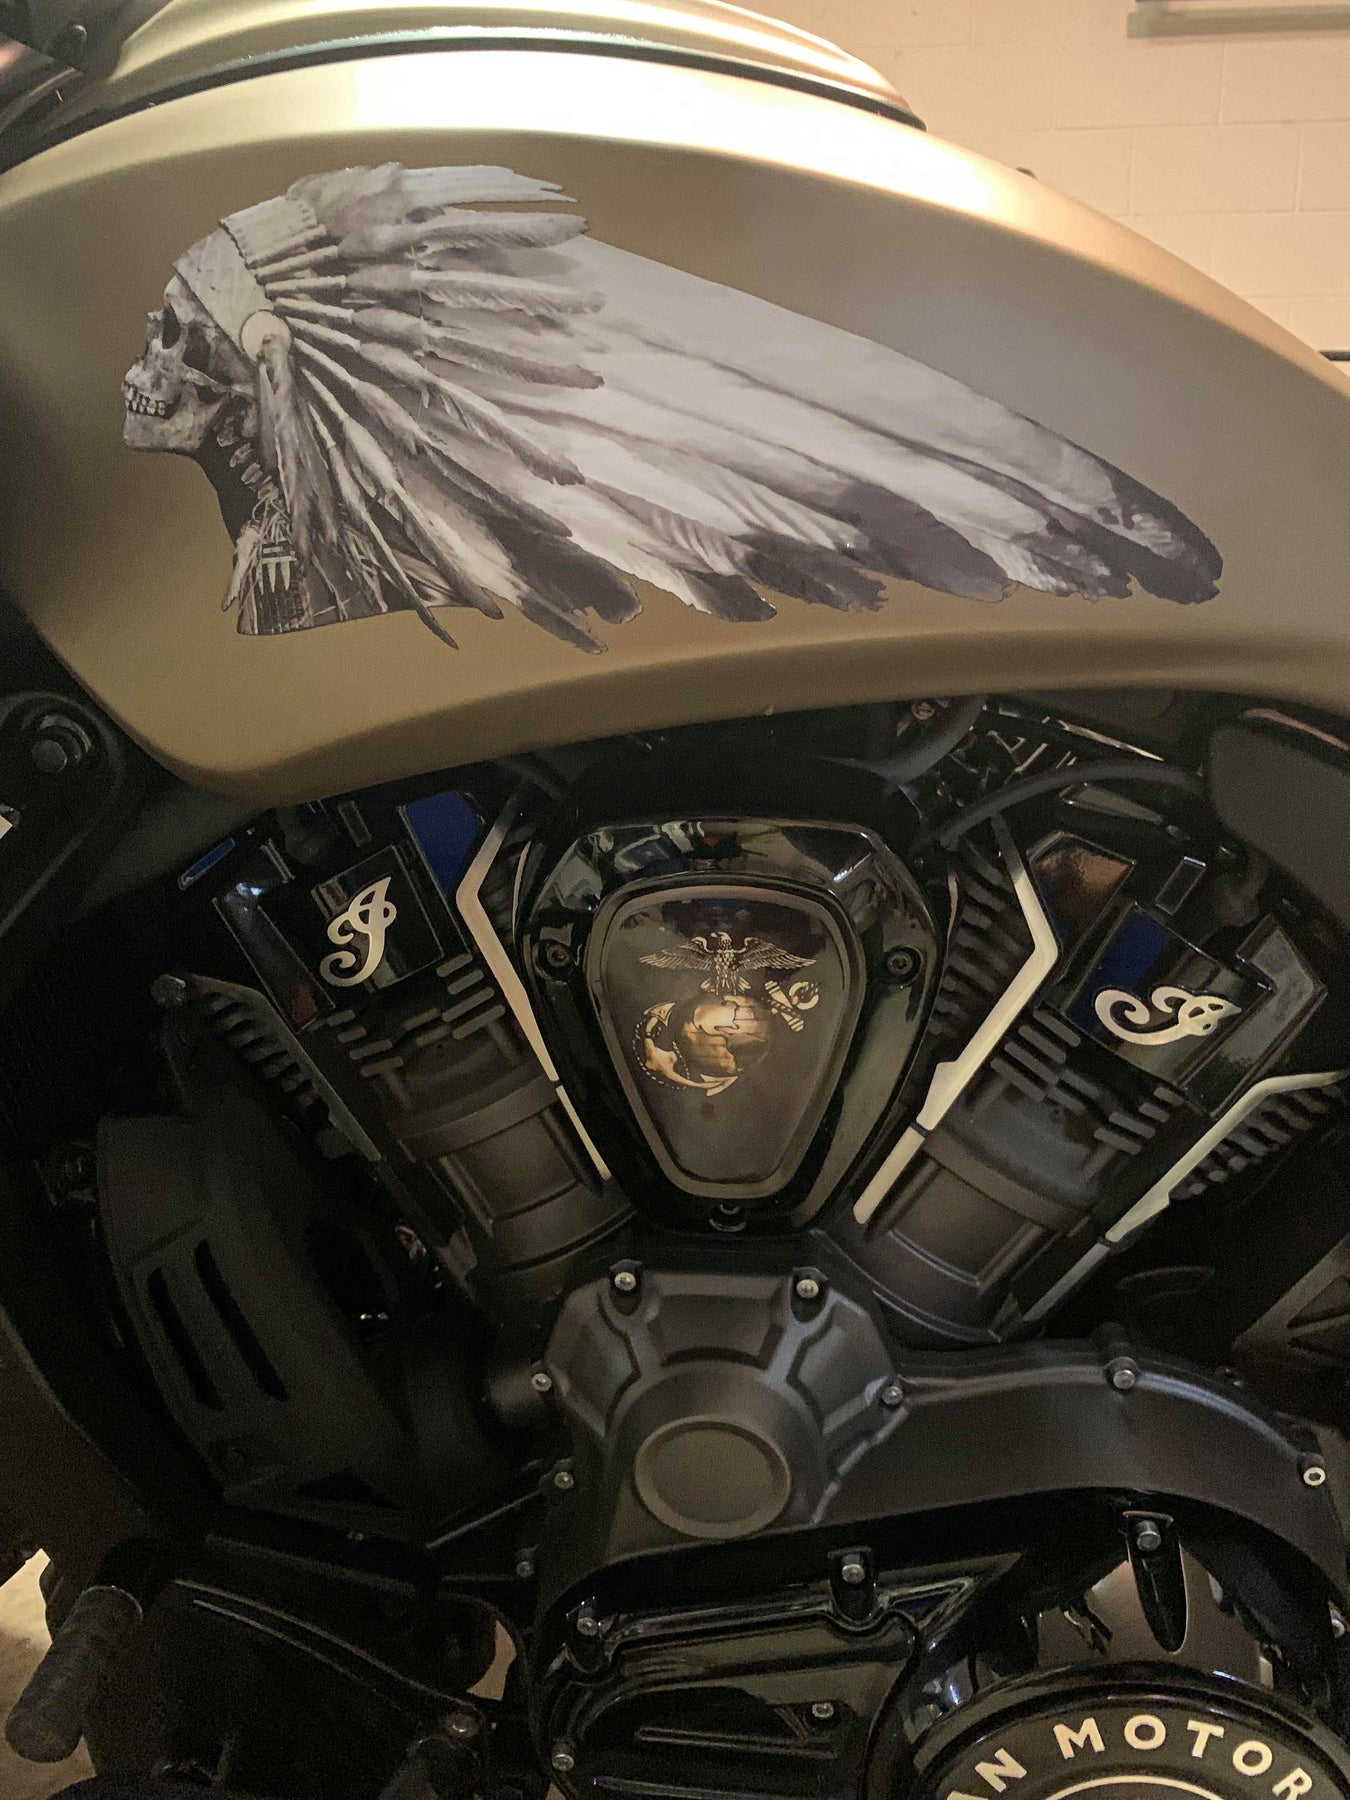
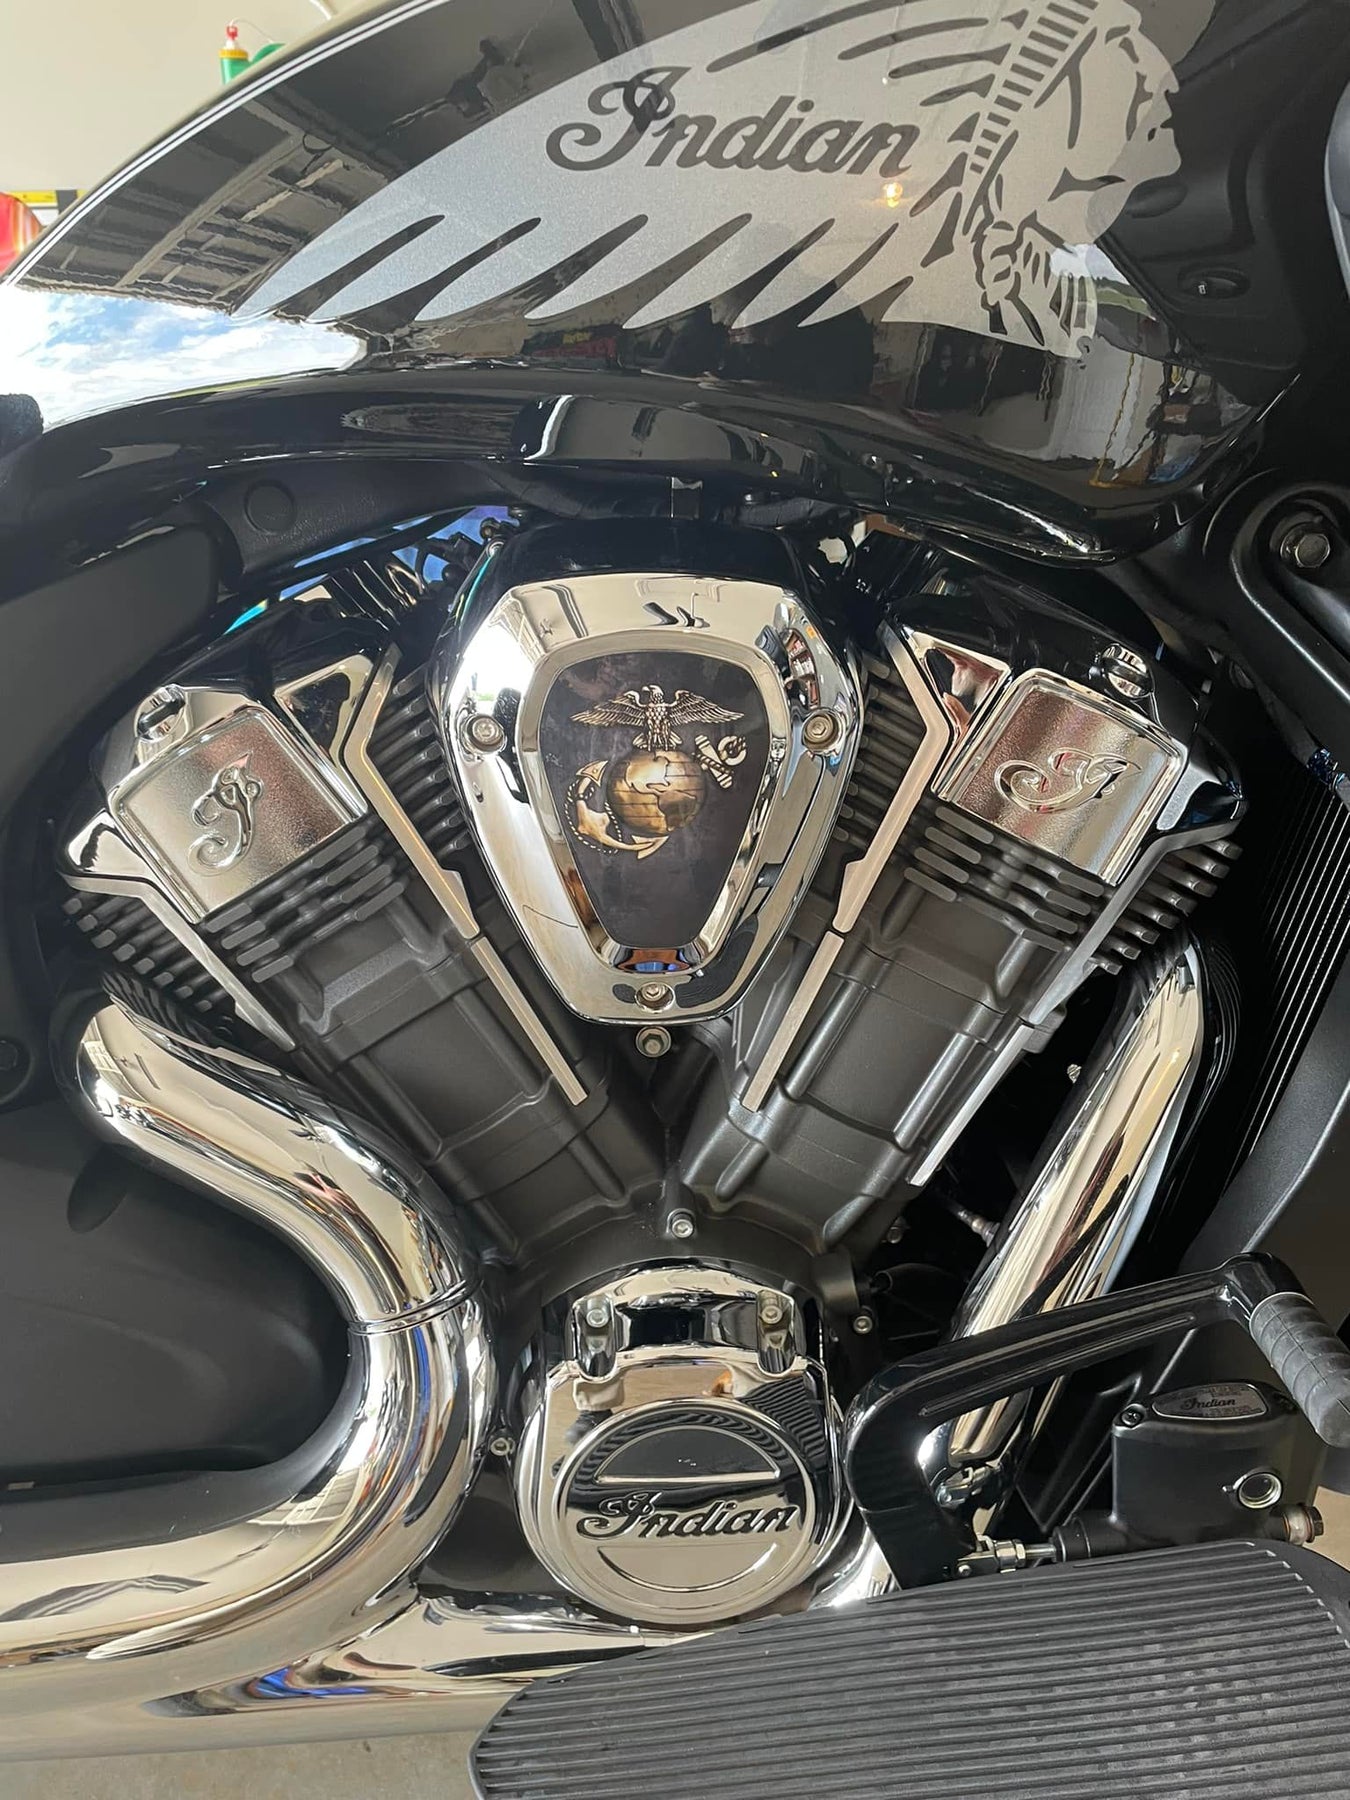
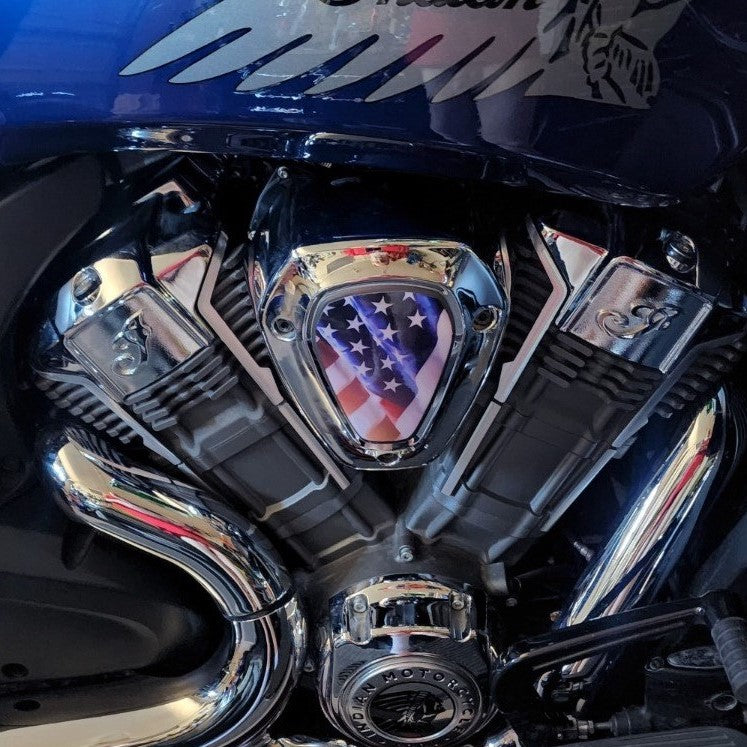
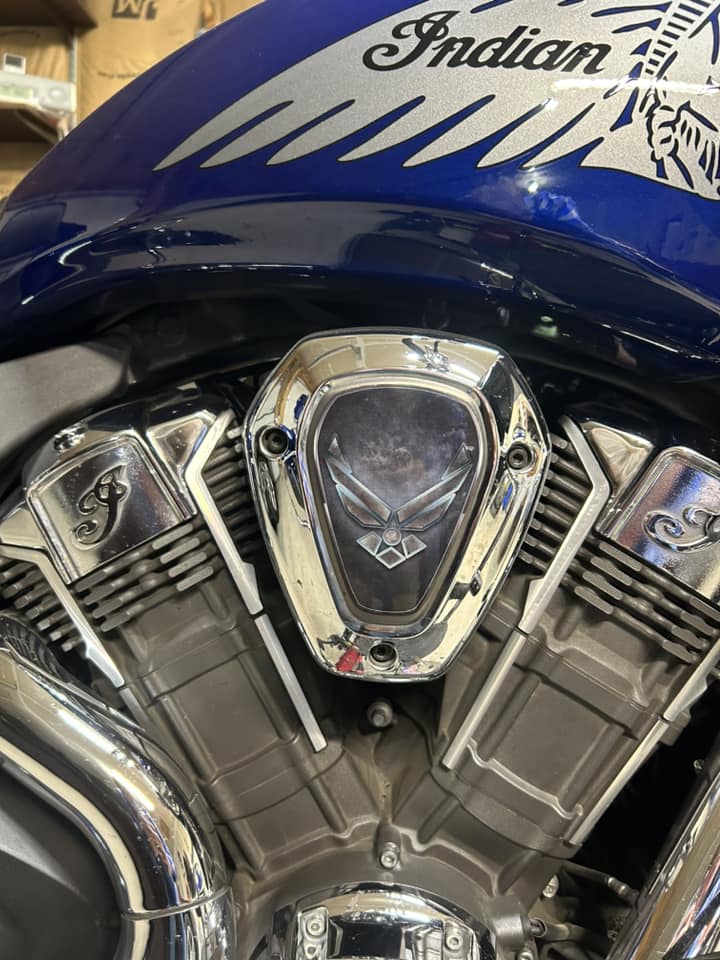
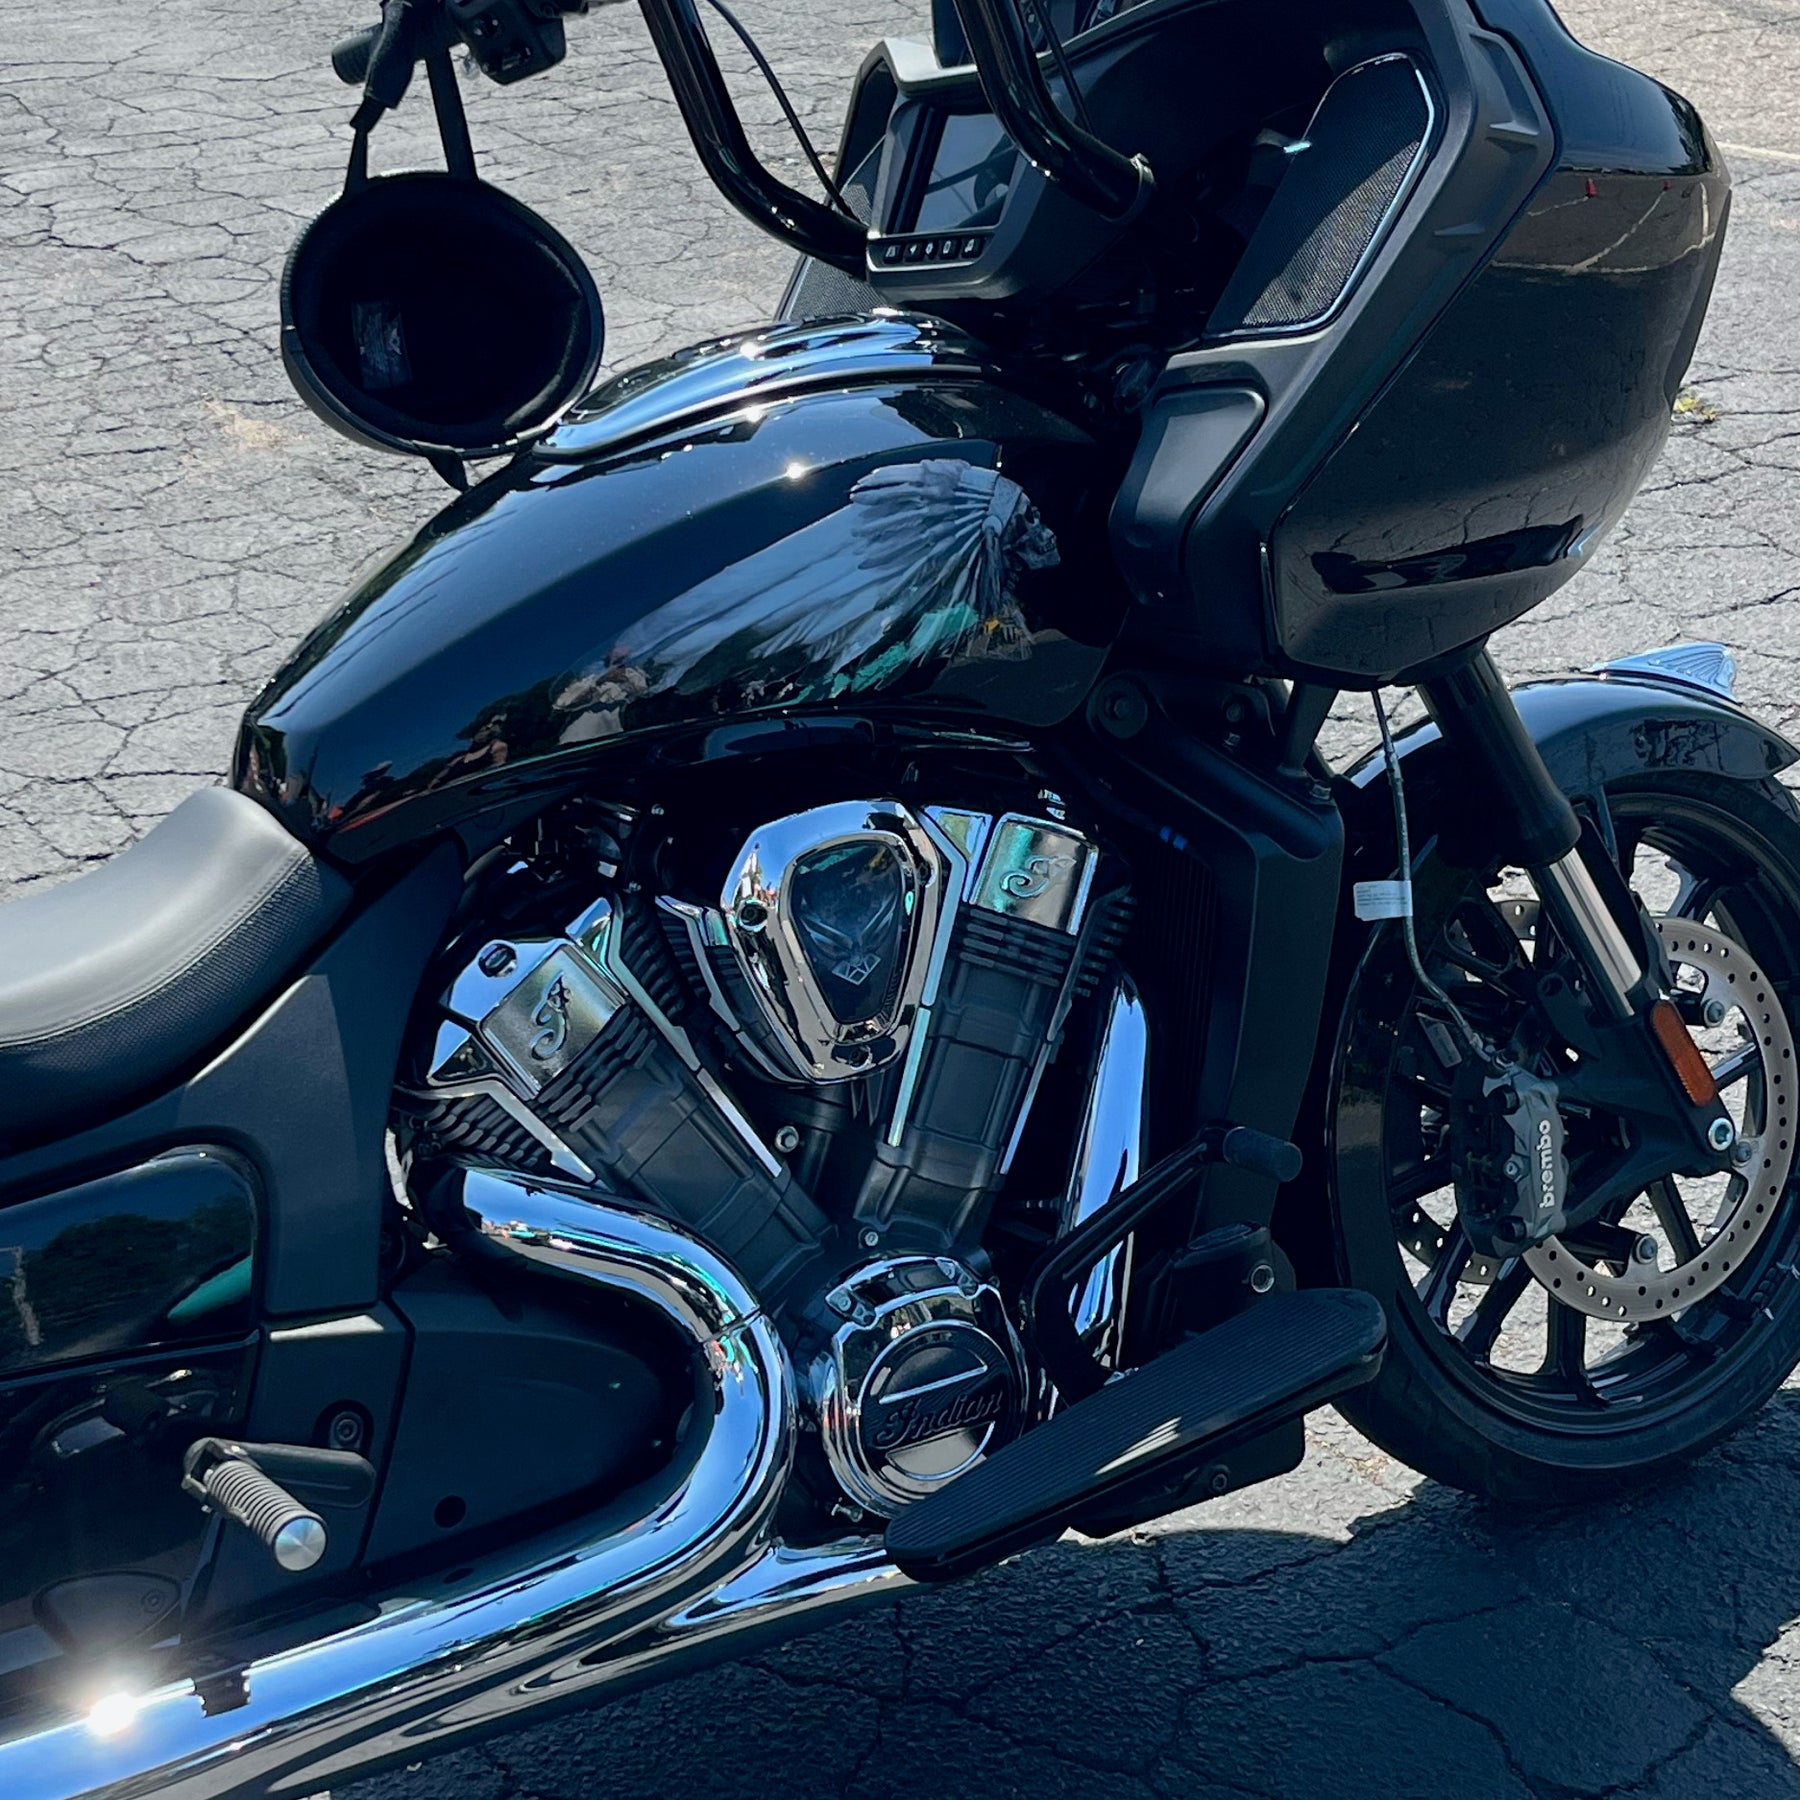
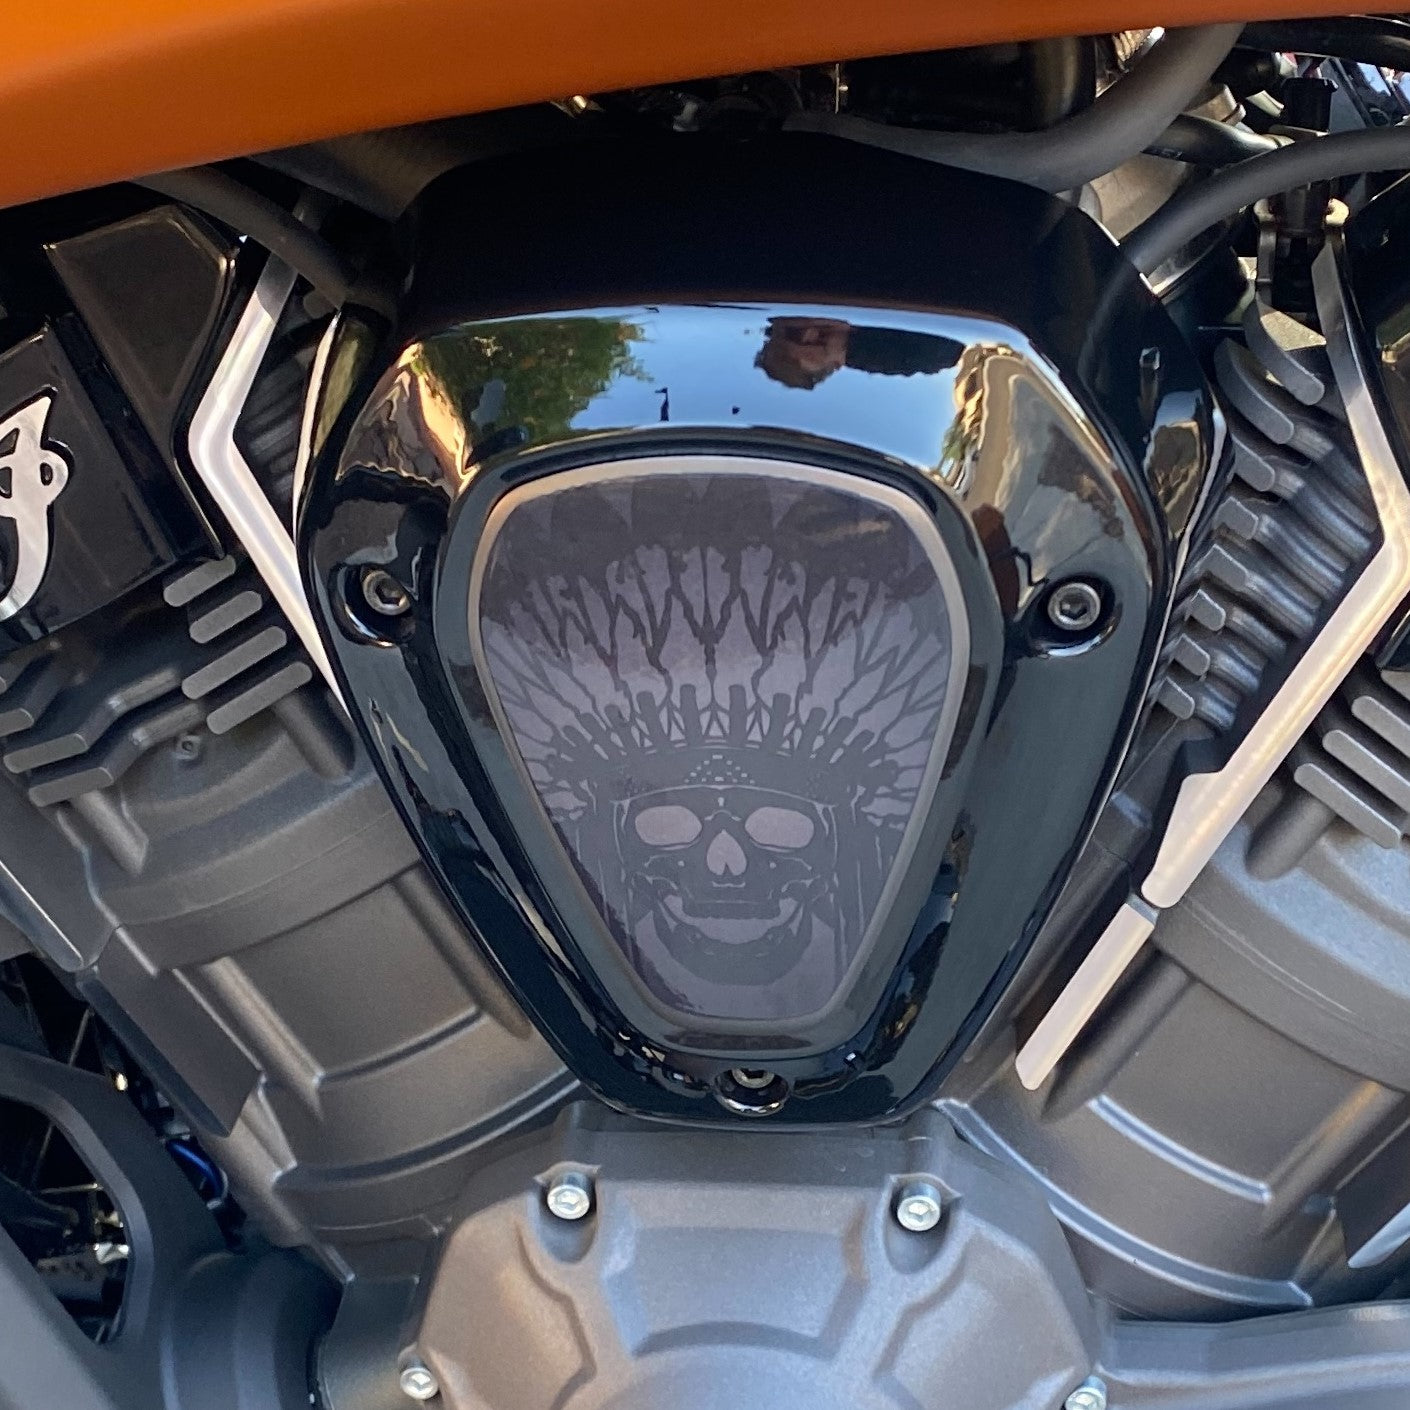
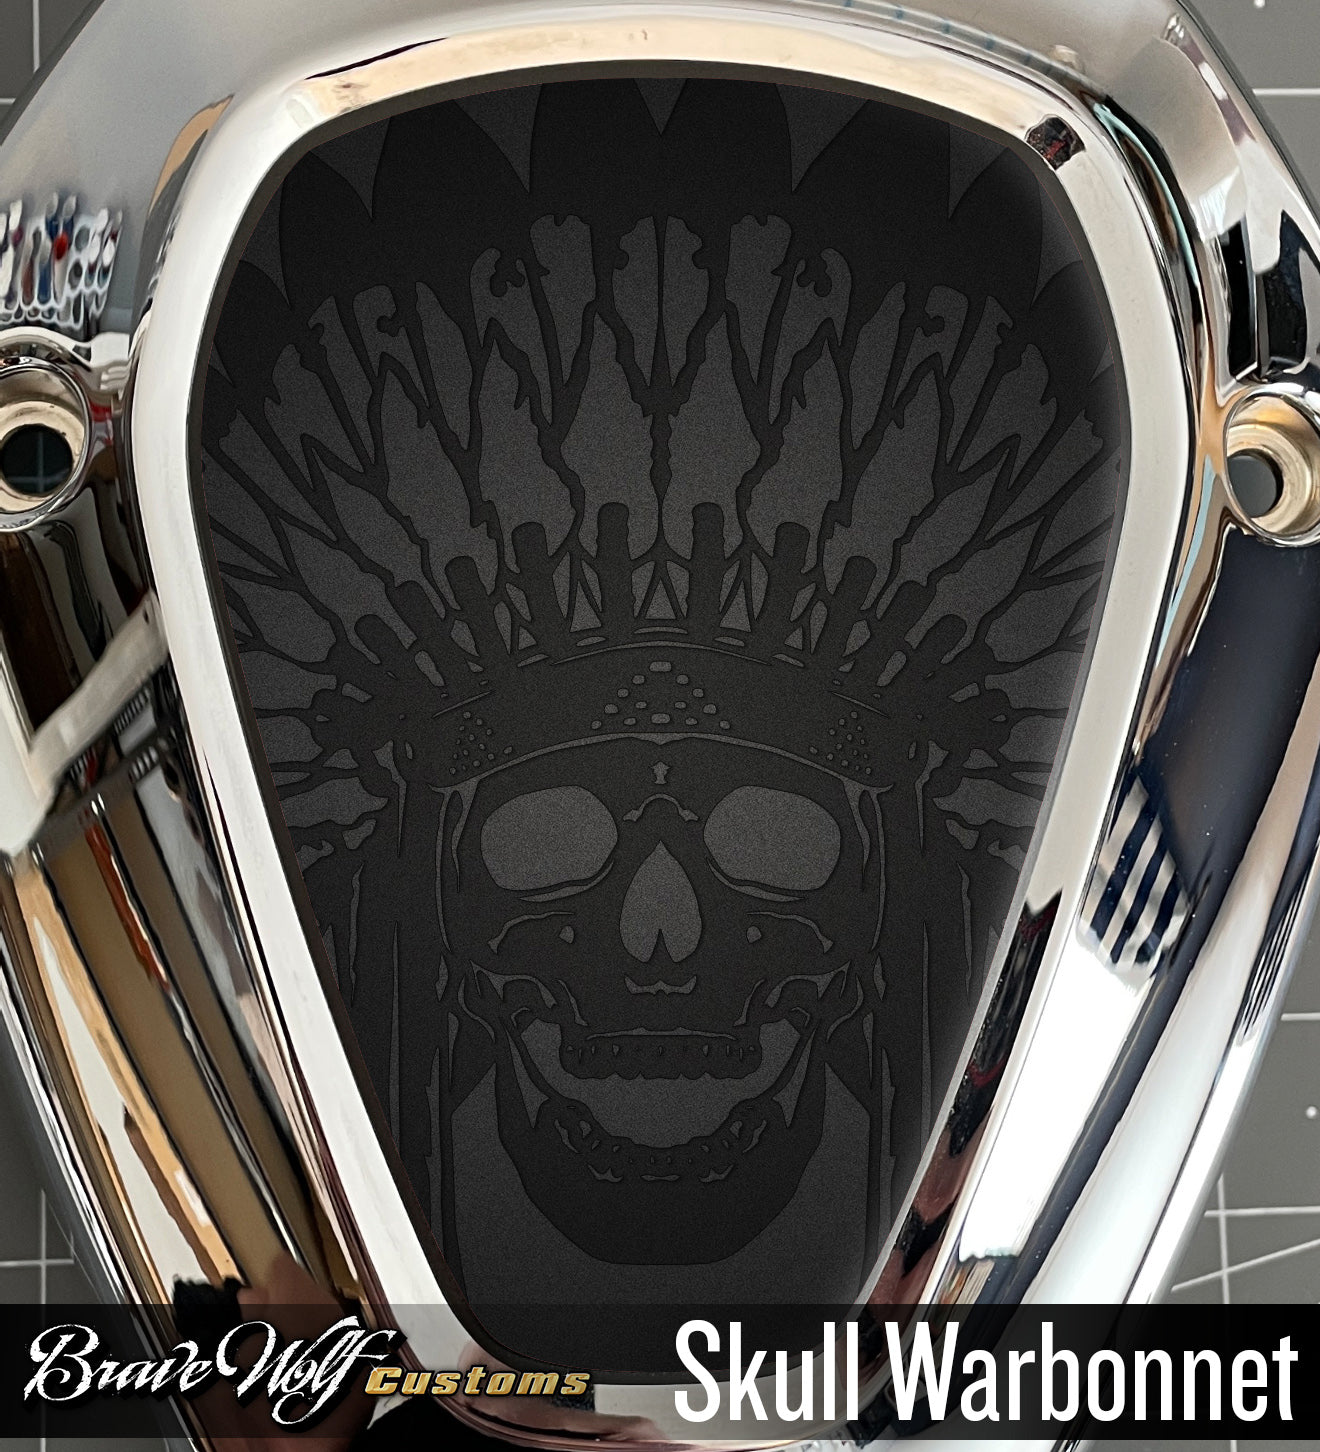
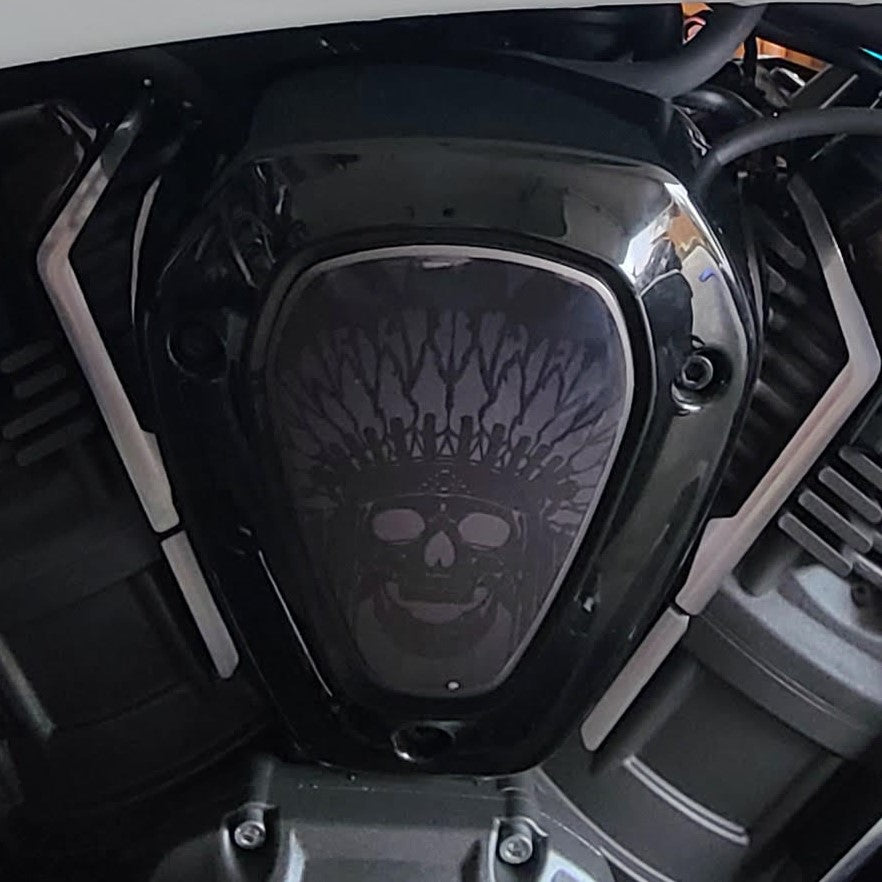
Skull Warbonnet 2" Emblem Coin
Regular price $8.00 Sale price $6.50 Save $1.50
Shipping calculated at checkout.
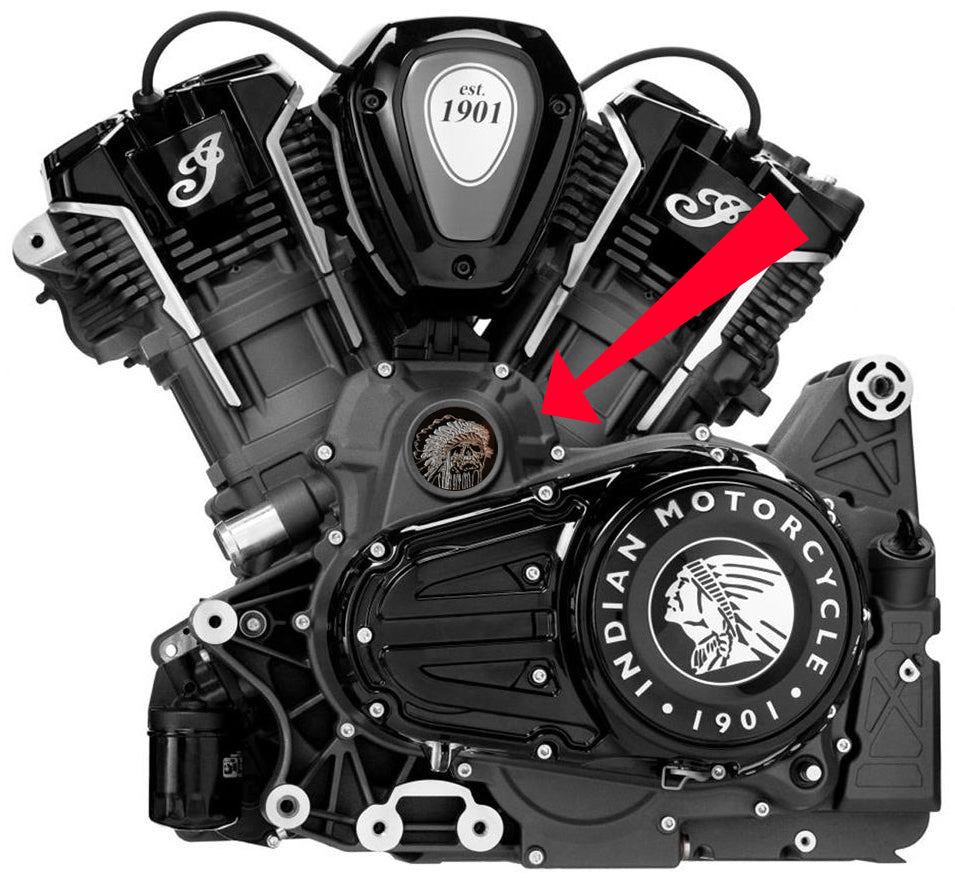
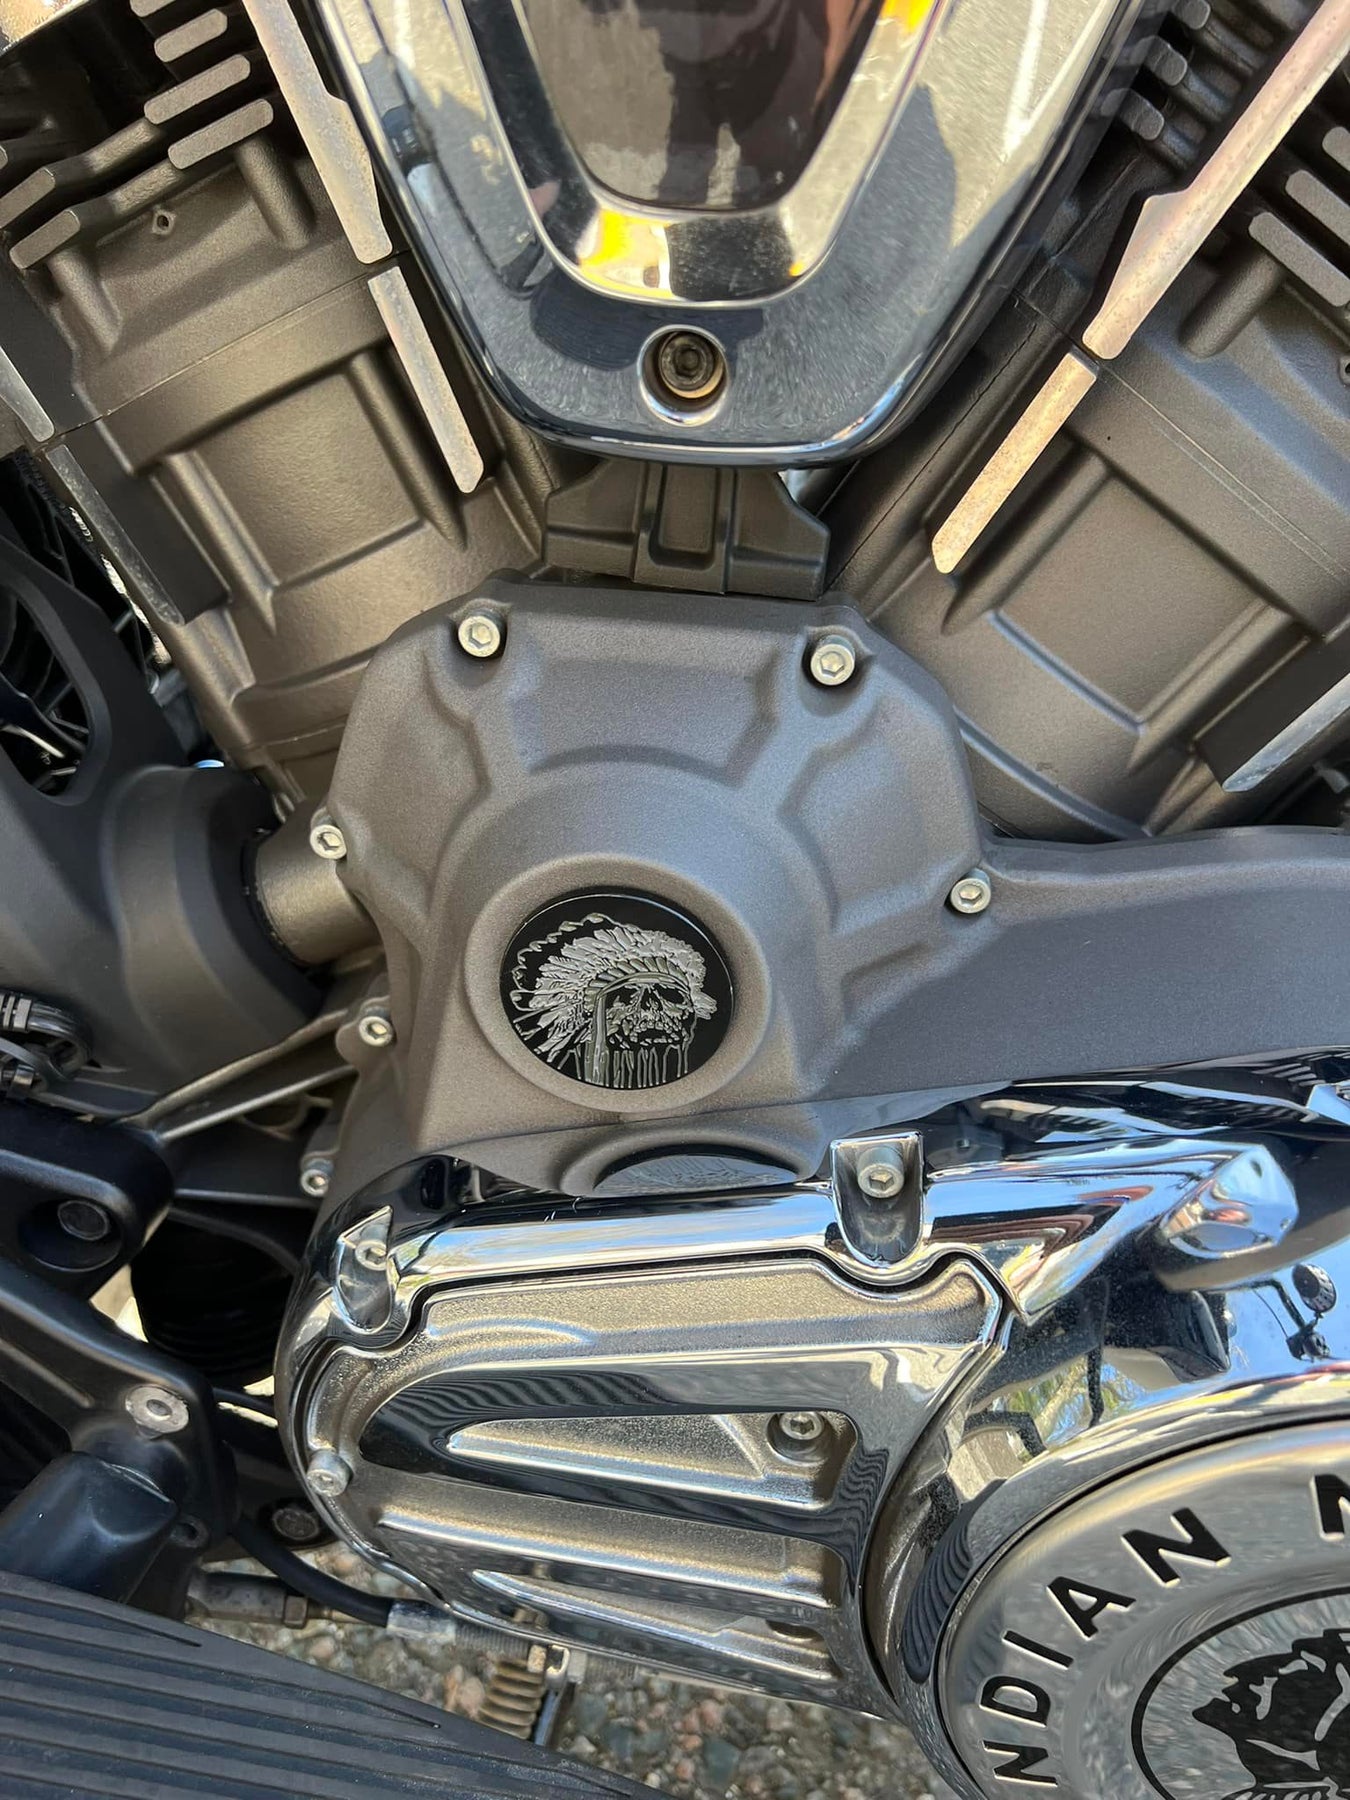
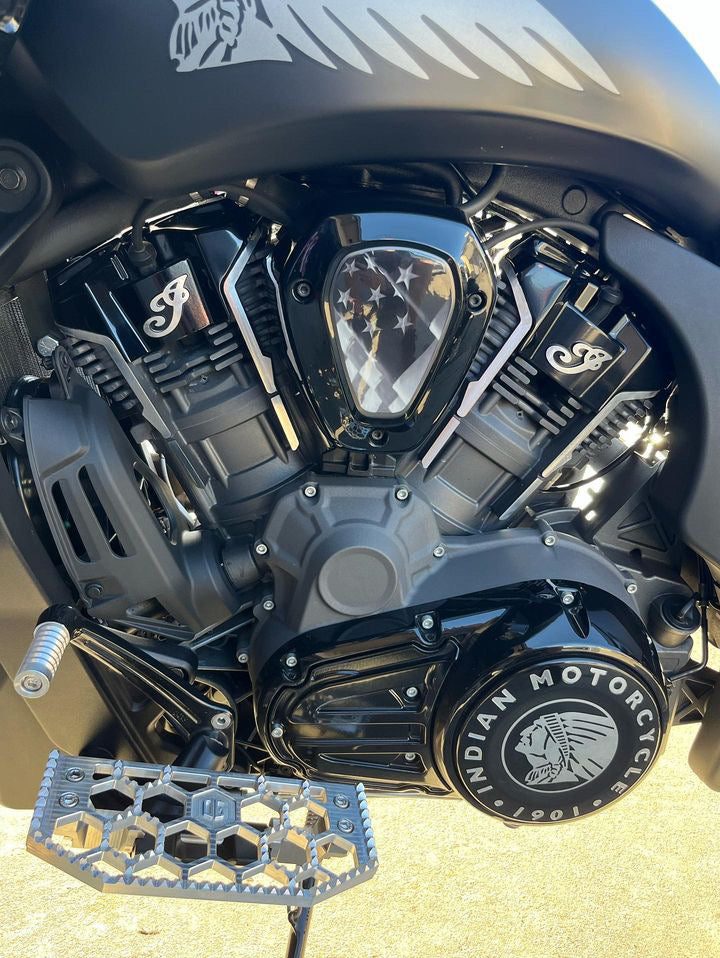
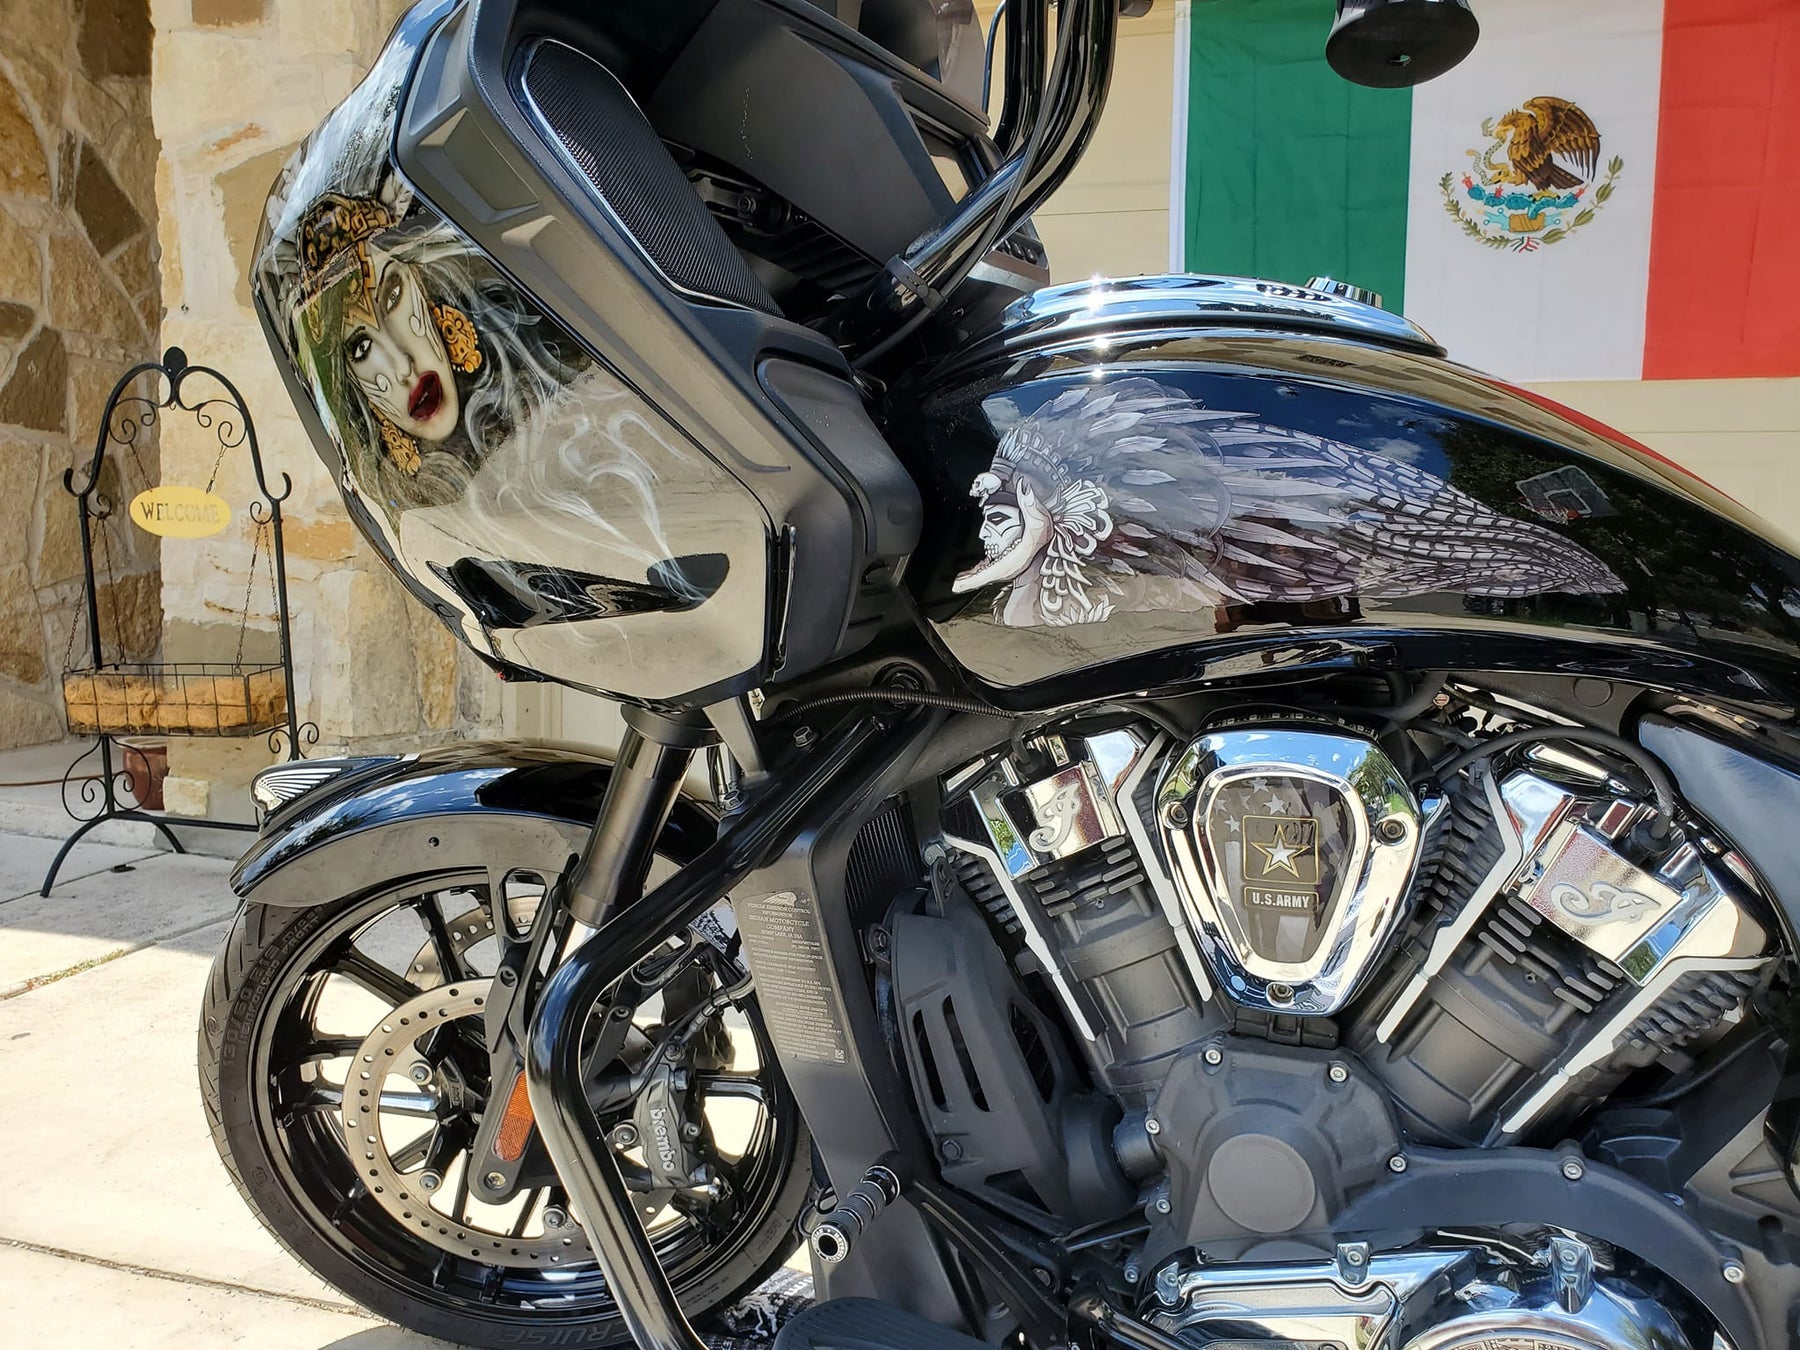
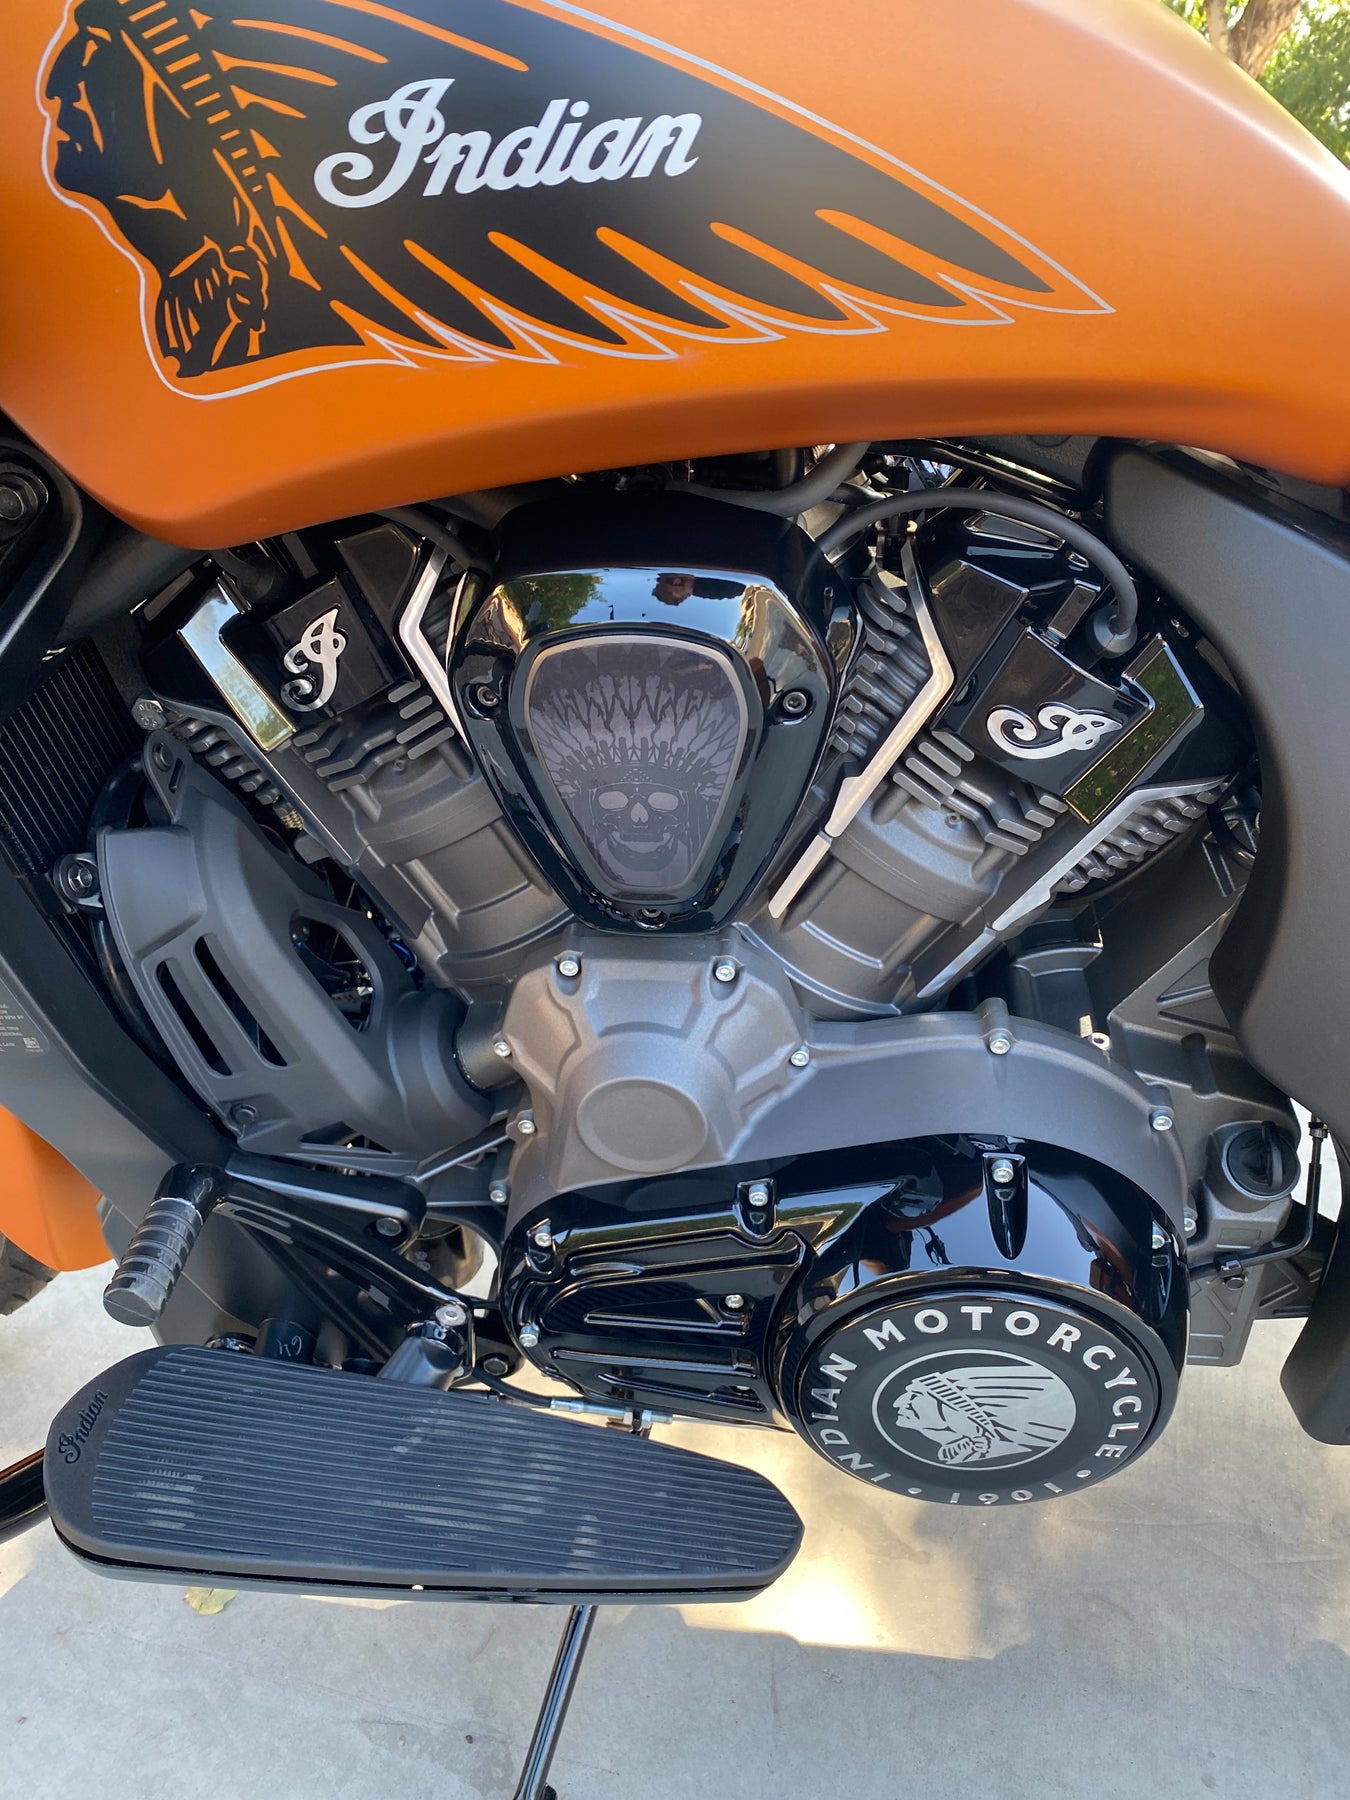
These embossed black-painted metal coin emblems are detailed with soft enamel to maintain ridges and detail. 2 inches in diameter, they're a perfect fit for the small circular inset on the left side of the Powerplus engine. If you don't ride a Powerplus model, you can install these anywhere you like. We recommend using 3M double-sided emblem tape or an adhesive that remains flexible such as Lexel or e6000 to install.

Photo courtesy of Anthony Masone


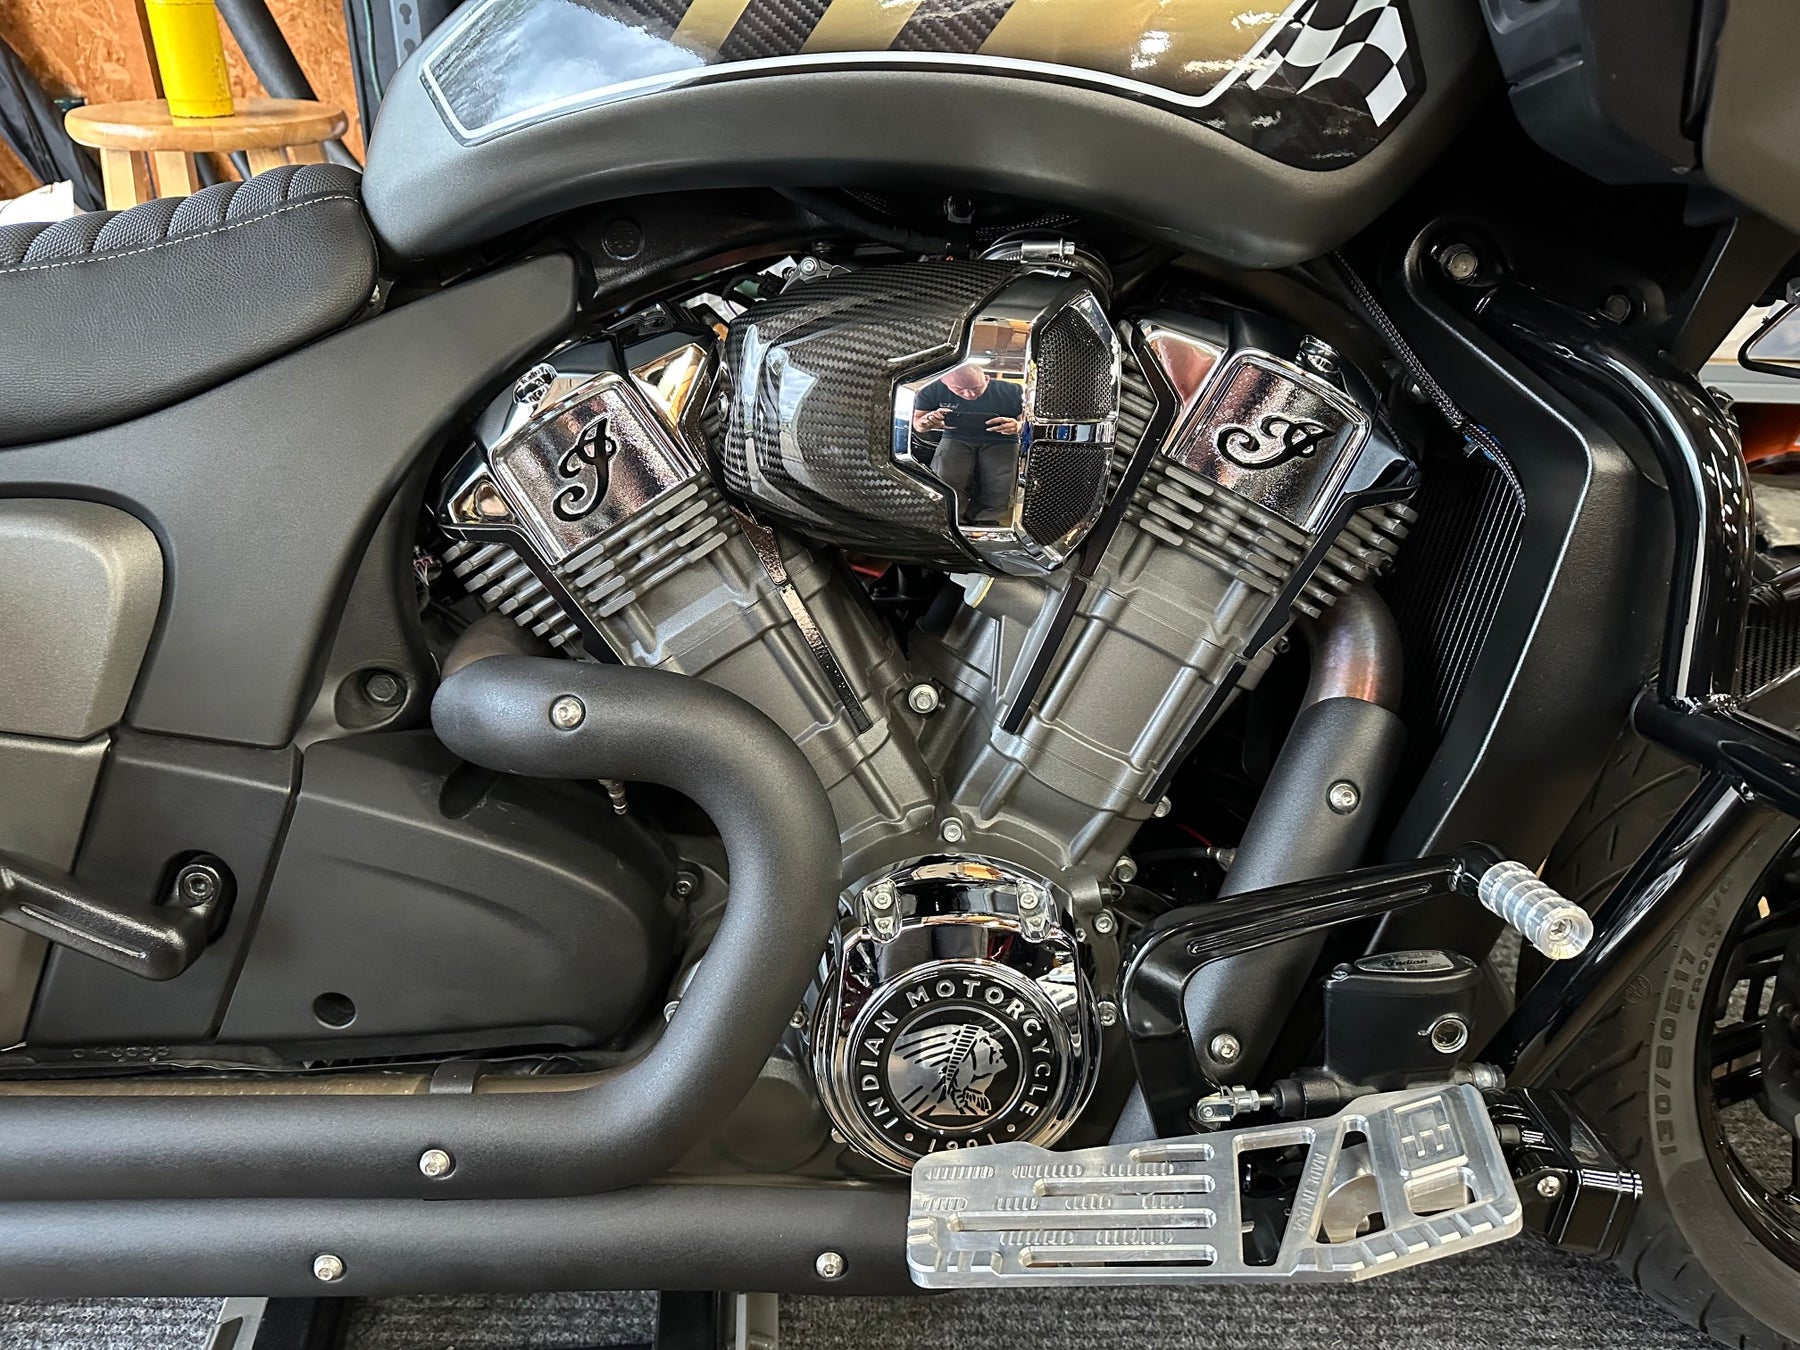
Powerplus Engine Accent Kit - Black
Regular price $35.00
Shipping calculated at checkout.
Stock Notice:
All style options for our Powerplus Engine Accent kits are usually in stock. However, they are produced in manufacturing runs so if they're out of stock at the time of your order, there may be a waiting period before we ship them out. If your order is time sensitive, feel free to contact us to check stock before ordering.
Engine accent kits for Indian Challenger and Pursuit, Powerplus Chieftain, and Powerplus Roadmaster.
Our UV DTF 3D PermaSticker Engine Accent kits combine the latest UV DTF technology with exceptional adhesive properties, ensuring that your accents will stick around for the long haul. With unparalleled durability, remarkable adhesive properties, and heat resistance capable of direct contact with your engine, they're the perfect material to add a custom touch to your bike.
Kit includes a total of 41 pieces. All the accents you need to do both sides of your engine AND plenty of extras in case you make a mistake during installation. + 2 Brave Wolf logos. The kit comes on a 17.5" backing sheet with with a transfer layer on top.
We're offering these in a stunning 20 different color combination styles, but if we don't have the combo you want, consider purchasing multiple sets to mix-and-match and you'll save 20% on each. We've priced them affordably so this should be an option.
Material Finish: an enamel-like finish. I wouldn't classify it as gloss or matte. Similar to egg-shell finish.
Installation:
These accents will need to be installed on a warm, clean, and dry engine. Do not attempt to install them cold or with condensation on the surface. You can run your bike to get the engine warm, but not hot, or use a hair dryer/heat gun. Installing these in winter months will be more difficult. Use scissors to separate each individual piece from the sheet. A pair of tweezers can be helpful to hold the accents in proper placement during installation. Once in place, use a firm object to press/rub over the full surface before peeling off the top transfer layer. Go slow while peeling the transfer layer. If the accent peels up without separating from the transfer, place it back down and press it more firmly into place. Because the surface is curved, the “I” will be the most challenging piece, so cut out around it as closely as possible to make it easier to position.


Powerplus Engine Accent Kit - Deepwater
Regular price $35.00
Shipping calculated at checkout.
Stock Notice:
All style options for our Powerplus Engine Accent kits are usually in stock. However, they are produced in manufacturing runs so if they're out of stock at the time of your order, there may be a waiting period before we ship them out. If your order is time sensitive, feel free to contact us to check stock before ordering.
Engine accent kits for Indian Challenger and Pursuit, Powerplus Chieftain, and Powerplus Roadmaster.
Our UV DTF 3D PermaSticker Engine Accent kits combine the latest UV DTF technology with exceptional adhesive properties, ensuring that your accents will stick around for the long haul. With unparalleled durability, remarkable adhesive properties, and heat resistance capable of direct contact with your engine, they're the perfect material to add a custom touch to your bike.
Kit includes a total of 41 pieces. All the accents you need to do both sides of your engine AND plenty of extras in case you make a mistake during installation. + 2 Brave Wolf logos. The kit comes on a 17.5" backing sheet with with a transfer layer on top.
We're offering these in a stunning 20 different color combination styles, but if we don't have the combo you want, consider purchasing multiple sets to mix-and-match and you'll save 20% on each. We've priced them affordably so this should be an option.
Material Finish: an enamel-like finish. I wouldn't classify it as gloss or matte. Similar to egg-shell finish.
Installation:
These accents will need to be installed on a warm, clean, and dry engine. Do not attempt to install them cold or with condensation on the surface. You can run your bike to get the engine warm, but not hot, or use a hair dryer/heat gun. Installing these in winter months will be more difficult. Use scissors to separate each individual piece from the sheet. A pair of tweezers can be helpful to hold the accents in proper placement during installation. Once in place, use a firm object to press/rub over the full surface before peeling off the top transfer layer. Go slow while peeling the transfer layer. If the accent peels up without separating from the transfer, place it back down and press it more firmly into place. Because the surface is curved, the “I” will be the most challenging piece, so cut out around it as closely as possible to make it easier to position.


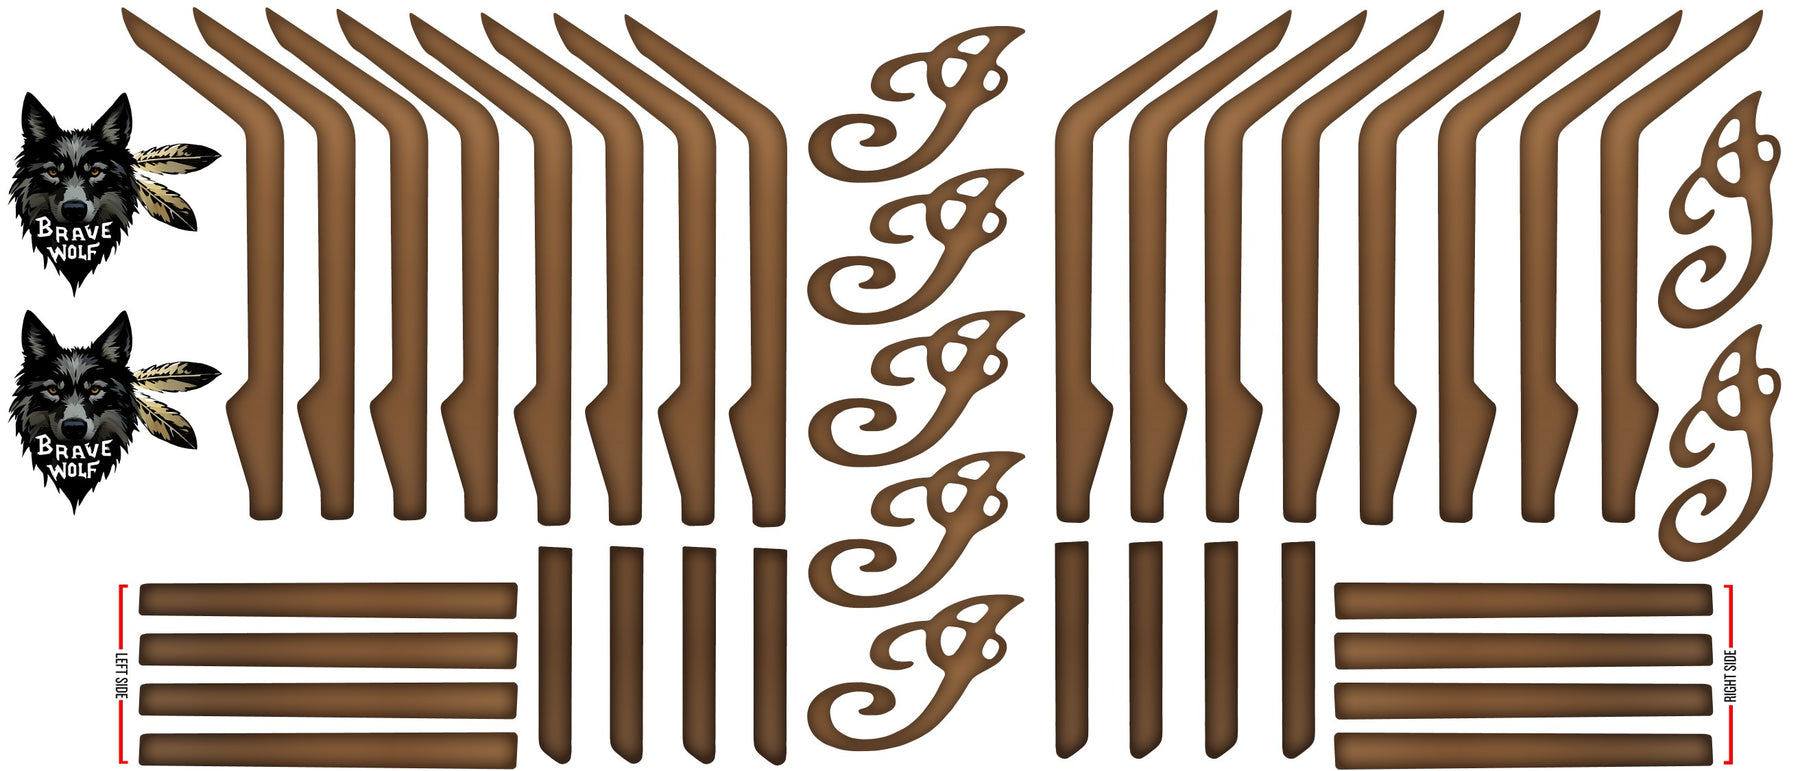
Powerplus Engine Accent Kit - Bronze
Regular price $35.00
Shipping calculated at checkout.
Stock Notice:
All style options for our Powerplus Engine Accent kits are usually in stock. However, they are produced in manufacturing runs so if they're out of stock at the time of your order, there may be a waiting period before we ship them out. If your order is time sensitive, feel free to contact us to check stock before ordering.
Engine accent kits for Indian Challenger and Pursuit, Powerplus Chieftain, and Powerplus Roadmaster.
Our UV DTF 3D PermaSticker Engine Accent kits combine the latest UV DTF technology with exceptional adhesive properties, ensuring that your accents will stick around for the long haul. With unparalleled durability, remarkable adhesive properties, and heat resistance capable of direct contact with your engine, they're the perfect material to add a custom touch to your bike.
Kit includes a total of 41 pieces. All the accents you need to do both sides of your engine AND plenty of extras in case you make a mistake during installation. + 2 Brave Wolf logos. The kit comes on a 17.5" backing sheet with with a transfer layer on top.
We're offering these in a stunning 20 different color combination styles, but if we don't have the combo you want, consider purchasing multiple sets to mix-and-match and you'll save 20% on each. We've priced them affordably so this should be an option.
Material Finish: an enamel-like finish. I wouldn't classify it as gloss or matte. Similar to egg-shell finish.
Installation:
These accents will need to be installed on a warm, clean, and dry engine. Do not attempt to install them cold or with condensation on the surface. You can run your bike to get the engine warm, but not hot, or use a hair dryer/heat gun. Installing these in winter months will be more difficult. Use scissors to separate each individual piece from the sheet. A pair of tweezers can be helpful to hold the accents in proper placement during installation. Once in place, use a firm object to press/rub over the full surface before peeling off the top transfer layer. Go slow while peeling the transfer layer. If the accent peels up without separating from the transfer, place it back down and press it more firmly into place. Because the surface is curved, the “I” will be the most challenging piece, so cut out around it as closely as possible to make it easier to position.


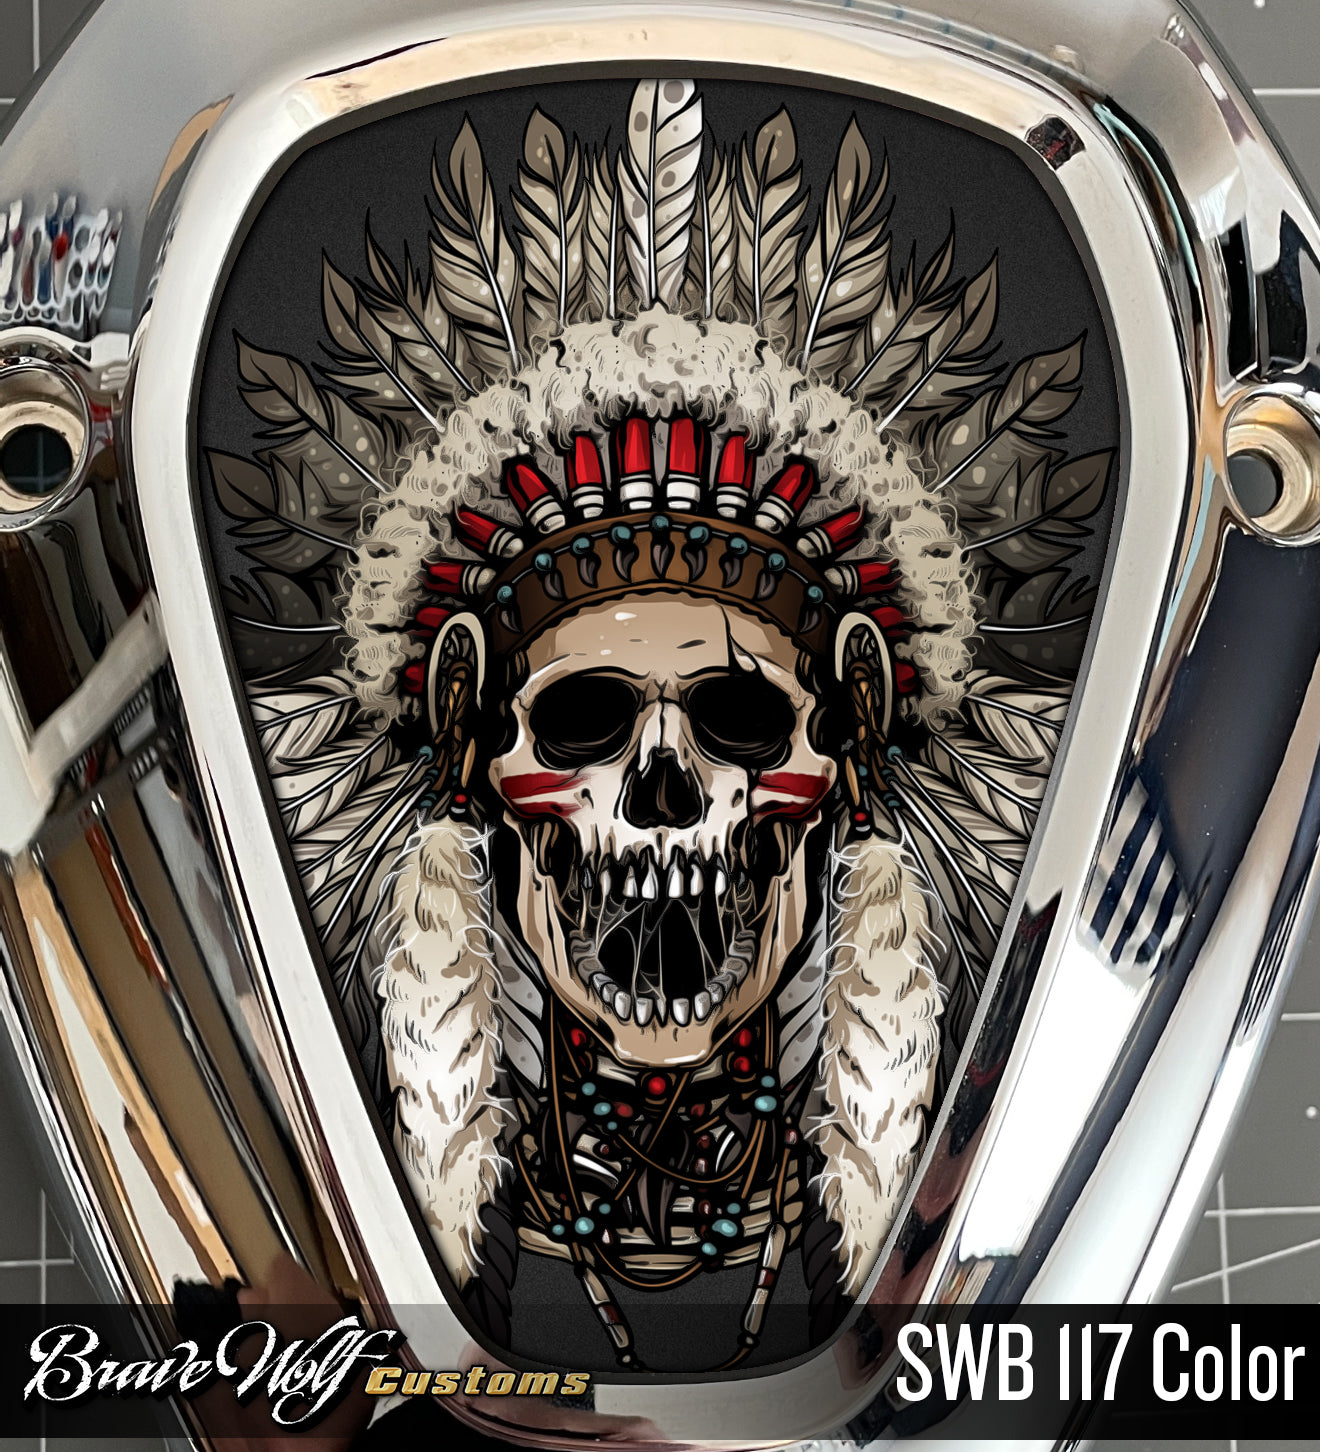
Powerplus Engine Accent Kit - Red and Black
Regular price $35.00
Shipping calculated at checkout.
Stock Notice:
All style options for our Powerplus Engine Accent kits are usually in stock. However, they are produced in manufacturing runs so if they're out of stock at the time of your order, there may be a waiting period before we ship them out. If your order is time sensitive, feel free to contact us to check stock before ordering.
Engine accent kits for Indian Challenger and Pursuit, Powerplus Chieftain, and Powerplus Roadmaster.
Our UV DTF 3D PermaSticker Engine Accent kits combine the latest UV DTF technology with exceptional adhesive properties, ensuring that your accents will stick around for the long haul. With unparalleled durability, remarkable adhesive properties, and heat resistance capable of direct contact with your engine, they're the perfect material to add a custom touch to your bike.
Kit includes a total of 41 pieces. All the accents you need to do both sides of your engine AND plenty of extras in case you make a mistake during installation. + 2 Brave Wolf logos. The kit comes on a 17.5" backing sheet with with a transfer layer on top.
We're offering these in a stunning 20 different color combination styles, but if we don't have the combo you want, consider purchasing multiple sets to mix-and-match and you'll save 20% on each. We've priced them affordably so this should be an option.
Material Finish: an enamel-like finish. I wouldn't classify it as gloss or matte. Similar to egg-shell finish.
Installation:
These accents will need to be installed on a warm, clean, and dry engine. Do not attempt to install them cold or with condensation on the surface. You can run your bike to get the engine warm, but not hot, or use a hair dryer/heat gun. Installing these in winter months will be more difficult. Use scissors to separate each individual piece from the sheet. A pair of tweezers can be helpful to hold the accents in proper placement during installation. Once in place, use a firm object to press/rub over the full surface before peeling off the top transfer layer. Go slow while peeling the transfer layer. If the accent peels up without separating from the transfer, place it back down and press it more firmly into place. Because the surface is curved, the “I” will be the most challenging piece, so cut out around it as closely as possible to make it easier to position.


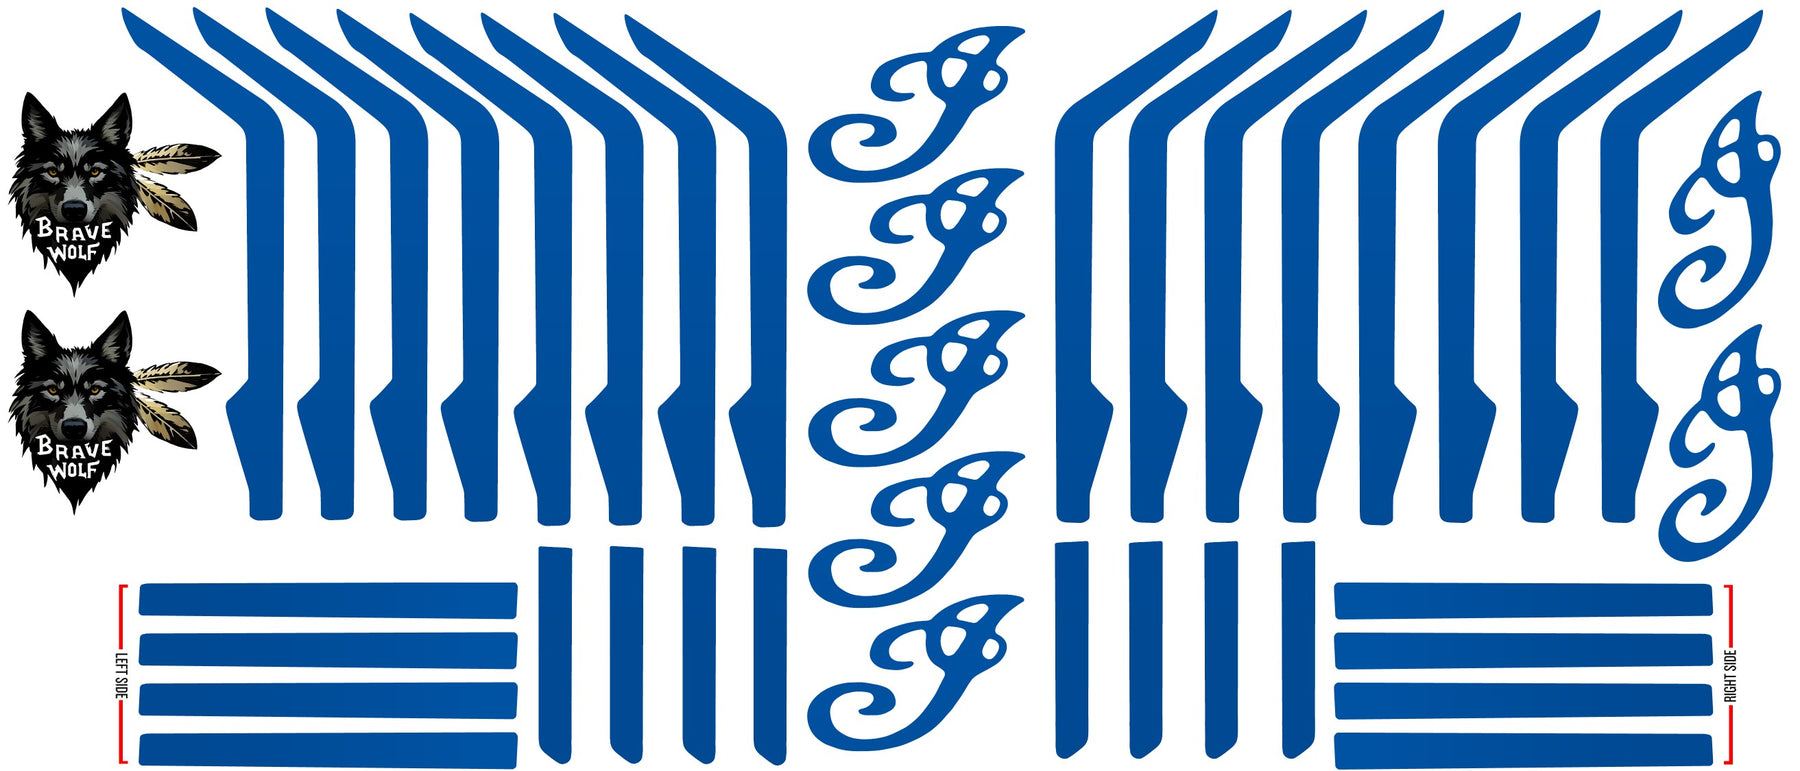
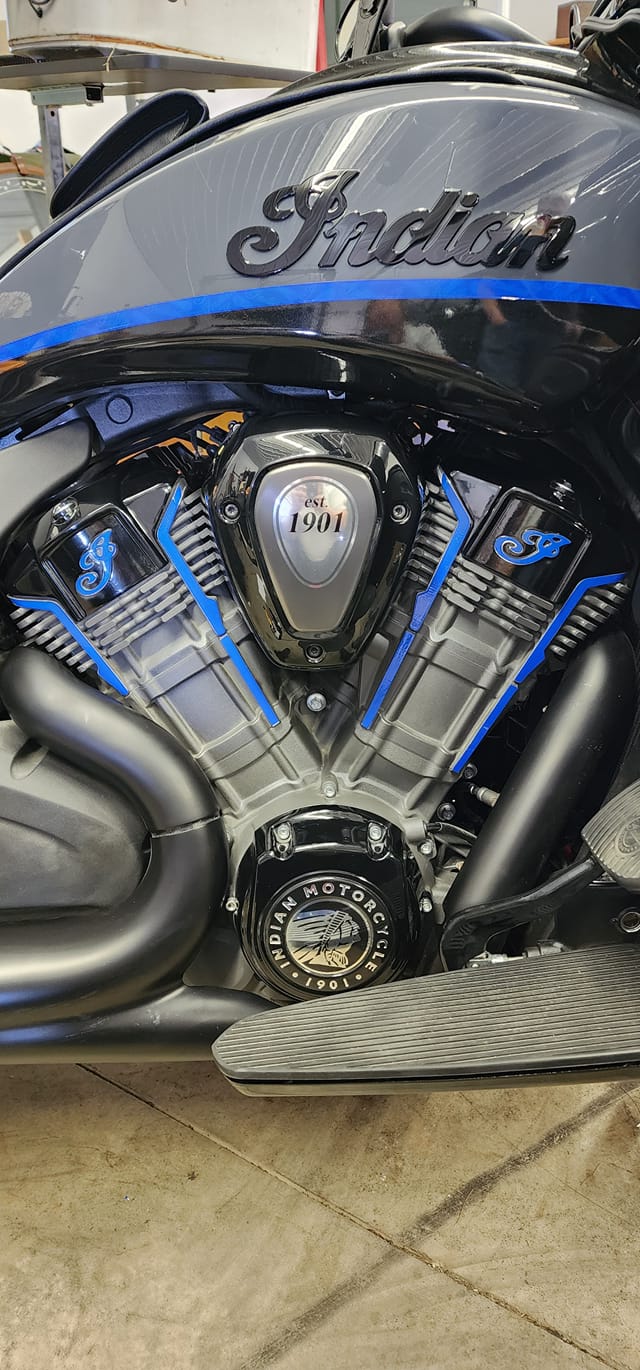
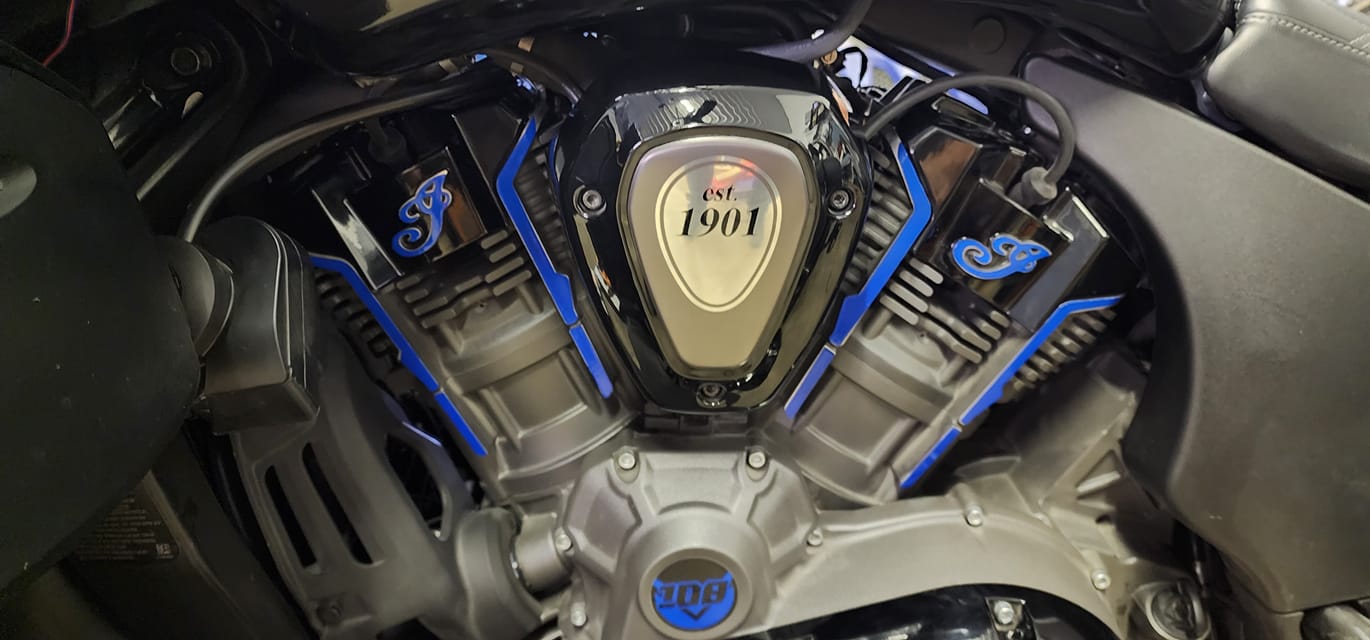
Powerplus Engine Accent Kit - Spirit Blue
Regular price $35.00
Shipping calculated at checkout.
Stock Notice:
All style options for our Powerplus Engine Accent kits are usually in stock. However, they are produced in manufacturing runs so if they're out of stock at the time of your order, there may be a waiting period before we ship them out. If your order is time sensitive, feel free to contact us to check stock before ordering.
Engine accent kits for Indian Challenger and Pursuit, Powerplus Chieftain, and Powerplus Roadmaster.
Our UV DTF 3D PermaSticker Engine Accent kits combine the latest UV DTF technology with exceptional adhesive properties, ensuring that your accents will stick around for the long haul. With unparalleled durability, remarkable adhesive properties, and heat resistance capable of direct contact with your engine, they're the perfect material to add a custom touch to your bike.
Kit includes a total of 41 pieces. All the accents you need to do both sides of your engine AND plenty of extras in case you make a mistake during installation. + 2 Brave Wolf logos. The kit comes on a 17.5" backing sheet with with a transfer layer on top.
We're offering these in a stunning 20 different color combination styles, but if we don't have the combo you want, consider purchasing multiple sets to mix-and-match and you'll save 20% on each. We've priced them affordably so this should be an option.
Material Finish: an enamel-like finish. I wouldn't classify it as gloss or matte. Similar to egg-shell finish.
Installation:
These accents will need to be installed on a warm, clean, and dry engine. Do not attempt to install them cold or with condensation on the surface. You can run your bike to get the engine warm, but not hot, or use a hair dryer/heat gun. Installing these in winter months will be more difficult. Use scissors to separate each individual piece from the sheet. A pair of tweezers can be helpful to hold the accents in proper placement during installation. Once in place, use a firm object to press/rub over the full surface before peeling off the top transfer layer. Go slow while peeling the transfer layer. If the accent peels up without separating from the transfer, place it back down and press it more firmly into place. Because the surface is curved, the “I” will be the most challenging piece, so cut out around it as closely as possible to make it easier to position.


MMIW Red Hand - Anywhere Decal
Regular price $40.00 Sale price $30.00 Save $10.00
Shipping calculated at checkout.
Stock Notice: Usually in stock (may take approximately 2-3 weeks before shipping if not in stock at the time of your order)
“MMIW Red Hand” Anywhere Decal - A Charity Drive Project
Missing and Murdered Indigenous Women is an epidemic of violence against Indigenous women in Canada, the United States, and Latin America; notably those in the FNIM and Native American communities. Across Latin America, it is estimated that Indigenous women and girls are disproportionately the victims of femicide.
STATISTICS
- Indigenous Women (girls +) murdered 10x higher than all other ethnicities.
- Murder is the 3rd leading cause of death for Indigenous Women (Centers for Disease Control).
- More than 4 out of 5 Indigenous Women have experienced violence (84.3%) (National Institute of Justice Report).
- More than half Indigenous Women experience sexual violence (56.1%).
- More than half Indigenous Women have been physically abused by their intimate partners (55.5 percent).
- 48.8% of Indigenous Women have been stalked in their lifetime.
- Indigenous Women are 1.7 times more likely than Anglo-American women to experience violence.
- Indigenous Women are 2xs more likely to be raped than Anglo-American white women.
- Murder rate of Indigenous Women is 3xs higher than Anglo-American women.
These decals are meant to bring awareness to this issue and can be used anywhere. Brave Wolf Customs will donate $15 from each order to a non-profit charitable organization whose mission is to offer support to the MMIW demographic.
Size: 7.5 x 7.2 inches each when displayed in the orientation of the image below

Weatherproof HD Gloss finish vinyl decals are self adhesive. We recommend using the wet method to install these decals: A spray bottle with water and dish soap can be used to wet the surface and the back of the decal, allowing you to slide the decal into place. Once you have it aligned properly, use your thumbs to push the moisture out from behind the decal, working from the center outwards to the edges and it will adhere to your bike. Using the wet method allows the decal surface to evenly distribute over the curved surface. A hair dryer to apply heat will make the process easier since the vinyl becomes more soft and flexible when warm.

Powerplus Engine Accent Kit - Carbon Fiber
Regular price $35.00
Shipping calculated at checkout.
Stock Notice:
All style options for our Powerplus Engine Accent kits are usually in stock. However, they are produced in manufacturing runs so if they're out of stock at the time of your order, there may be a waiting period before we ship them out. If your order is time sensitive, feel free to contact us to check stock before ordering.
Engine accent kits for Indian Challenger and Pursuit, Powerplus Chieftain, and Powerplus Roadmaster.
Our UV DTF 3D PermaSticker Engine Accent kits combine the latest UV DTF technology with exceptional adhesive properties, ensuring that your accents will stick around for the long haul. With unparalleled durability, remarkable adhesive properties, and heat resistance capable of direct contact with your engine, they're the perfect material to add a custom touch to your bike.
Kit includes a total of 41 pieces. All the accents you need to do both sides of your engine AND plenty of extras in case you make a mistake during installation. + 2 Brave Wolf logos. The kit comes on a 17.5" backing sheet with with a transfer layer on top.
We're offering these in a stunning 20 different color combination styles, but if we don't have the combo you want, consider purchasing multiple sets to mix-and-match and you'll save 20% on each. We've priced them affordably so this should be an option.
Material Finish: an enamel-like finish. I wouldn't classify it as gloss or matte. Similar to egg-shell finish.
Installation:
These accents will need to be installed on a warm, clean, and dry engine. Do not attempt to install them cold or with condensation on the surface. You can run your bike to get the engine warm, but not hot, or use a hair dryer/heat gun. Installing these in winter months will be more difficult. Use scissors to separate each individual piece from the sheet. A pair of tweezers can be helpful to hold the accents in proper placement during installation. Once in place, use a firm object to press/rub over the full surface before peeling off the top transfer layer. Go slow while peeling the transfer layer. If the accent peels up without separating from the transfer, place it back down and press it more firmly into place. Because the surface is curved, the “I” will be the most challenging piece, so cut out around it as closely as possible to make it easier to position.

Powerplus Engine Accent Kit - Gold
Regular price $35.00
Shipping calculated at checkout.
Stock Notice:
All style options for our Powerplus Engine Accent kits are usually in stock. However, they are produced in manufacturing runs so if they're out of stock at the time of your order, there may be a waiting period before we ship them out. If your order is time sensitive, feel free to contact us to check stock before ordering.
Engine accent kits for Indian Challenger and Pursuit, Powerplus Chieftain, and Powerplus Roadmaster.
Our UV DTF 3D PermaSticker Engine Accent kits combine the latest UV DTF technology with exceptional adhesive properties, ensuring that your accents will stick around for the long haul. With unparalleled durability, remarkable adhesive properties, and heat resistance capable of direct contact with your engine, they're the perfect material to add a custom touch to your bike.
Kit includes a total of 41 pieces. All the accents you need to do both sides of your engine AND plenty of extras in case you make a mistake during installation. + 2 Brave Wolf logos. The kit comes on a 17.5" backing sheet with with a transfer layer on top.
We're offering these in a stunning 20 different color combination styles, but if we don't have the combo you want, consider purchasing multiple sets to mix-and-match and you'll save 20% on each. We've priced them affordably so this should be an option.
Material Finish: an enamel-like finish. I wouldn't classify it as gloss or matte. Similar to egg-shell finish.
Installation:
These accents will need to be installed on a warm, clean, and dry engine. Do not attempt to install them cold or with condensation on the surface. You can run your bike to get the engine warm, but not hot, or use a hair dryer/heat gun. Installing these in winter months will be more difficult. Use scissors to separate each individual piece from the sheet. A pair of tweezers can be helpful to hold the accents in proper placement during installation. Once in place, use a firm object to press/rub over the full surface before peeling off the top transfer layer. Go slow while peeling the transfer layer. If the accent peels up without separating from the transfer, place it back down and press it more firmly into place. Because the surface is curved, the “I” will be the most challenging piece, so cut out around it as closely as possible to make it easier to position.


Powerplus Engine Accent Kit - Riot Orange
Regular price $35.00
Shipping calculated at checkout.
Stock Notice:
All style options for our Powerplus Engine Accent kits are usually in stock. However, they are produced in manufacturing runs so if they're out of stock at the time of your order, there may be a waiting period before we ship them out. If your order is time sensitive, feel free to contact us to check stock before ordering.
Engine accent kits for Indian Challenger and Pursuit, Powerplus Chieftain, and Powerplus Roadmaster.
Our UV DTF 3D PermaSticker Engine Accent kits combine the latest UV DTF technology with exceptional adhesive properties, ensuring that your accents will stick around for the long haul. With unparalleled durability, remarkable adhesive properties, and heat resistance capable of direct contact with your engine, they're the perfect material to add a custom touch to your bike.
Kit includes a total of 41 pieces. All the accents you need to do both sides of your engine AND plenty of extras in case you make a mistake during installation. + 2 Brave Wolf logos. The kit comes on a 17.5" backing sheet with with a transfer layer on top.
We're offering these in a stunning 20 different color combination styles, but if we don't have the combo you want, consider purchasing multiple sets to mix-and-match and you'll save 20% on each. We've priced them affordably so this should be an option.
Material Finish: an enamel-like finish. I wouldn't classify it as gloss or matte. Similar to egg-shell finish.
Installation:
These accents will need to be installed on a warm, clean, and dry engine. Do not attempt to install them cold or with condensation on the surface. You can run your bike to get the engine warm, but not hot, or use a hair dryer/heat gun. Installing these in winter months will be more difficult. Use scissors to separate each individual piece from the sheet. A pair of tweezers can be helpful to hold the accents in proper placement during installation. Once in place, use a firm object to press/rub over the full surface before peeling off the top transfer layer. Go slow while peeling the transfer layer. If the accent peels up without separating from the transfer, place it back down and press it more firmly into place. Because the surface is curved, the “I” will be the most challenging piece, so cut out around it as closely as possible to make it easier to position.


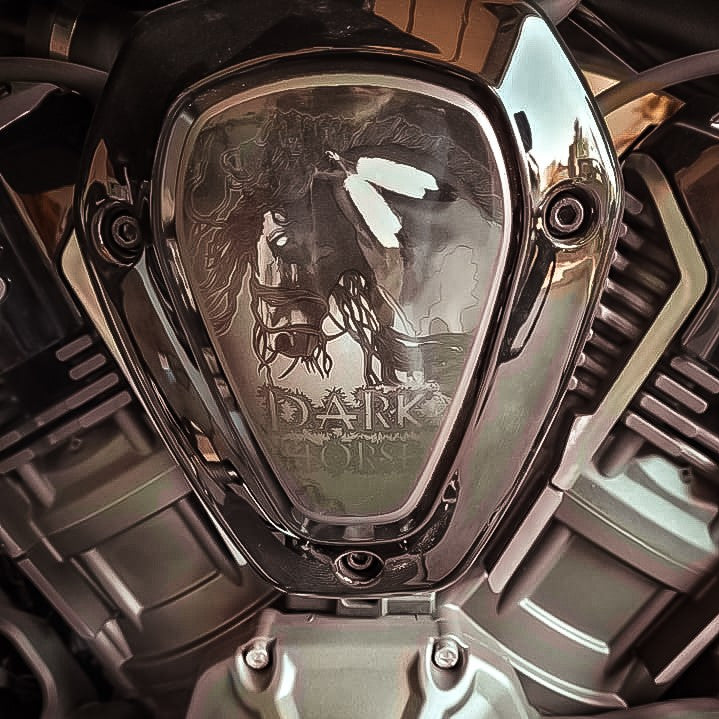
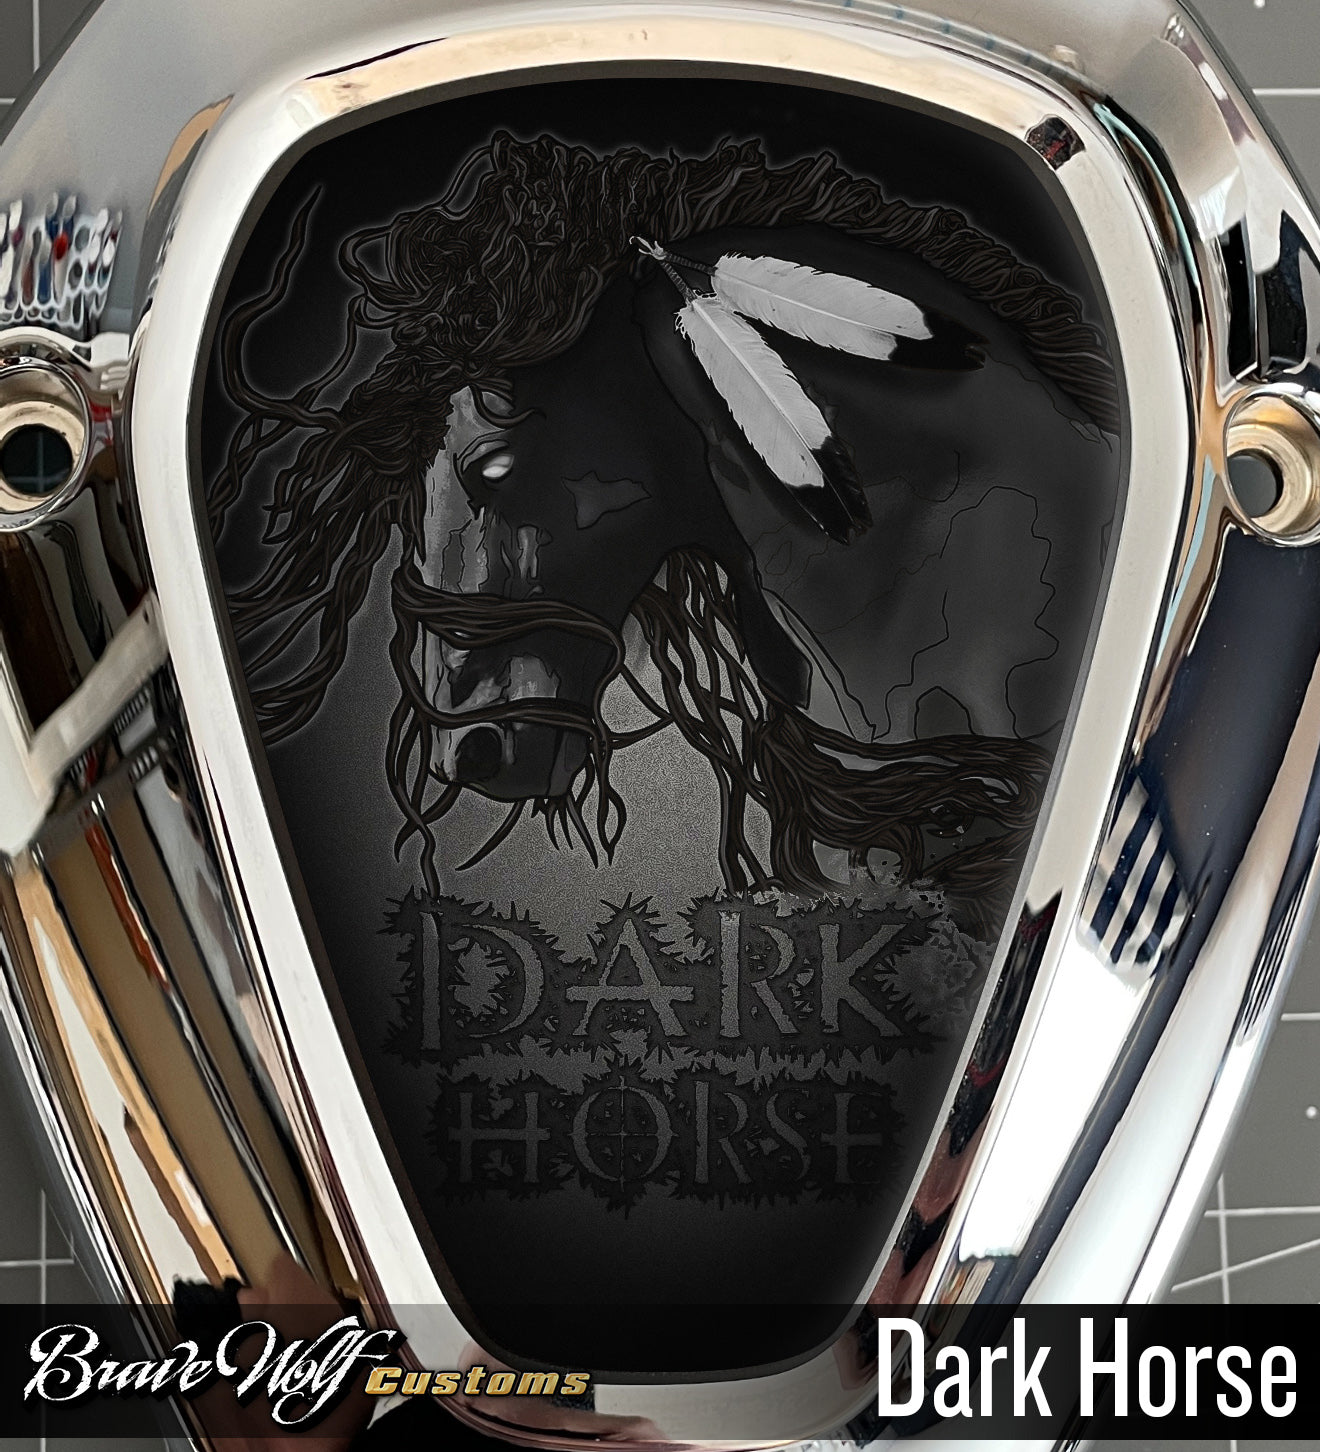
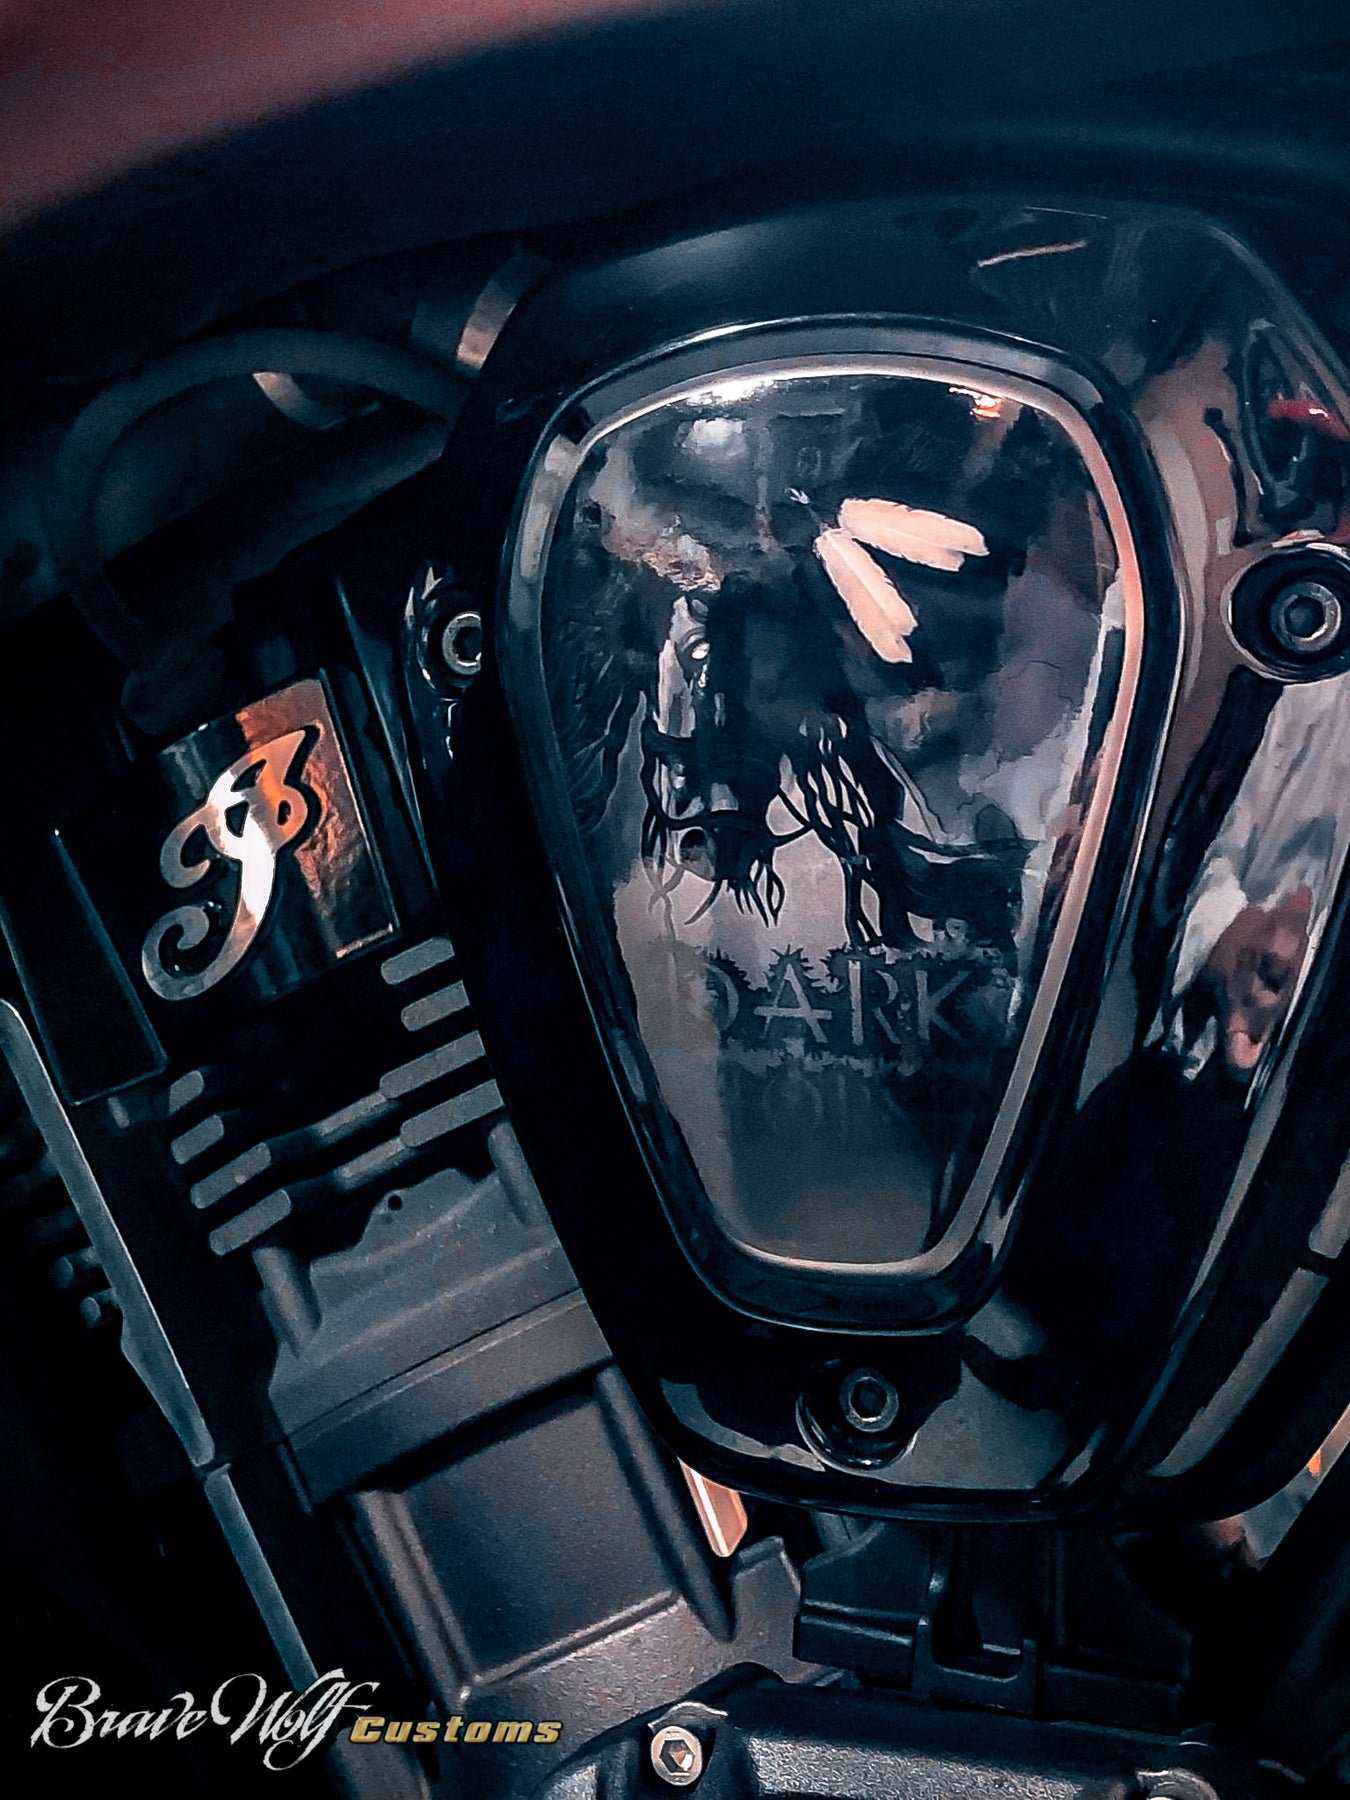
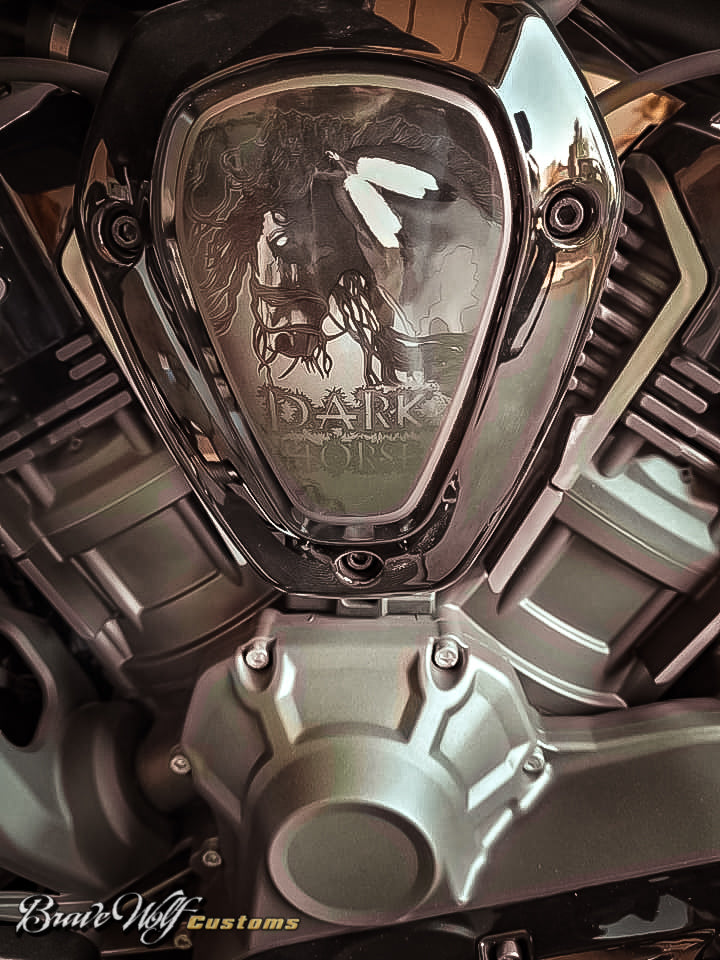
Powerplus Engine Accent Kit - Dark Horse
Regular price $35.00
Shipping calculated at checkout.
Stock Notice:
All style options for our Powerplus Engine Accent kits are usually in stock. However, they are produced in manufacturing runs so if they're out of stock at the time of your order, there may be a waiting period before we ship them out. If your order is time sensitive, feel free to contact us to check stock before ordering.
Engine accent kits for Indian Challenger and Pursuit, Powerplus Chieftain, and Powerplus Roadmaster.
Our UV DTF 3D PermaSticker Engine Accent kits combine the latest UV DTF technology with exceptional adhesive properties, ensuring that your accents will stick around for the long haul. With unparalleled durability, remarkable adhesive properties, and heat resistance capable of direct contact with your engine, they're the perfect material to add a custom touch to your bike.
Kit includes a total of 41 pieces. All the accents you need to do both sides of your engine AND plenty of extras in case you make a mistake during installation. + 2 Brave Wolf logos. The kit comes on a 17.5" backing sheet with with a transfer layer on top.
We're offering these in a stunning 20 different color combination styles, but if we don't have the combo you want, consider purchasing multiple sets to mix-and-match and you'll save 20% on each. We've priced them affordably so this should be an option.
Material Finish: an enamel-like finish. I wouldn't classify it as gloss or matte. Similar to egg-shell finish.
Installation:
These accents will need to be installed on a warm, clean, and dry engine. Do not attempt to install them cold or with condensation on the surface. You can run your bike to get the engine warm, but not hot, or use a hair dryer/heat gun. Installing these in winter months will be more difficult. Use scissors to separate each individual piece from the sheet. A pair of tweezers can be helpful to hold the accents in proper placement during installation. Once in place, use a firm object to press/rub over the full surface before peeling off the top transfer layer. Go slow while peeling the transfer layer. If the accent peels up without separating from the transfer, place it back down and press it more firmly into place. Because the surface is curved, the “I” will be the most challenging piece, so cut out around it as closely as possible to make it easier to position.


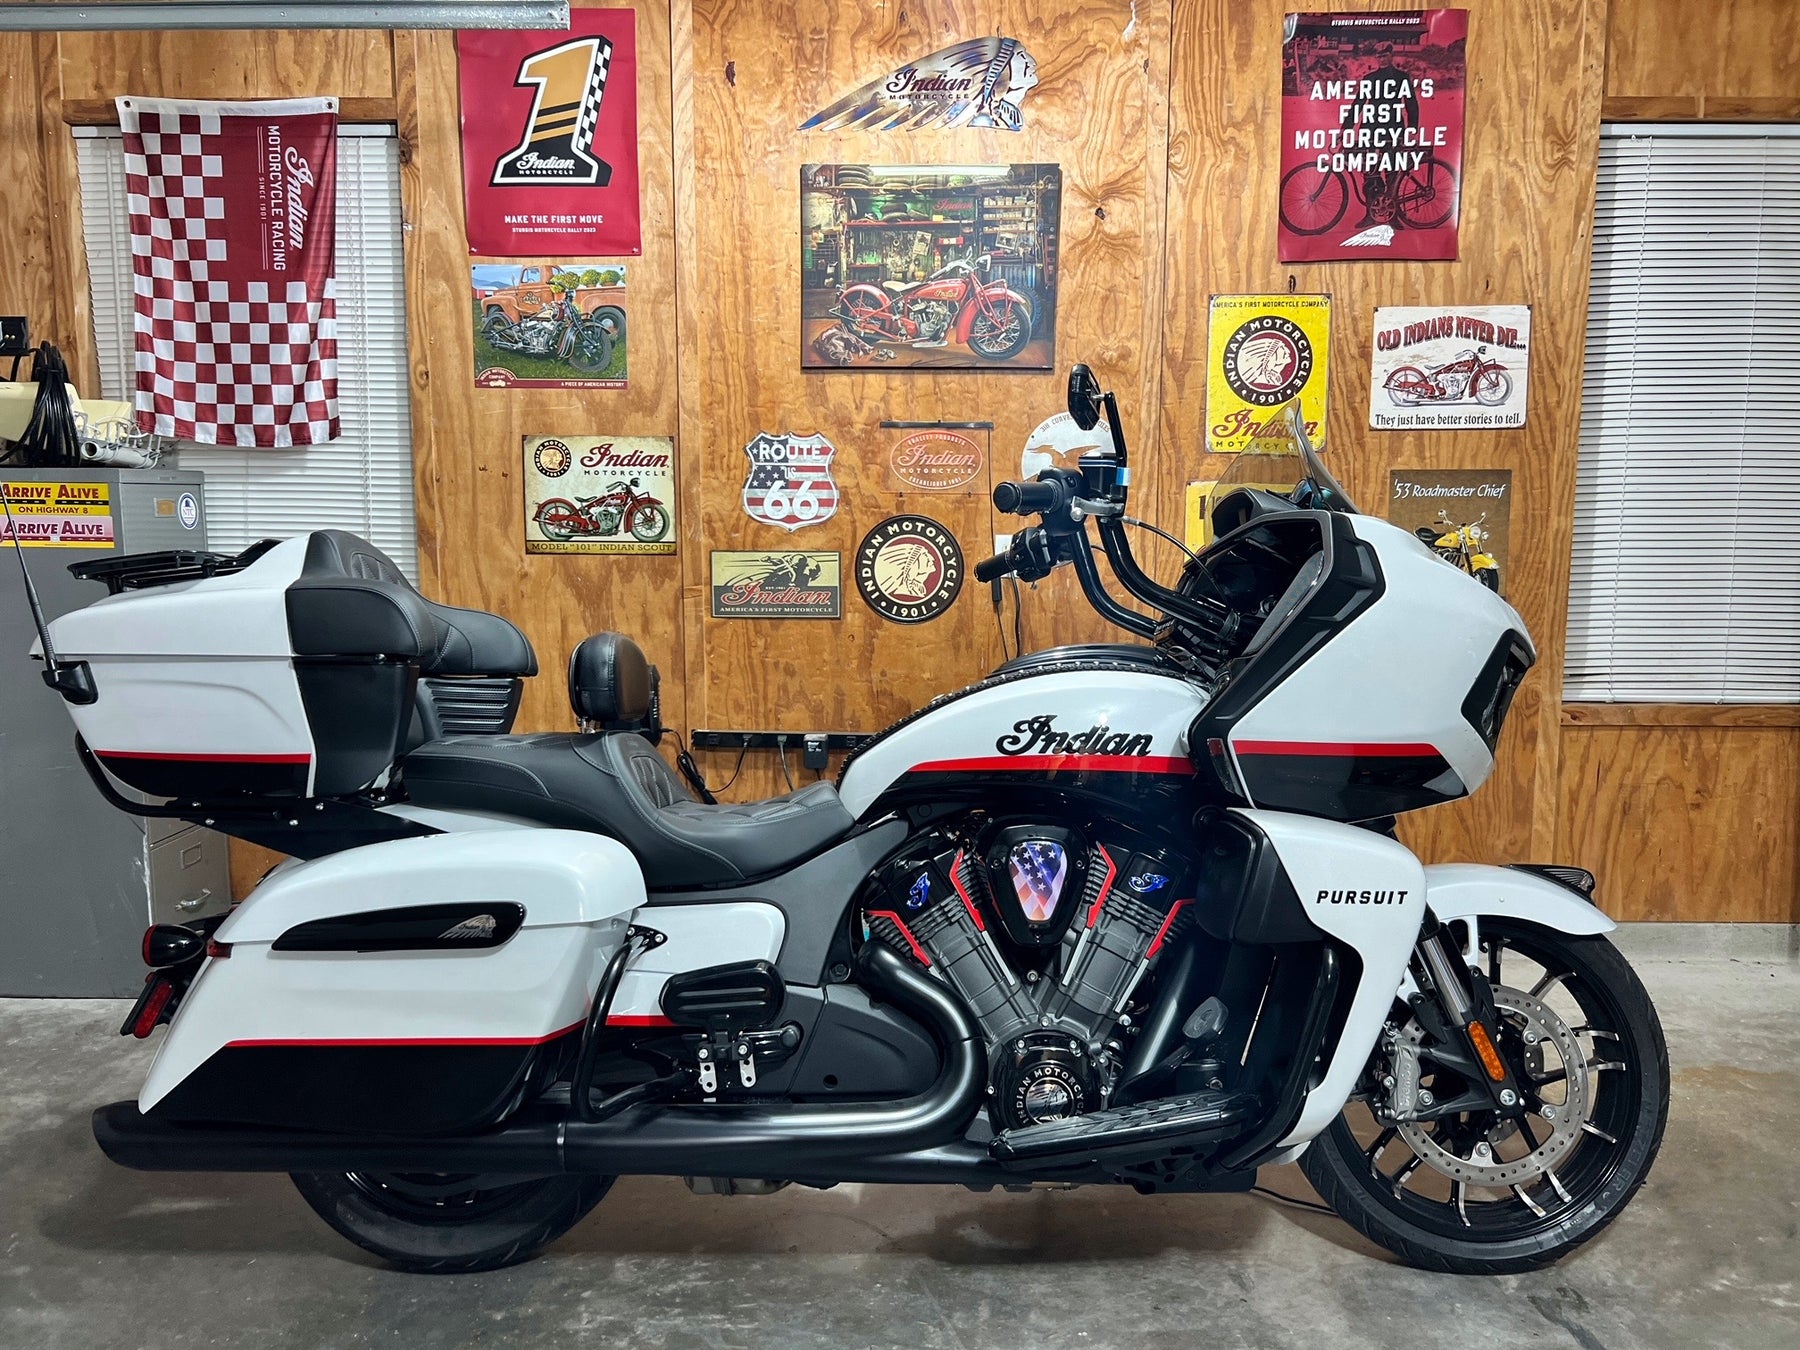
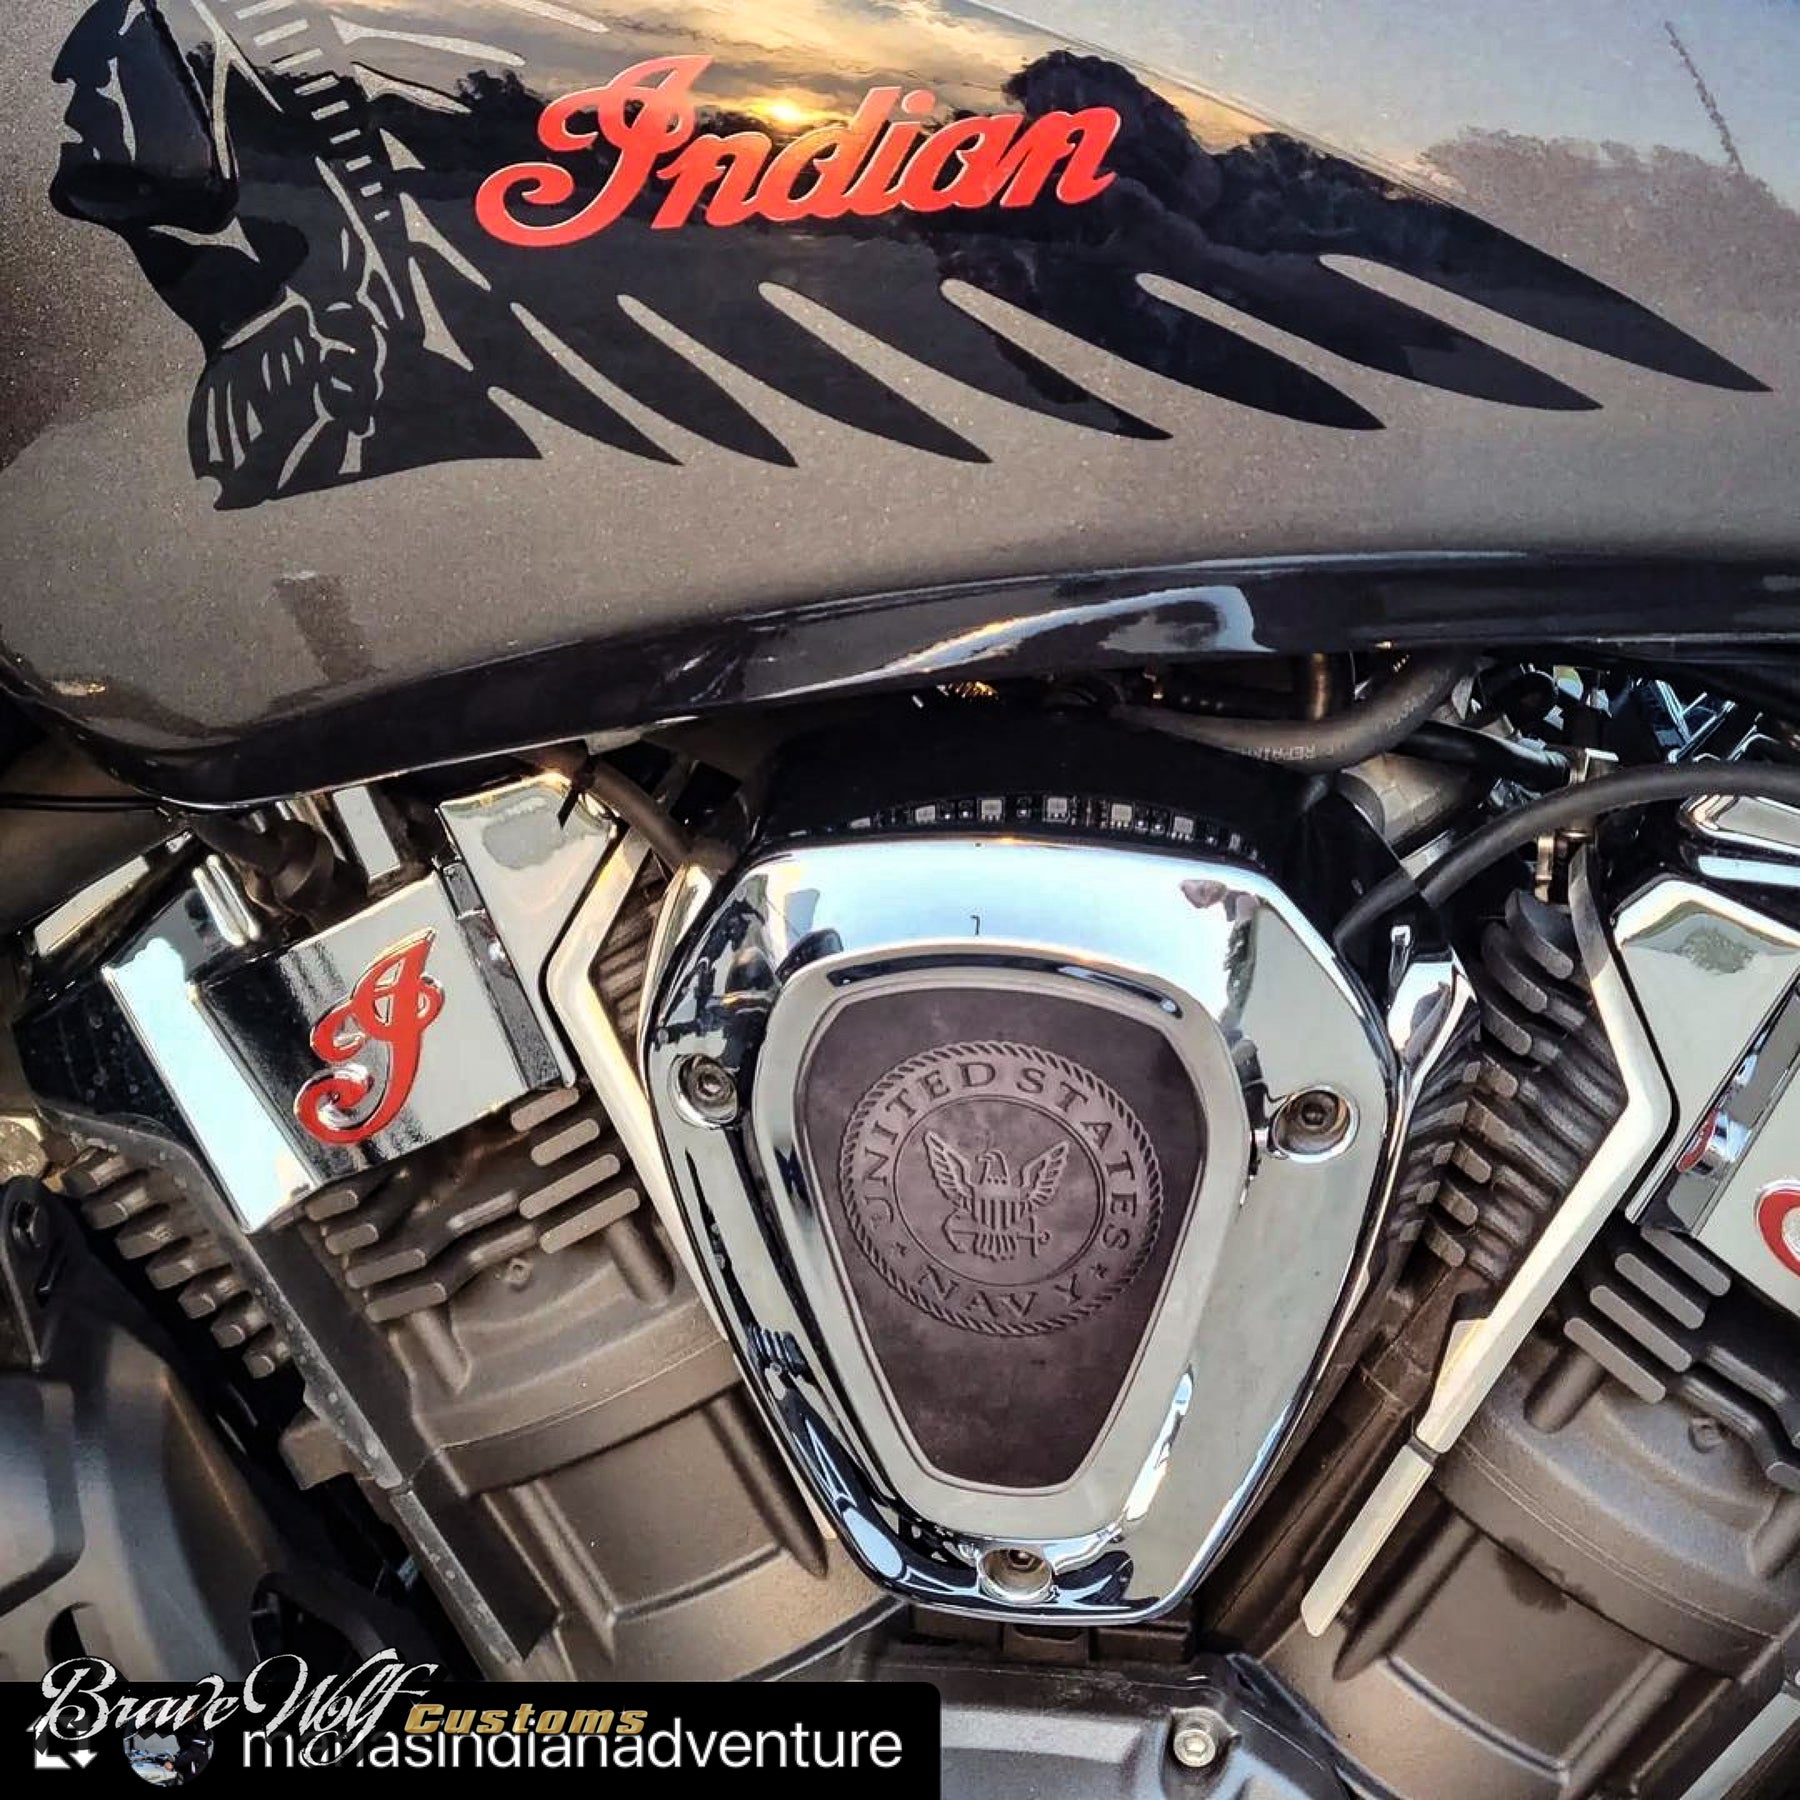
Powerplus Engine Accent Kit - America
Regular price $35.00
Shipping calculated at checkout.
Stock Notice:
All style options for our Powerplus Engine Accent kits are usually in stock. However, they are produced in manufacturing runs so if they're out of stock at the time of your order, there may be a waiting period before we ship them out. If your order is time sensitive, feel free to contact us to check stock before ordering.

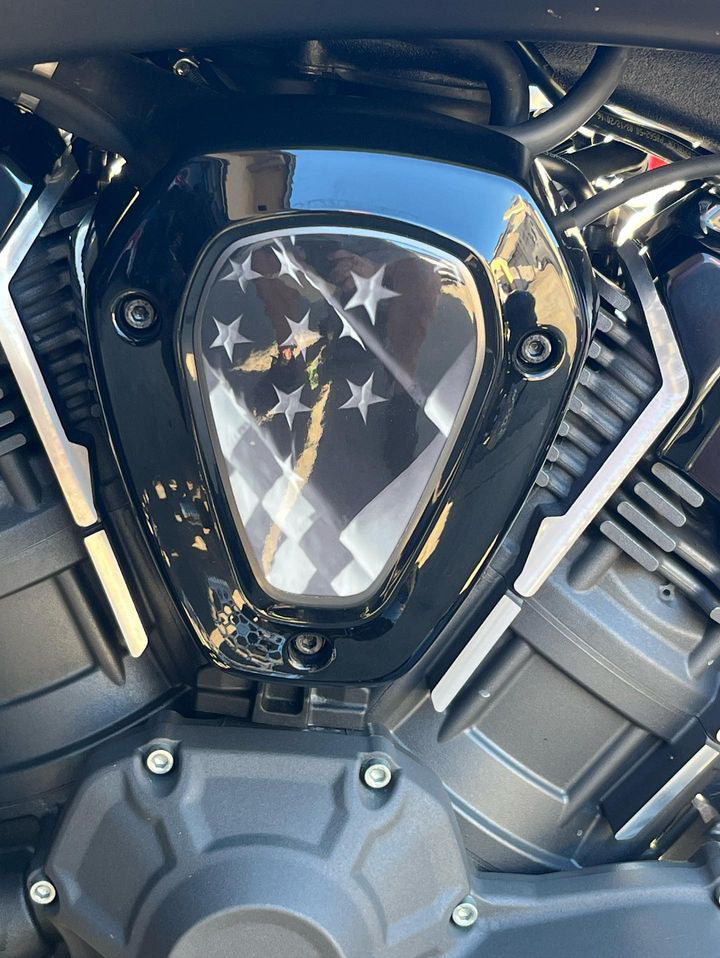
Engine accent kits for Indian Challenger and Pursuit, Powerplus Chieftain, and Powerplus Roadmaster.
Our UV DTF 3D PermaSticker Engine Accent kits combine the latest UV DTF technology with exceptional adhesive properties, ensuring that your accents will stick around for the long haul. With unparalleled durability, remarkable adhesive properties, and heat resistance capable of direct contact with your engine, they're the perfect material to add a custom touch to your bike.
Kit includes a total of 41 pieces. All the accents you need to do both sides of your engine AND plenty of extras in case you make a mistake during installation. + 2 Brave Wolf logos. The kit comes on a 17.5" backing sheet with with a transfer layer on top.
We're offering these in a stunning 20 different color combination styles, but if we don't have the combo you want, consider purchasing multiple sets to mix-and-match and you'll save 20% on each. We've priced them affordably so this should be an option.
Material Finish: an enamel-like finish. I wouldn't classify it as gloss or matte. Similar to egg-shell finish.
Installation:
These accents will need to be installed on a warm, clean, and dry engine. Do not attempt to install them cold or with condensation on the surface. You can run your bike to get the engine warm, but not hot, or use a hair dryer/heat gun. Installing these in winter months will be more difficult. Use scissors to separate each individual piece from the sheet. A pair of tweezers can be helpful to hold the accents in proper placement during installation. Once in place, use a firm object to press/rub over the full surface before peeling off the top transfer layer. Go slow while peeling the transfer layer. If the accent peels up without separating from the transfer, place it back down and press it more firmly into place. Because the surface is curved, the “I” will be the most challenging piece, so cut out around it as closely as possible to make it easier to position.


Powerplus Engine Accent Kit - Royal Purple
Regular price $35.00
Shipping calculated at checkout.
Stock Notice:
All style options for our Powerplus Engine Accent kits are usually in stock. However, they are produced in manufacturing runs so if they're out of stock at the time of your order, there may be a waiting period before we ship them out. If your order is time sensitive, feel free to contact us to check stock before ordering.
Engine accent kits for Indian Challenger and Pursuit, Powerplus Chieftain, and Powerplus Roadmaster.
Our UV DTF 3D PermaSticker Engine Accent kits combine the latest UV DTF technology with exceptional adhesive properties, ensuring that your accents will stick around for the long haul. With unparalleled durability, remarkable adhesive properties, and heat resistance capable of direct contact with your engine, they're the perfect material to add a custom touch to your bike.
Kit includes a total of 41 pieces. All the accents you need to do both sides of your engine AND plenty of extras in case you make a mistake during installation. + 2 Brave Wolf logos. The kit comes on a 17.5" backing sheet with with a transfer layer on top.
We're offering these in a stunning 20 different color combination styles, but if we don't have the combo you want, consider purchasing multiple sets to mix-and-match and you'll save 20% on each. We've priced them affordably so this should be an option.
Material Finish: an enamel-like finish. I wouldn't classify it as gloss or matte. Similar to egg-shell finish.
Installation:
These accents will need to be installed on a warm, clean, and dry engine. Do not attempt to install them cold or with condensation on the surface. You can run your bike to get the engine warm, but not hot, or use a hair dryer/heat gun. Installing these in winter months will be more difficult. Use scissors to separate each individual piece from the sheet. A pair of tweezers can be helpful to hold the accents in proper placement during installation. Once in place, use a firm object to press/rub over the full surface before peeling off the top transfer layer. Go slow while peeling the transfer layer. If the accent peels up without separating from the transfer, place it back down and press it more firmly into place. Because the surface is curved, the “I” will be the most challenging piece, so cut out around it as closely as possible to make it easier to position.

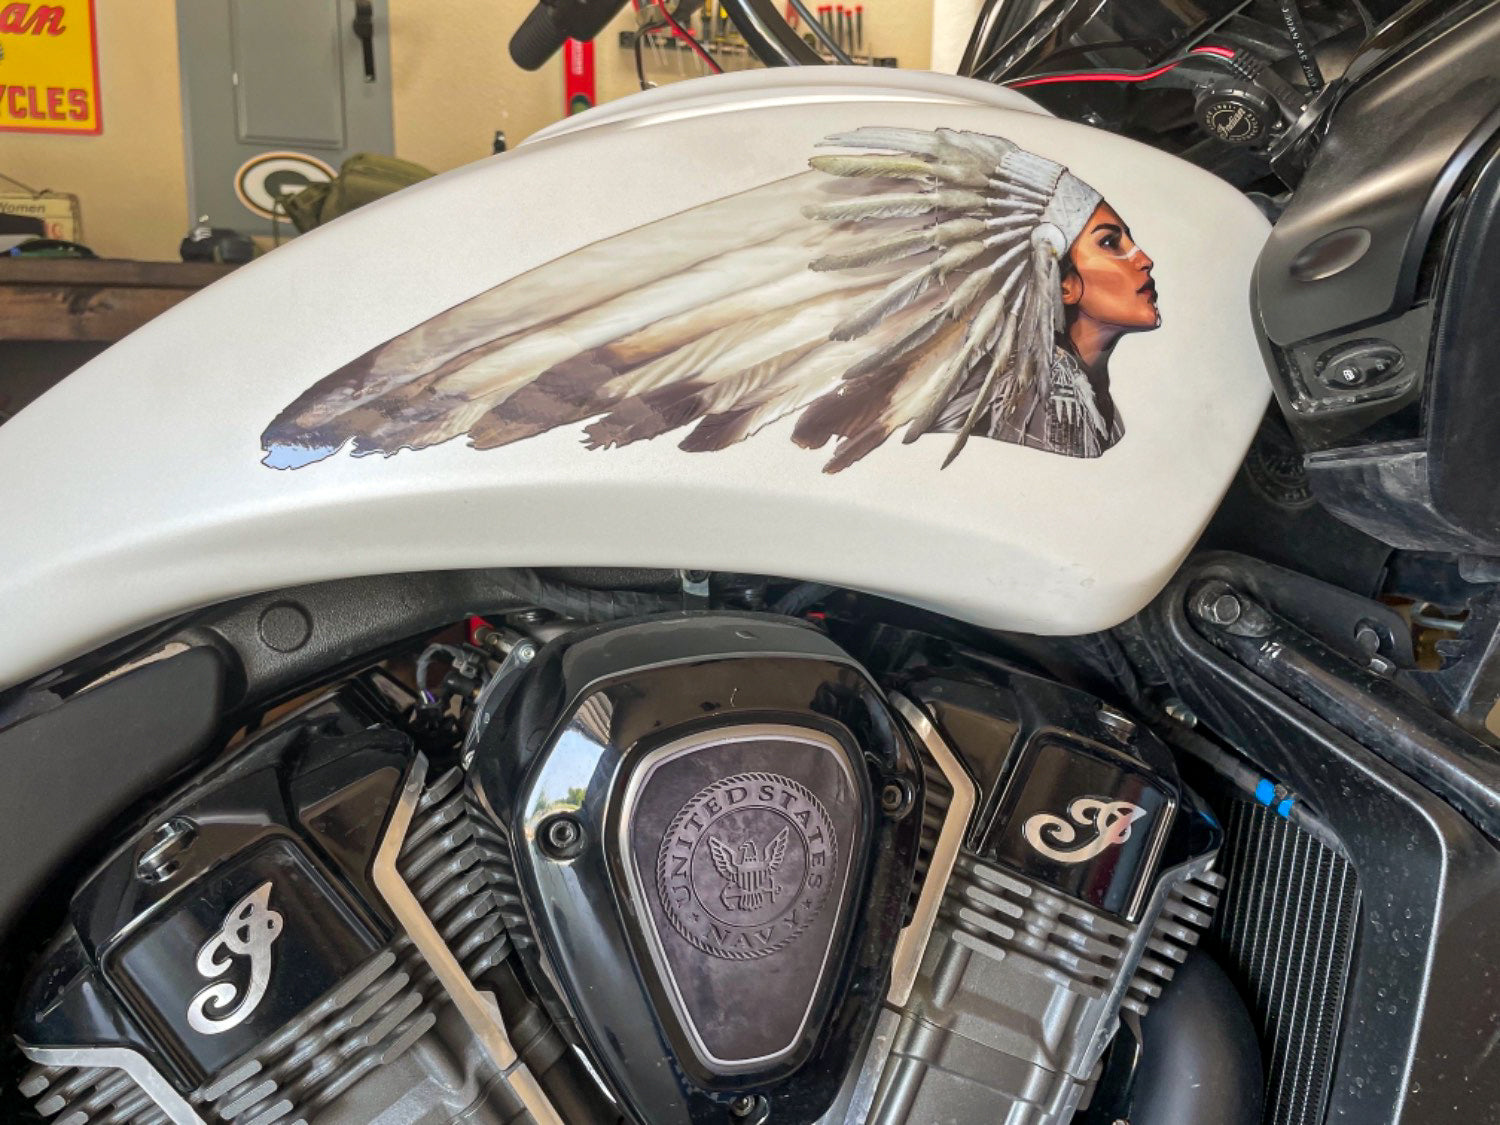
Powerplus Engine Accent Kit - White
Regular price $35.00
Shipping calculated at checkout.
Stock Notice:
All style options for our Powerplus Engine Accent kits are usually in stock. However, they are produced in manufacturing runs so if they're out of stock at the time of your order, there may be a waiting period before we ship them out. If your order is time sensitive, feel free to contact us to check stock before ordering.
Engine accent kits for Indian Challenger and Pursuit, Powerplus Chieftain, and Powerplus Roadmaster.
Our UV DTF 3D PermaSticker Engine Accent kits combine the latest UV DTF technology with exceptional adhesive properties, ensuring that your accents will stick around for the long haul. With unparalleled durability, remarkable adhesive properties, and heat resistance capable of direct contact with your engine, they're the perfect material to add a custom touch to your bike.
Kit includes a total of 41 pieces. All the accents you need to do both sides of your engine AND plenty of extras in case you make a mistake during installation. + 2 Brave Wolf logos. The kit comes on a 17.5" backing sheet with with a transfer layer on top.
We're offering these in a stunning 20 different color combination styles, but if we don't have the combo you want, consider purchasing multiple sets to mix-and-match and you'll save 20% on each. We've priced them affordably so this should be an option.
Material Finish: an enamel-like finish. I wouldn't classify it as gloss or matte. Similar to egg-shell finish.
Installation:
These accents will need to be installed on a warm, clean, and dry engine. Do not attempt to install them cold or with condensation on the surface. You can run your bike to get the engine warm, but not hot, or use a hair dryer/heat gun. Installing these in winter months will be more difficult. Use scissors to separate each individual piece from the sheet. A pair of tweezers can be helpful to hold the accents in proper placement during installation. Once in place, use a firm object to press/rub over the full surface before peeling off the top transfer layer. Go slow while peeling the transfer layer. If the accent peels up without separating from the transfer, place it back down and press it more firmly into place. Because the surface is curved, the “I” will be the most challenging piece, so cut out around it as closely as possible to make it easier to position.