At Brave Wolf Customs, you'll find weatherproof motorcycle decals and a comprehensive selection of aftermarket parts and accessories for your Indian Challenger or Pursuit. Our assortment is designed to personalize your bike, making it distinctly yours. We've joined forces with industry partners and friends to ensure you find everything you need under one roof. Aftermarket selection available on our site now also includes handpicked products from their offerings.
283 products
283 products


Powerplus Engine Accent Kit - Dark Horse
Regular price $35.00
Shipping calculated at checkout.
Stock Notice:
All style options for our Powerplus Engine Accent kits are usually in stock. However, they are produced in manufacturing runs so if they're out of stock at the time of your order, there may be a waiting period before we ship them out. If your order is time sensitive, feel free to contact us to check stock before ordering.
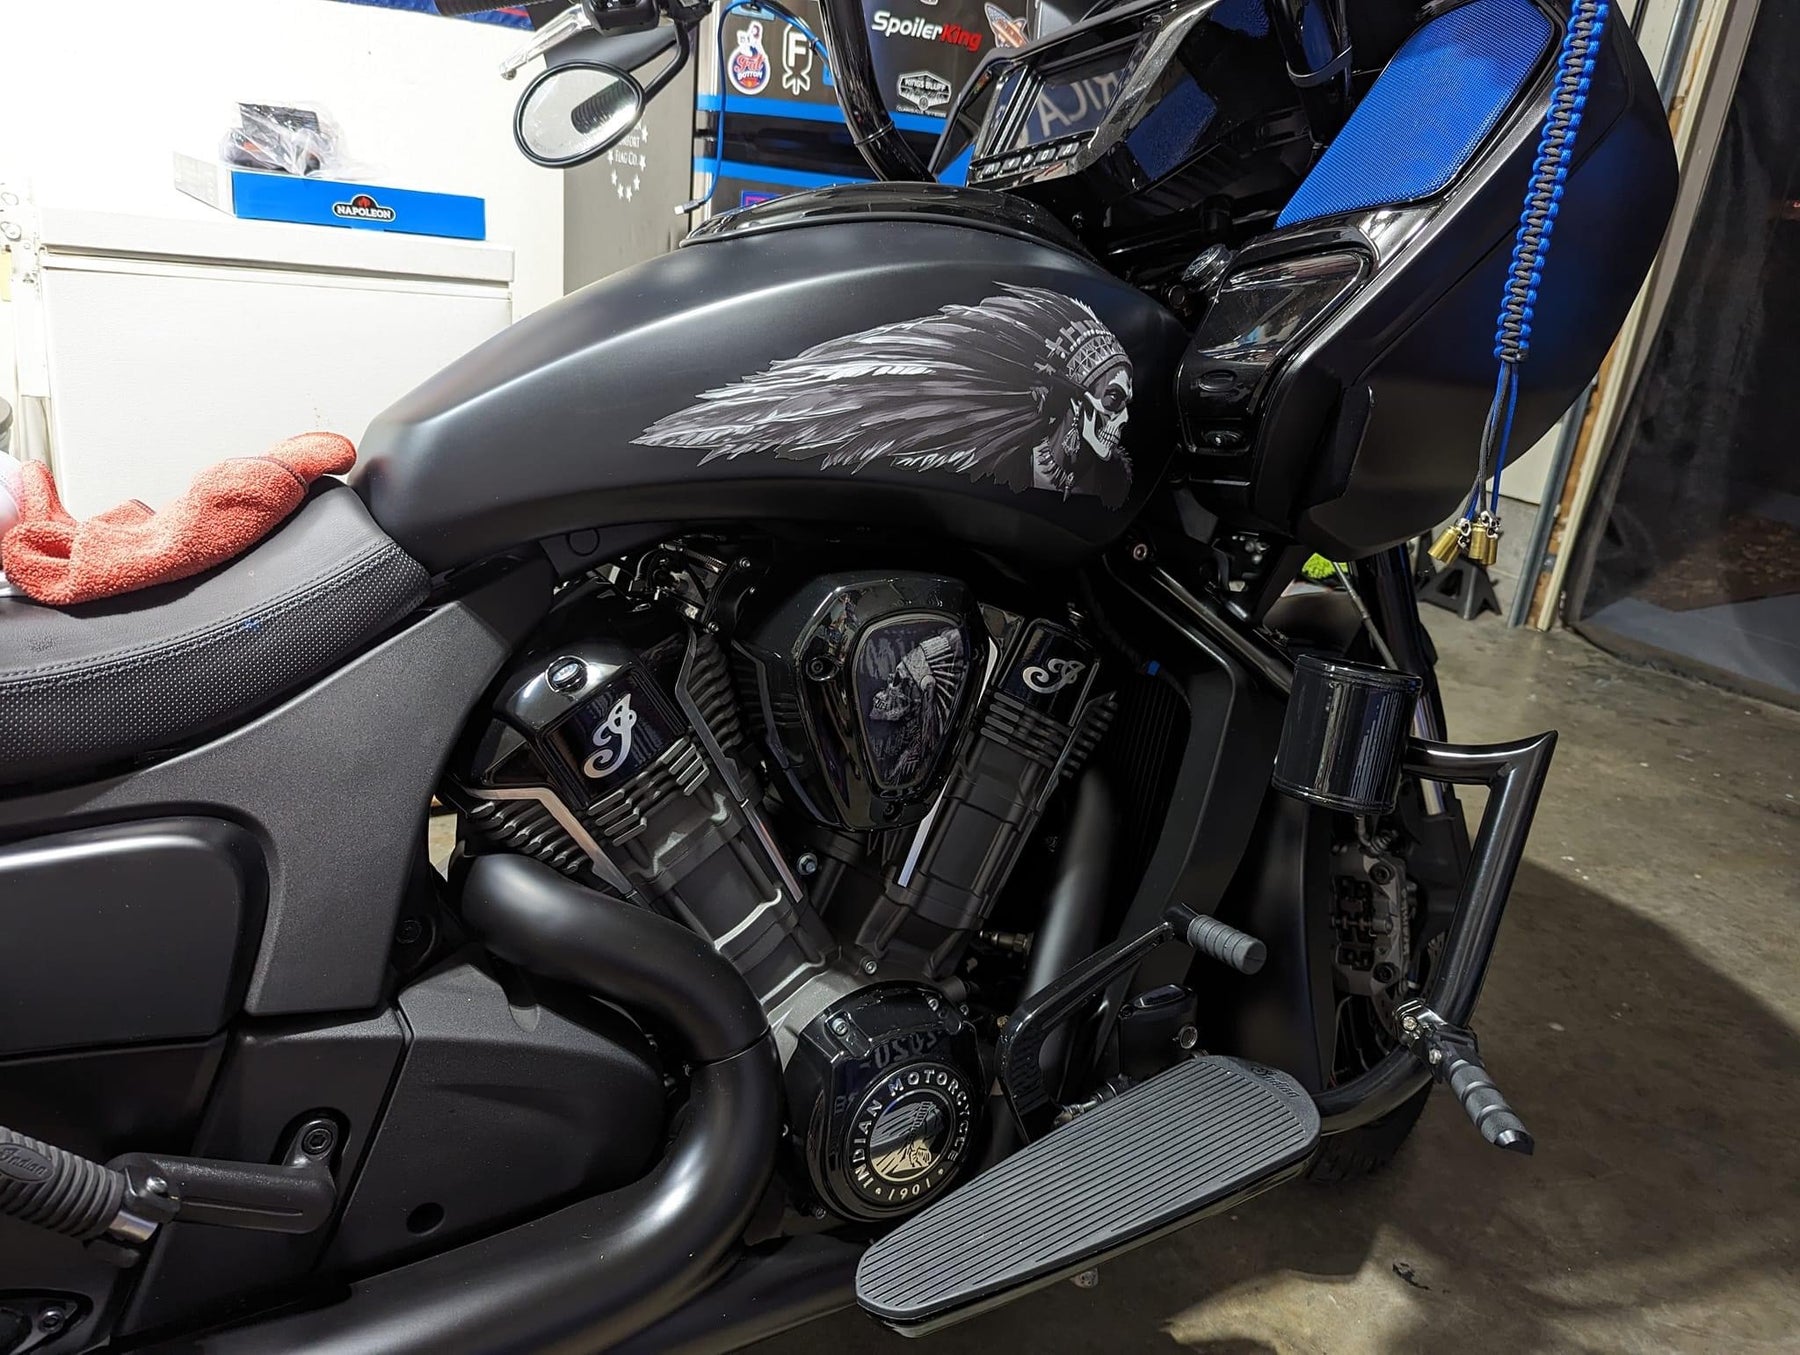
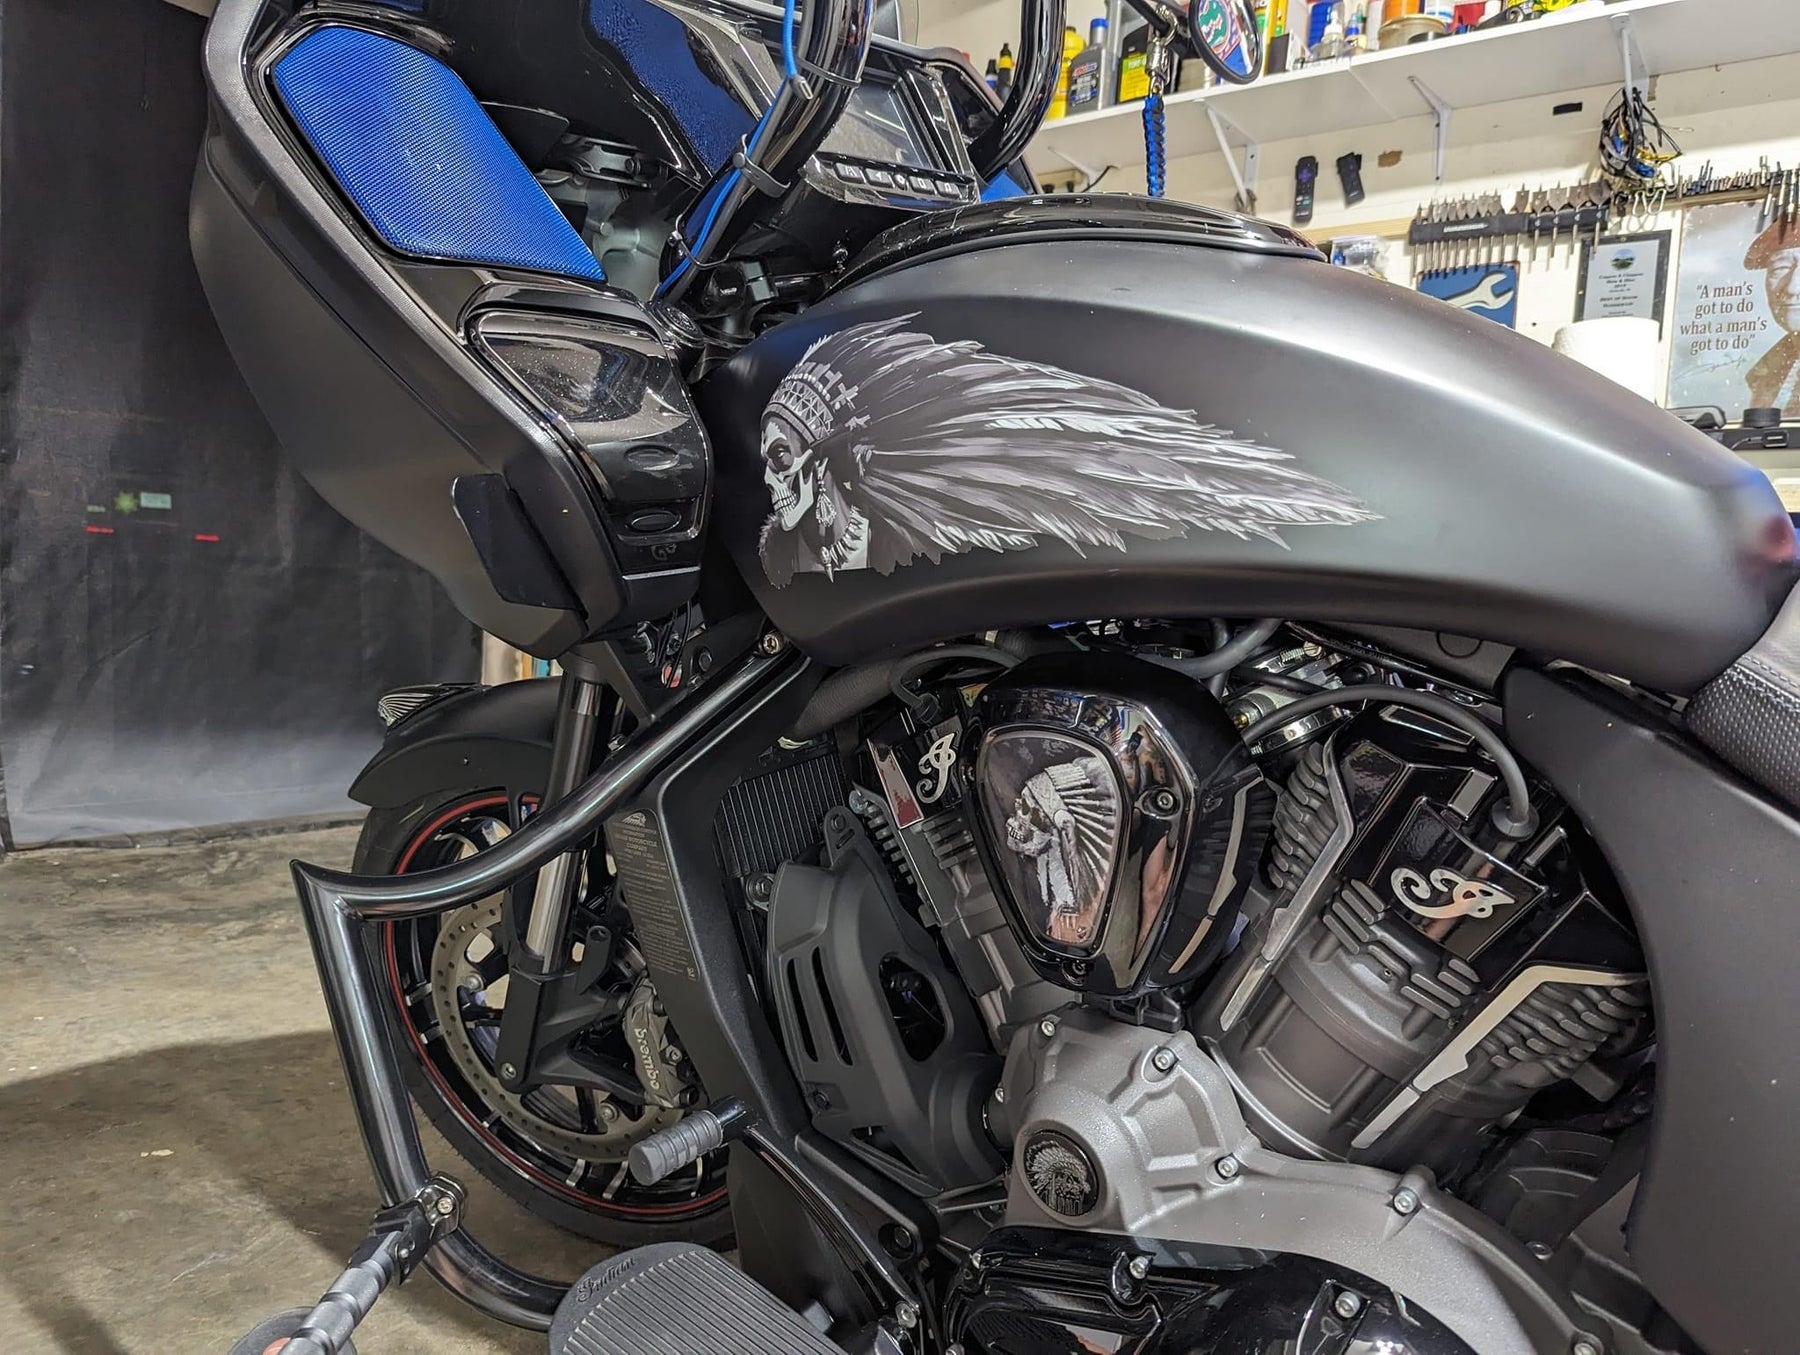
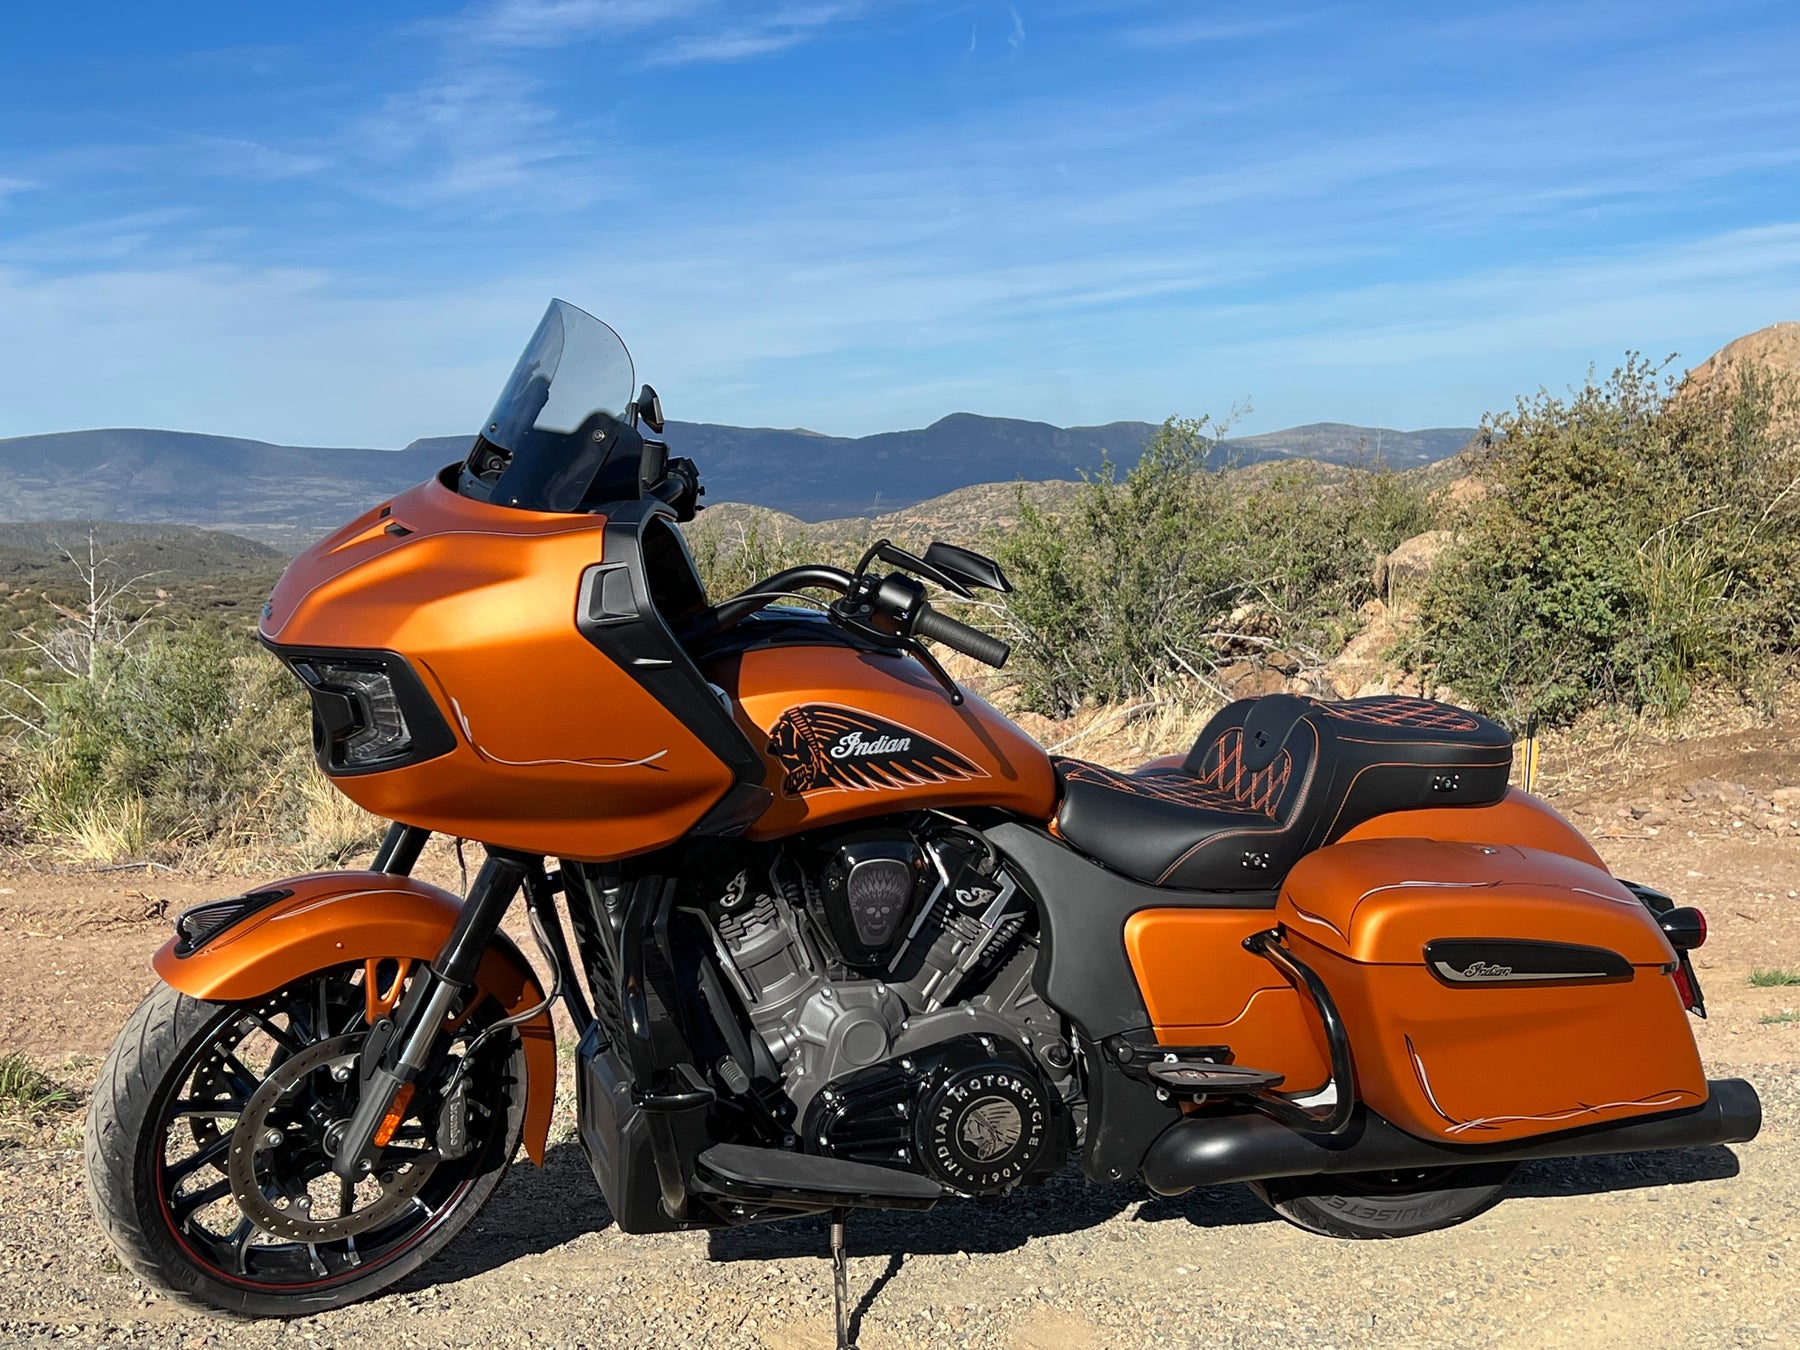
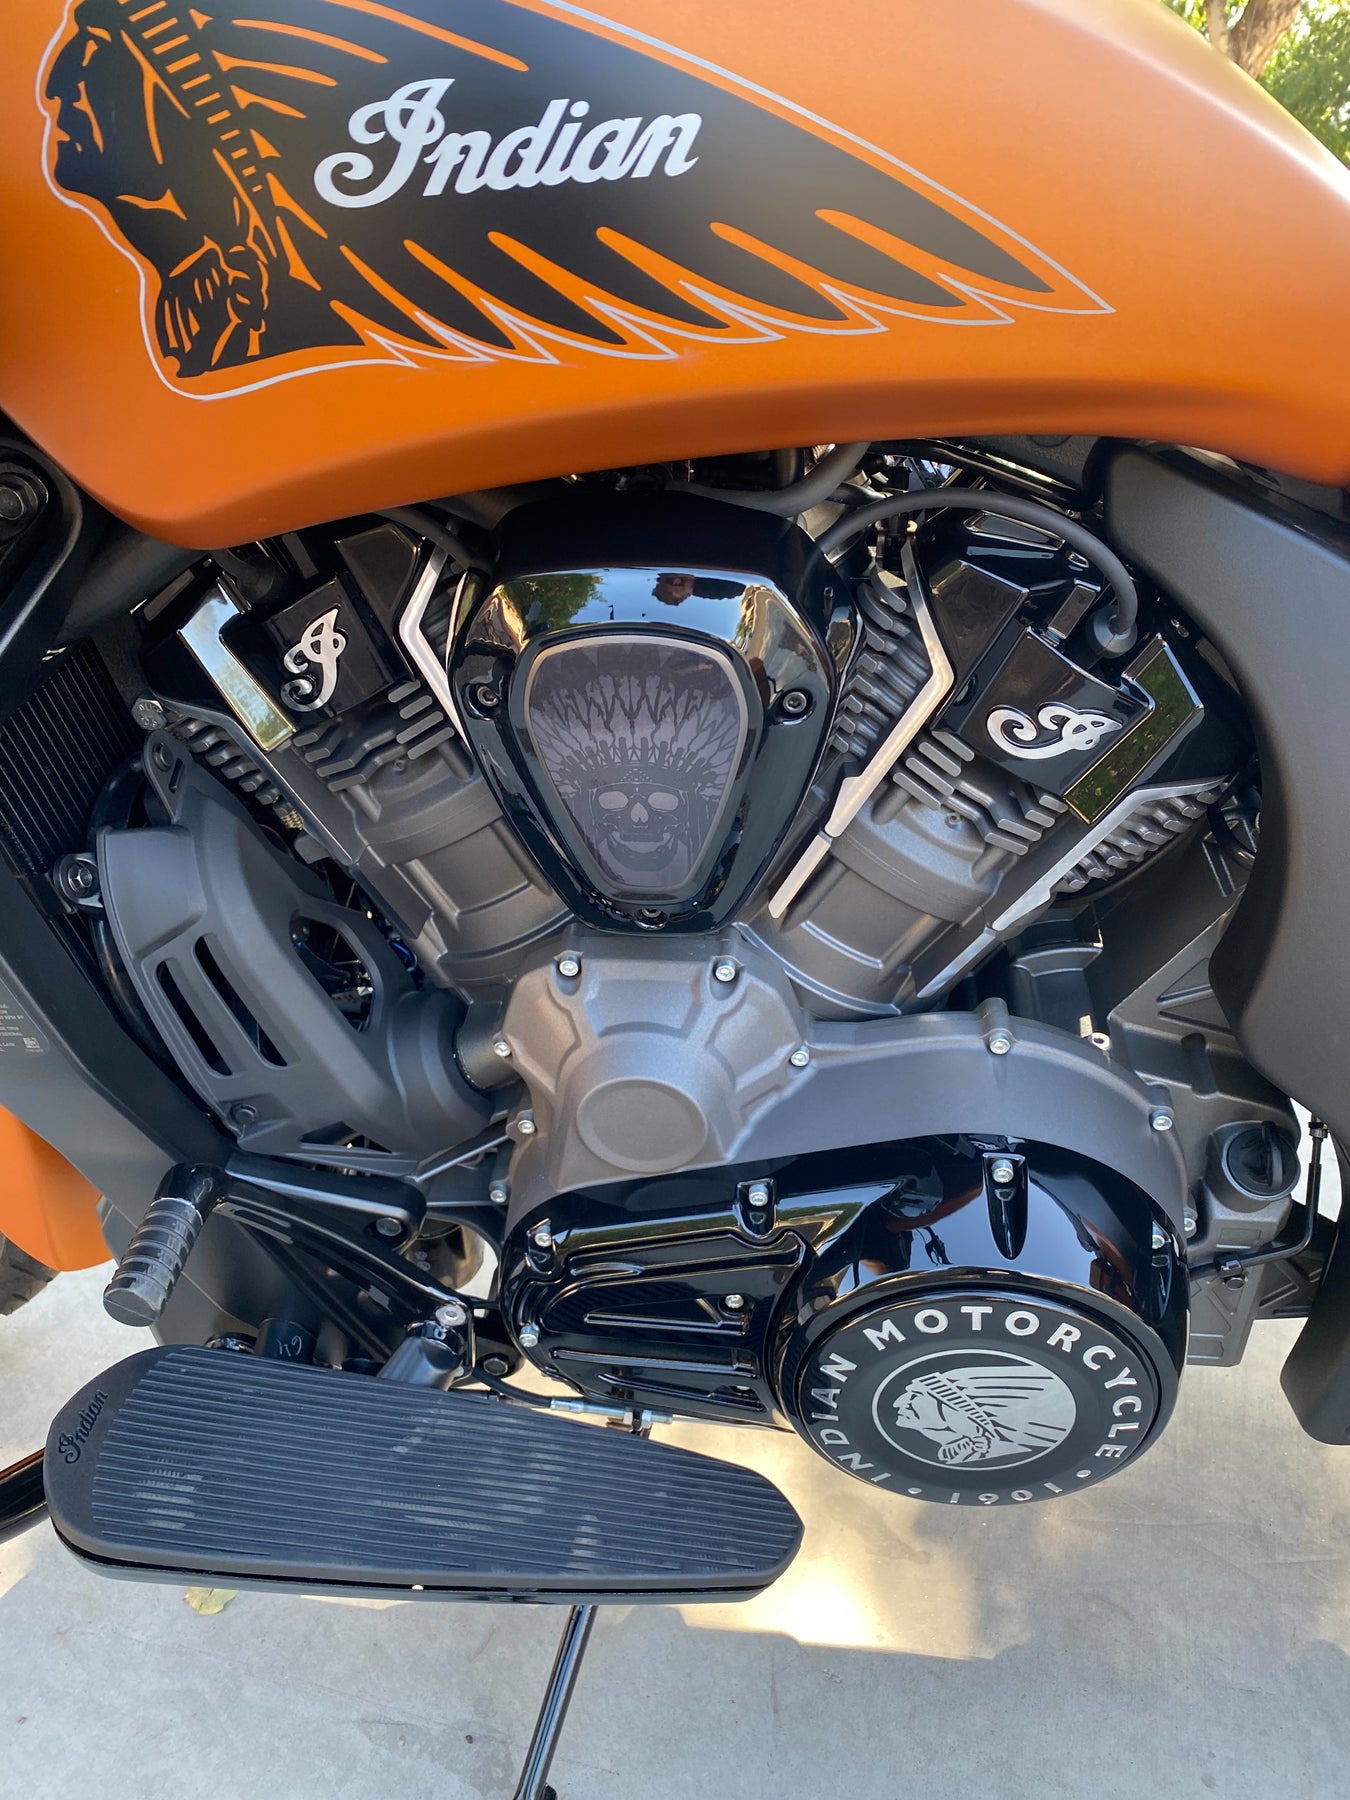
Engine accent kits for Indian Challenger and Pursuit, Powerplus Chieftain, and Powerplus Roadmaster.
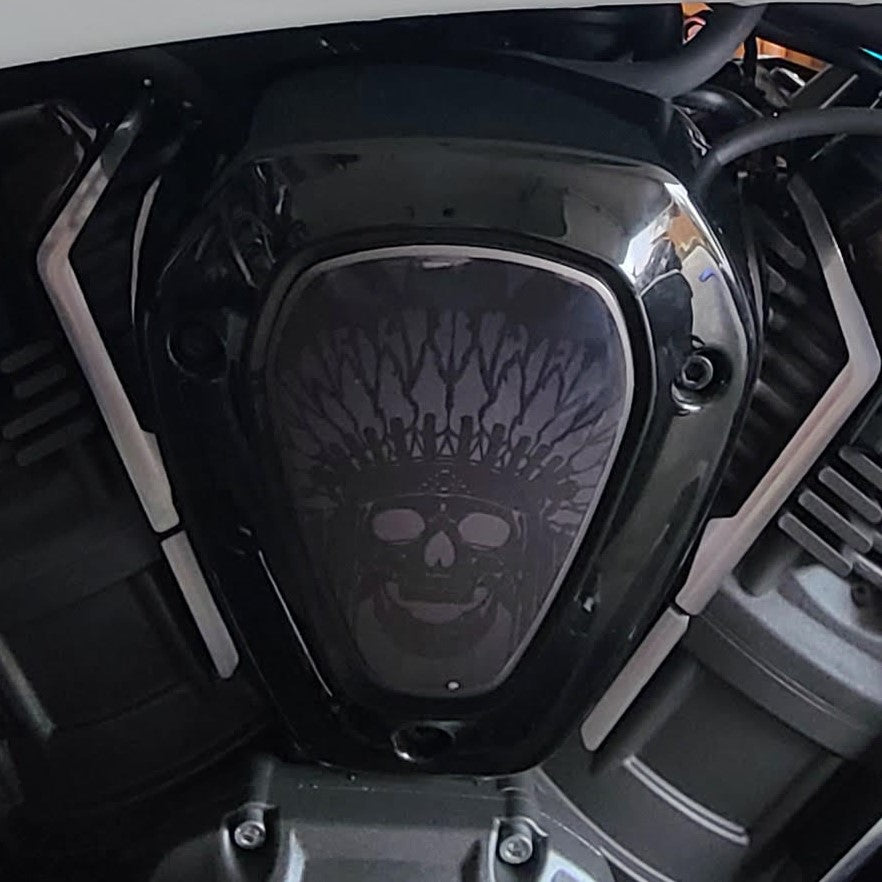
Our UV DTF 3D PermaSticker Engine Accent kits combine the latest UV DTF technology with exceptional adhesive properties, ensuring that your accents will stick around for the long haul. With unparalleled durability, remarkable adhesive properties, and heat resistance capable of direct contact with your engine, they're the perfect material to add a custom touch to your bike.
Kit includes a total of 41 pieces. All the accents you need to do both sides of your engine AND plenty of extras in case you make a mistake during installation. + 2 Brave Wolf logos. The kit comes on a 17.5" backing sheet with with a transfer layer on top.
We're offering these in a stunning 20 different color combination styles, but if we don't have the combo you want, consider purchasing multiple sets to mix-and-match and you'll save 20% on each. We've priced them affordably so this should be an option.
Material Finish: an enamel-like finish. I wouldn't classify it as gloss or matte. Similar to egg-shell finish.

Installation:
These accents will need to be installed on a warm, clean, and dry engine. Do not attempt to install them cold or with condensation on the surface. You can run your bike to get the engine warm, but not hot, or use a hair dryer/heat gun. Installing these in winter months will be more difficult. Use scissors to separate each individual piece from the sheet. A pair of tweezers can be helpful to hold the accents in proper placement during installation. Once in place, use a firm object to press/rub over the full surface before peeling off the top transfer layer. Go slow while peeling the transfer layer. If the accent peels up without separating from the transfer, place it back down and press it more firmly into place. Because the surface is curved, the “I” will be the most challenging piece, so cut out around it as closely as possible to make it easier to position.


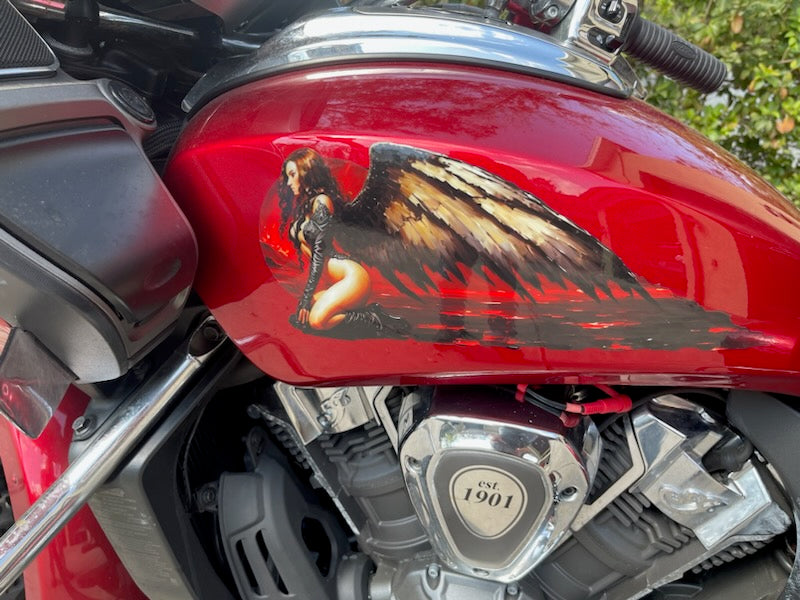
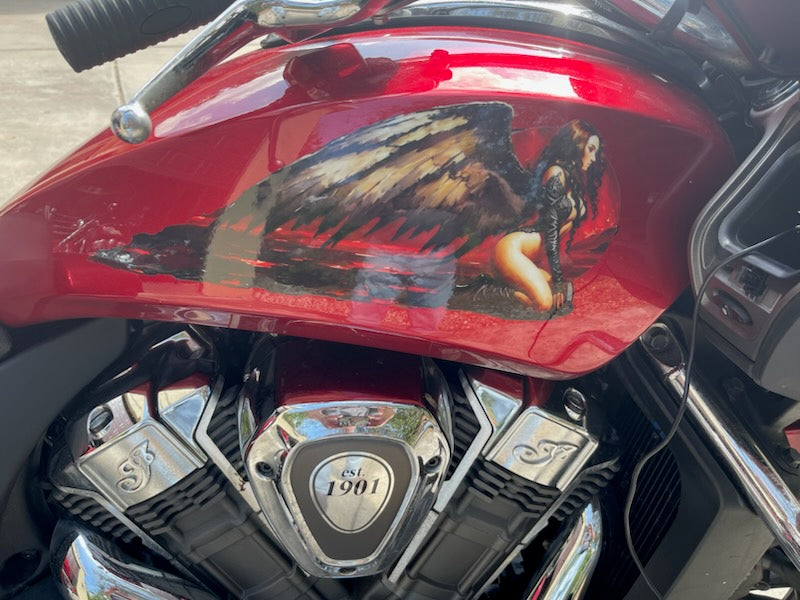
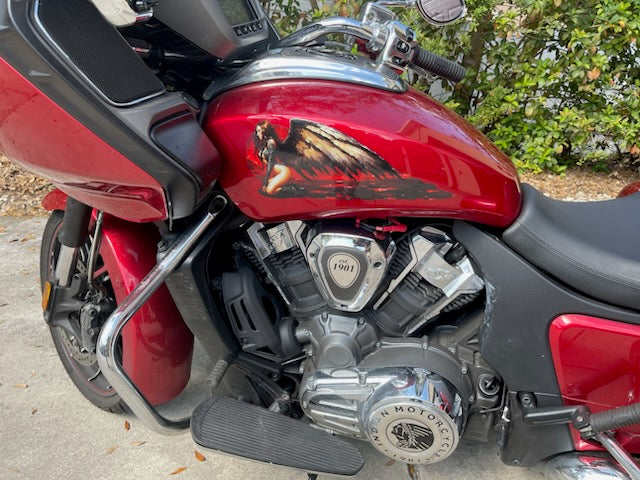
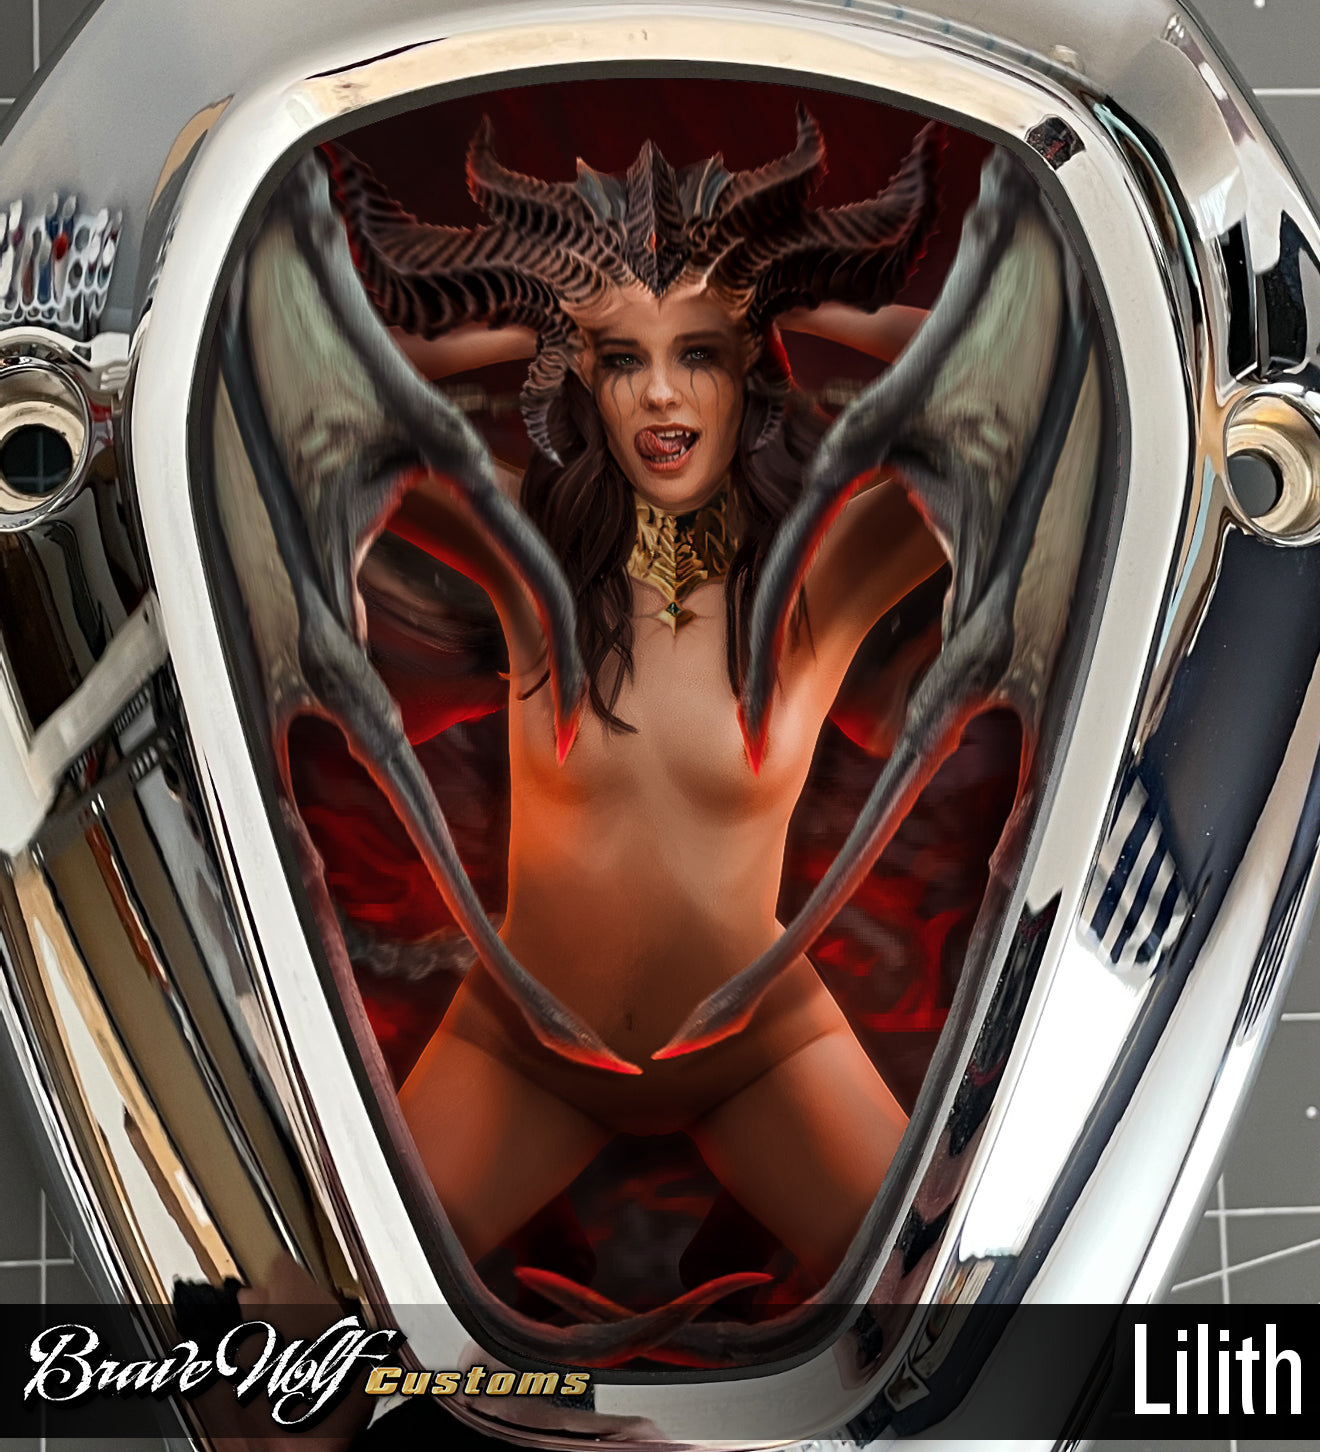
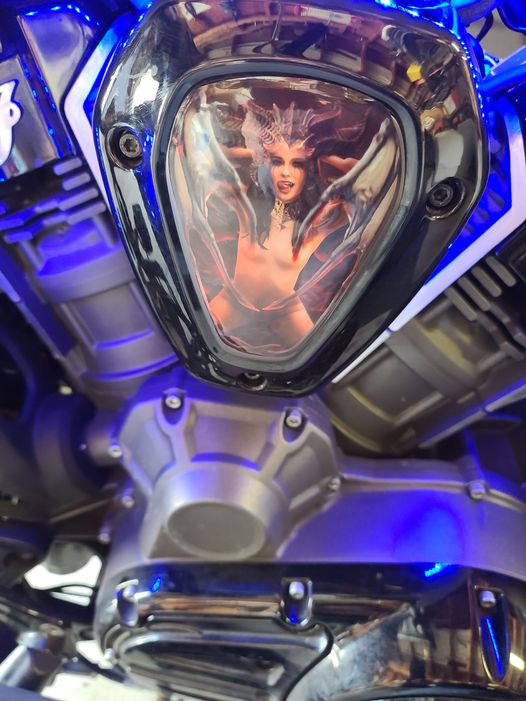
Lilith-2023 - Universal Tank Decal-Color
Regular price $100.00
Shipping calculated at checkout.
Stock Notice - usually in stock (may take approximately 2-3 weeks before shipping if not in stock at time of order)
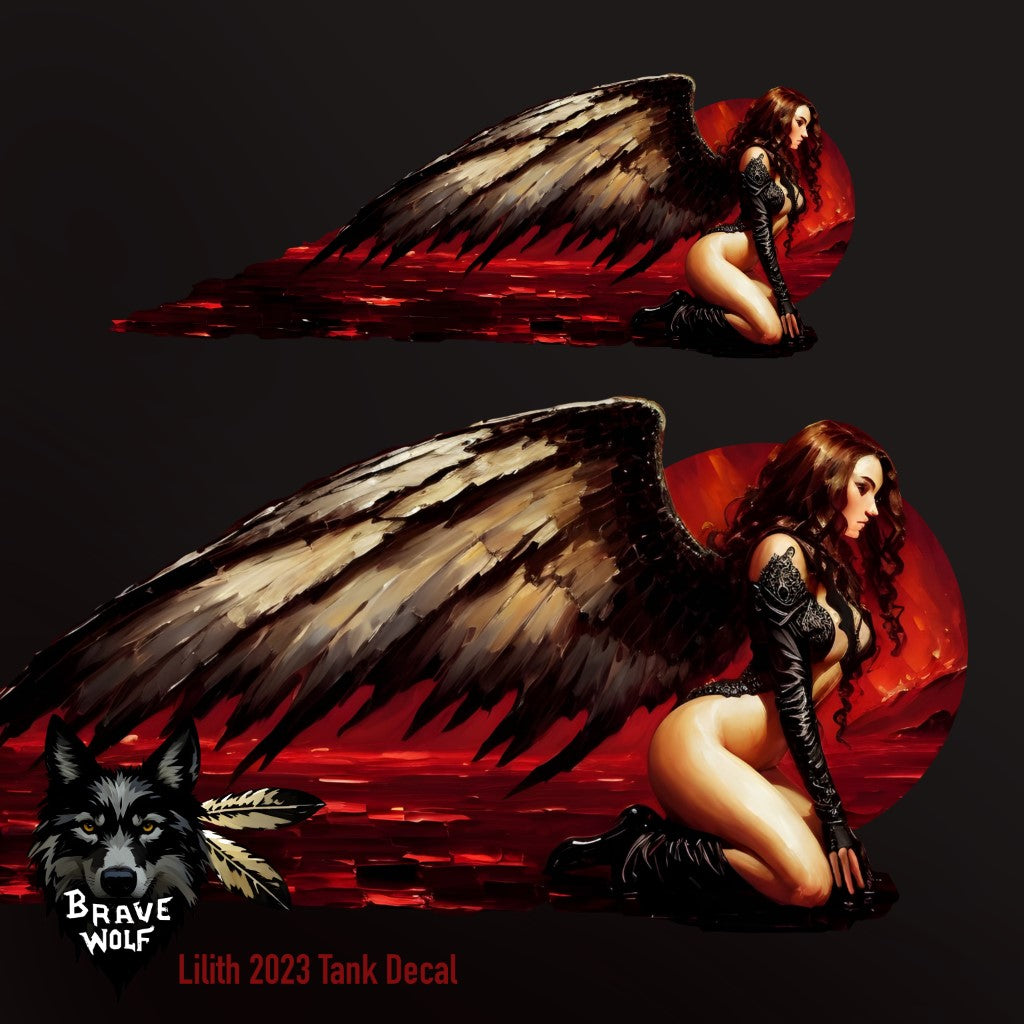
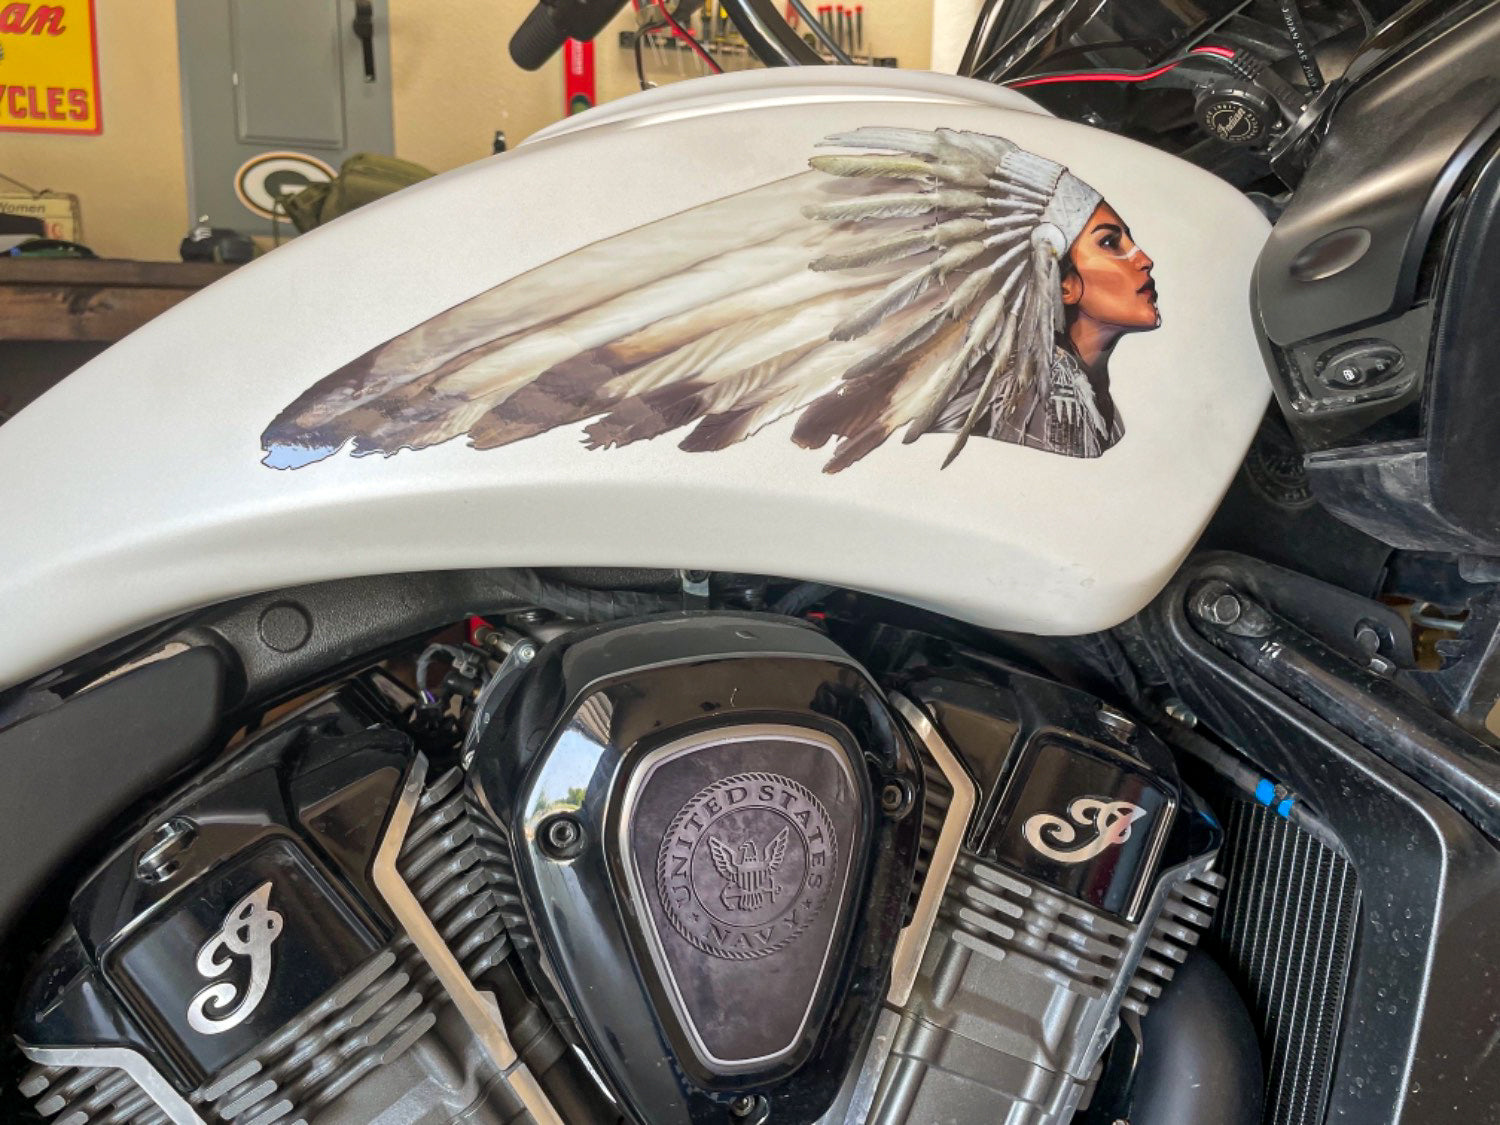
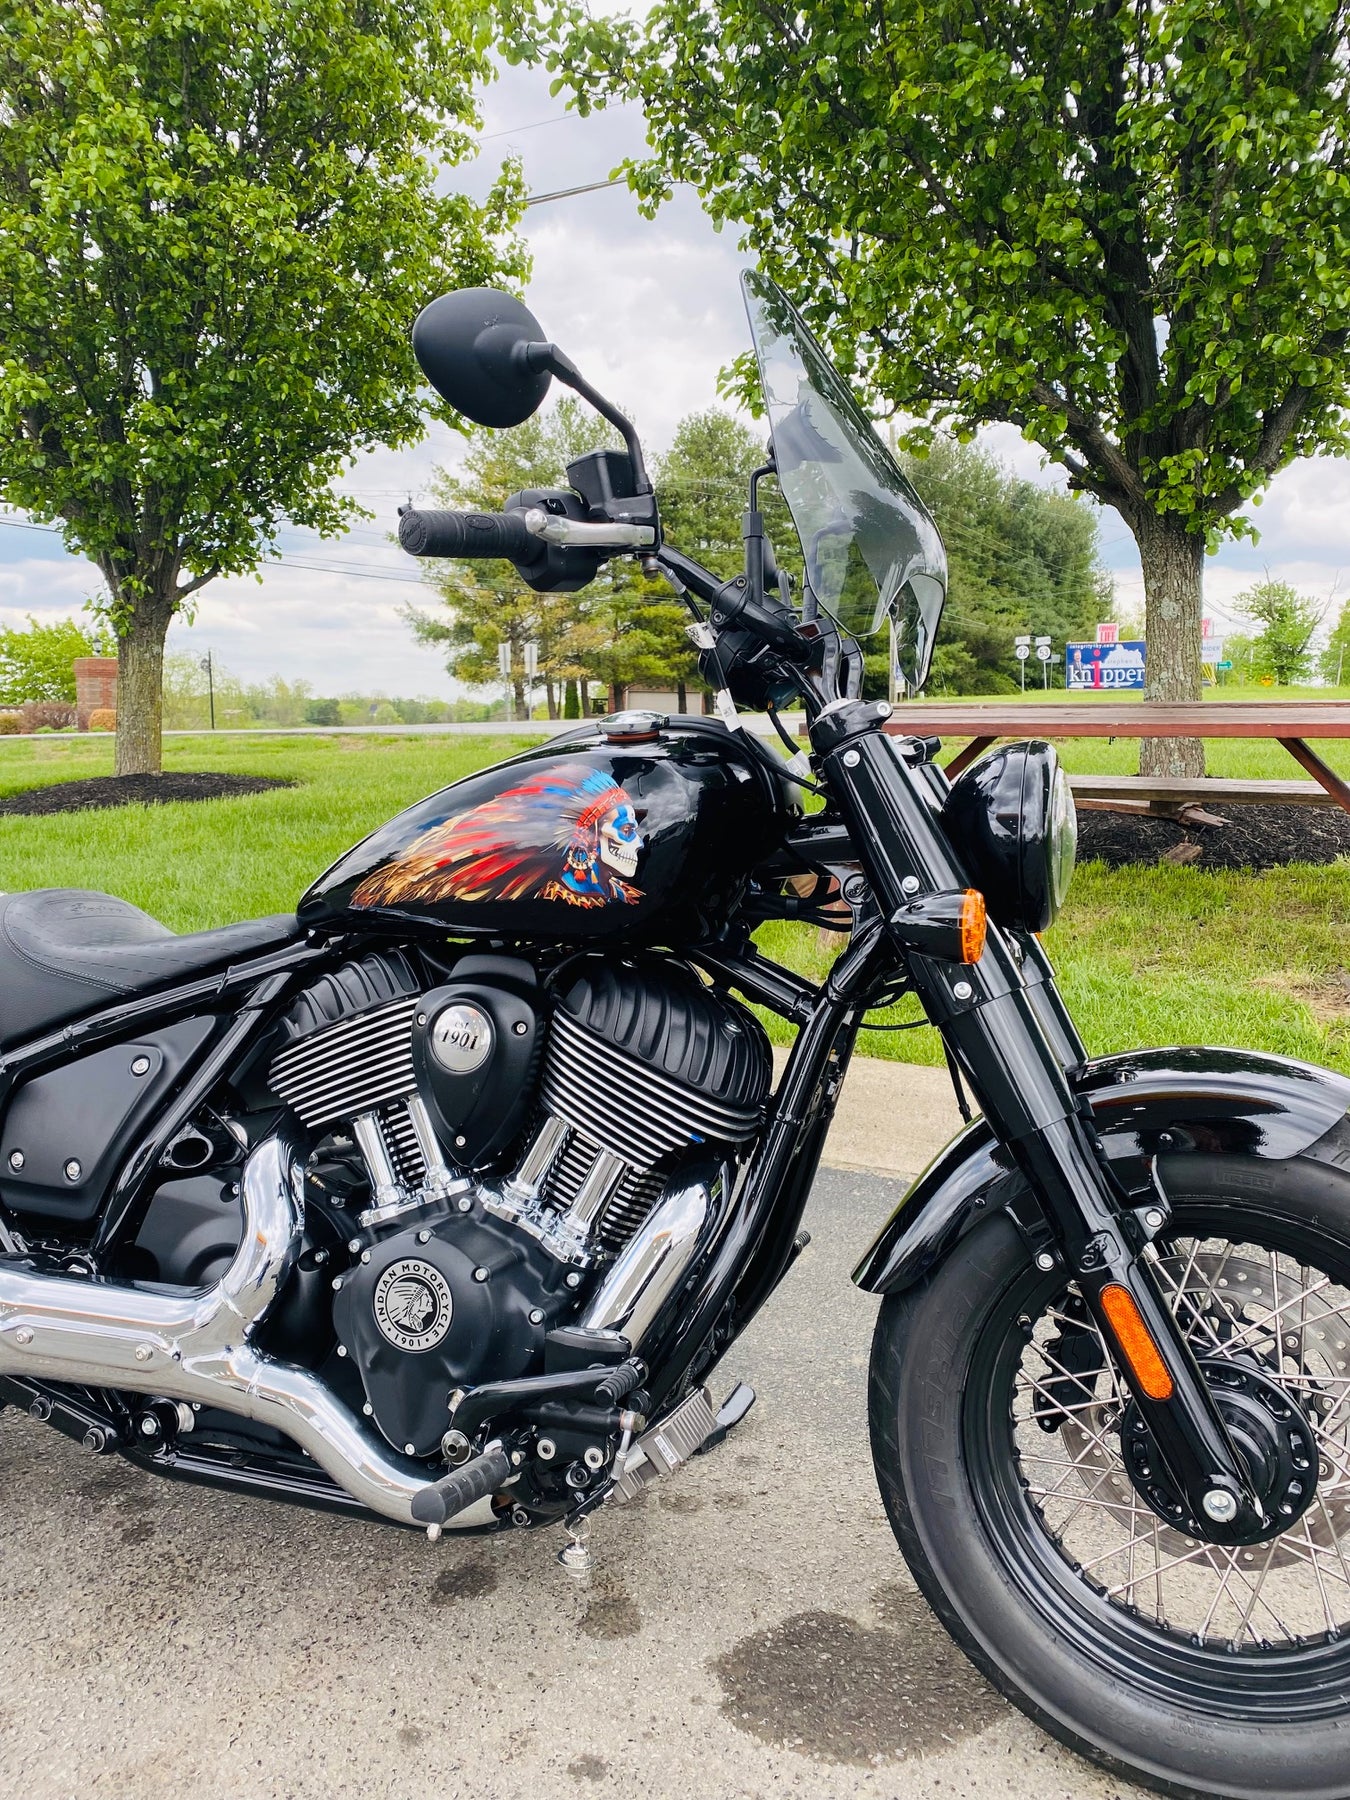
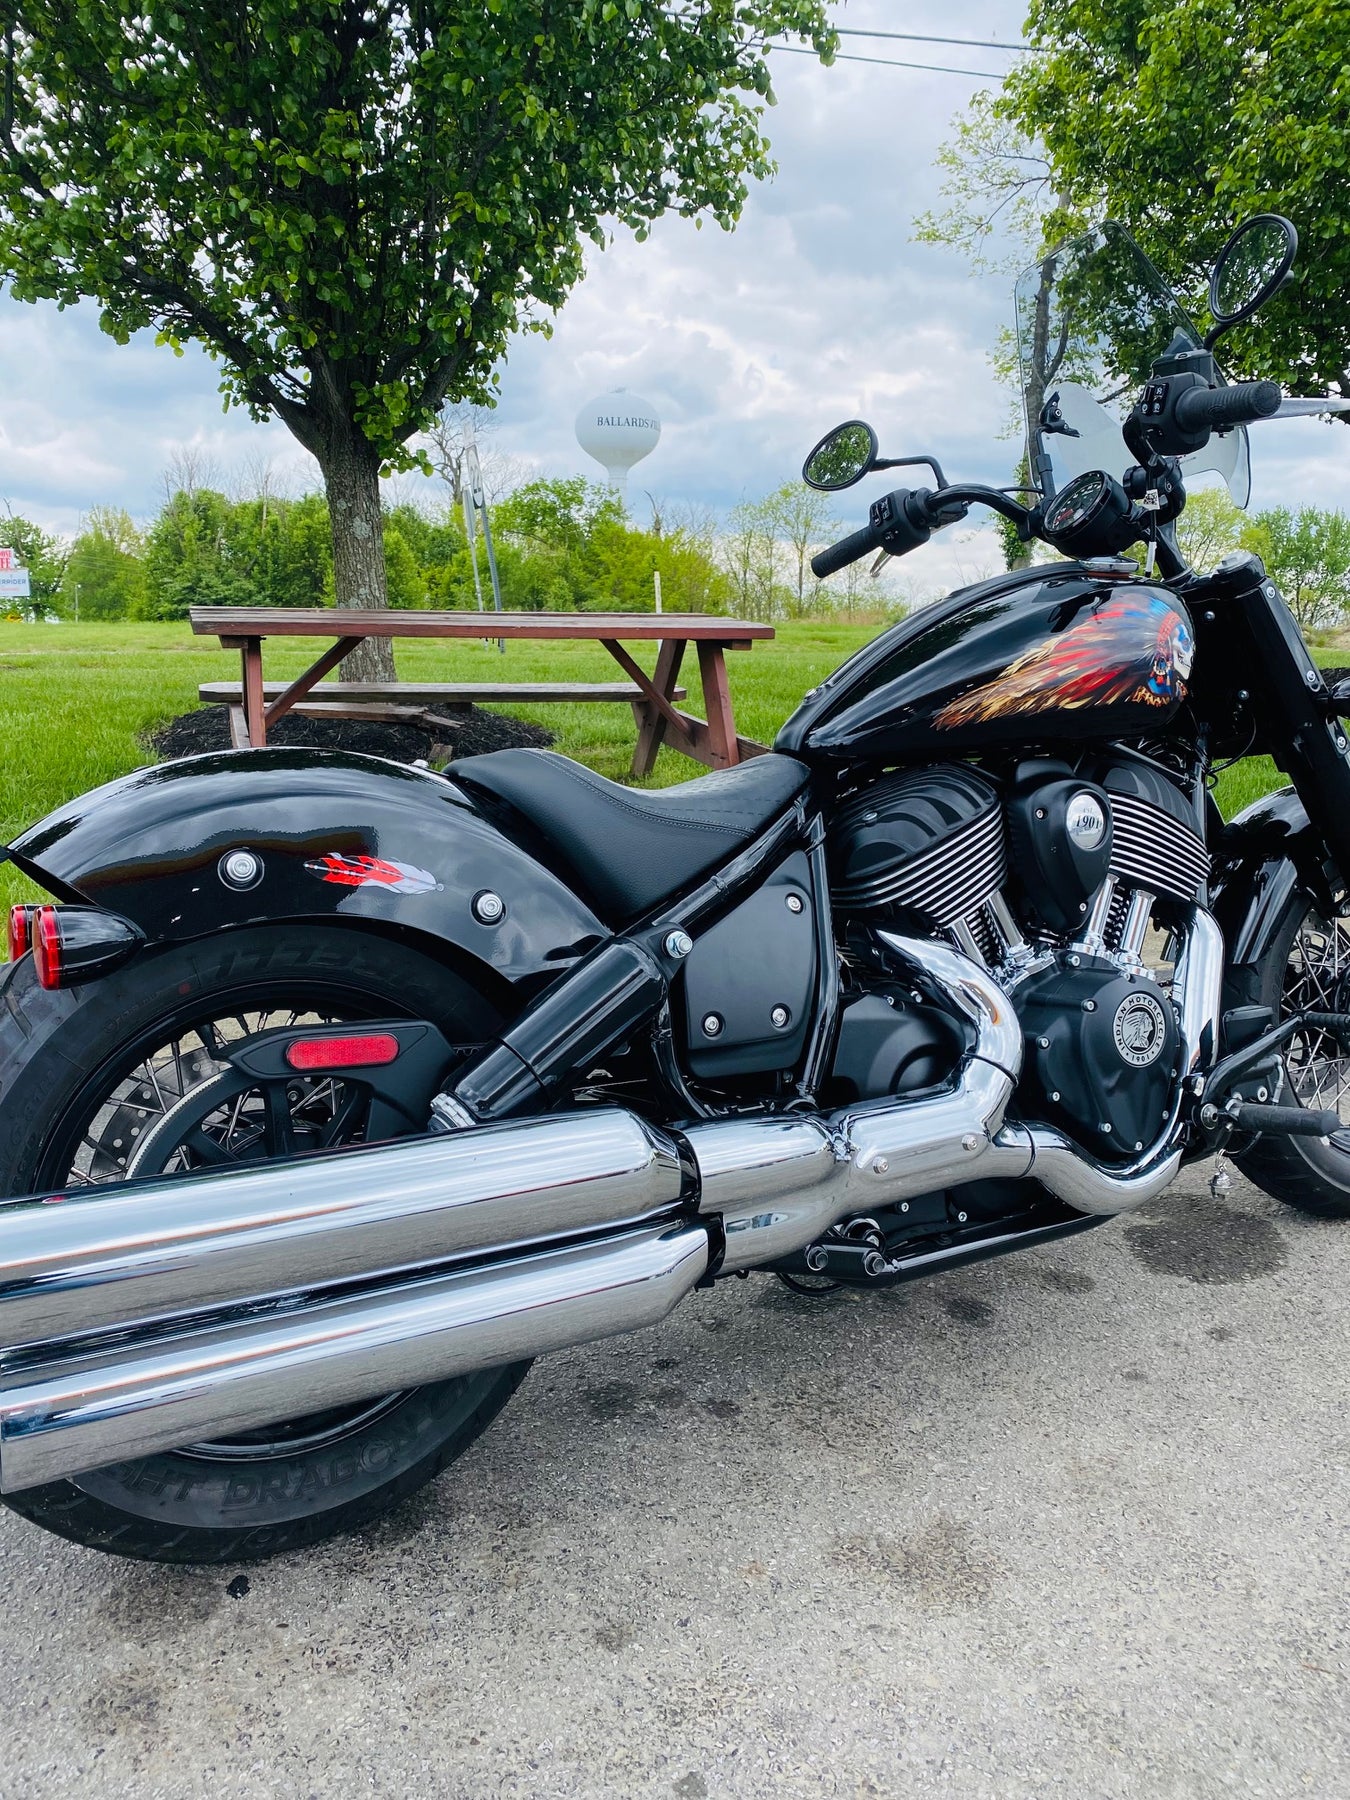
“Lilith-2023" Universal Tank Decals for all Brands and Models of Motorcycles
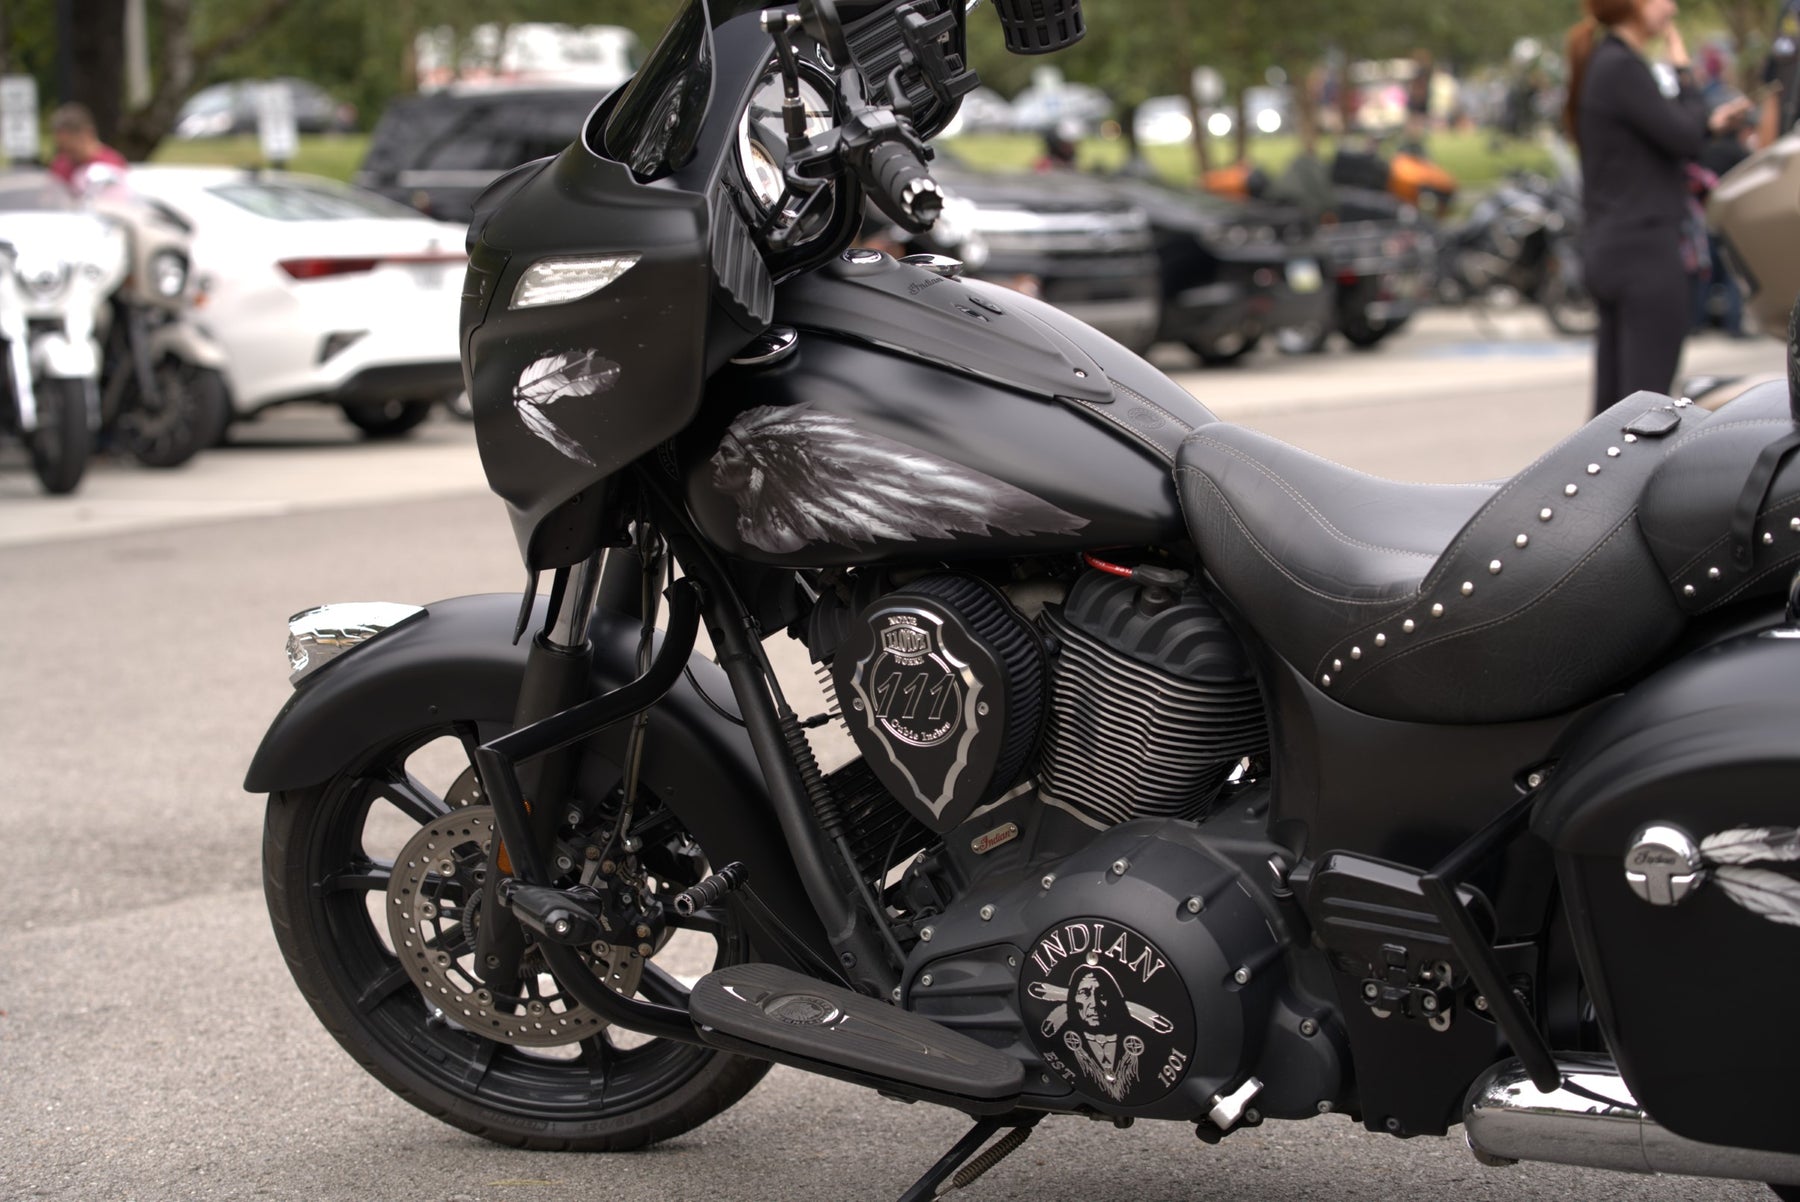
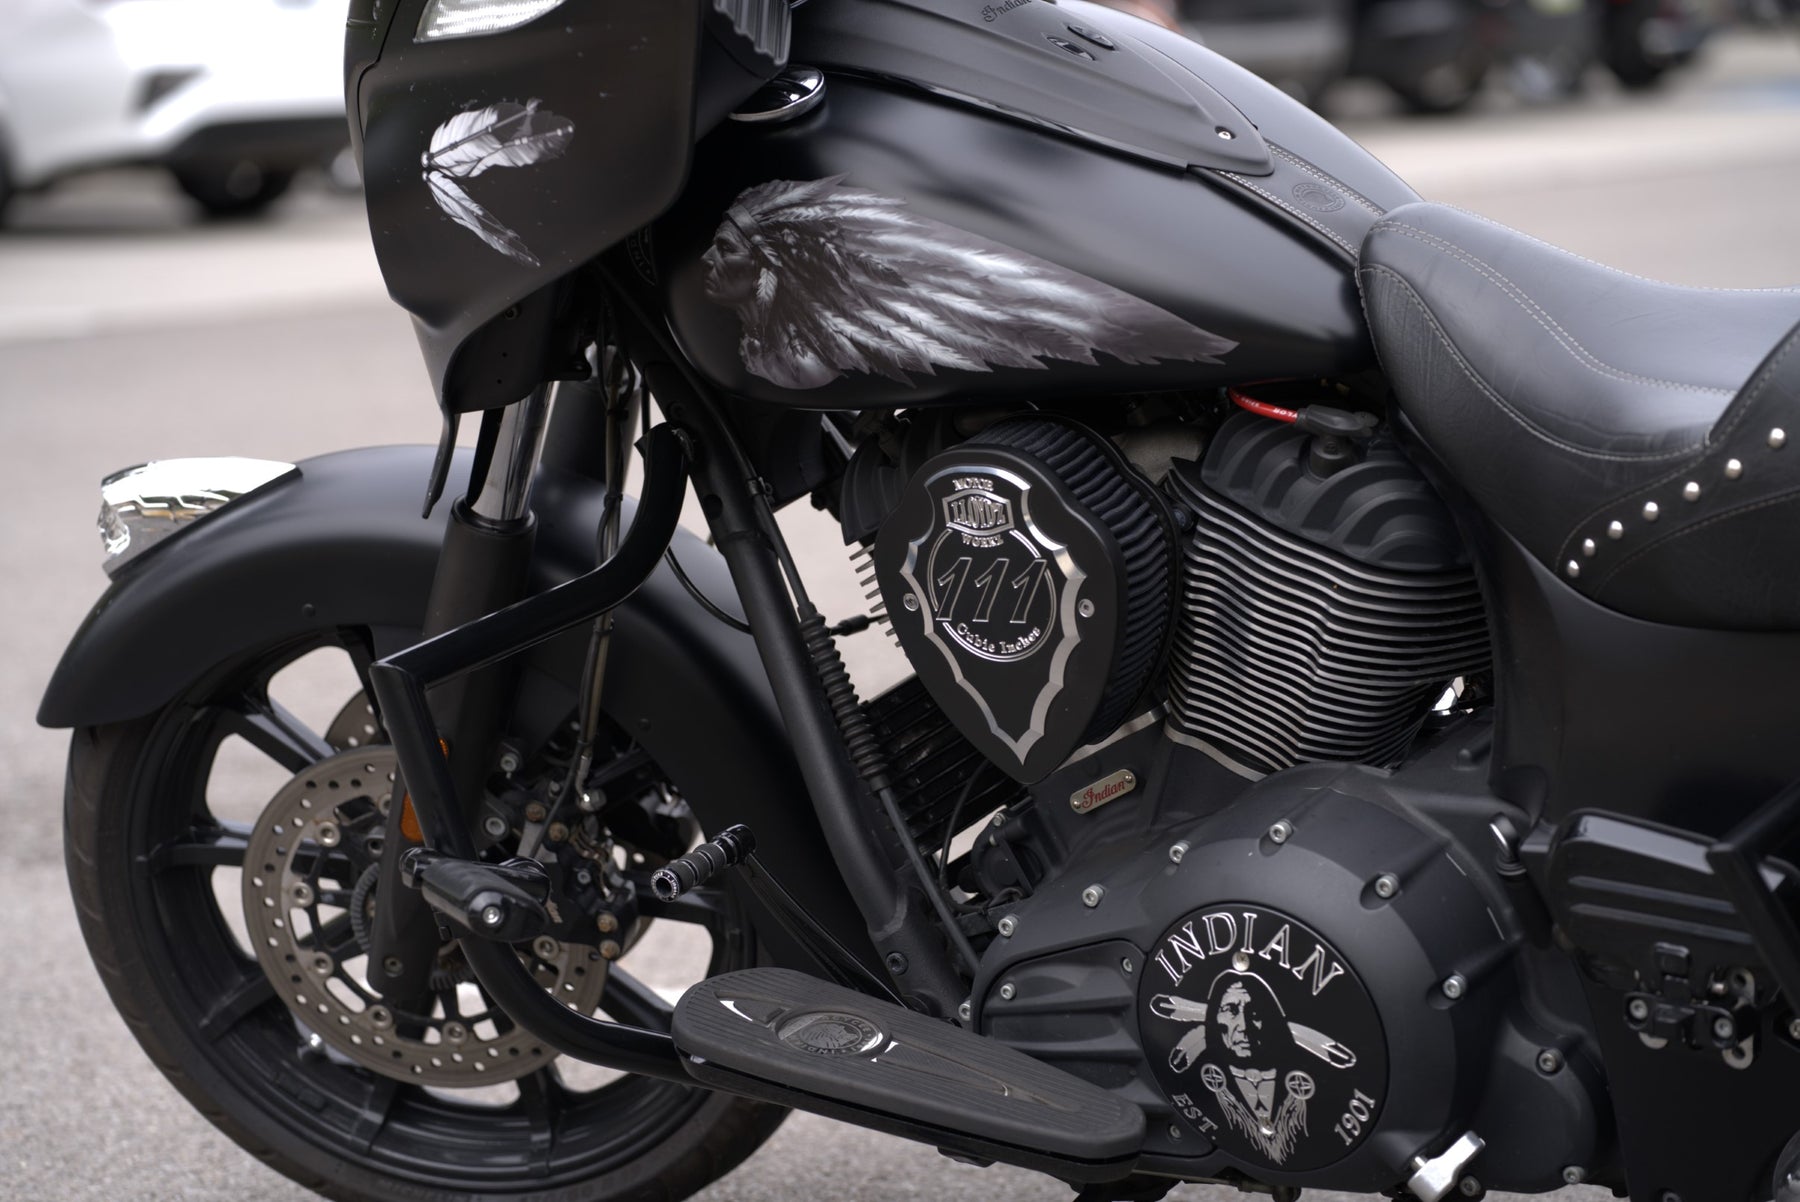
These decals were designed to cover the original headdress on Indian Motorcycles but can be used by any brand or model of bike.
If you have an Indian Scout, we recommend purchasing our Scout version which is slightly smaller in order fit on the tank side without extending over the border.
Size:

These decals are designed for all brands/models of motorcycles. Check the measurements to ensure a proper fit on your bike before ordering. If your tank already has a graphic, we can’t guarantee these decals will cover it completely. To verify fit and coverage, print out the template below, cut it out and tape it to your tank. (Print out template will be added soon)

How To Install: <-Visit our How To page for videos
Weatherproof HD Gloss finish vinyl decals are self adhesive. We recommend using the wet method to install these decals: A spray bottle with water and dish soap can be used to wet the surface and the back of the decal, allowing you to slide the decal into place. Once you have it aligned properly, use your thumbs to push the moisture out from behind the decal, working from the center outwards to the edges and it will adhere to your bike. Using the wet method allows the decal surface to evenly distribute over the curved surface. A hair dryer to apply heat will make the process easier since the vinyl becomes more soft and flexible when warm.


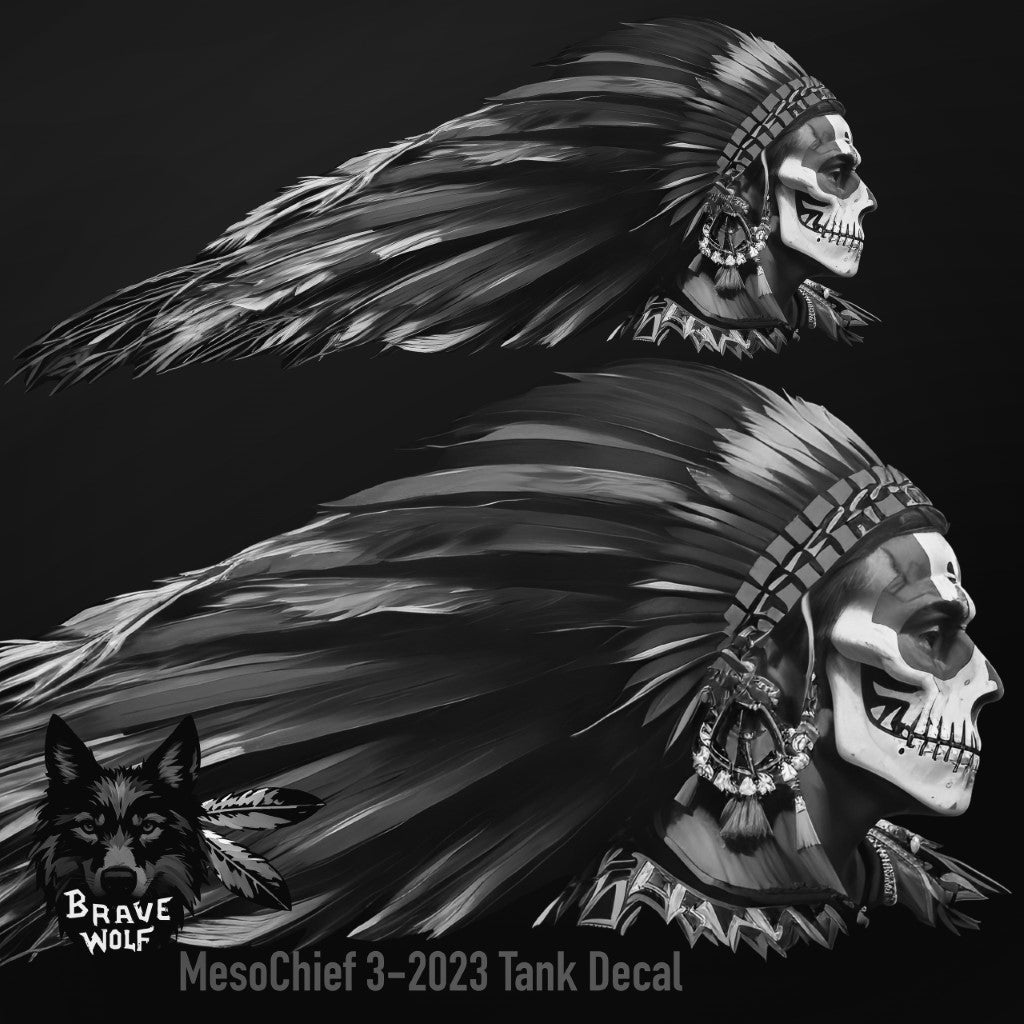


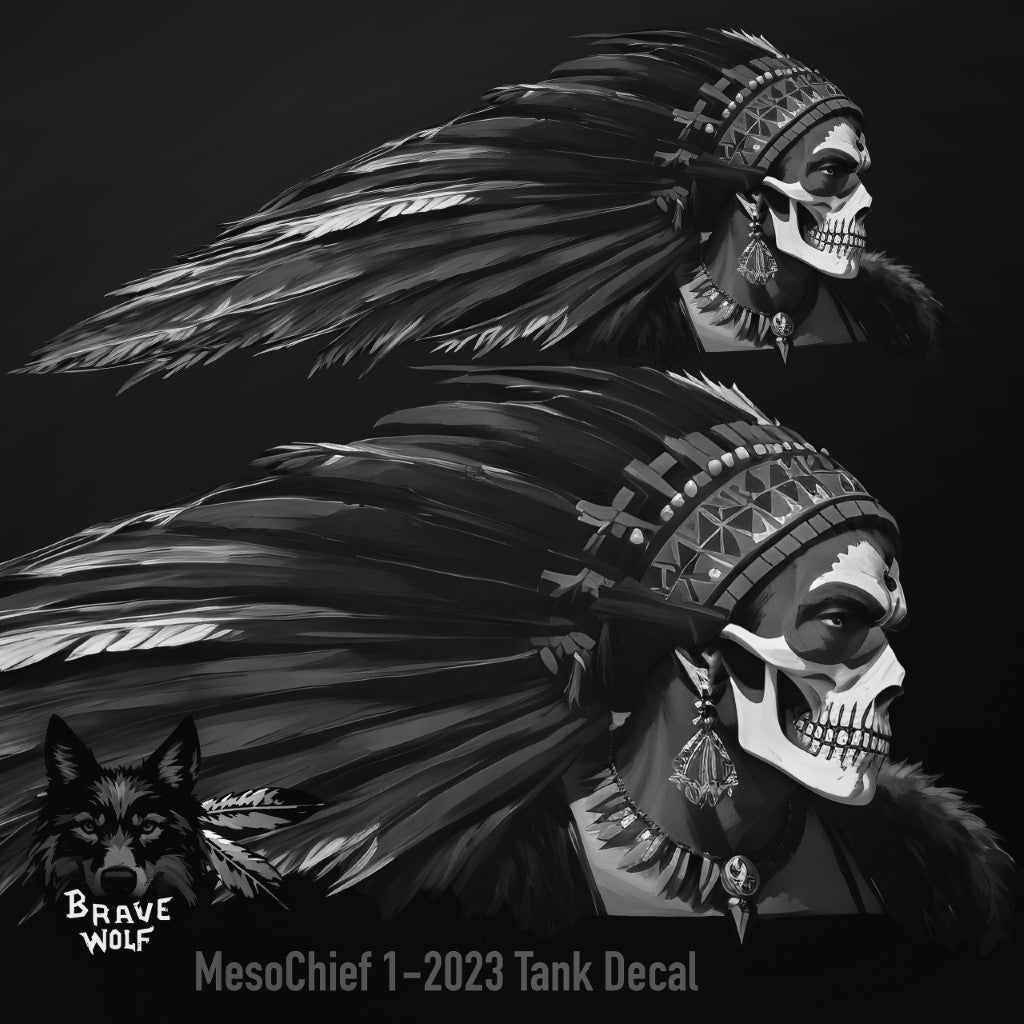
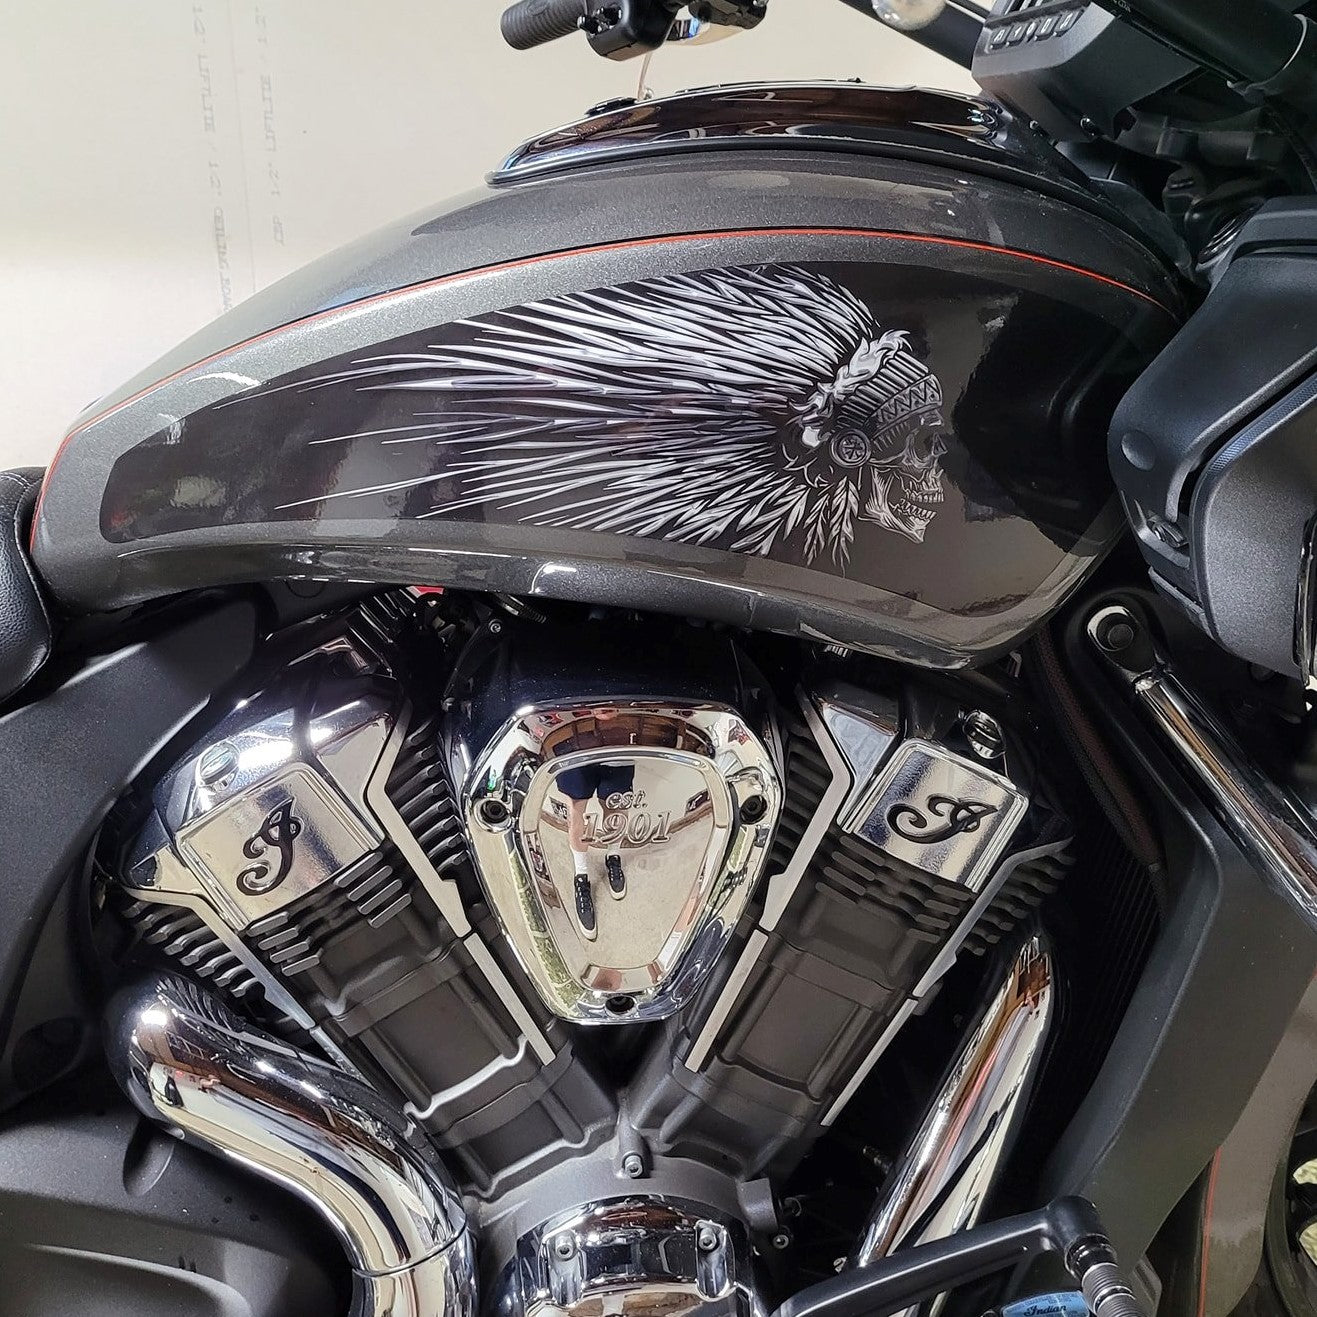
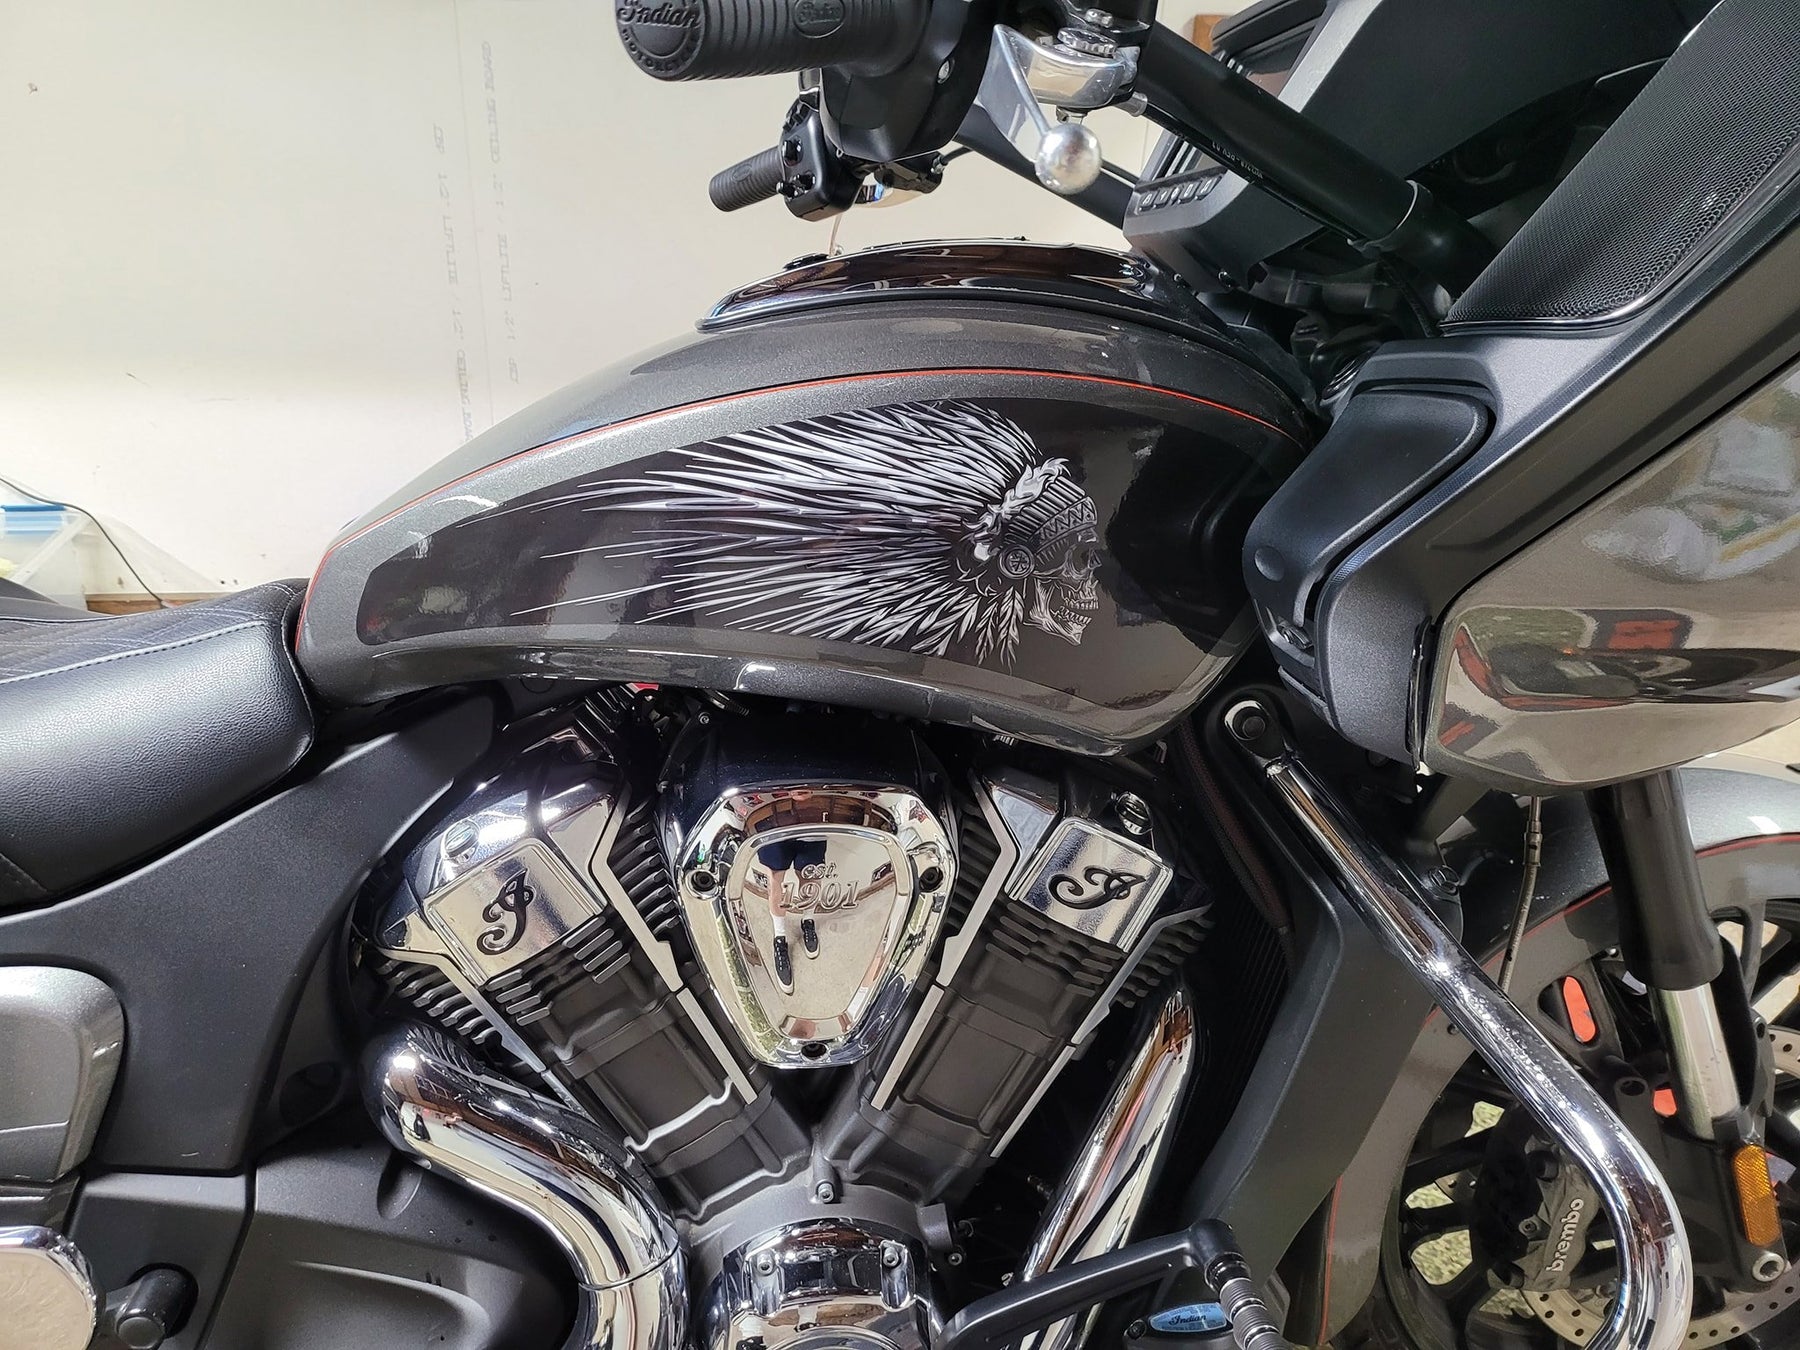
MesoChief 3-2023 - Universal Tank Decal-B&W
Regular price $100.00
Shipping calculated at checkout.
Stock Notice: (may take approximately 2-3 weeks before shipping if not in stock at the time of your order)
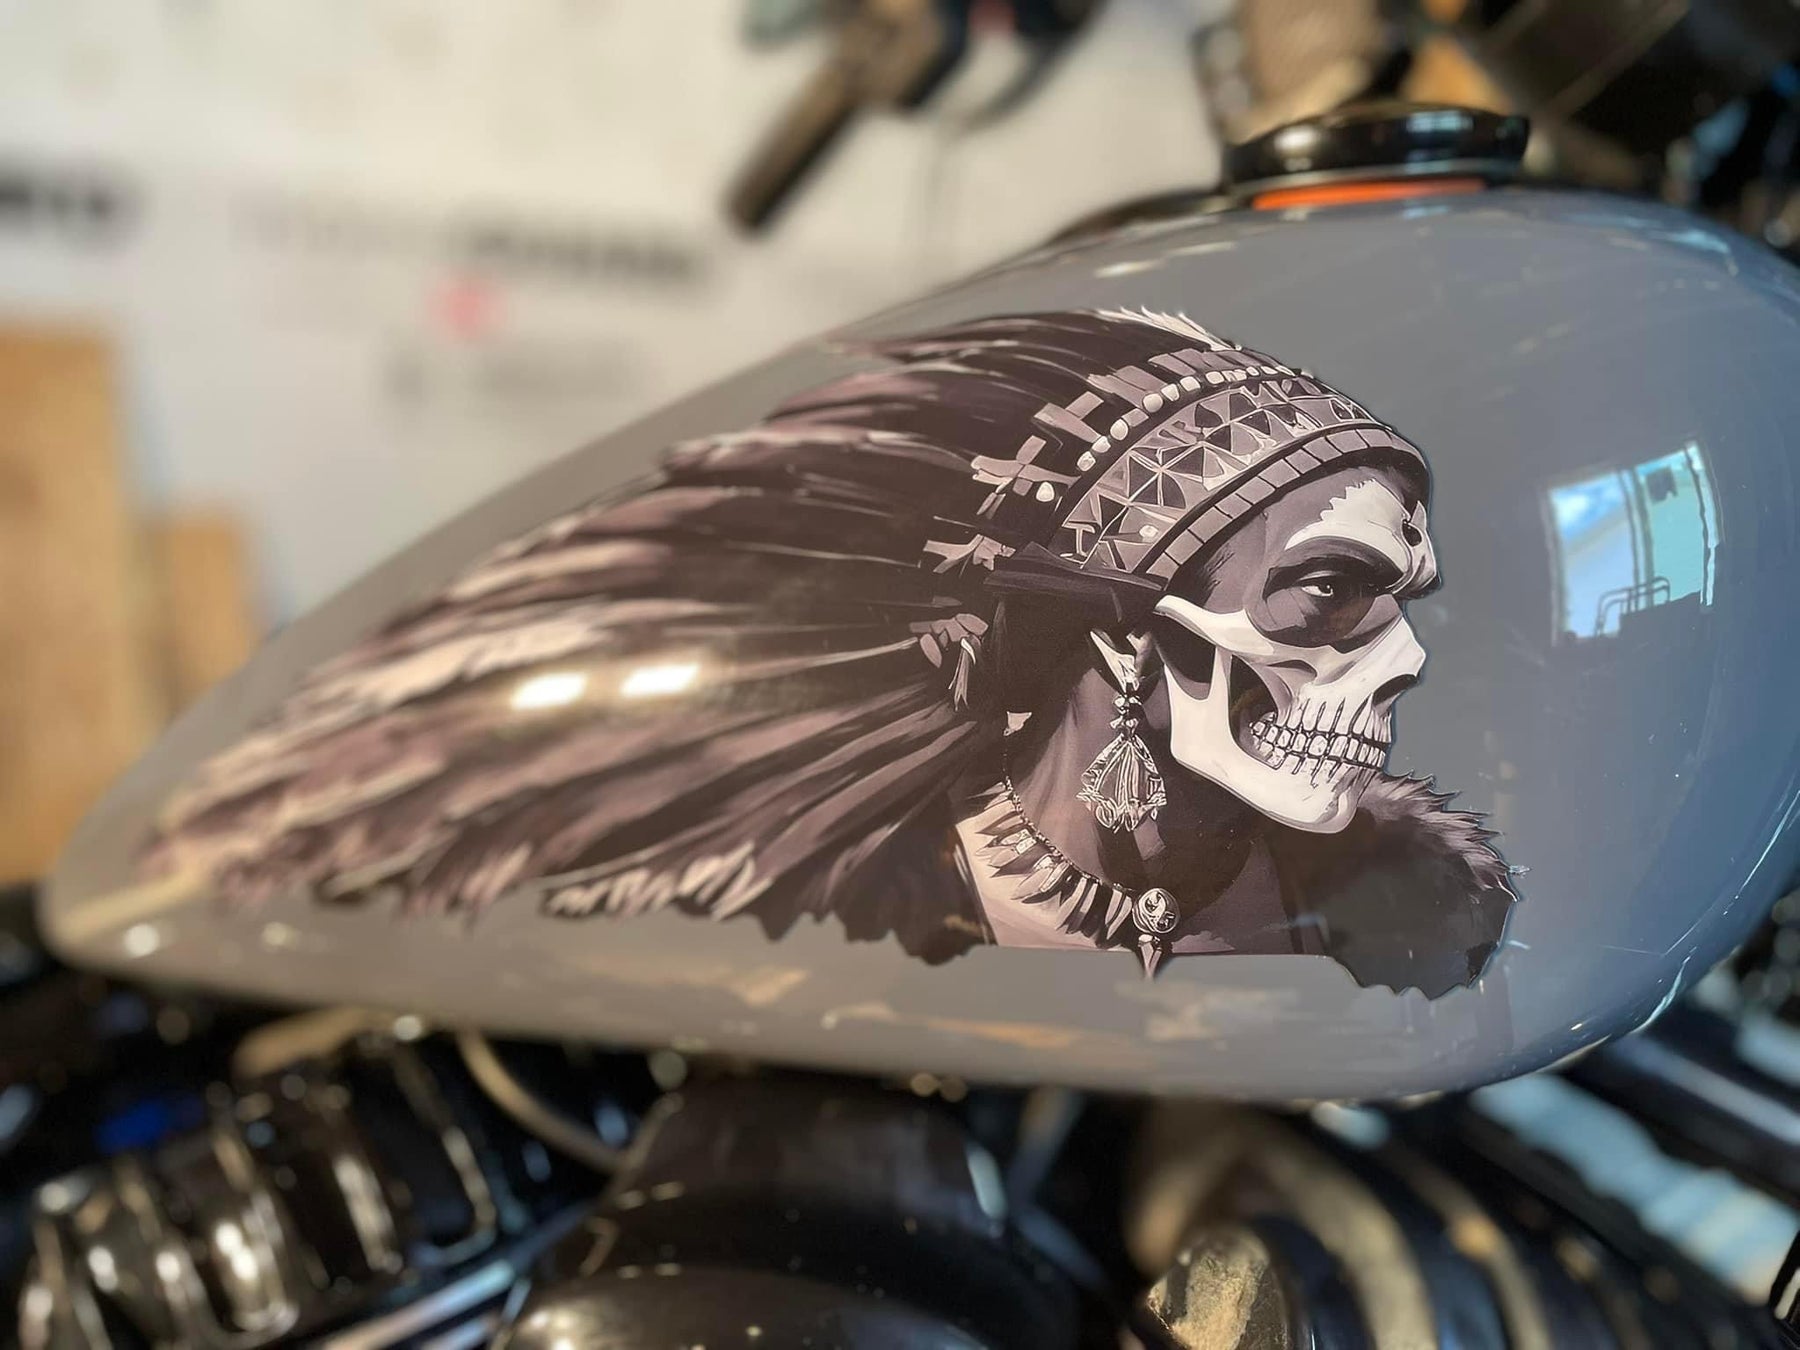
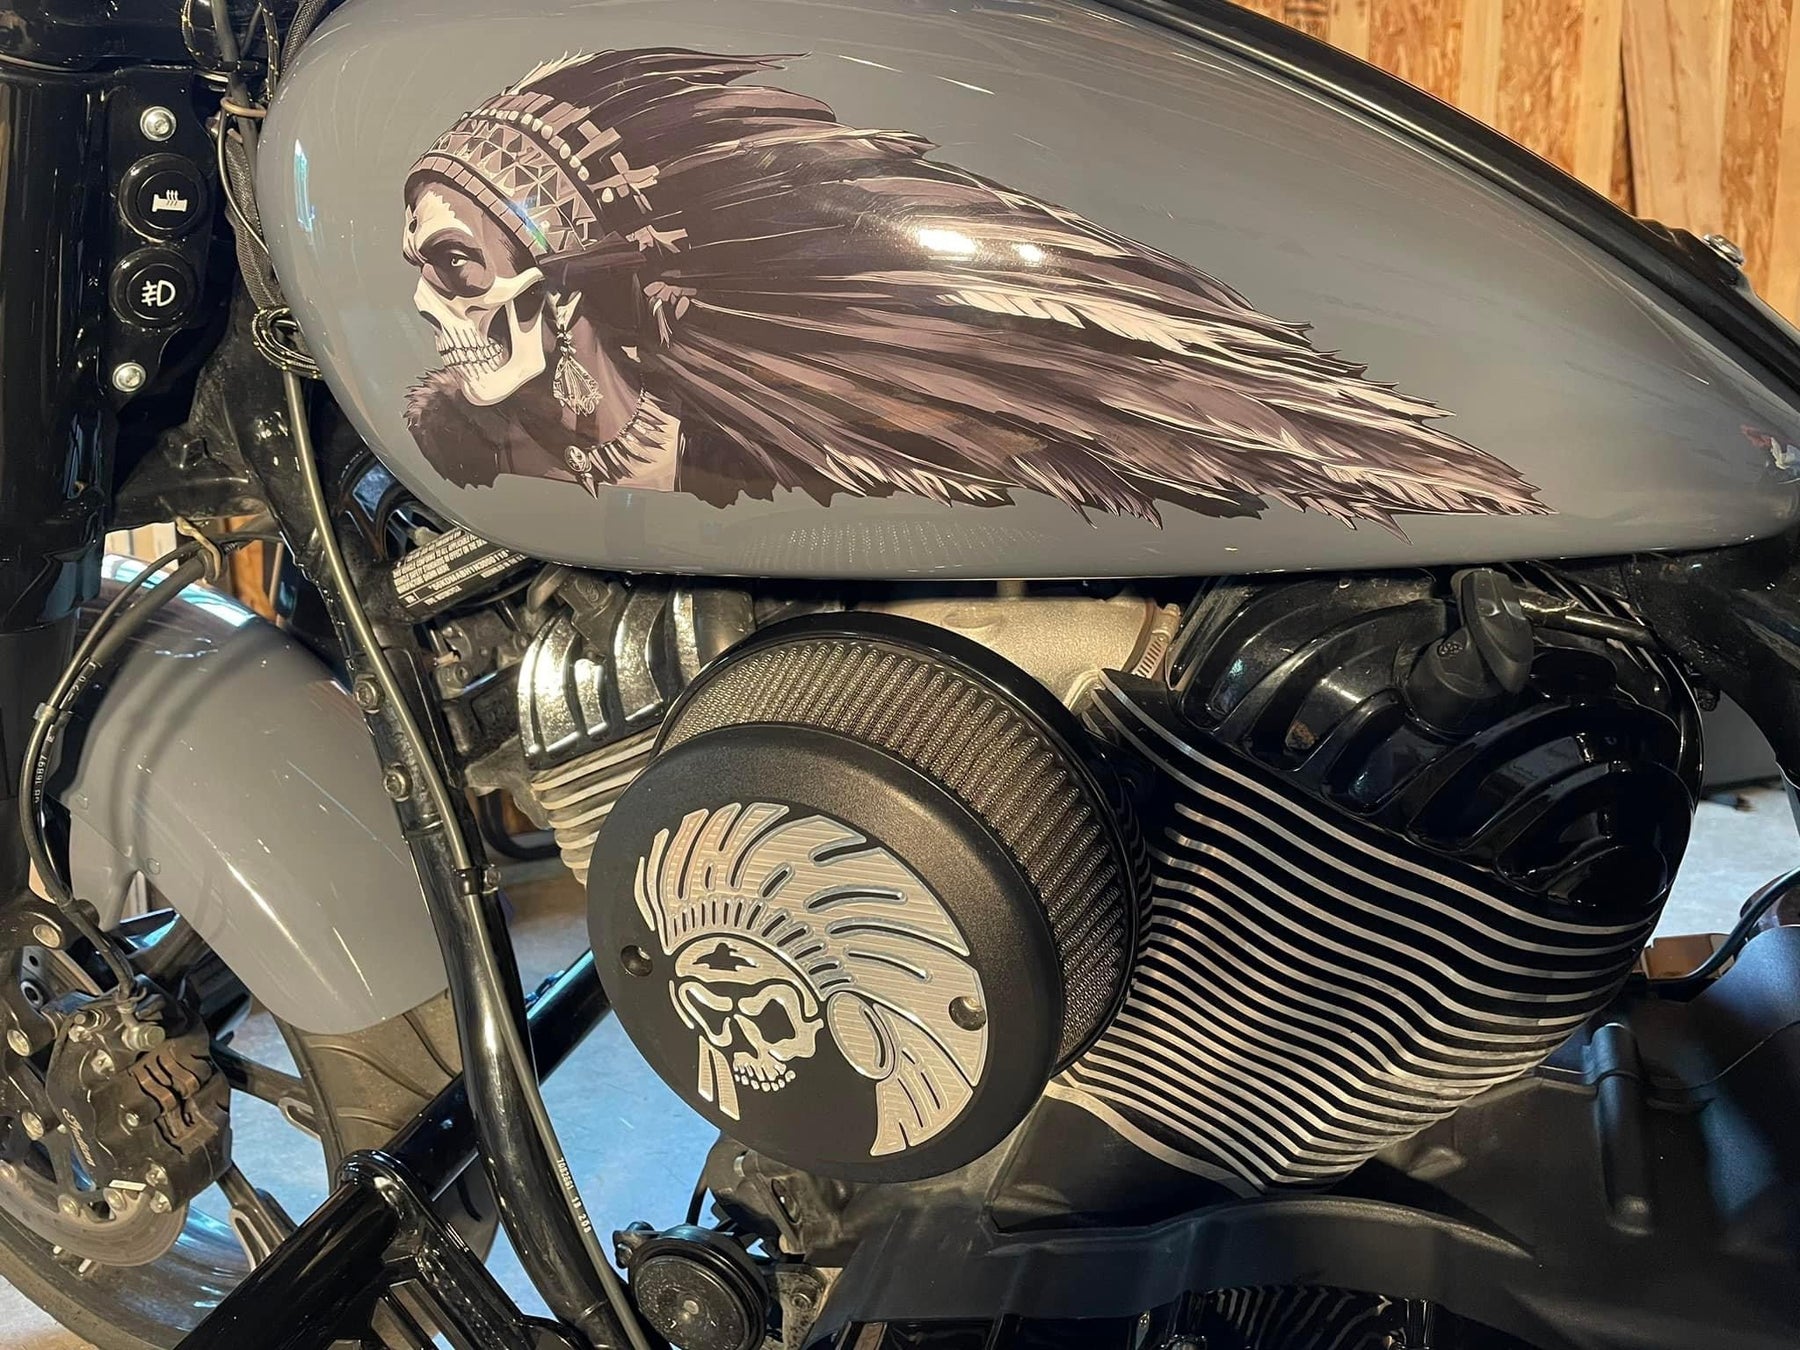
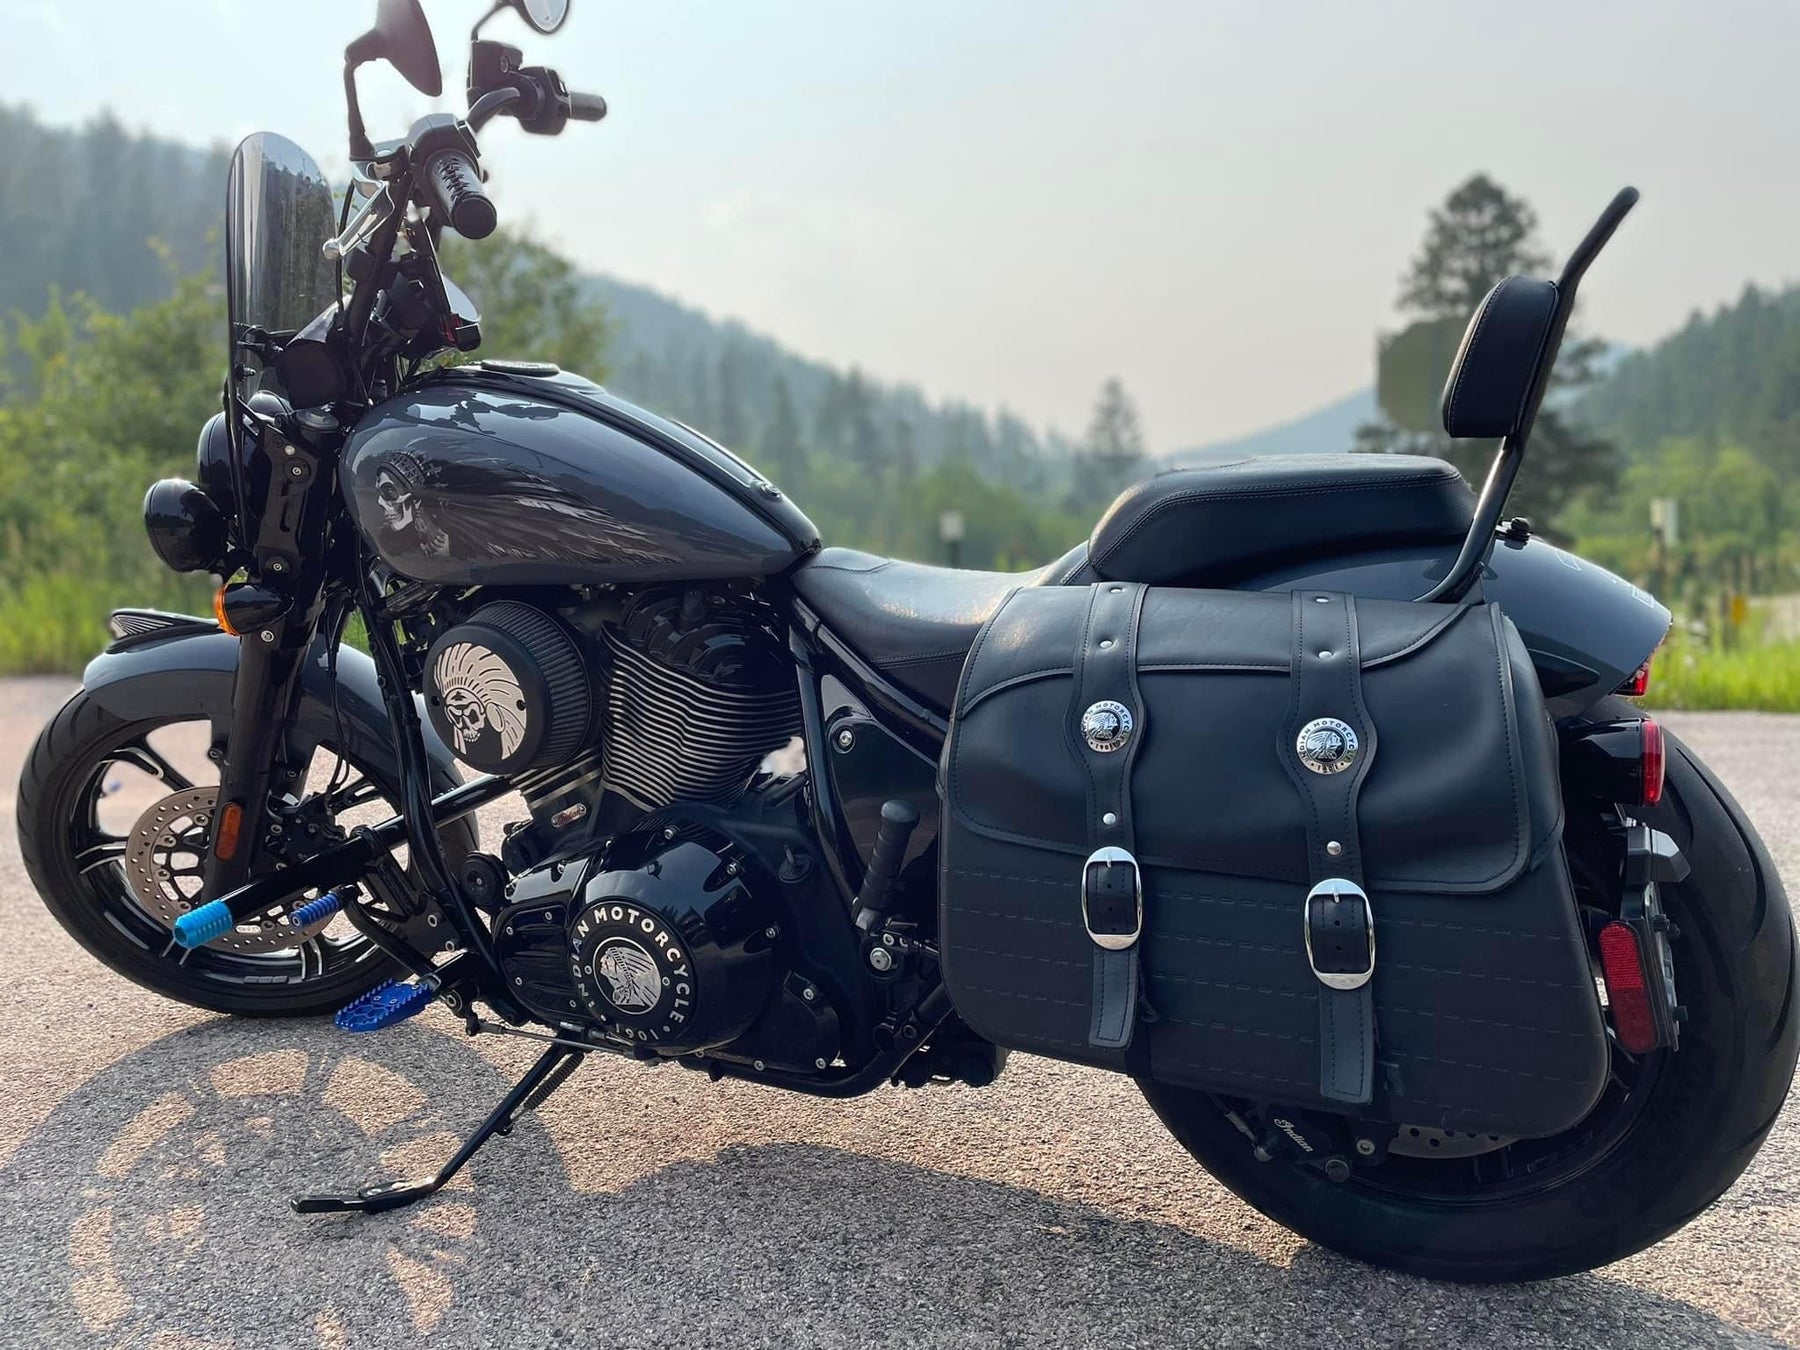
“MesoChief 3-2023" Universal Tank Decals for all Brands and Models of Motorcycles

These decals were designed to cover the original headdress on Indian Motorcycles but can be used by any brand or model of bike.
If you have an Indian Scout, we recommend purchasing our Scout version which is slightly smaller in order fit on the tank side without extending over the border.
Size: 5.9 inches by 14.6 inches wide

These decals are designed for all brands/models of motorcycles. Check the measurements to ensure a proper fit on your bike before ordering. If your tank already has a graphic, we can’t guarantee these decals will cover it completely. To verify fit and coverage, print out the template below, cut it out and tape it to your tank. (Print out template will be added soon)
How To Install: <-Visit our How To page for videos
Weatherproof HD Gloss finish vinyl decals are self adhesive. We recommend using the wet method to install these decals: A spray bottle with water and dish soap can be used to wet the surface and the back of the decal, allowing you to slide the decal into place. Once you have it aligned properly, use your thumbs to push the moisture out from behind the decal, working from the center outwards to the edges and it will adhere to your bike. Using the wet method allows the decal surface to evenly distribute over the curved surface. A hair dryer to apply heat will make the process easier since the vinyl becomes more soft and flexible when warm.


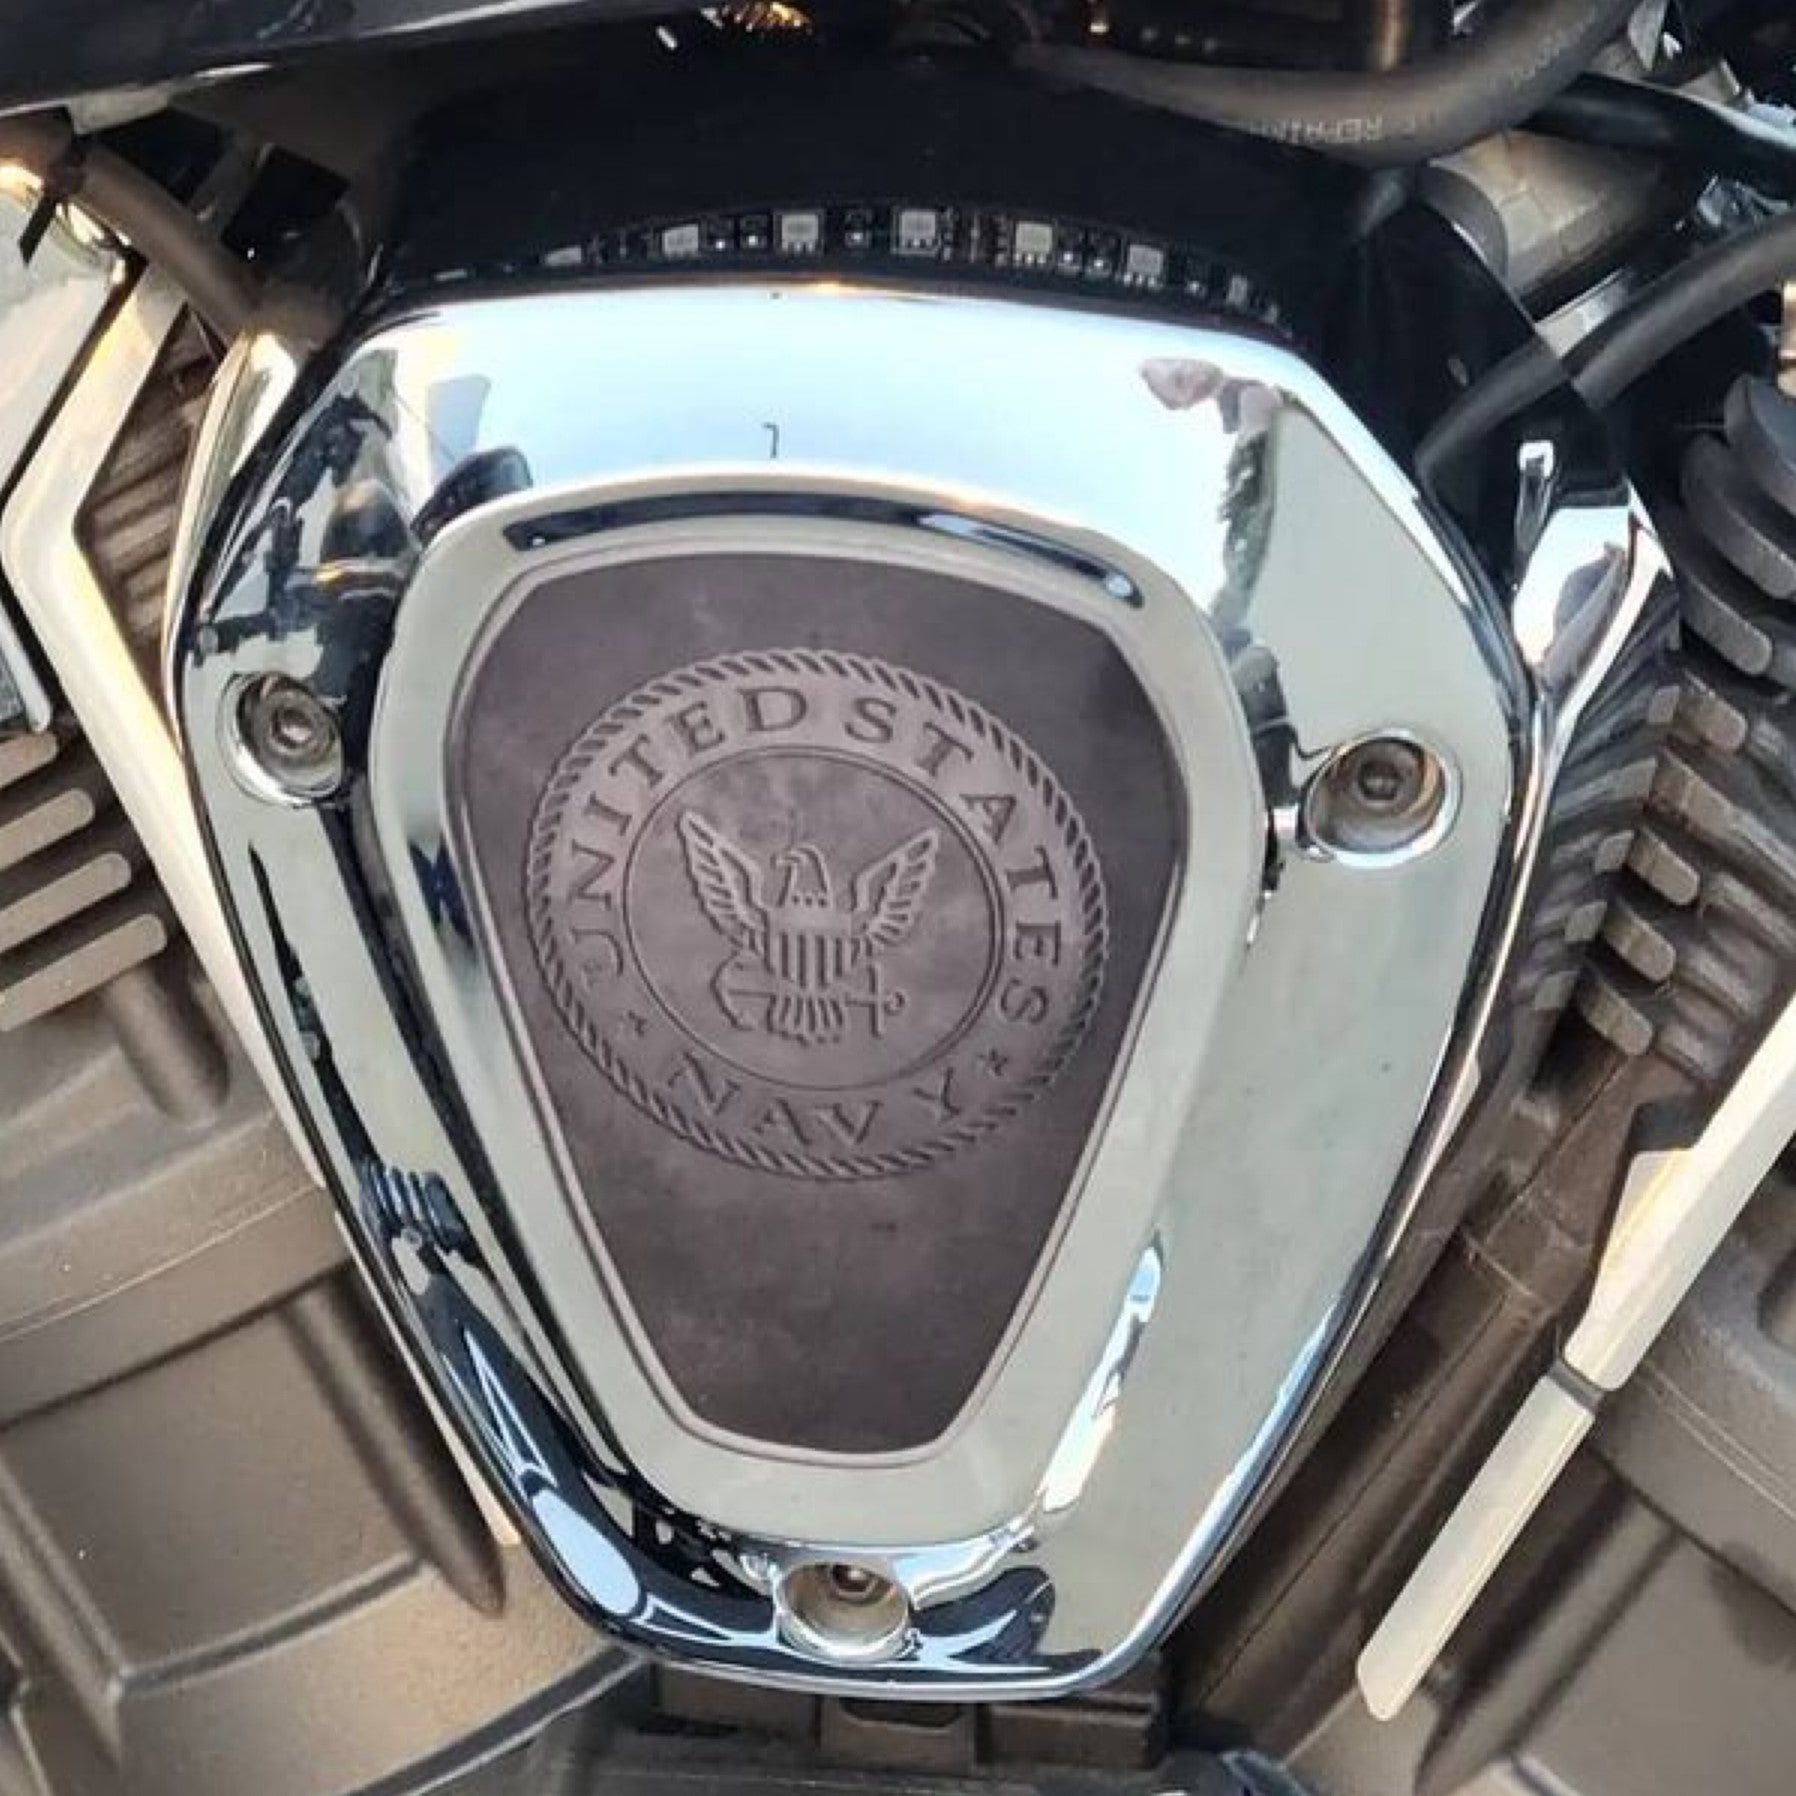
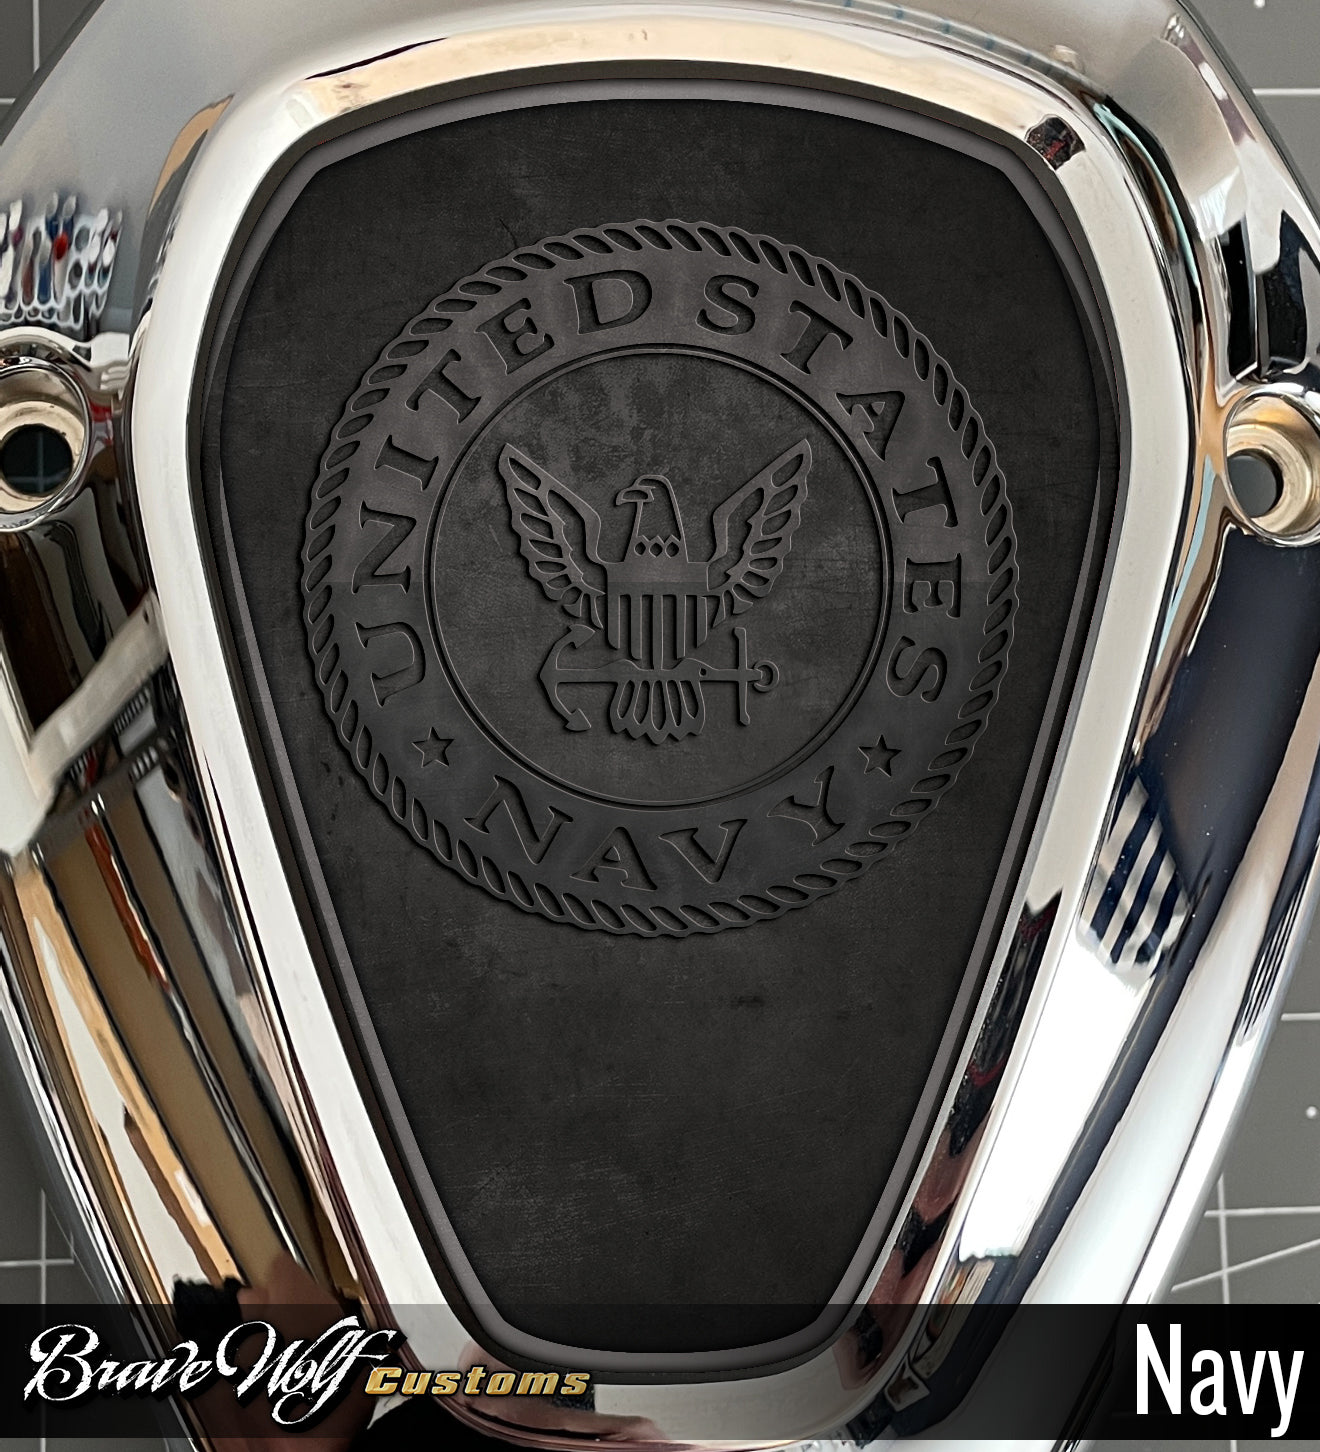
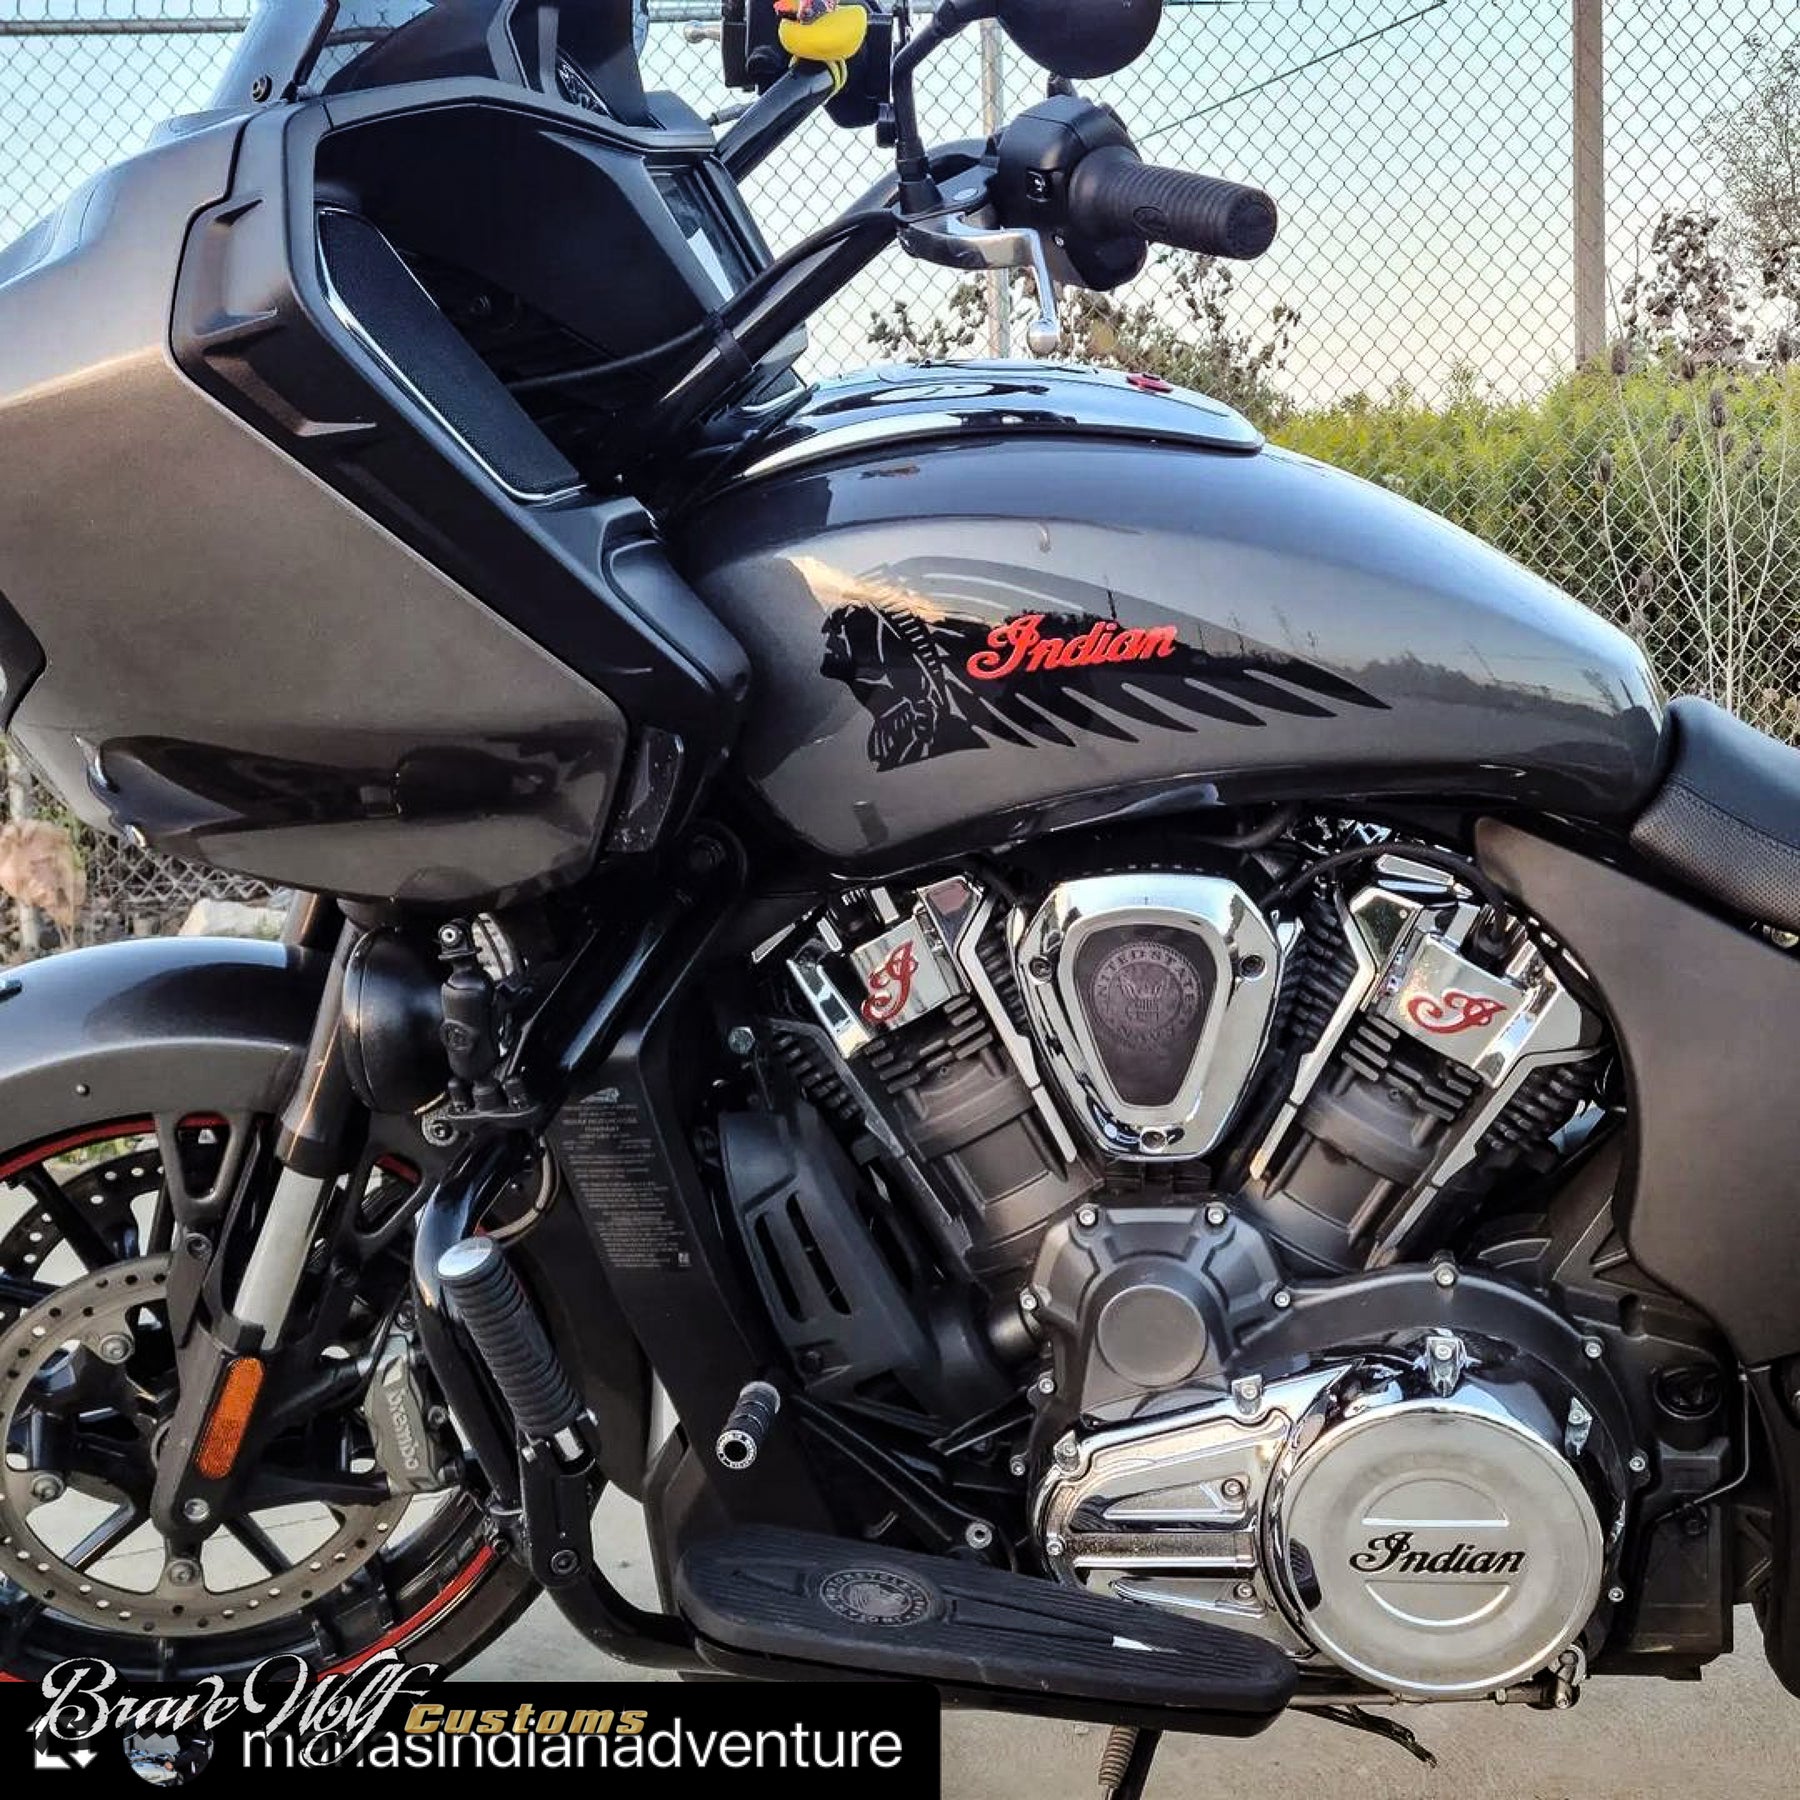
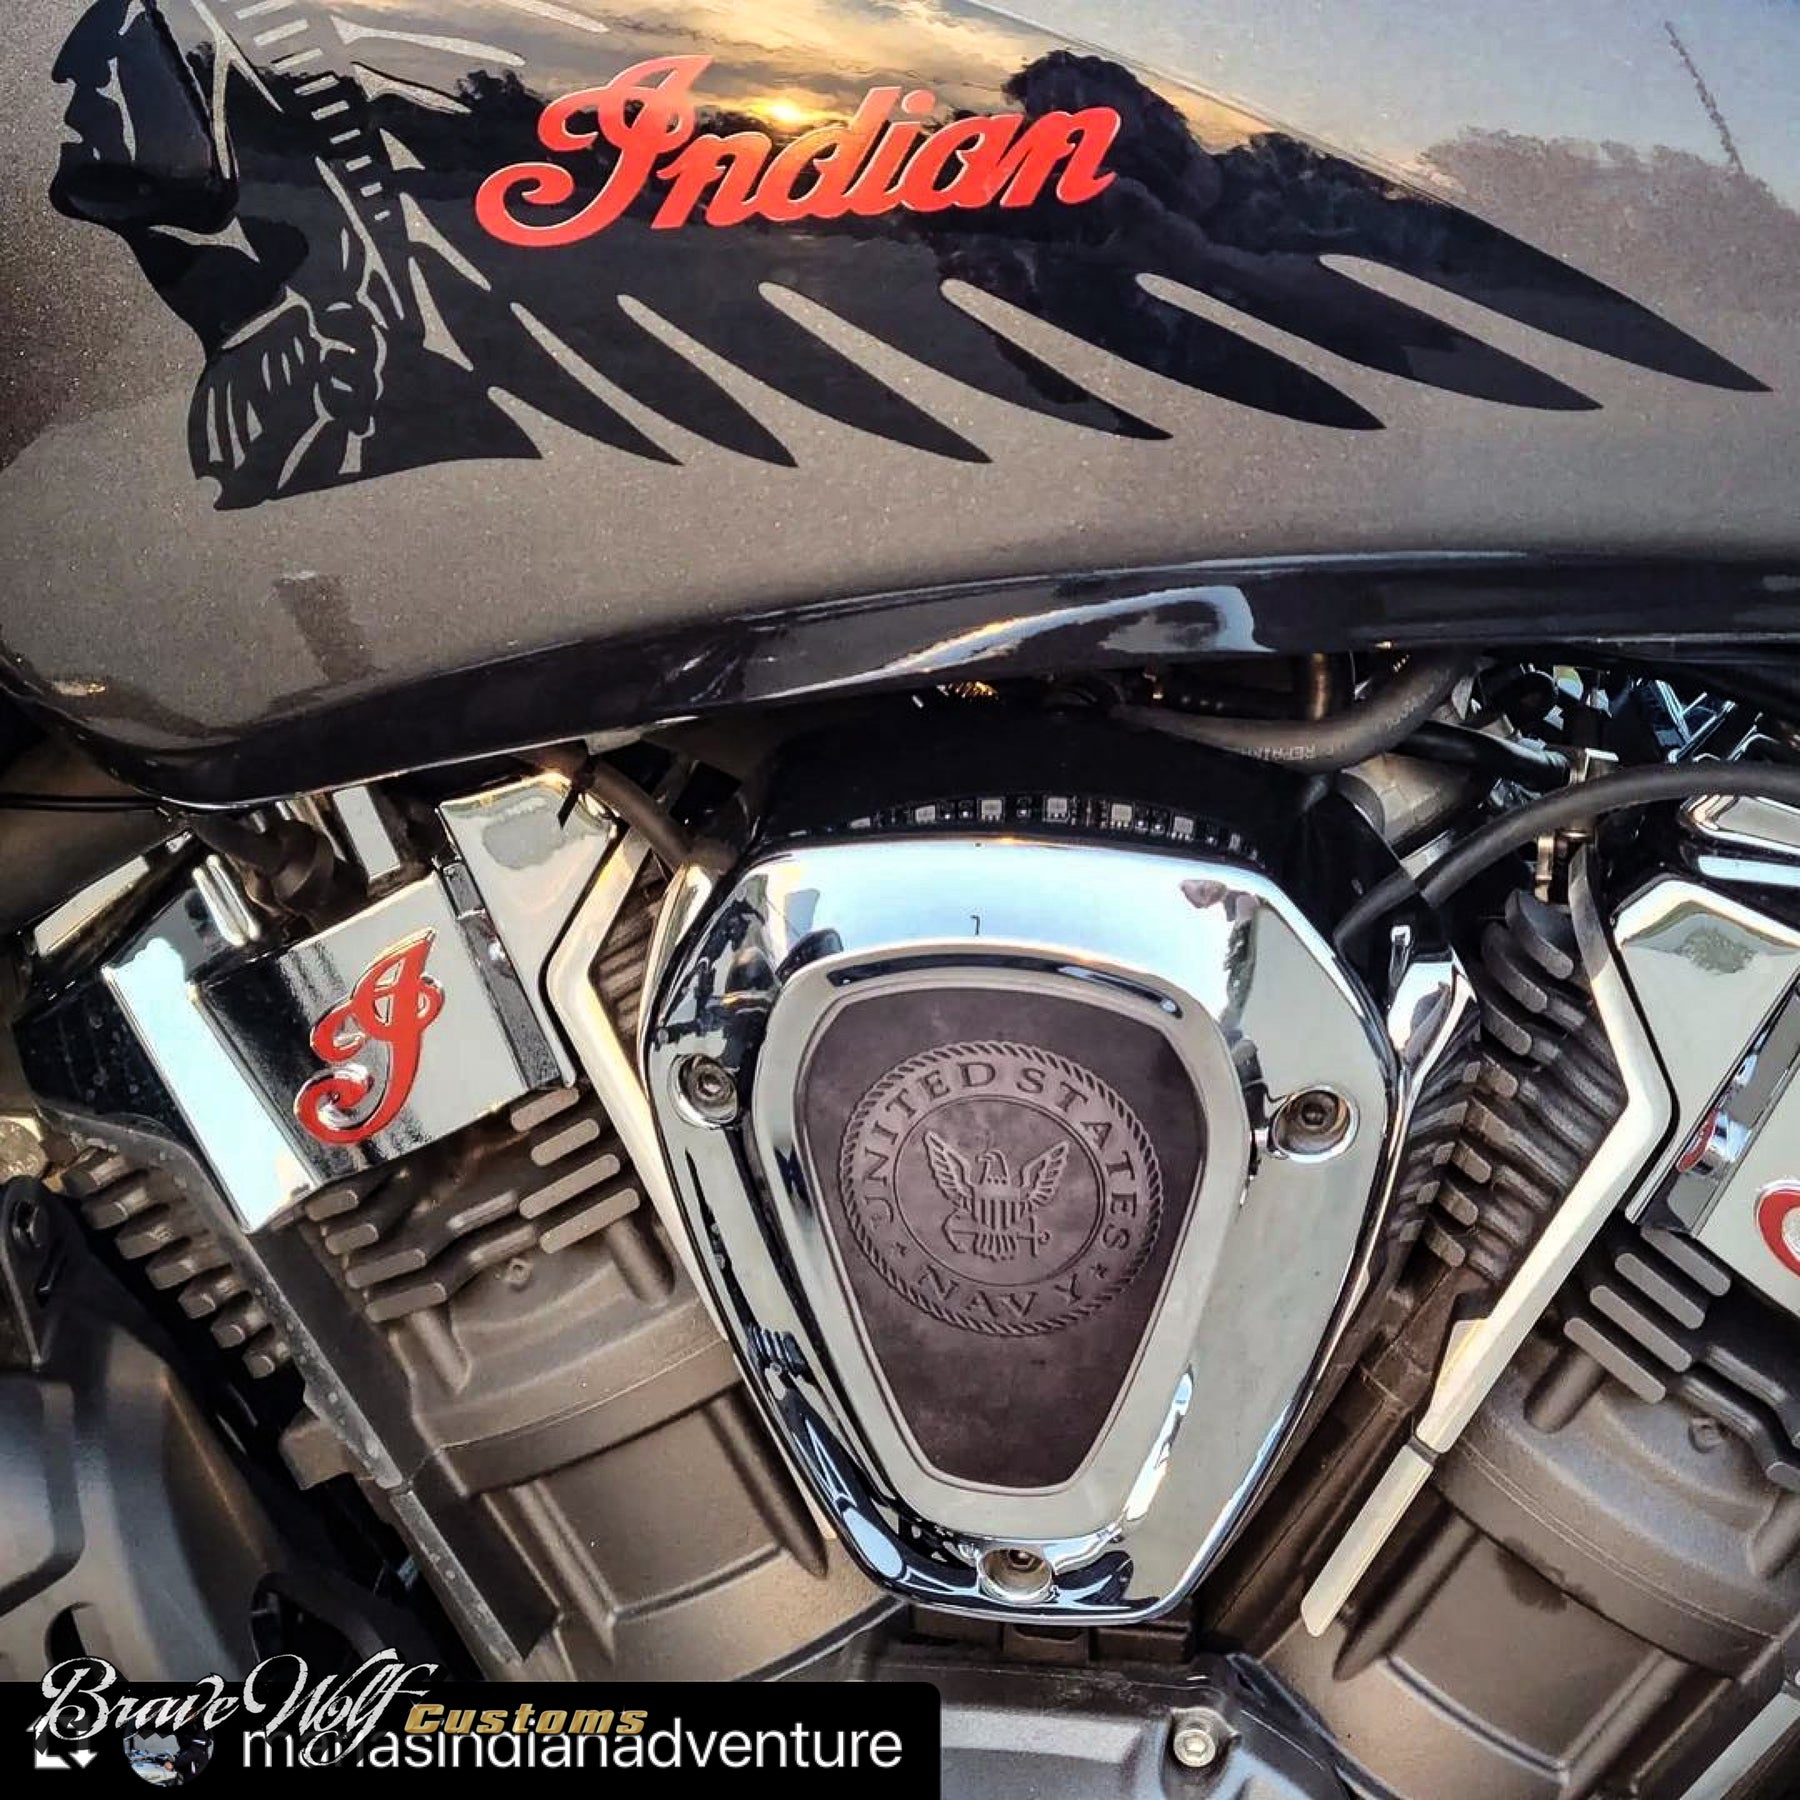
Powerplus Engine Accent Kit - America
Regular price $35.00
Shipping calculated at checkout.
Stock Notice:
All style options for our Powerplus Engine Accent kits are usually in stock. However, they are produced in manufacturing runs so if they're out of stock at the time of your order, there may be a waiting period before we ship them out. If your order is time sensitive, feel free to contact us to check stock before ordering.

Engine accent kits for Indian Challenger and Pursuit, Powerplus Chieftain, and Powerplus Roadmaster.
Our UV DTF 3D PermaSticker Engine Accent kits combine the latest UV DTF technology with exceptional adhesive properties, ensuring that your accents will stick around for the long haul. With unparalleled durability, remarkable adhesive properties, and heat resistance capable of direct contact with your engine, they're the perfect material to add a custom touch to your bike.
Kit includes a total of 41 pieces. All the accents you need to do both sides of your engine AND plenty of extras in case you make a mistake during installation. + 2 Brave Wolf logos. The kit comes on a 17.5" backing sheet with with a transfer layer on top.
We're offering these in a stunning 20 different color combination styles, but if we don't have the combo you want, consider purchasing multiple sets to mix-and-match and you'll save 20% on each. We've priced them affordably so this should be an option.
Material Finish: an enamel-like finish. I wouldn't classify it as gloss or matte. Similar to egg-shell finish.
Installation:
These accents will need to be installed on a warm, clean, and dry engine. Do not attempt to install them cold or with condensation on the surface. You can run your bike to get the engine warm, but not hot, or use a hair dryer/heat gun. Installing these in winter months will be more difficult. Use scissors to separate each individual piece from the sheet. A pair of tweezers can be helpful to hold the accents in proper placement during installation. Once in place, use a firm object to press/rub over the full surface before peeling off the top transfer layer. Go slow while peeling the transfer layer. If the accent peels up without separating from the transfer, place it back down and press it more firmly into place. Because the surface is curved, the “I” will be the most challenging piece, so cut out around it as closely as possible to make it easier to position.


Powerplus Engine Accent Kit - Royal Purple
Regular price $35.00
Shipping calculated at checkout.
Stock Notice:
All style options for our Powerplus Engine Accent kits are usually in stock. However, they are produced in manufacturing runs so if they're out of stock at the time of your order, there may be a waiting period before we ship them out. If your order is time sensitive, feel free to contact us to check stock before ordering.
Engine accent kits for Indian Challenger and Pursuit, Powerplus Chieftain, and Powerplus Roadmaster.
Our UV DTF 3D PermaSticker Engine Accent kits combine the latest UV DTF technology with exceptional adhesive properties, ensuring that your accents will stick around for the long haul. With unparalleled durability, remarkable adhesive properties, and heat resistance capable of direct contact with your engine, they're the perfect material to add a custom touch to your bike.
Kit includes a total of 41 pieces. All the accents you need to do both sides of your engine AND plenty of extras in case you make a mistake during installation. + 2 Brave Wolf logos. The kit comes on a 17.5" backing sheet with with a transfer layer on top.
We're offering these in a stunning 20 different color combination styles, but if we don't have the combo you want, consider purchasing multiple sets to mix-and-match and you'll save 20% on each. We've priced them affordably so this should be an option.
Material Finish: an enamel-like finish. I wouldn't classify it as gloss or matte. Similar to egg-shell finish.
Installation:
These accents will need to be installed on a warm, clean, and dry engine. Do not attempt to install them cold or with condensation on the surface. You can run your bike to get the engine warm, but not hot, or use a hair dryer/heat gun. Installing these in winter months will be more difficult. Use scissors to separate each individual piece from the sheet. A pair of tweezers can be helpful to hold the accents in proper placement during installation. Once in place, use a firm object to press/rub over the full surface before peeling off the top transfer layer. Go slow while peeling the transfer layer. If the accent peels up without separating from the transfer, place it back down and press it more firmly into place. Because the surface is curved, the “I” will be the most challenging piece, so cut out around it as closely as possible to make it easier to position.


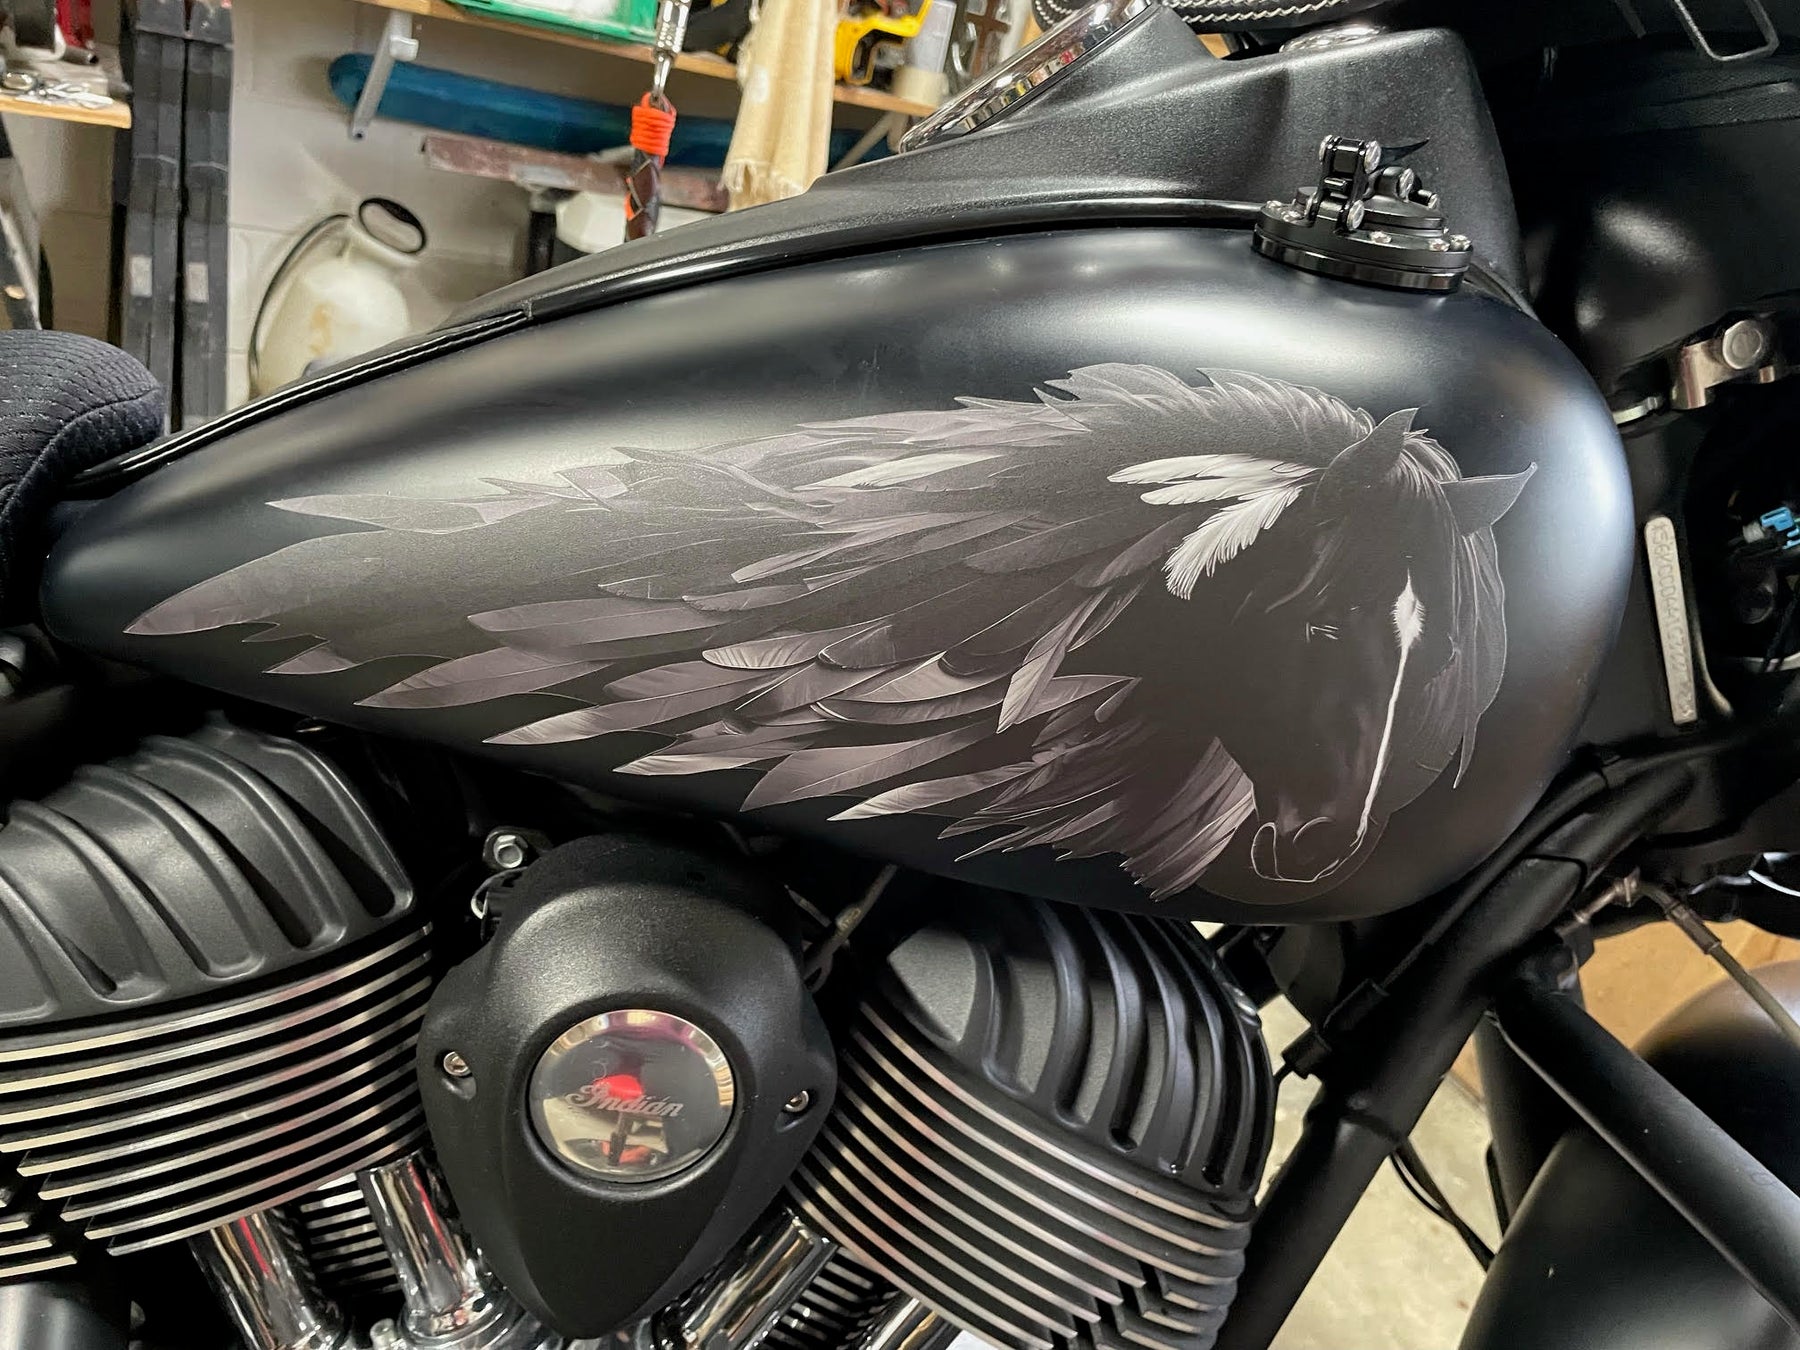
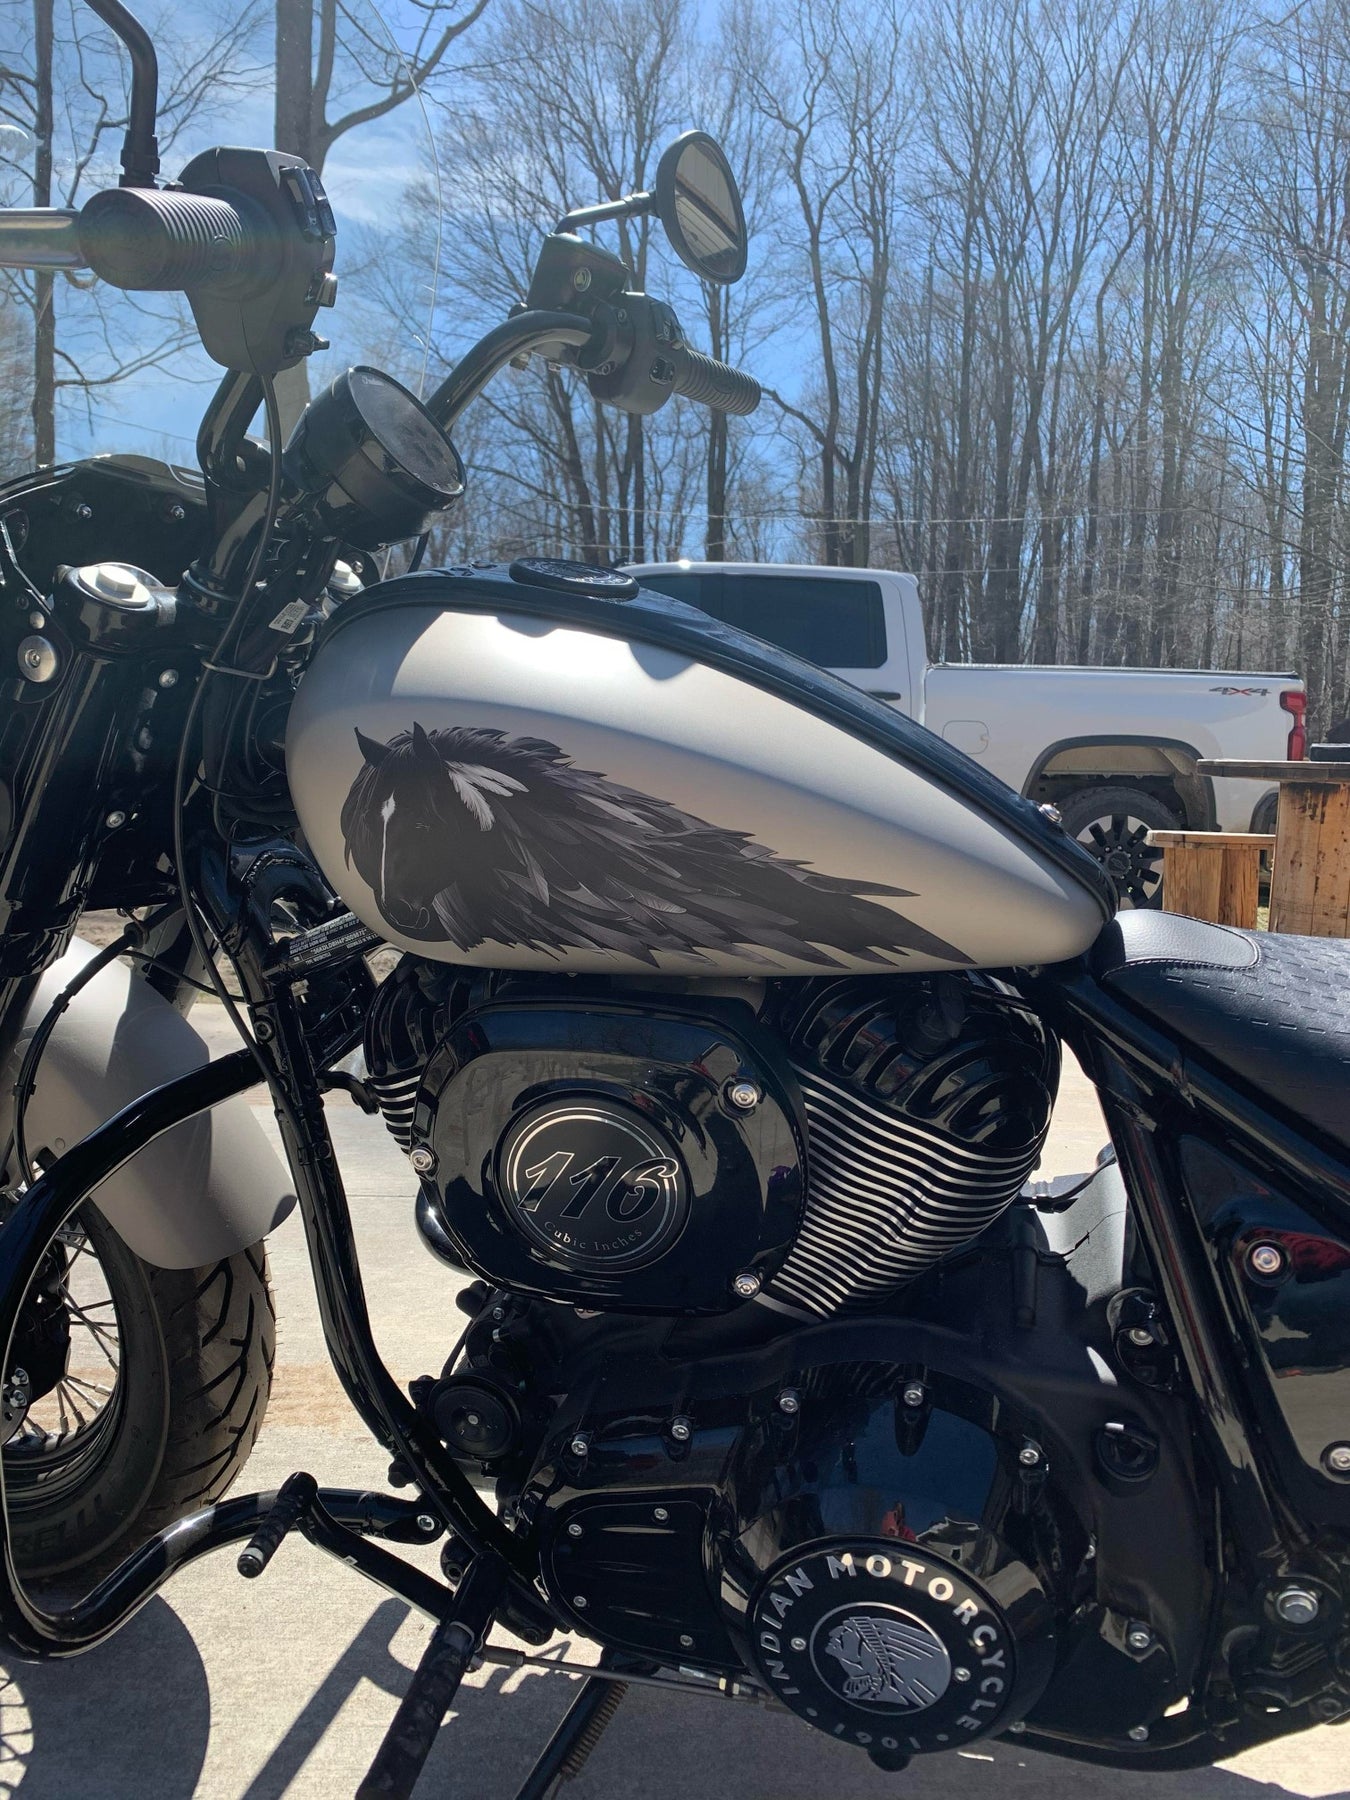


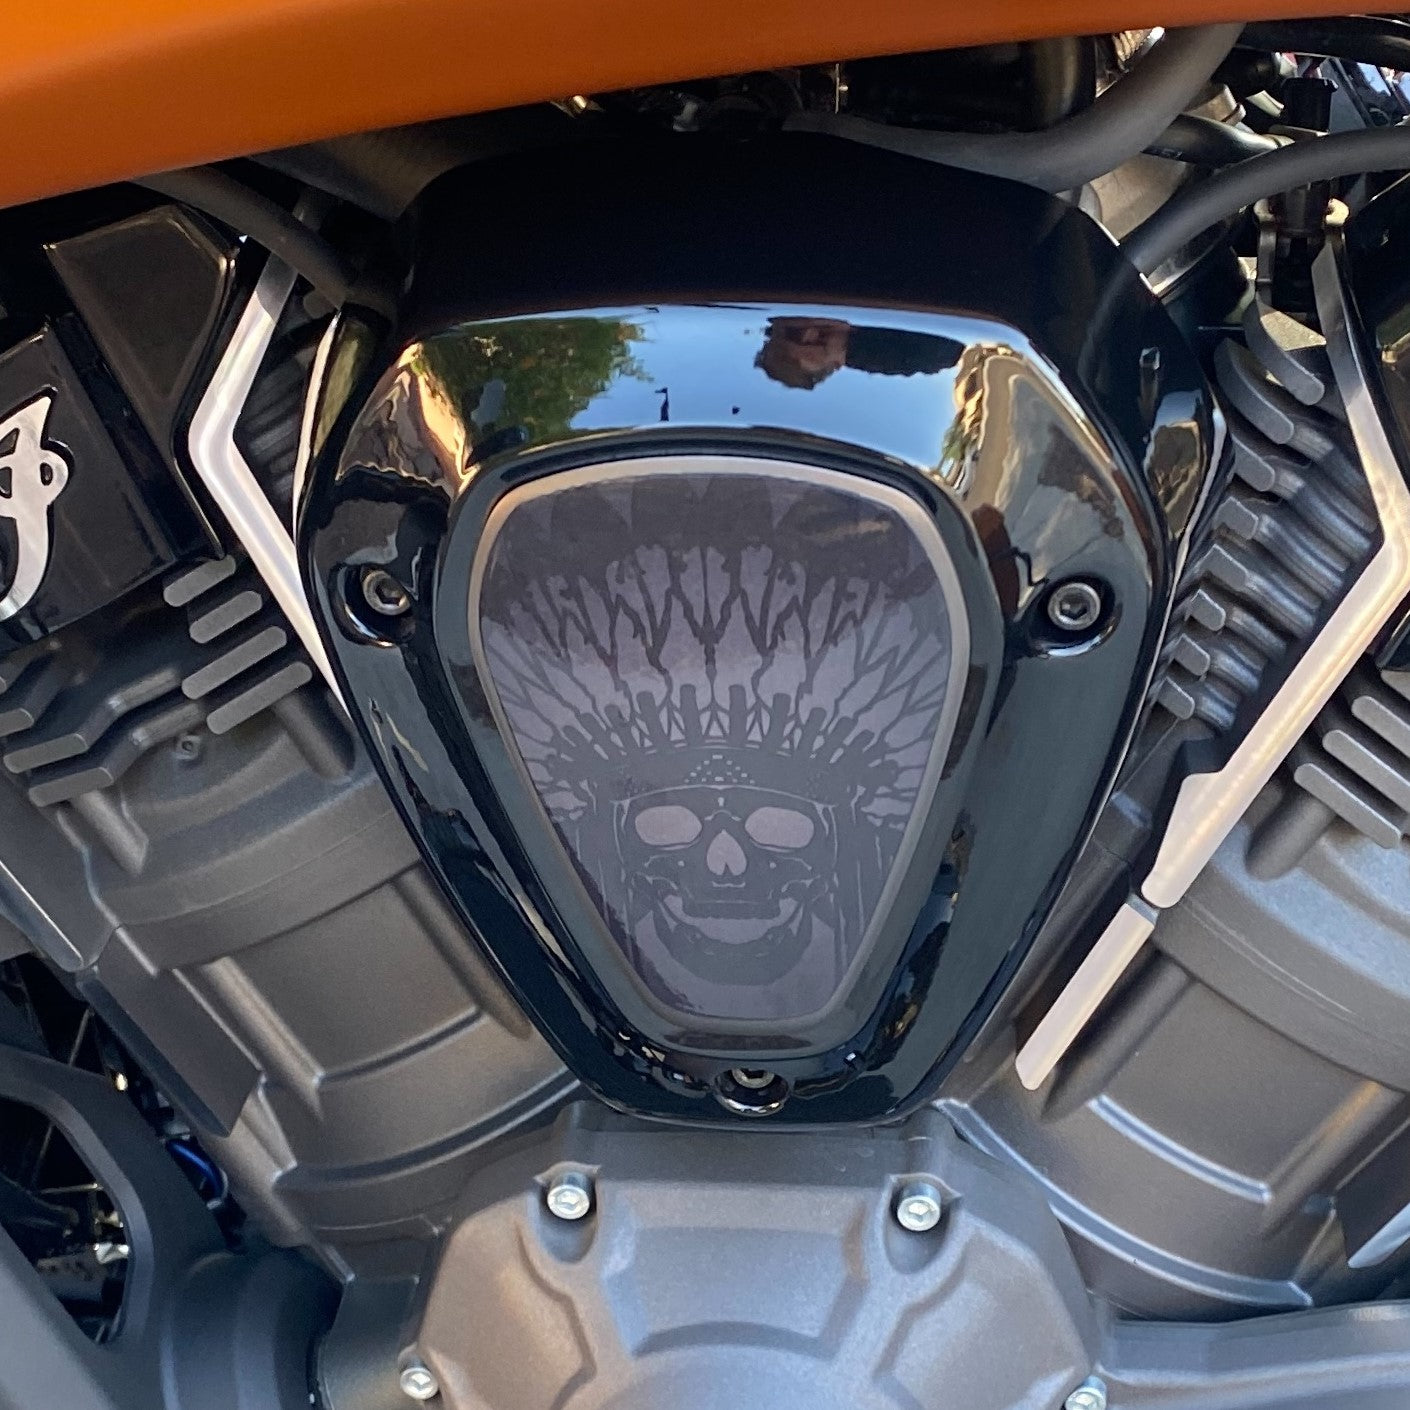
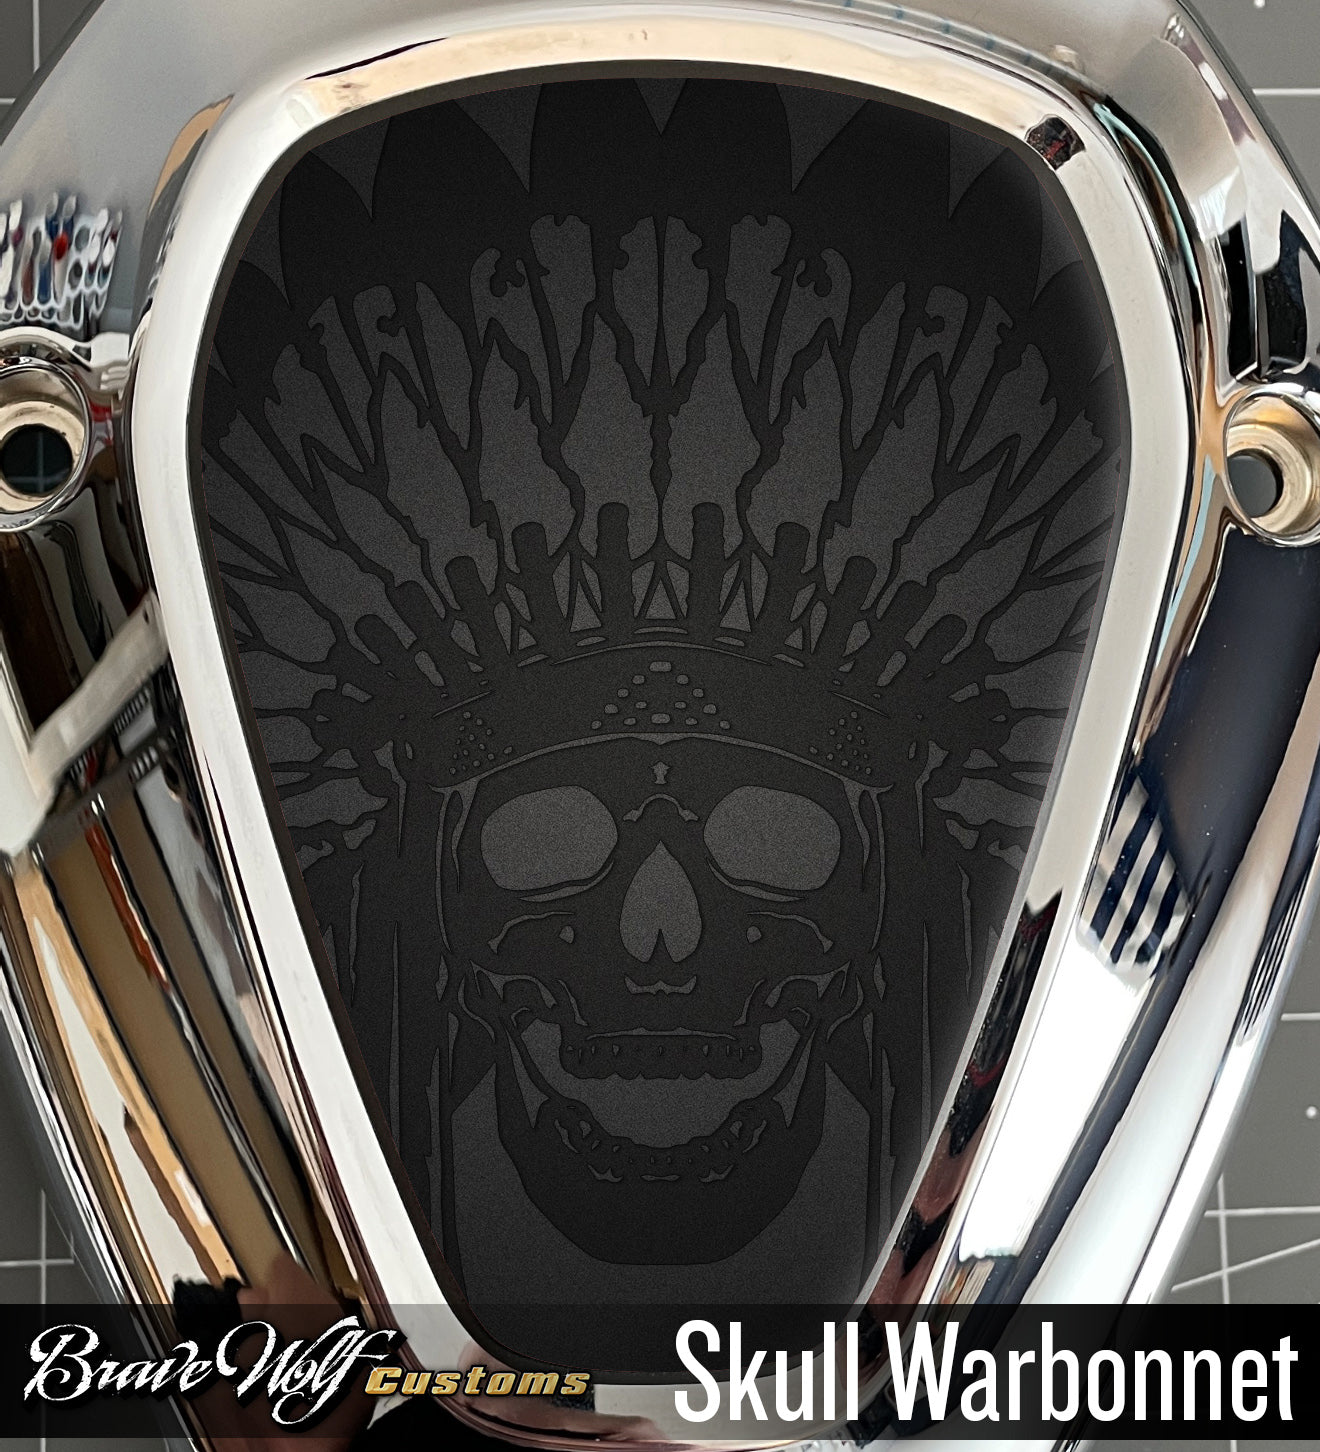
SWB-729-White Smoke-Powerplus Tank Decal Set
Regular price $100.00
Shipping calculated at checkout.
Stock Notice - Usually in stock (may take approximately 2-3 weeks before shipping if not in stock at time of order)
Fits Indian Challenger and Pursuit, Powerplus Chieftain, and Powerplus Roadmaster

Size: Covers a large portion of the tank side and should be centered during application for greatest appeal.
Weatherproof laminated decals are self adhesive.
How To Install: <-Visit our How To page for videos
We recommend using the wet method to install larger decals: A spray bottle with water and dish soap can be used to wet the tank and the back of the decal, allowing you to slide the decal into place. To get the proper soap/water mix, start with a squirt of soap into your spray bottle. Shake it up and then spray it on your hand. Rub your finger tips together. You should feel the slipperiness of the soap. If it just feels like water, add more soap and try again. Once you have it aligned properly, use a squeegee or some non-abrasive tool (even your fingers) to push the moisture out from behind the decal and it will adhere to your tank. A plastic putty scraper with a thin cloth wrapped around it will work great and prevent scratching your decals.

Powerplus Engine Accent Kit - White
Regular price $35.00
Shipping calculated at checkout.
Stock Notice:
All style options for our Powerplus Engine Accent kits are usually in stock. However, they are produced in manufacturing runs so if they're out of stock at the time of your order, there may be a waiting period before we ship them out. If your order is time sensitive, feel free to contact us to check stock before ordering.
Engine accent kits for Indian Challenger and Pursuit, Powerplus Chieftain, and Powerplus Roadmaster.
Our UV DTF 3D PermaSticker Engine Accent kits combine the latest UV DTF technology with exceptional adhesive properties, ensuring that your accents will stick around for the long haul. With unparalleled durability, remarkable adhesive properties, and heat resistance capable of direct contact with your engine, they're the perfect material to add a custom touch to your bike.
Kit includes a total of 41 pieces. All the accents you need to do both sides of your engine AND plenty of extras in case you make a mistake during installation. + 2 Brave Wolf logos. The kit comes on a 17.5" backing sheet with with a transfer layer on top.
We're offering these in a stunning 20 different color combination styles, but if we don't have the combo you want, consider purchasing multiple sets to mix-and-match and you'll save 20% on each. We've priced them affordably so this should be an option.
Material Finish: an enamel-like finish. I wouldn't classify it as gloss or matte. Similar to egg-shell finish.
Installation:
These accents will need to be installed on a warm, clean, and dry engine. Do not attempt to install them cold or with condensation on the surface. You can run your bike to get the engine warm, but not hot, or use a hair dryer/heat gun. Installing these in winter months will be more difficult. Use scissors to separate each individual piece from the sheet. A pair of tweezers can be helpful to hold the accents in proper placement during installation. Once in place, use a firm object to press/rub over the full surface before peeling off the top transfer layer. Go slow while peeling the transfer layer. If the accent peels up without separating from the transfer, place it back down and press it more firmly into place. Because the surface is curved, the “I” will be the most challenging piece, so cut out around it as closely as possible to make it easier to position.


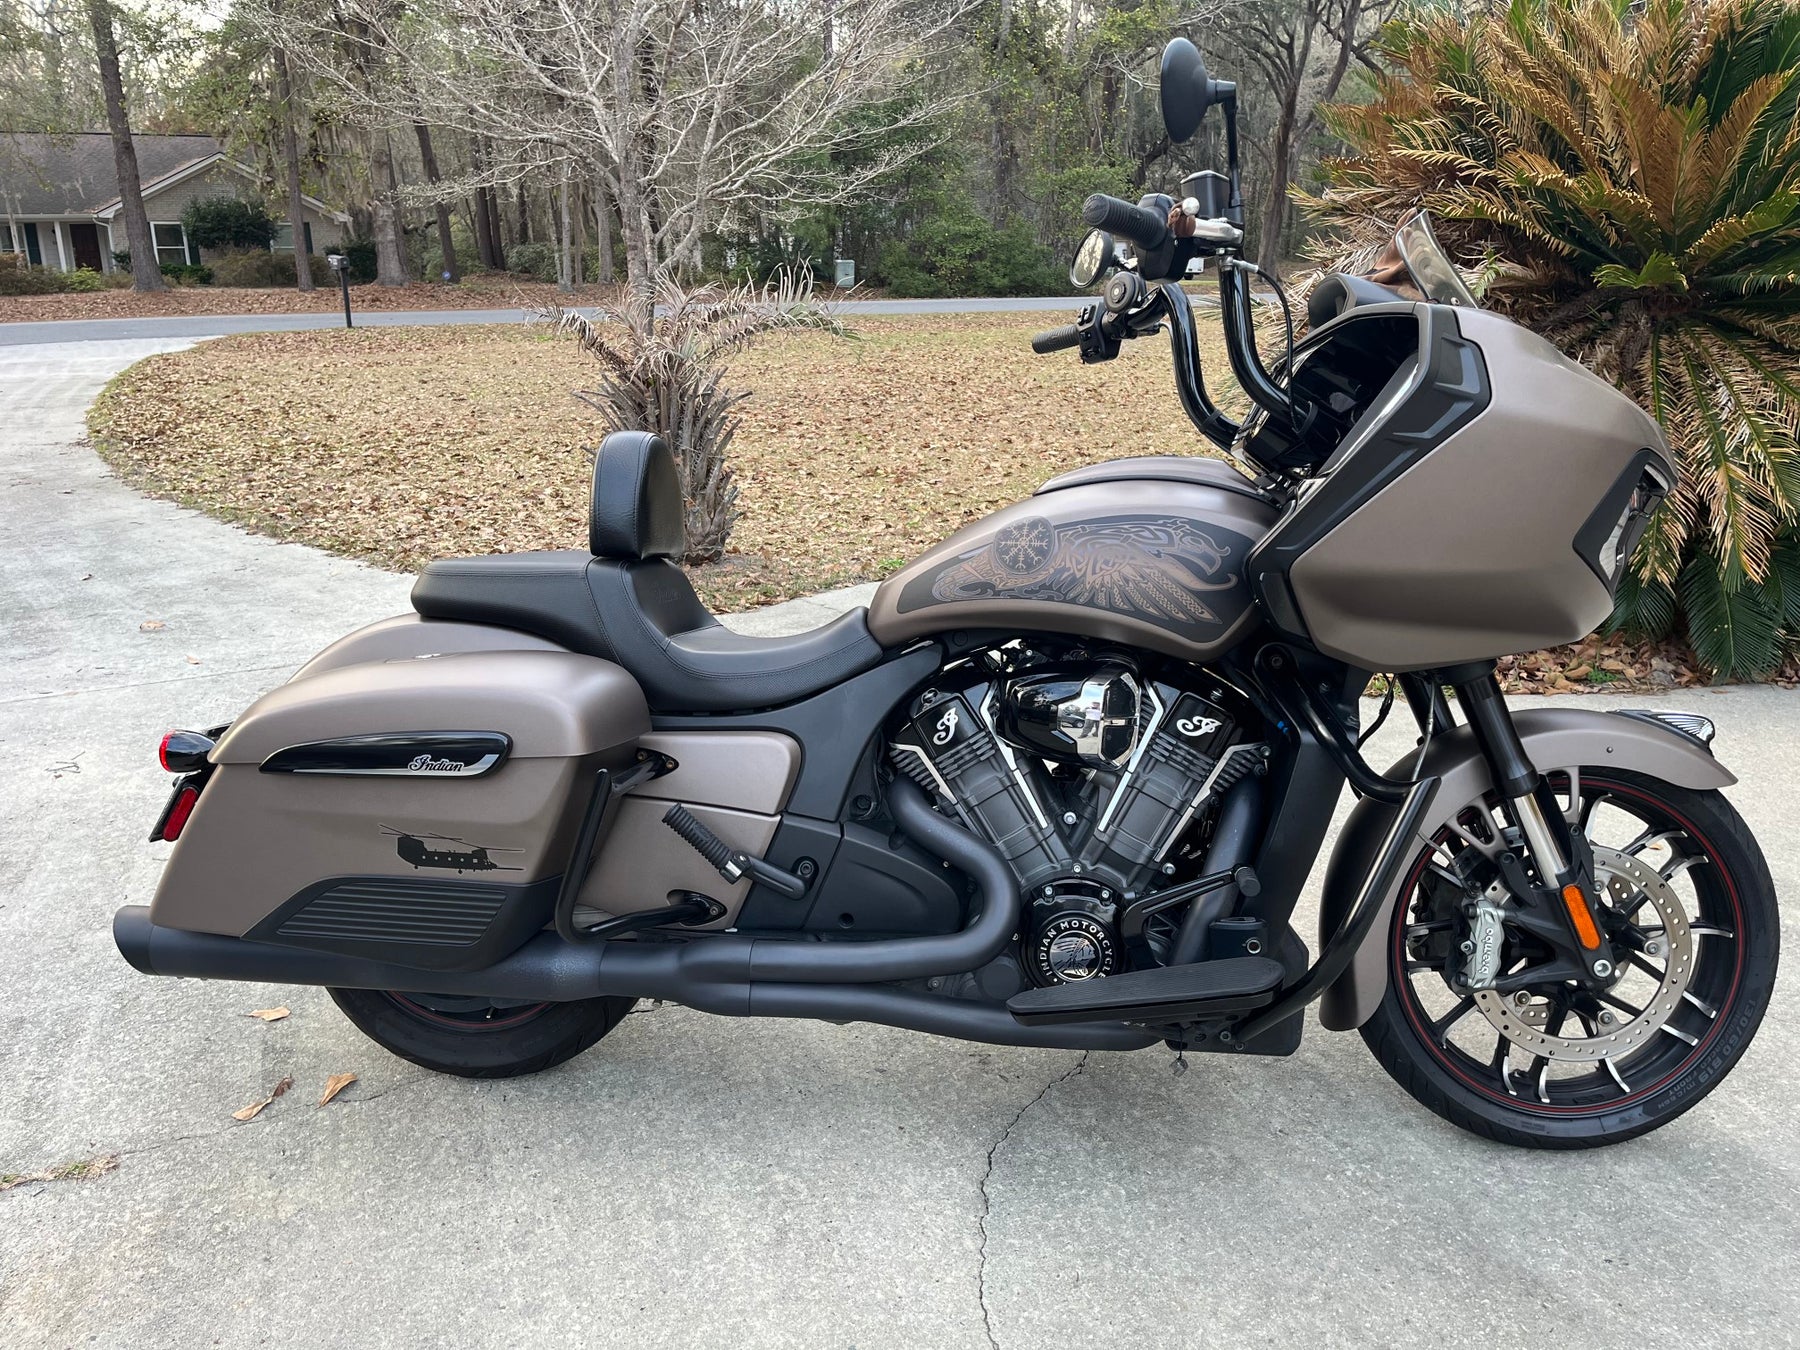
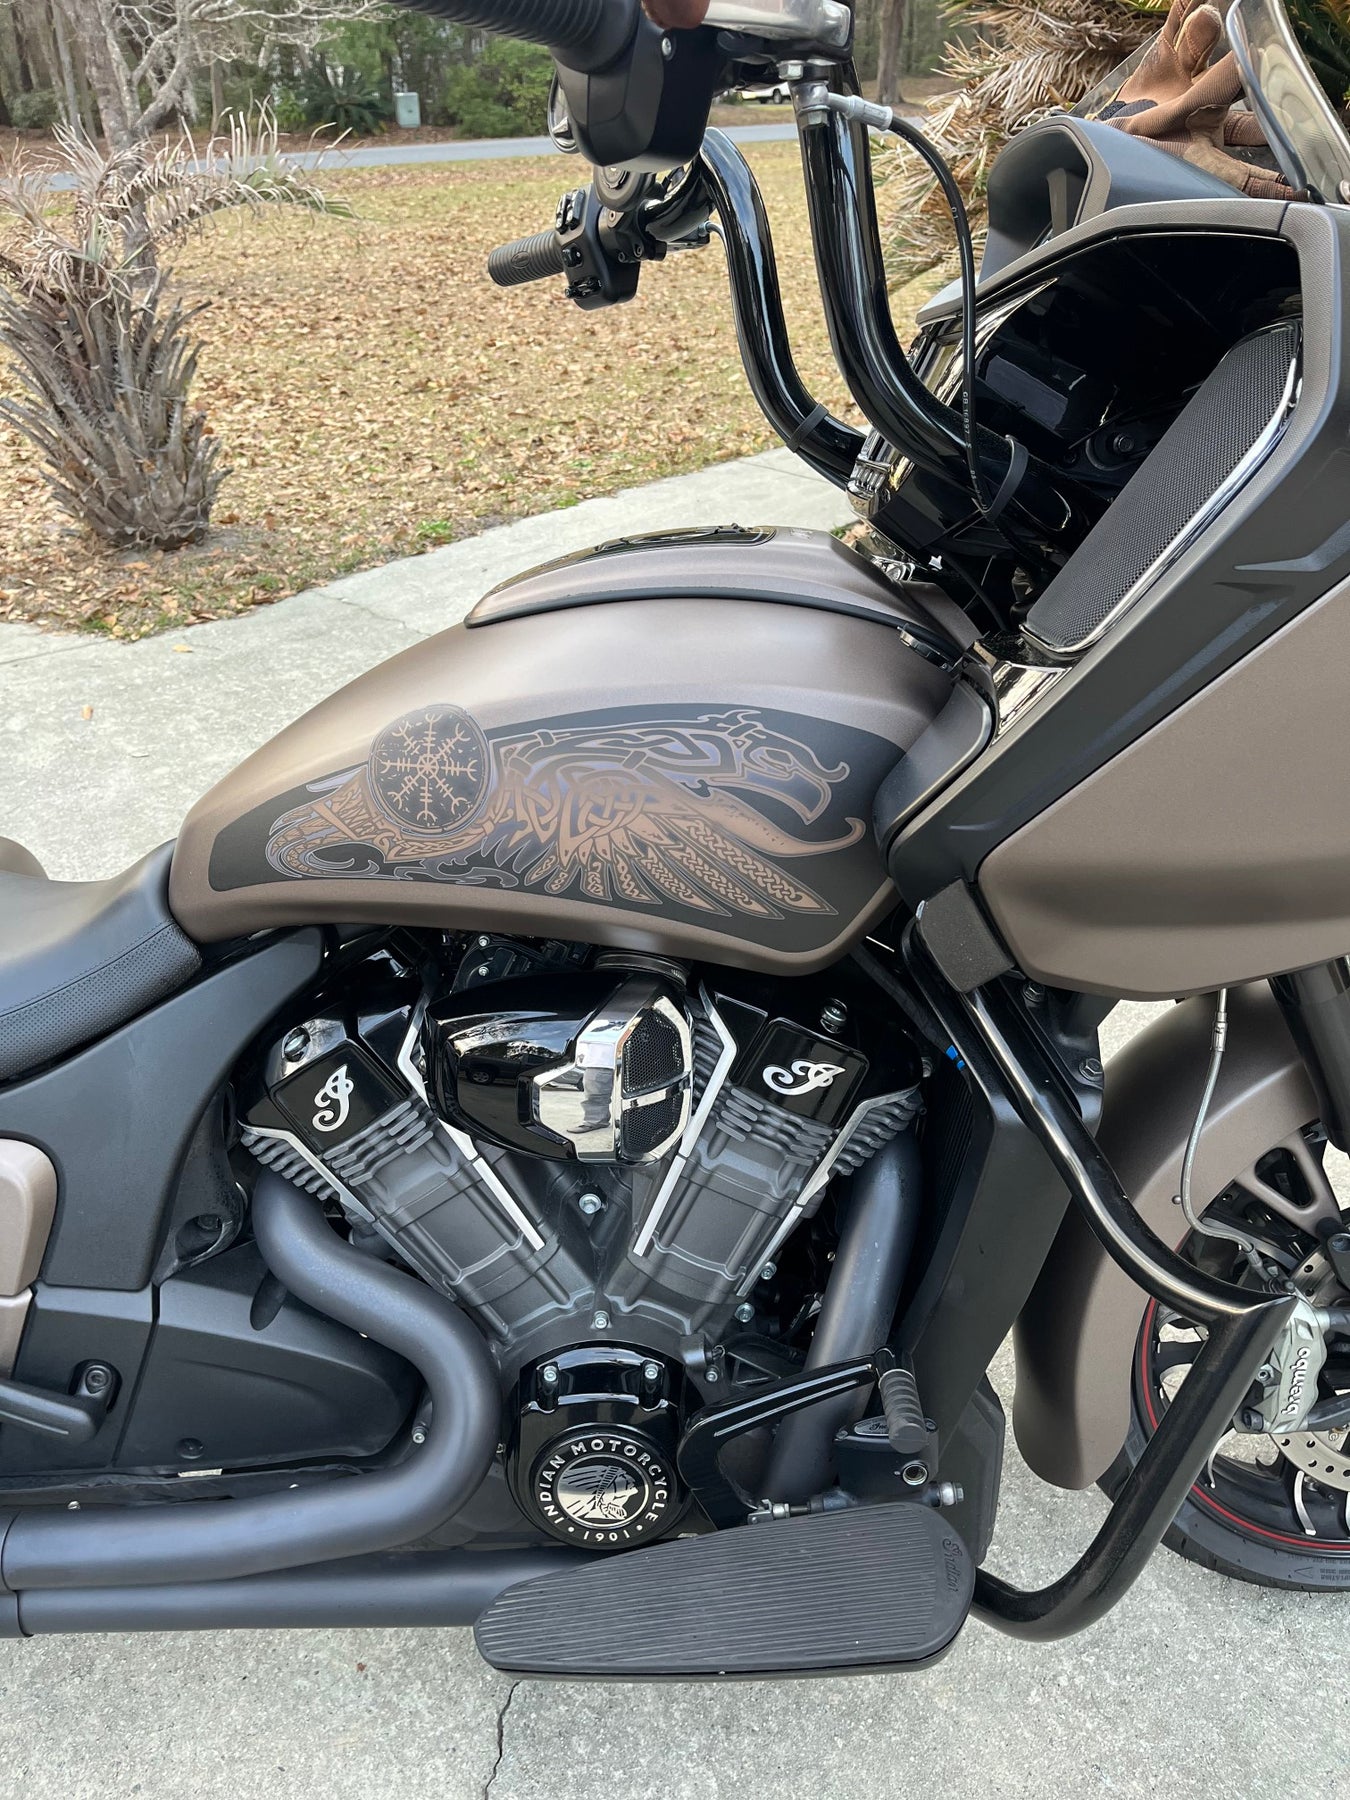
Odin's Ravens "Bronze" Tank Decal set for Indian Powerplus lineup
Regular price $100.00
Shipping calculated at checkout.
Stock Notice: (may take approximately 2-3 weeks before shipping if not in stock at the time of your order)
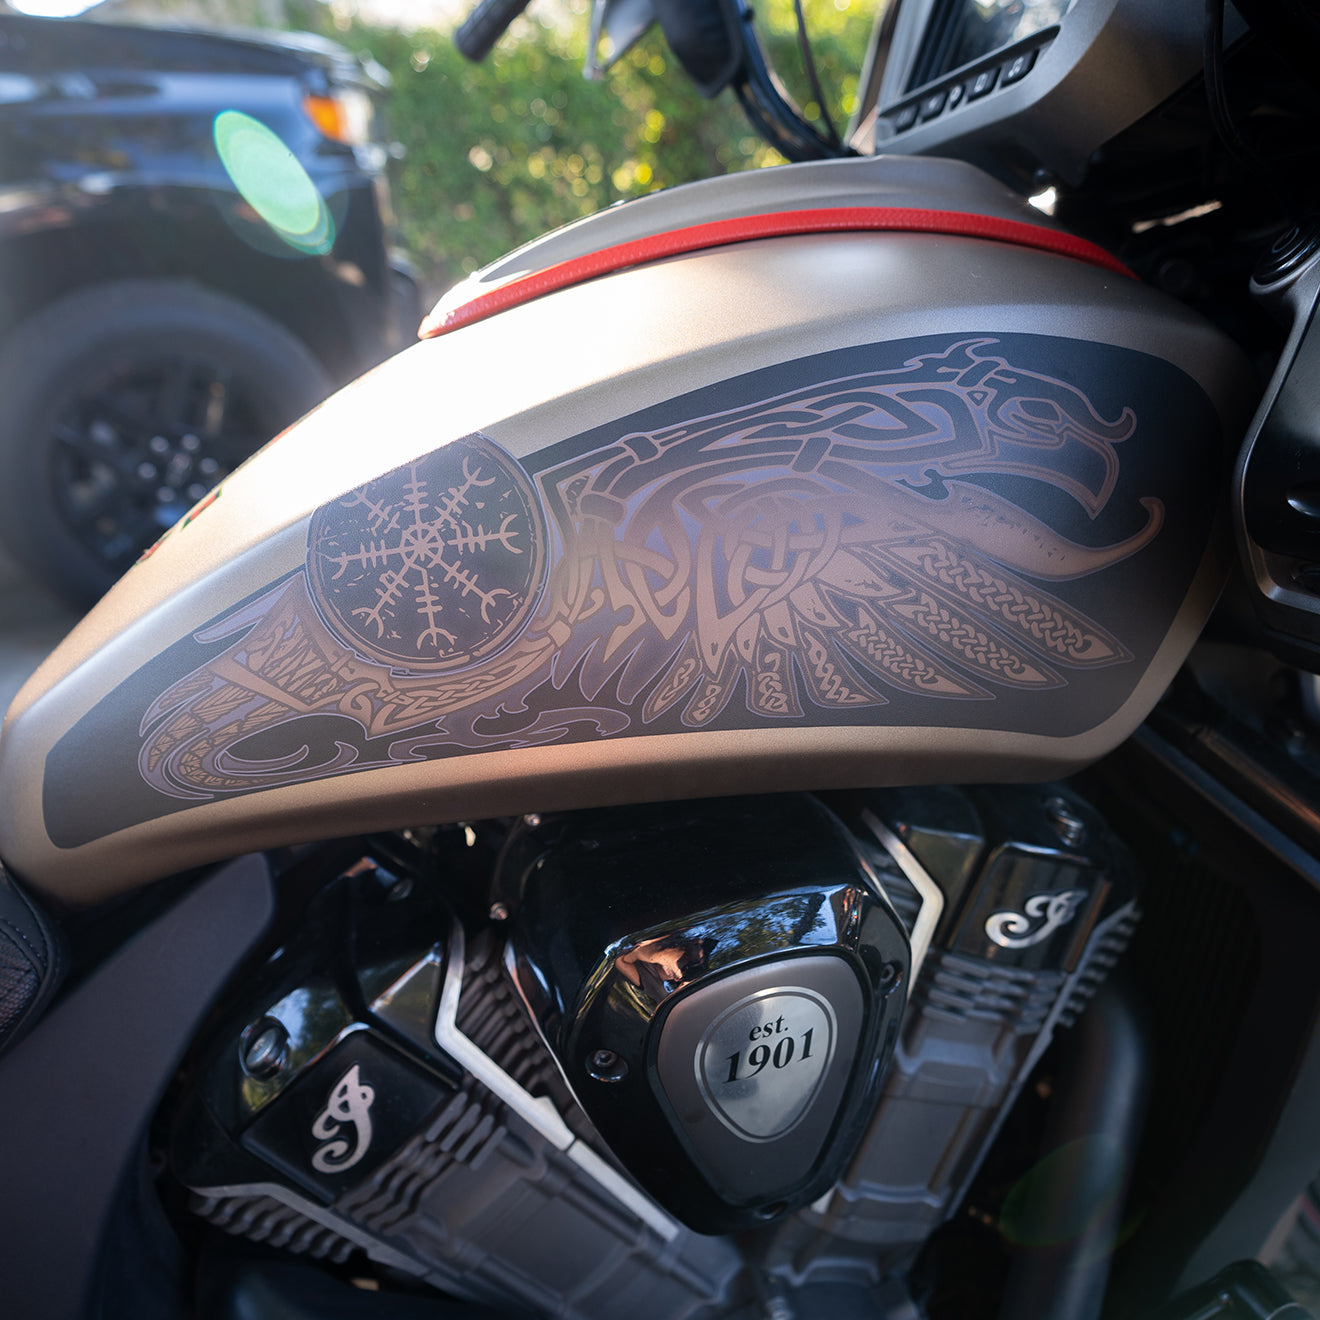
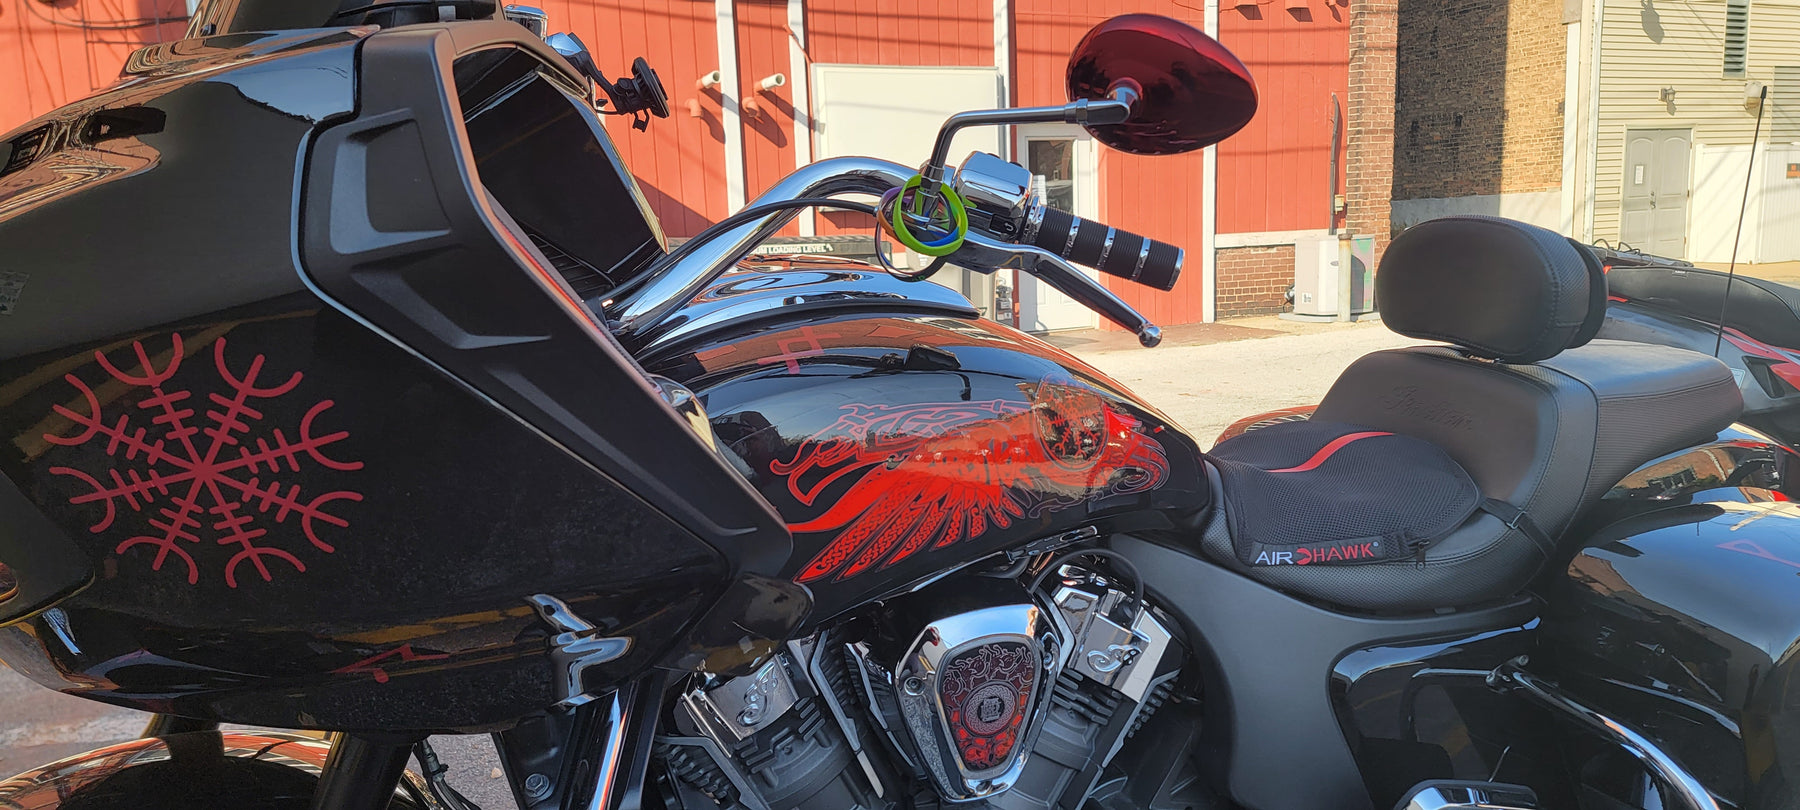
“Odin's Ravens Bronze" Tank Decal set for Indian Challenger/Pursuit
The artwork for these decals was sponsored by Tyler Cramer. Featuring Odin's two ravens, Huginn and Muninn (one for each side of the tank).
Size: Covers a large portion of the tank side on Challenger and Pursuit models and should be centered during application for greatest appeal. The "Helm of Awe" will wrap slightly over the top of the tank to create depth (see image below)

How To Install: See video below
Weatherproof HD Gloss finish vinyl decals are self adhesive. We recommend using the wet method to install these decals: A spray bottle with water and dish soap can be used to wet the surface and the back of the decal, allowing you to slide the decal into place. Once you have it aligned properly, use your thumbs to push the moisture out from behind the decal, working from the center outwards to the edges and it will adhere to your bike. Using the wet method allows the decal surface to evenly distribute over the curved surface. A hair dryer to apply heat will make the process easier since the vinyl becomes more soft and flexible when warm.

Odin's Ravens-White-Tank Decal Set for Indian Powerplus lineup
Regular price $100.00
Shipping calculated at checkout.
Stock Notice - Usually in stock (may take approximately 2-3 weeks before shipping if not in stock at time of order)
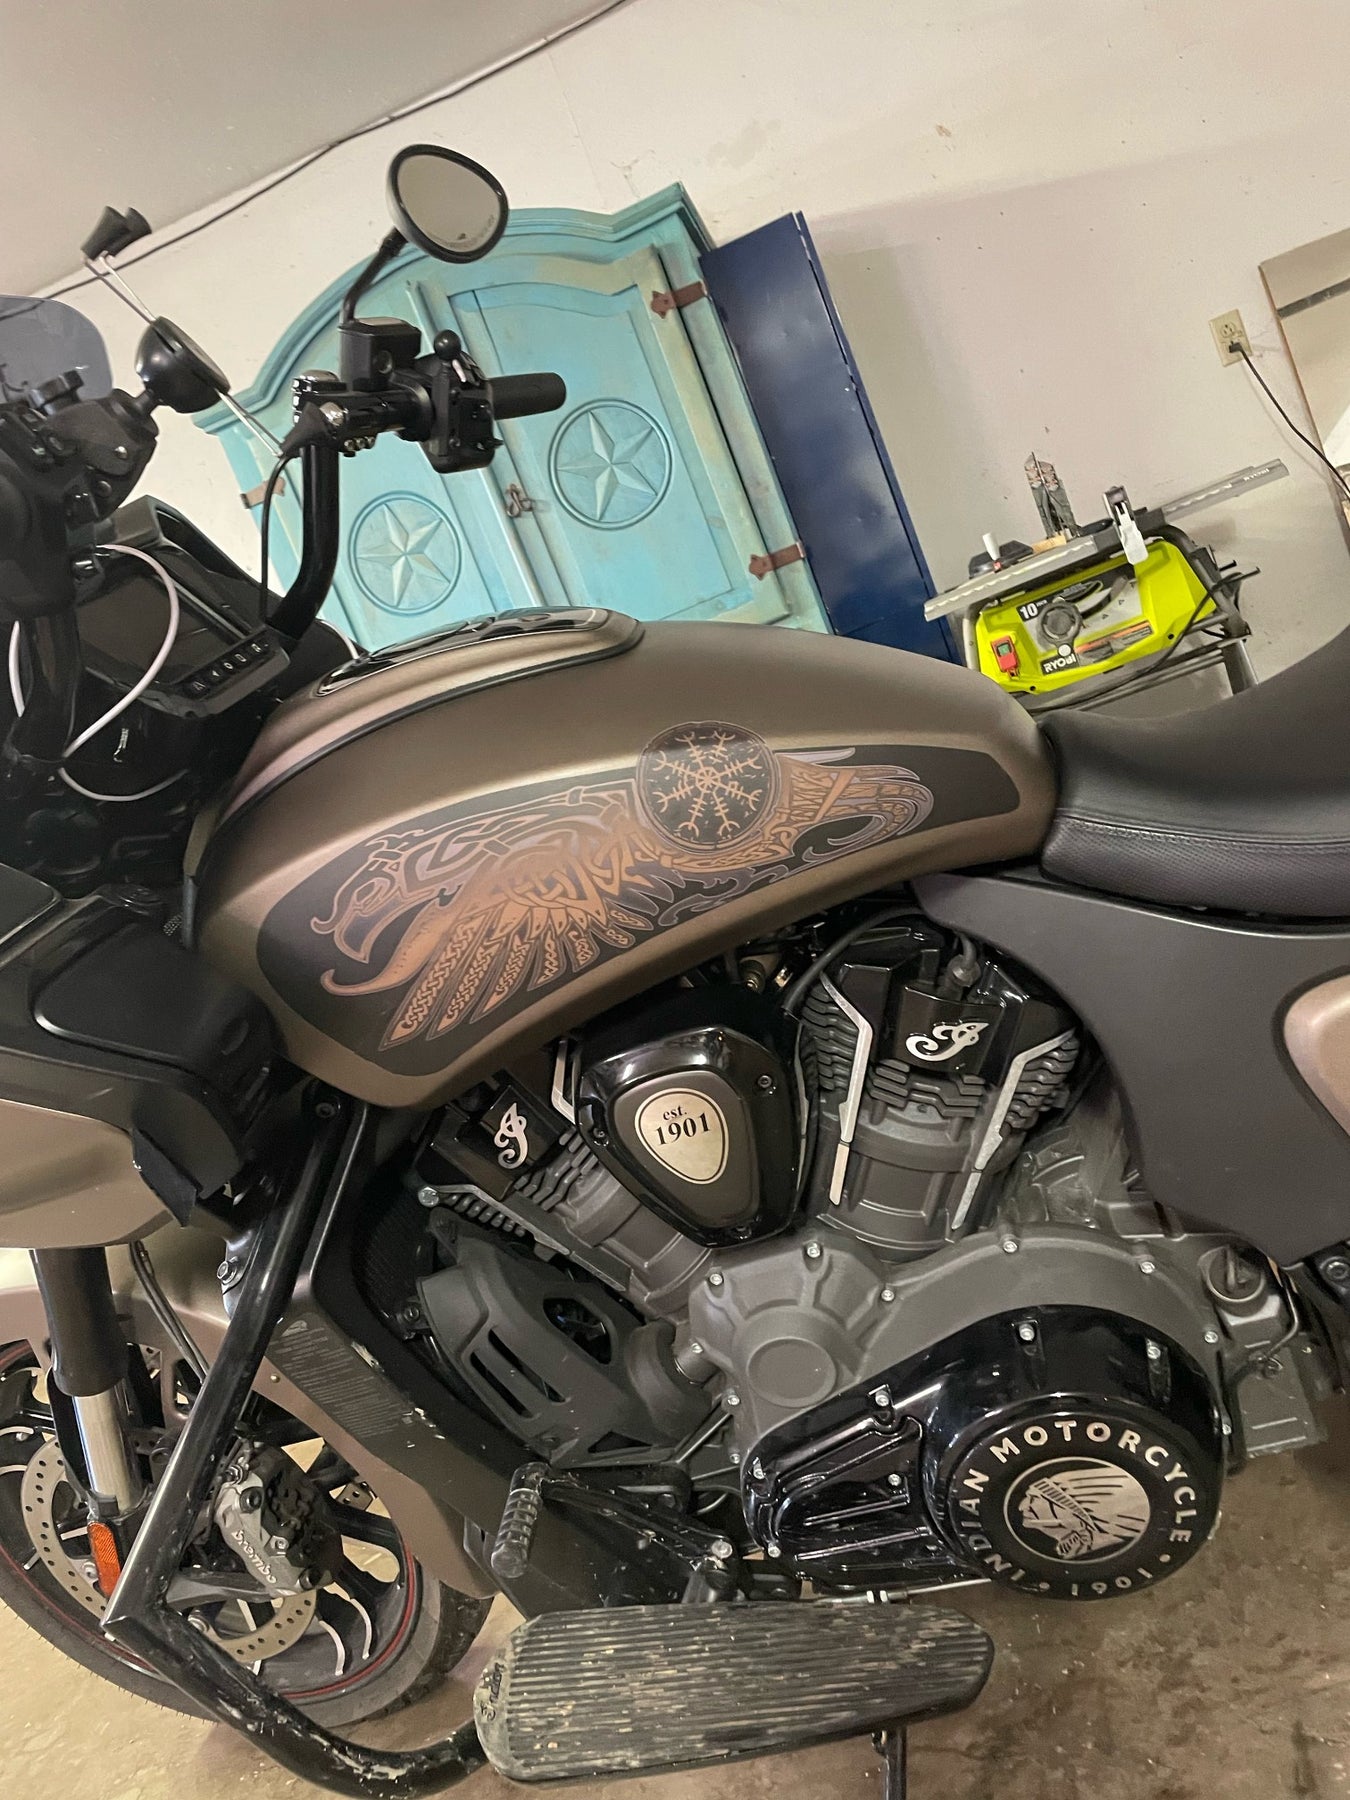
Fits Indian Challenger and Pursuit, Powerplus Chieftain, and Powerplus Roadmaster
Size: Covers a large portion of the tank side and should be centered during application for greatest appeal.

How To Install: <-Visit our How To page for videos
Weatherproof HD Gloss finish vinyl decals are self adhesive. We recommend using the wet method to install these decals: A spray bottle with water and dish soap can be used to wet the surface and the back of the decal, allowing you to slide the decal into place. Once you have it aligned properly, use your thumbs to push the moisture out from behind the decal, working from the center outwards to the edges and it will adhere to your bike. Using the wet method allows the decal surface to evenly distribute over the curved surface. A hair dryer to apply heat will make the process easier since the vinyl becomes more soft and flexible when warm.


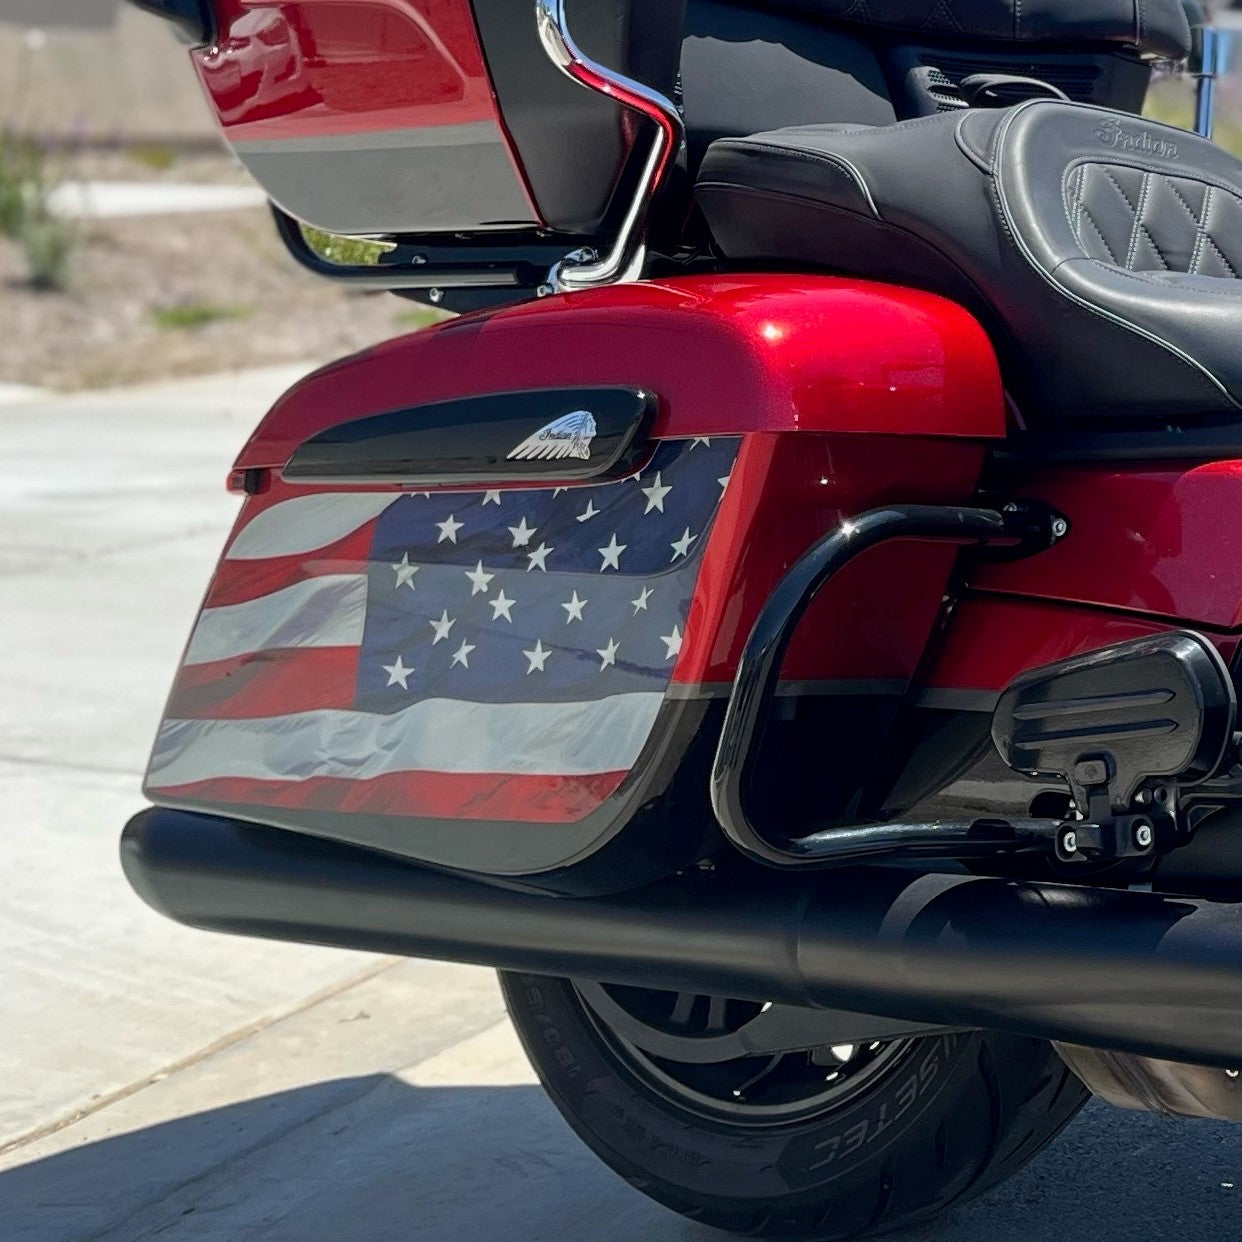


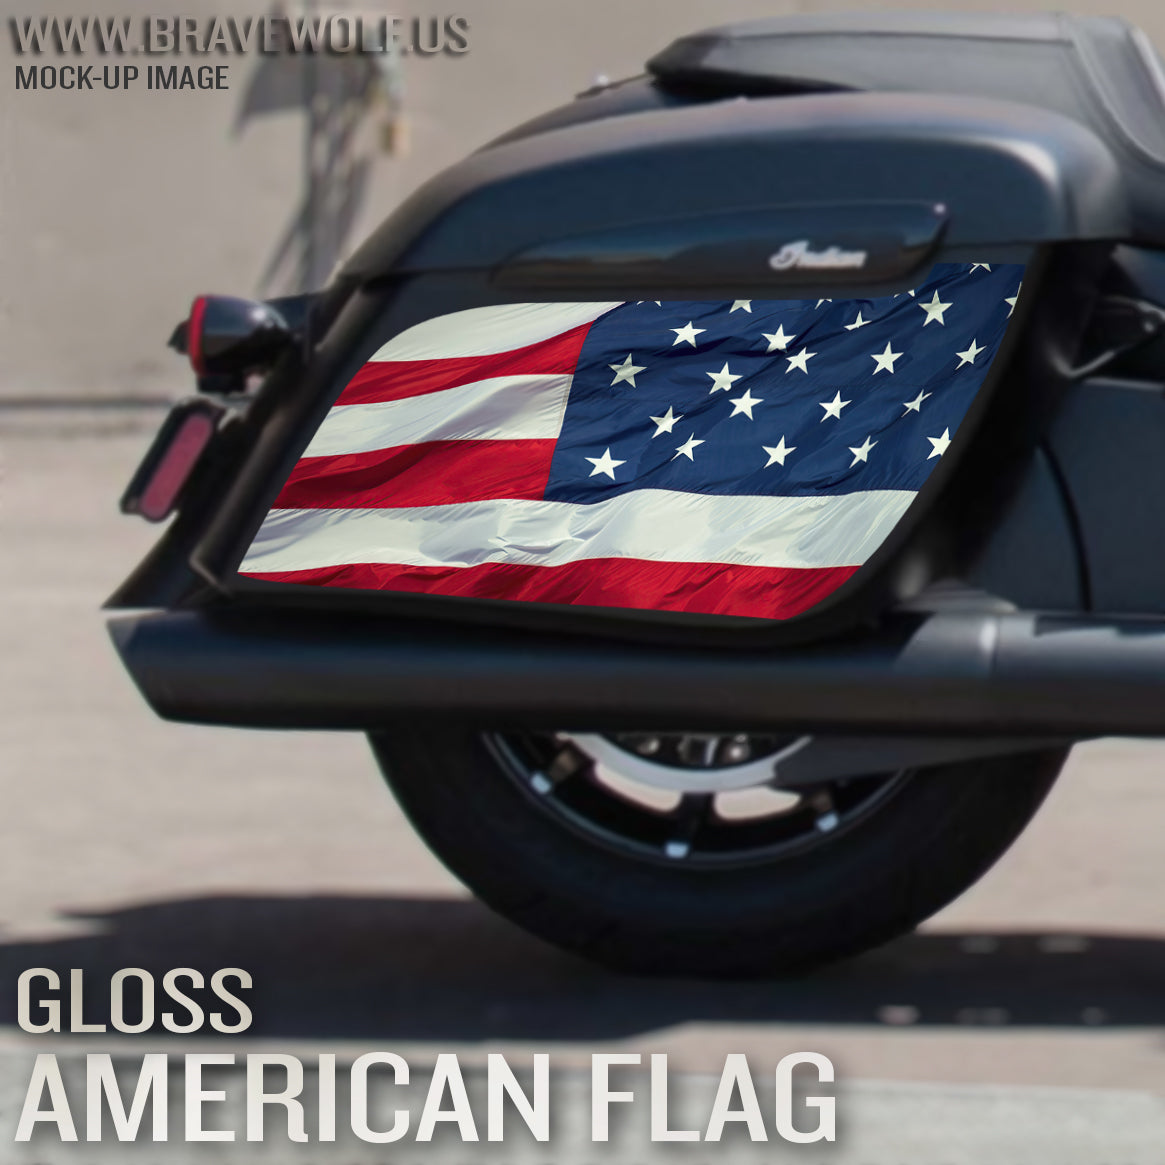
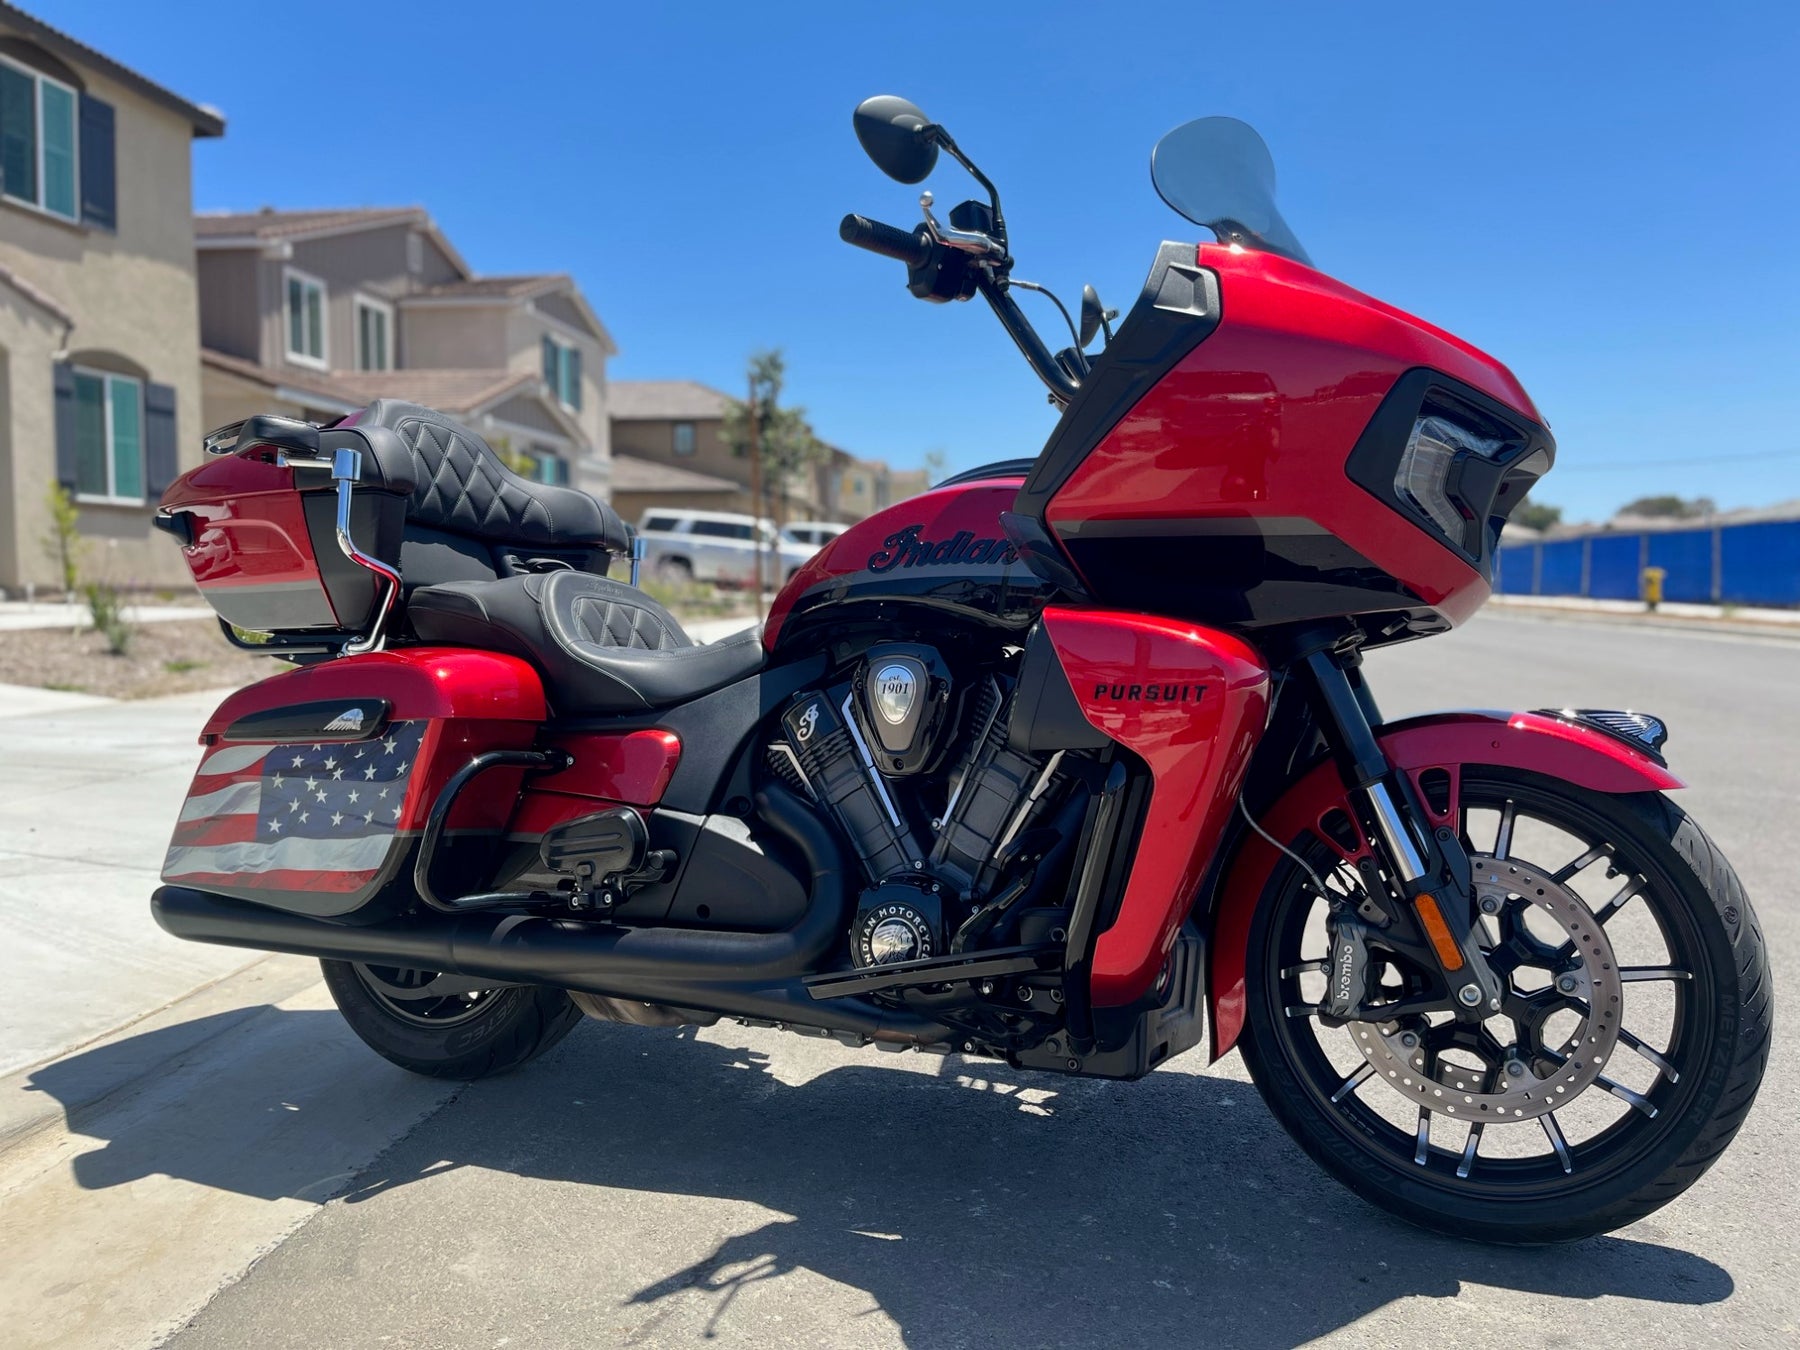


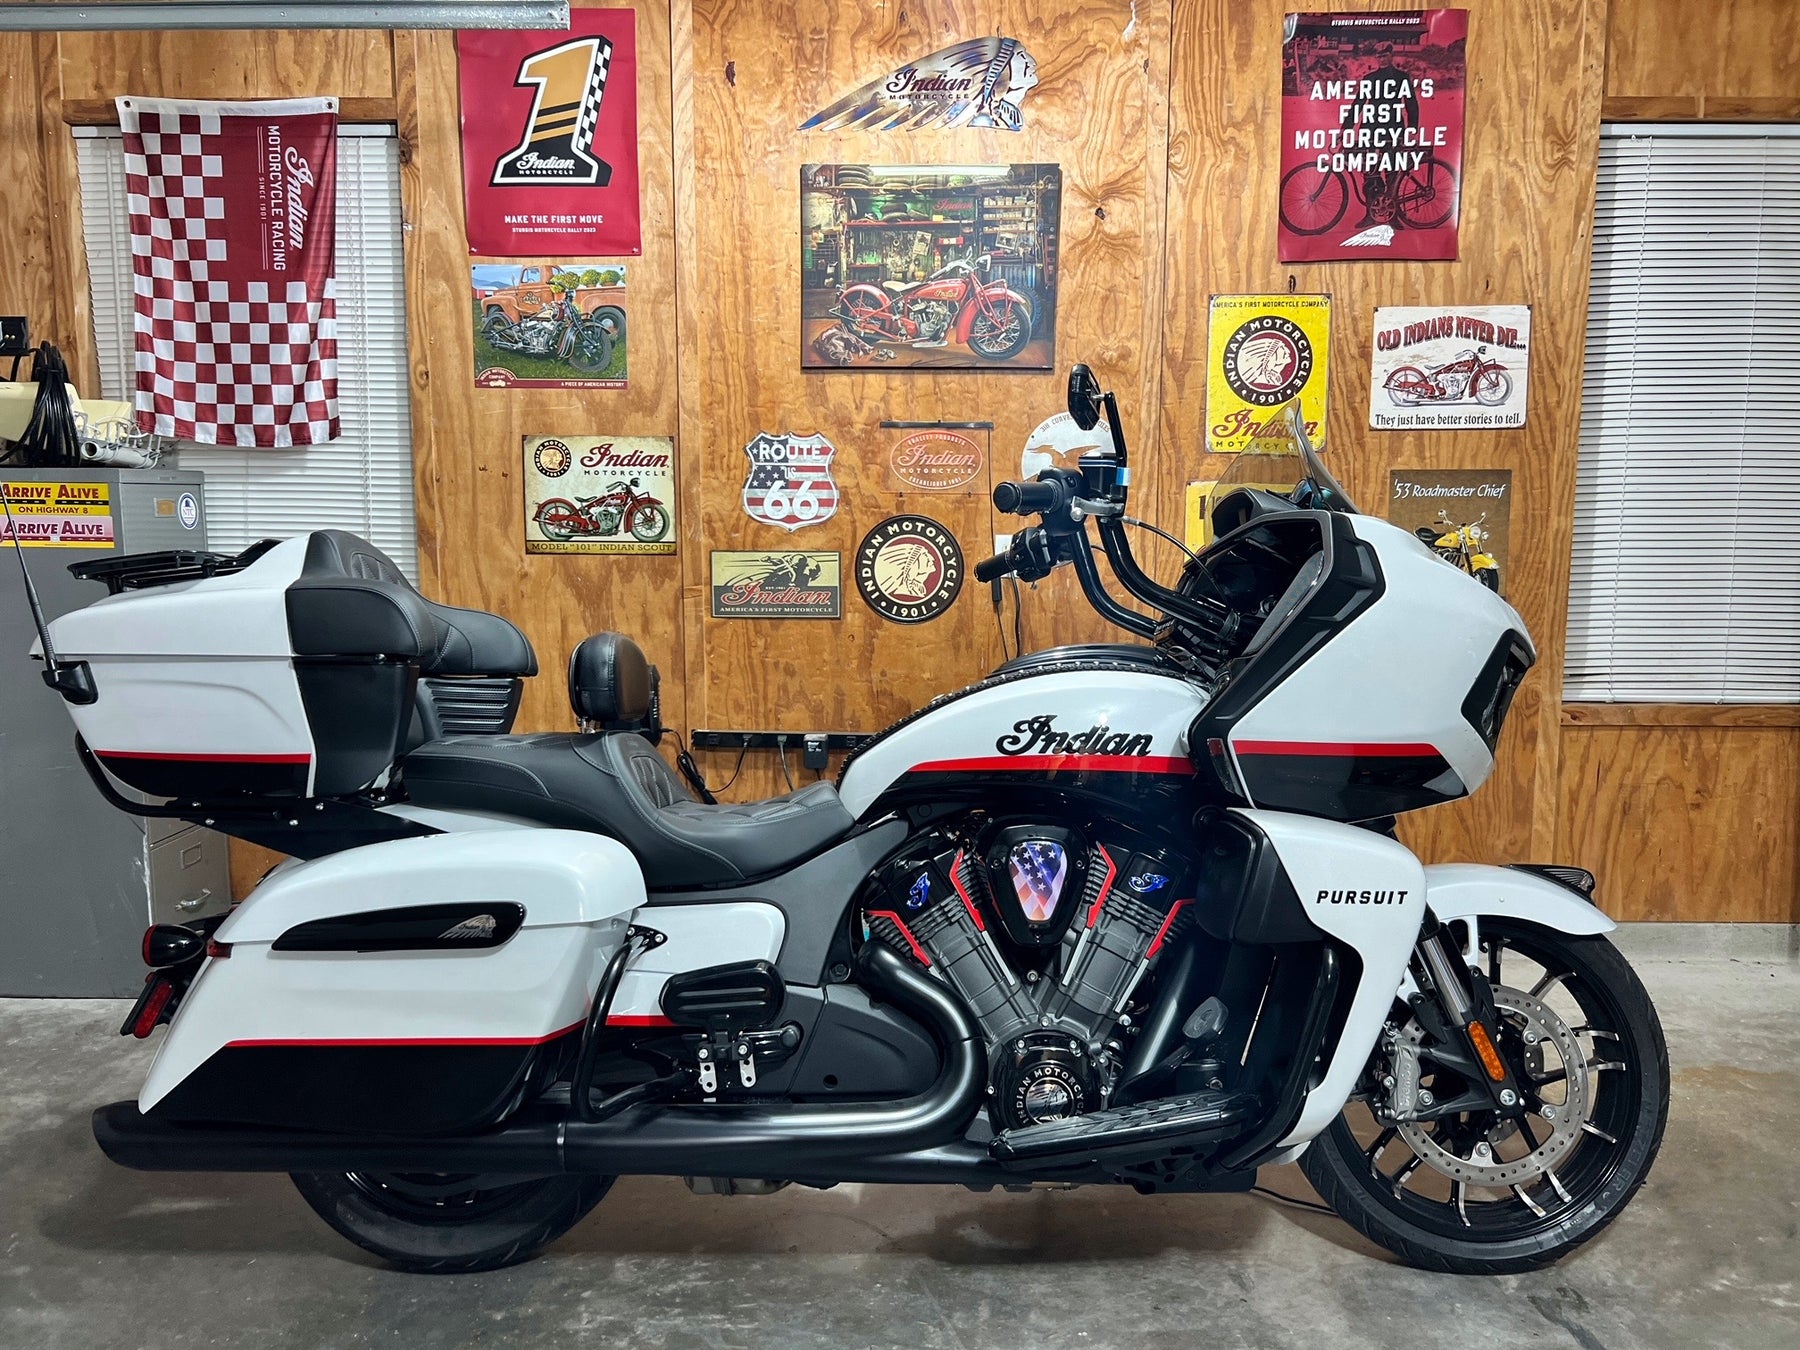
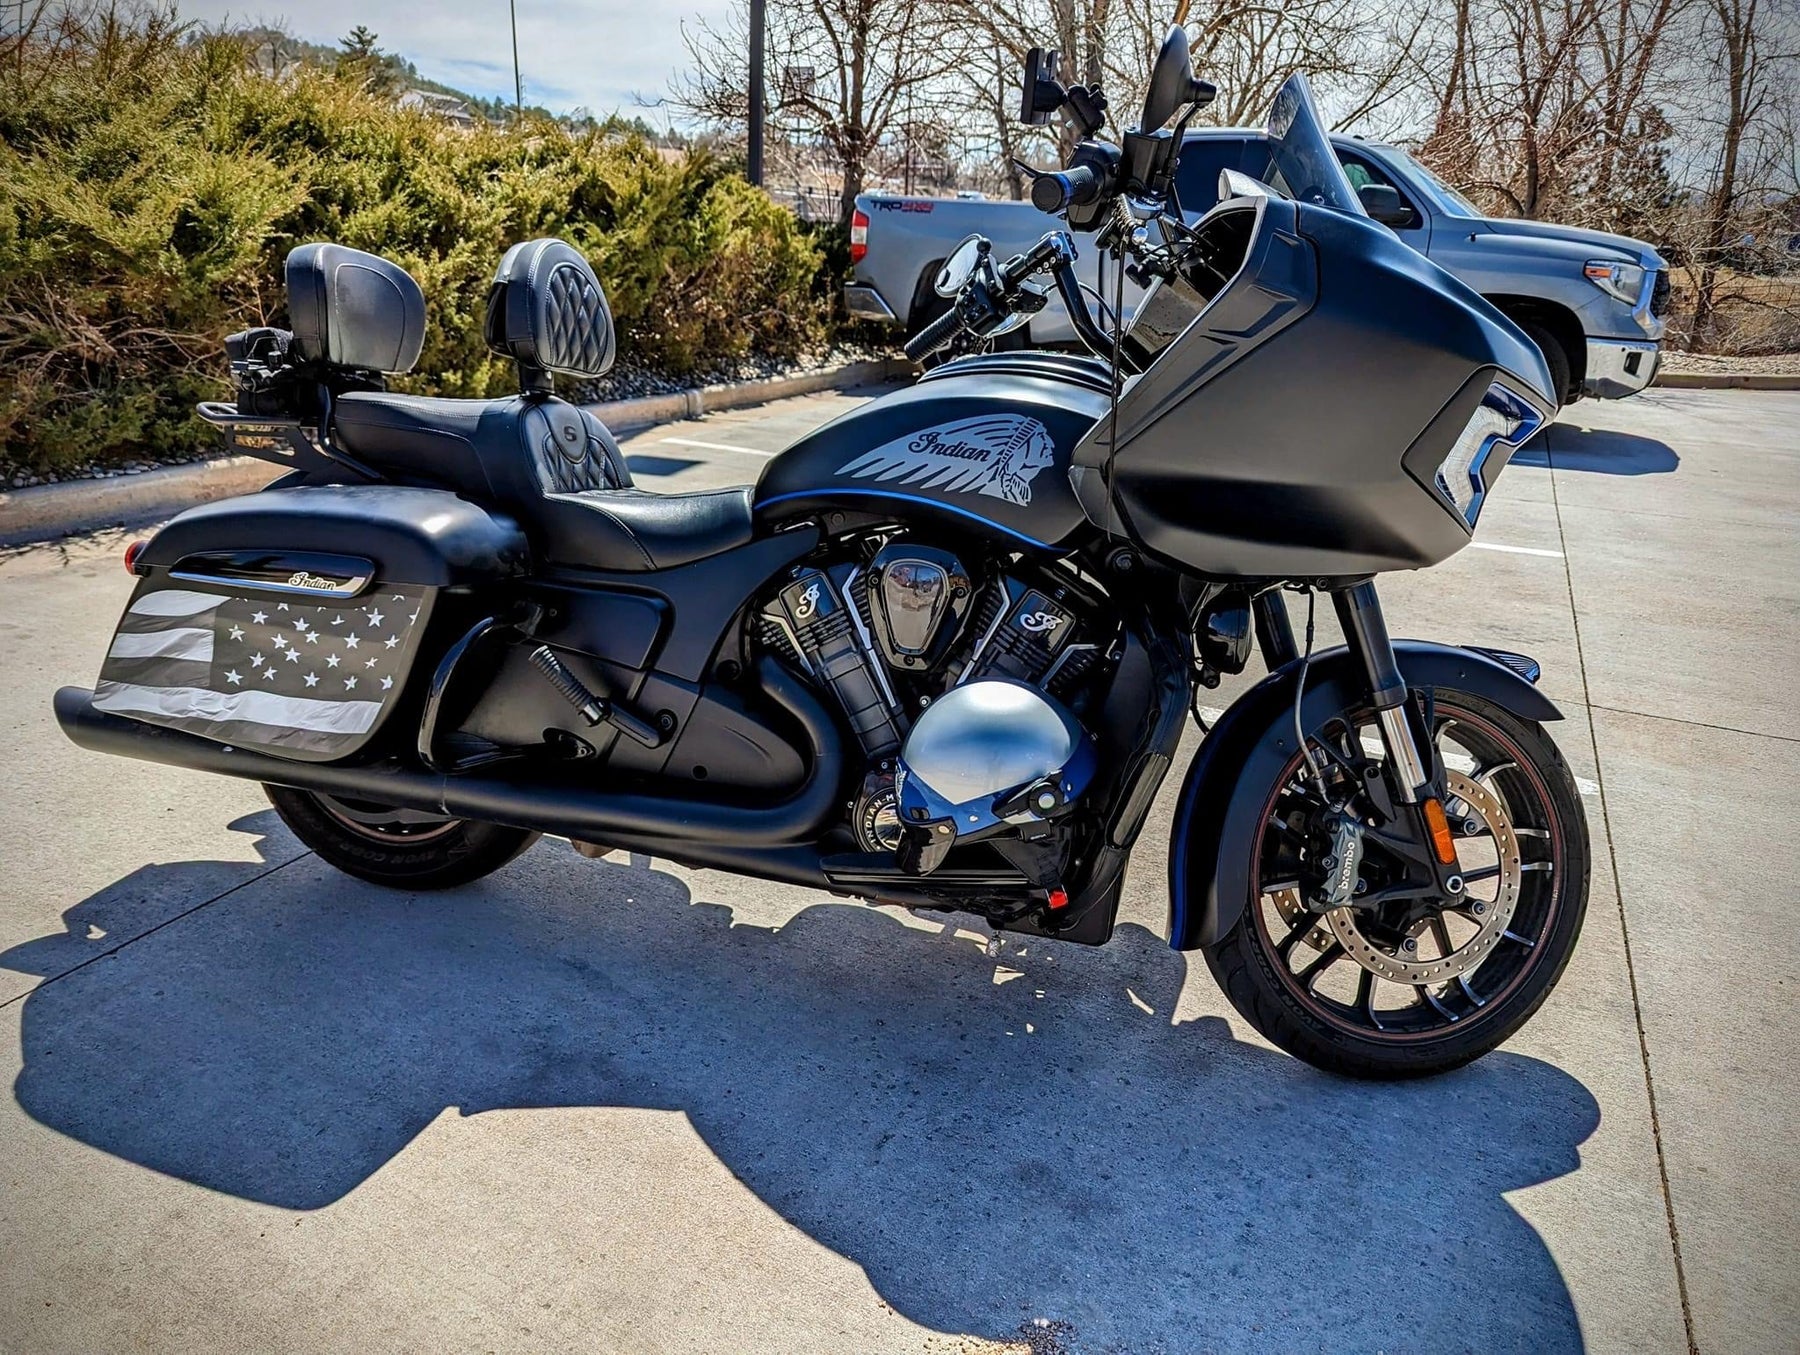
American Flag Decal Set - New Style Indian Saddlebags
Regular price $150.00
Shipping calculated at checkout.
Stock Notice: (may take approximately two-three weeks before shipping if not in stock at the time of your order)
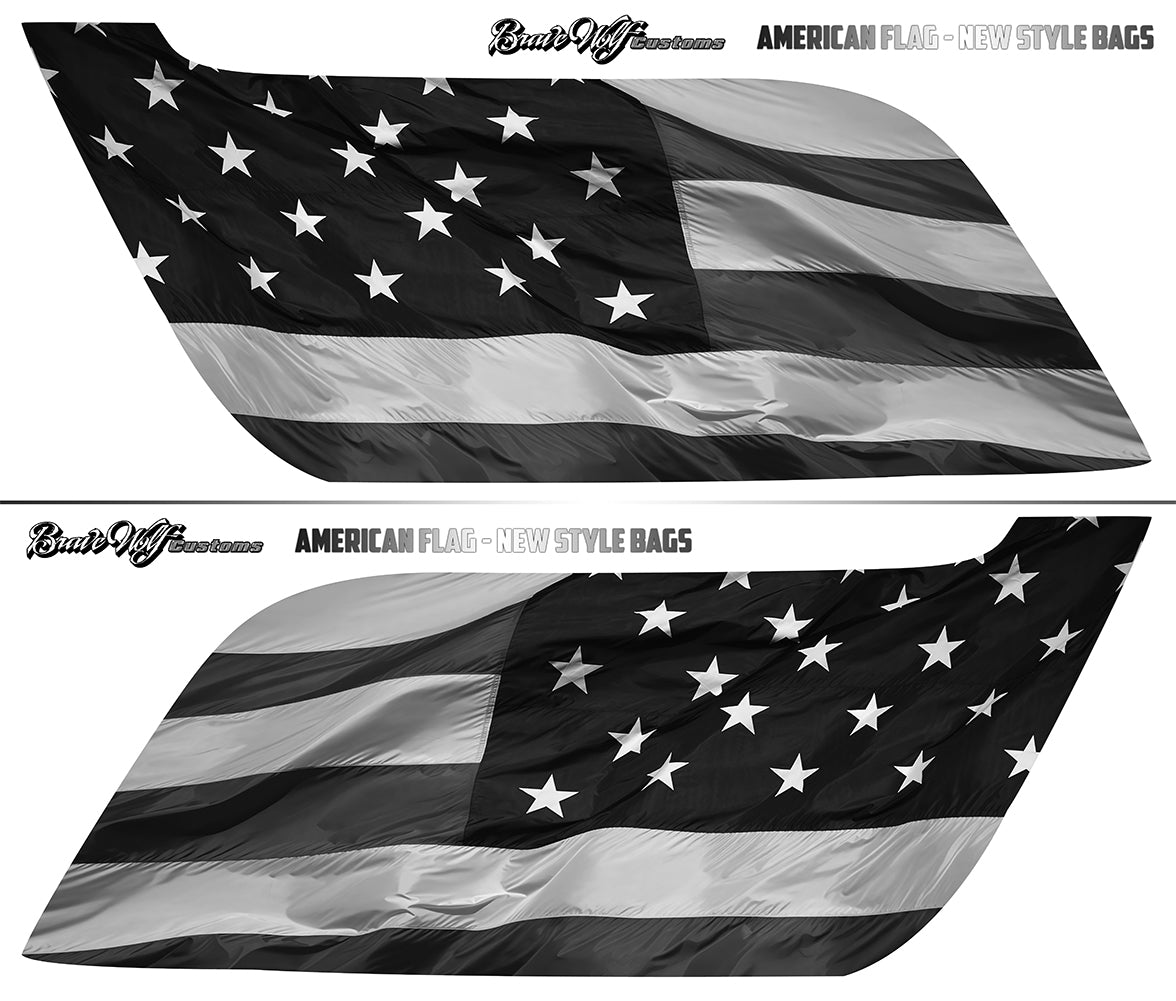
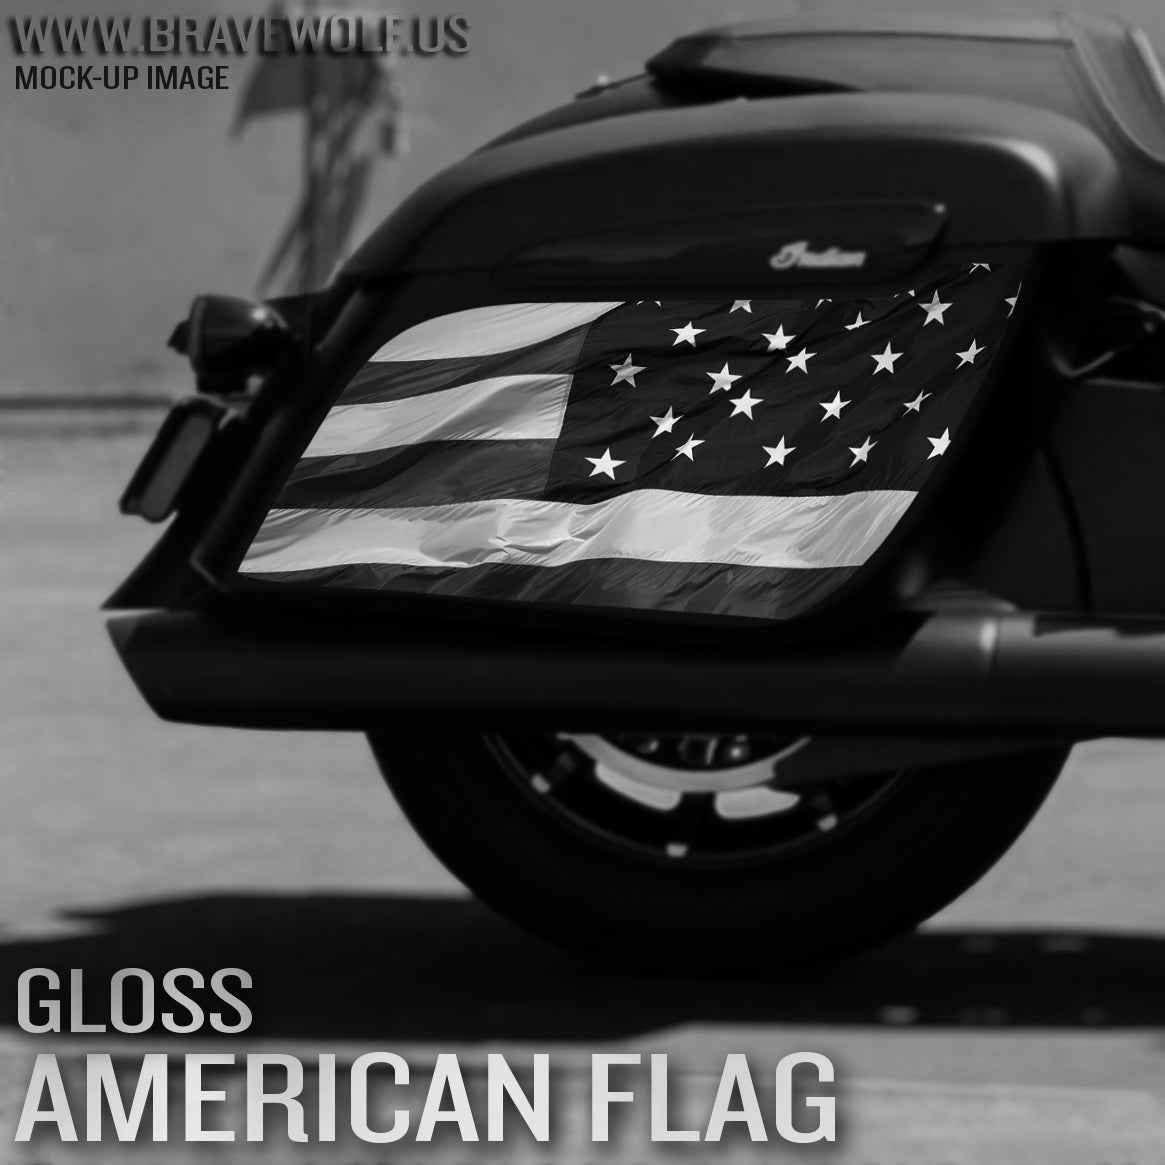
American Flag Decal Set for new style Indian Saddlebags
Size: Fits the side of the left and right saddlebag for the newer style (non-rounded) Indian hard bags. For models that have the plastic bag guard on the front/bottom corner, the guard must be removed to use these decals. (See Mock-up images)

Weatherproof laminated decals are self adhesive.
How To Install: <-Visit our How To page for videos
We recommend using the wet method to install larger decals: A spray bottle with water and dish soap can be used to wet the tank and the back of the decal, allowing you to slide the decal into place. To get the proper soap/water mix, start with a squirt of soap into your spray bottle. Shake it up and then spray it on your hand. Rub your finger tips together. You should feel the slipperiness of the soap. If it just feels like water, add more soap and try again. Once you have it aligned properly, use a squeegee or some non-abrasive tool (even your fingers) to push the moisture out from behind the decal and it will adhere to your tank. A plastic putty scraper with a thin cloth wrapped around it will work great and prevent scratching your decals.


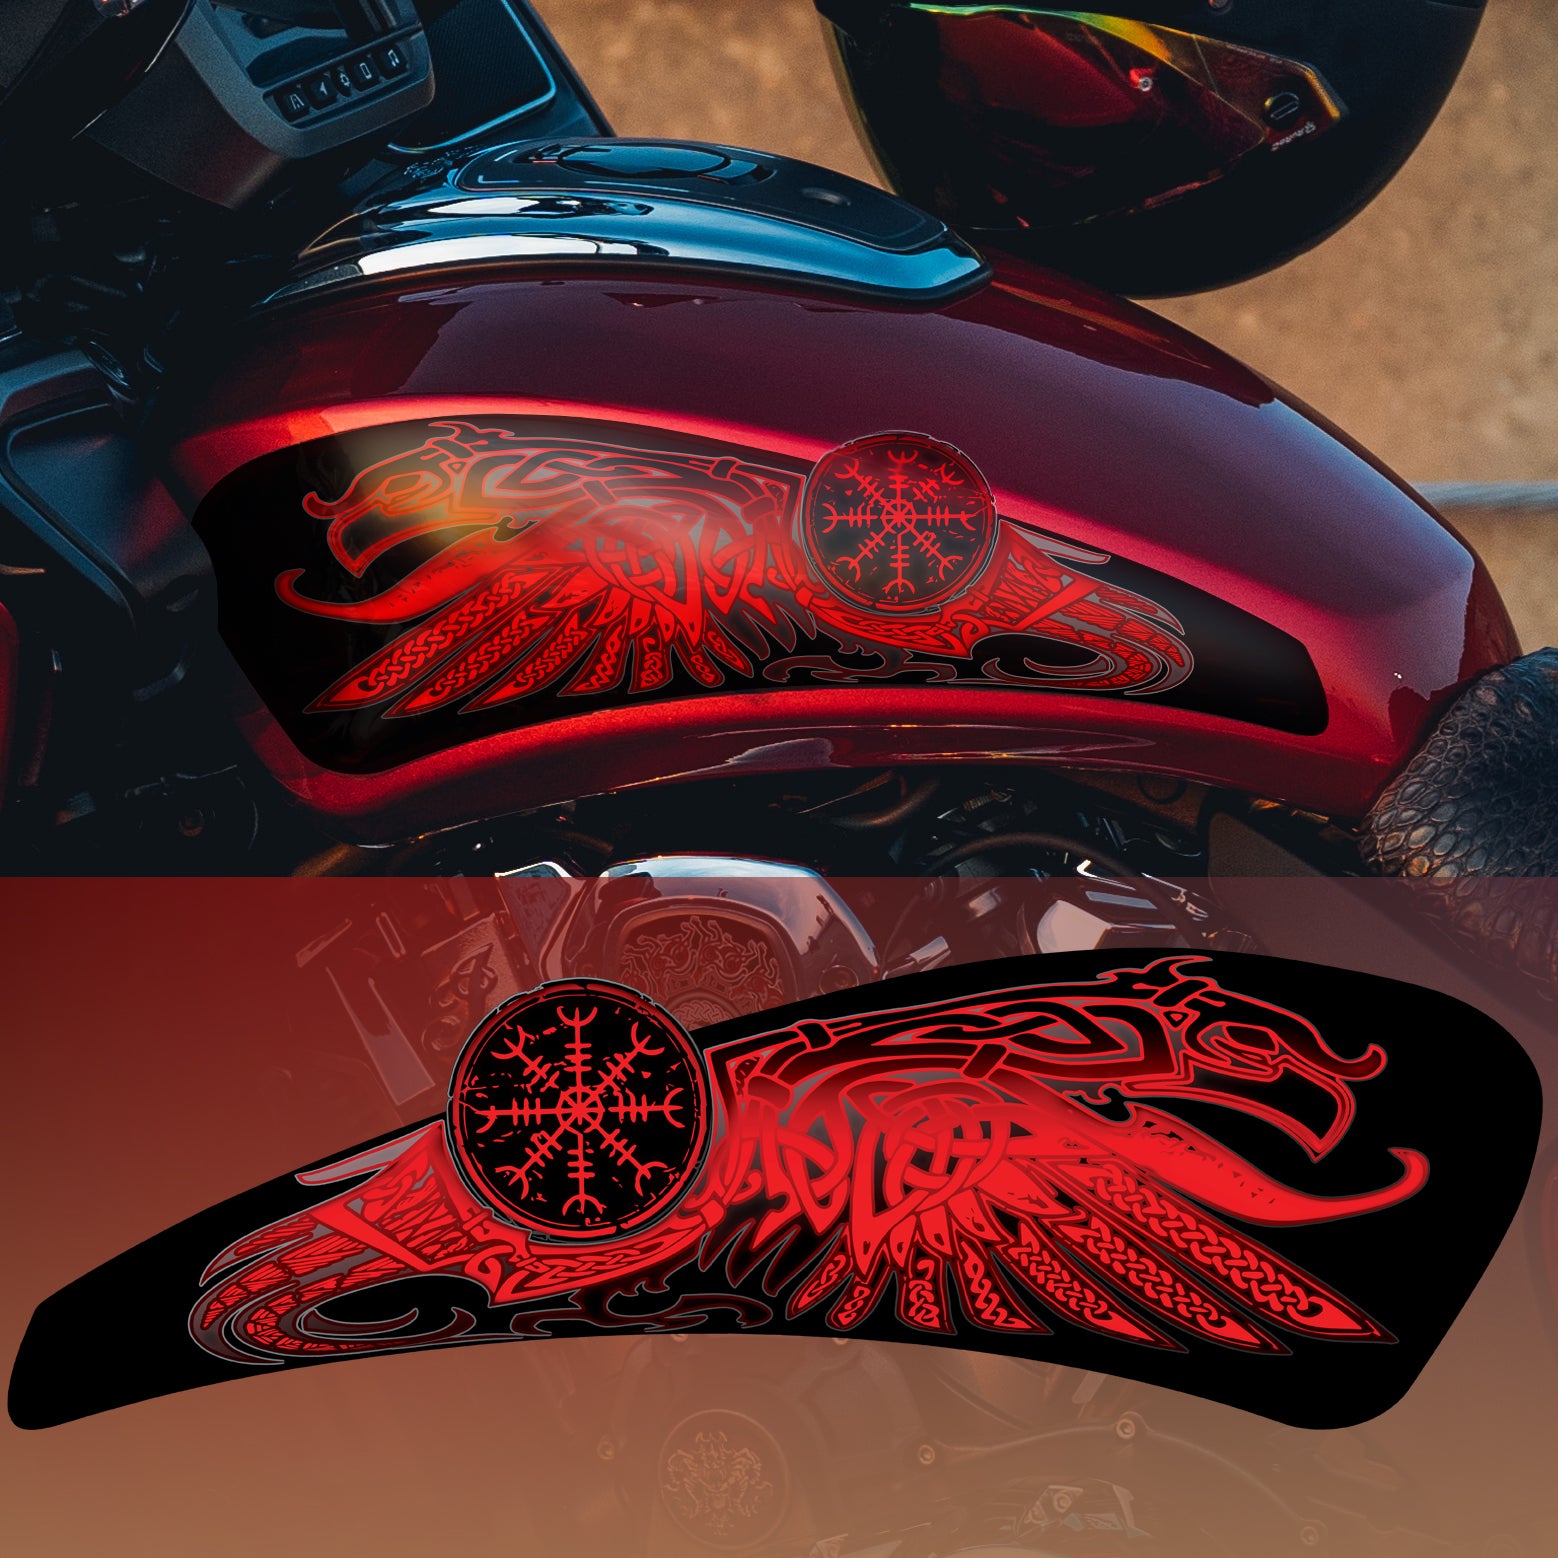
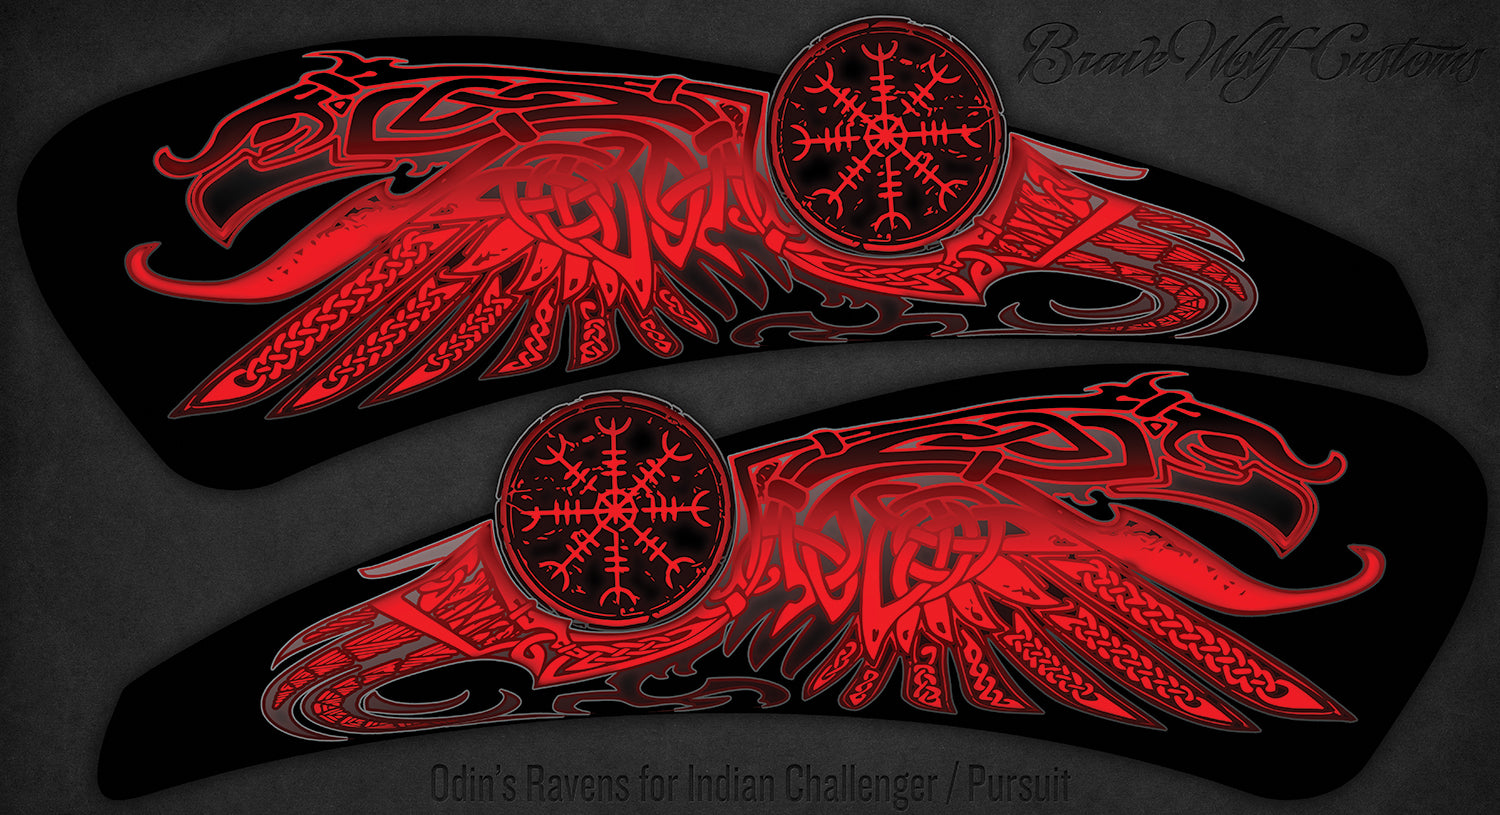

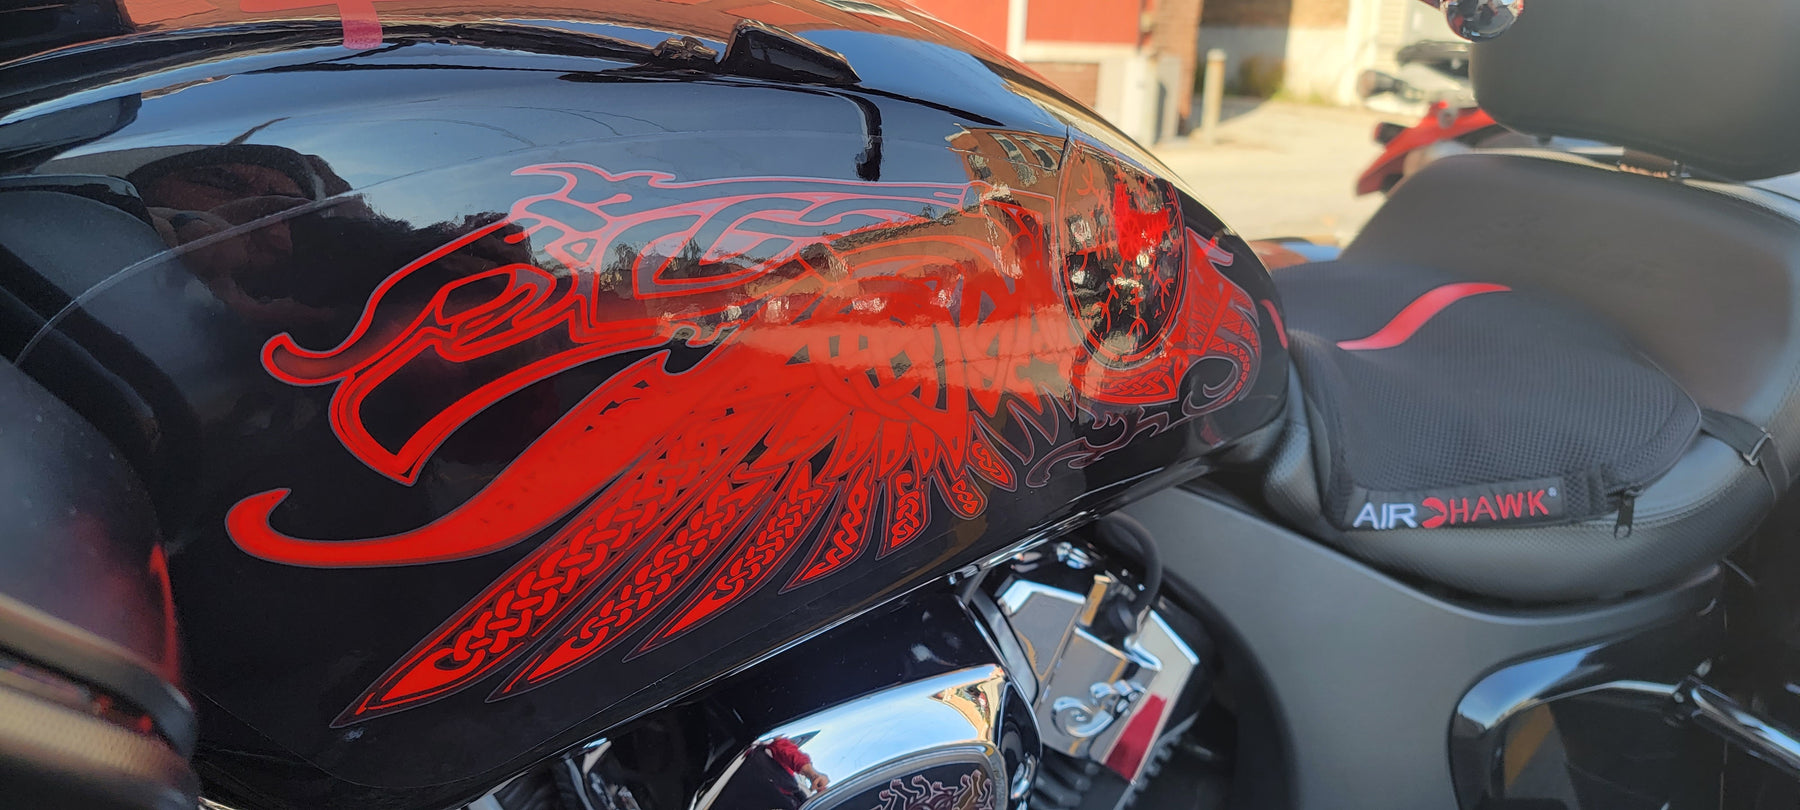
Odin's Ravens Tank Decal Set for Indian Powerplus lineup
Regular price $100.00
Shipping calculated at checkout.
Stock Notice: (may take approximately 2-3 weeks before shipping if not in stock at the time of your order)
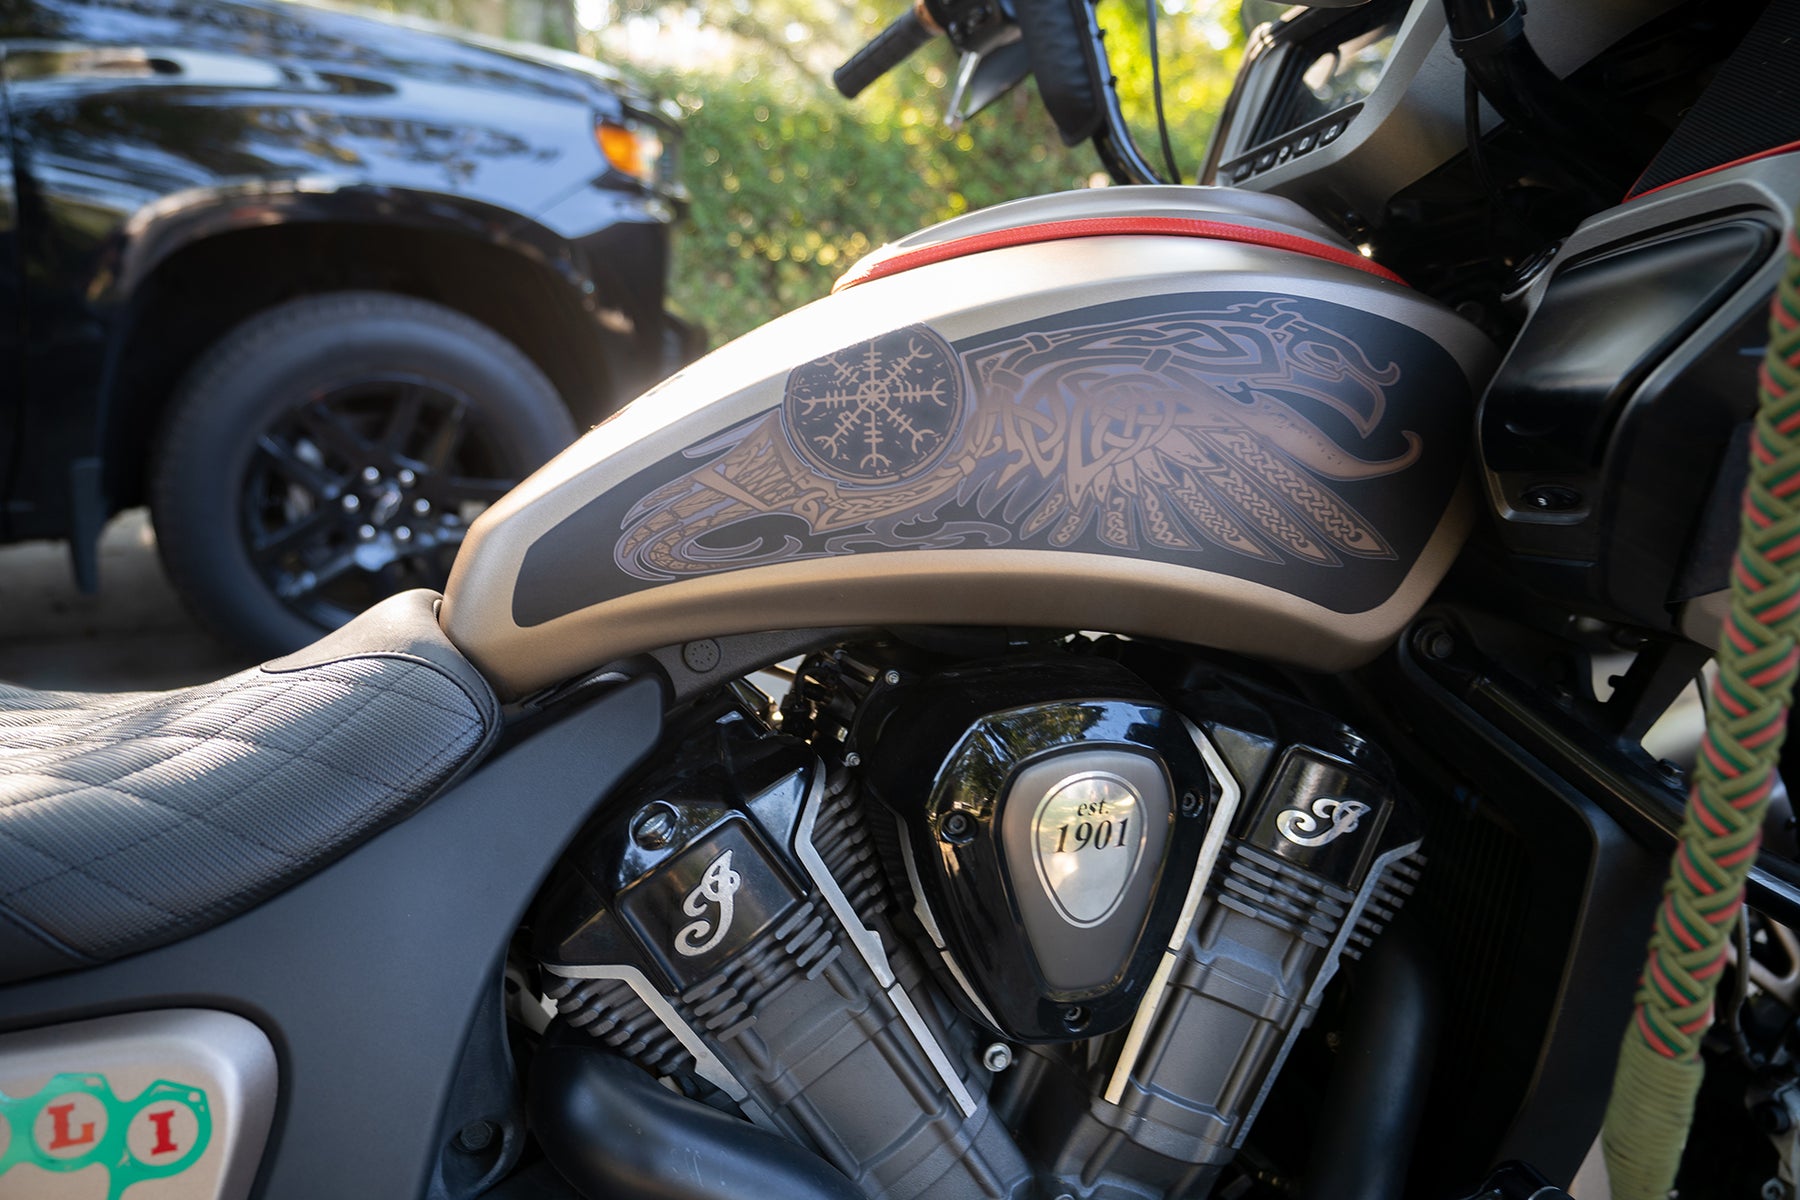
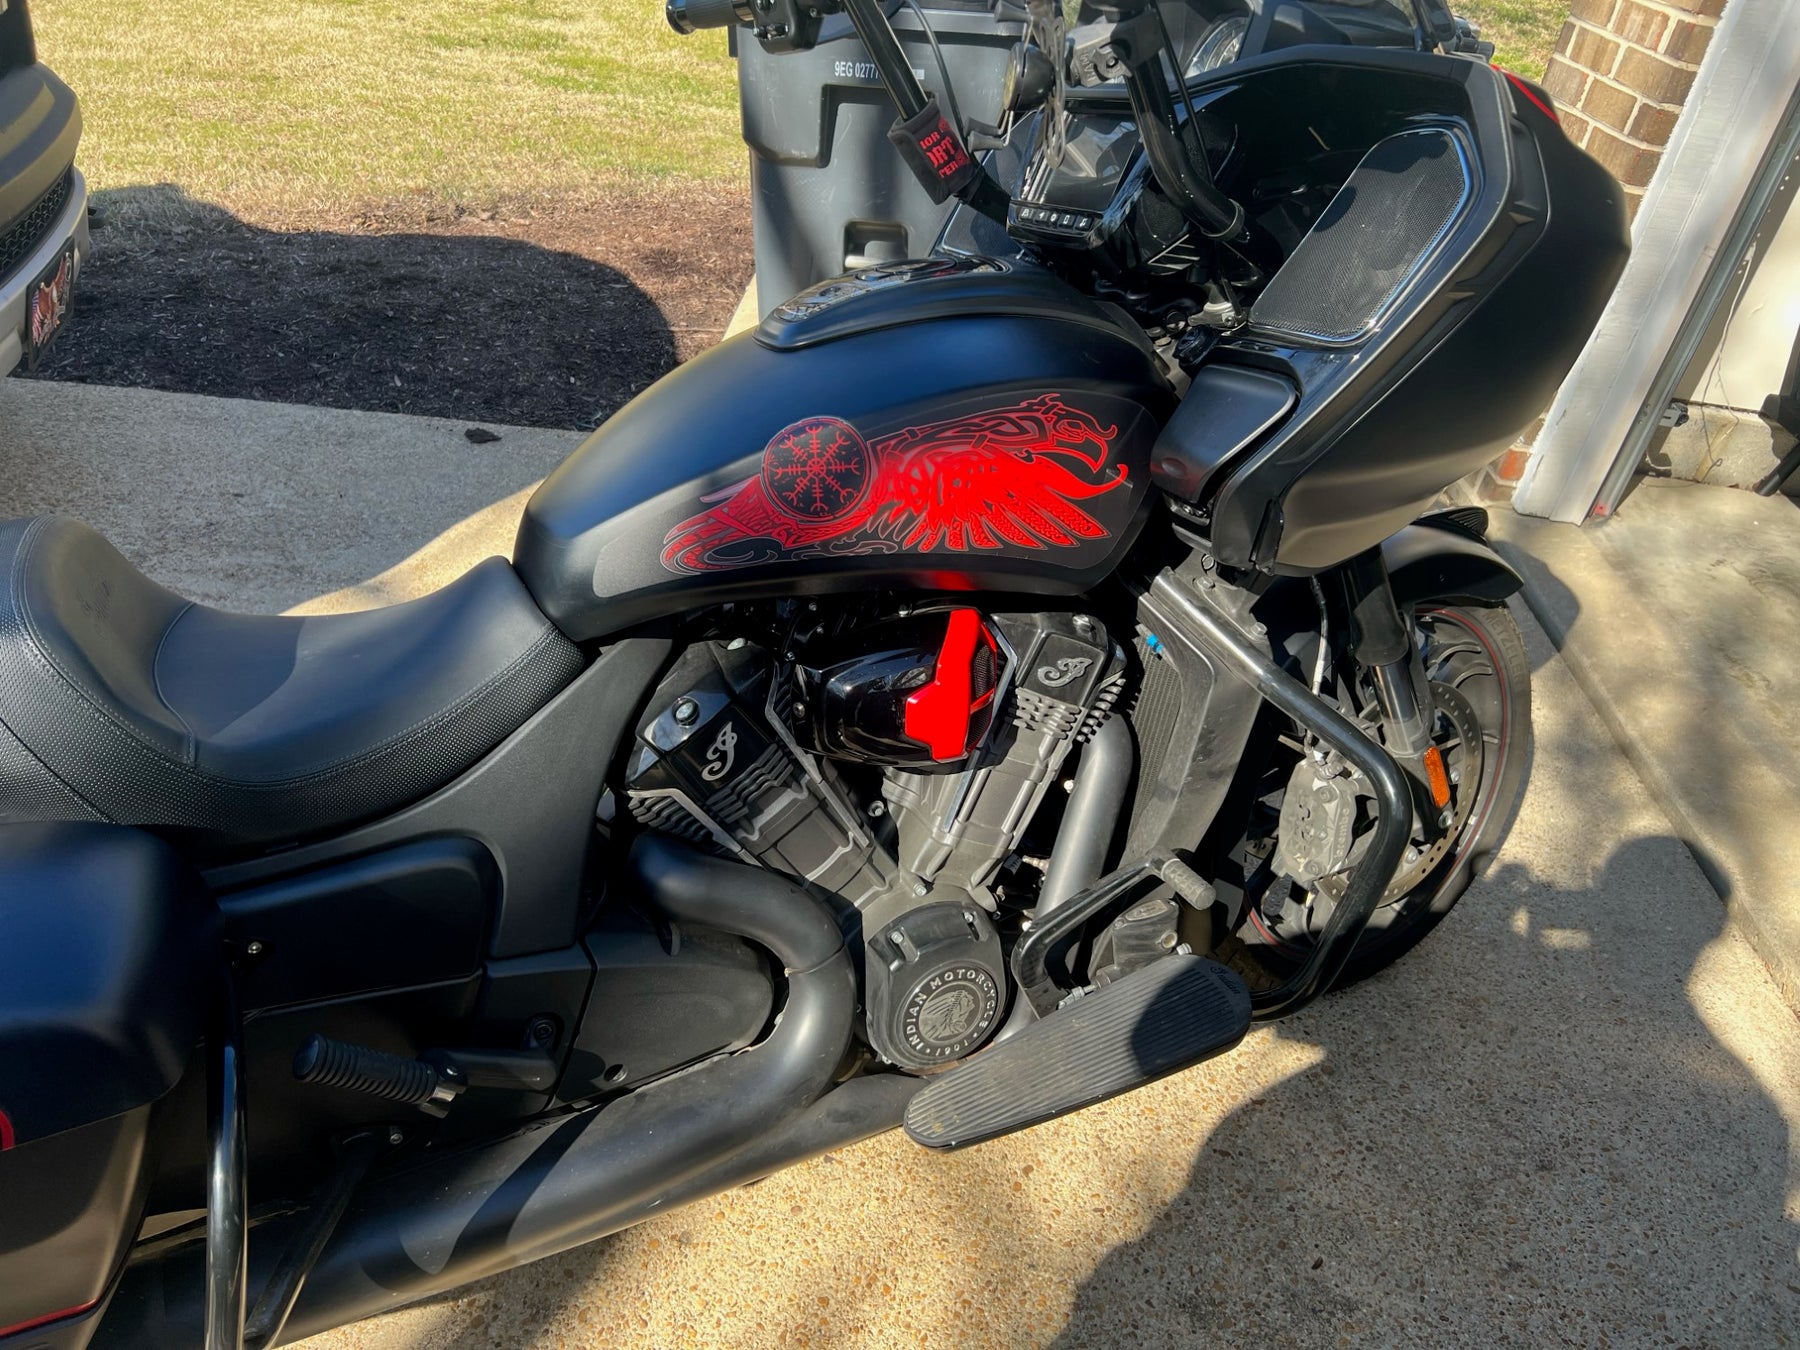
“Odin's Ravens" Tank Decal set for Indian Challenger/Pursuit
The artwork for these decals was sponsored by Tyler Cramer. Featuring Odin's two ravens, Huginn and Muninn (one for each side of the tank).
Size: Covers a large portion of the tank side on Challenger and Pursuit models and should be centered during application for greatest appeal. The "Helm of Awe" will wrap slightly over the top of the tank to create depth (see mock-up image)
How To Install: <-Visit our How To page for videos
Weatherproof HD Gloss finish vinyl decals are self adhesive. We recommend using the wet method to install these decals: A spray bottle with water and dish soap can be used to wet the surface and the back of the decal, allowing you to slide the decal into place. Once you have it aligned properly, use your thumbs to push the moisture out from behind the decal, working from the center outwards to the edges and it will adhere to your bike. Using the wet method allows the decal surface to evenly distribute over the curved surface. A hair dryer to apply heat will make the process easier since the vinyl becomes more soft and flexible when warm.


MesoChief 3-2023 - Universal Tank Decal-Color
Regular price $100.00
Shipping calculated at checkout.
Stock Notice: (may take approximately 2-3 weeks before shipping if not in stock at the time of your order)
“MesoChief 3-2023" Universal Tank Decals for all Brands and Models of Motorcycles
These decals were designed to cover the original headdress on Indian Motorcycles but can be used by any brand or model of bike.
If you have an Indian Scout, we recommend purchasing our Scout version which is slightly smaller in order fit on the tank side without extending over the border.
Size: 5.9 inches by 14.6 inches wide
These decals are designed for all brands/models of motorcycles. Check the measurements to ensure a proper fit on your bike before ordering. If your tank already has a graphic, we can’t guarantee these decals will cover it completely. To verify fit and coverage, print out the template below, cut it out and tape it to your tank. (Print out template will be added soon)
How To Install: <-Visit our How To page for videos
Weatherproof HD Gloss finish vinyl decals are self adhesive. We recommend using the wet method to install these decals: A spray bottle with water and dish soap can be used to wet the surface and the back of the decal, allowing you to slide the decal into place. Once you have it aligned properly, use your thumbs to push the moisture out from behind the decal, working from the center outwards to the edges and it will adhere to your bike. Using the wet method allows the decal surface to evenly distribute over the curved surface. A hair dryer to apply heat will make the process easier since the vinyl becomes more soft and flexible when warm.


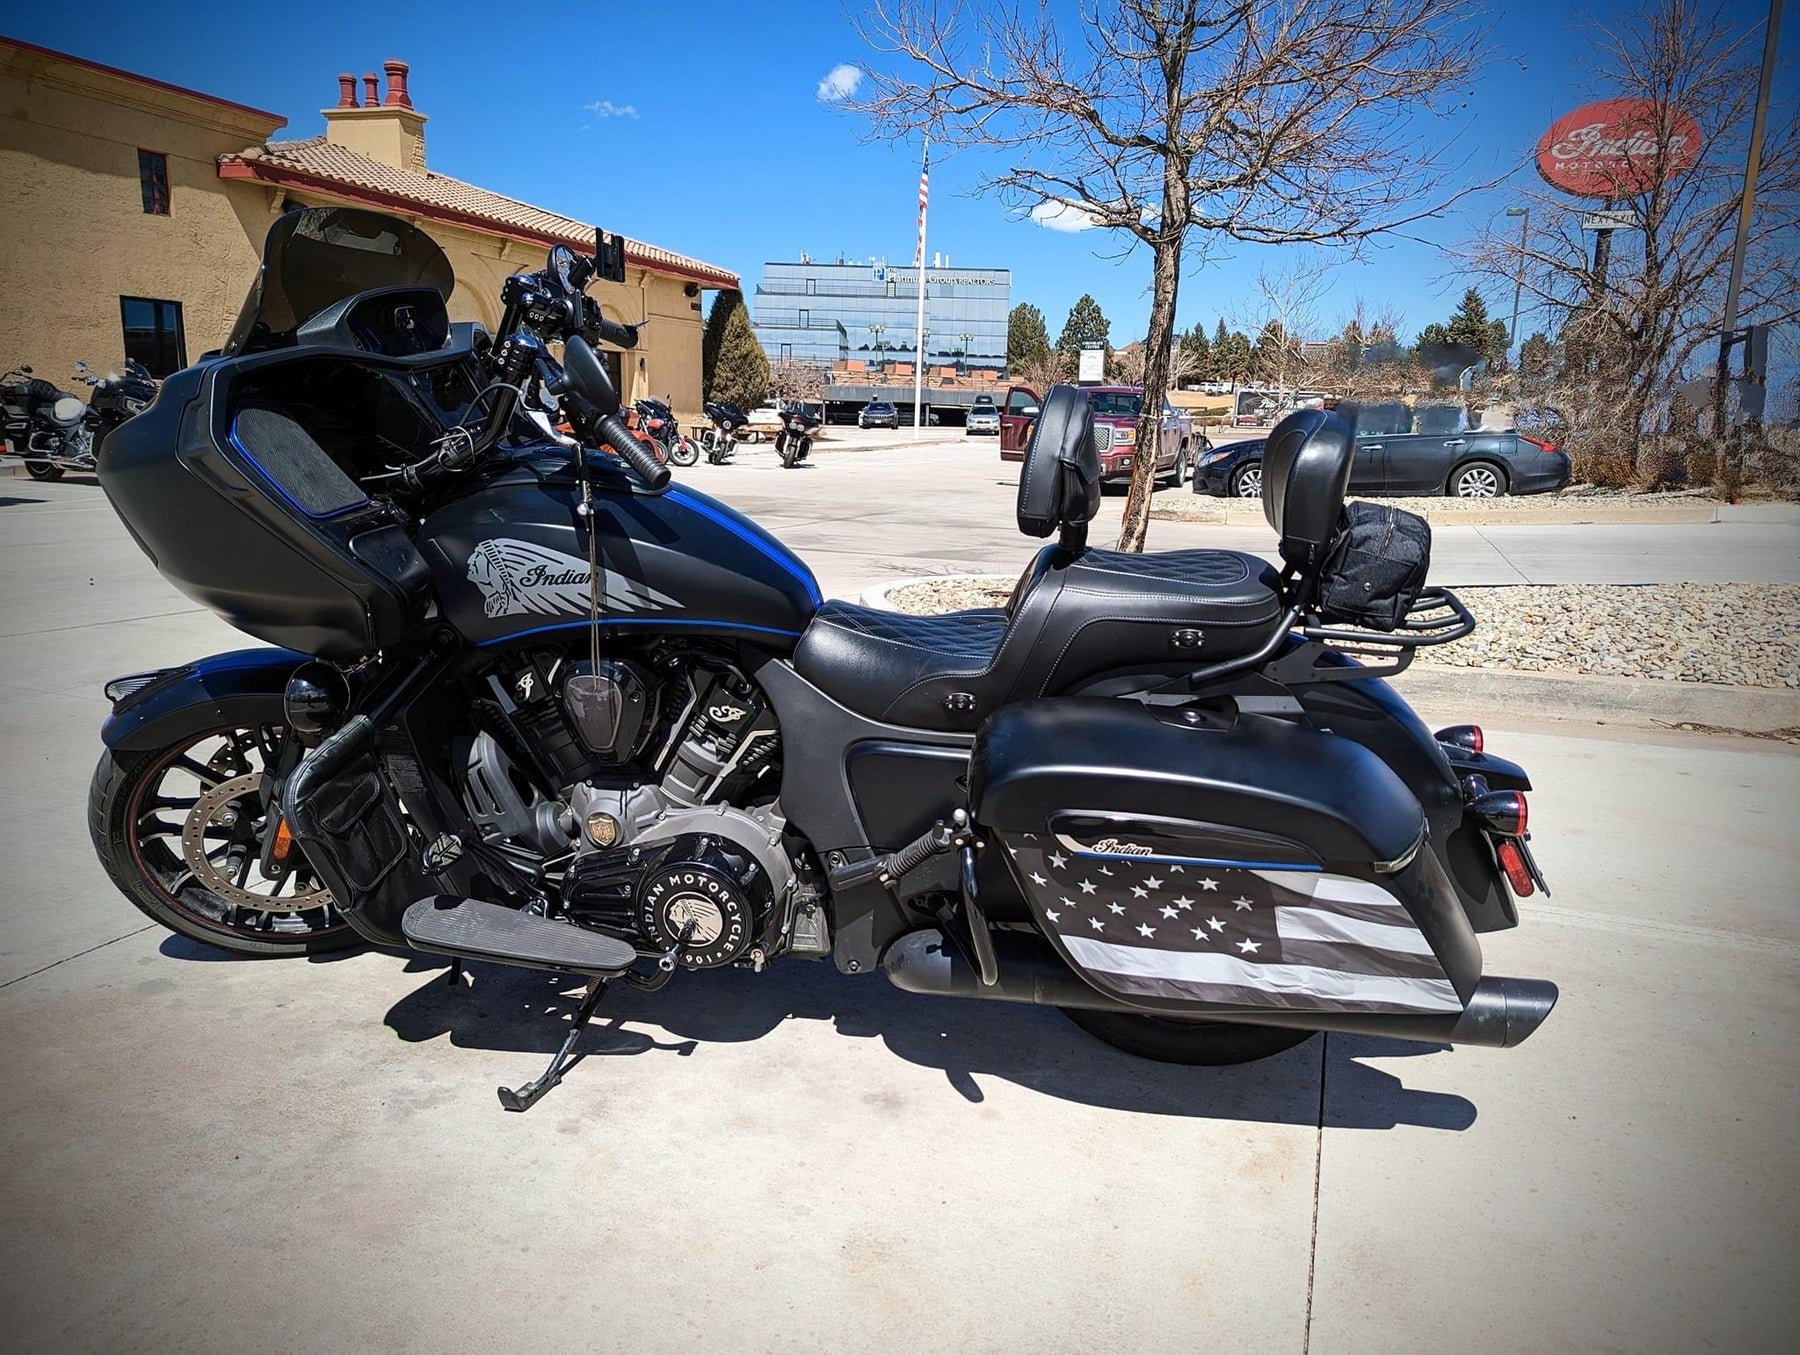
American Flag B&W Decal Set - New Style Indian Saddlebags
Regular price $150.00
Shipping calculated at checkout.
Stock Notice: (may take approximately two-three weeks before shipping if not in stock at the time of your order)
American Flag Decal Set for new style Indian Saddlebags
Size: Fits the side of the left and right saddlebag for the newer style (non-rounded) Indian hard bags. For models that have the plastic bag guard on the front/bottom corner, the guard must be removed to use these decals. (See Mock-up images)

Weatherproof laminated decals are self adhesive.
How To Install: <-Visit our How To page for videos
We recommend using the wet method to install larger decals: A spray bottle with water and dish soap can be used to wet the tank and the back of the decal, allowing you to slide the decal into place. To get the proper soap/water mix, start with a squirt of soap into your spray bottle. Shake it up and then spray it on your hand. Rub your finger tips together. You should feel the slipperiness of the soap. If it just feels like water, add more soap and try again. Once you have it aligned properly, use a squeegee or some non-abrasive tool (even your fingers) to push the moisture out from behind the decal and it will adhere to your tank. A plastic putty scraper with a thin cloth wrapped around it will work great and prevent scratching your decals.


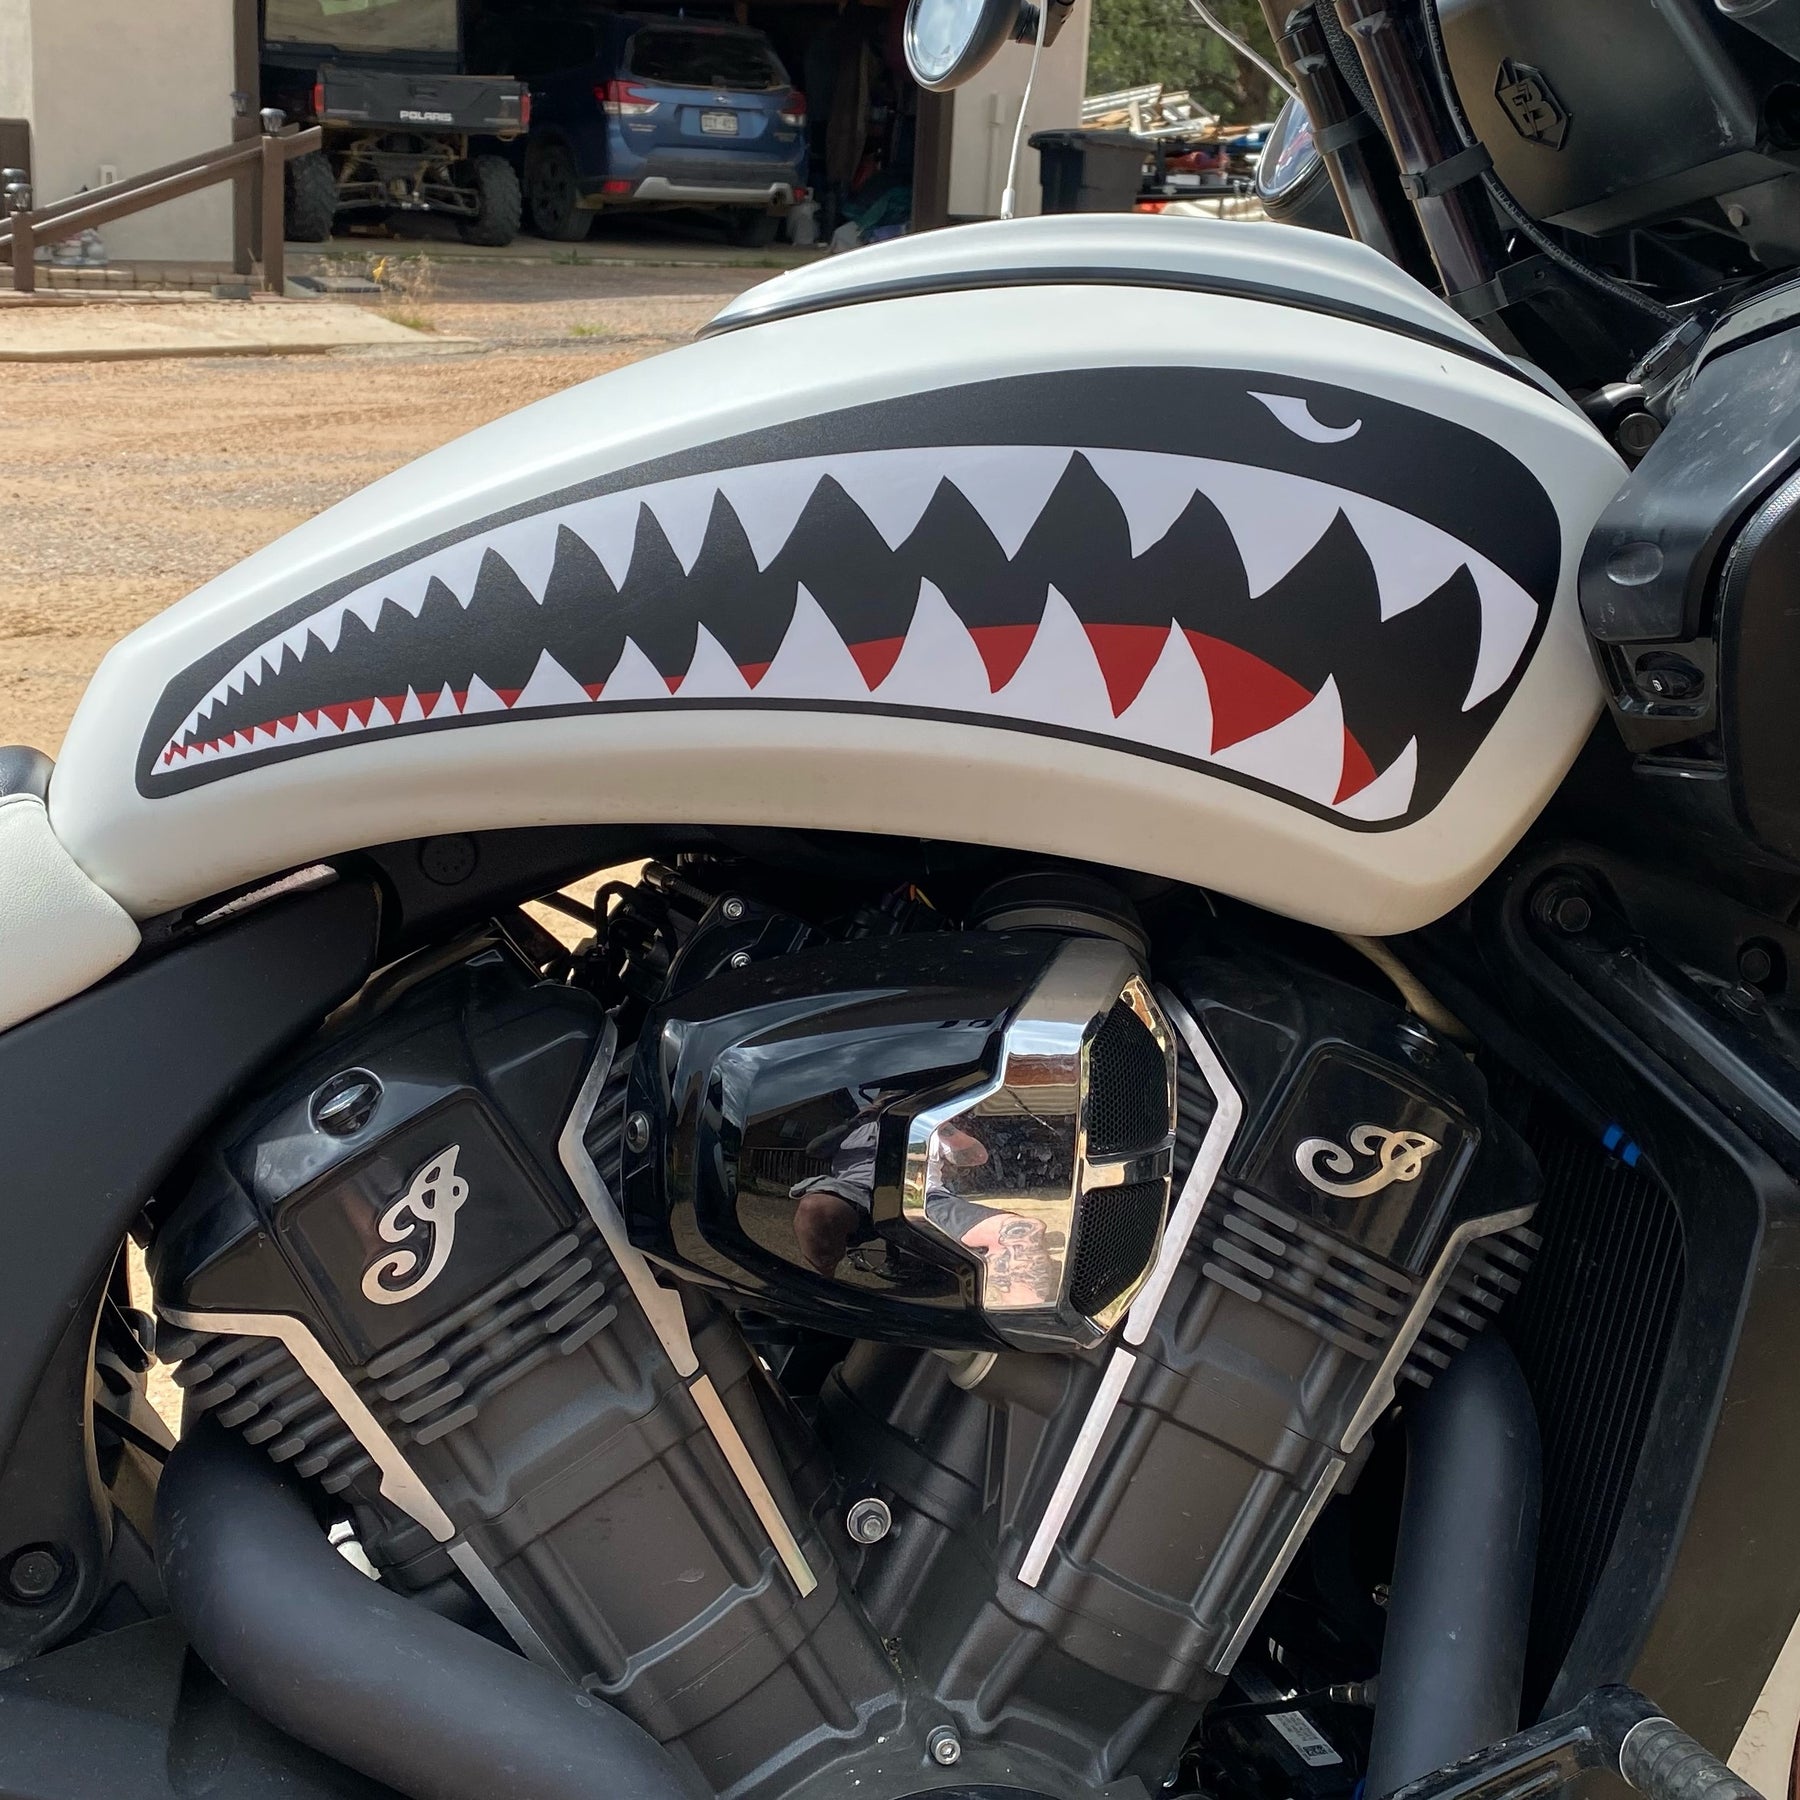


Bomber Tank Decal Set for Indian Powerplus lineup
Regular price $100.00
Shipping calculated at checkout.
Stock Notice: (may take approximately 3-4 weeks before shipping if not in stock at time of order)
Tank Decal set for Indian Challenger/Pursuit, Powerplus Chieftain, Powerplus Roadmaster

Size: Covers a large portion of the tank side and should be centered during application for greatest appeal.
Weatherproof laminated decals are self adhesive.
How To Install: <-Visit our How To page for videos
We recommend using the wet method to install larger decals: A spray bottle with water and dish soap can be used to wet the tank and the back of the decal, allowing you to slide the decal into place. To get the proper soap/water mix, start with a squirt of soap into your spray bottle. Shake it up and then spray it on your hand. Rub your finger tips together. You should feel the slipperiness of the soap. If it just feels like water, add more soap and try again. Once you have it aligned properly, use a squeegee or some non-abrasive tool (even your fingers) to push the moisture out from behind the decal and it will adhere to your tank. A plastic putty scraper with a thin cloth wrapped around it will work great and prevent scratching your decals.


Red/Carbon-Podium Finish for Challenger/Pursuit
Regular price $200.00
Shipping calculated at checkout.
Product is made to order: usually takes approximately 2-3 weeks for us to receive them from our manufacturer before shipping to you.

The first design in our new BWC Racing lineup of bagger-racing inspired livery for your Indian Challenger/Pursuit. "Podium Finish" features a checkered flag as a tribute to our winning performance on the track. This decal set is available in gloss or matte finish and includes fairing, tank, and saddlebag graphics with two additional BWC Racing decals. Install them all or just the ones you want, every set contains a total of 8 decals.


Installation:
Decal installation should be done using the wet method as explained in our "How-to" video.
Decal Placement:
The Fairing decals are meant to align with the front cutout section where the lights are and the back end matches up with the downward curve on fairing.

Mock Up: (gold/carbon shown here)


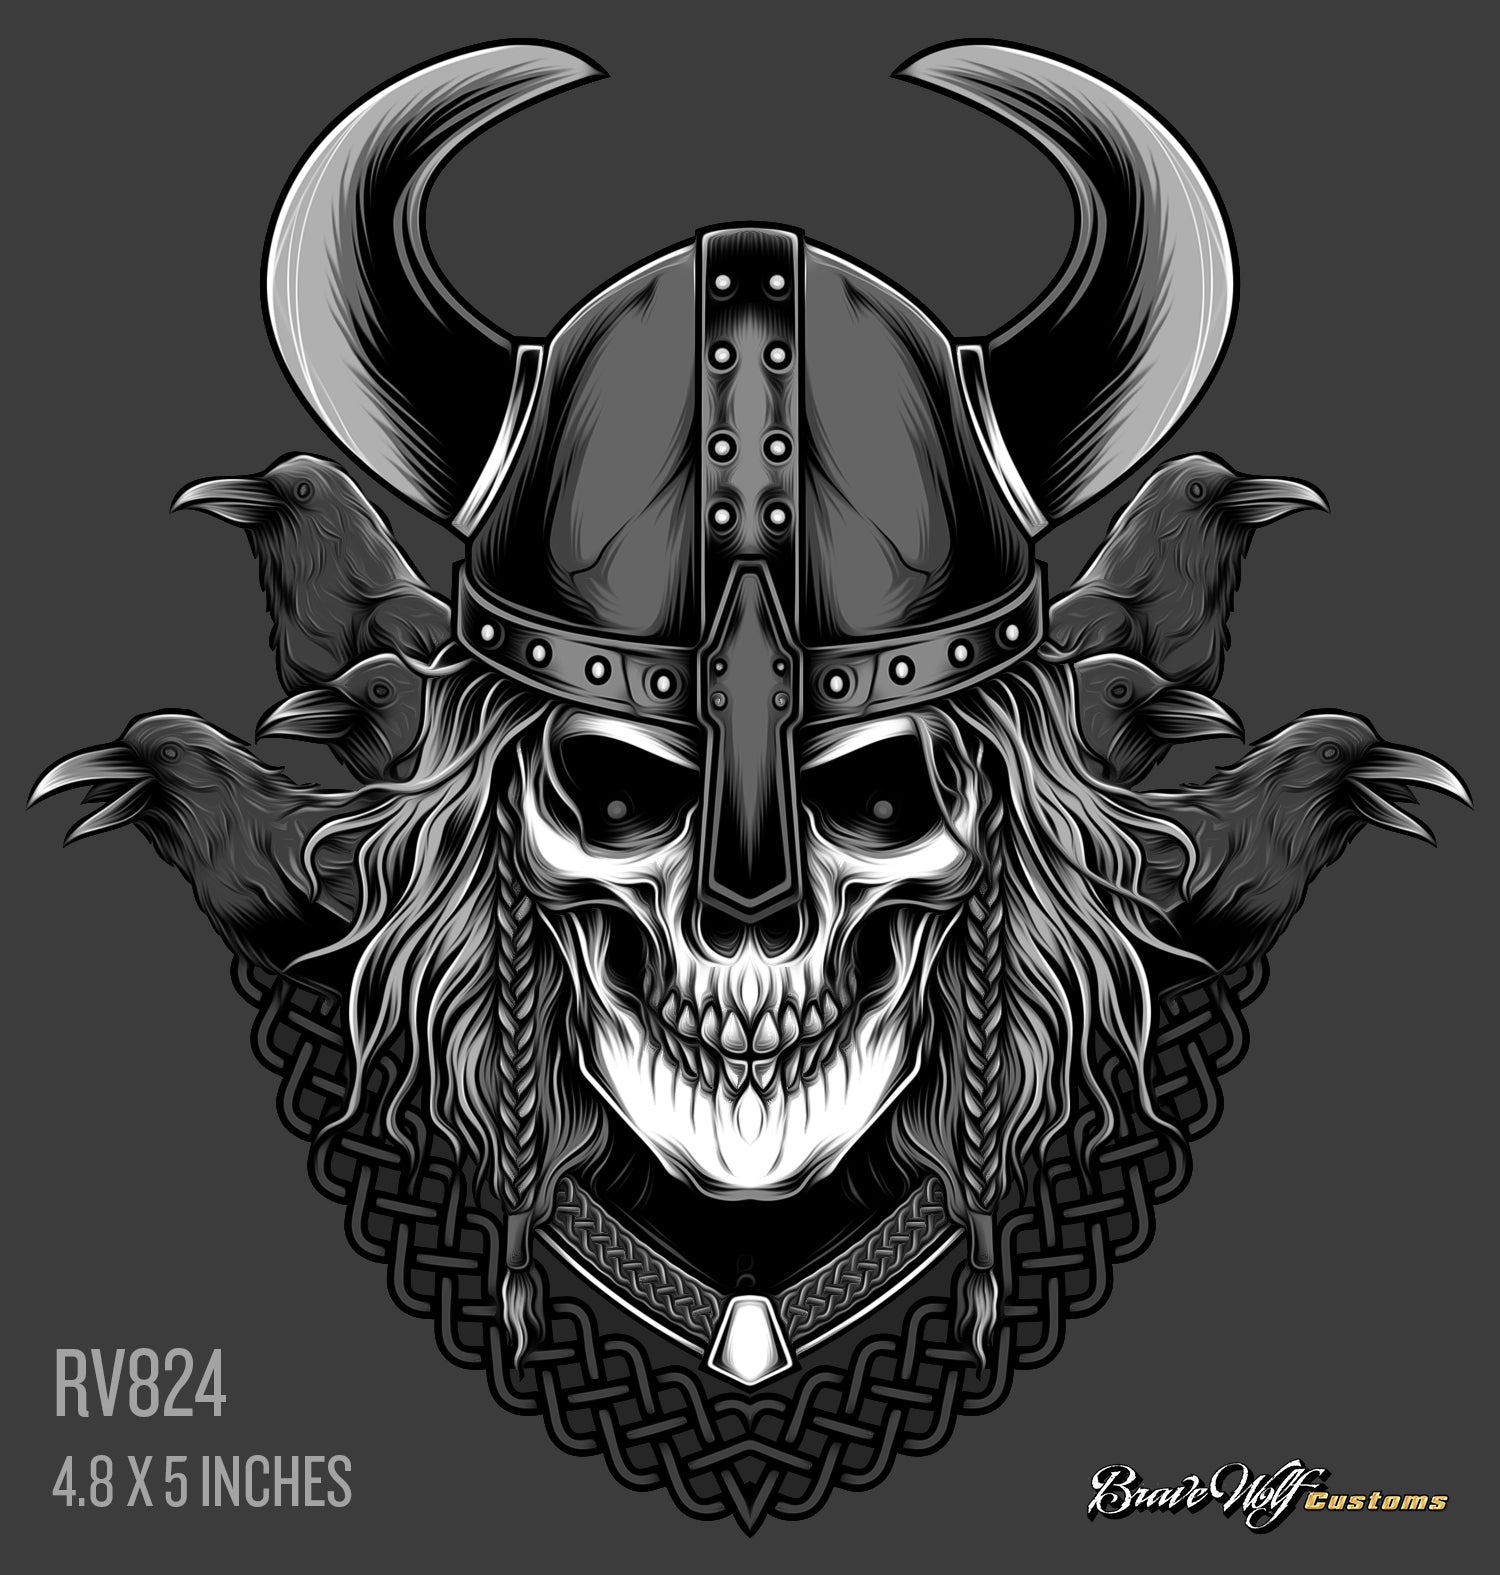
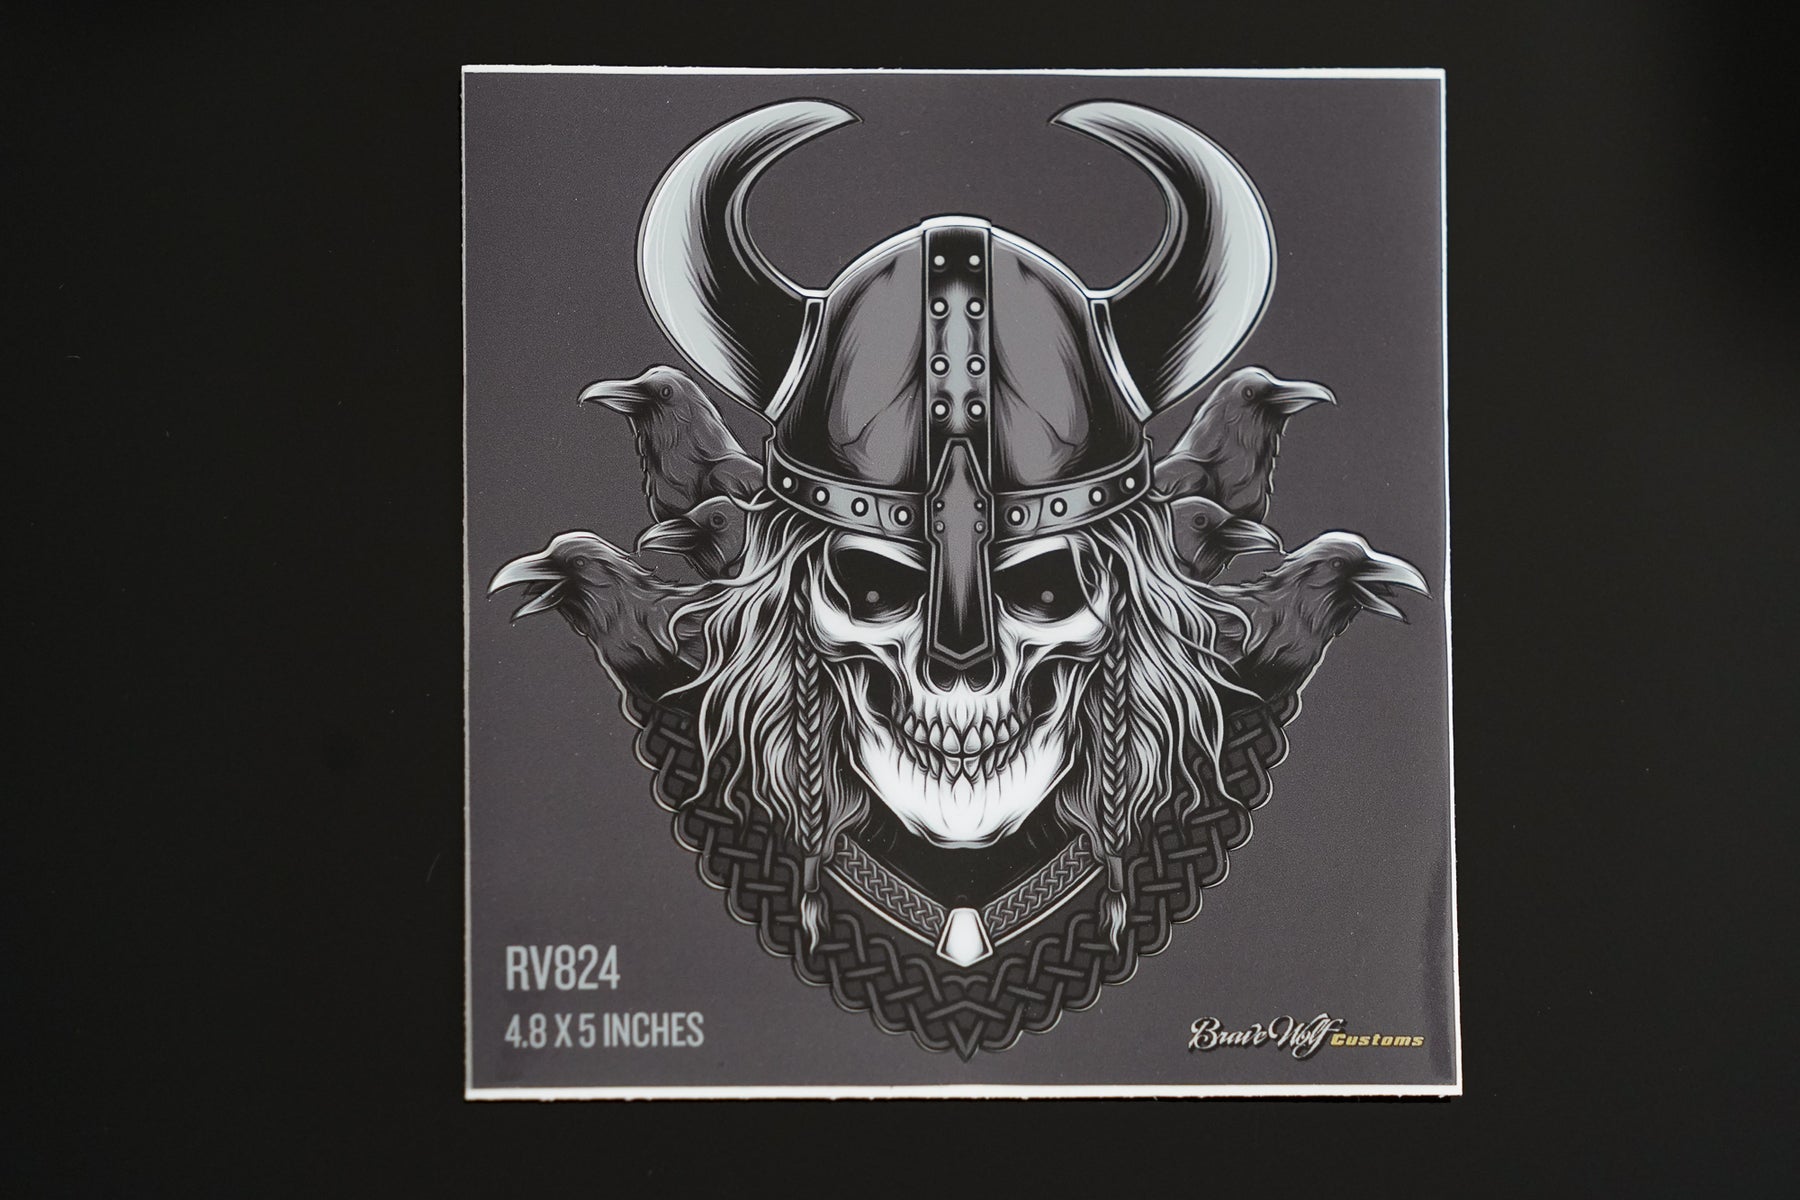
Raven Viking RV824-B&W Anywhere Decal
Regular price $15.00
Shipping calculated at checkout.
Usually in stock - (if not in stock at time of order may take approximately 2-3 weeks before shipping)
“Raven Viking RV824” Anywhere Decal
These decals are meant to be used anywhere. We wanted to provide more options that allow you to customize the look of your bike while using the same high-quality materials we use for our tank and saddlebag decals.
Size: 4.8 x 5 inches

Gloss finish pictured above
Weatherproof laminated decals are self adhesive. We recommend using the wet method to install these decals: A spray bottle with water and dish soap can be used to wet the surface and the back of the decal, allowing you to slide the decal into place. Once you have it aligned properly, use your thumbs to push the moisture out from behind the decal, working from the center outwards to the edges and it will adhere to your bike. Using the wet method allows the decal surface to evenly distribute over the curved surface. A hair dryer to apply heat will make the process easier since the vinyl becomes more soft and flexible when warm.


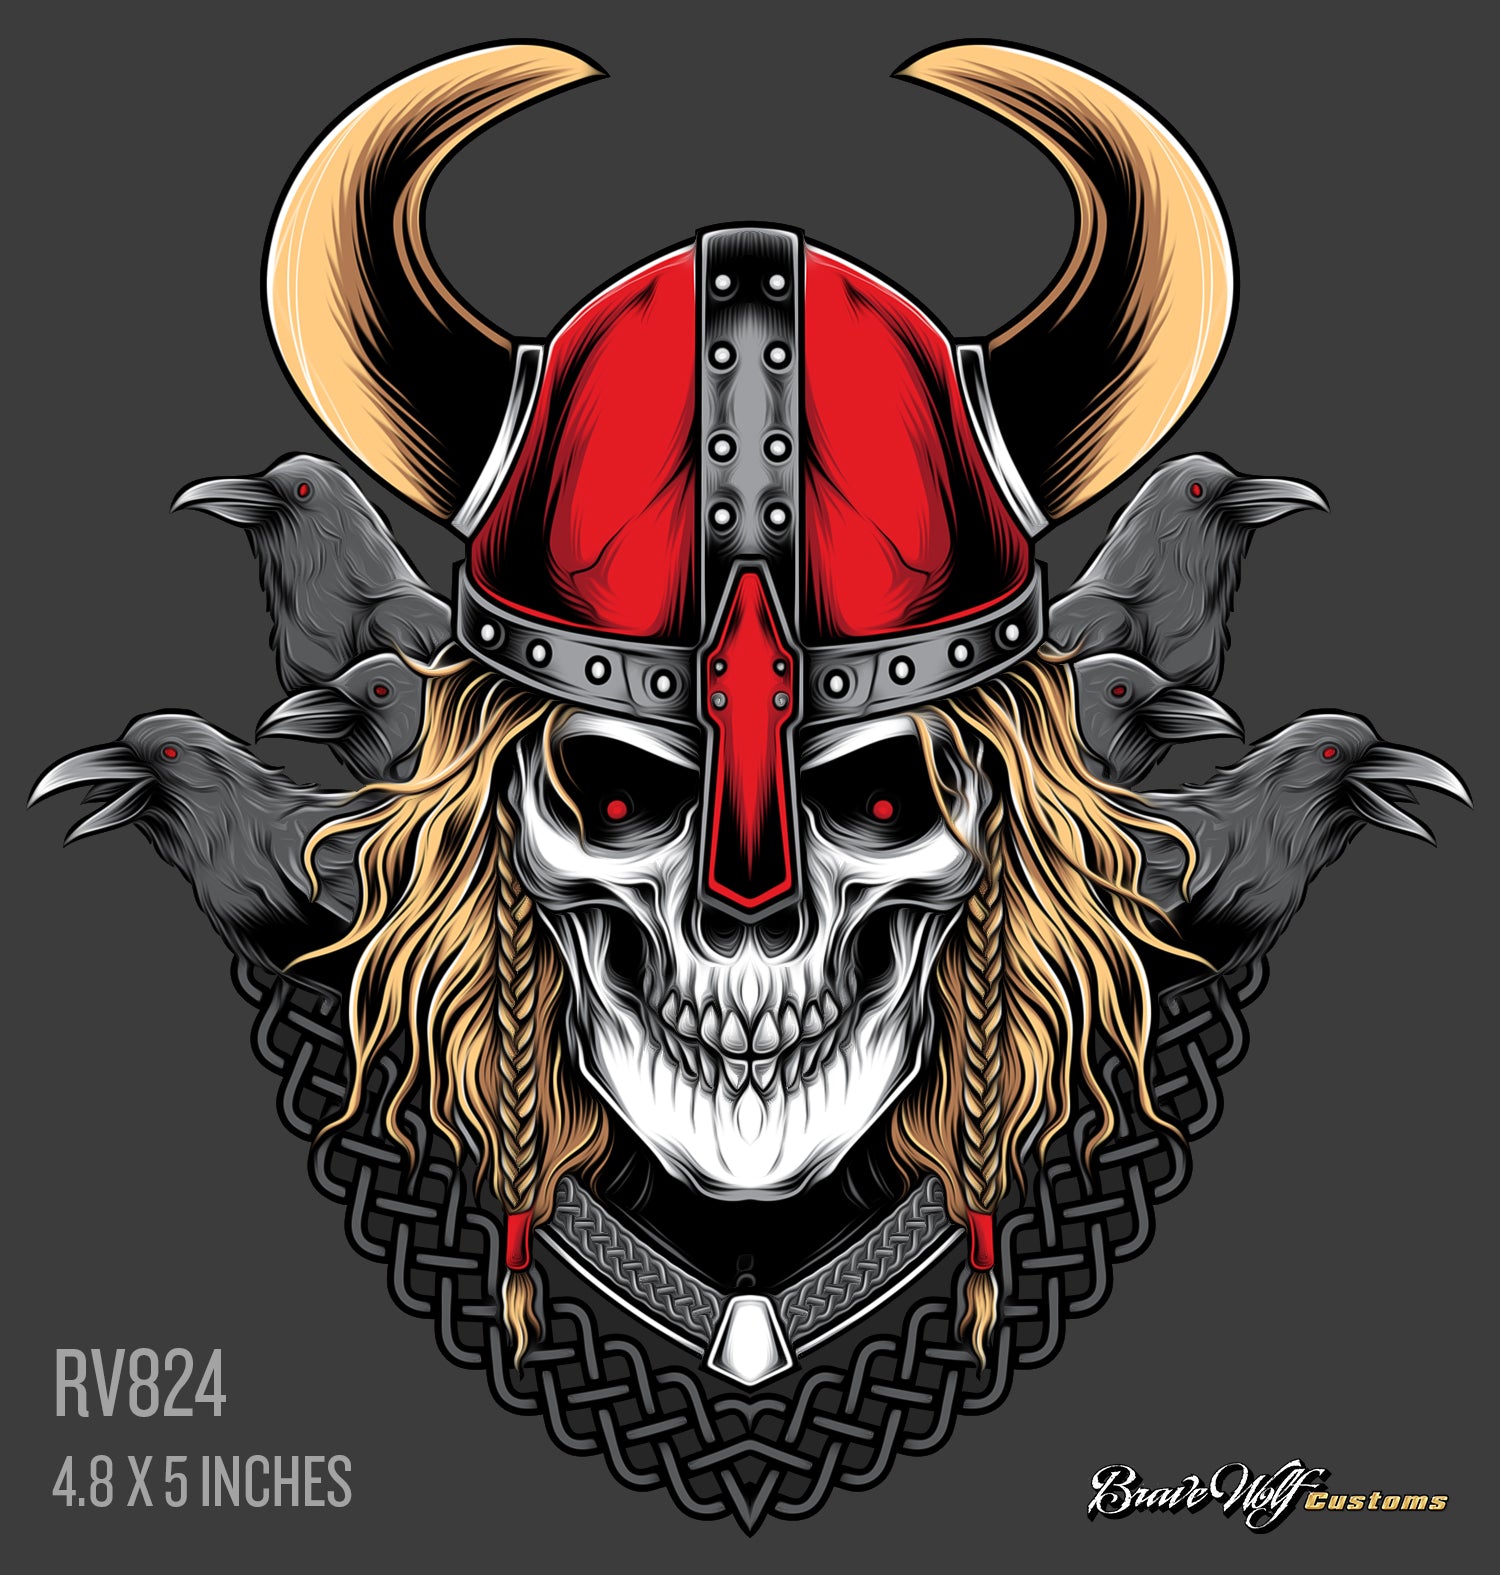
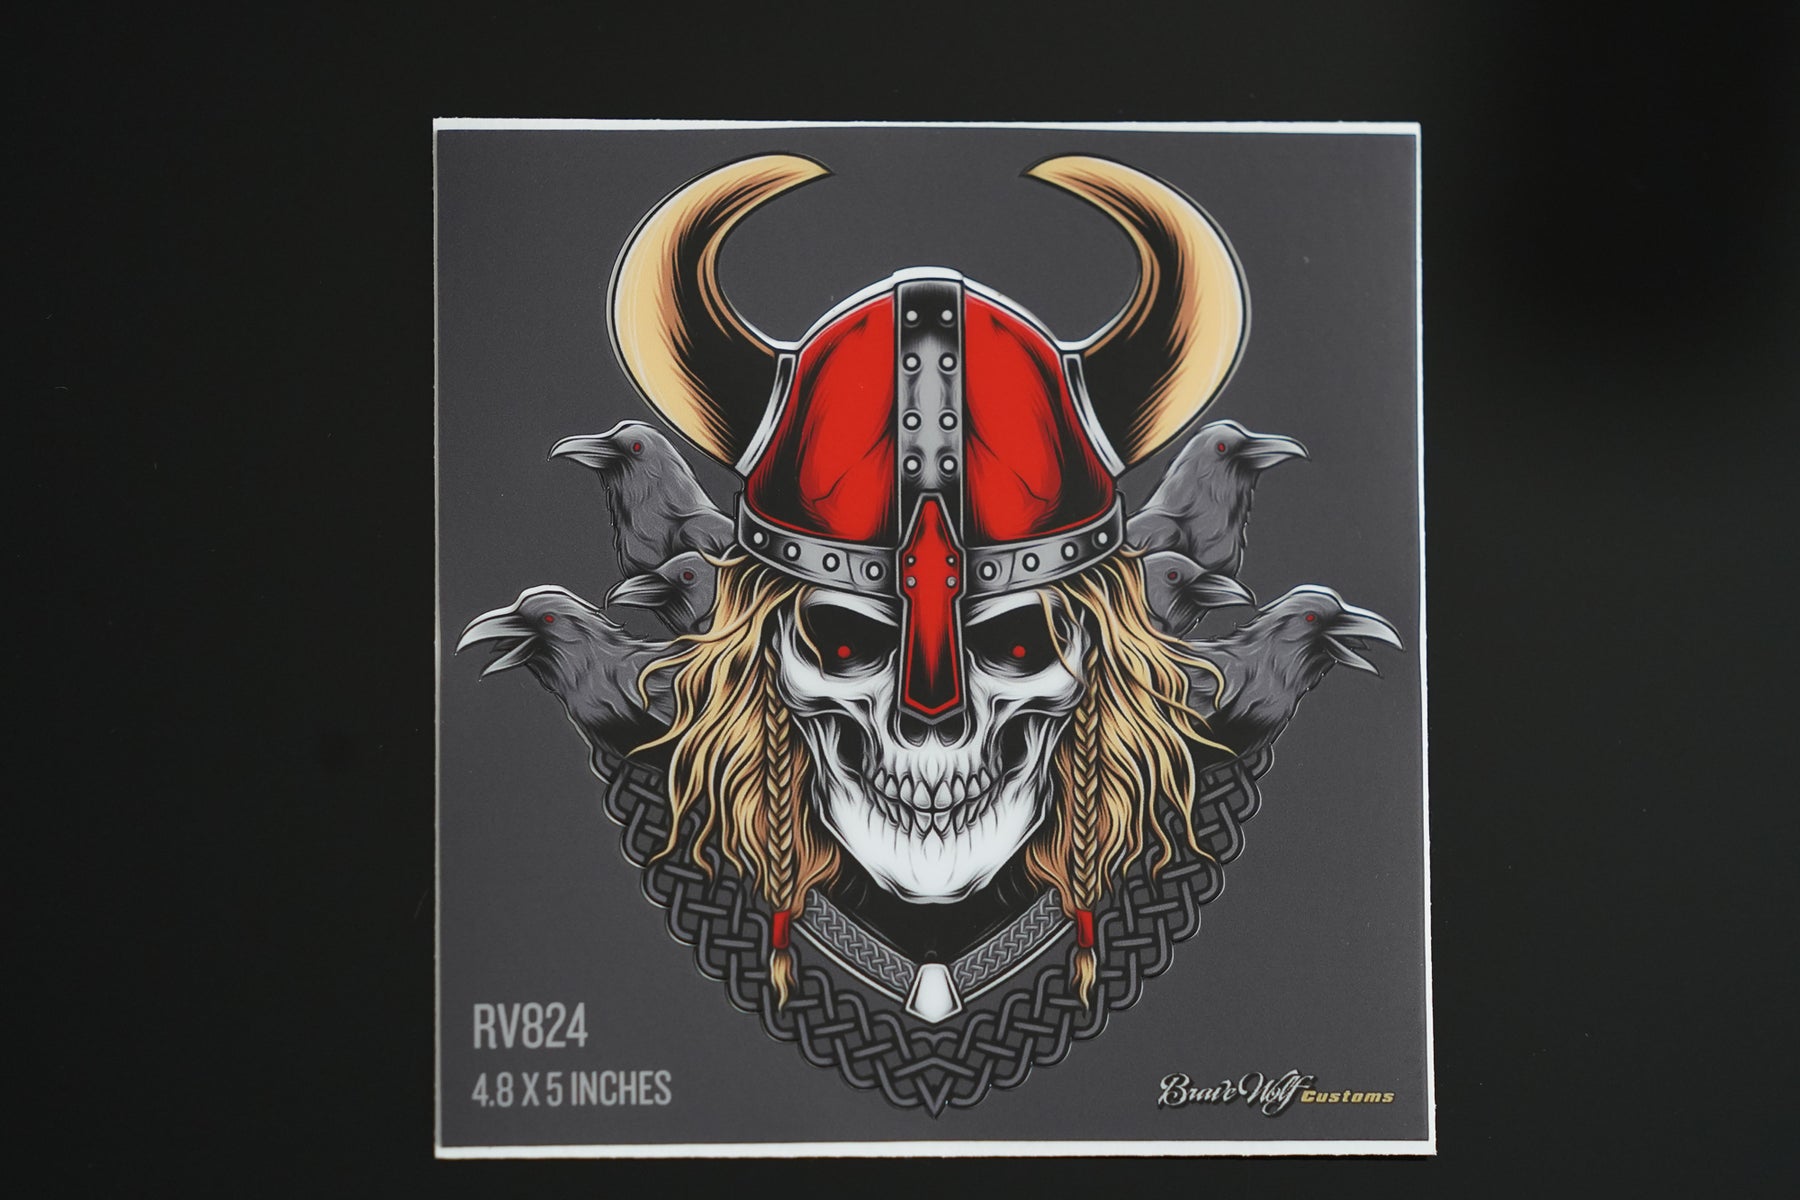
Raven Viking RV824-Color Anywhere Decal
Regular price $15.00
Shipping calculated at checkout.
Stock Notice: usually in stock (may take approximately 2-3 weeks before shipping if not in stock at the time of your order)
“Raven Viking RV824” Anywhere Decal
These decals are meant to be used anywhere. We wanted to provide more options that allow you to customize the look of your bike while using the same high-quality materials we use for our tank and saddlebag decals.
Size: 4.8 x 5 inches

Gloss finish pictured above
Weatherproof laminated decals are self adhesive. We recommend using the wet method to install these decals: A spray bottle with water and dish soap can be used to wet the surface and the back of the decal, allowing you to slide the decal into place. Once you have it aligned properly, use your thumbs to push the moisture out from behind the decal, working from the center outwards to the edges and it will adhere to your bike. Using the wet method allows the decal surface to evenly distribute over the curved surface. A hair dryer to apply heat will make the process easier since the vinyl becomes more soft and flexible when warm.


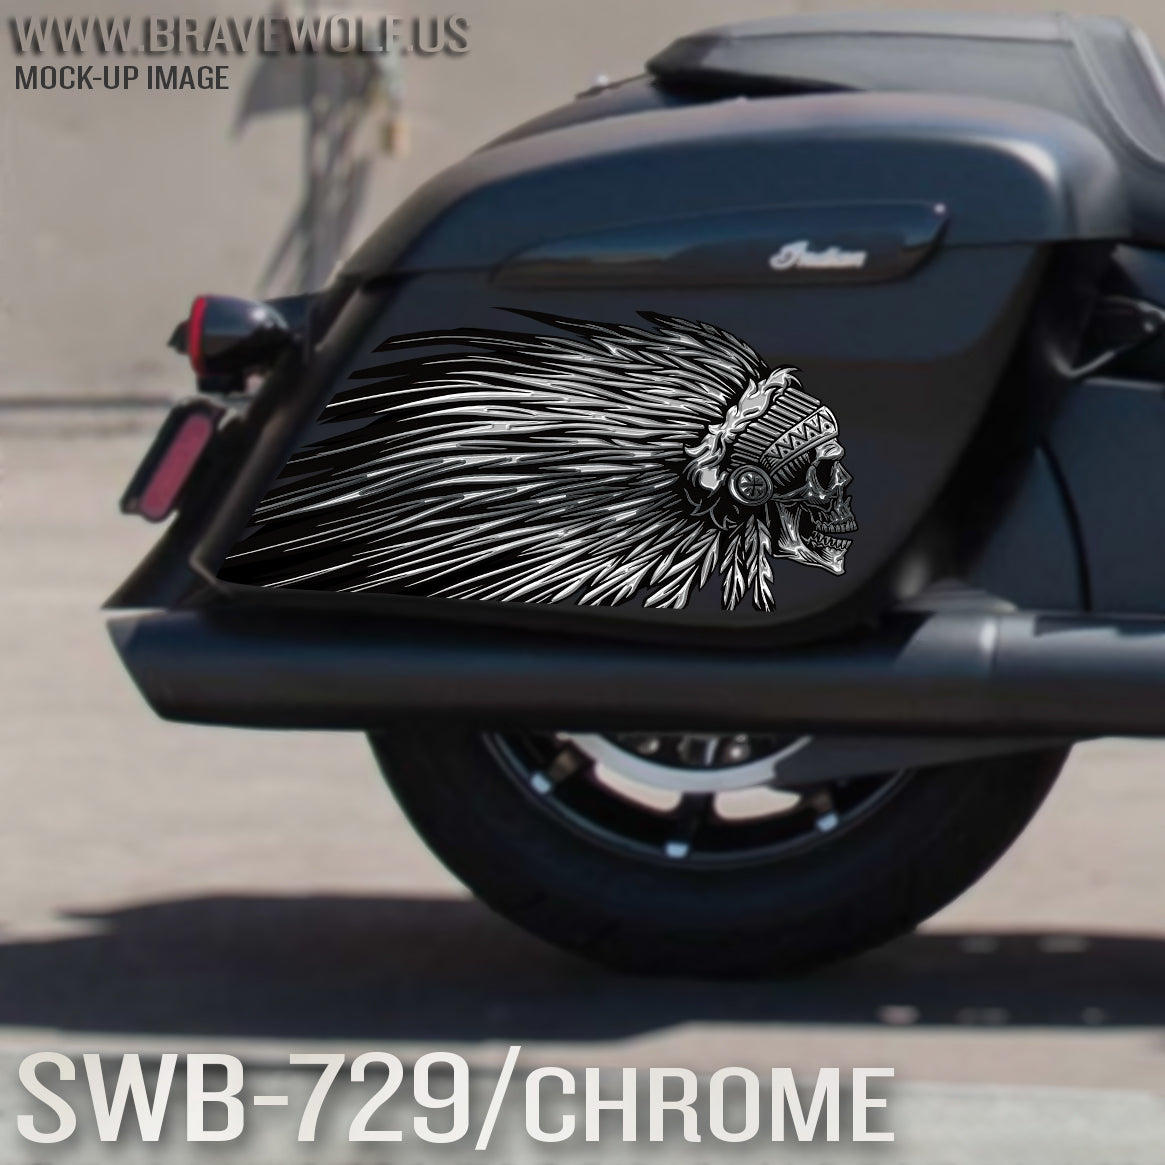
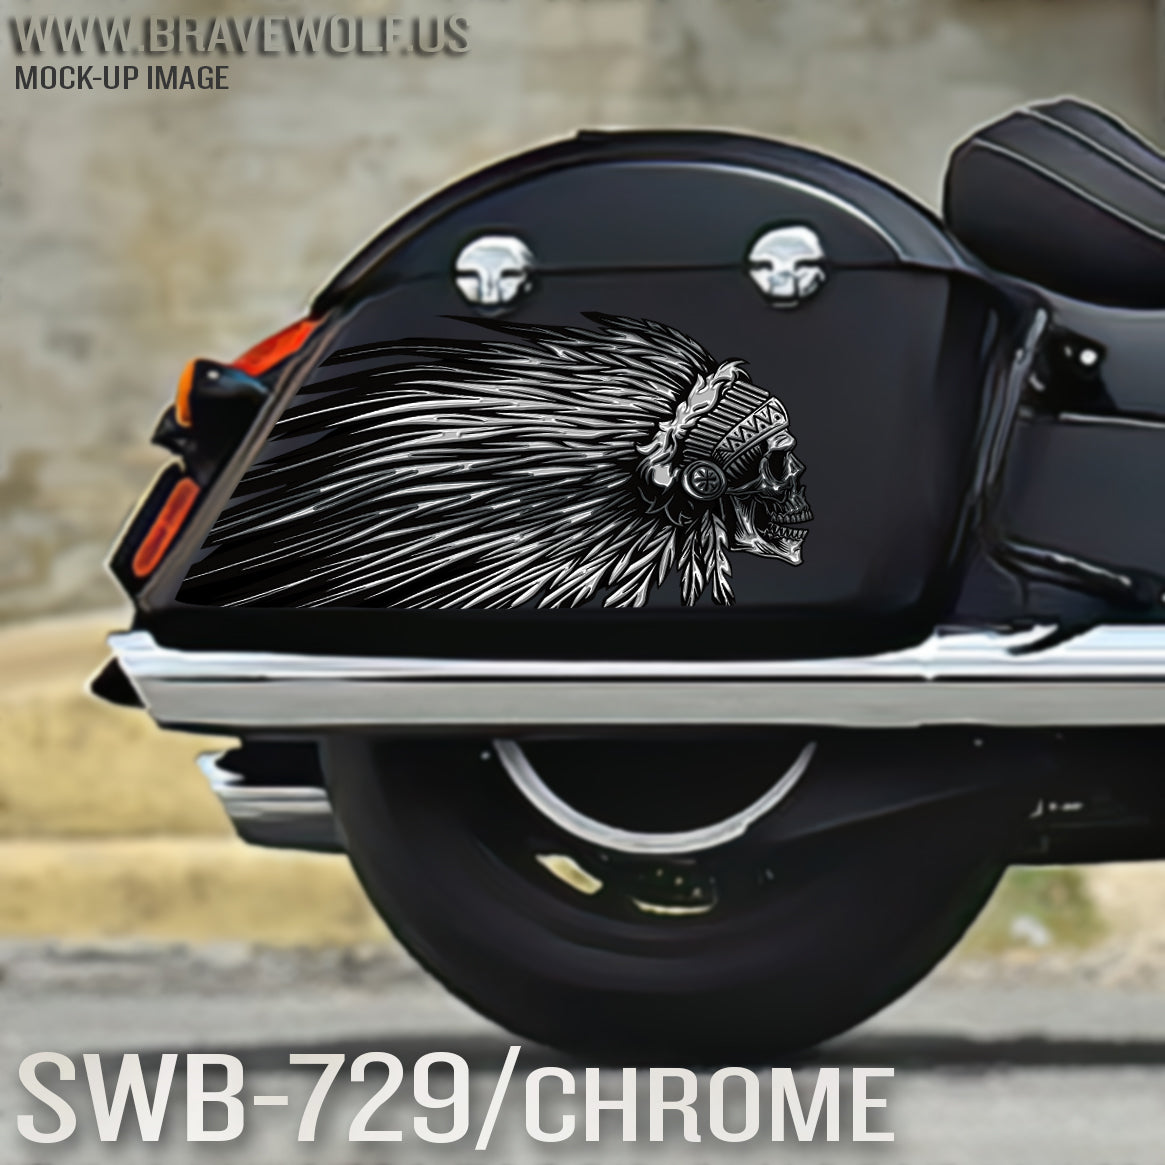


Saddlebag Decals-SWB729-Chrome
Regular price $180.00
Shipping calculated at checkout.
Stock Notice - Special Order (may take approximately 2-3 weeks before shipping if not in stock at time of order)
Our saddlebag decals are made from premium weatherproof hi-tack vinyl with a long lifespan that will keep them looking new for years. They are available in two finishes, heavy-duty 12 mil laminated Gloss (looks like it's painted on), or a heavy-duty sandy matte textured premium finish.
|
Fitment Guide: Fits both styles of Indian OEM saddlebags (rounded and squared). Also fits the Challenger & Pursuit when the plastic bag guard is removed. |

Installation:
Installing our decals is easy to do yourself at home. We recommend removing all of the excess decal material (the background image) before installing the decals. This will allow you to dispose of all the small cut-out pieces so that the pieces do not get trapped underneath your decal when installing it on the bike. Once you have all of the small pieces and background removed, you can use the "wet method" to install the decals to your saddlebags. The wet method involves using a spray bottle of water with a couple drops of dish soap in the mixture and spraying the surface of your saddlebags to wet the entire surface. Then carefully remove the backing from your decal and use the spray bottle to wet the adhesive side of the decal. Now you can gently place the decal on your saddlebag. Because the surfaces are wet, you can pull the decal up to reposition it until you get it where you want it. Once it's in place, use a squeegee or other object such as a credit card wrapped in a microfiber towel to squeeze the water out from behind the decal. You can also use your hands to do this. You should take care not to use a hard/abrasive object that can scratch the decals or your bike's paint. The high-tack adhesive will begin to set/adhere to the bike as soon as the liquid is push out from behind the decal. Use caution to ensure the towel or object you are using does not catch any edges of the decal and pull it off your bike. If you take your time and be gentle during installation, it should be an easy process. A hair dryer can be used to speed up the drying process if needed.
Feel free to visit our How-To page on the website to watch a "wet method" installation video.


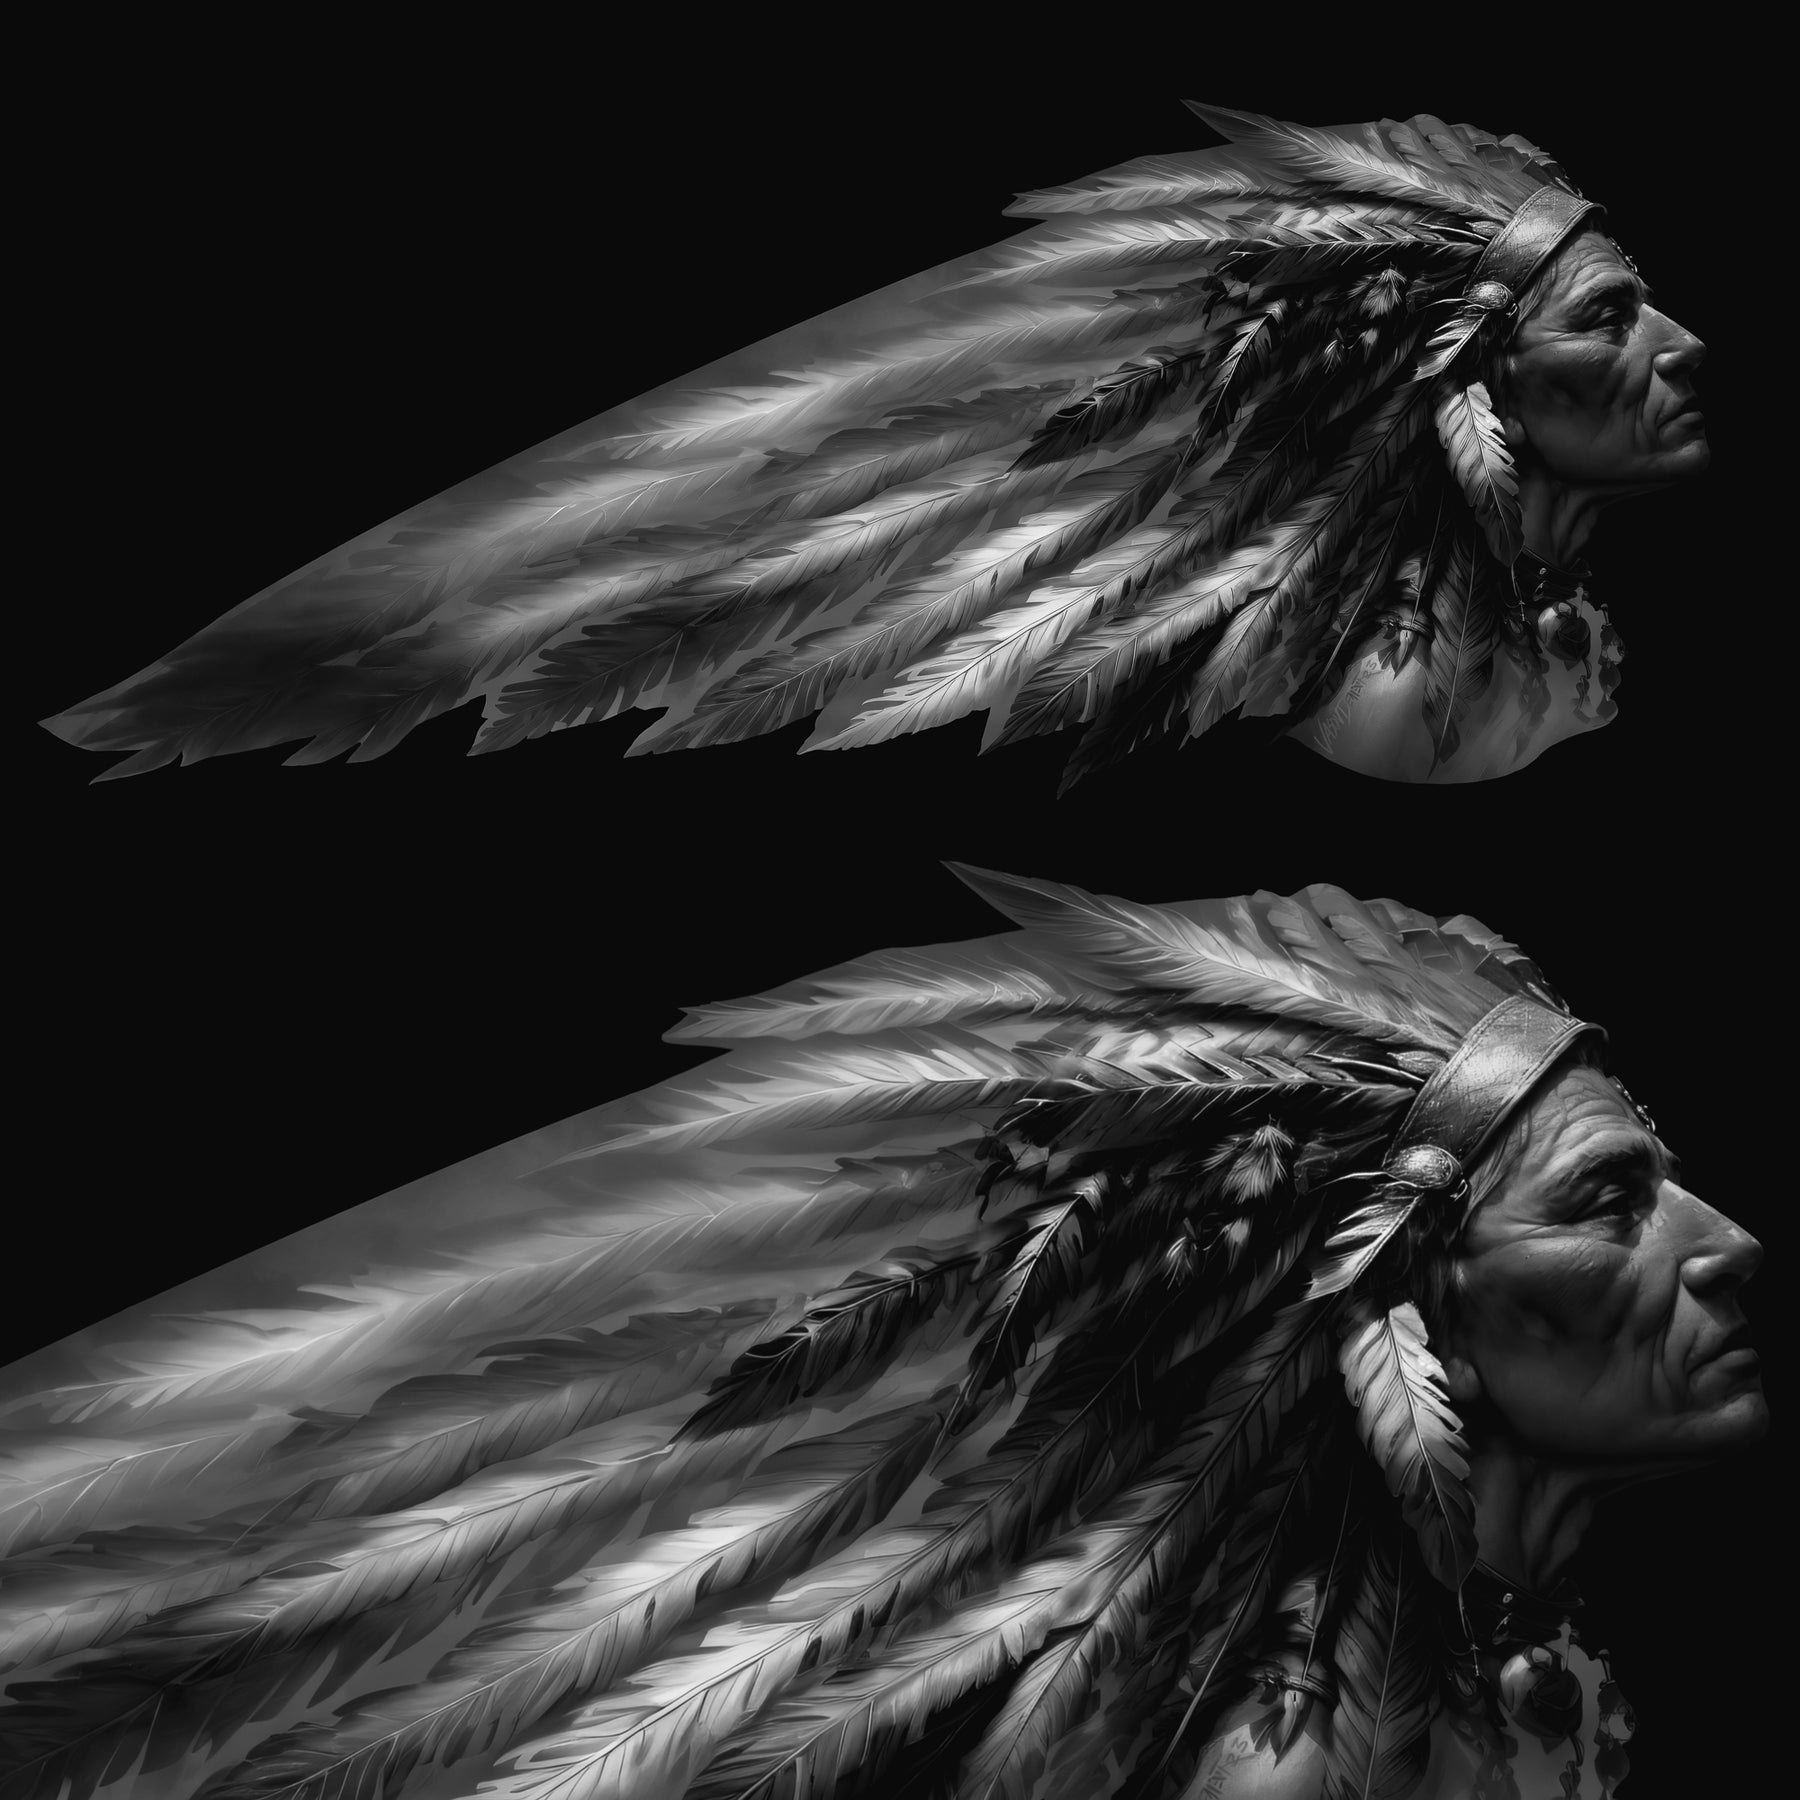

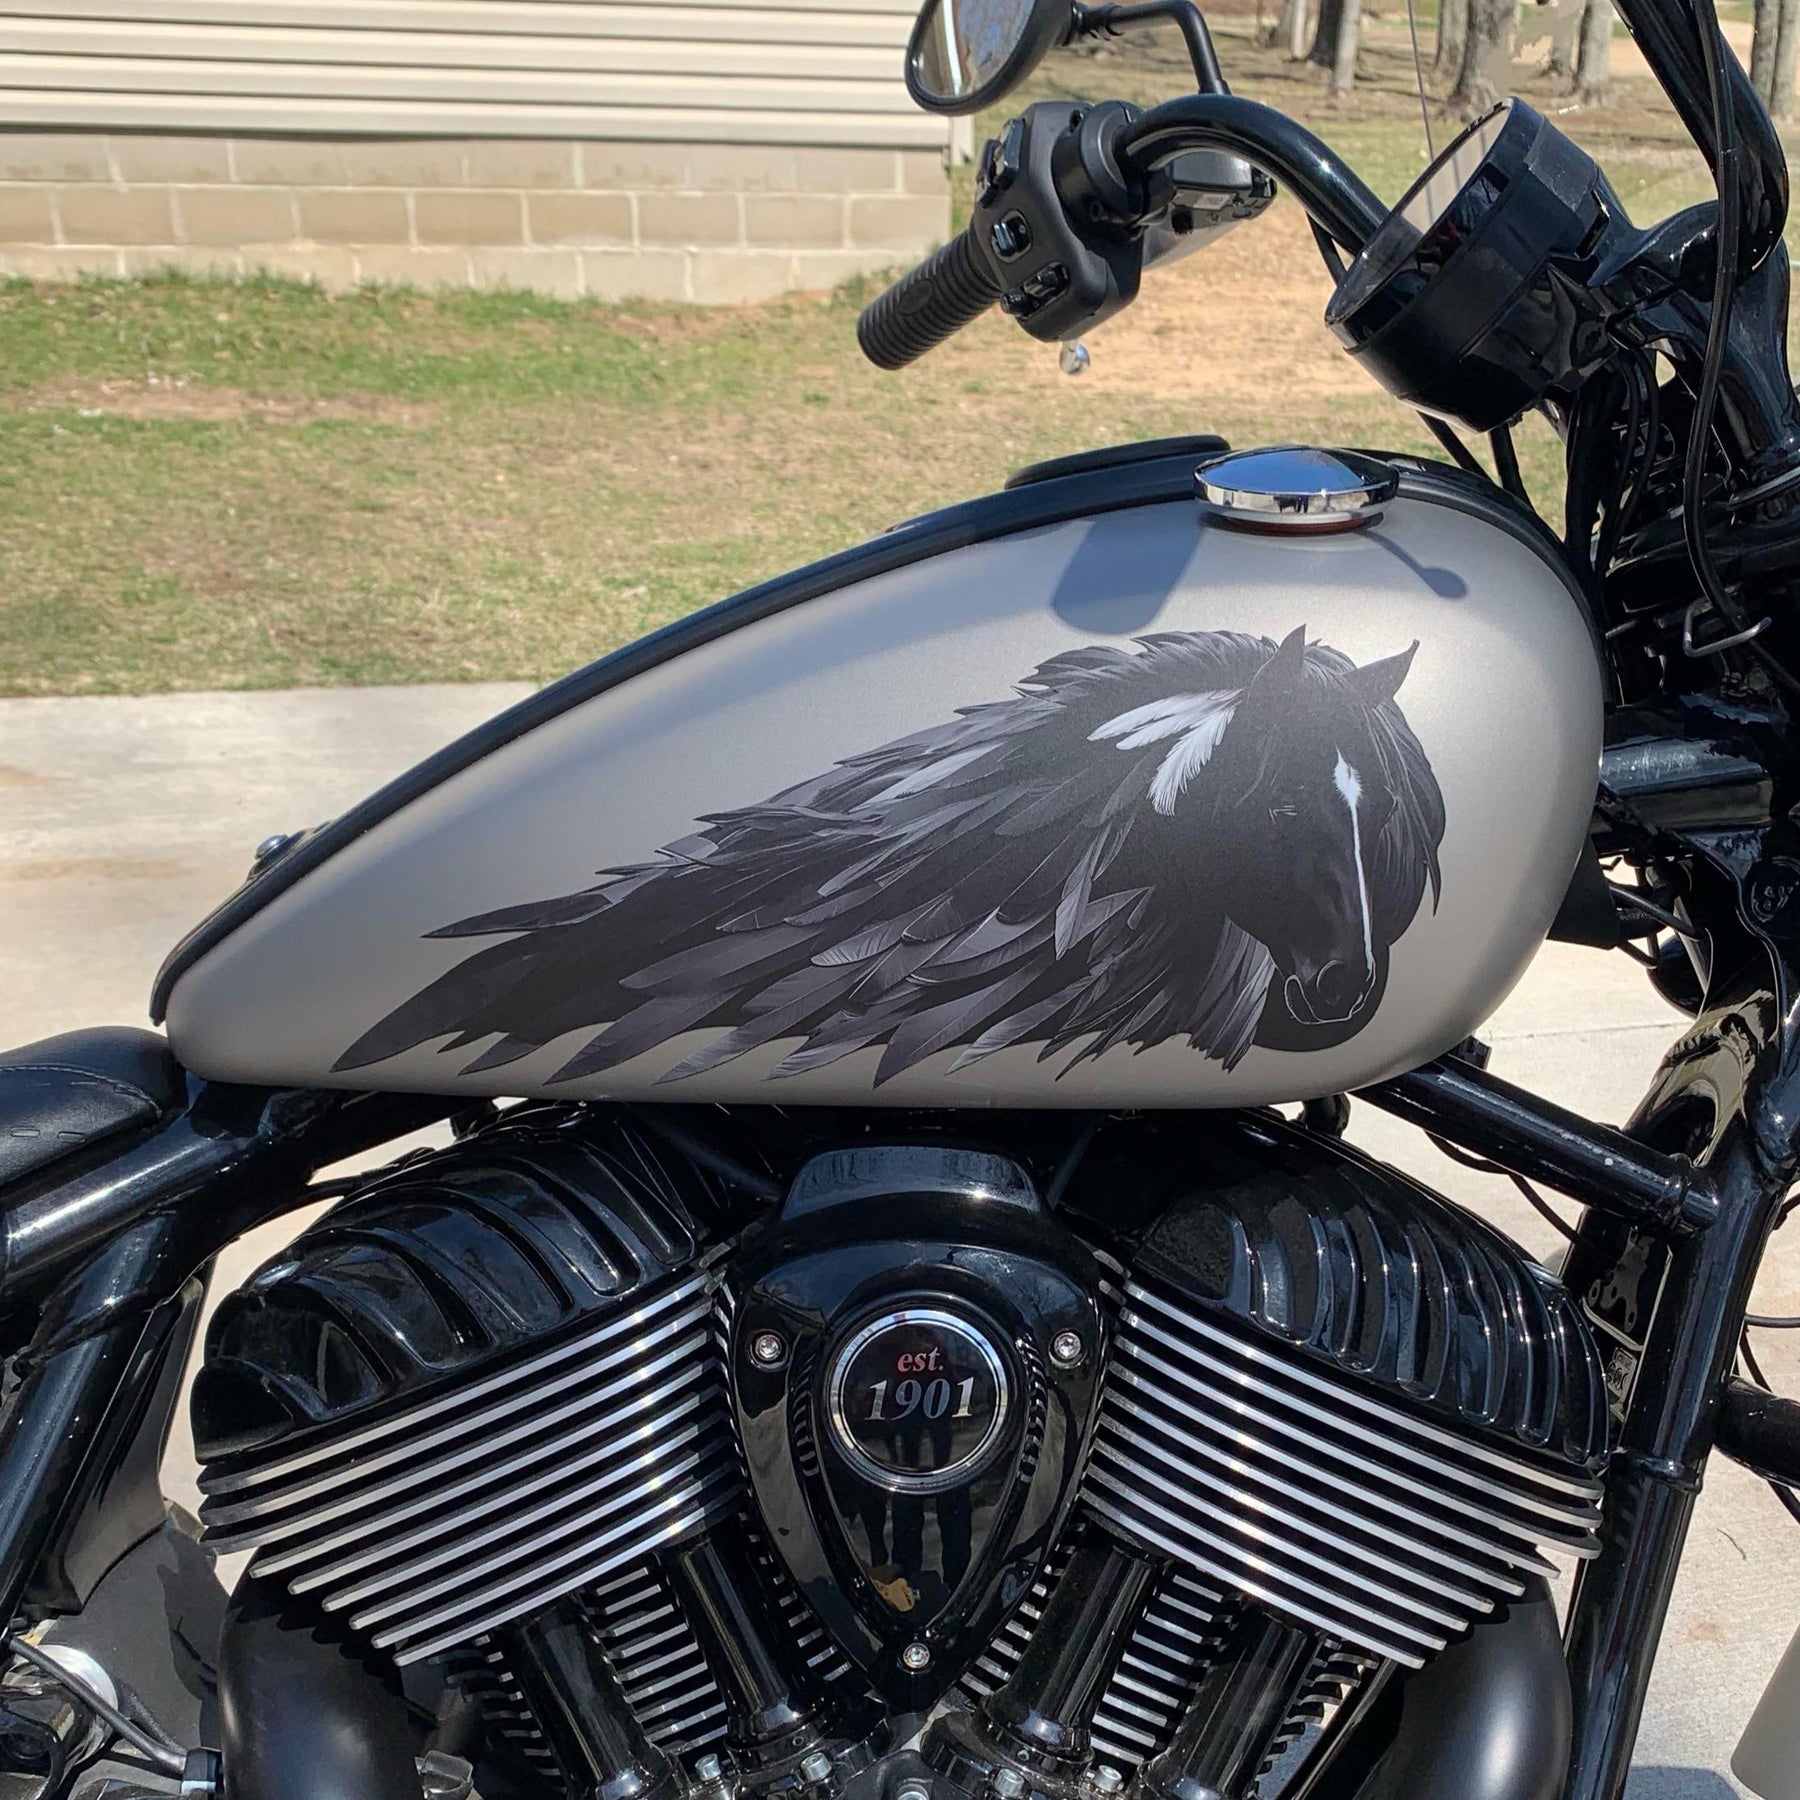
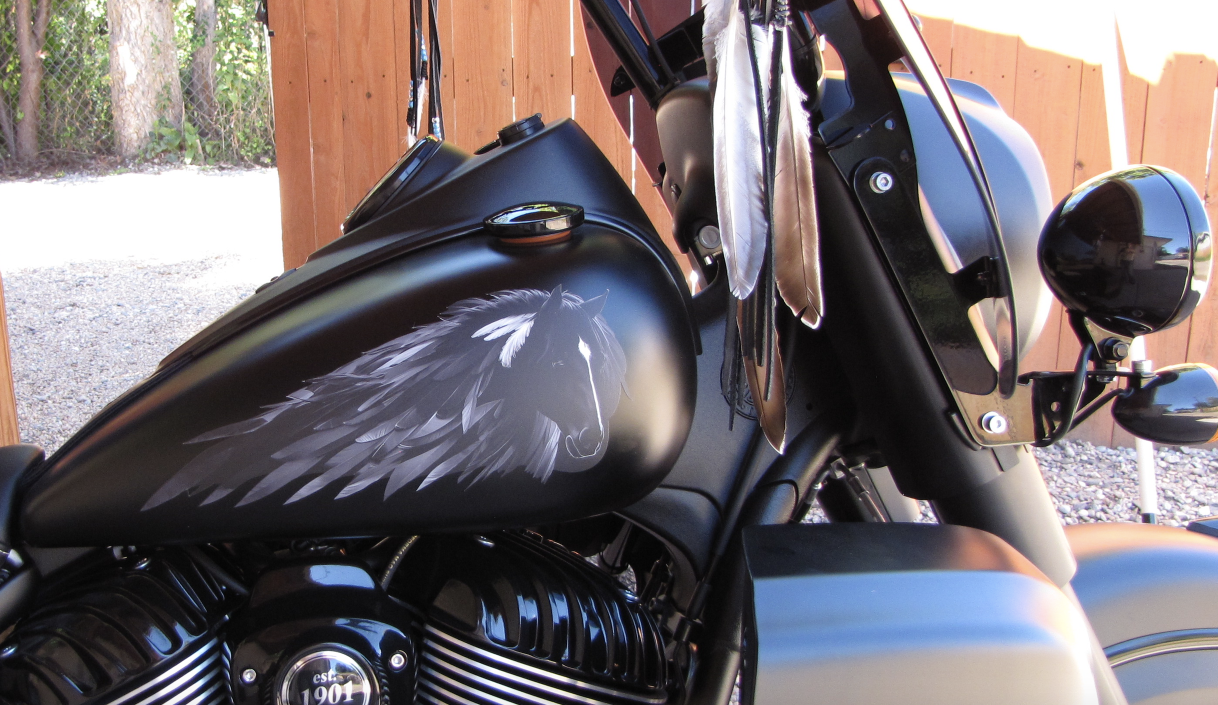
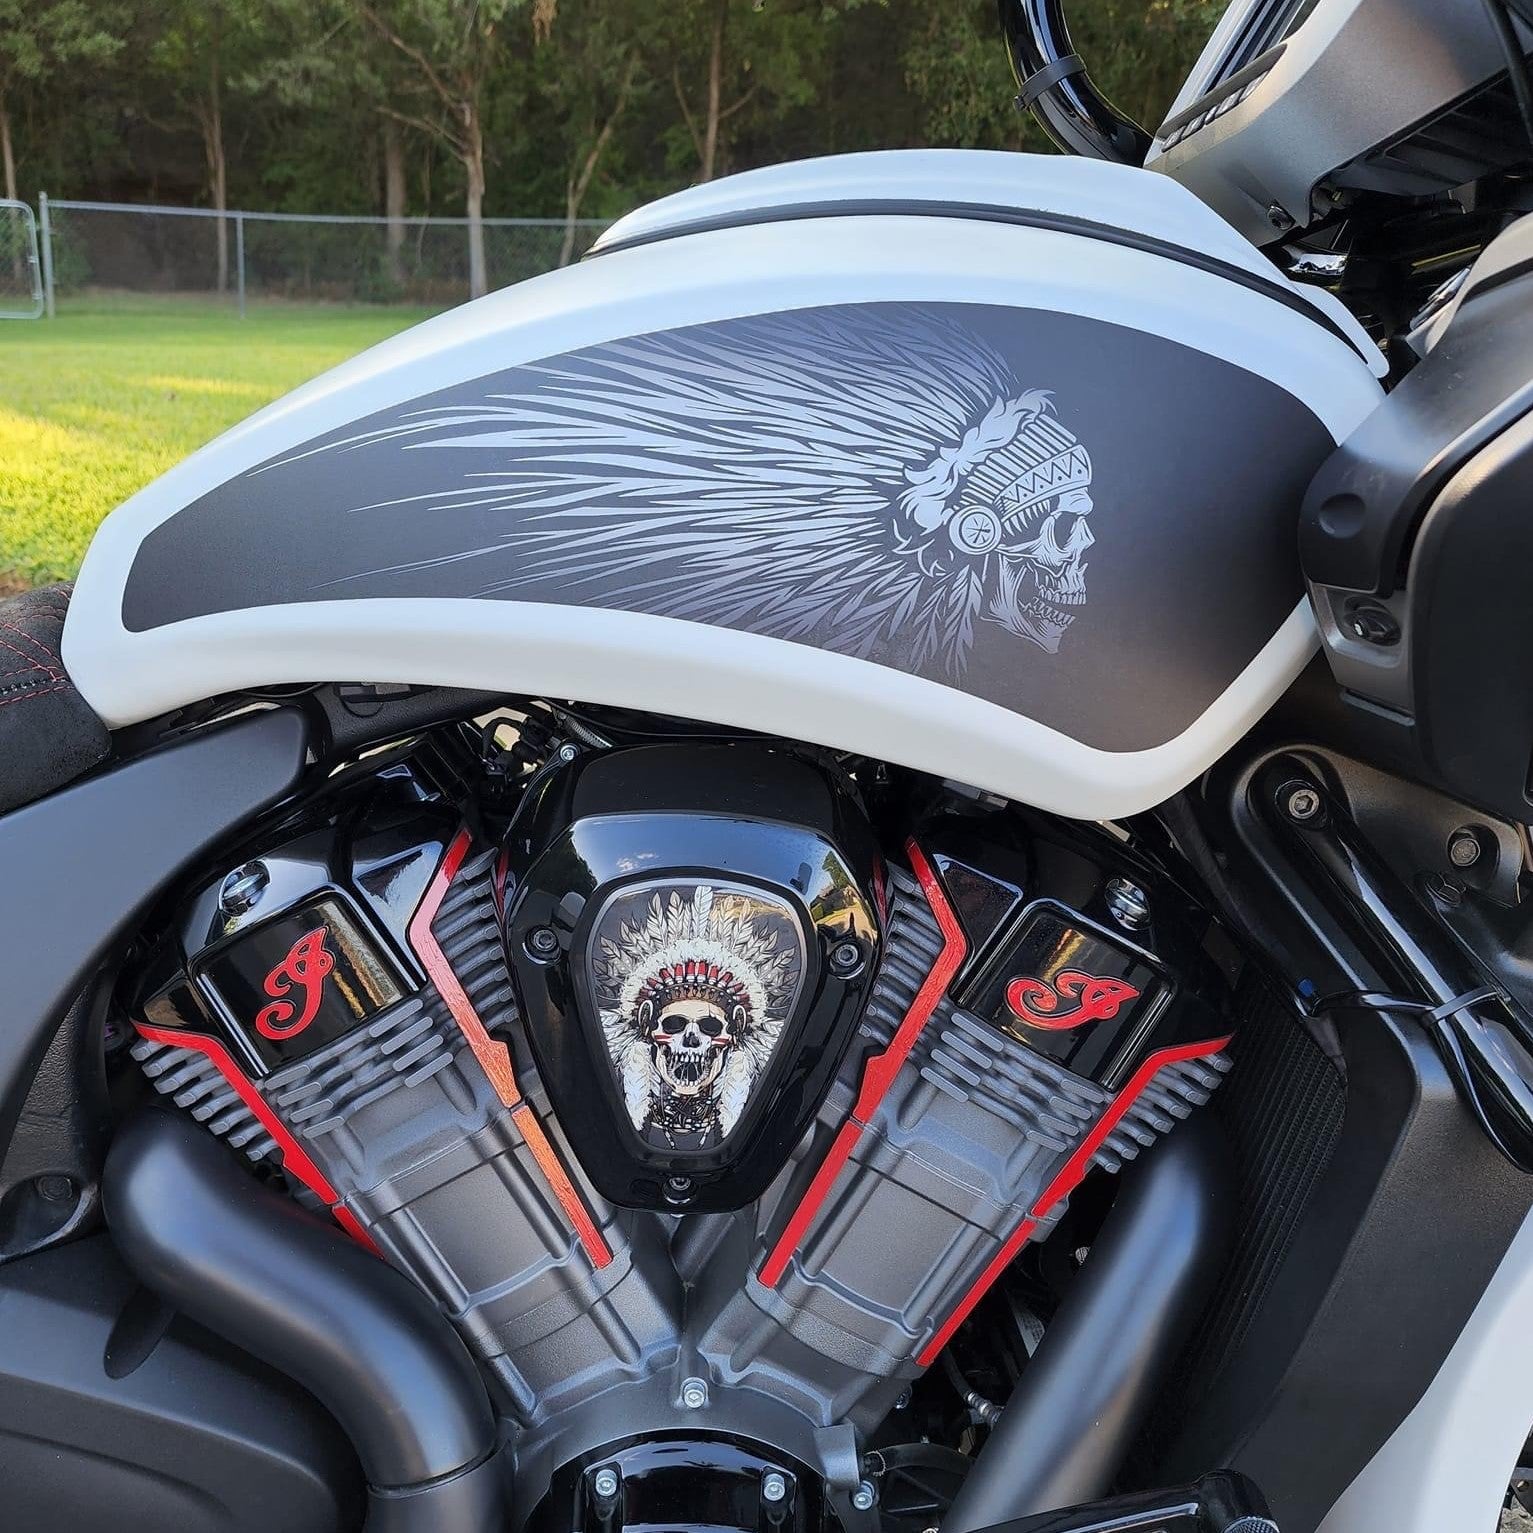
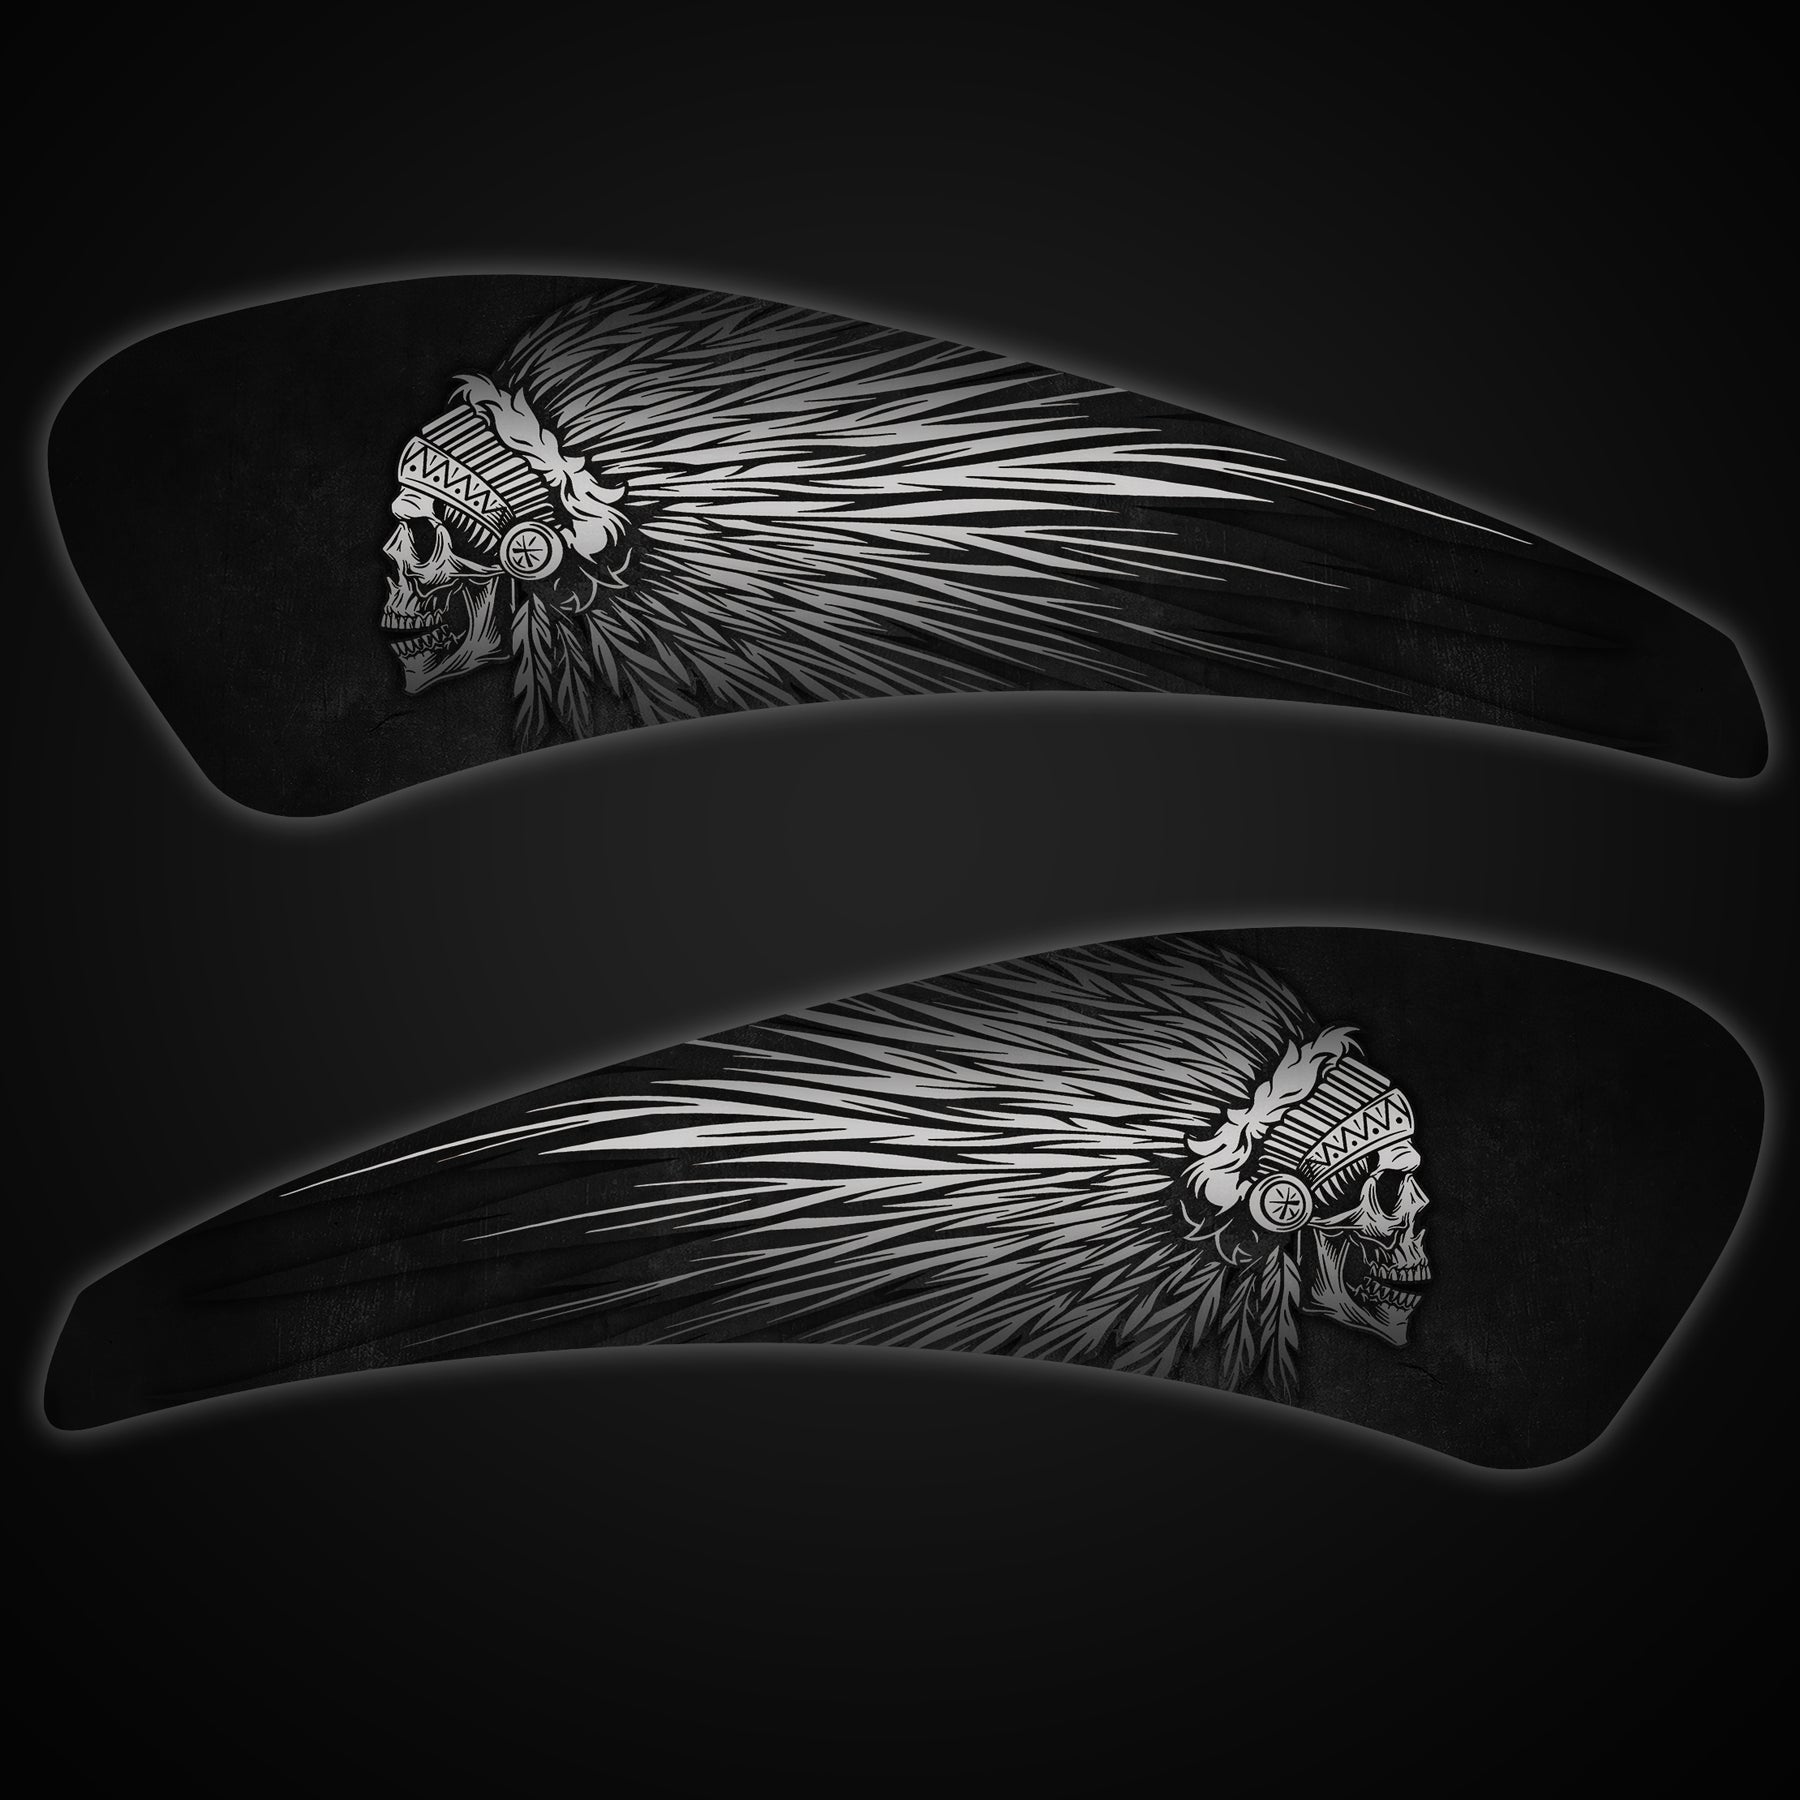
Spirit of the West - Universal Tank Decal-B&W
Regular price $100.00
Shipping calculated at checkout.
Stock Notice: (may take approximately 2-3 weeks before shipping if not in stock at the time of your order)
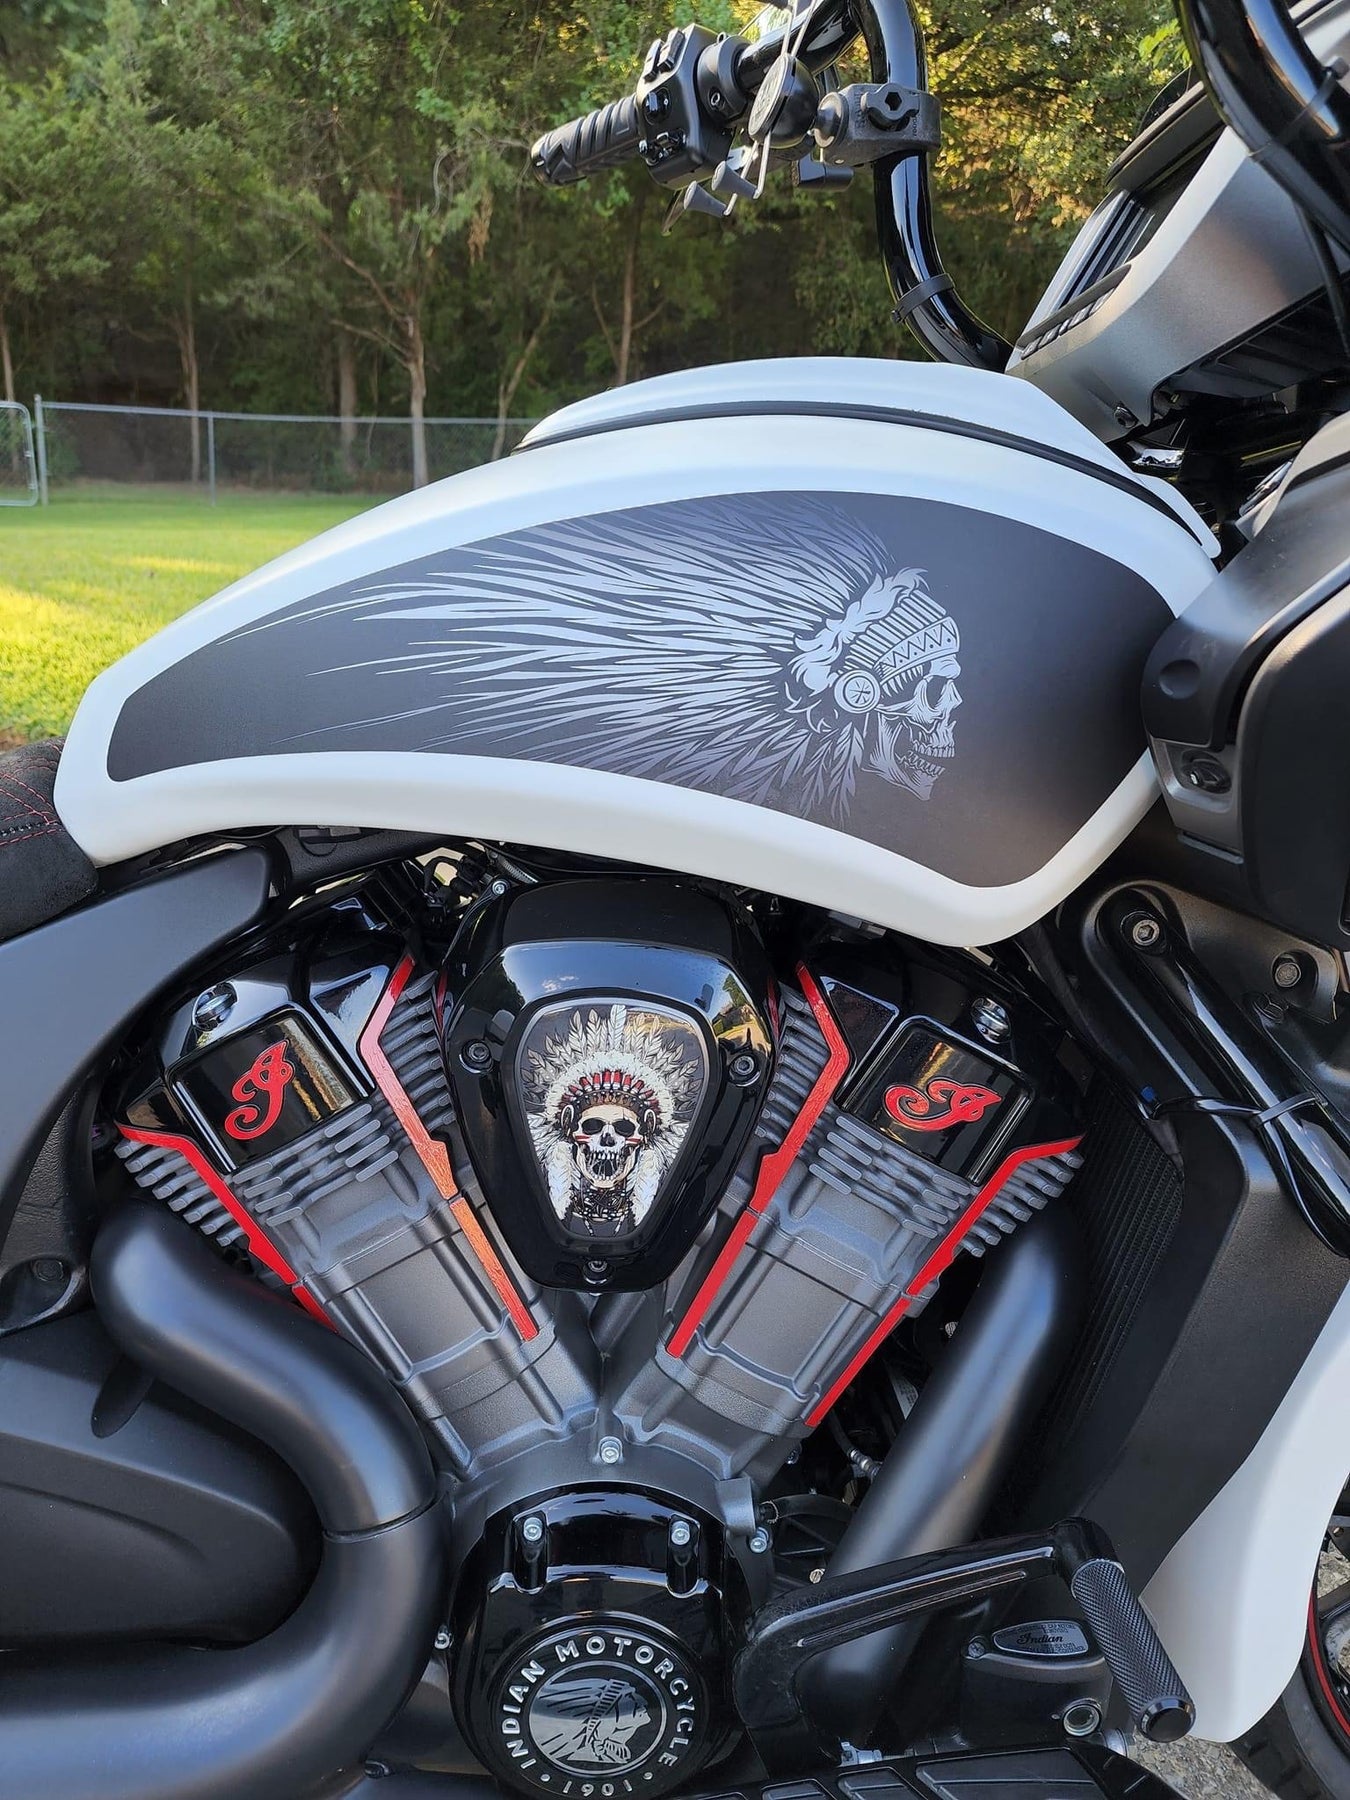
“Spirit of the West" Black & White - Universal Tank Decals for all Brands and Models of Motorcycles
This artwork is meant to invoke the spirit of wild open America.
These decals were designed to cover the original headdress on Indian Motorcycles but can be used by any brand or model of bike.
If you have an Indian Scout, we recommend purchasing our Scout version which is slightly smaller in order fit on the tank side without extending over the border.
Size: 6.15 inches x 14.7 inches

Fitment over OEM headdress logo

These decals are designed for all brands/models of motorcycles. Check the measurements to ensure a proper fit on your bike before ordering. If your tank already has a graphic, we can’t guarantee these decals will cover it completely.
How To Install: <-Visit our How To page for videos
Weatherproof HD Gloss finish vinyl decals are self adhesive. We recommend using the wet method to install these decals: A spray bottle with water and dish soap can be used to wet the surface and the back of the decal, allowing you to slide the decal into place. Once you have it aligned properly, use your thumbs to push the moisture out from behind the decal, working from the center outwards to the edges and it will adhere to your bike. Using the wet method allows the decal surface to evenly distribute over the curved surface. A hair dryer to apply heat will make the process easier since the vinyl becomes more soft and flexible when warm.

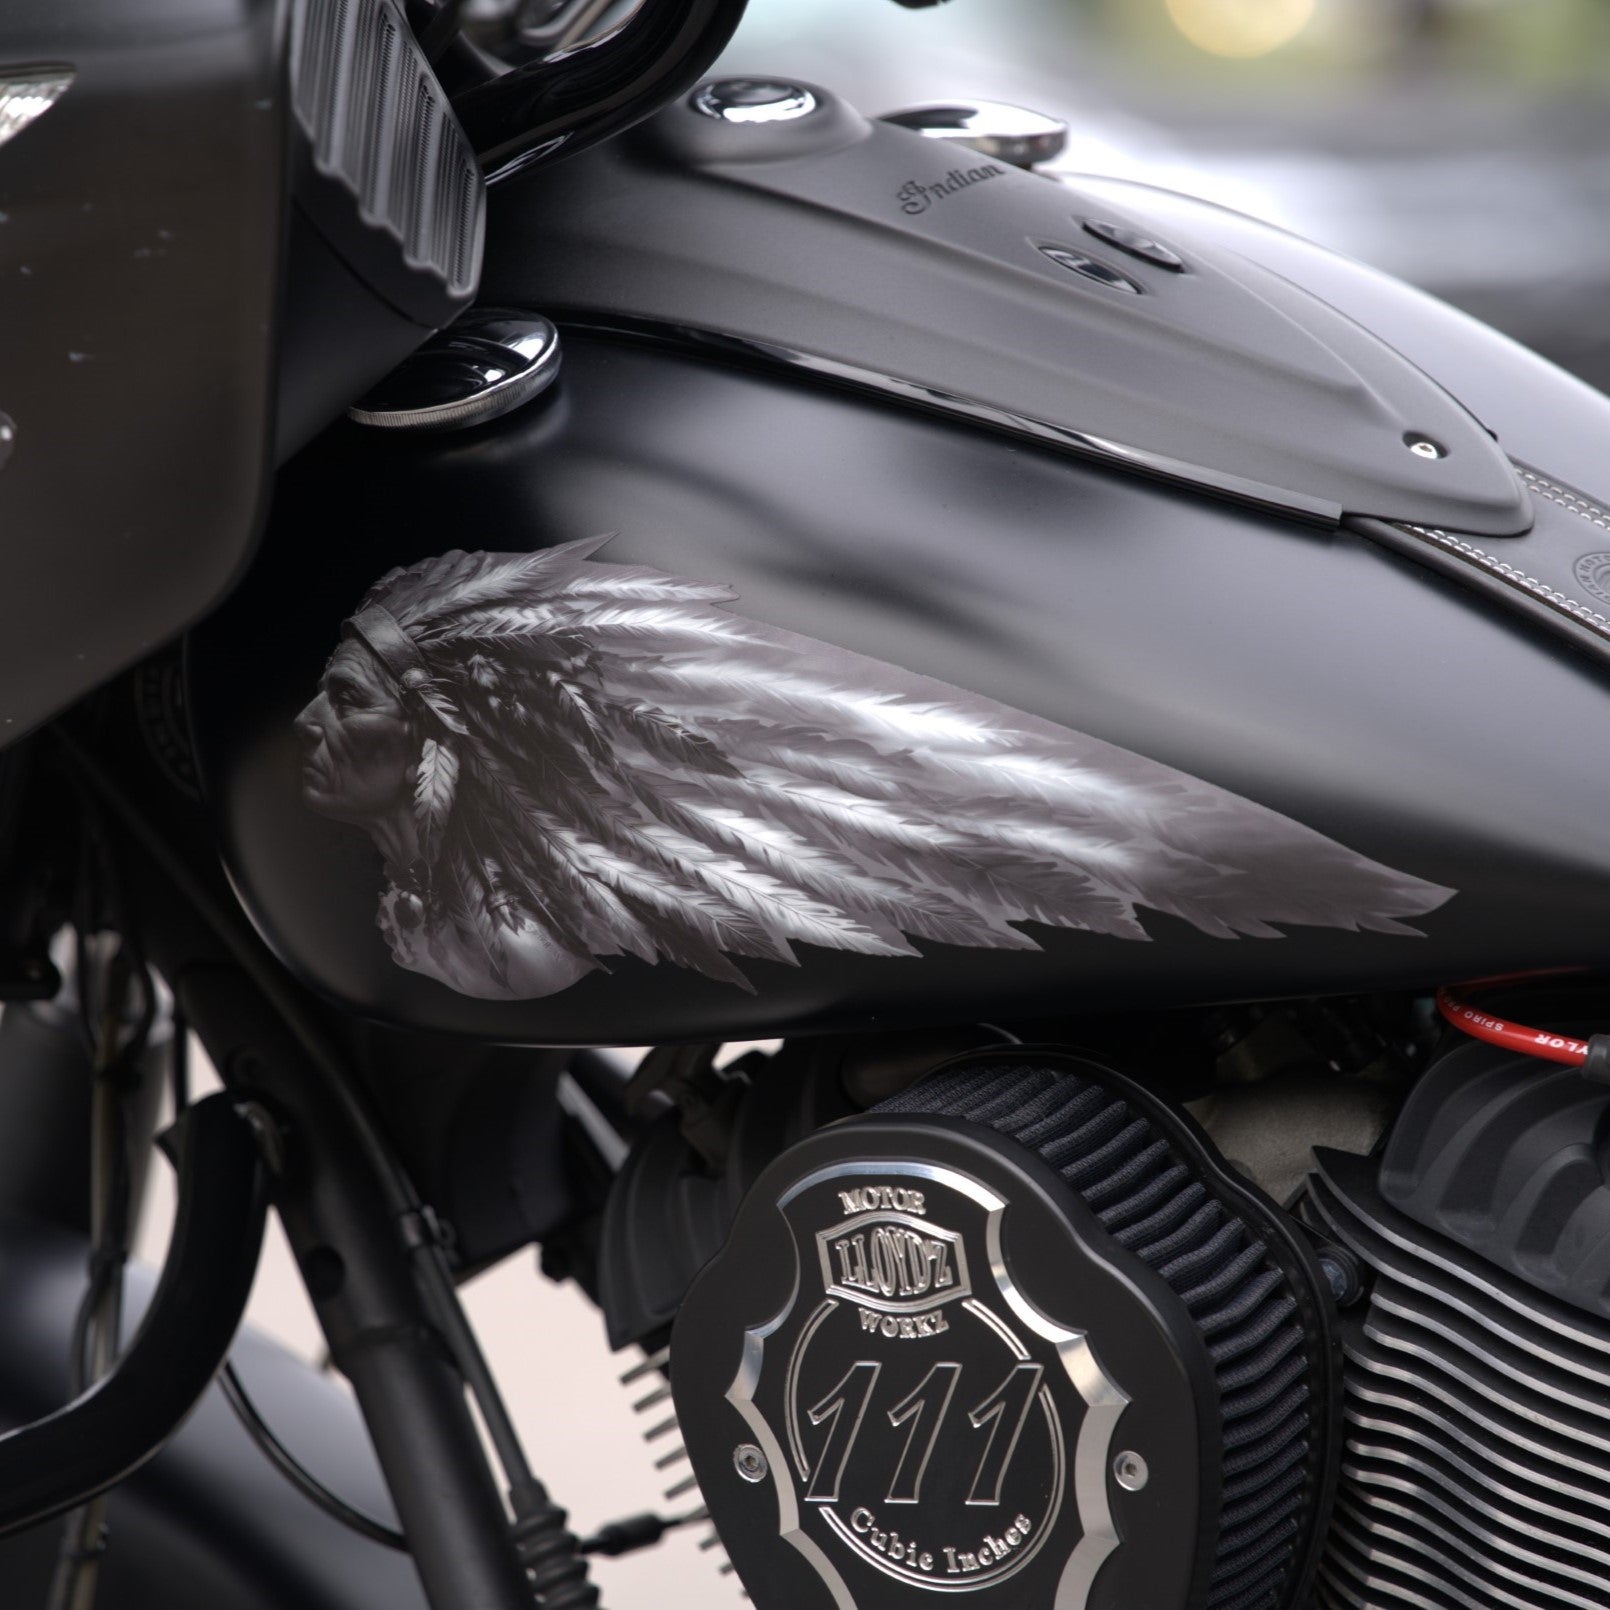
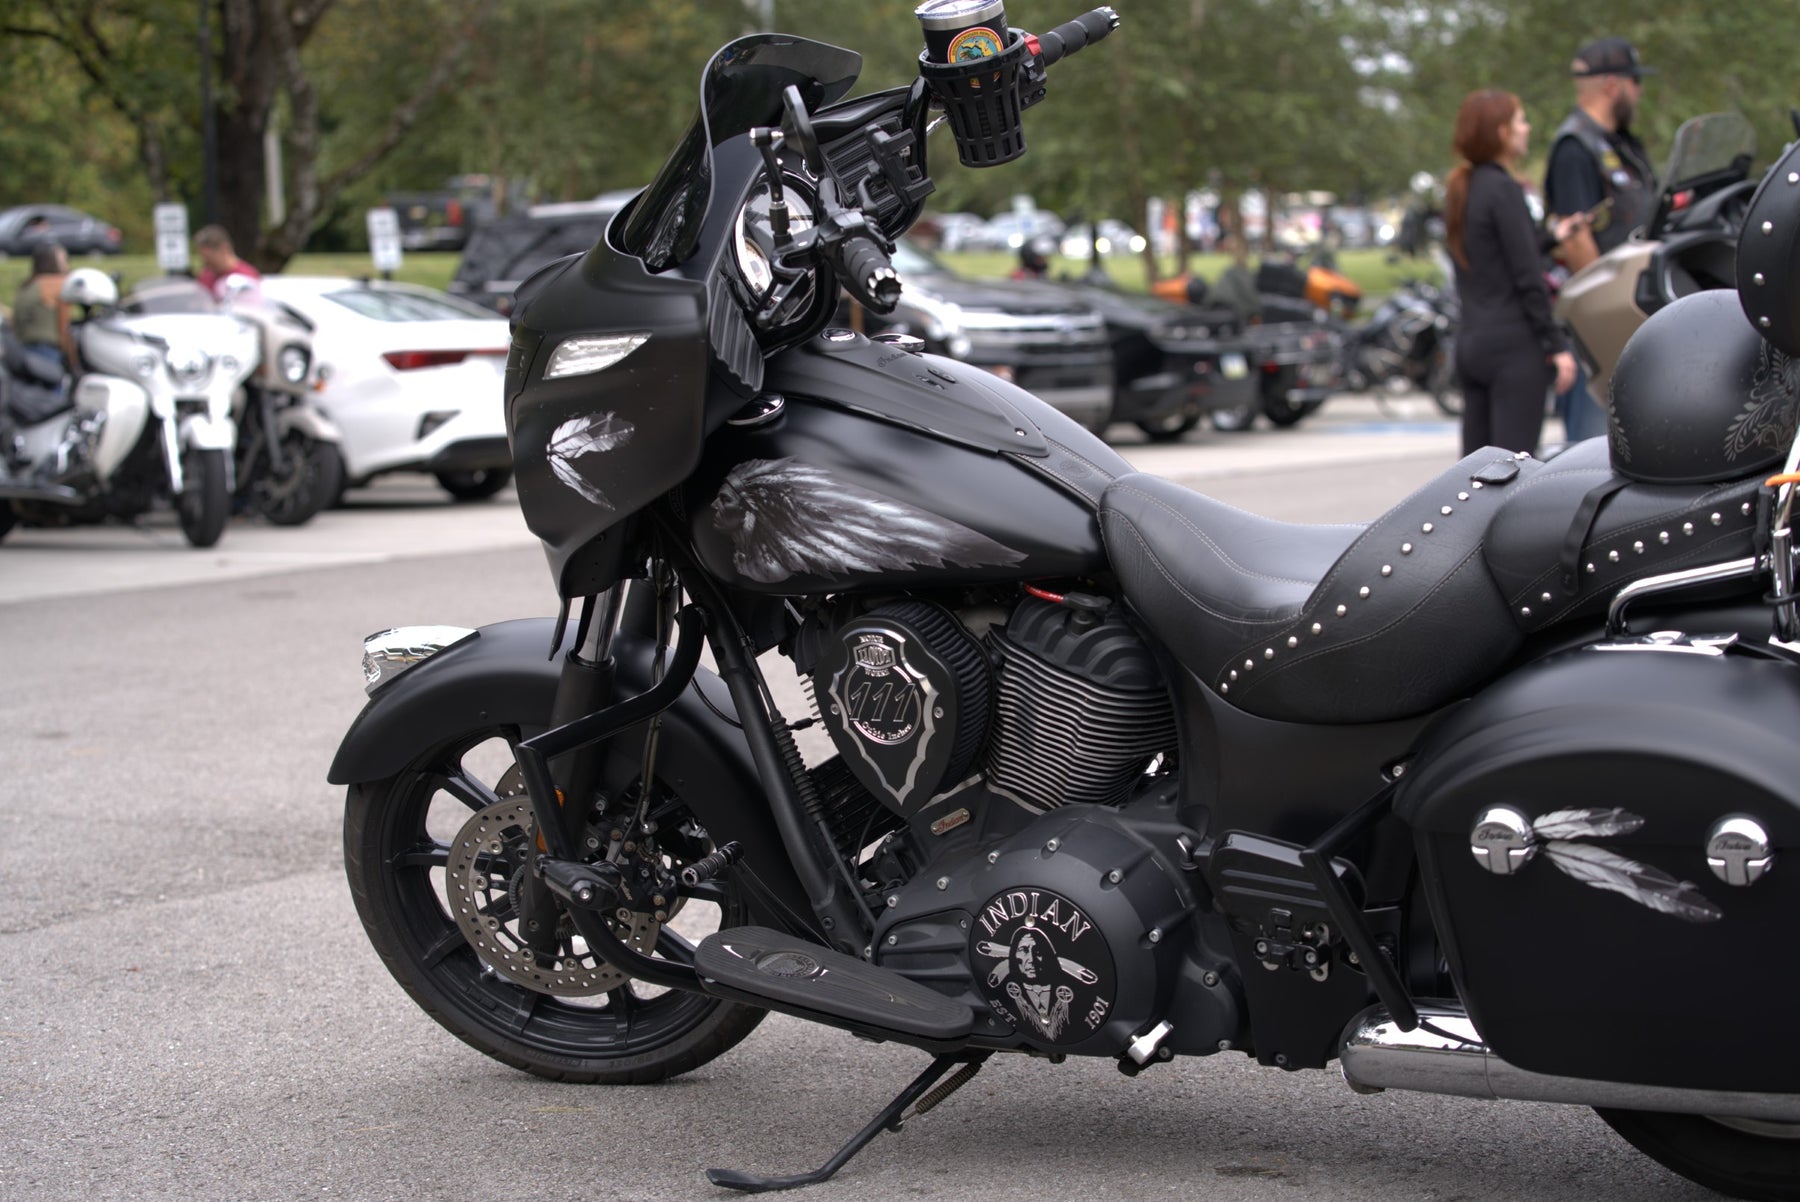
Spirit of the West - Universal Tank Decal-Color
Regular price $100.00
Shipping calculated at checkout.
Usually in stock (may take approximately 2-3 weeks before shipping if we don't have it in stock at the time of your order)
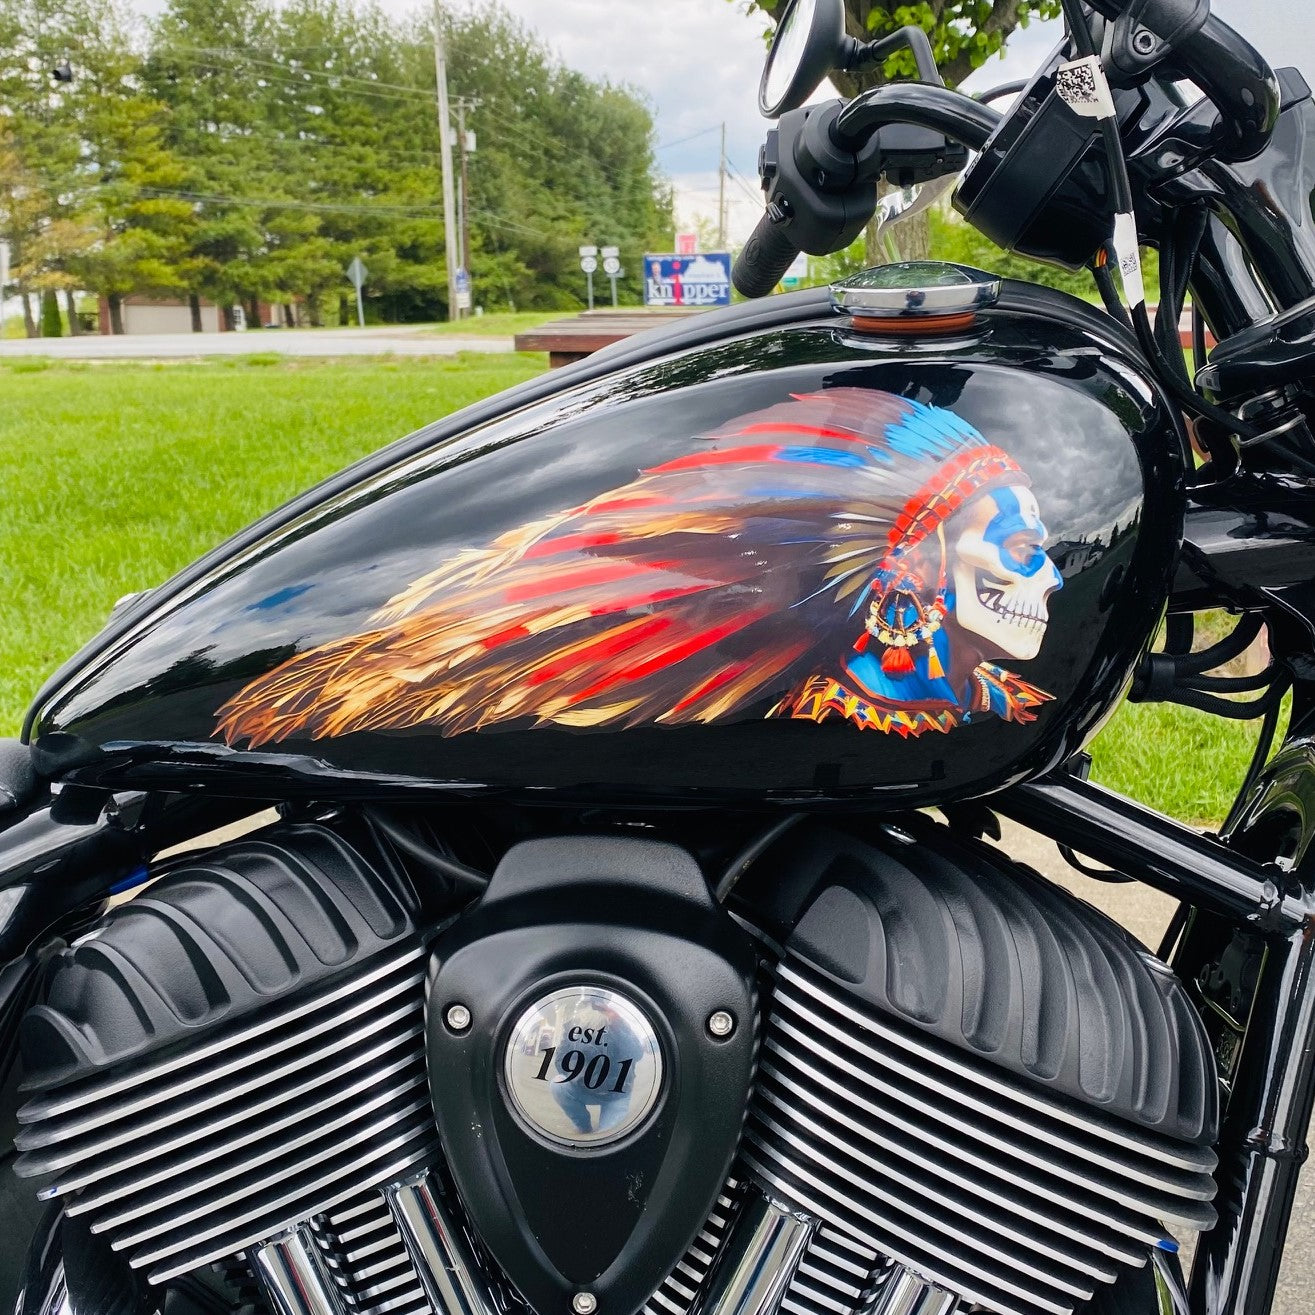
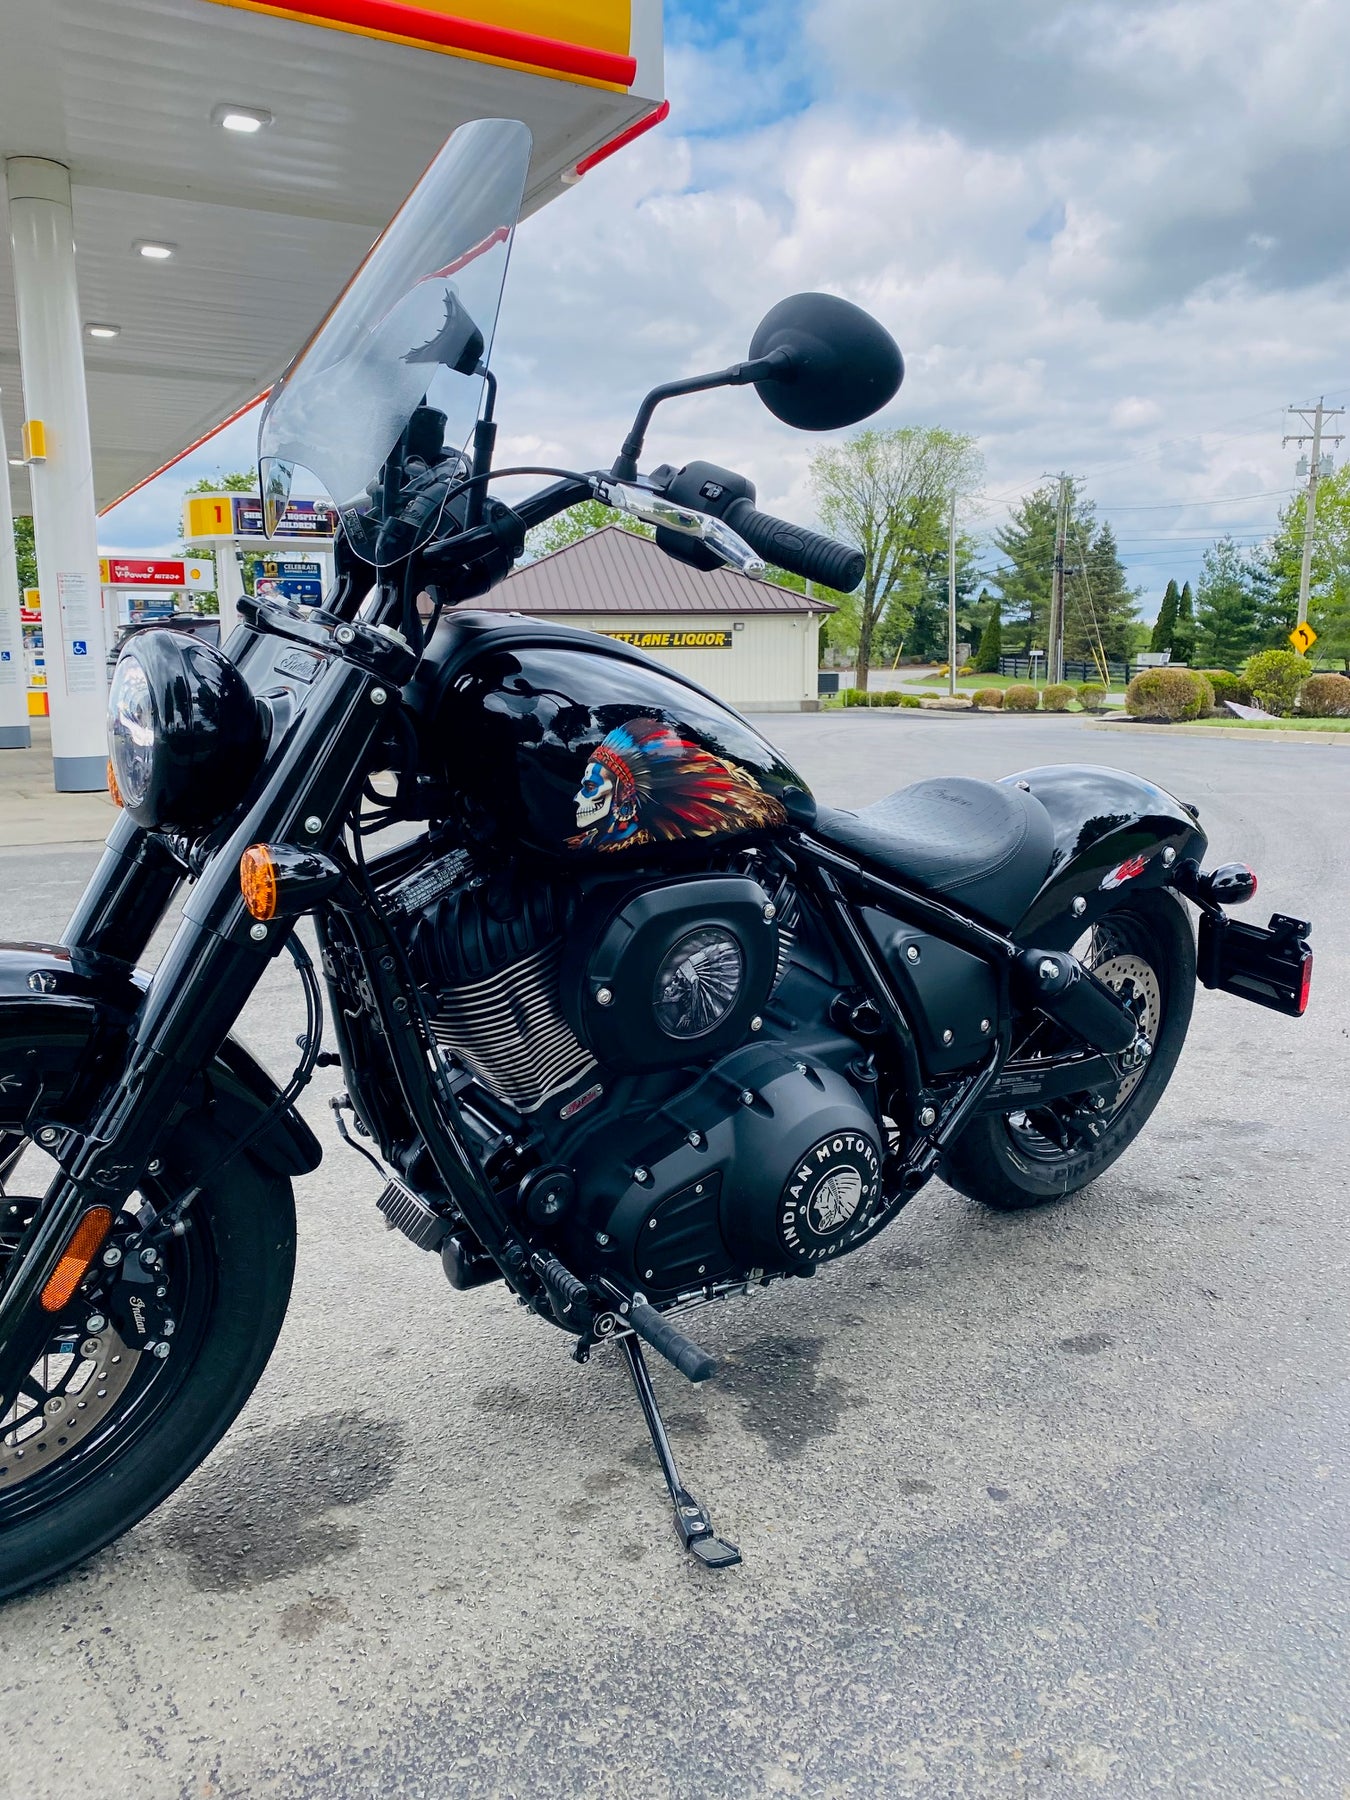
“Spirit of the West" Universal Tank Decals for all Brands and Models of Motorcycles
This artwork is meant to invoke the spirit of wild open America. The colors are subdued, almost grayscale but with more warmth and a bit of flesh tone in the face.
These decals were designed to cover the original headdress on Indian Motorcycles but can be used by any brand or model of bike.
If you have an Indian Scout, we recommend purchasing our Scout version which is slightly smaller in order fit on the tank side without extending over the border.
Size: 6.15 inches x 14.7 inches
Fitment over OEM headdress logo
These decals are designed for all brands/models of motorcycles. Check the measurements to ensure a proper fit on your bike before ordering. If your tank already has a graphic, we can’t guarantee these decals will cover it completely.
How To Install: <-Visit our How To page for videos
Weatherproof HD Gloss finish vinyl decals are self adhesive. We recommend using the wet method to install these decals: A spray bottle with water and dish soap can be used to wet the surface and the back of the decal, allowing you to slide the decal into place. Once you have it aligned properly, use your thumbs to push the moisture out from behind the decal, working from the center outwards to the edges and it will adhere to your bike. Using the wet method allows the decal surface to evenly distribute over the curved surface. A hair dryer to apply heat will make the process easier since the vinyl becomes more soft and flexible when warm.